

BLOG
Stories, articles, and updates from the Ranch community.

Improving Soils in the Humid Tropics of Costa Rica
In permaculture and agroforestry circles it’s common to hear the idea that we’re not growing plants so much as we’re cultivating rich, healthy soils in which plants will do their own growing.
By Anthony, Apprentice 2020
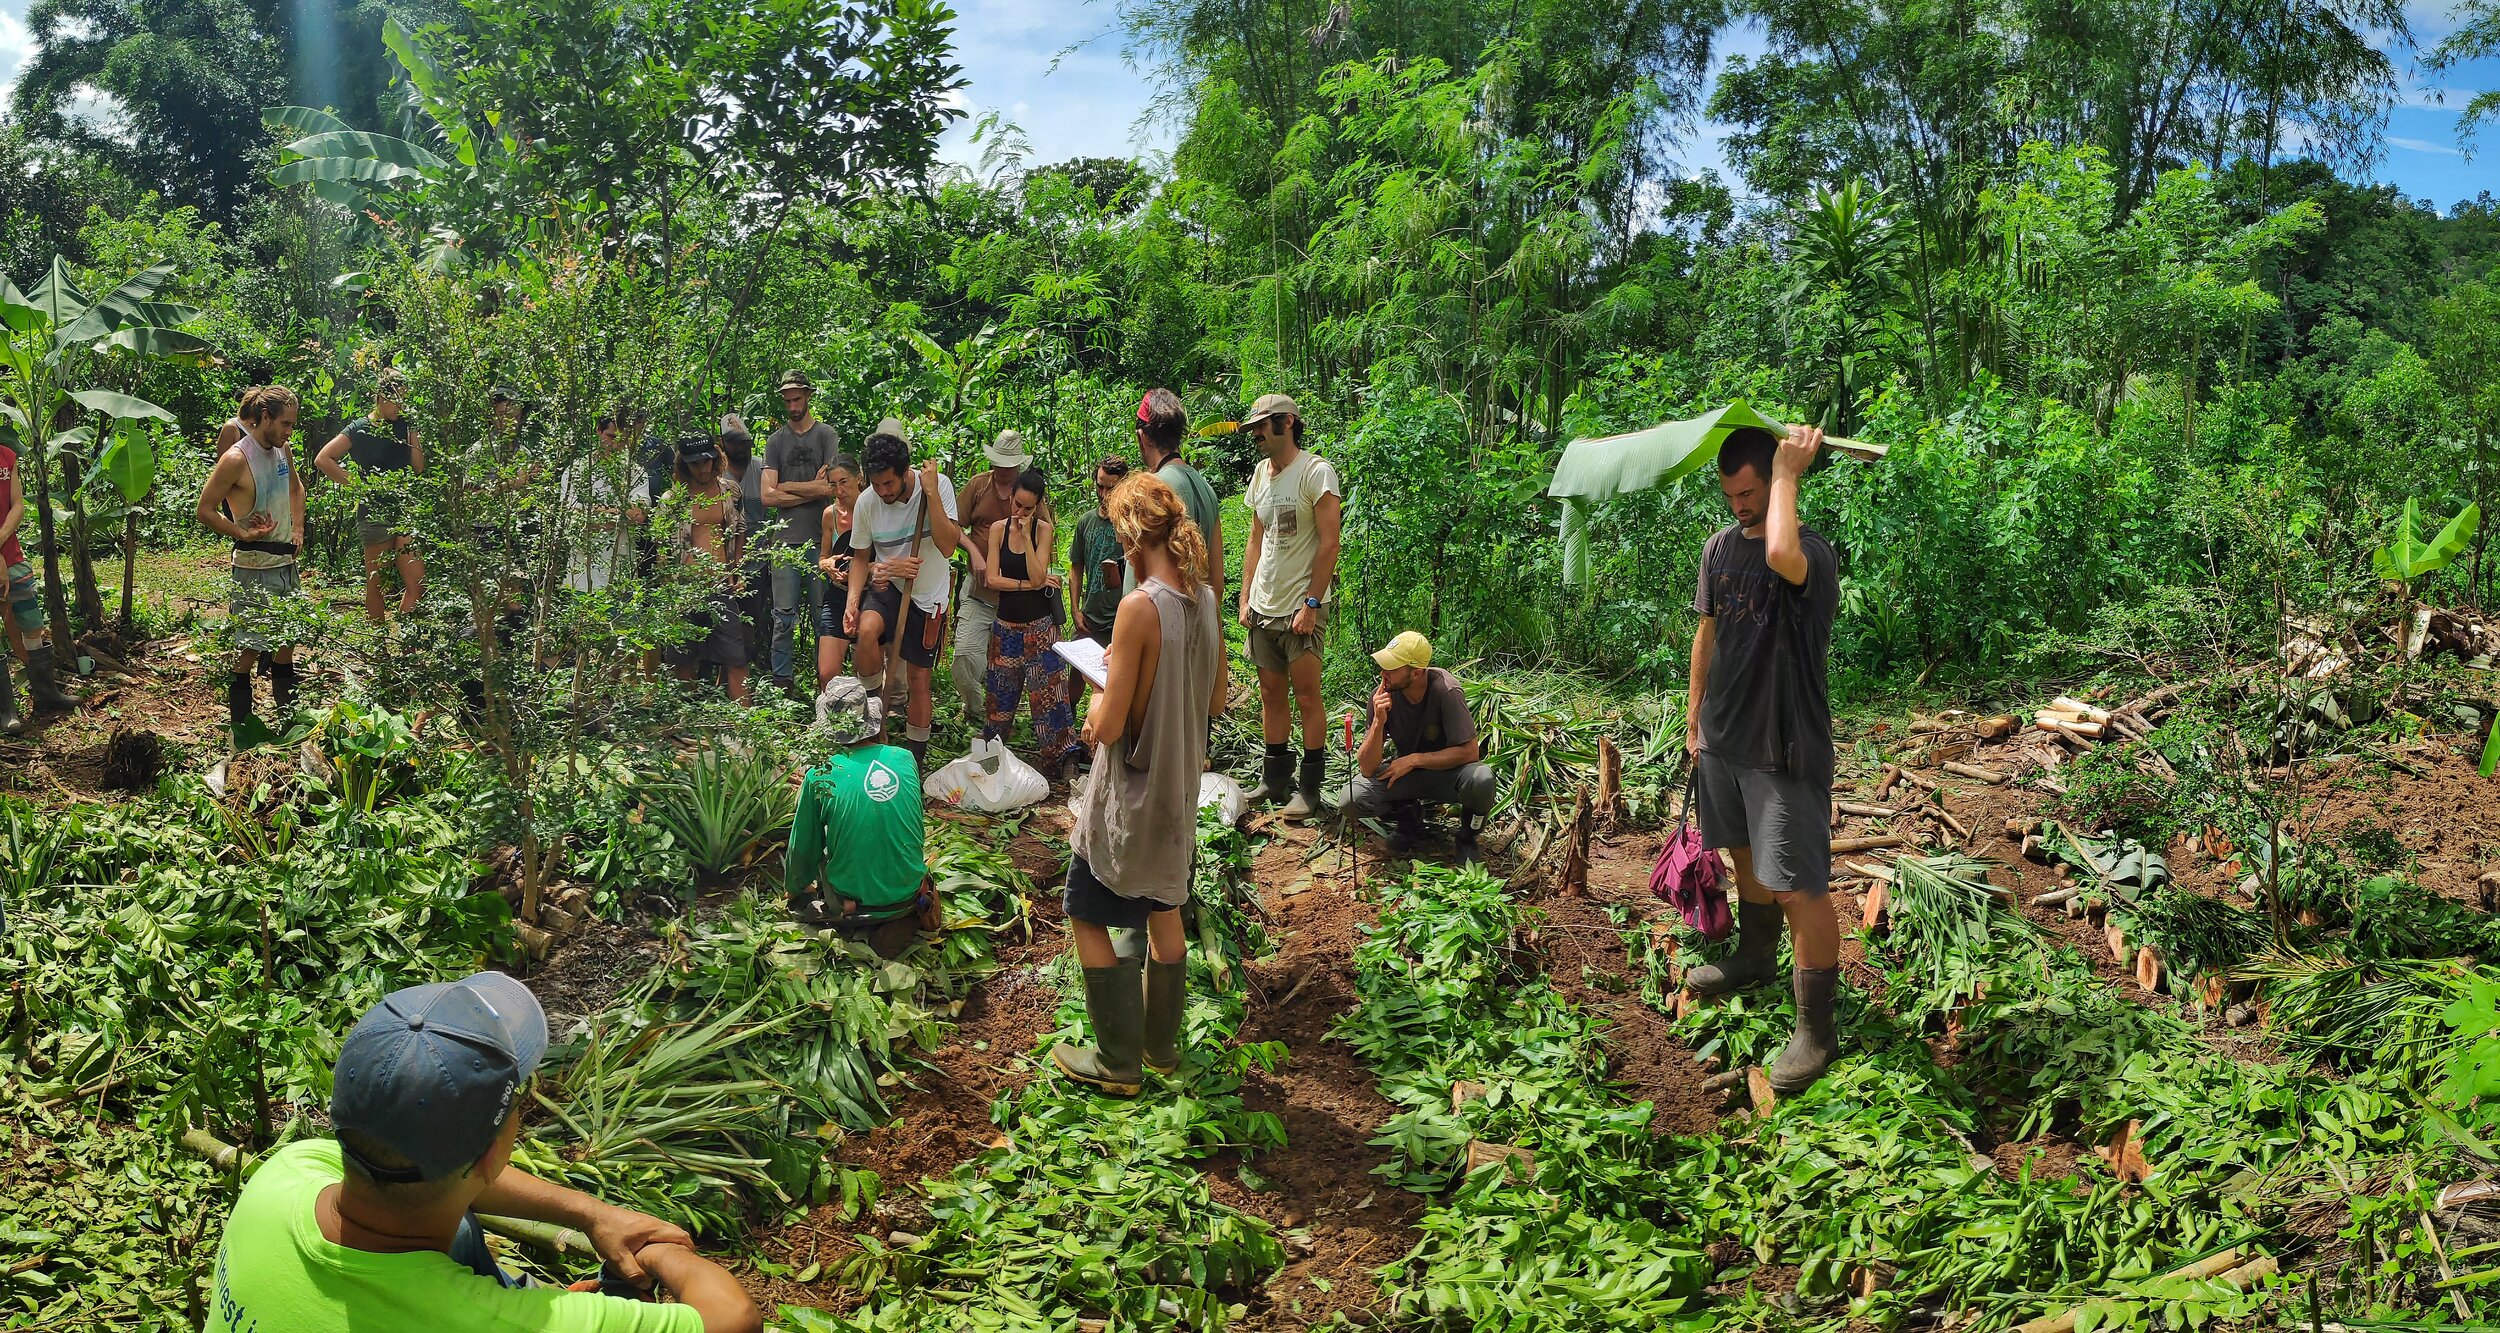
Syntropic farming workshop at Rancho Mastatal
In permaculture and agroforestry circles it’s common to hear the idea that we’re not growing plants so much as we’re cultivating rich, healthy soils in which plants will do their own growing. Yet, to this end changing the make-up of soils seems like a daunting job. So how can we go about the task of improving our soils in a simple and efficient way that corresponds with permaculture principles?
The challenge of Tropical Soils
Soils in humid Tropical America are generally found to be eroded and leached. In this region’s ecosystems, about 85% of nutrients are held in plants and animals, so the soils themselves are infertile. Only terraces, floodplains, and new volcanoes keep some soil fertility replenished if land is cultivated (Mollison, 2004). This yields soils that are high in clay content, poor in nutrient content, and often quite acidic. As we say here at the Rancho Mastatal, a permaculture farm in Costa Rica, it’s soil that’s great for natural building, yet not ideal for growing an abundance of food.
The goal with soils like ours is to improve soil texture, increase mineral and nutrient content, reduce soil acidity, enrich microbial life, and increase the quantity of organic matter held in the soil.
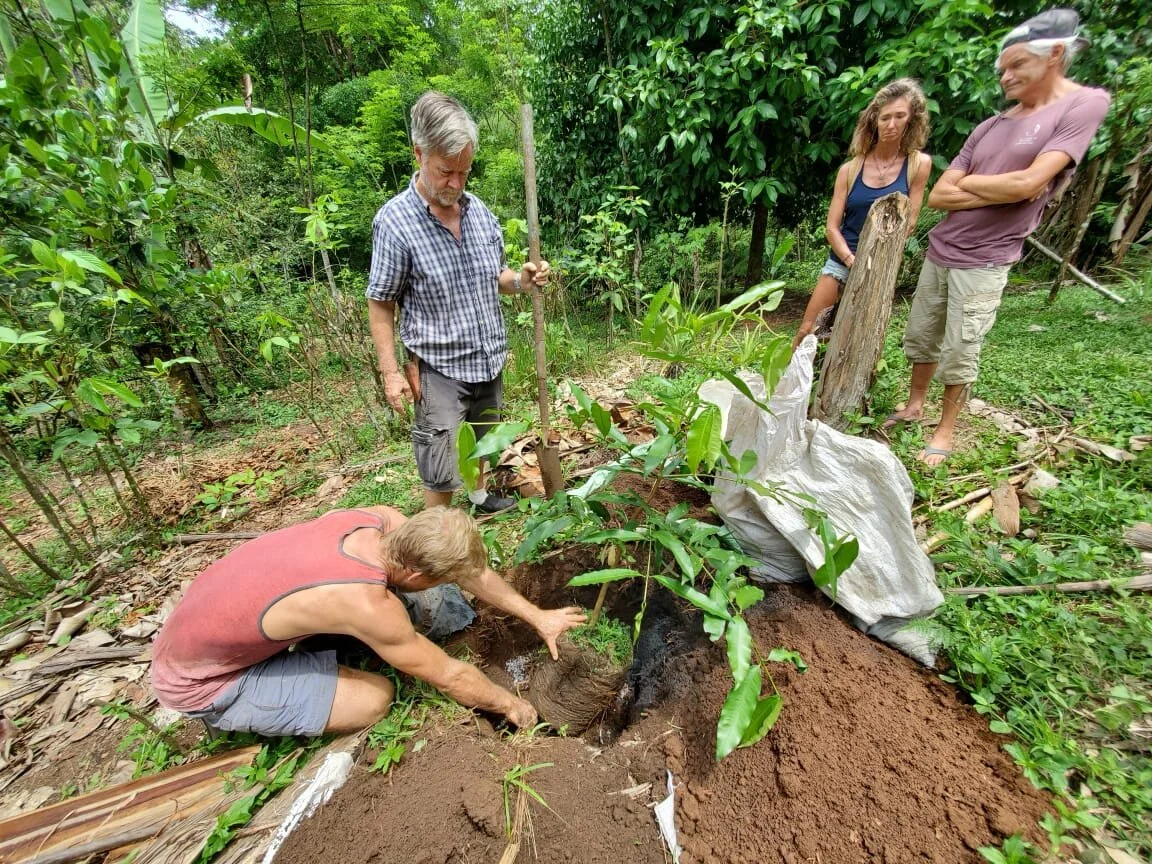
Planting a fruit tree during our annual Agroforestry Skills Workshop
Permaculture & Agroforestry based strategies
In a recent agroforestry workshop held at the Rancho Mastatal here in Costa Rica, a class that worked through concepts of a multi-strata, diverse style of permaculture, the holy trinity of soil amendments for the humid tropics was revealed. The three pillars of improving cultivated soils are
Biomass
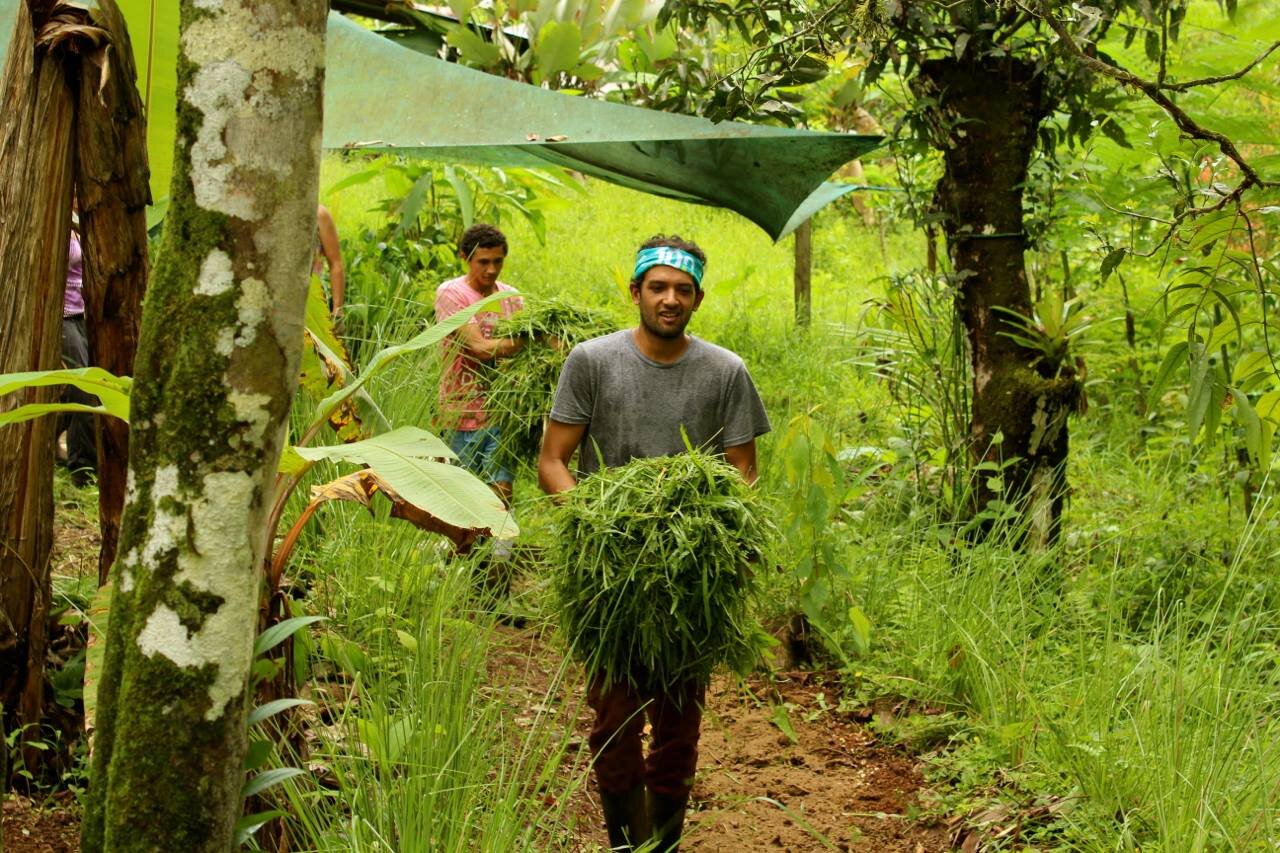
The strategy of biomass organized on contour (lines running perpendicular to the direction of the cultivated slope) is the most visible method used here at Rancho Mastatal to improve the soil’s structure and nutritional/mineral content, our ‘organic’ way of applying fertilizer. In the humid tropics, biomass tends to be available in great quantity, and can be used to build up the mentioned contours. Over time these will build to form terraces that greatly reduce soil loss related to erosion and leaching.
Mountain Microorganisms
Mountain microorganisms is a world of its own. Through the fermentation of leaf litter from nearby forests, we cultivate microorganisms which are then applied to our soils, the foliage of our plants, and our compost. We are reproducing healthy bacteria and yeast that, when used in our permaculture systems, will in turn help our plants absorb more nutritional benefit from our soils. To read in more depth about how to make Mountain Microorganisms read this article.
Biochar
Biochar will then provide a long-lasting refuge for these beneficial microorganisms. This is due to its incredibly high surface area within its structure. This special form of charcoal is extremely slow to break down and both directly provides nutrients and minerals to our soils as well as creating a positive feedback loop of topsoil production.
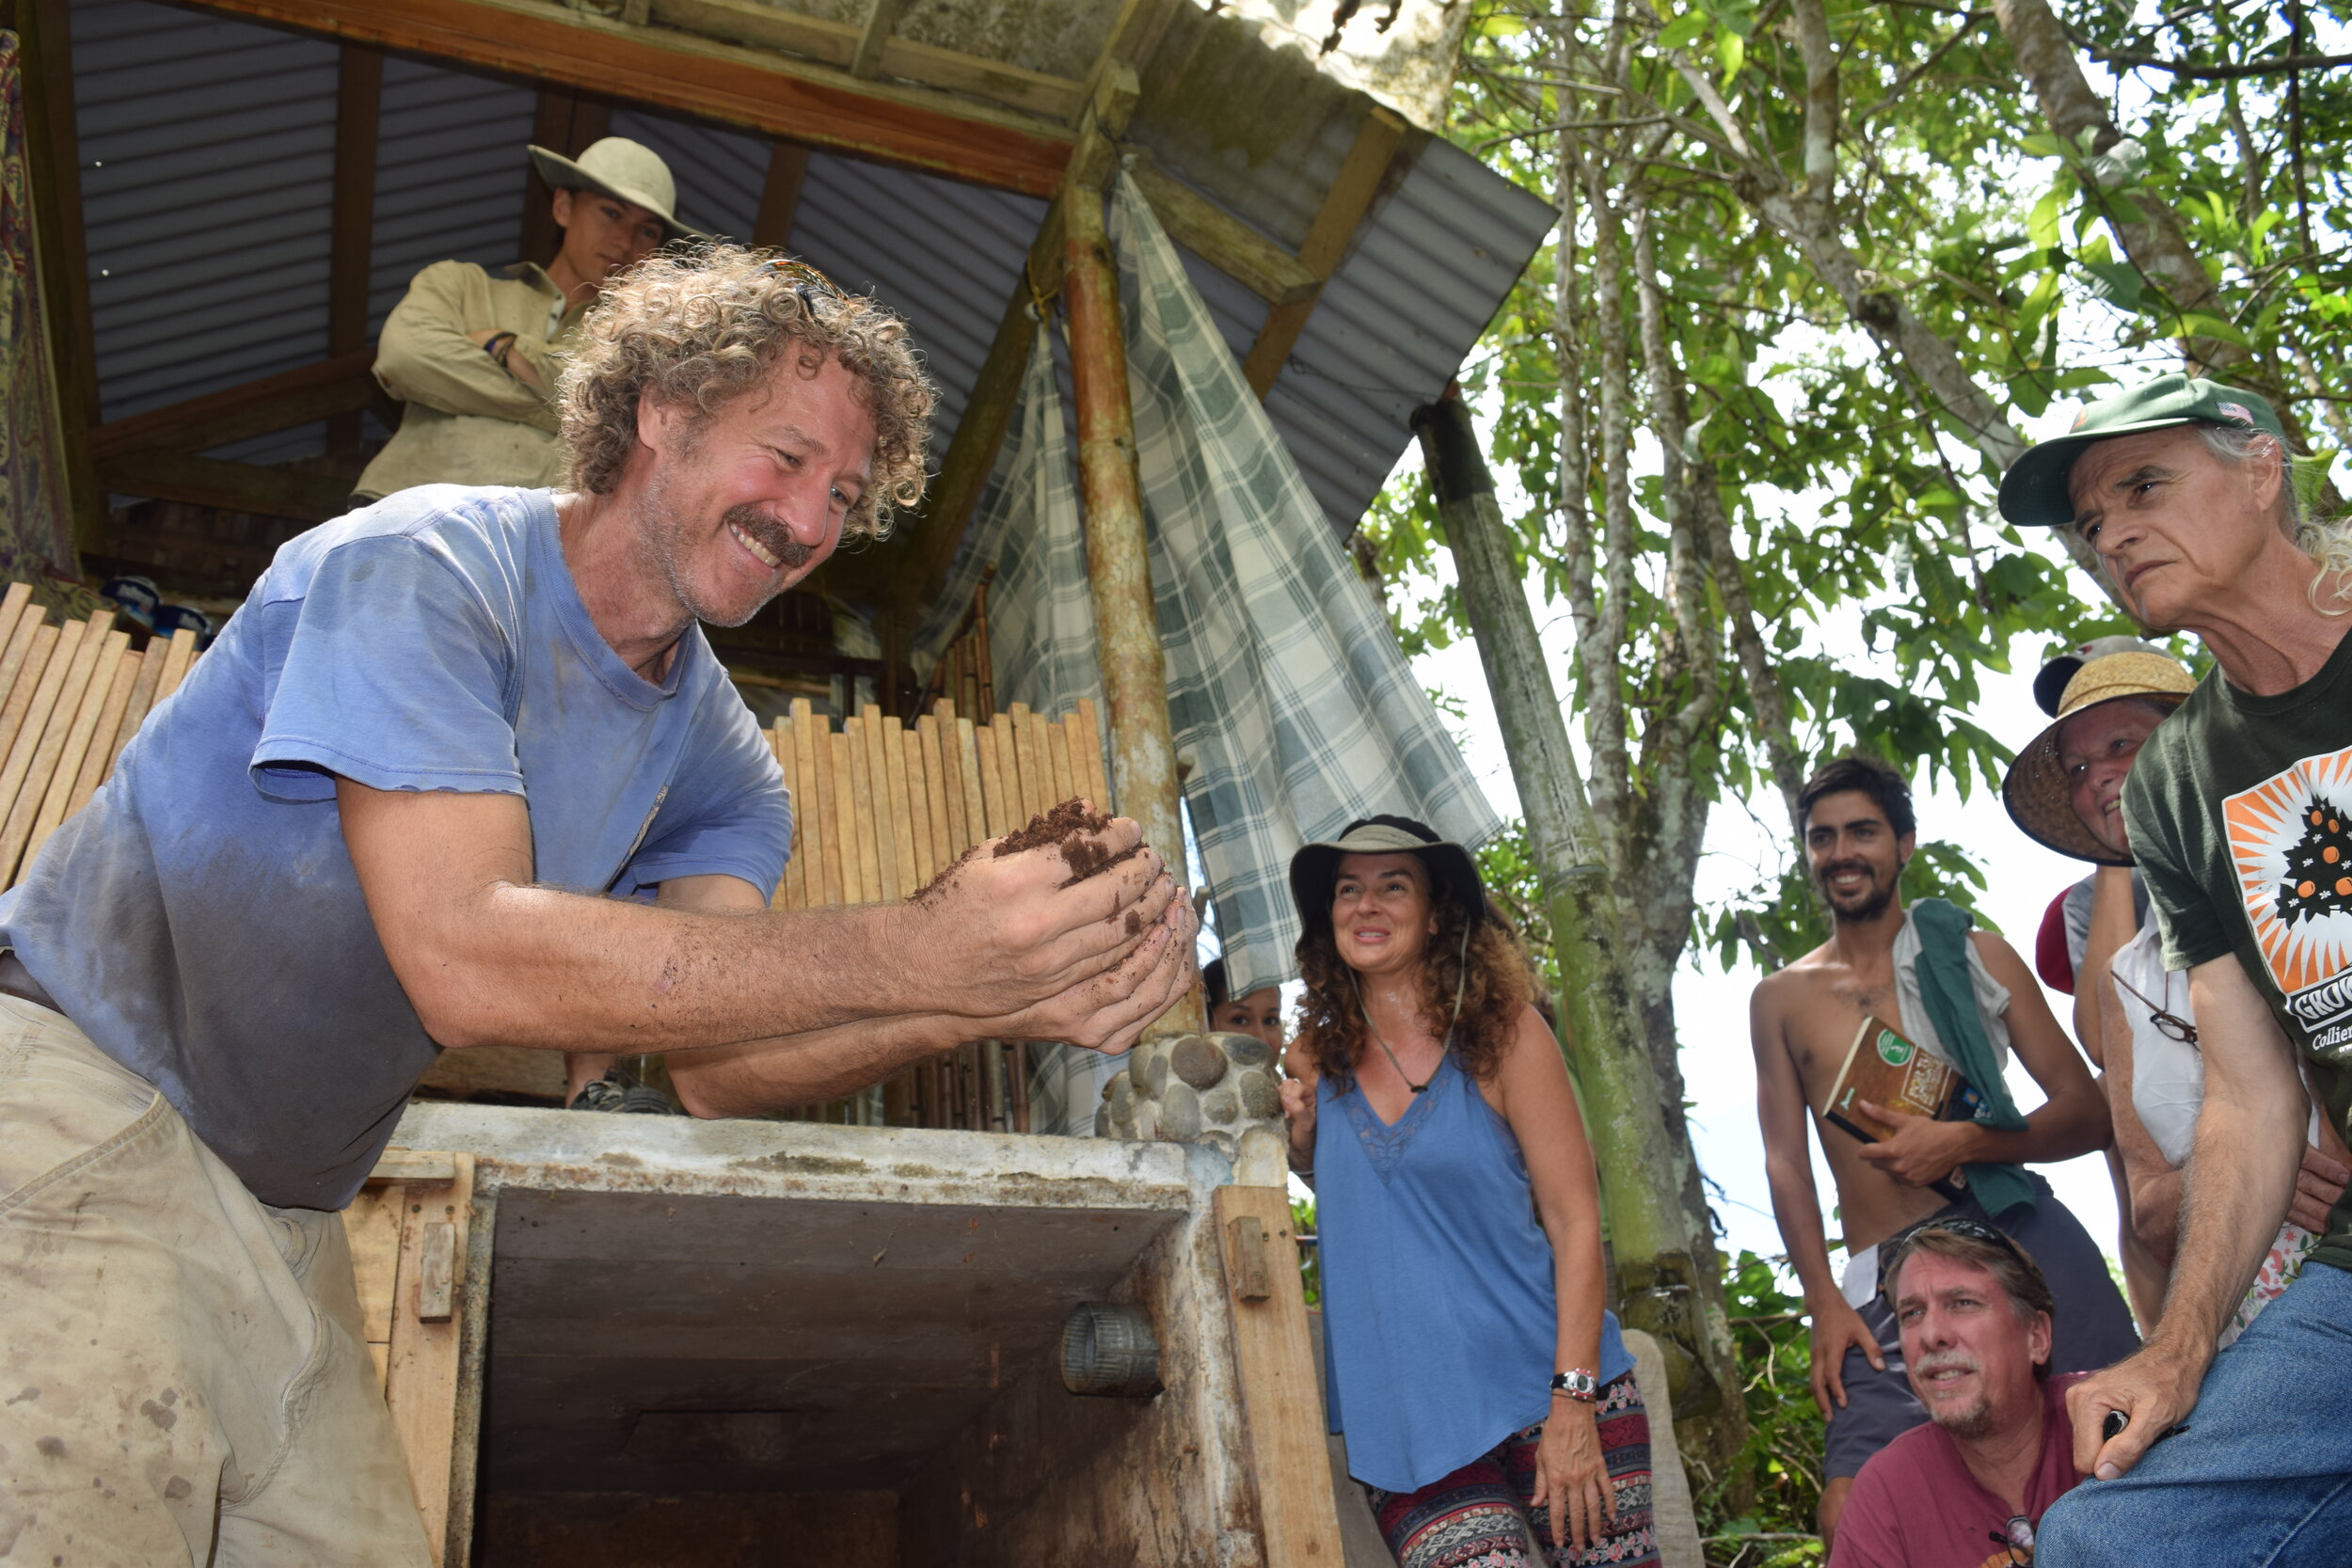
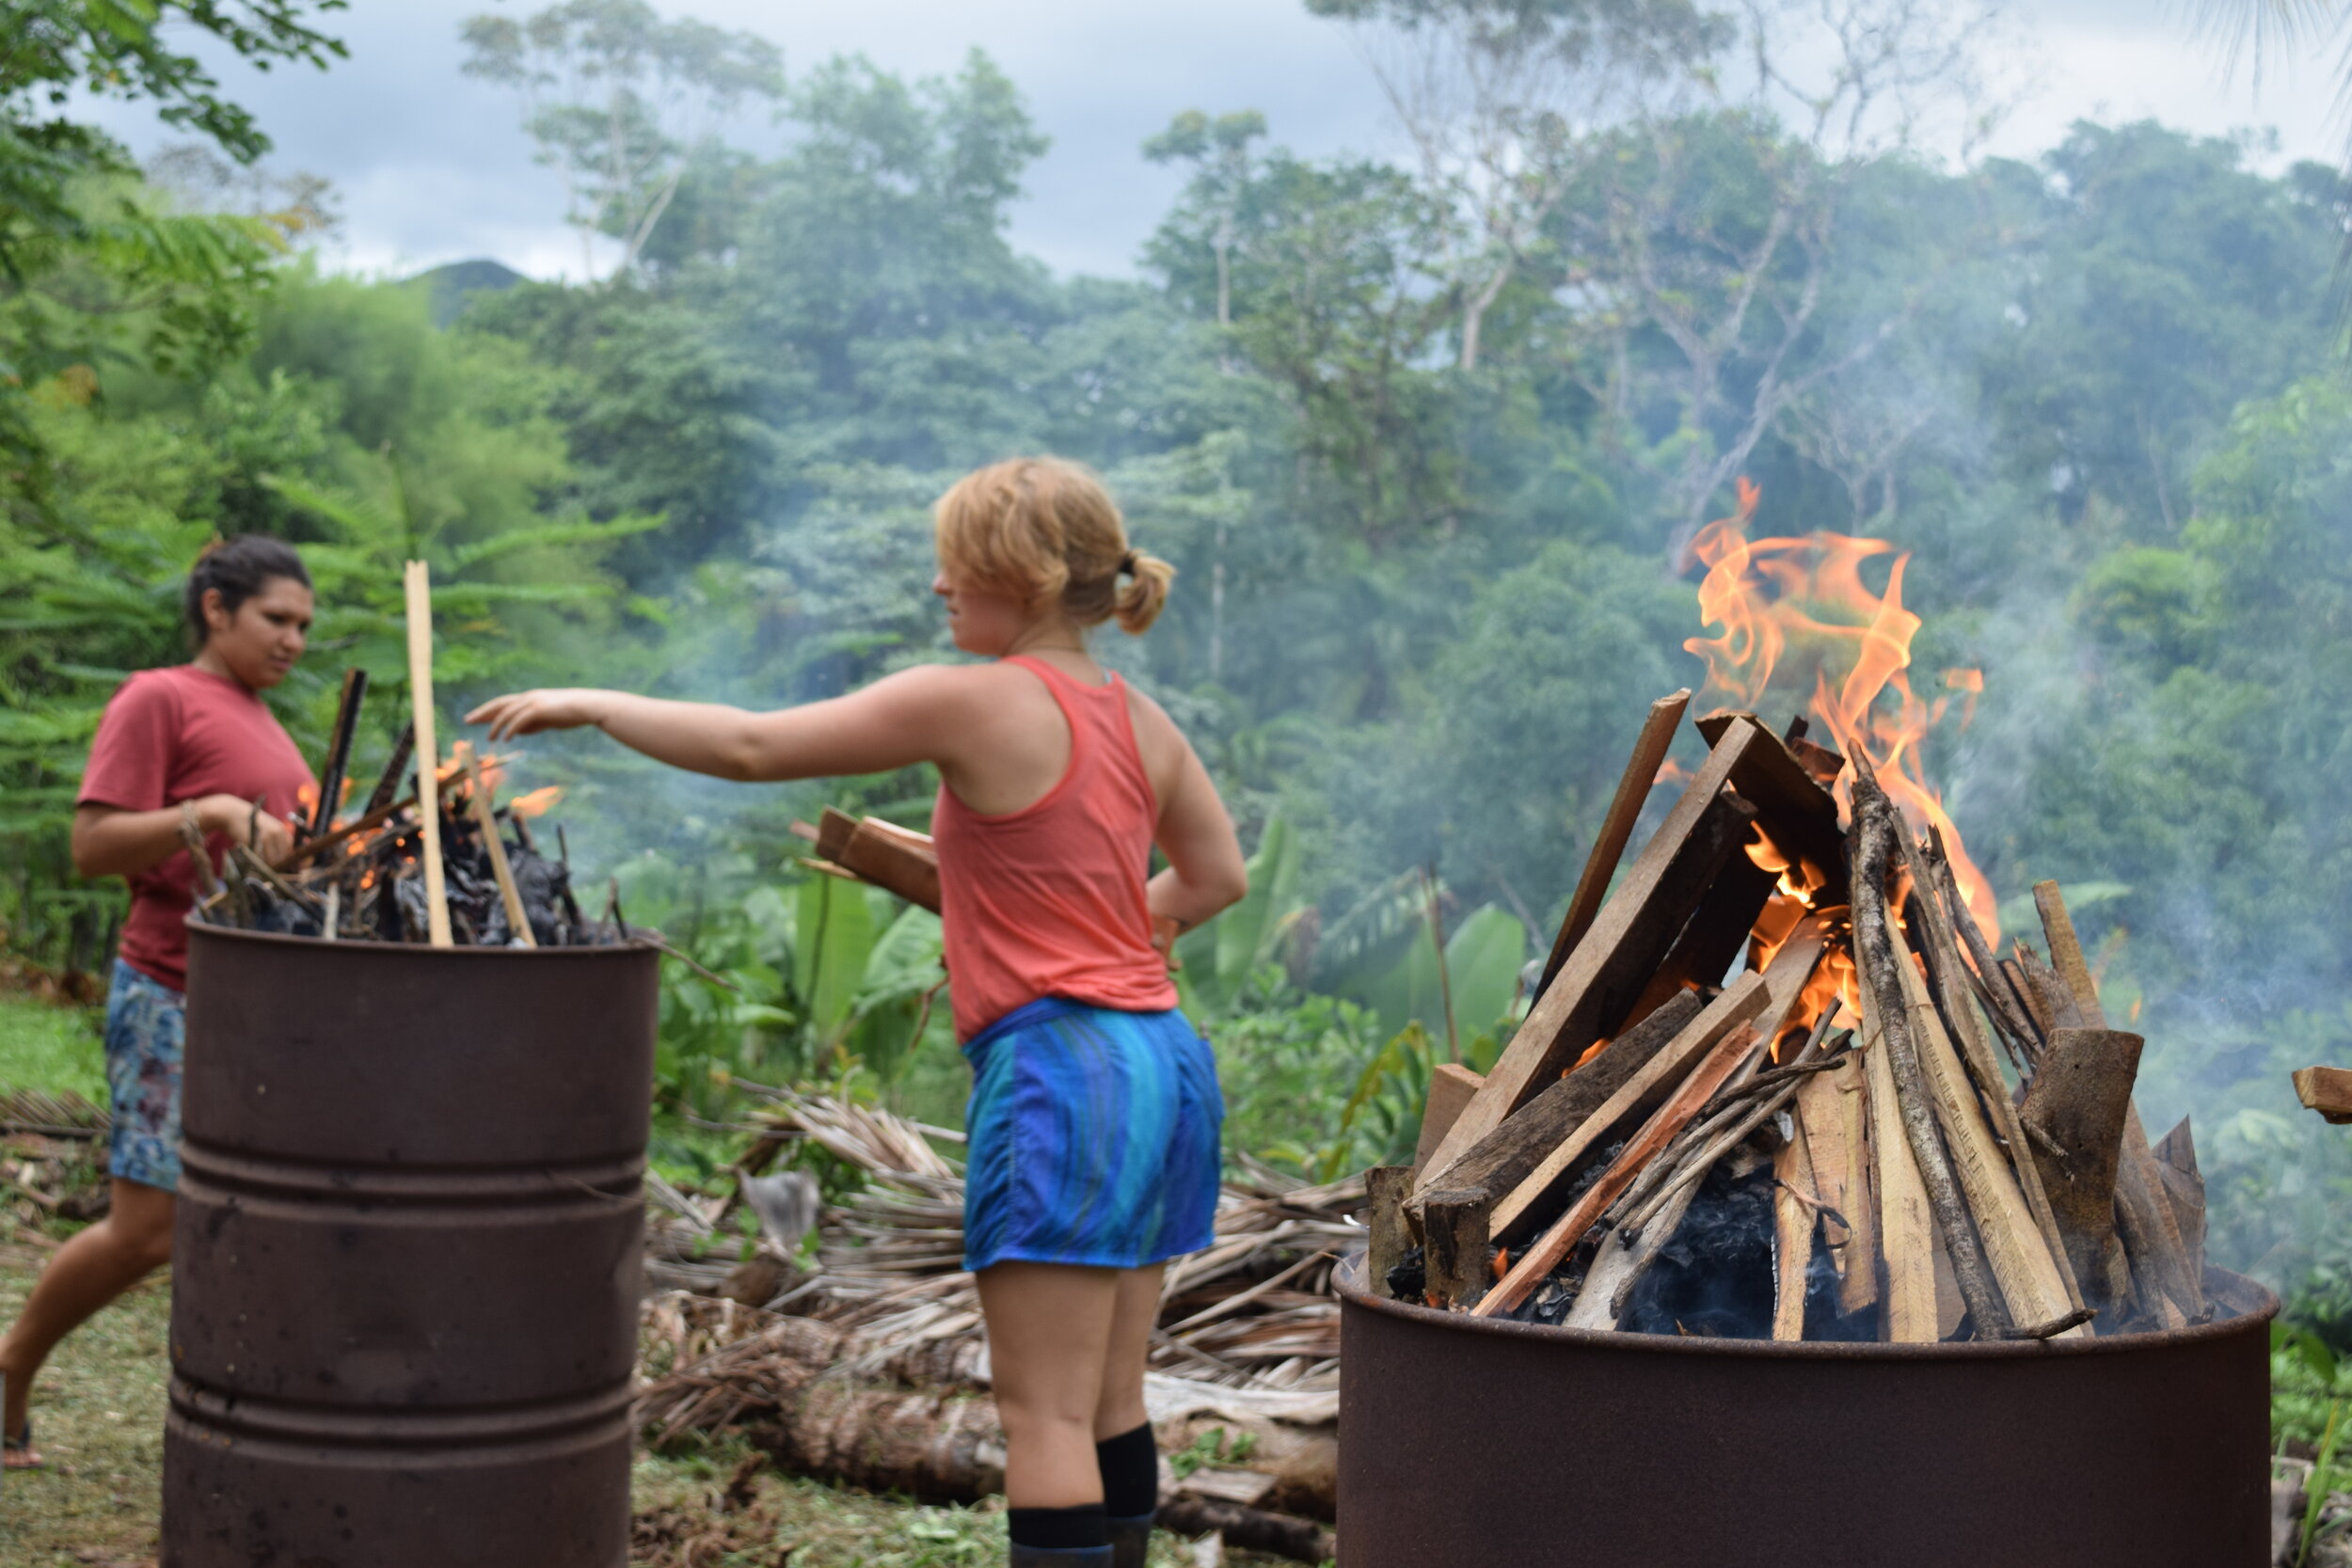
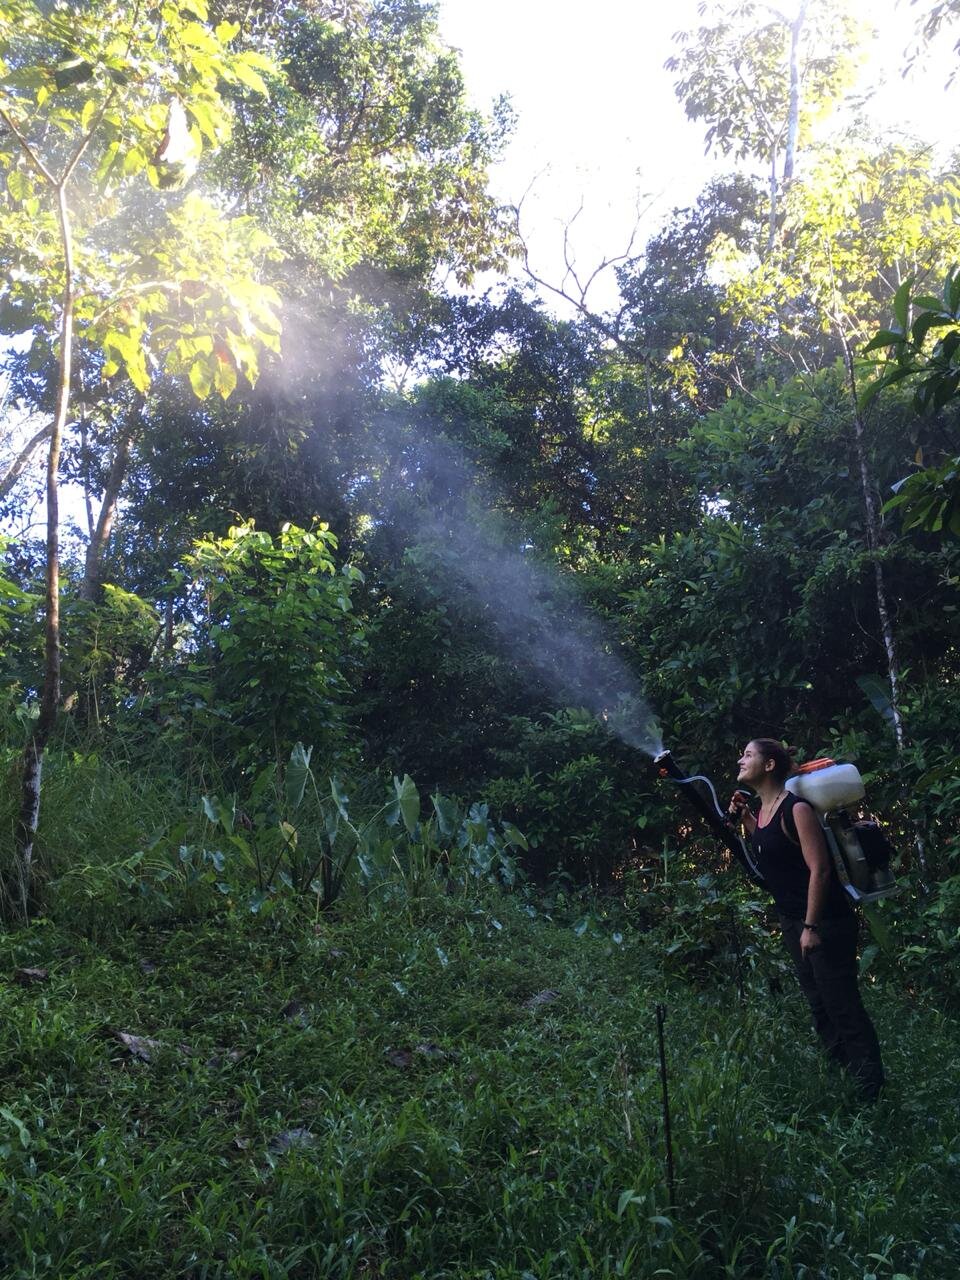
Many ways to develop tropical soils
There are other solid permaculture concepts for improving soils in the humid tropics that should be mentioned here. To deal with highly acidic soils, adding lime at regular temporal intervals is a useful strategy. We tend to avoid planting annuals while opting for perennials, by which we disturb the soil less and reduce potential erosion. Read our article about which perennial greens do well in the tropics here. Over time these plants will help build humus and topsoil. There are plenty of pro tips from the world of permaculture that you’ll find helpful, like adding shredded cane and bamboo species as a mulch for silica and calcium enrichment. This will in turn help to raise pH levels (lower acidity) of soils and reduce leaching and erosion. We add Humanure and effluent from our Biodigestors, this helps build our soil and use commonly wasted products to grow food!
Want to Learn More?
If you’re interested in agricultural concepts such as improving soils, make sure to check out Rancho Mastatal’s workshops, including:
Past Blogs on Soil and Permaculture in the Tropics
We have a lot of past blogs on this topic. Here are a few to read:
Applied Permaculture Principles

Our apprentices doing some chop and drop in the orchards

Timber Framing: 10 Things You Didn't Know You Needed to Know (Part 2)
With proper instruction, patience, and focus, it is entirely possible for a beginner to accomplish amazing things with this building technique.
By Kara, Apprentice 2020
(This article continues from Part 1, read that one first to learn some basic tips for Timber Framing!)
Timber framing is an important natural building technique here at Rancho Mastatal, and much of it is done by workshop participants and apprentices-- not people with years of experience! With proper instruction, patience, and focus, it is entirely possible for a beginner to accomplish amazing things with this building technique. If you’ve taken a timber framing workshop with us here at the Ranch, you may find these tips a helpful reminder of the little techniques that often escape our memory. And if you’re planning on building your own sustainable home, these small things might be the difference between a day of frustration and a successful frame-raising.


If you’re interested in building your own home and timber framing check out our latest workshop offerings.

It takes a team to raise a frame
Doing your Lay-up
5. Pulling Horizontal Lines
After you’ve laid your tape and marked your measurements with a crow’s foot mark (remembering to subtract the 10” you’ve burned! See Part 1 of Timber Framing Tips to learn more), you’re ready to pull your horizontal lines around your timber. This means drawing straight, accurate lines around your timber at a right angle to the edge of your reference face, to indicate the cuts needed for each joint. With the crow’s foot ‘V’, pointing towards one long edge of the timber, it’s easy to see where on your mark your line needs to cross, but you still need to make sure that you’re drawing it perpendicular to the edge between the two reference faces. Both a framing square and a combination square can help you do this.
To use the framing square, orient your timber so that one reference face is up, and the other is on the side closest to your body. Hold the framing square with the ‘L’ parallel to the ground, one side resting flat across your timber where it intersects the measurement mark, and hold the edge of the other side flush against the close face of the timber. You’ll have to hold the square at a slight downward angle, but keep it as shallow as you can. Hold the framing square tight to the timber with your hip, and draw your line with a sharp pencil when you have it positioned accurately.
You can do the same thing with your combination square, and it’s not as important to be standing with a reference face facing you, as long as you’re aware each time you’re drawing a line to hold the flat edge of the square against a reference face. Never draw a line while the edge of the square is
resting against a non-reference face, it’s an easy mistake to make, but it can skew your lines and eventually cause misalignment in your joints if you don’t catch the mistake.
To pull a horizontal line around to a non-reference face, where you don’t have the crow’s foot mark, keep your square against a reference face, and draw the line around the timber, being careful to align your pencil lines at the corners. You’ll end up flipping your timber around as you work, so it’s important to mark your reference faces clearly. A thick chalk mark is ideal, so that you can see quickly if you’re using the right face to draw your lines from.
6. Drawing Vertical Lines
To draw the vertical lines for your layup, the ones parallel to the long edge of the timber, using a combination square is quick and accurate. Set the known distance between the edge of the reference face and your cut line, and place the flat edge of the square against the reference face, holding it parallel to the ground to that the ruler is resting fully on the timber. Using square rule, you only actually know the distance between the line and the edge of the reference face, since the corner
between reference faces is where your ‘perfect’ timber within the timber lives, and there could be extra wood on the other sides.
When setting the distance on your combination square, reveal the needed amount beyond the handle, leaving the tick mark on the ruler just slightly covered by the handle. Draw the line by holding your pencil against the end of the ruler, and drag both square and pencil along the length of the line, moving in tandem to draw a smooth line.
By almost covering the tick mark that you’re measuring to on the ruler, you account for the small
distance between the pencil line and the end of the ruler-- a sharp pencil helps, too!

Using the combination square to make your lines, making sure to set it just under the measurement you want, to account for the width of the pencil line
Cutting Joints
7. Don’t Remove Your Line!
Whenever you are cutting any joint remember to not cut away your line! The perfect cut would be cutting your line in half, but this isn’t always easy to achieve, especially for beginners. So instead cut just to the waste side of your line. This is important because as you’re cutting the rest of the joint you need reference of where to cut to! Seems obvious, but many people’s lines seem to disappear.
8. Practice Your Square Cuts
Seriously, you may think using a hand saw to make a square cut is easy… Well it’s not if you’ve never done it! Especially on large timbers. Usually you have a bit of extra timber to spare on either end, do as many practice cuts as you need to get a square cut.
To make a square cut, remember to cut on the waste side of the line. Align your saw blade at the far side of the line, you will move the blade down the line slowly, creating a small cut along the line (a kerf cut). Once you have your kerf cut you will begin moving the saw blade diagonally down the side line that is facing you, keeping the blade in the original kerf cut, and trying to not drop the blade down the other side that you can’t see. Stop cutting once you’ve reached the bottom. Now repeat on the other side of the timber, keeping your blade in the original kerf and moving the blade down the line. If at any point your blade begins to move off the line, stop and correct it immediately. The farther you move from the line the harder it will be to correct it.
The diagonal cuts should line up and create a square cut. You can check it with a framing square to see how far off or on you are.
9. Bevel up or bevel down
First, always make sure you have a sharp chisel! A dull chisel will make everything slower and probably not give you as clean of a cut.
There are two sides to the chisel. The bevel refers to the angled slant at the end of the chisel.
When you are cutting your joints it’s important to orientate the bevel the right way for which way the wood grain is going. When you are going with the grain of the wood, the bevel should be faced down. This will help insure that you don’t dive into the wood. Then when you are going against the grain, the bevel should be up.
10. Get a Team
Yep, timber framing kind of requires at least a few people. You always want someone to check your layouts before you cut anything. It is very helpful to have a partner to help spot you when you’re drilling the holes for mortises. And then when it comes to raising the frame, the extra hands will definitely be helpful and appreciated.

A student cutting this long tenon
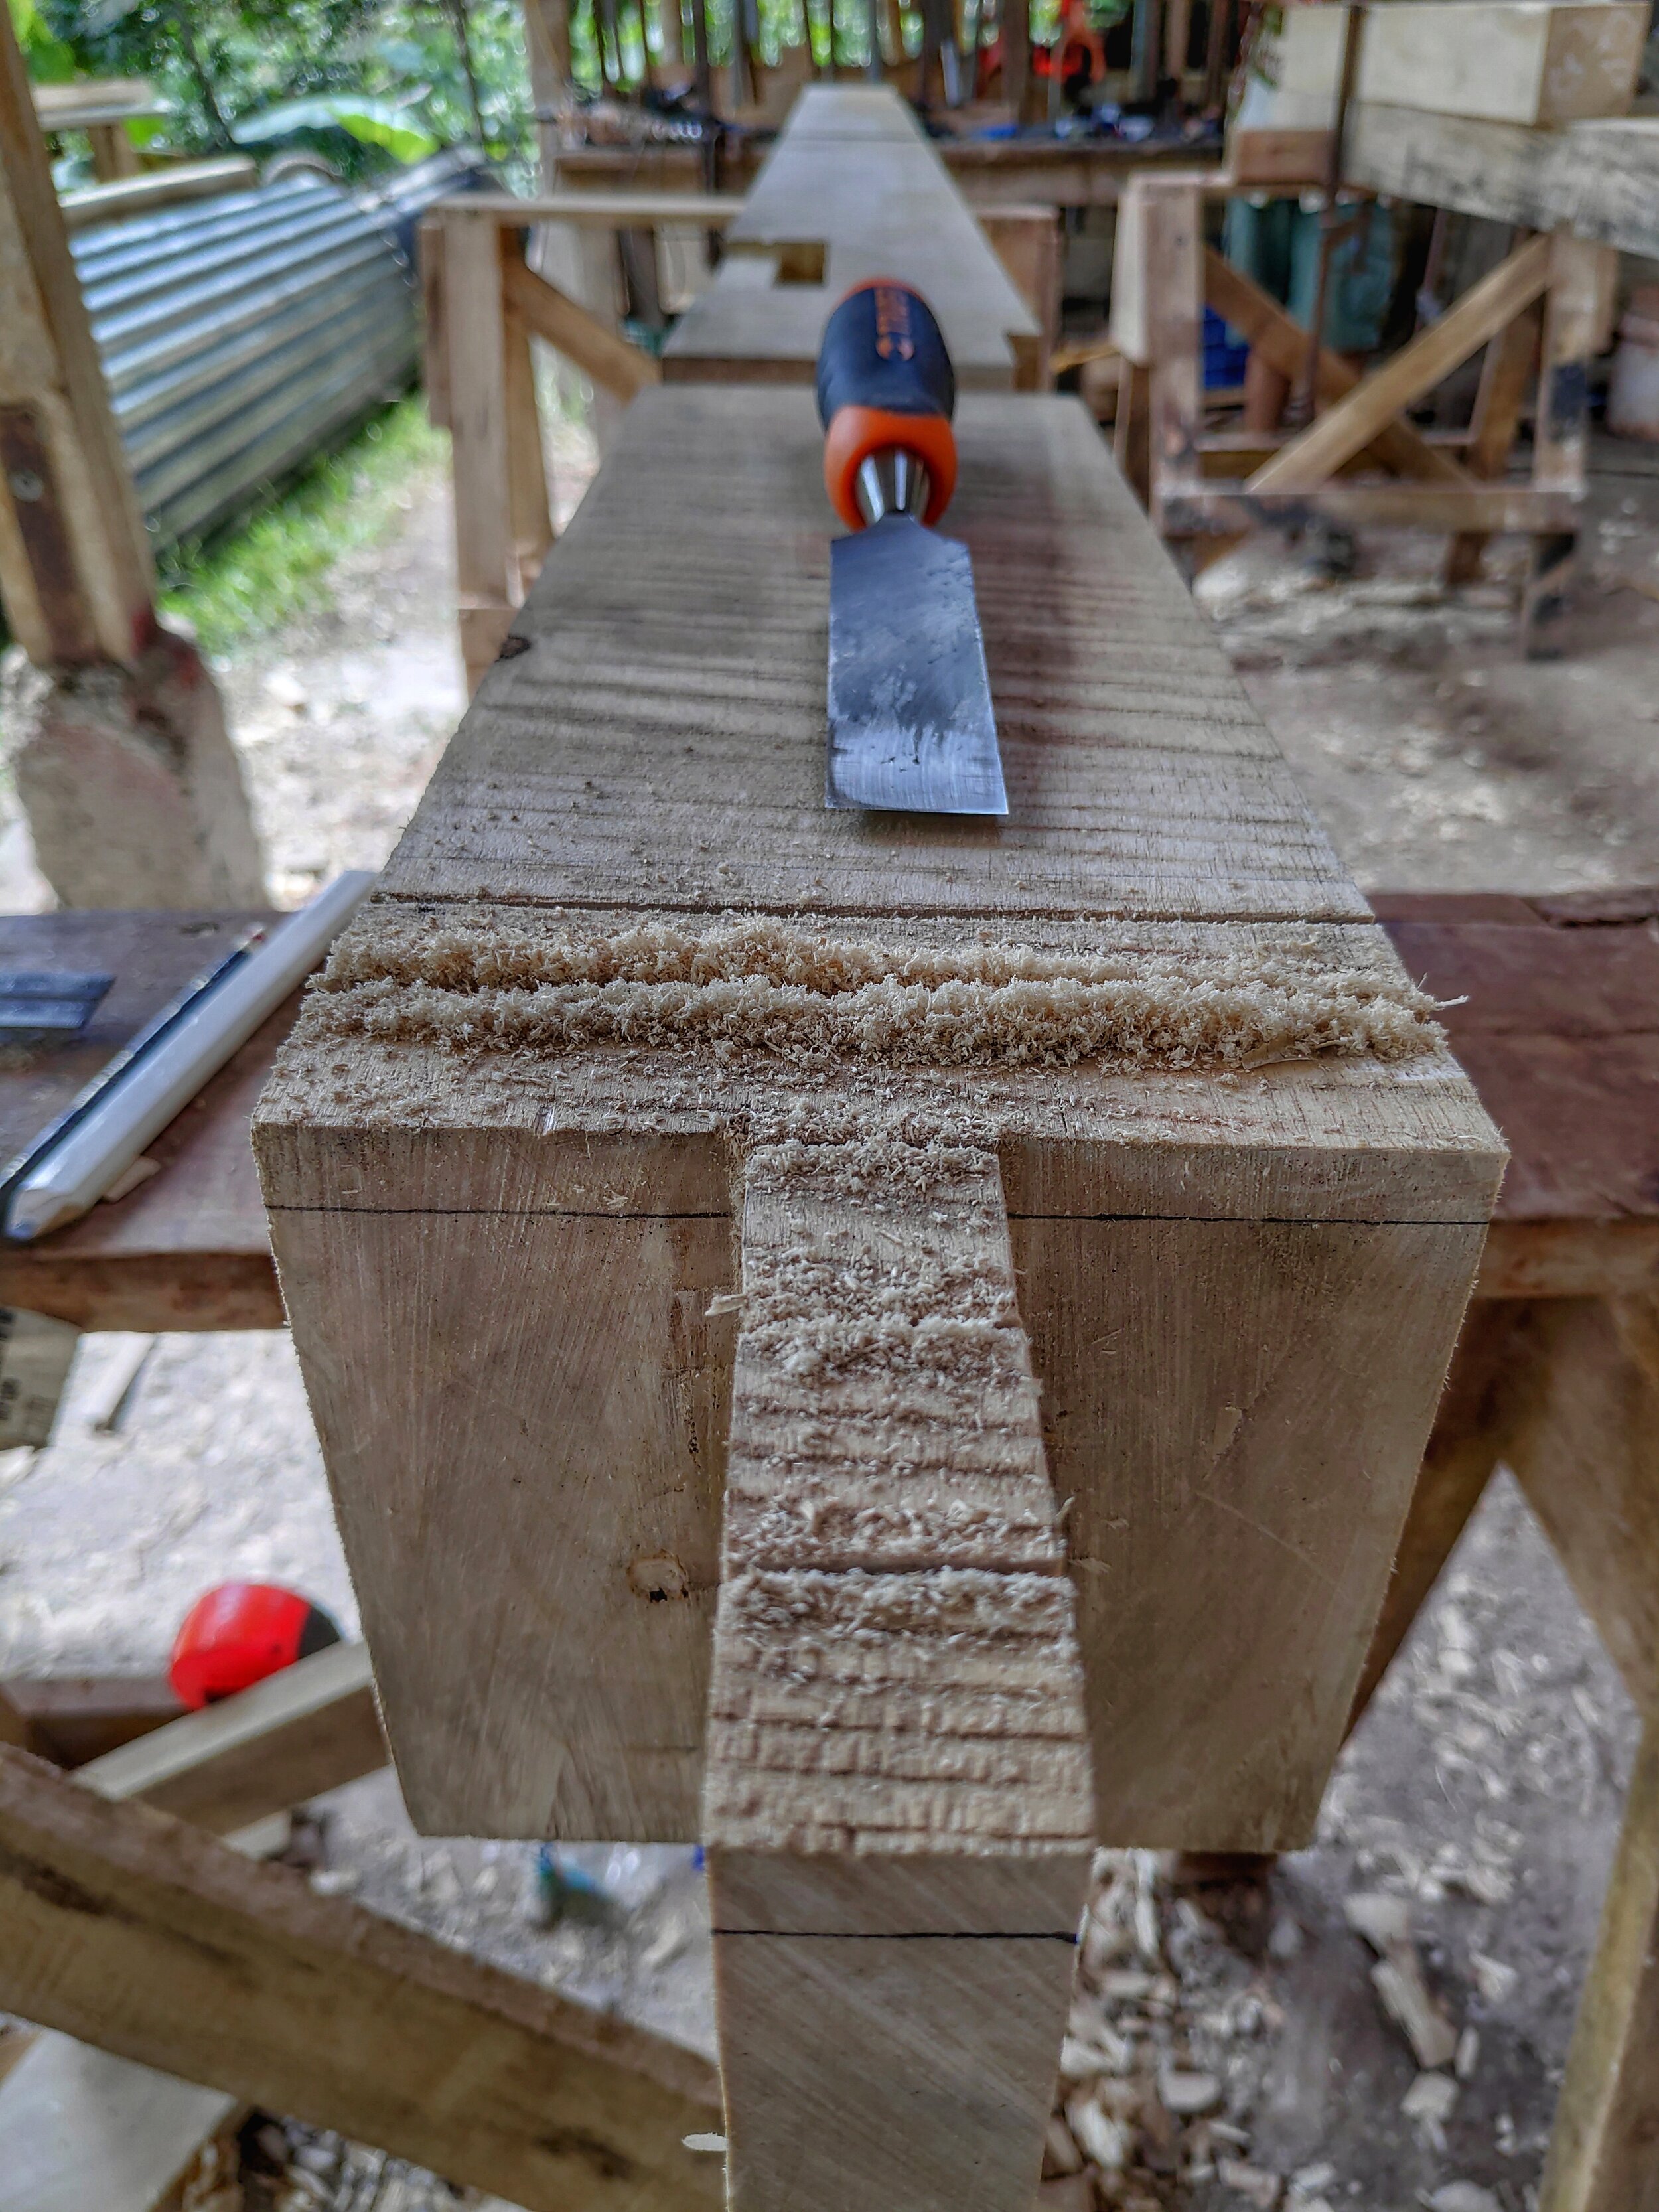
The kerf cuts to remove the housing on this joint
Want to Build Your Own Home?

Timber frame joinery
With over 15 years of experience in natural building including earth building, bamboo construction, and timber framing, Rancho Mastatal is a great learning environment to get inspired and hands on experience in these fields.
Make sure to check out our natural building courses:
Natural Building and Plasters Intensive
We host most of these courses annually, so make sure to stay tuned by visiting our workshop page here.
Past articles on timber framing and natural building at the Ranch:
Timber Framing: A Real Application of Sustainable Forestry Management
How to be a Permaculture Prepper: Self-reliance for the End of the World
Have you been haunted by dreams of the impending apocalypse? Is a sense of doom (and a complementary sense of gloom) beginning to pervade your every waking moment? Do you sometimes wake up in the middle of the night, thinking you left the stove on, only to realize it’s not your kitchen on fire, but the whole stinkin’ world?
By Mathew “Mateo” Pattillo
(Warning: This article MAY contain humor)
Have you been haunted by dreams of the impending apocalypse? Is a sense of doom (and a complementary sense of gloom) beginning to pervade your every waking moment? Do you sometimes wake up in the middle of the night, thinking you left the stove on, only to realize it’s not your kitchen on fire, but the whole stinkin’ world?
If you answered yes to any of these questions, then you may be reading the most timely and relevant blog/article of your life.
True, the world is a complex and scary place, and every year it seems to get more and more scary and complex. Change is coming faster than ever before, and it’s sometimes hard not to feel like this really is the End Times coming to town to crash on our couch for a while. “Horseman #3, Pestilence, Horseman #3, your sandwich is ready.” Would you like a cold Corona with that?
But here’s the so what: So what if the world is ending? So what if everything collapses around us and burns to ash and the acid rains fall and the oceans rise up and the heavens themselves come crashing down to Earth So what, IF YOU can survive it all, and do it in style!
This is: How to Use the Principles of Permaculture to Ensure that YOU Survive the Apocalypse and are Around to Rebuild Society After the Dust Settles (And Look Good While you’re Doing it).

Permaculture Prepper Principles
Now there are a lot of different ways to embody the Permaculture Prepper spirit, but I’m going to focus on what I’ve identified as some key points.
Water is a Valuable Resource

One aspect of the impending change that you cannot overlook is the increase in resource scarcity that is likely coming. In the new age around the corner, the principle of “There is no such thing as waste” will become more like a natural law. Hopefully you’re already using a compost toilet, but you’re gonna have to take it to the next level.
Yes, that means it’s time to start drinking your own pee. There is a ton of nutrients just going down the drain every day: salts, amino acids, nitrogen, smelly stuff, and yellow all packed up in there, and I’d be willing to bet that you’ve been letting it all go to waste. Shame really. But it’s ok, it’s never too late to make a change for the better, and the time is now. Get used to this, because it is going to become a necessary norm in the not so distant future. Also it’s sterile and has a great flavor. Beyond these obvious benefits, it’s also a critical way to save water. When the wells n’ pipes ain’t runnin’ free, you’ll be glad you’re drinkin’ pee. That’s what my grandpappy used to say to me, and by golly he was right!
Prepping 101: Beans Have Power
Another critical factor in your survival is going to be your food supply. Permaculture principles abound around this factor. Plant different crops together, plant many diverse species, zone your space for ease of access and maintenance according to need, etc. etc. But we also need to look to a key prepper principle if we want to be truly prepared. That is: have as many cans of beans as possible.
It is a law of the apocalypse that whosoever holds the most beans, holds the most power. You can use canned beans to pay off wasteland bandits, barter for honey with your neighbor, and even to chuck at one of the heads of the giant mutant rats invading your root cellar. Canned beans are invaluable, and if you really want to make it in the New World, you’re gonna have to can your own beans.
In order to maximize the efficiency of your operation, and to integrate with your permaculture system, you can plant the empty cans around your bean plants, right next to your corn, and alongside your squash. This way you can knock the ripe beans right down into the can, saving lots of time and hassle, and giving you immediate bean cannage. The metal cans in the soil can also leach some essential mineral nutrients, giving your plants a boost that they’ll be thanking you for. This kind of next level companion planting is what will give you the edge you’ll need to not just survive, but to THRIVE.
Visualize the Future: What does 2050 look like? What do you look like in 2050?
Next up is a very important piece, so I want you to read closely. Think about all the apocalypse movies you’ve seen. Think about the drawings, the comics, the TV shows, all the visual examples of the End Times that you’ve seen before. All the people who are still alive and kickin’ it, what do they look like? What do they have in common?
That’s right! They all have badass apocalypse outfits! This is not by accident. It is actually a key factor for your survival, so you should take some time now while you have it to get your outfits ready, and lookin’ sleek n fleek ya hear?
By starting this process early, you can also abide by another Permie principle, which is to start small and make gradual changes. Get a few piercings, maybe a scary skull tattoo on your neck. Start wearing a wallet chain, and perhaps a spiky bracelet. This way, when the time comes to don the garb in full, you’ll feel comfortable, and that much more ready to tackle the big challenges ahead with a solid foundation of wasteland style confidence built up over time.

Get prepped

Definitely learn to use one of these!
Oh dang, look at the time! I’ve got to go clean out the guinea pig cages. That’s another point I forgot to mention; guinea pigs are key. Don’t overlook the guinea pigs. Anyway, I’ll be back next time to talk about how permaculture principles can be applied to toast for a delicious breakfast. Good luck preppin’ y’all!
Want to Learn More?
If you want to know what the actual Permaculture Principles are, read our past blog article on how we apply them here at the Ranch.
Or join us for our annual Permaculture Design Course! We have one in November 2020 and another in April 2021.

Timber Framing: 10 Things You Didn't Know You Needed to Know
Either way it’s important to know that timber framing takes patience and practice if you’re a beginner. The tips in this article are intended to introduce some important concepts in timber framing and to solve some common problems before they even arise, in order to set you up for success in your sustainable home build.
By Kara, Apprentice 2020
Timber framing is an integral part of the natural building techniques we use at Rancho Mastatal. The building style provides a strong framework to combine with other techniques. Adobe, cob, wattle and daub-- can all be used in conjunction with a timber frame. Maybe you’re already planning on building a timber frame house, or weighing options of building types. Either way it’s important to know that timber framing takes patience and practice if you’re a beginner. The tips in this article are intended to introduce some important concepts in timber framing and to solve some common problems before they even arise, in order to set you up for success in your sustainable home build.
If you’re interested in learning the basics of timber framing you can check out our upcoming workshop.

A happy crew after finishing the raising of this timber frame
1. Square Rule
When building your sustainable home it may be possible to work with locally sourced, large-dimension timber, but the pieces provided by your local sawyer may vary in size and squareness. For timber framing, a construction style that relies on accurate measurements, this reality presents an interesting problem. A common solution, and one we use for our natural buildings at Rancho
Mastatal, is called square rule. The basis of square rule is the assumption that a perfect, slightly smaller, timber exists within your uneven timber. By making measurements and joints align to this
imagined perfect timber, the inconsistencies between the actual timber sizes won't affect the integrity of your joinery.
In practice, there are likely to be two adjacent faces on your timber that are at 90 degrees (or close enough to plane one side until they are). These two sides become your reference faces, and thinking in terms of your ‘perfect’ timber, it’s nestled into that 90 degree corner. You’ll measure everything from these two sides, marking them distinctly in pencil or chalk so that you can quickly see where they are.
In planning where your joinery is going to be laid out, you have to keep in mind that the exterior faces must be flush to allow the cladding to be attached as well. This means that one of your reference faces will always be on the exterior facing side of your timber. Along with this consideration, you’ll want most cuts to be on a reference face. Even if they aren’t, joints will be measured to the inner surfaces of the reference faces, so that the inconsistencies in the timber won’t affect their placement.
When cutting, this may mean that you have to cut out ‘housing’ for the joints on non-reference faces. This is a reduction that exposes the ‘perfect’ smaller timber, and allows mated pairs of joints to sit flush against each other. By exposing the ‘perfect’ timber, identical pieces like knee braces
become interchangeable throughout the building-- so you don’t have to plan for the inconsistencies and variations in each piece.
Square rule is a concept that may seem daunting at first, but it can becoming intuitive with practice. By measuring to the ‘perfect’ timber, and cutting housing to expose it, means that each piece can be cut without knowing the unique shape of the corresponding timbers it will fit into. I recommend doing more research into the topic. The book “Learn to Timber Frame” by Will Beemer is a good resource.

Using a framing square to find your best 90 degree sides

And a hand planer to make those sides perfectly 90

A perfectly sharp pencil
2. Sharpening your Pencil
To mark measurements on a rough piece of timber, it’s best to use a carpenter’s pencil. It should be sharpened to a wedge (you can use a chisel or a knife), so that you can make a thin line or a thick one. You can even shave down one wide side flat to the lead, so that it sits flush with your ruler as you draw a line. It’s important to consider the sharpness and the angle you’re holding your pencil as you draw, since it’s easy to skew a line as you draw it along your timber if you’re not paying attention.

Exact measurements are key to your frame fitting together
3. Burning 10”
When running a tape measure over your timber, don’t start measuring right from zero. Sometimes the metal edge is loose, and it is hard to get an accurate read on where 0” actually is. Instead, place your tape measure so that 10” is on your beginning mark. Measure from there, adding the 10” to your measurement. It’s better to use 10” than 1”, because it’s easier to see if you’ve forgotten to account for the burn when you’re checking your layout. Don’t get burned by the burn!

A crow’s foot helps you identify the right measurement
4. Crow’s Foot Marking
When marking measurements taken from your tape measure, use a ‘V’ shape ‘crow’s foot’ mark on
your timber instead of a single line. While carefully holding your tape flat against the timber (being sure not to move it!), draw the crux of the ‘V’ at the mark you’re measuring to, drawing both lines from the point out. A sharp pencil lead is crucial here for accuracy. A single, quickly drawn line can curve, and later it can be hard to tell exactly where on that line the accurate measurement is.

A timber frame joint called a “scarf joint” that allows you to join two long timbers together
Part 2 to Come!
Building your sustainable home using timber framing techniques is an exacting, but rewarding pursuit. Part 2 will continue with more tips to help you measure, layout, cut, and assemble your building.
Want to Build Your Own Home?
With over 15 years of experience in natural building including earth building, bamboo construction, and timber framing, Rancho Mastatal is a great learning environment to get inspired and hands on experience in these fields.
Make sure to check out our 2021 natural building courses:
Natural Building and Plasters Intensive: February 2021
Bamboo Construction: April 2021
Timber Frame Construction: June 2021
We host most of these courses annually, so stay tuned yearly by visiting our workshop page here.
Check out these past articles about natural building and timber framing here at the Ranch:
Design Ideas for a Sustainable Home in the Tropics
Timber Framing: A Real Application of Sustainable Forestry Management

Students in the Timber Frame course raising the frame they cut in class
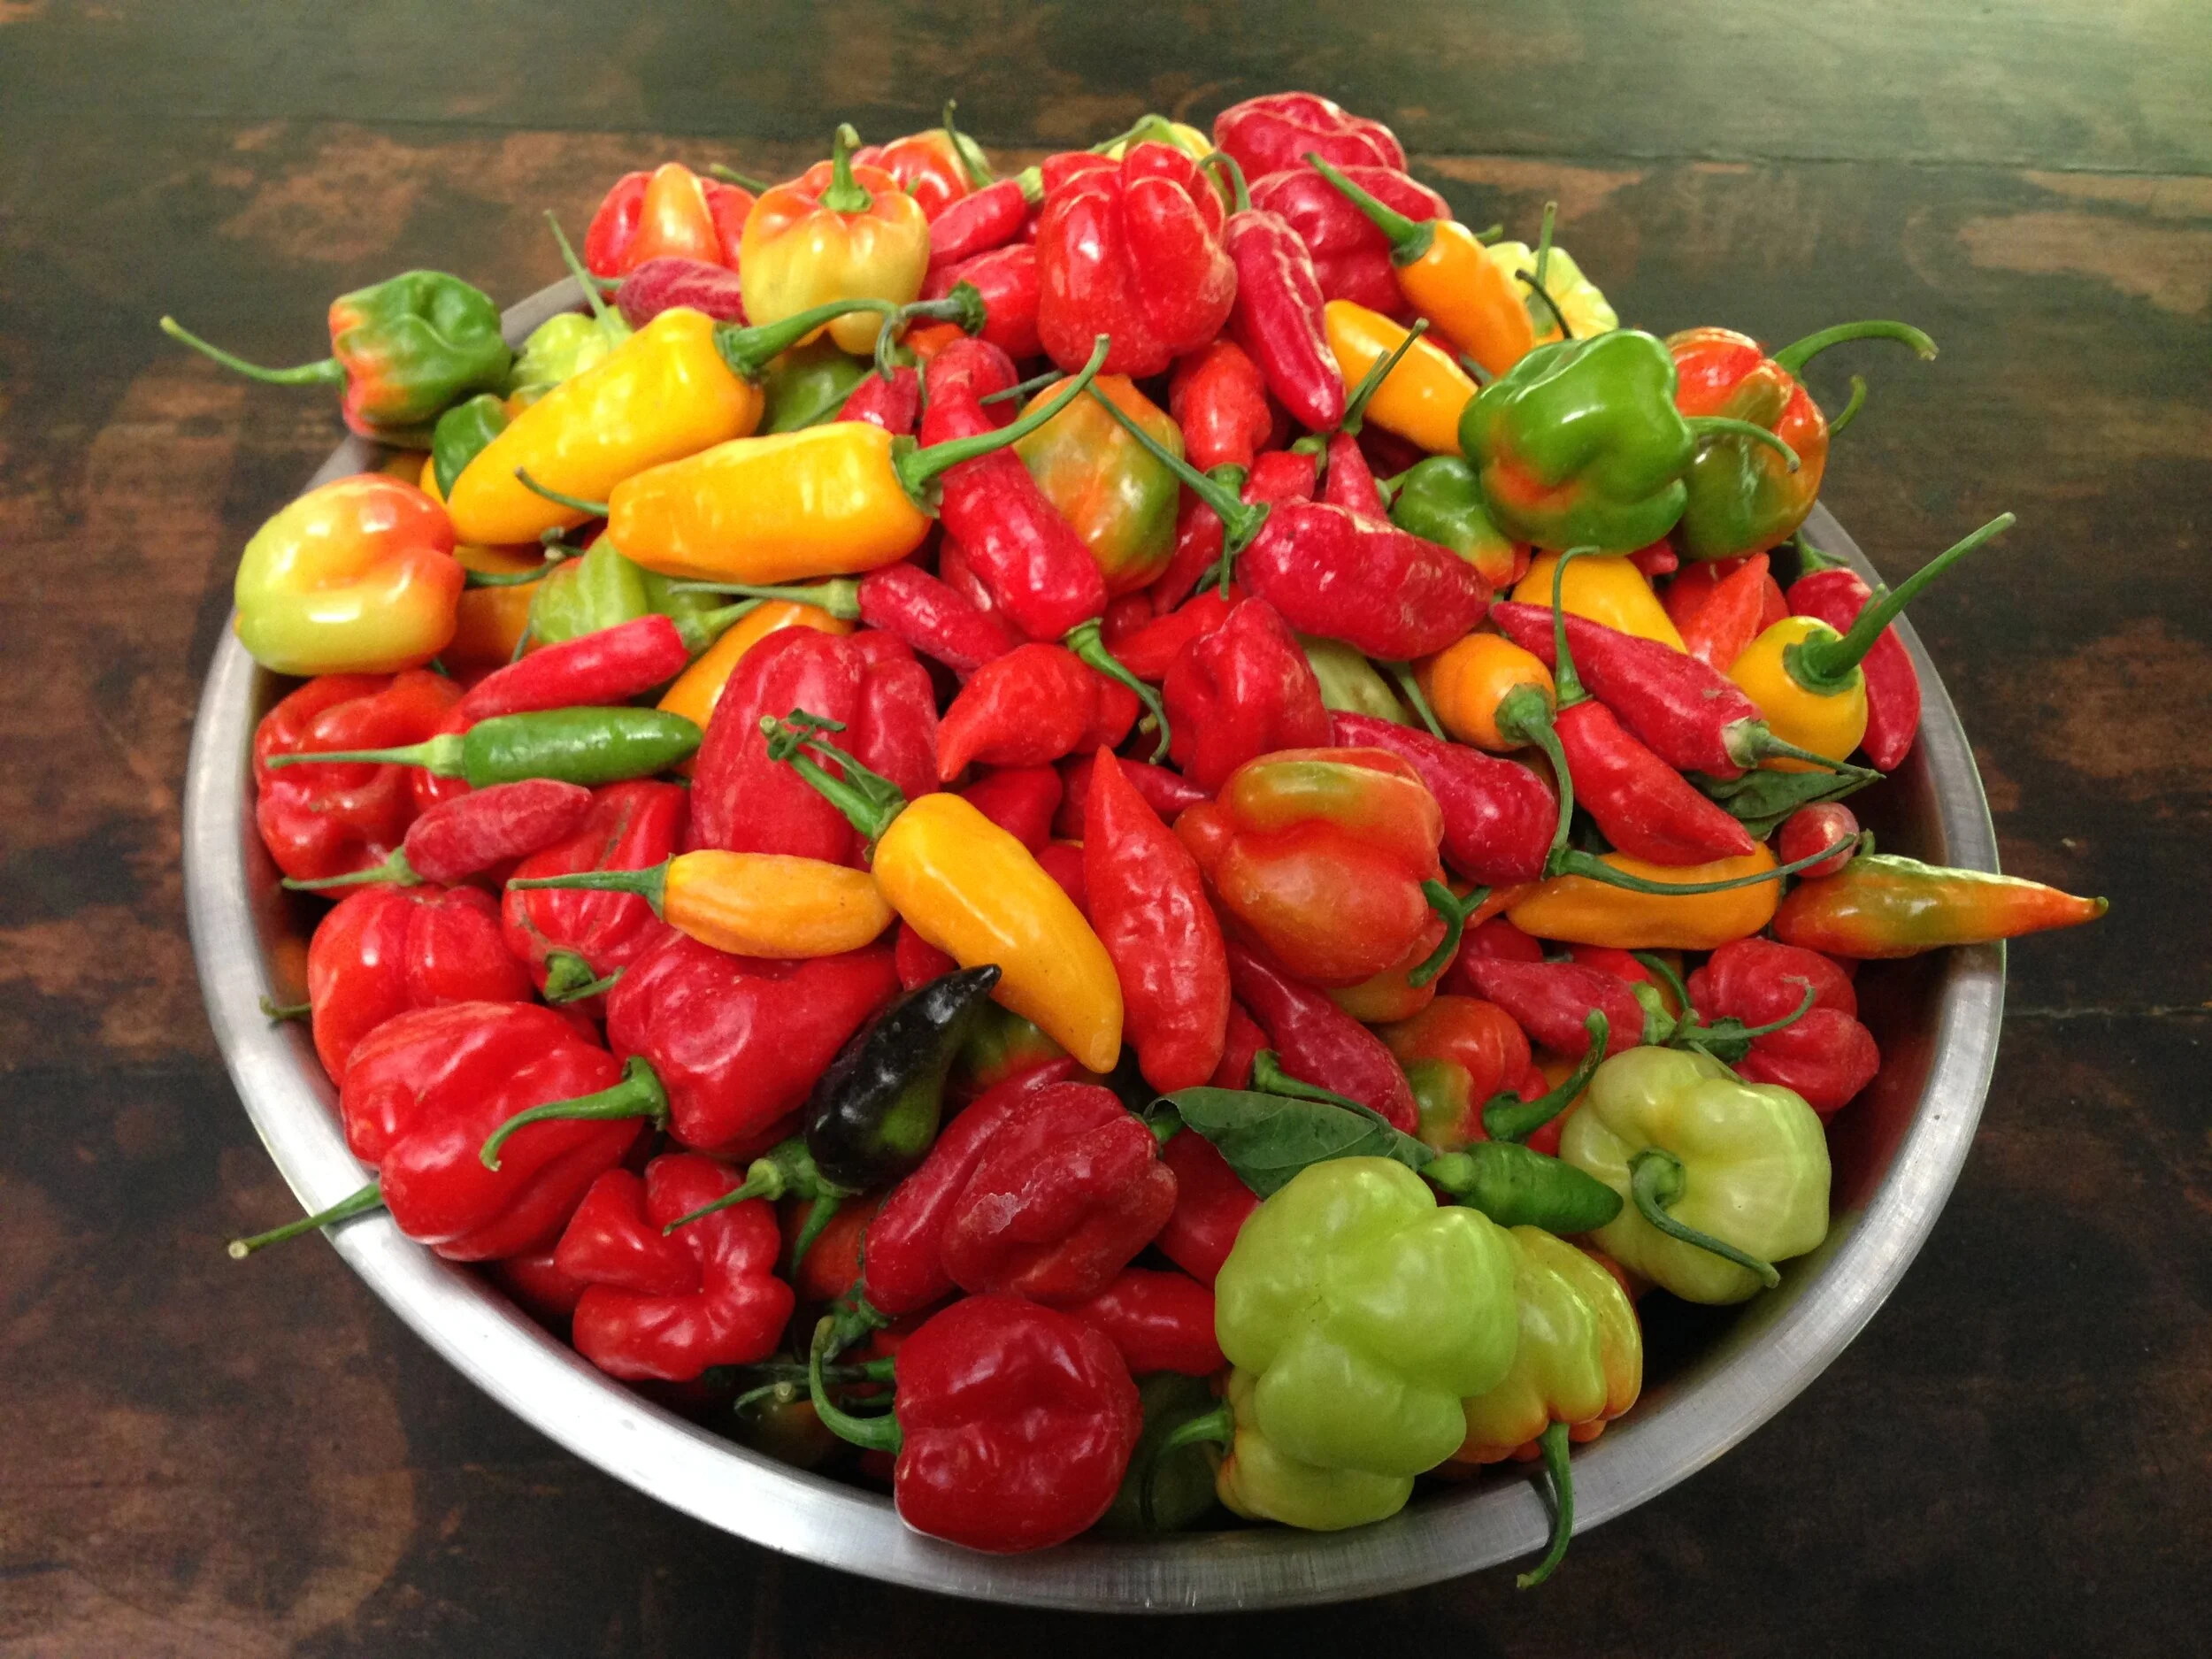
Farm to Table: Chilie Recipes
What do you do with all those chiles?!
Farm to Table: Chile Recipes
By Marco, Apprentice 2020
Before we get hot and saucy…
…is it chile, chilli, or chili? Good question. I usually hedge my bets and switch between the three spellings. Actually, all of them are correct. They all come from the Aztec Nahuatl word “chilli”, which became chile in Spanish and eventually the anglicised chilli. Chili, with one l, is the American spelling and is the reason my spell check is red-lining me right now. Anyway, glad we got that out the way. Moving on…
A Brief History of Chiles
When Columbus first landed in the West Indies (in modern-day Dominican Republic and Haiti) in 1492, he noted that the locals (Arawak) were preserving meat using pepper juices, specifically one type called “axi”. This is where the Spanish word aji was derived. (It was around this time that they noticed the Nahuatl word “chilli” being used as well). These plants were very valuable to the natives and were used extensively in most of their cuisine. The Spanish discovered that the peppers were easily preserved when dried and that the seeds kept well, leading to their far, wide and rapid dissemination throughout the world. (Thanks also, in no small part, to birds, of course. Cheers guys.)
Peppers vs. Chiles
One last bit of nomenclature clarification is the common confusion between the various peppers – bell peppers, black/white pepper (peppercorn) and chilli peppers. This goes back again to Columbus and his crew. Back in the day, peppercorn was as valuable as silver to Europeans. Thus, when they arrived in what they thought was India, they also expected to find peppercorn. Instead they found chillies. Nobody’s sure whether they dubbed them “pimiento” (pepper in Spanish) because they mistook them for peppercorn, or if they were trying to pull a fast one…my money’s on the latter. Learn more about black pepper from Dani’s last article “Life of Spice.”
Farm to Table Chile Recipes at the Ranch
At the Ranch, we try our best to follow permaculture principles. A couple of big ones are obtaining a yield and transforming/repurposing waste. Hence farm to table recipes abound and we are consistently trying to find novel ways of using our yields and decreasing our reliance on outside produce. This dry season has been particularly productive for our chillies and has hence inspired some spicy condiment creations. Below are a few spicy specials you can try at home:

Different types of chiles drying
Tabasco Sauce
Tabasco is perhaps the most famous hot sauce ever made. First synthesized in 1850, when Maunsel White decided to boil and mash up some chiles he’d brought back from Tabasco, Mexico and add vinegar and salt. The peppers found their way into middle-aged banker Ed McIlhenny’s hands whence they were blended, lacto-fermented for 30 days (nowadays they are fermented for 3 years in oak barrels) and then put into wine vinegar, creating the hot sauce we all know and love today. It’s a simple and delicious way to preserve chiles and comes in two varieties: quick and slow.
Ingredients:
· Chiles
· Vinegar
· Salt
Method 1 (quick version)
Step 1:
Chop up the chiles and weigh. Add 2% salt by weight (e.g. 100g chiles = 2g salt) and mix. Put them into a large container and make sure they are completely submerged in brine – you might have to add brine to achieve this. [Brine = water + 2% salt]. Leave the chilies to ferment for 1-2 weeks.
Step 2:
Remove chiles from brine (keep the brine!) and blend them into a chunky paste. Put the chiles back in their brine and add vinegar. Leave to ferment another week.
Step 3:
Strain off the liquid – this can be bottled and used as (quick) Tabasco.
[Pro-tip: The chilli solids can be dehydrated (in the sun or in an electric dehydrator) and used as chili flakes!]
Method 2 (slow/proper Tabasco version)
Step 1:
Same as quick version
Step 2:
Same as before - strain, blend and put into a jar but don’t add vinegar or brine this time. Place a muslin cloth (we just use a repurposed pillowcase) over the top of the jar and press down.
Step 3:
Add a thick layer of salt on top of the cloth – this will help seal the sauce whilst absorbing much of the moisture. This salt can then be dried and used as chile salt, once the sauce is ready.

Place cloth on top of jar and press down

Add thick layer of salt

Fold edges into the jar and cap
Step 4:
Leave to ferment for 6 – 36 months.

Chiles fermenting away

Finished Tabasco Sauce!
Chilli Jam (approx. 800ml)
This is one of my favorite condiments. It goes great with anything fried, meaty, cheesy and/or salty. Yum. The ingredients are few and the method easy. You can play around with this one as much as you like, substituting, adding and subtracting ingredients to your heart’s (and tongue’s) desire…
Ingredients
- 4 tomatoes
- 4 bell peppers
- 20 chiles
- 2 onions
- 2 heads of garlic
- 5-10grams of ginger
- 700grams sugar
- 300ml malt/balsamic vinegar
- [fruit of your choice]

You can smoke your chiles to give it a smoky taste!
Method
- Start by blending everything (except the tomatoes, sugar and vinegar) to a chunky consistency.
- Roughly chop the tomatoes and chuck them into a pot over medium heat. Cook them until they are softened up and the skins are starting to come off (5mins).
- Throw in the rest of the blended ingredients. Stir and cook (2mins).
- [You can throw in any fruit of your choosing here to give a unique flavour to the jam. We've had success with: pineapple, passion fruit, pickled limes, papaya and roasted zucchini.]
- Add sugar. Stir until dissolved (2mins).
- Add vinegar. Stir.
- Cook on a low-medium heat stirring occasionally until the jam has cooked down to a jammy consistency (30-45mins).
- Leave to cool - flavours will combine and take on new dimensions once the jam has cooled!
- Put in a glass jar and store in the fridge. Should keep for at least 3 months.
Jalapeno & Lime Pickle Hot Sauce
This is a two-step recipe that involves an initial lacto-ferment. Like the chilli jam, you can get creative and substitute the lime pickle for other fruits.
Ingredients
- 20+ Jalapeno peppers (or another chile of your choosing)
- 2 onions
- 2 heads of garlic
- 5-10grams ginger
- 2 carrots
- 250ml orange juice syrup*
- 2 lime pickles / juice of 2 limes

Lime Pickle
Method
Step 1 - Lacto-ferment:
- Roughly chop the: 20+ Jalapeno peppers, 2 onions, 2 heads of garlic, 5-10cm ginger, 2 carrots
- Weigh the total and add 2% salt. Mix.
- Put into a jar and submerge in brine (salt water).
- Leave to ferment for 1-3 weeks.
Step 2:
- Take your lacto-fermented ingredients and blend them (brine 'n all) to a paste.
- Mix in orange juice syrup.*
- Finely chop lime pickles / squeeze the juice of 2 limes and mix into sauce.
- Bottle it up and enjoy!
*Make the syrup by mixing 1 part orange juice to 1 part sugar. Cook over a low heat until the liquid reduces down to a syrupy texture.
So, there you go. Three simple chili sauce recipes to spice up your meals and make your grandmother proud. Hope you enjoy them as much as we do! Stay tuned for more farm to table tips, tricks, and recipes!


Natural Building & Clay Carving - Add Artistic Expression to Your Home
Now you have an expanse of clay before you, a blank canvas to express yourself upon. Have fun! Feel the warmth and beauty of the clay, and tap into your inner artist. Get dirty, and share the experience with someone else! With some practice, you might be surprised what kind of beautiful things you can make with just a bit of Earth!
Natural Building & Clay Carving - Add Artistic Expression to Your Home
By Mateo, Apprentice 2020
Clay. Oh noble clay. O beautiful, hardy, earthy clay. Whence forth did you come, and how did we ever come to deserve such a wondrous material? Art thou merely a dream... oh

A Dorodango, using a handful of clay from our soil
Oh sorry... didn't see you there. I was just entranced by this ball of clay I have here in my hand. Why do I have clay in my hand you ask? Well, why DON'T you is what I say!
I'm here today to preach the wonders of clay, and more specifically to try and convince you to go out in your backyard this afternoon and dig a hole and play in the mud. You'll be so busy having fun, you might not even realize that you're making art at the same time! So buckle up, and let's dive into the world of Clay Carving!
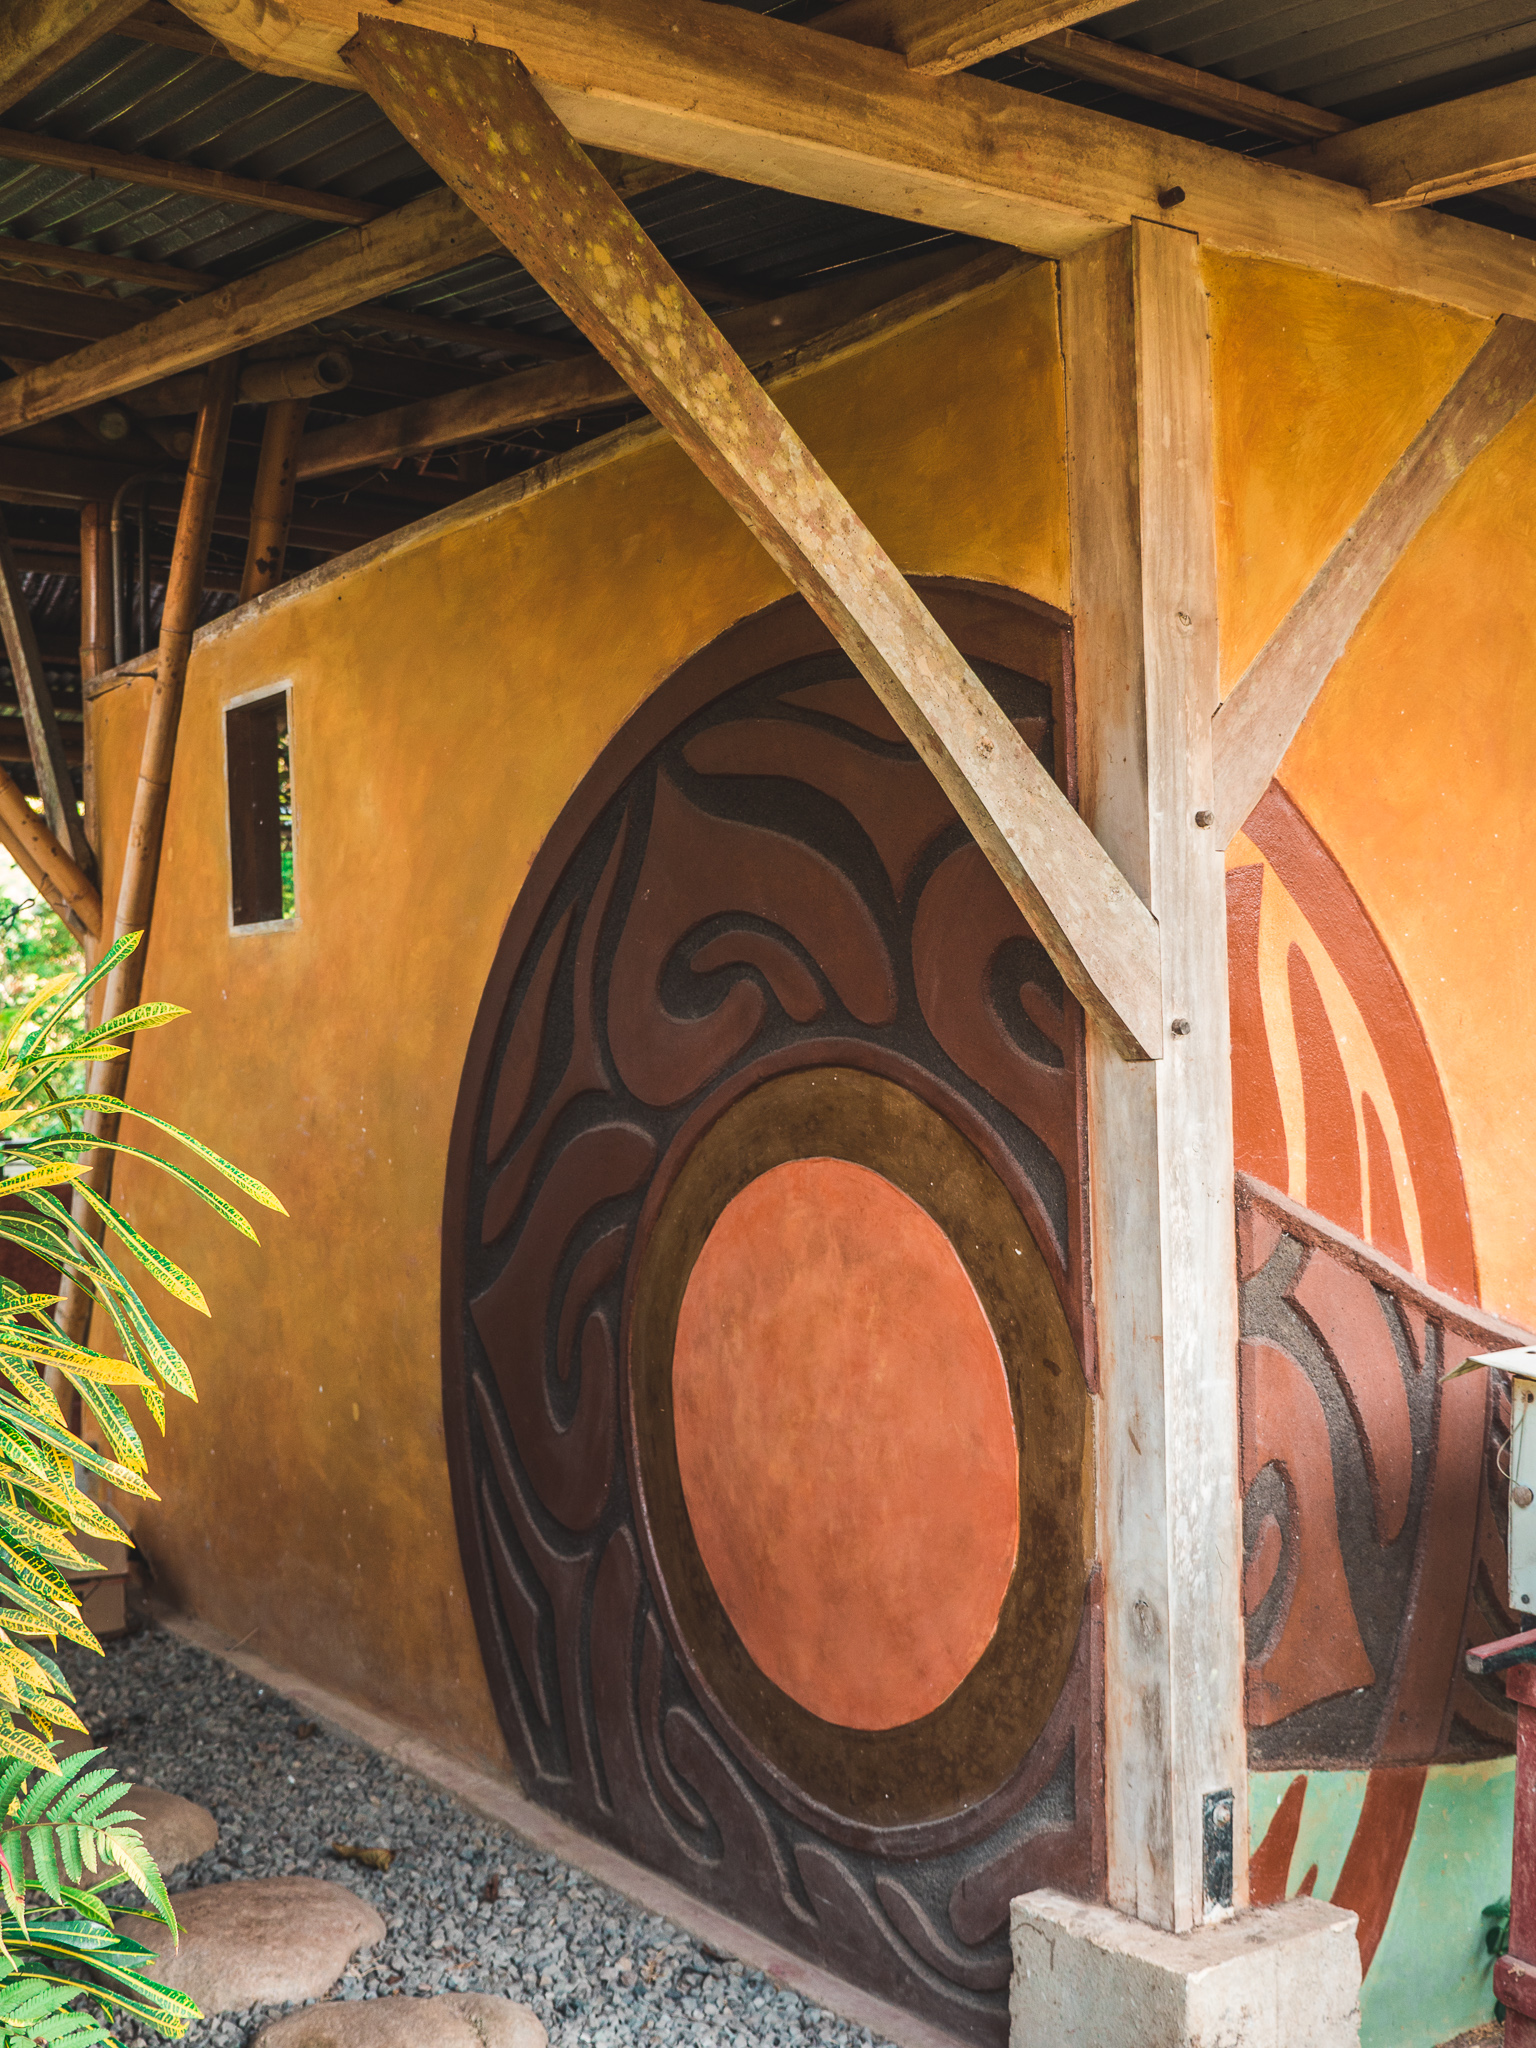
Clay carving with polished lime plaster on the center and a timber frame structure
What is Clay Carving?
Now first off let's get one thing straight. I'm not talking about your classic clay pottery, or your other classic clay sculpture. I'm talking about Clay CARVING. What's the difference you say? Go ahead and take a look at those pictures all around these here words. These are all examples of clay carvings we have adorning different natural buildings here at Rancho Mastatal.

Clay carving is the process of building up layers of clay in differing colors or textures, and then carving away those layers in forms and shapes to create a 3 dimensional "relief" carving. This technique transforms ordinary, flat walls into amazing works of art, and can drastically transform and elevate a space. It also goes hand and hand with natural building techniques like earthen walls and clay plasters.
Building your Clay Carving Canvas
Now that you know what it is, you might be wondering, where would I even do this? The answer to that my friend, is wherever you want.
Well, maybe not wherever. But you could do it in a lot of places! In your home, in your garden, your backyard, your school, your workplace (if your boss is cool), etc. etc. If that 's too much choice, here, take these tips for building yourself a canvas to work on.
Build a rectangular panel out of plywood. You can line the edges with 1x1 in pieces of wood to contain the plaster and clay plaster mix as you apply it. You will probably need to apply a base coat of cement based plaster with some acrylic glue in it to bond to the plywood and create a rough surface for the clay to stick to. A 2' x 3' panel would make for a nice size to practice on, and if you like how it turns out, you can clean the edges up and place it in the garden, on your porch or hang it from a wall somewhere! (If you're thinking about, or already are, building a house, then consider adorning whole walls with an artistic carved clay finish. The beauty of your natural building will astound!)

Practice panels in our annual natural building course
OR make a cob bench, and add a clay carving to the back. Cob is one of the simplest and most versatile natural building materials. By just mixing clay, sand, and straw in the correct ratio (more on ratios in a bit), you can then stack and mold the cob into flowing, beautiful shapes, and the surface will be nice and rough for further Clay coats to stick to. Stack it up into a bench shape in the backyard, and then leave yourself a nice flat area on the back for your carving to live.
Getting Natural Building Materials
At this point, there are two directions you can take, or maybe you can walk right in the middle. You can either buy good quality, pre sifted sand and clay from hardware and/or ceramic supply stores, or you can go into your backyard and dig up some Earth and see what you find.
Soil is different everywhere, and amounts of clay and sand vary widely between locations. Regardless, you'd want to dig down at least 6" (though this varies by location) to get past the topsoil, and then do some tests to figure out how much clay and sand you have at hand. This could mean doing the jar test, filling a jar with a handful of soil and water and letting the parts separate out, sand falling to the bottom and clay settling on top. Or you could send out a sample for precise testing if you want to be scientific about it. Once you have a better idea of what ratios of material are in your soil, you can make a mix.
This process is essential in most natural building endeavors, and is a skill that takes practice. Trust me on this though, getting to know the Earth around you will bring benefits beyond just what you can build with it.
Making a Clay Carving Mix
Clay is naturally flexible, while sand is naturally rigid. Sand provides structure, while clay binds a mix together. The right balance of the two will give you a material that you can carve into shape, and have it stay.
Finding that balance is part of the fun. Try mixing in different ratios, starting with 1:1, and taking some notes along the way. What feels good to work with? What drys well without cracking? What lets you carve without crumbling? Some tips to start: too much clay will cause cracking, and too much sand will cause crumbling. Too wet of a mix won't hold its shape or stay on a wall, and too dry will be hard to apply.

Sample sizes of sand, clay, and straw ratios
Remember, that as you carve you will reveal lower layers of clay. Try finding or buying different colors of clay, or mix in pigment or colorful materials to create contrast and interplay between layers. And don't be in too much of a rush to apply the next layer; if it's not dried enough, your layers may blend together.
Finally, a note on tools
You can do all of this with your hands and a razor blade, laying material down, smoothing it out, and cutting it into shapes once dry. You can also use different tools like floats and trowels to smooth and flatten layers, and other tools like chisels and awls to aid your carving. Start small and easy before you spend money on new tools, and look for used tools or tool rentals before a big purchase.
Summary Step by Step
To wrap up, let's go through a step by step and some final tips:
1. Gather all your tools and materials. It is better to do all your preparation before you start. Think through what you will need from start to finish, including clean up!
2. Prepare your canvas. Whether you're building a new surface or applying to an old one, make sure that the surface is rough or "keyed" so that the clay mix has more surface area to bind and hold on to.
3. Create your mix. Do small batches for tests and samples before going big, so you have an idea what it will turn out like before spending a lot of time and energy. Also keep in mind that you can get finer (as in smaller sand) and creamier (as in more clay) as you add more and more layers, but you'll have to apply in thinner and thinner layers to prevent cracking as these ratios change.
4. Apply your first layer. Smooth and flatten as much as you desire. Let dry enough so that you can add a new layer without the under layer blending with your new layer. You may need to wait several days between layers in a humid climate.
5. Apply second layer. You can now add as many layers as you want to carve away, altering color and texture between layers as desired.
6. Carve away clay to reveal the art within! A razor blade is effective due to its sharp edge, though any knife could work. The basic process is to cut with the knife the outline of the shape, then carve out the interior (with an awl, screwdriver, or even stick). Cut at an angle, widening outwards from the surface, to create cleaner lines and forms. You can smooth the revealed surface beneath with fingers or smooth stones. Dig and carve deeper to reveal more layers beneath!
7. Clean up when you're done, especially your tools to prevent rust. Finally, if you want your clay carving to last longer or be water resistant (though not water proof) you can apply a hardening oil like linseed oil.

Exposing the different layers of plaster. You can see here the design sketched in, and the first coat of red clay plaster being carved away to expose the underneath grey plaster.
Let the Artist in You Soar!
Now you have an expanse of clay before you, a blank canvas to express yourself upon. Have fun! Feel the warmth and beauty of the clay, and tap into your inner artist. Get dirty and share the experience with someone else! With some practice, you might be surprised what kind of beautiful things you can make with just a bit of Earth!

Working on the Rancho Mastatal mandala on the outside of our food processing kitchen. The yellow is a frescoed lime plaster.

The clay carving done on the outside of a small cabin. The entire project was completed by our 2017 apprentices!
Want to Learn More?
For a great video of a beautiful clay carving in action watch this video by The Nito Project.
To get hands on instruction and learning in clay carving and other natural building and plaster techniques come join us for our annual Natural Building and Plasters Intensive.
Stay tuned about our annual workshops!

Life of Spice: Pepper
Farm to table is an inspiring movement whose time has come. As anxiety about our environment and health increases, awareness is spreading about the impact our diet has on not just own well-being, but the well-being and future of the entire planet. Alarms are going off worldwide. Our eyes are opening. People everywhere are waking up. We’re waking up… and eating breakfast.
By Dani, Apprentice 2020
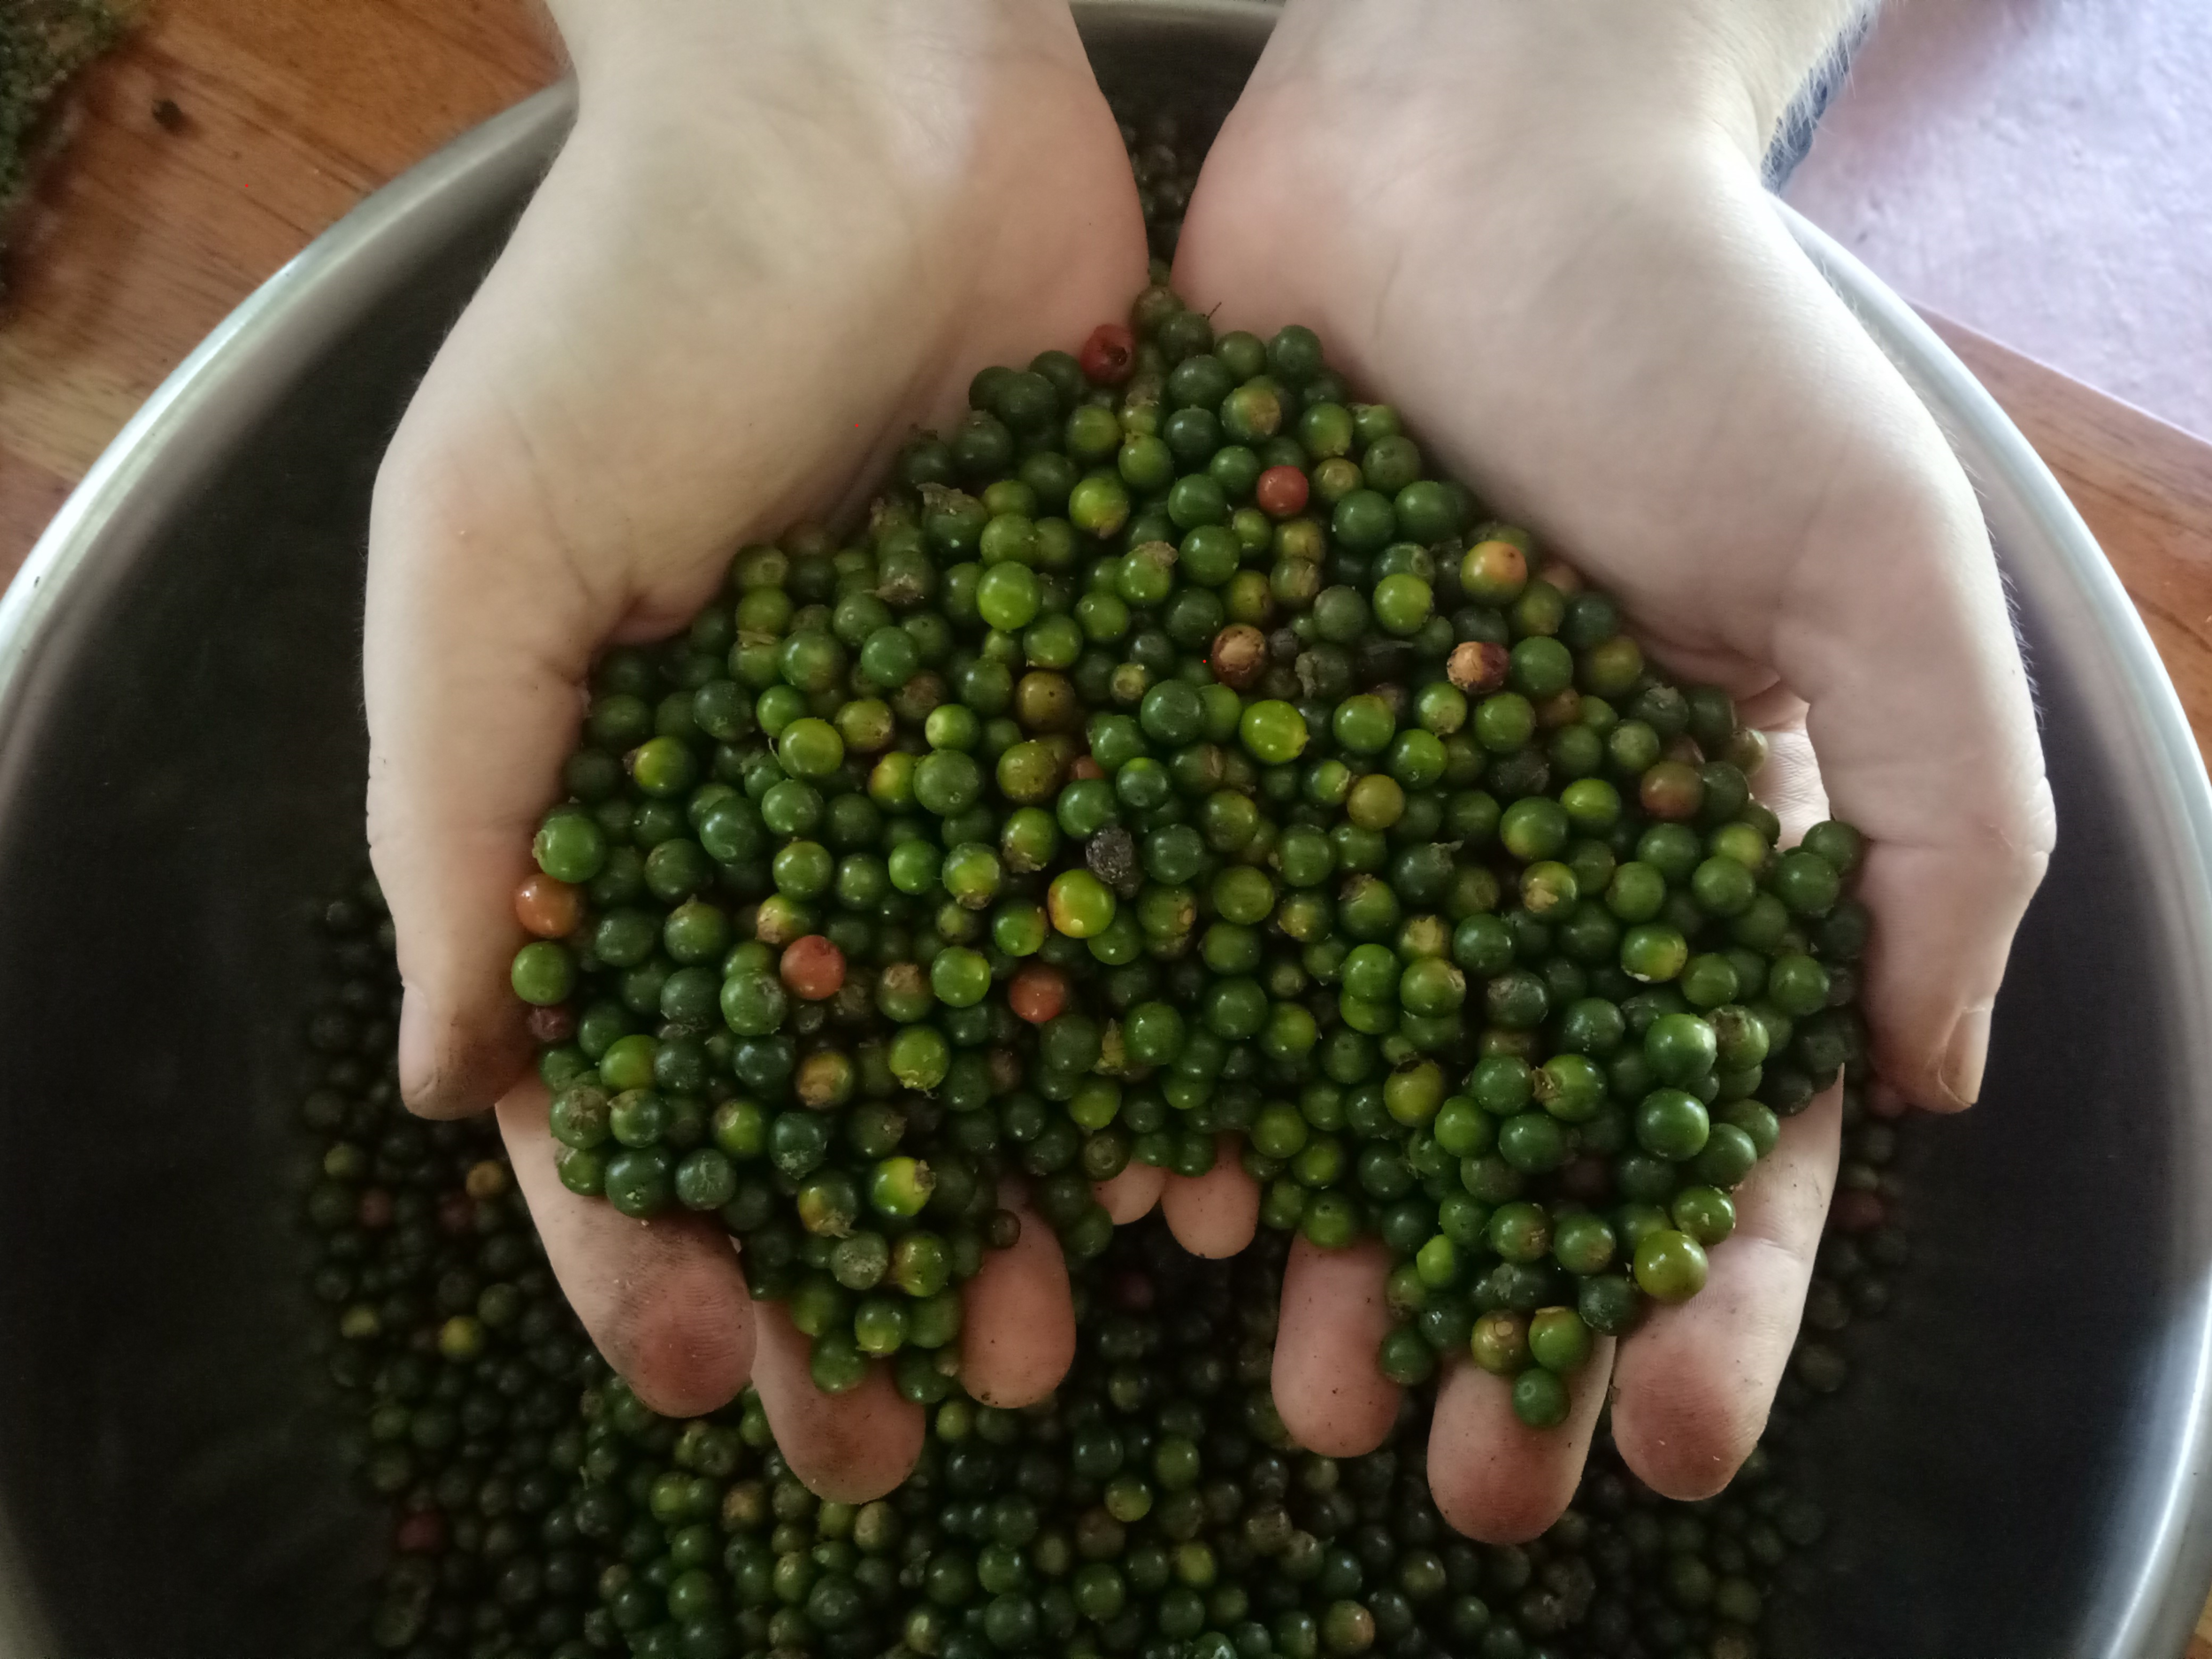
Farm to table is an inspiring movement whose time has come. As anxiety about our environment and health increases, awareness is spreading about the impact our diet has on not just own well-being, but the well-being and future of the entire planet. Alarms are going off worldwide. Our eyes are opening. People everywhere are waking up. We’re waking up… and eating breakfast.
Eating Black Pepper
It’s a typical morning in the conscious kitchens of North America. Today’s special is one of my favorites, a spinach omelet with caramelized onions and a side of roasted potatoes. The eggs are from a permaculture farm’s weekly CSA box, the onions and potatoes from the local farmers’ market, and the spinach is from the garden in the backyard. The omelet slides off the skillet, smothered in rich butter from a small scale dairy farm nearby. The potatoes, piping hot from the oven, make a great companion on the plate. It’s a mouthwatering sight, dotted with black pepper for a little bit of spice.
Mmmmmm, pepper: king of the spices, maker of meals, creator of cuisine. The pepper in our breakfast today came from… somewhere. Somewhere local? Probably not. Spices are the sorcery of every meal, turning bland into brilliant, mediocre to magical. Most of us are blessed with a diet full of spice, but when we talk about eating local, the spice rack often gets overlooked. One way we can work towards restoring the health of our bodies, our minds, our society, and our home planet is to bring more awareness into our diets. Think local. Practice permaculture. Eat farm to table. We hear these terms all the time now, but while people talk about where the eggs on their breakfast table came from, what about the pepper on the eggs?
Black pepper is consumed more than all other spices put together. It sits next to salt on the tables in every diner in America and in most people’s homes. It is hard to imagine a kitchen without pepper, but it hasn’t always been this way. The globalization of food has been happening for so long, a lot of us are completely unaware of which foods are native to where. Chickens originally came from the jungle. Asia used to be without chilies, Italy without tomatoes. What does eating local mean, and how long has it been since people actually ate that way? We’re making big efforts to be conscious consumers, but how often do we stop and appreciate the spice in our lives?
Origins of Black Pepper
Pepper is native to India and is one of the spices that sparked the global spice trade and in turn the globalization of food. Pepper has been traded for thousands of years, and there are even references to pepper found in Egypt from 2600 B.C. For centuries, it spun the wheels of the trade world and brought wealth to many merchants, and it wasn’t only a way of making money. Pepper itself became money and served as hard currency throughout much of the middle ages. In some places, people’s wealth could actually be judged by their pepper assets. Imagine if they could see the casual way in which it is consumed today.
The Value of Black Pepper
Currently, the average price of pepper across the globe is $4.34 per kilogram. These days, Vietnam is the leading country in pepper production, producing about one-third of the world’s pepper. It’s followed by India. Vietnam is also the leading consumer of pepper at 166 thousand tons per year. Again, India follows at 88 thousand tons. That makes sense, right? The places producing pepper are consuming it, local eating. The third biggest consumer of pepper is the USA at 68 thousand tons per year. That is a lot of pepper for a place that doesn’t produce any. On Amazon, a kilogram of McCormick’s Whole Black Pepper costs about $30. The biggest cost in pepper production is labor, but the average price farmers collect for pepper is just $2-$4 per kilogram.
Farm to Table Spices
Understanding where things grow, how they are processed, and who grows them is one way to create a deeper appreciation and understanding of the food we eat and nourish our connection to the earth from which it grows. Trying to live a life embodying permaculture values at Rancho Mastatal has given me a wonderful opportunity to see how different foods are grown and processed. Until recently, I had definitely taken spices for granted. My experience with pepper here has led to reflection on the spice in my life and an appreciation for the sources behind the sorcery. So how does pepper get from the farm to our table?
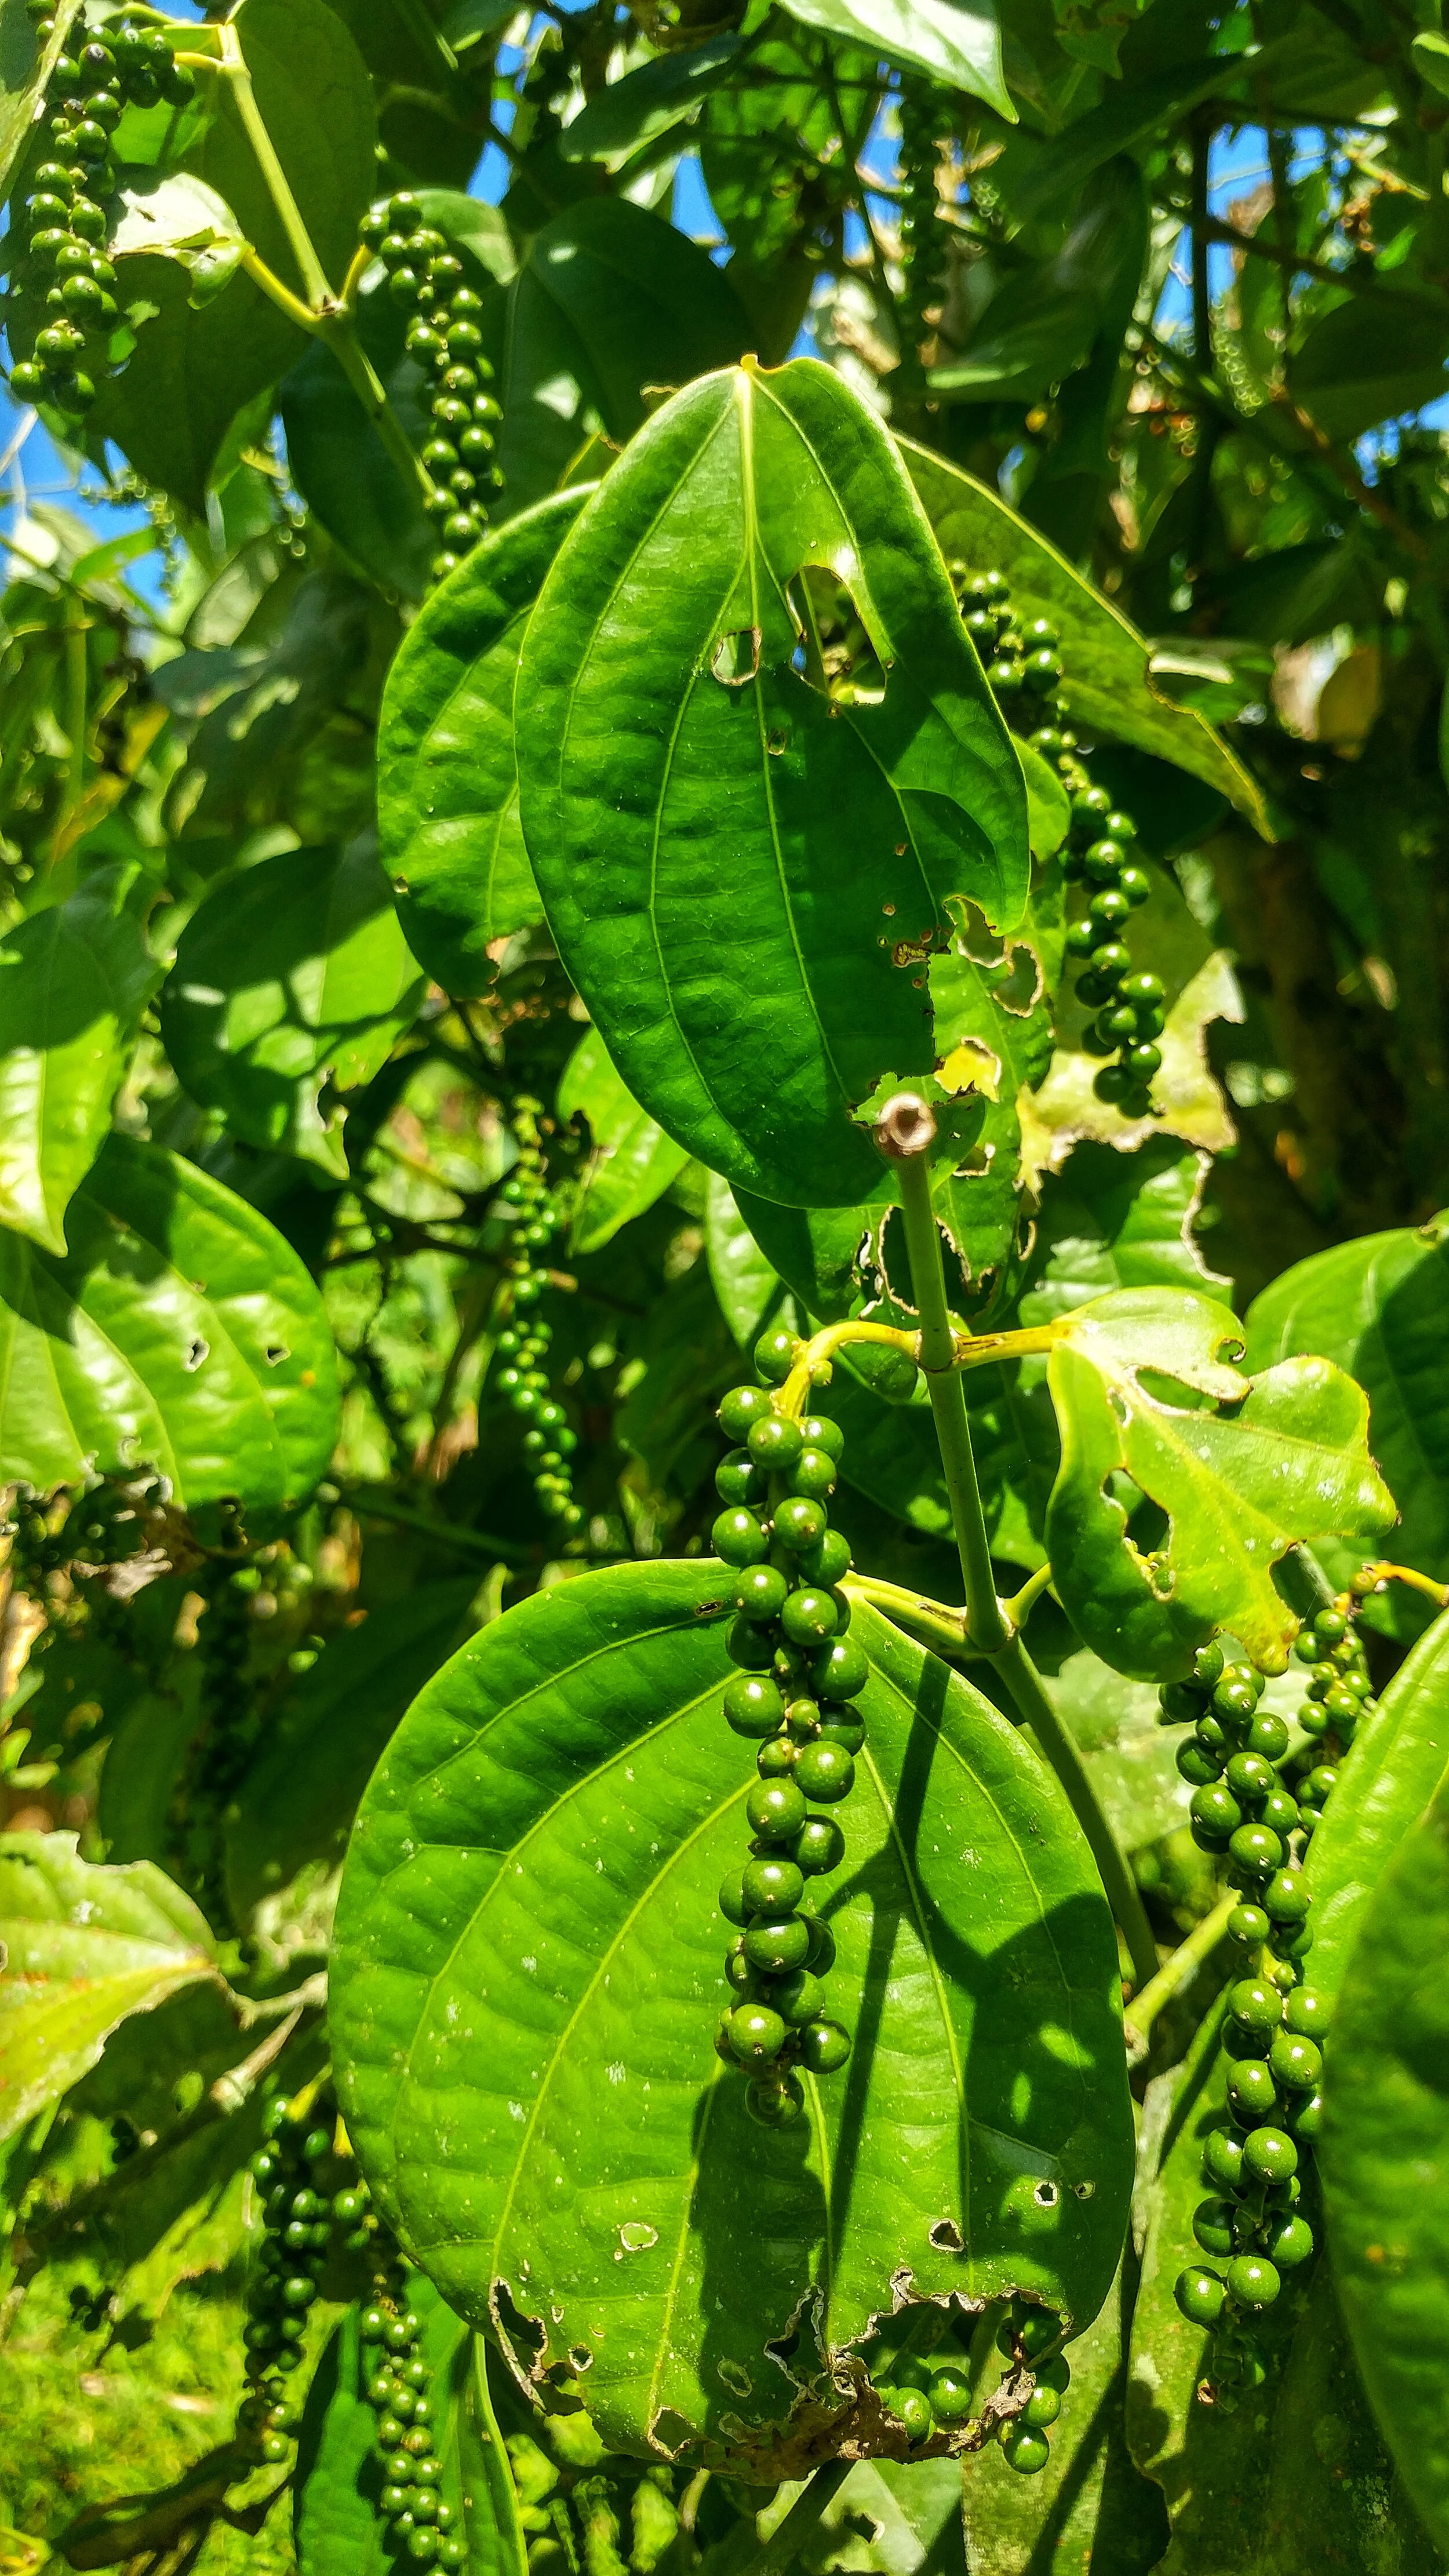
That black pepper on our omelet and potatoes is from a fruit, often referred to as a berry or peppercorn. It grows on a tropical climbing bush, and the white pepper in so many well-loved curries comes from the same plant. The pepper plant is a vine grown best on a living post, from small bushes to massive trees. Here at the ranch, we grow pepper on Gliricidia sepium, (known as madero negro in Costa Rica) a nitrogen fixing tree. Pepper has its origins in forest ecosystems, so it is a fitting plant for a permaculture food forest in the tropics.
How to care for your Black Pepper plant
To maximize yields, pepper plants need to be pruned properly. Once the vine is at least 8 nodes tall, it can be pruned from 3-4 nodes up from the base of the vine, just above a node. After pruning, the plant will send up two new shoots, and the vine cutting can be propagated by placing the stem in soil where it will grow new roots. People have given pepper new roots all over the world. Global trade increased the demand for pepper and sparked efforts to grow it in tropical places across the globe. Now, pepper is grown in 26 different countries, including Costa Rica.

Red Pepper and Green Pepper

White Pepper and Black Pepper
How to Process Peppercorns
The first time I had pepper that was farm to table was here at Rancho Mastatal where we spent a day harvesting and processing pepper. Pepper is ready to harvest once one of the fruits in a bunch has turned red. First, the we collected the peppercorns in bunches and took them off the branches. We then separated the red berries from the green ones. The red berries become white pepper by soaking them in water for a day and peeling off the red flesh to reveal the white seeds. The seeds are then dried to make the white pepper on our spice racks.
The green berries we picked were destined to become black pepper. We blanched these for 1-2 minutes which starts an enzymatic reaction that turns the pepper black. Then we spread them on a drying rack. They can either be sun-dried, or you can use a dehydrator. Pepper dries to one-third of its weight.

Though the steps may seem simple, this was a very labor intensive process. It took seven of us 3 hours to harvest and process 4.5kg of pepper which dried down to 1.5 kg of pepper. This is about 40 dollars’ worth of pepper. It is truly a wonder that pepper is relatively inexpensive and so readily available. I wonder how many working hands and how many miles it has taken to bring pepper to my meals all these years.
Farm to Table Black Pepper
Farm to table has become a mainstream movement, and the growing awareness about the connection between our health and the well-being of our planet in relation to our diets is such a positive shift in our consciousness. But how would all those amazing farm fresh, local foods taste without spices? What would our omelet be without the king of spice itself?
Permaculture & Spices
While I don’t think people should go into their kitchens and empty their spice racks, I do think it’s important to appreciate all the resources and labor that go into every food we eat as well as understand the history of how it got from the forest to our table. Part of the word permaculture is culture, and it is incredible how pepper affected cultures everywhere and added to a permanent globalization of foods. It influenced the way people prepare, experience, and appreciate food. It changed people’s tastes. It changed cultures’ cuisines. Pepper was a powerful initiator in the transition away from eating local. With the globalization of our diets going back millenniums, what does it mean to truly eat local these days? As I continue to live my life of spice, I will keep asking these questions.
Hope you have a better understanding of the process of black pepper and how it gets from the vine to your grinder.
Speaking of spice… check out our past blog posts about vanilla!
And stay tuned for Dani’s next article on Life of Spice, featuring cinnamon!
Sources and Further Reading
Heinerman’s Encyclopedia of Healing Herbs and Spices by John Heinerman
Black Pepper- Piper Nigrum edited by P.N. Ravindran
Spices – A Global History by Fred Czarra

Applied Permaculture Principles
There are a lot of misconceptions about what Permaculture is, most people think of it as an agricultural system, typically some sort of food forest and whilst maybe it does make sense for you to have a food forest, maybe it doesn’t! The specifics of applying the principles will vary based on your environment, project , goals etc… but the principles will always remain the same. In permaculture there are 12 underlying principles that help guide us through the design and thinking process. We have highlighted below how we apply each of these principles at our site to help inform you how these principles can be applied in practice.
By Nic, Core team member
There are a lot of misconceptions about what Permaculture is. Most people think of it as an agricultural system, typically some sort of food forest and whilst maybe it does make sense for you to have a food forest, maybe it doesn’t! The specifics of applying the principles will vary based on your environment, project , goals etc… but the principles will always remain the same. In permaculture there are 12 underlying principles that help guide us through the design and thinking process. We have highlighted below how we apply each of these principles, many times in more than just one way, at our site. We hope this helps inform you how these principles can be applied in practice. If this article intrigues you, check out our annual Permaculture Design Course!
Permaculture Principle: #1 - Creatively Use and Respond to Change
This is an almost everyday occurrence here, with such a huge diversity of projects and systems at the Ranch. One of the big changes that many people experience here is the change in diet, coming to a tropical region we focus on locally available food sources. In this photo we showcase a typical meal of rice, beans, picadillo, salad and plantains and green papaya kimchi, all sourced from within 20 miles of the Ranch. Each year apprentices learn about how to creatively use these new food types, and learn from our experience of eating and preparing these food items for the last 19 years.

Yucca bammies, green papaya kimchi, fresh garden salad and a mango salsa…yummy!

Patacones, lacto fermented Jalapanos, pickled turmeric, green papaya kraut, dairy kefir sauce
Permaculture Principle: #2 - Observe & Interact
We love fermentation here at the Ranch we use it for so many things but as every ferment in every climate is slightly different it involves observation and interaction to fine tune your recipes. You have to pay close attention to each batch to make sure you get the perfect balance of flavors from the fermentation process, this timing varies throughout the year and depends a lot on the ambient temperature! Here we have some different pickles and ferments that we make from Green Papaya, Chayote and wing beans….Yummy!!!

Wing bean pickles

Chayote pickles
Permaculture Principle #3 - Catch & Store Energy
For the last 12 years we have been using two types of bio-digestors at the ranch to catch and store energy from human (and cow) poop. For those unfamiliar with the system, a large underground vessel is used to create an anaerobic environment where the feces is broken down, killing any pathogens and releasing Methane gas which we pipe up to our kitchen and use to cook on. The now safe effluent is used to passively feed, bananas, bamboo and cacao trees.
On the left a mosaic describes the closed loop system we employ at the Ranch and on the right the mosaic describes the open loop, linear system that is often found around the world when dealing with human feces.

Permaculture Principle #4 - Obtain a Yield
Jackfruit is one of the largest fruits in the world, it grows and begins to produce very quickly and is ideally suited to our tropical climate. In our agroforestry systems we have many jackfruit trees of different varities. Here is a typical harvest of Jackfruit when it is really pumping!! We love to eat Jackfruit green (when it is more like a starch) and have been lacto-fermenting it, a great way to store and add nutrition to this abundant fruit. We then use the jackfruit to make a hash, or as a replacement for the pasta in a lasagna or even a pizza topping… its just so versatile!!

Permaculture Principle #5- Self Regulate & Accept Feedback
Rancho Mastatal is an education center, community and lodge. We host a year long apprenticeship, 100’s of high school students and 100’s of guests throughout the year. We eat together, live together, play together and work together. Conflicts are inevitable and we have designed many systems to productively work through these. We encourage feedback sessions with our one year apprentices through group meetings and one on ones to accept feedback and make the necessary changes to make all of our experiences living together more enjoyable. Here we are all meeting in our wonderful meeting room, a round earthen structure.

Permaculture Principle #6 - Use & Value Renewables
Over our 20 years of existence we have always valued and used renewable energy sources, from our biodigestor, to our super-efficient wood burning cook stoves to our dry composting toilets, these are all ways to use and capture renewable energies. We have also installed 10+ small solar systems at the ranch to power cabins far from the grid and to help community members in Mastatal and nearby villages have power. We are lucky to live in a country that also values renewable energy sources. Costa Rica is powered by 95% renewable energy sources a magnificent achievement by world standards.

Bamboo, a fantastic renewable building material
Join us April 2021 for our Bamboo Management Class or our Bamboo Construction Course

Fuel efficient stoves
In these photos we are setting up scaffold to harvest bamboo to build with, installing a small PV system for a local community member to help them have lights in the evening, and cooking on our fuel efficient wood cook stove.

Installing some PV panels in the community
Permaculture Principle #7 - Produce No Waste
This principle is gaining a lot more traction in the modern convenient driven society, where single use plastics have become commonplace. With the slow realization that we cannot keep throwing stuff away, the principle of produce no waste seems more relevant than ever. Here at the Ranch we are a large consumer of food and goods, often feeding up to 50 people a day we go through a lot of food!! Over the years we have used our purchasing power to convince/encourage local farmers to reduce their packaging. Our vegetables are delivered in baskets, our tapa dulce is wrapped in cane leaves, our rice comes in rice sacks which we can re-use for storage of other goods such as sawdust for our composting toilets and we get our milk in gallon containers we wash and send back and forth with the dairy farmer. We are not perfect, and we definitely still produce waste but considering the average American produces 4.5lbs of garbage a day we are well below that!! As we have become more aware of this issue around the world, this is one of the simplest and most accessible ways to become a more responsible world citizen.
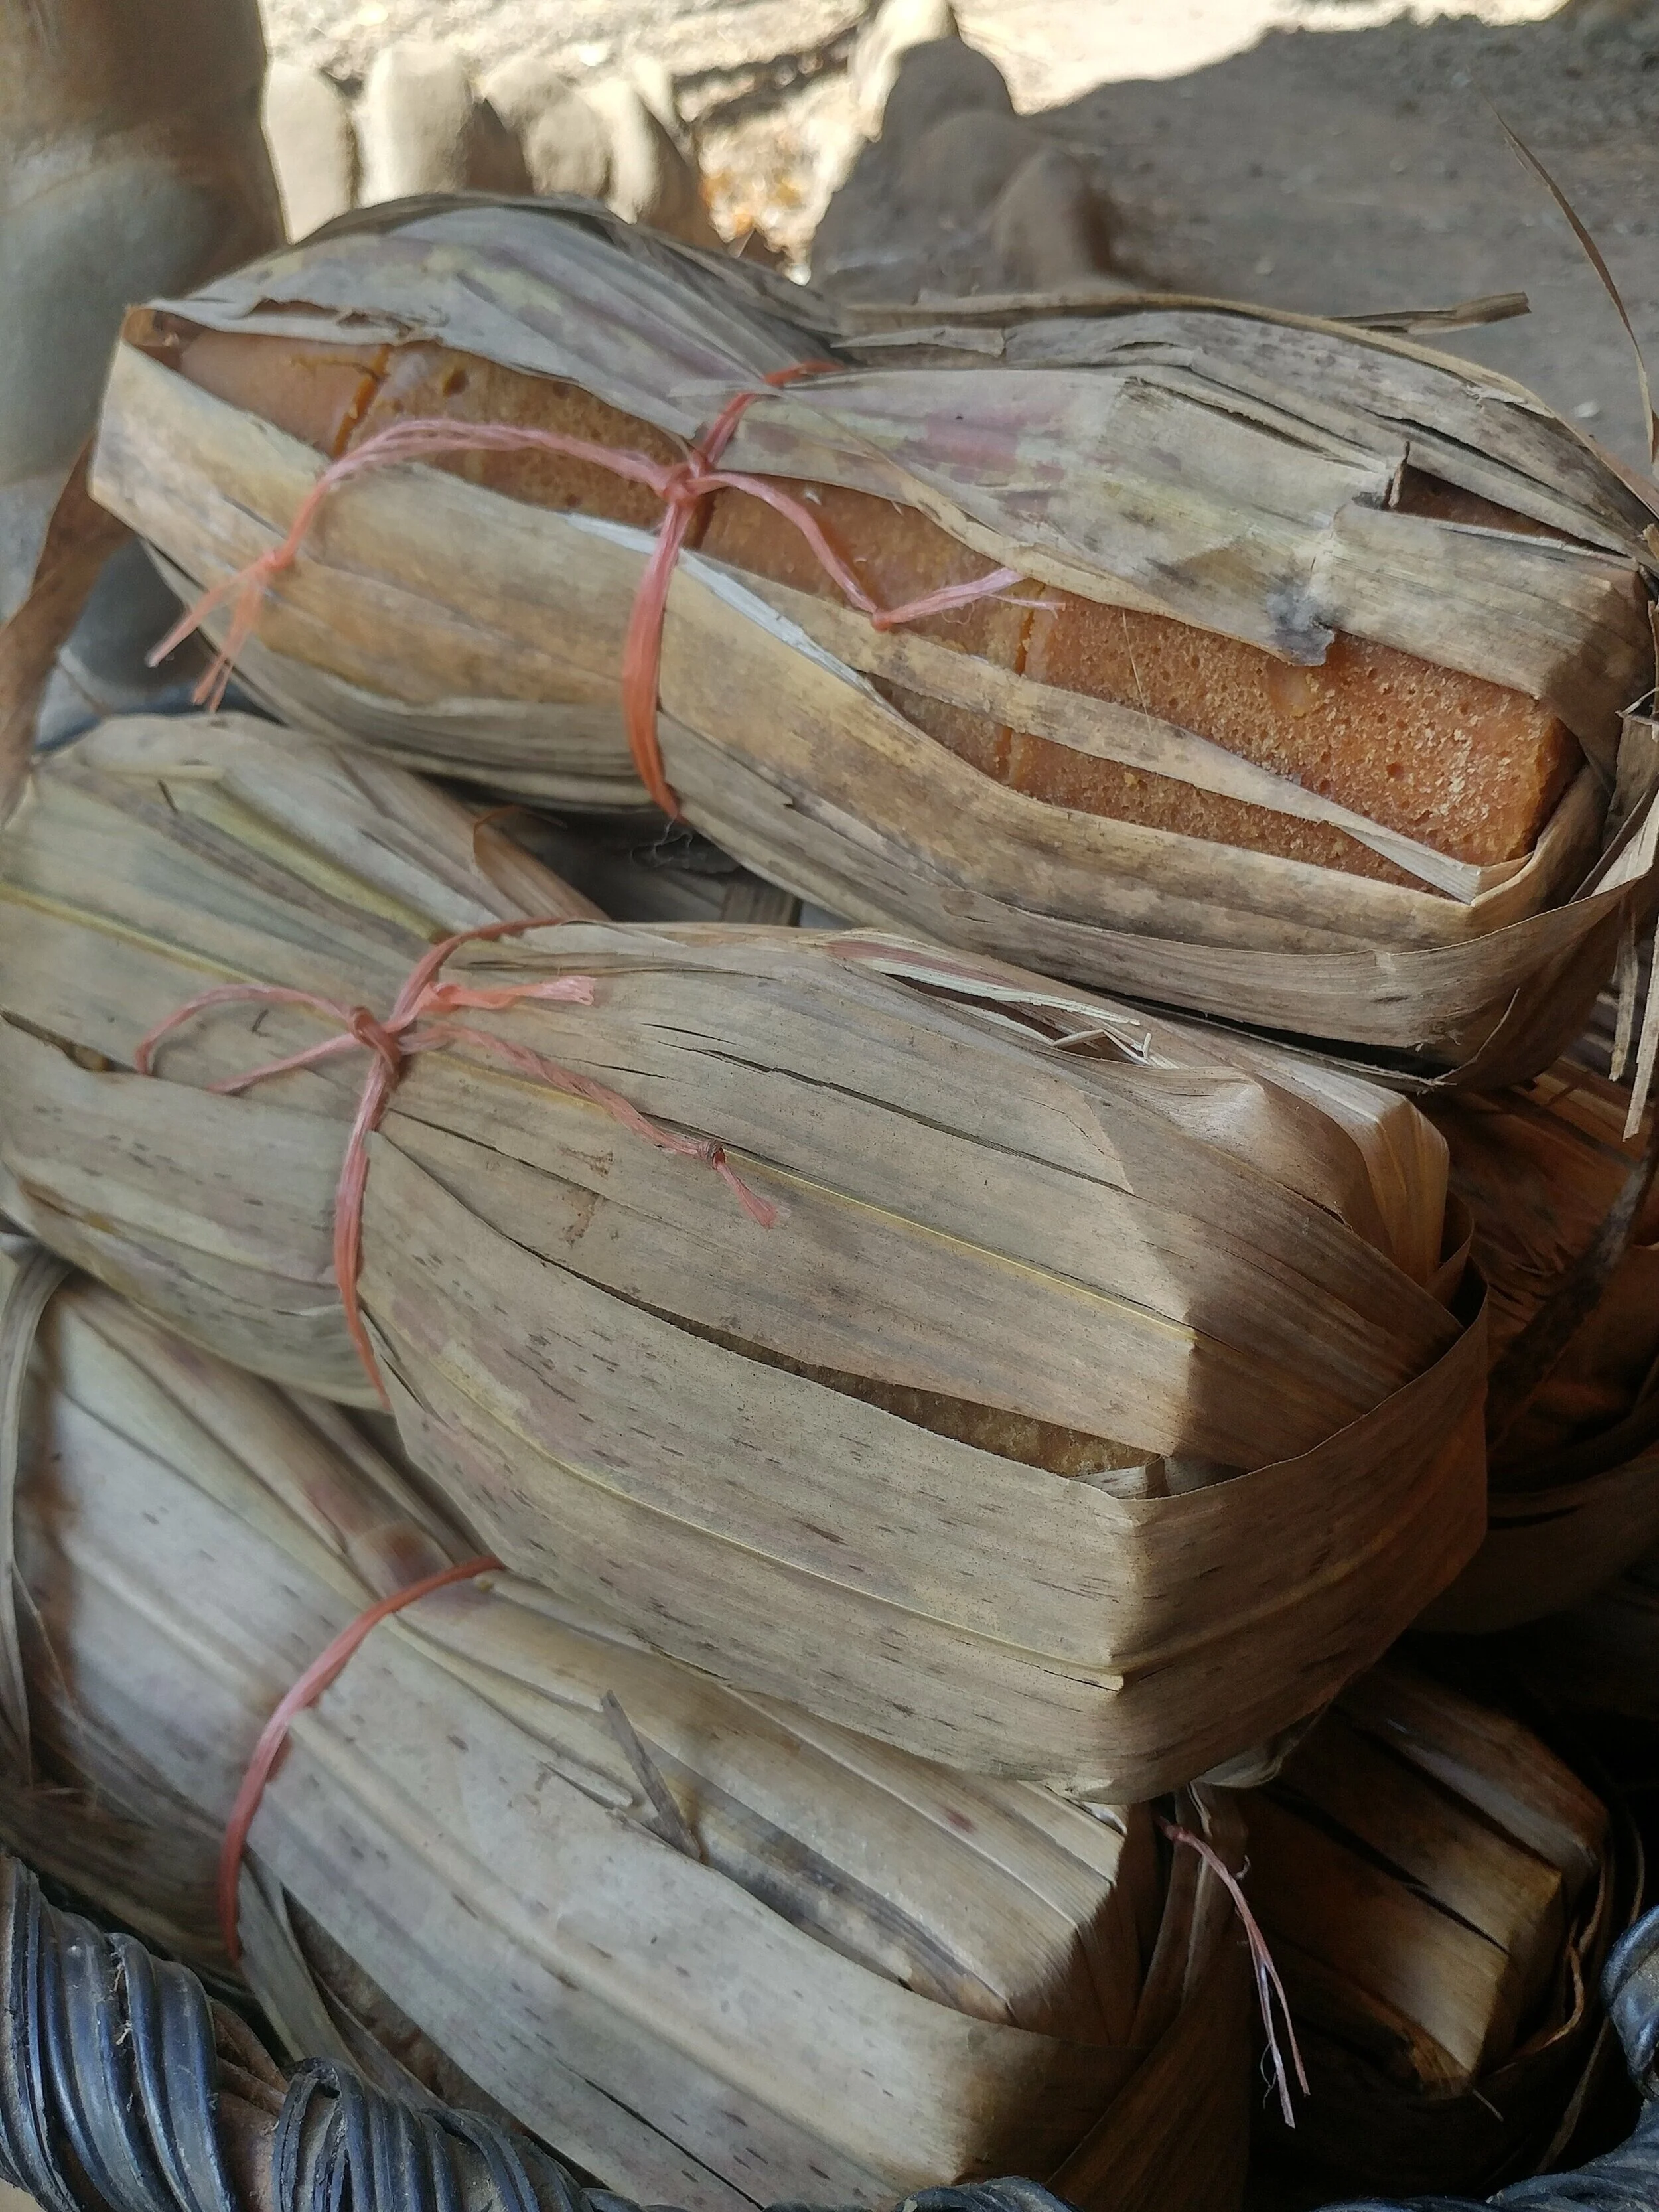
Our local sugar, tapa dulce

Sacks and baskets used to store food
Permaculture Principle #8 - Design from Pattern to Detail

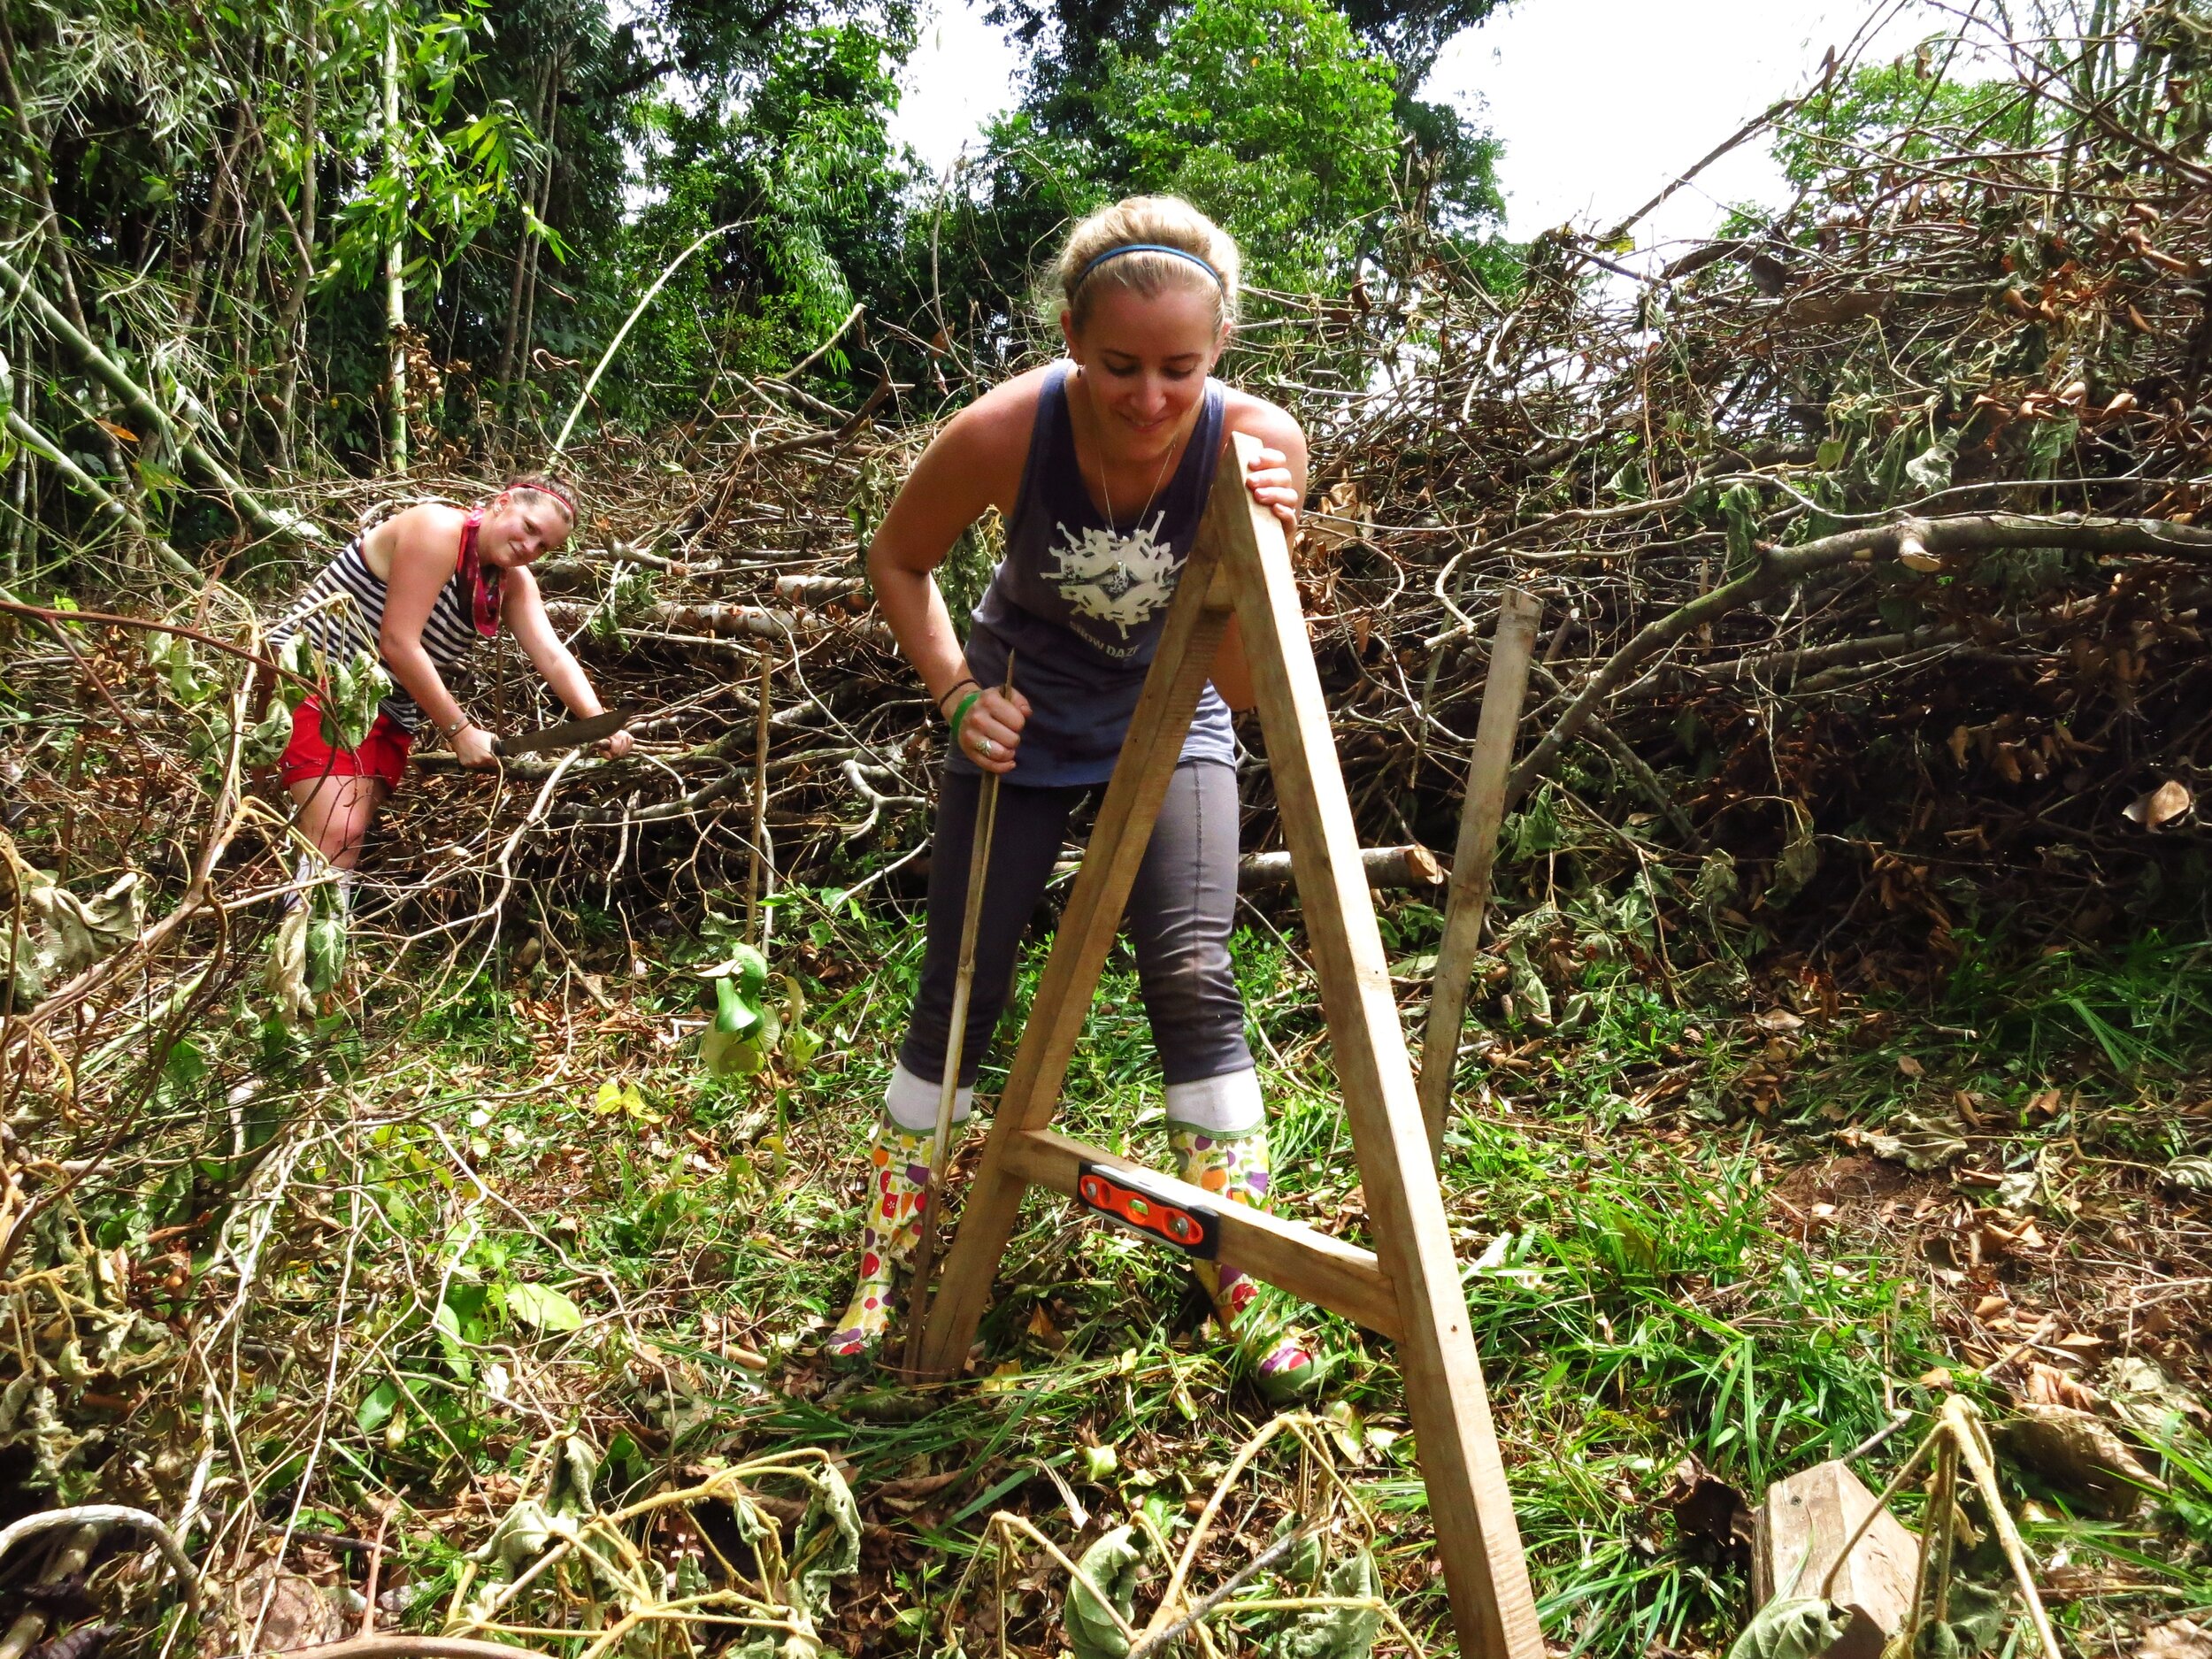
Students in our annual PDC learning to use the A-frame

Nice lines of trees on contour
One of the biggest challenges in tropical climates is the huge amount of rainfall we receive, seeing the pattern of deforestation and eroded landscapes on our property we countered this by reforesting land using diverse perennial tree crops, which mimic the forest stratas, protecting the soil and producing food for us to eat. We dig swales & retention ponds, plant on contour and use deep rooted species, mulch heavily all to help slow down the flow of water and build healthier more productive soils.

Lydia, an apprentice, planting and properly mulching this new fruit tree
Permaculture Principle #9 - Integrate rather than segregate
One of the ways we do this is by integrating different species known as guilds. These plant guilds help support one another and diversify your site making them less prone to diseases and providing shade, fertility and structure. We grow our black pepper vines on a living post. This post produces some shade and the living post is also a nitrogen fixing tree. Nearby we have more nitrogen fixing trees and bananas to provide more shade, food and mulch to the black pepper. Stay tuned for our next blog on the Life of Spice: Black Pepper.

Permaculture Principle #10 - Use Small Slow Solutions
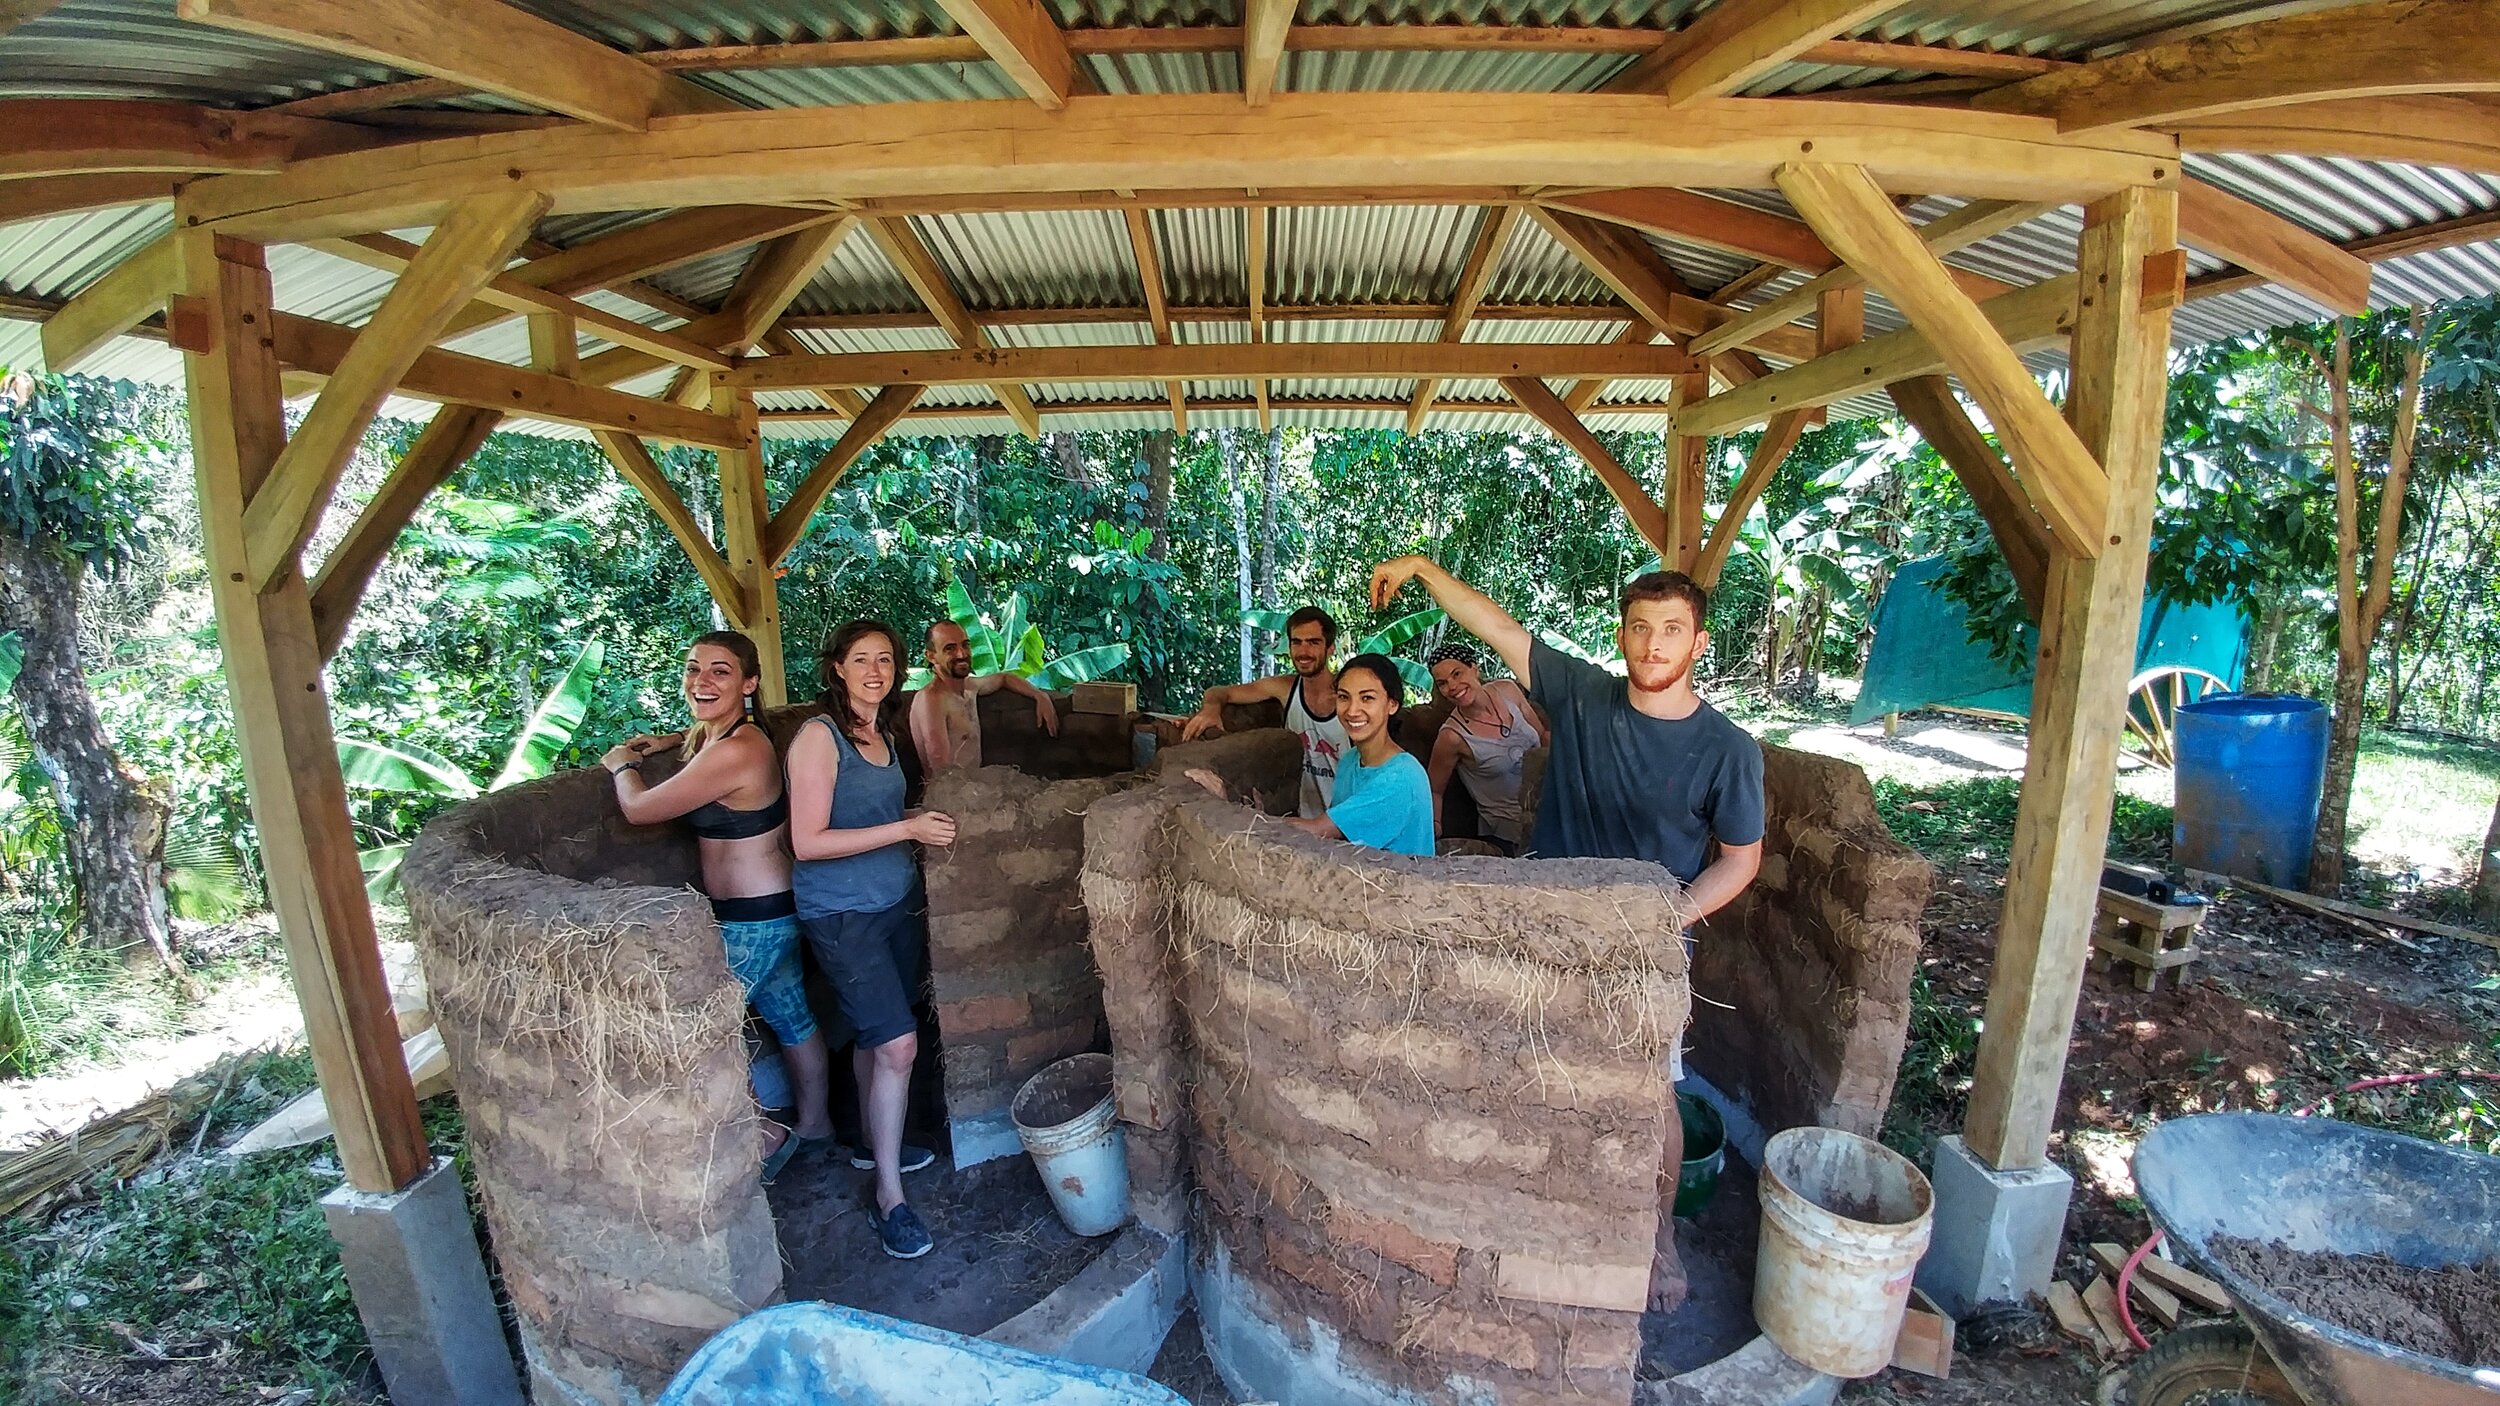
Apprentices building an adobe brick walled shower that’s under a timber framed structure
Everything that we build at the Ranch is by hand. People always ask us how long it takes to build things and it takes a long time to be honest. Our goals are to give people educational opportunities in the building process not just to make something as quickly as possible. We see the value in taking it slow and not using a lot of machinery to streamline our building process. We use our buildings to create beautiful healthy homes that are not only using local resources but help us make connections with people and build community. Check out this article on how we built this Tadelakt shower

Permaculture Principle #11 - Use & Value Diversity

Don Chepo winnowing his harvest of beans
For many people the idea of becoming self-sufficient is an appealing one. We look at things in a different way by using and valuing diversity we aim to create regional food security and value the food we grow equally to the food we can obtain from local farmers. By supporting our neighbors and friends we build community, financially support local farmers and get to eat fresh local produce everyday! Beans from Don Chepo, Tapa Dulce from Don Gerardo, Eggs from Doña Flor and Coffee from Jose Luis are just some examples.

Don Gerardo using his ox to press the sugar cane

Dona Flor feeding her chickens
Permaculture Principle #12 - Use Edges & Value the Marginal

Homemade banana vinegar
As we said before we love vinegar and fermentation at the Ranch. One of the simplest vinegar recipes we use is valuing the marginal, fruit scraps and peels make an excellent vinegar. We pack them into a bucket add water and let the natural yeasts convert the sugars into alcohol and then into vinegar. What is commonly treated as a waste product has now been converted into a sugar source for a vinegar which we can use to spice up some of our fresh garden salads! Read our latest blog on farm to table, homemade banana vinegar.

A variety of aging homemade vinegars
These are just some of the many examples of the way we implement the 12 permaculture principles here at the Ranch.
If you are interested in permaculture design and it’s principles join us for our annual 2 week, life changing Permaculture Design Course.

6 reasons to use a biodigester as a low tech, off the grid, renewable energy source for cooking
For almost two decades now, Rancho Mastatal has been working on creating a more sustainable lifestyle by researching, developing, and teaching about more efficient ways to build, grow food, cook, and live as a community while reducing the impact these activities have on our environment.
As cooking is one of the most energy-consuming activities within a house, we find it relevant to implement an alternative renewable energy source to satisfy one of our guests’ favorite moments of the day: meals. With that perspective, we built a biodigestor 8 years ago.
By Nico, Apprentice 2020
“Agricultural, industrial, and human digestion processes create an ongoing (and growing) stream of organic refuse. Without thoughtful management, organic wastes can emit fugitive methane gases as they decompose. Methane creates a warming effect 34 times stronger than carbon dioxide over one hundred years.” - Project Drawdown
Renewable Energy for Cooking
For almost two decades now, Rancho Mastatal has been working on creating a more sustainable lifestyle by researching, developing, and teaching about more efficient ways to build, grow food, cook, and live as a community while reducing the impact these activities have on our environment.
As cooking is one of the most energy-consuming activities within a house, we find it relevant to implement an alternative renewable energy source to satisfy one of our guests’ favorite moments of the day: meals. With that perspective, we built a biodigestor 8 years ago.
What is a Biodigestor?

Our biodigestor
A biodigestor is basically a system that allows us to produce methane out of human and animal manure (see more info on last year’s article). Here at the Ranch we decided to go for a low tech, polyethylene tubular biodigester technology, also known as the sausage system here in Costa Rica, because of the shape of the chamber. We chose this because it is a cheap and simple way to produce methane for small-scale farmers. It is appealing to rural people, firstly because of the low cost of the installation and therefore of the gas, and also for the improvement in the environment that the installation allows. It can be applied in rural or urban areas and in both low and hilly lands, creating a low tech system able to produce a renewable energy source as well as a fertilizer for your land.

A glance at our system
6 Reasons to Build a Biodigestor
But besides the awesome concept of being able to transform waste into energy, there are many other advantages to having a biodigestor. Here are 6 reasons on why you should build one:
1. Biodigestors can be Low Tech
A common misconception about biodigestors is that they should be these high tech, expensive systems made out of a lot of different components. Like people, biodigestors come in many shapes and sizes: from continuously fed to batch fed, made out of metal or polyethylene, vertical or horizontal, using cow manure or human waste (or both), there is probably a biodigestor out there waiting for you. If you decide to go for a simple system like ours, there aren’t many components and you would be surprised by their simplicity. With the help of a couple people and some skills, you can set your system up within two days. The maintenance is pretty simple as well, and again, depending on the system you choose, you can decide to either dedicate a bit of time for maintenance every day, or choose a batch fed system, which takes more time to put in place but is then autonomous for a couple weeks
2. Biodigestors can be cheap
Again, this depends on a lot of variables: which system you choose, whether you have to excavate soil, if you are willing to do it yourself or prefer hiring people, whether you are able to use reused materials, etc. For instance, the main component of our system, which acts as a fermentation chamber and a gas reservoir, cost us $700.
3. It can be used off-grid
Here at the Ranch, the amount of people coming through doesn’t allow us to be completely off the grid; we cook over 23,000 meals a year! We still decided to implement this system in an effort to reduce our dependence upon fossil fuels such as propane and take a step toward ecological self-sufficiency. For smaller communities, like a small scale farm, or by increasing the size of the system, it is totally possible to implement an off the grid cooking system.

The methane stove that we cook meals on
4. It creates a nutrient rich organic fertilizer
This low tech system houses a wide variety of bacteria, each one with a specific task. Some break the matter into simpler molecules of sugars and acids. Other microbes, which find oxygen toxic, are able to break down the simple organic matter to form gases. The ultimate end result of this process is both the natural gas for heat and electricity as well as valuable soil amendments which we disperse throughout our gardens.
5. It reduces the greenhouse effect
Methane, CH4, which makes up 70% of the biogas produced by our biodigester, creates a warming effect 34 times stronger than carbon dioxide. By burning this gas, not only do we create a renewable energy source that allows us to produce energy, we decompose the methane into a less potent greenhouse gas.
6. It’s comfortable
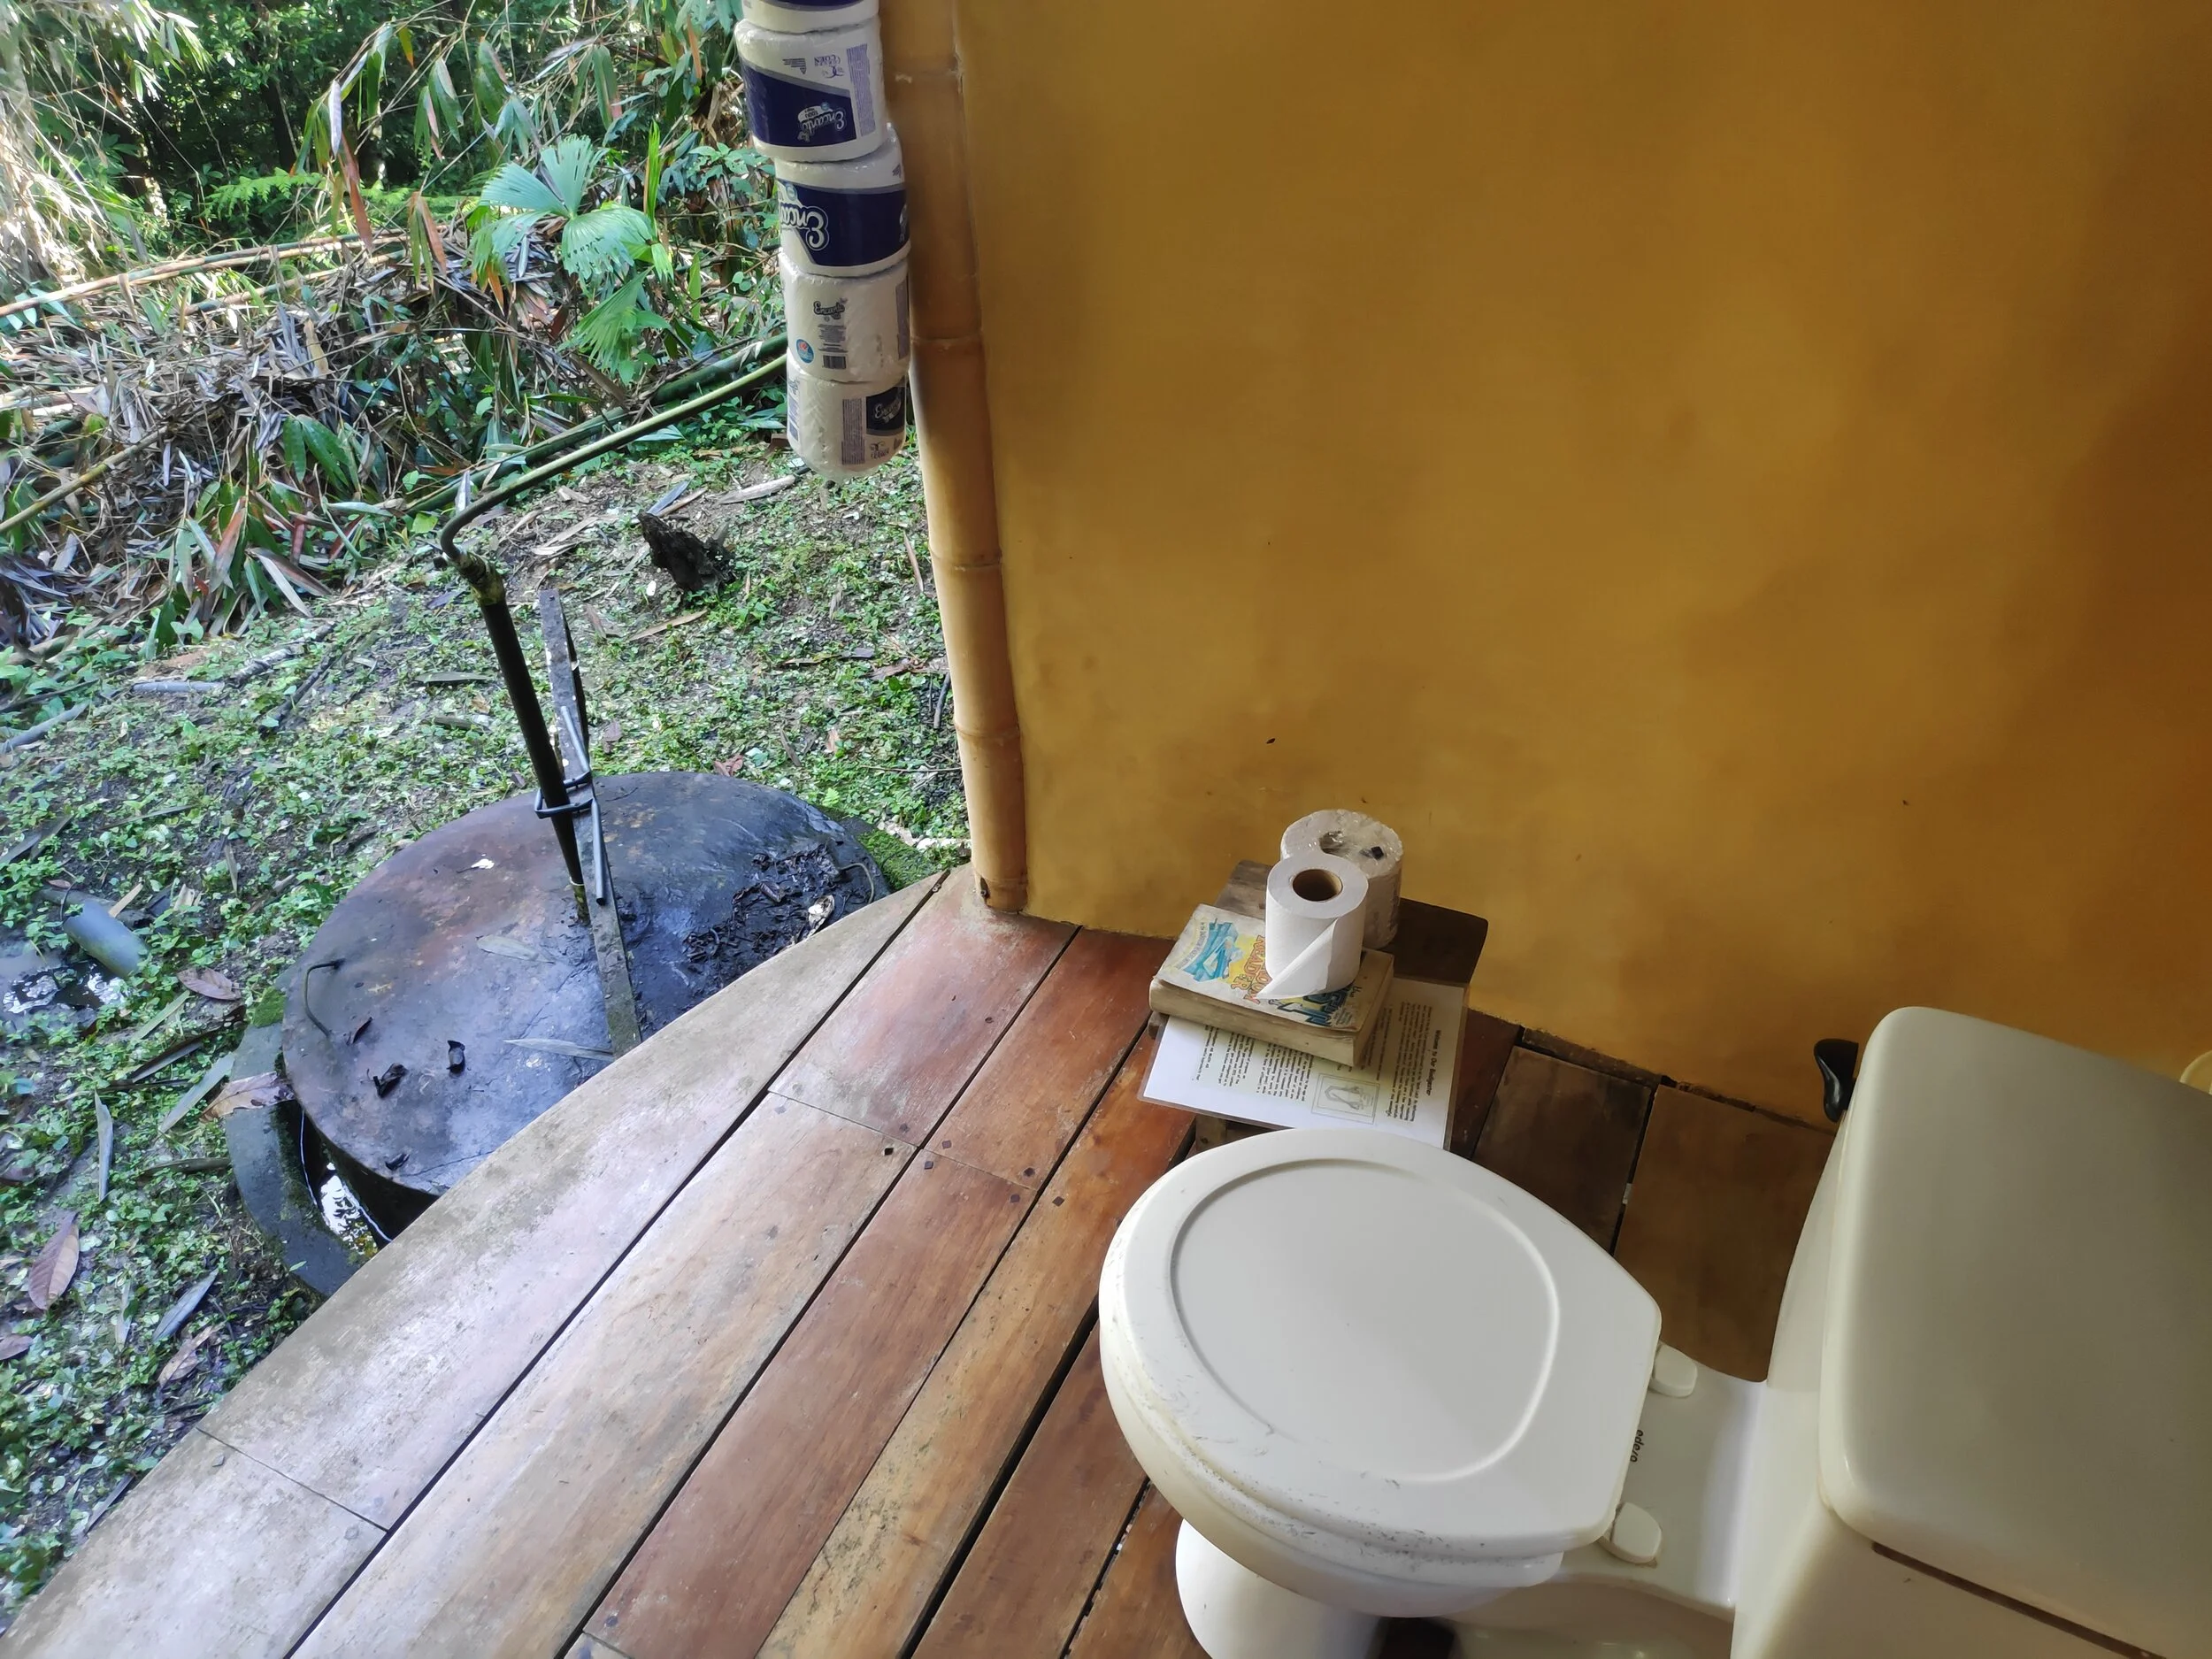
Some people are apprehensive about the idea of having to use a composting toilet ( even though they shouldn’t be, see article by Moanna on Composting Toilets to discover all the wonders of using a composting toilet, a wonderful low tech and off the grid system). By connecting your greywater system to a biodigestor, you will keep the comfort of doing your doodies in a water system while doing your duties for our wonderful Earth. As a matter of fact, our biodigster’s toilet was voted the Best Compost Loo In The World Award in 2012 by the readers of Permaculture Magazine, Inspiration for Sustainable Living.
Why else are Biodigestors Great!
The list doesn’t stop here. A biodigester helps reduce landfill and water-polluting effluents, and eradicates odors and pathogens. It allows small scale farming to create a renewable energy source while allowing them to better control the breaking down of their animal manure into fertilizer, being more self-sufficient and less dependent upon other chemicals. In a world where it has become increasingly urgent to find simple solutions to step towards sustainability, implementing low tech and easy to manage solutions like this one seems more relevant than ever.
The Project Drawdown, a comprehensive plan to combating climate change, puts Biodigestors in the top 100 things we can do.
Hope you feel inspired to think about and make changes to the current system of waste management.
Check out Moanna’s latest article on why composting toilets are another great way to make a sustainable change in the system.

Timber Framing: A Real Application of Sustainable Forestry Management
The deforestation problem that constantly threatens our global forest resources is one that we can overcome. To accomplish this, though, we must again learn to give our forests real value. The main idea here is that our forests must be more economically valuable in their current state than they would be under competing land uses. If not, they will be deforested.
By Anthony, 2020 apprentice
The deforestation problem that constantly threatens our global forest resources is one that we can overcome. To accomplish this, though, we must again learn to give our forests real value. The main idea here is that our forests must be more economically valuable in their current state than they would be under competing land uses. If not, they will be deforested.
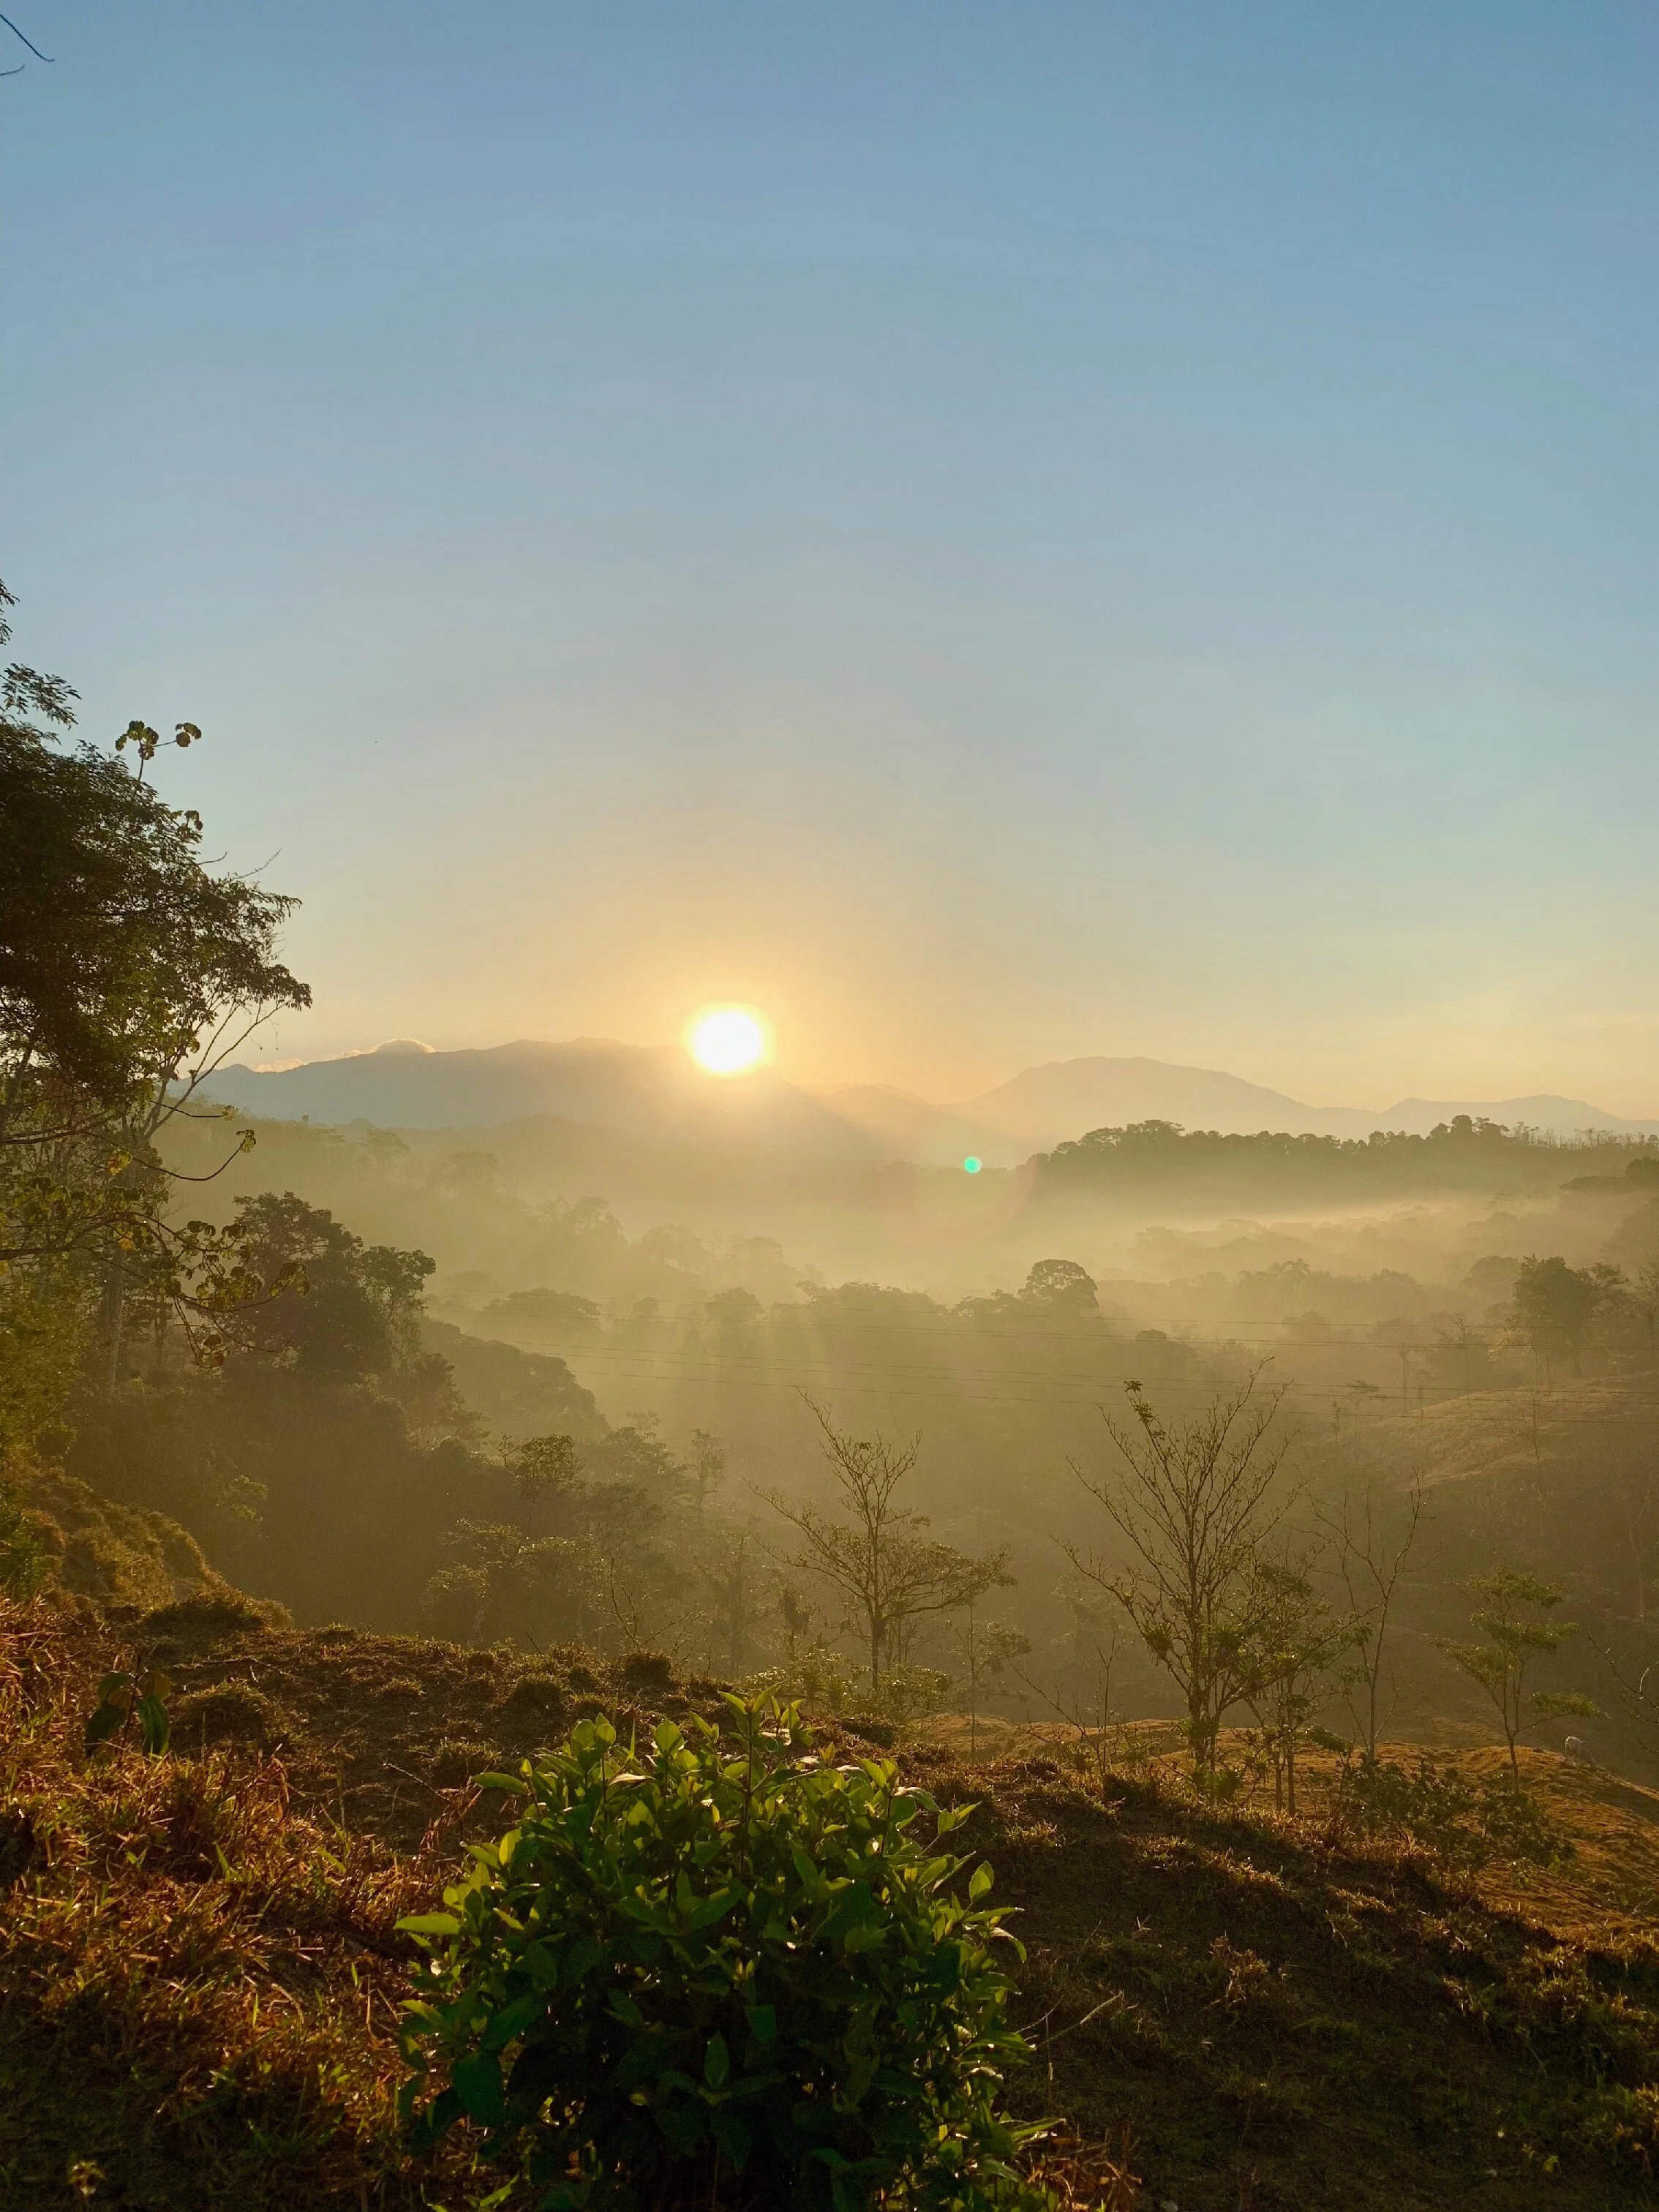
Cattle Pasture and Forest,
Latin America’s diverse and astoundingly beautiful forests are constantly under threat. Here, deforestation occurs when forest owners decide that they can earn more money doing something else with their land. Forests are routinely slashed and burned to make room for agricultural systems, cattle ranches, infrastructure, urbanizations, and mining, to name a few alternative land uses.
One real strategy to conserve our precious forests is sustainable forestry management, a practice that selectively and sustainably chooses trees to be harvested within a forest in order to use their timber for construction, furniture, tools, and artisanal products. When well planned and carried out respectfully, sustainable forest management gives way to increased biodiversity within a given forest, offers employment opportunities in rural communities, and, perhaps above all, makes a forest’s continued existence economically possible.
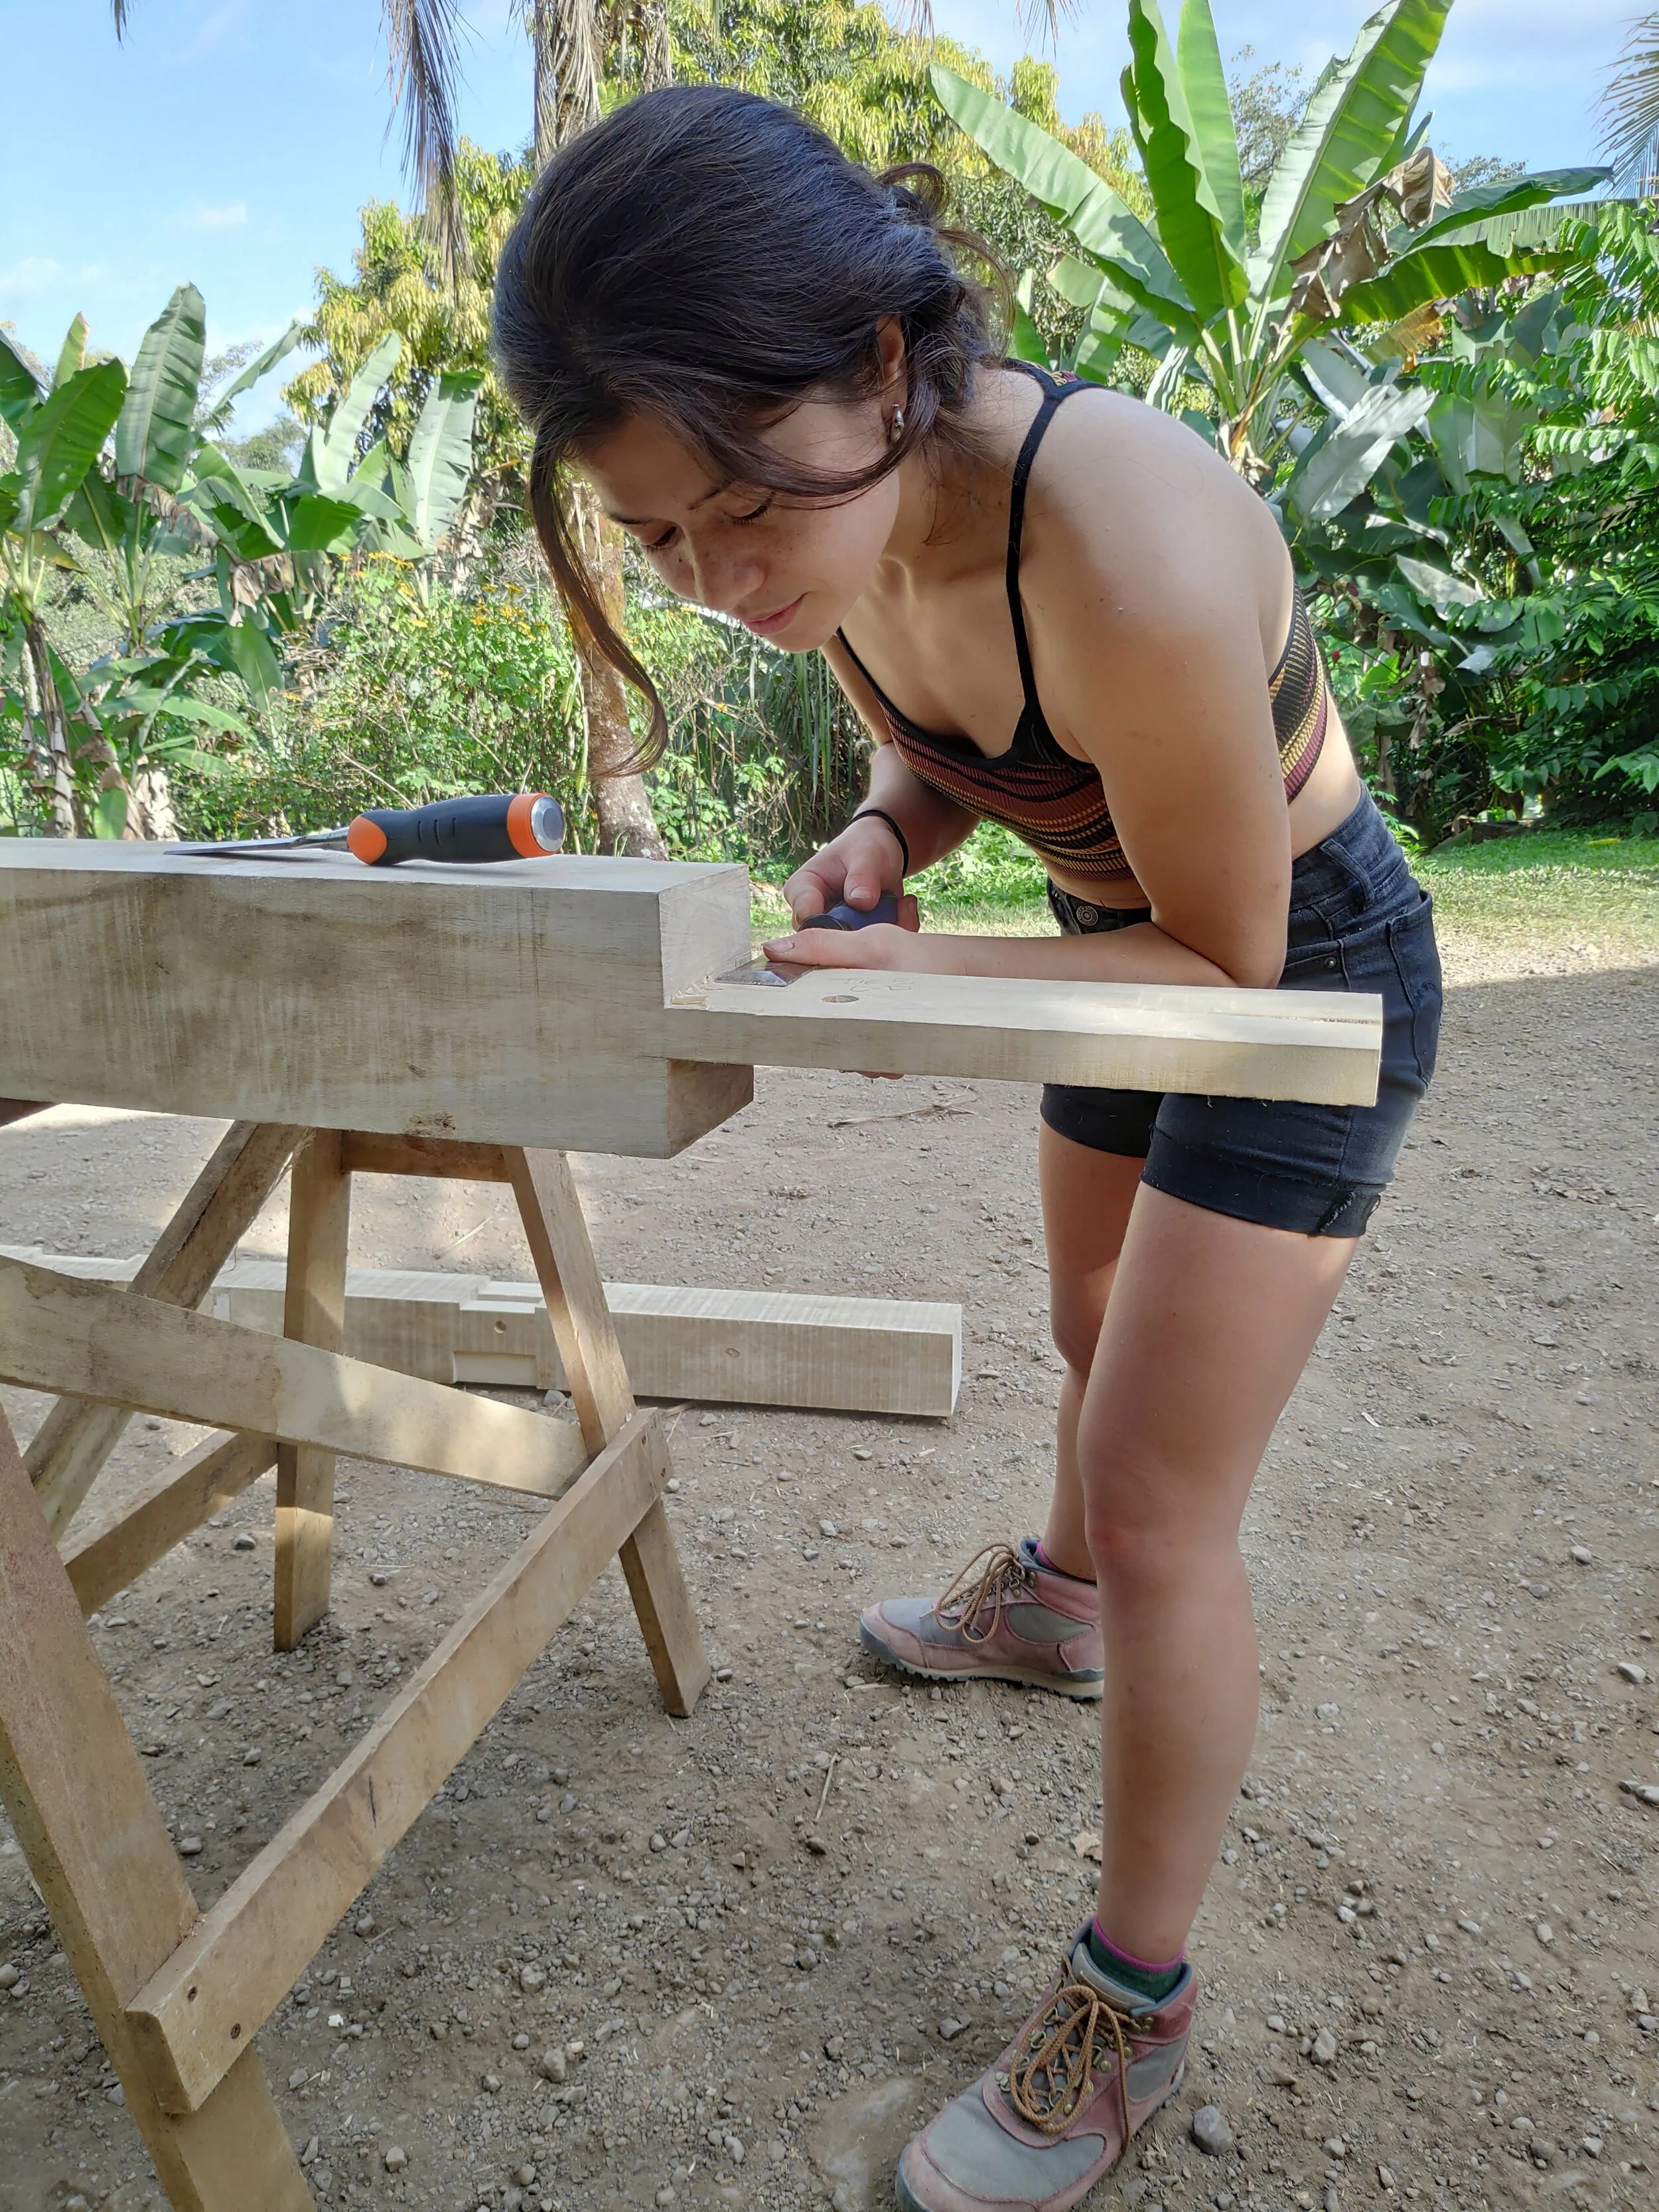
Timber Framing
Rancho Mastatal is putting this plan into action. This Costa Rican-based educational farm offers workshops in diverse areas with an emphasis on sustainable community living in the tropics. One of their flagship courses, ‘Introduction to Timber Framing’ leads workshop attendees through the process of building a simple and elegant timber frame home. Starting with the basics, such as tool sharpening and laying out a timber using the square-rule method, the workshop ends in climactic style on raising day when the students see their work come to fruition. After many days of focused, methodical work chiseling and sawing, the timber frame home is assembled in a swift group effort in a single morning. The workshop is an ideal combination of focused individual development and group camaraderie.
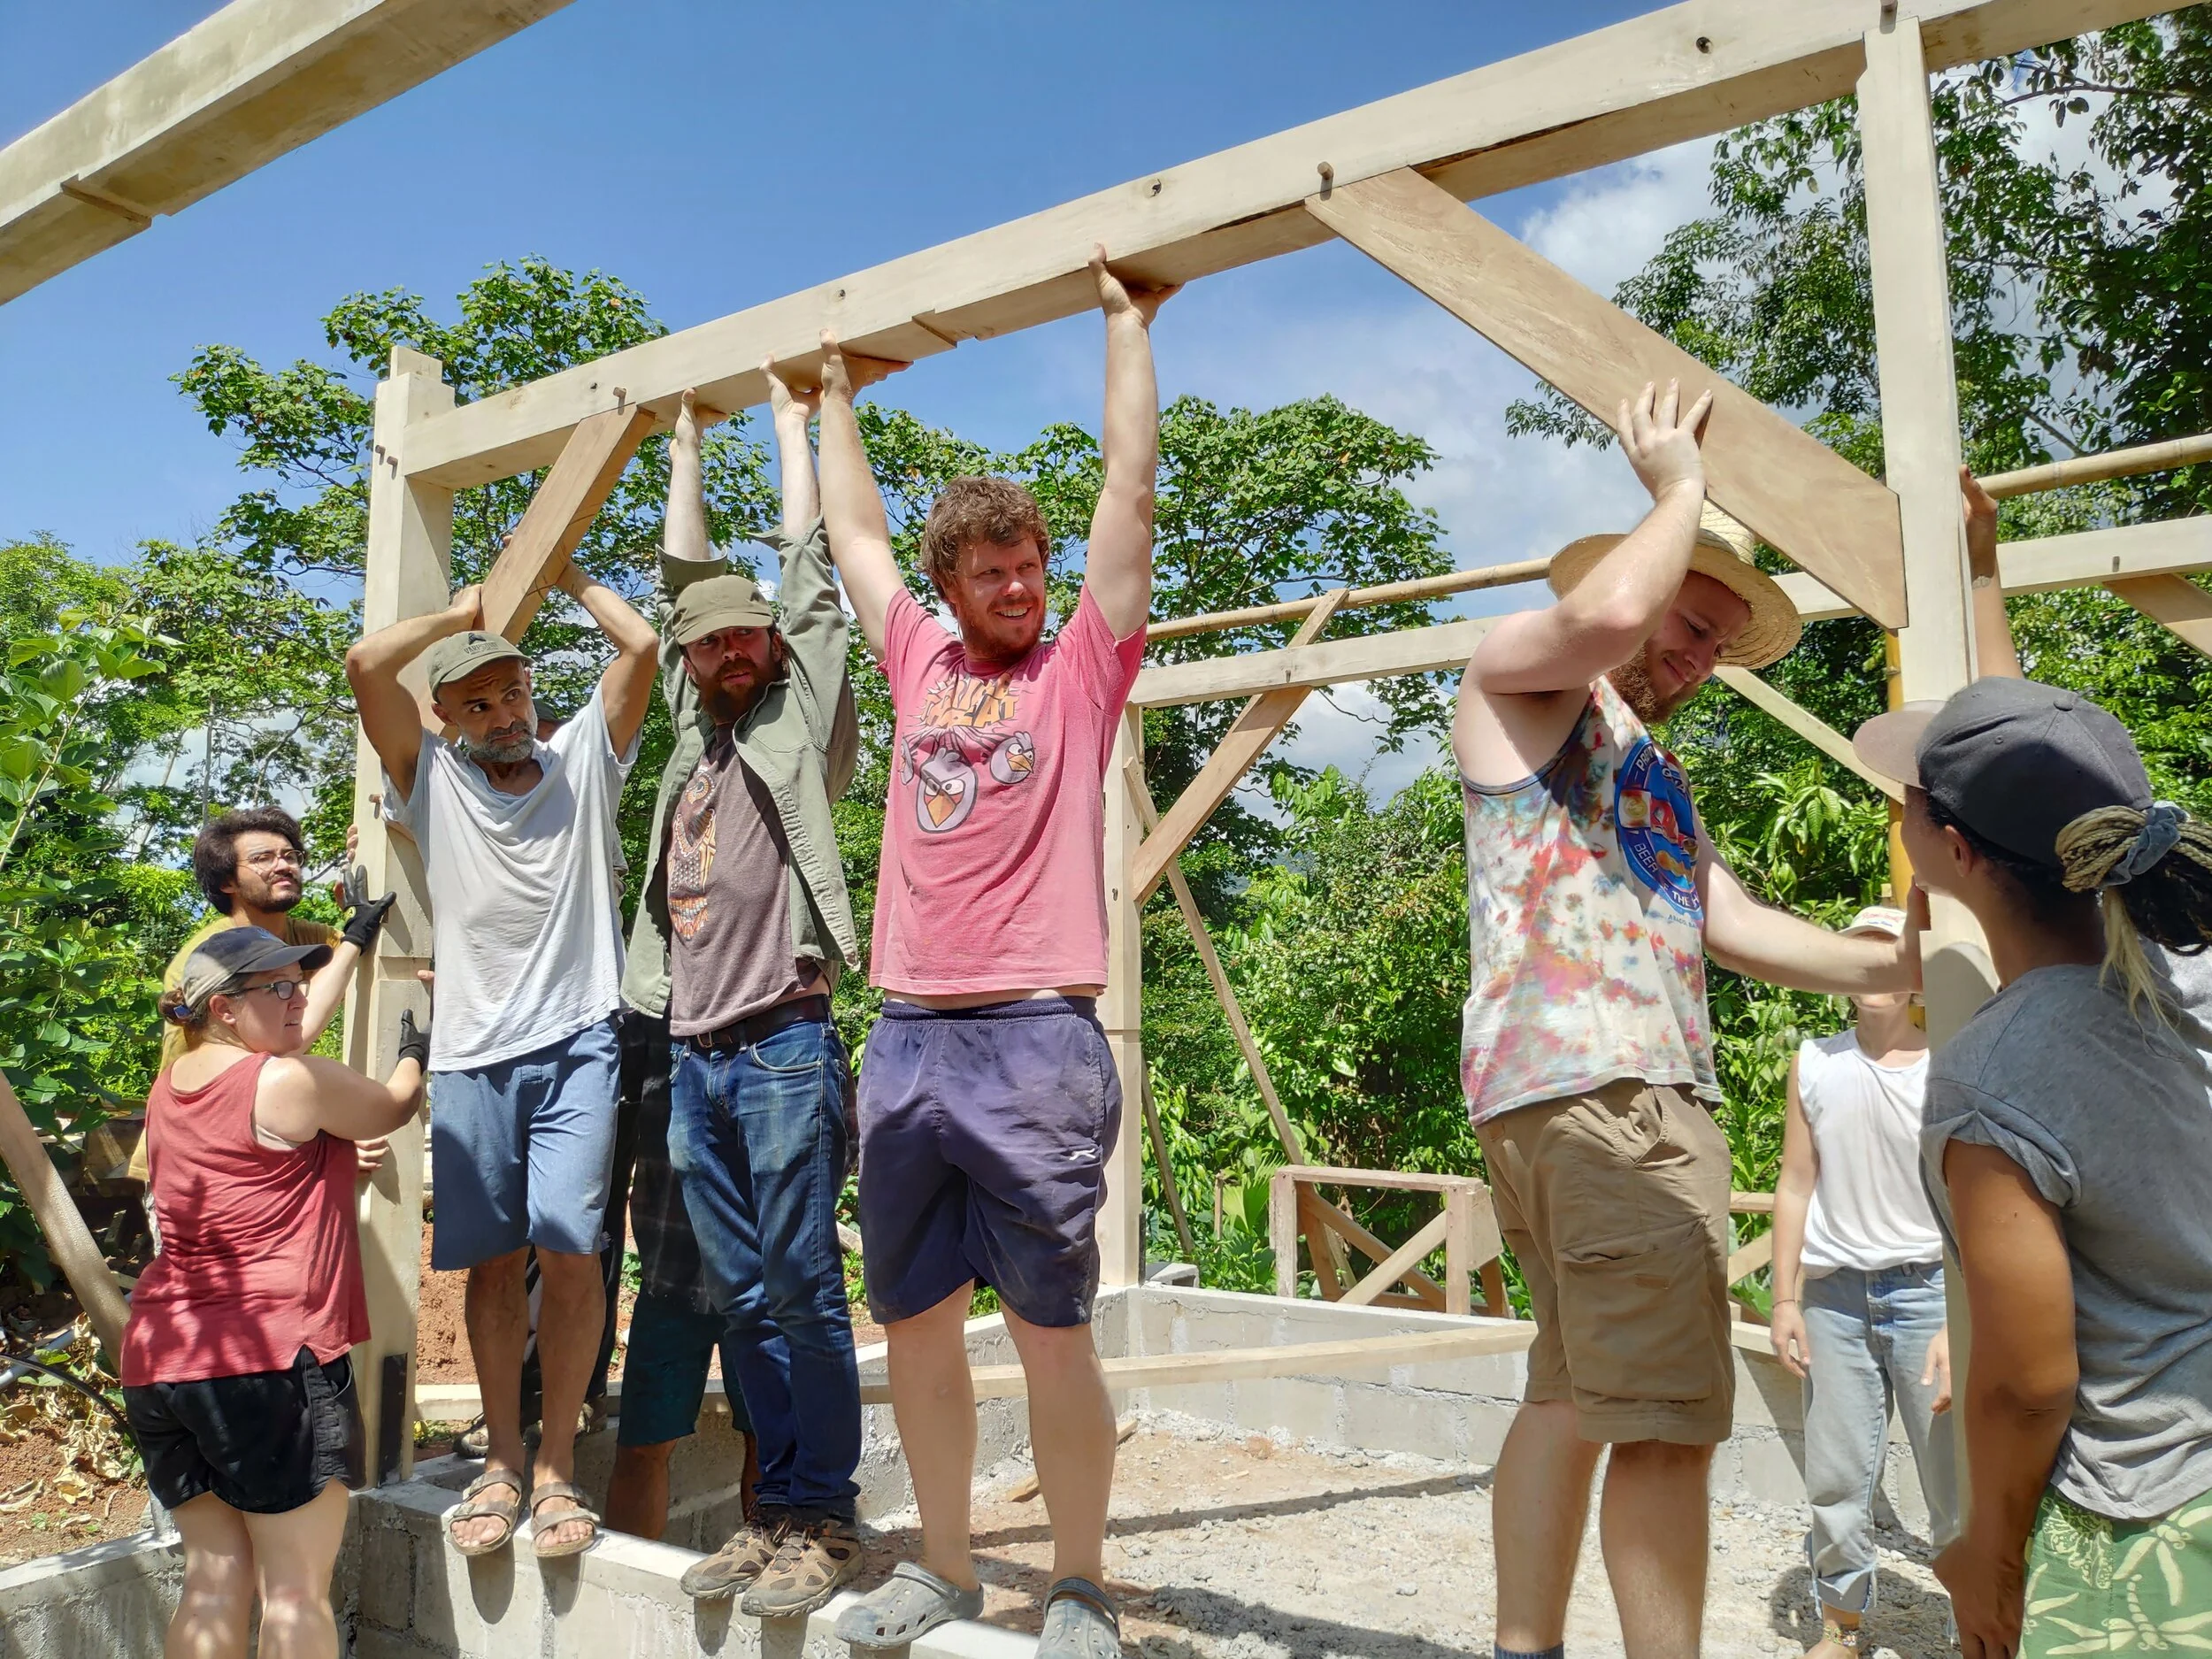
Sourcing sustainable wood
The timber used for the construction of Rancho Mastatal’s timber frames originates from two main sources, both of which are sustainably and carefully chosen: selectively-felled trees from managed secondary forests, and trees planted specifically to be harvested for their wood. Additionally, the national context of the timber frame workshops is significant. Rancho Mastatal exists in a nation aiming to be carbon neutral by the year 2021. So far, large-scale national strategies have been based on a renewable energy sector, yet little has been done for real improvement in the construction sector. Here Rancho Mastatal leads the way toward carbon neutrality while conserving tradition.
To be original, one returns to the origins. Sustainable forestry management and timber frame buildings are ancient traditions that must be practiced in order to be culturally conserved. By integrating these traditions into a business plan through its educational workshops, Rancho Mastatal and its core team aim to realize an originality apt for modern times.

A nice display of the different joinery in one post
Stay tuned for the next blog Timber Framing Tips: The Things You Didn’t Know You Needed to Know.
Join us in 2021 for our Timber Framing Workshop to get hands on practice and instruction on this beautiful and traditional form of building.

Transforming Human-waste into Fertilizer: Compost Toilets
You likely grew up with flushing toilets, seeing your poop as something to dispose of, but you might also be one of those who agree that humans can only thrive once we live in harmony with nature. The zero-waste movement is in a sense, a yearning to imitate nature where there is no such thing as waste; one organism's excrement is another's food. Compost toilets turn human "waste" (discarded feces and urine) into soil fertility as humanure (food for micro-organisms and fruit trees) - the actual human waste is everything that cannot decompose: cigarette butts, plastic-sixpack rings, deodorant cans, batteries, the five billion gallons of polluted drinking water we flush down our toilets everyday, and the millions of tons of organic material dumped into the natural environment year after year.
by Moanna , 2020 Apprentice
"Carelessly dumping waste out into the world is a self-centered act of arrogance. Humanure composters can stand under the stars at night gazing at the heavens, and know that, when nature calls, their excretions will not foul the planet. Instead, those excretions are humbly collected, fed to microorganisms, and returned to the Earth as a healing medicine for the soil" -
Joseph Jenkins, author of the Humanure Handbook
Zero Waste?
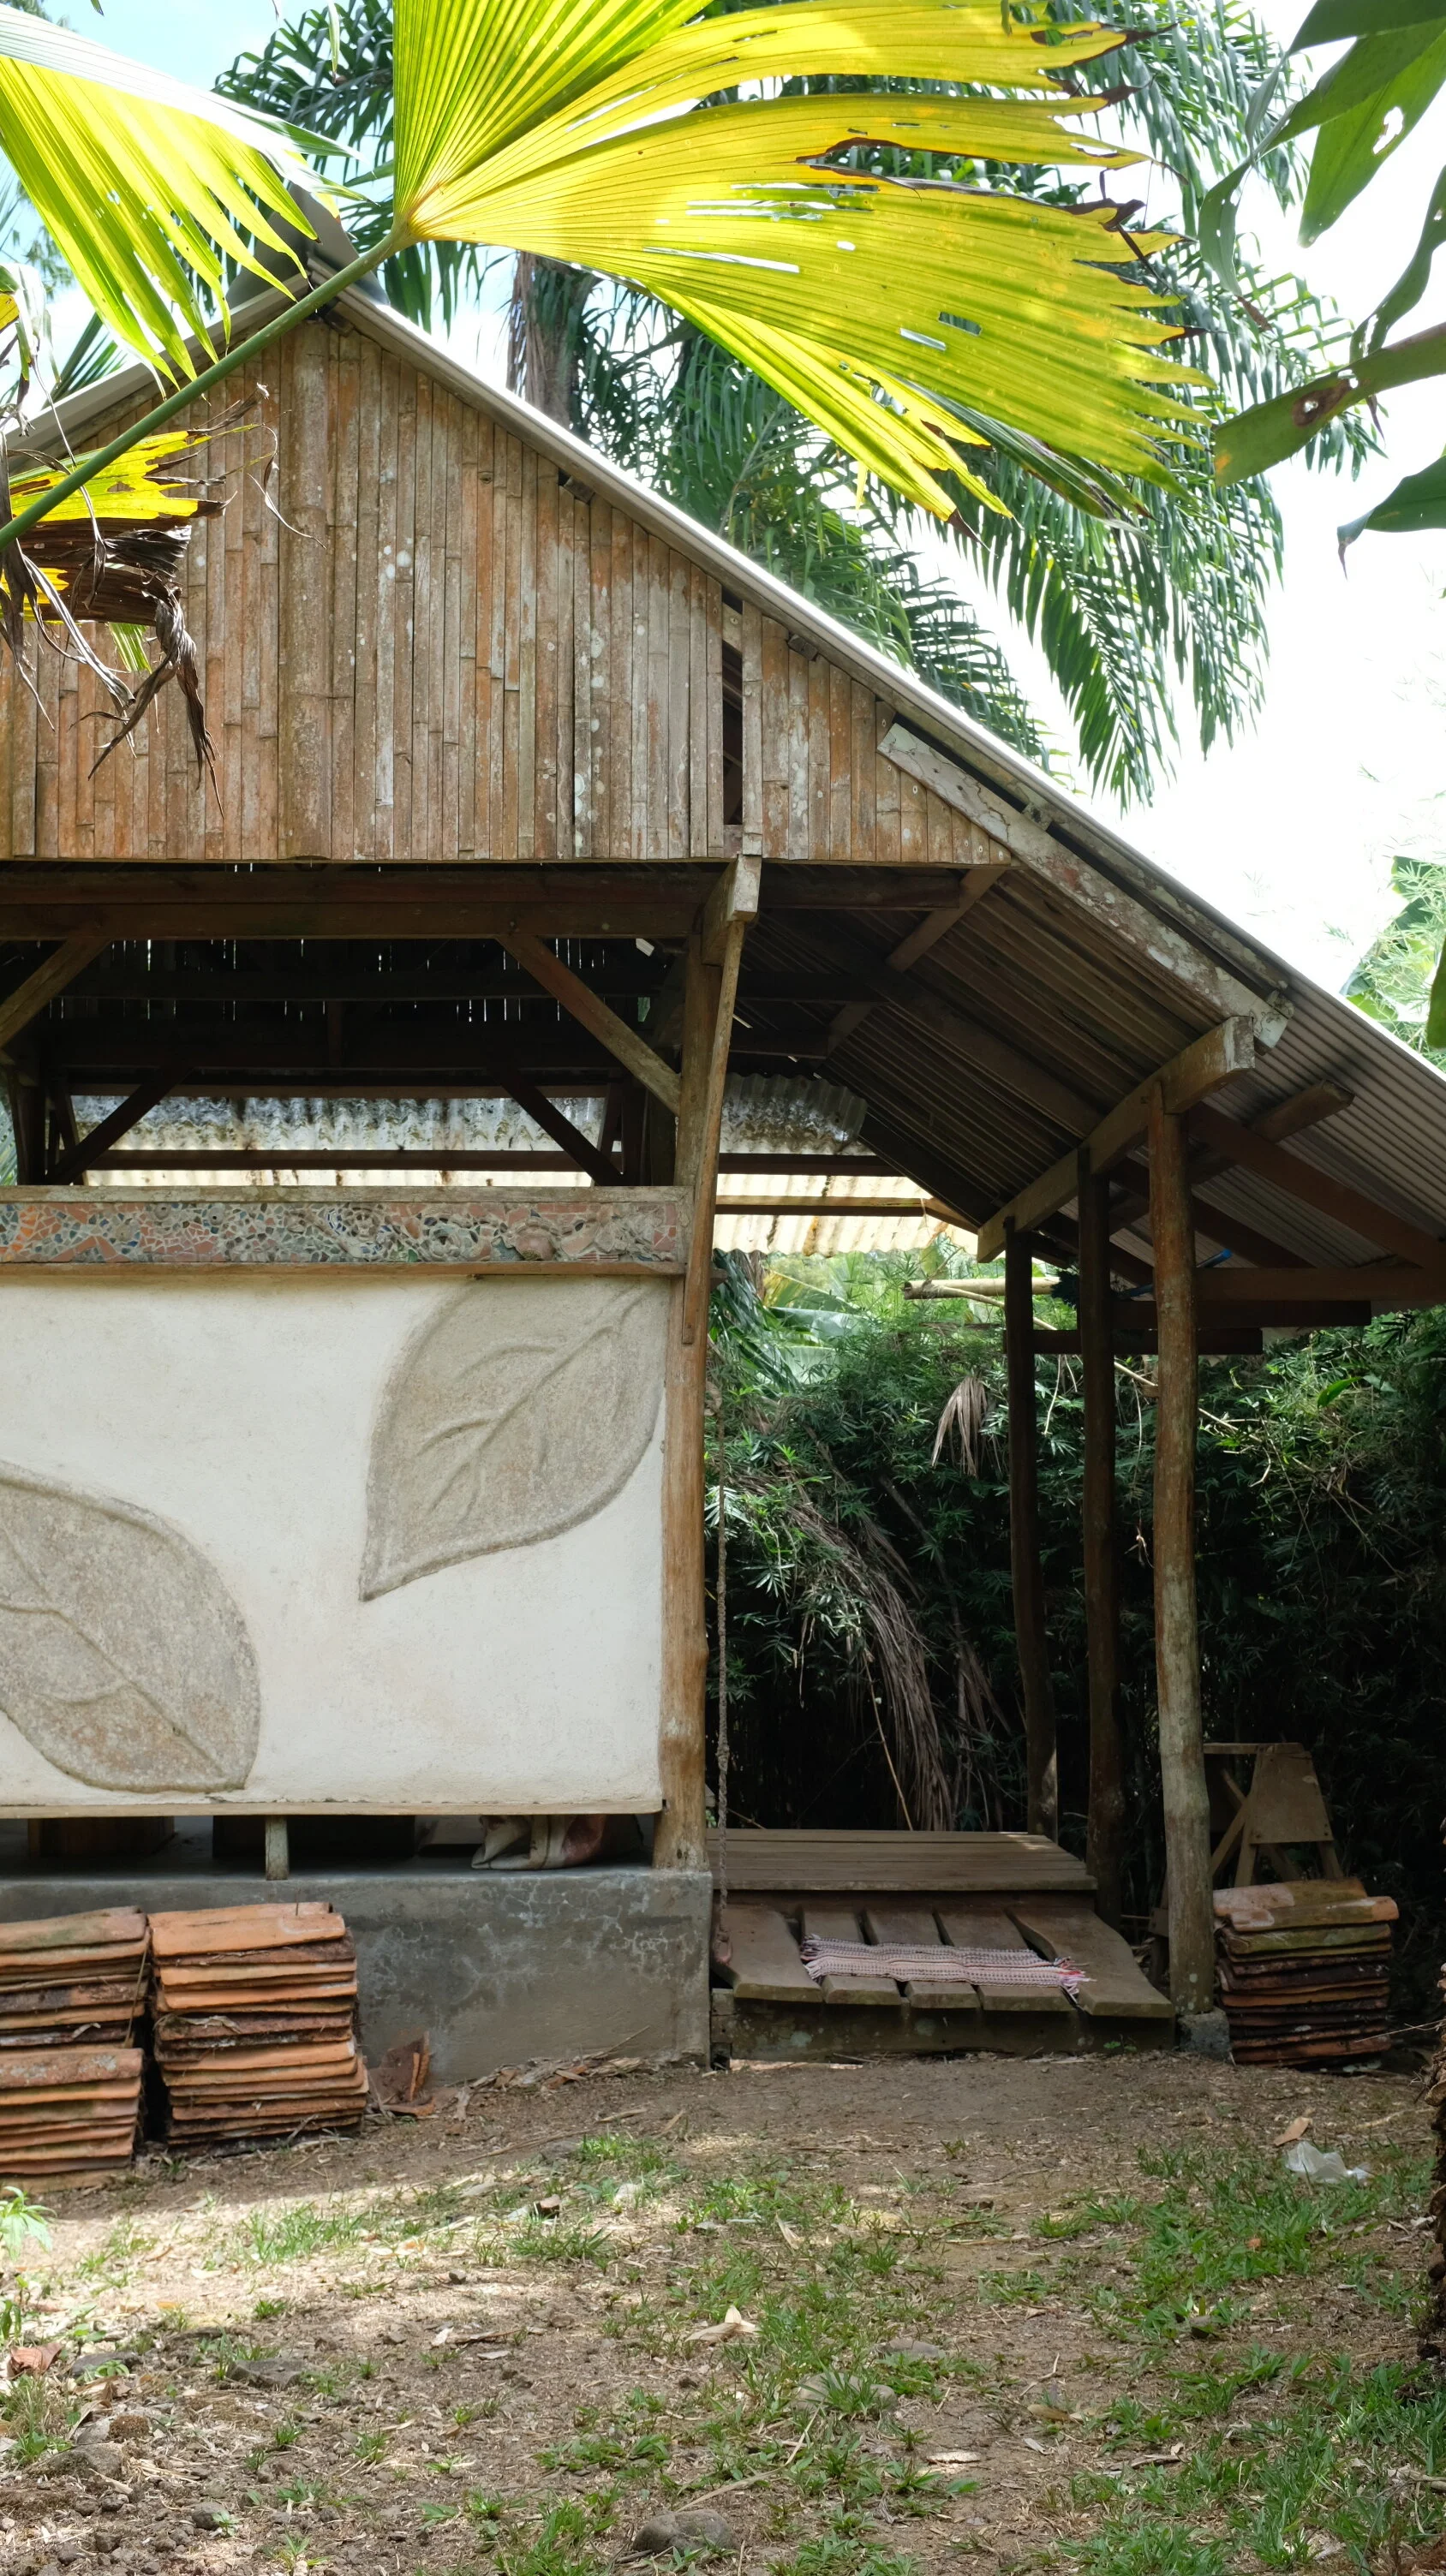
You likely grew up with flushing toilets, seeing your poop as something to dispose of, but you might also be one of those who agree that humans can only thrive once we live in harmony with nature. The zero-waste movement is in a sense, a yearning to imitate nature where there is no such thing as waste; one organism's excrement is another's food. Compost toilets turn human "waste" (discarded feces and urine) into soil fertility as humanure (food for micro-organisms and fruit trees) - the actual human waste is everything that cannot decompose: cigarette butts, plastic-sixpack rings, deodorant cans, batteries, the five billion gallons of polluted drinking water we flush down our toilets everyday, and the millions of tons of organic material dumped into the natural environment year after year.
Two thirds of the world have no toilet, and don't have a choice, and must live intimately with their shit. Some of us have the opportunity to use it as fuel and fertilizer, instead of turning it into poison. It can feed us, heat us and cure us. There are so many ways to shit properly.
Composting Toilets
Pooping at any of the Rancho's outdoor compost toilets is a pleasing experience; they are made of beautiful natural materials and you are likely to observe all kinds of butterflies or birds. What has nourished your body and instead of being disposed, will feed and sustain millions of other lifeforms. Pooping and urinating becomes a contribution rather than a disposal; instead of waste that gets dumped somewhere, it's a useful resource that gets valued.
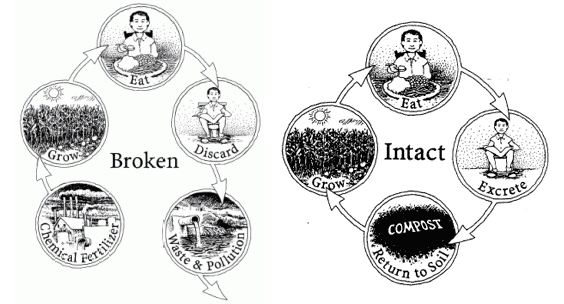
From the Humanure Handbook by Joseph Jenkins
The human nutrient cycle goes like this 1) grow food 2) eat it 3) collect and process organic residues (feces, urine, food scraps) 4) return the processed organic matter to the soil, thereby enriching the soil and enabling more food to grow!
Why Composting Toilets?
"If you want to be free, learn to live simply. Use what you have and be content where you are." - Joseph Jenkins, author of the Humanure Handbook
It is not only for those with gardens and fruit trees who should be excited by humanure but all of us who value clean water and air. Compost toilets align with the permaculture ethics of care for Earth and people, and a fair distribution of resources. Here are a few aspects on why and how.
Protect and save water
Each toilet flush launches five to six gallons of polluted water - All life depends on water, and although Earth is mostly water only 3% is without salt and of that 2/3's are locked up in ice - this means that humans pollute the less than 1% of drinking water we have. If a household switches to waterless toilets it would save 40 thousand gallons of water per year. Each flush usually goes somewhere to be "treated", where despite the massive amount of energy and chemical input, pollutants such as nitrates, chlorine, pharmaceutical drugs, industrial chemicals and many more are let out into our living planet, which affects us since we are apart of and one with this living world.
Pumps up resilience
We will be facing all kinds of disruption due to the speed and frequency of natural disasters and their consequences. Flushing toilets rely heavily on well-established infrastructure, and loads of energy, water and chemicals. With the growing number of natural disasters, this system is super vulnerable as storms, floods, and fires can cause disruption many parts of that system. Urban and suburban areas globally are experiencing storm events causing flooding and overflowing the basins in sewage systems. This can go on for days or weeks, and human excrement along with all the other waste that goes down the drains ends up in the streets, and we're back to the middle ages where diseases and pathogens get to have a big party. So if you know how to compost and make humanure, you can stop relying on this fragile and eco-cidic system and help others in the same direction, and when disruption occurs in your surrounding community you can continue to recycle your brown gold!
Compost can degrade toxic chemicals
An Austrian farmer could feed his community with the produce from his fields that were sprayed with compost-type microorganisms, whereas the produce from surrounding farms were banned due to radioactive cesium contamination from the Chernobyl disaster. Micro-organisms in compost are able to digest these toxic compounds because many produce antibiotics. If this excites you, check out Mycilium Running by Paul Stamets.
SCARY FACTS About the current waste system
There is an exceptional degree of agreement within the scientific community that natural systems can no longer absorb the burden of current human practices
The use of antibiotics is so widespread that many people are now breeding antibiotic resistant bacteria in their intestinal systems. These bacteria are excreted into toilets and make their way to wastewater treatment plants where the antibiotic resistance can be transferred to other bacteria, and the water containing and breeding these bacteria is led out into our living planet. The chlorine used to supposedly clean water seems to increase bacterial resistance to some antibiotics. (Waste water microbiology p.86 Humanure Handbook)
Chlorine is used to disinfect much of the world's drinking water and wastewater before its released out to our environment. The most harm comes from the by-products such as chloroform and dioxin, that cause all sorts of awful stuff such as death in snapping turtles, death in lake trout, reproductive problems in otters and minks, and cancer in humans - to name a few.
50-90% of pharmaceutical drugs humans consume end up in waterways - chemotherapy drugs, antibiotics, hormones and much more are found in tap water, lakes, rivers and drinking water aquifers.
Too often waste is being dumped into water bodies, which the treatment plants are not prepared to deal properly with. Sadly governments and private co-operations are too busy to let consumers know - in review of twenty water systems in six states, out 157 drinking water quality violations, the public were notified on time in only 17 of the cases (humanure book pg 112).
Humanure Fun Facts
Human excrement is in many south east asian countries known as "night soil", and was never wasted. Quite the opposite it was a valuable resource! On the island Tainan in Taiwan it was sold on blackmarkets to fertilize fishfarms.
Fecal transplant saves lifes: A dose of healthy poop, with its 35,000 families of bacteria, can replenish the gut's flora and settle it back to normal. With our massive use of antibiotics we wipe out the good bacteria along with the bad. Transplanting a healthy gut flora into a one suffering from Clostridium diificile (which kills 100,000 each year in america and europe) has been shown in studies to heal 91% of patients in certain cases. (Colours magazine, Shit: a survival guide)
Squating while pooping is the most healthy posture, as it straightens the canal to the desirable 132 degrees. In a study it took squatters 51 seconds to move their bowels, while it took 131 seconds for those who sat. (Colours magazine, Shit: a survival guide)
How do Composting Toilets Work?
"Composting is easier to do than to describe, and like lovemaking, magic when you do it well" -
Sim Van der Ryn
Is it safe? Will it eliminate pathogens and diseases? Does it get stinky? Will it attract flies and rats? Is it hard work? All these question will depend on how the system is designed. There are loads of different systems, and ways of composting humanure. You can buy all sorts of commercial composting toilets, and your climate, local regulations and way of living will guide you to the most appropriate way to turn your "waste" into resource. * This also means that the decomposition process depends on and varies according to each system, place and environment. *
Here at Rancho Mastatal we have 11 composting toilets in 2 sizes (large scale capacity and single family capacity). We size these based on their location and projected use. All of them are designed to be passive systems with little to no management or maintenance. The Ranch's compost toilet system is simple; there are two chambers, when one is filled it gets left to decompose, and by the time the second is filled, the first has transformed into brown gold/rich fertilizer!
The ones in the pictures are the large size composting toilets (each chamber about 2m x 1m x 1m), these are used on average over the year by 7-10 people. They have been sized to take about one year for one side of the chambers to fill up, and the decomposition process is also one year, the same amount of time for the other side to get filled up.

Emptying a composted side of humanure into reusable bags to spread on our orchards

The 2 chamber system that we use here
Composting requires 4 neccesities: Oxygen, moisture, appropriate temperature and a balanced diet, which is the right carbon/nitrogen ratio. When these conditions are right bacteria will start to get active and heat up the compost, creating temperatures over 120 degrees fahrenheit. This rapidly kills pathogens, and just like Mother Nature intended, humanure is a treat for the soil.
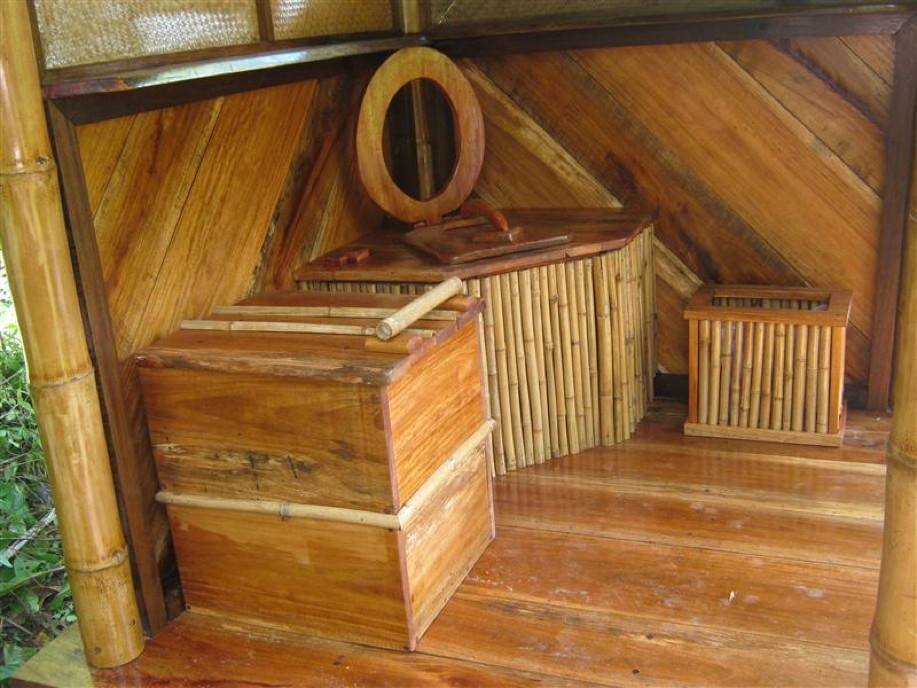
A cozy seat
When one chamber is filled the toilet-seat is moved on top of the next chamber, the first is left to decompose with a lid on, and in between is a box for sawdust. For each 'contribution' 2-3 scoops of sawdust is applied to balance the carbon/nitrogen ratio (Sawdust is the carbon sucking up all the nitrogen rich human contributions). Before starting a new chamber it is filled with bigger bulky carbon materials, generally a lattice of bamboo or sticks. This helps create an aerobic environment for the composting organisms to do their work and we avoid having an anaerobic environment, which means no air for the good bacteria to do their job resulting in a stinky toilet.
The design of this system is based on the diverse flow of people on the Ranch; when we have all kinds of people in different quantities for many different periods of time that use our compost toilets, the design is simple for low maintenance. All that needs to be managed is to make sure there is sawdust available and adding the finished soil fertilizer around our orchards once a year. Our main food production is in agro-forestry so we feed the humanure to the trees, by using the natural biological filter of the trees nutrient absorption system we get as an extra layer of safety from any potential pathogens or chemicals in the humanure.
The Composting Stages
Stage 1:
Mesophilic bacteria, (100 million - 1 billion per g of compost), eats, reproduce and create heat until it reaches around 44-52*C (111-125*F) which is the transition to
Stage 2:
Thermophilic bacteria thrives in the higher temperatures, takes over and continue to create heat, sometimes reaching up to 70*C . This heating stage can take place over days, weeks or months. As it cools down again we reach
Stage 3:
Where more diverse organisms such as fungi and earthworms moves in, and digest bigger and more coarse material.
Stage 4:
Is the curing/maturing phase, a long and important one. A long curing period (e.g., half a year in the tropics or a whole year in the temperate, after the thermophilic stage) adds a safety net for pathogen destruction. The longer they are subjected to the microbiological competition of the compost pile, the more likely they will die a swift death. All of this is linked to the soil food web.

Humanure is harmless to handle once fully decomposed and aged
Thanks to the bacteria, fungi and bugs, thriving with good moisture, air and a mix of human excrement and sawdust, the poop from 2018 has gone through a curing process through 2019, and last month the 2020 apprentice team could empty out the beautifully smelling and textured humanure.
Before you begin on this journey towards saving water, decreasing the the extraction and pollution of limited clean freshwater, protecting planetary health and enhancing soil fertility, further exploration and information is necessary. Some simple tips would also be to explore the possibilities to phase out flush toilets in your local community and check out what other people in similar situations to you are doing to stop pooping in drinking water. "The Humanure Handbook" is possibly the best and most enjoyable source of information, Joseph Jenkins shares his 20+years of compost toilet experience and knowledge, and the way he writes has made many crack out in laughter.
This simple low-tech composting system has a positive impact on the Earths ecosystems, making us closer to a harmonious relationship with this living planet. It aligns you with permaculture principles such as catching and storing energy, creating zero-waste, obtain a yield, and makes use of the permaculture attitude where "the problem is the solution". We don't need more science or bigger technology or complexity to meet the crazy complicated crisis that we're facing, but some humility and respect for all that is simple; deal with our own excretions, by making humanure that enhance soil fertility!
Legal issues in Costa Rica
Yes! They are Legal!!
In Costa Rica the legal principles guiding black water disposal are based on the possible contamination of fresh water resources. Composting toilets fall into the category of a safe alternative to blackwater disposal as they don't even create the blackwater in the first place as they are dry (use no flush system). In this document published by the ministry of health, you can see in annex 5 (scroll all the way to the bottom) that composting toilets are legally allowed as a viable alternative to a conventional septic system if the stipulations as outlined in the document are met. This is exciting news for people based in Costa Rica and hopefully can act as a catalyst for other places in the world including them in the building and health codes.
Humanure into Food?
Methane from a Biodigestor
Here at The Ranch our compost toilets feeds the soil, and our Bio-D toilet makes gas for cooking breakfast, it is more attractive option for those who are more comfortable with a flushing toilet, and it is another way of turning "waste" into a valuable resource.

Our biodigester
Black soldier flies
They eat everything, create rich fertilizer and both insects and flies can be a rich protein source for chickens!
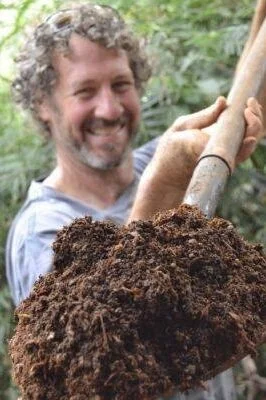
A beautiful scoop of humanure

One of our outdoor compost toilets
Hope you feel inspired to, if you can, stop contributing to the modern waste cycle and start creating closed loop systems! Don’t know what closed loop systems are? Join us for our annual Permaculture Design Course to learn about the ethics and principles of permaculture design.
We have been using compost toilets here on the farm for 19 years and always had successful turnouts.
Stay tuned for our next blog on our biodigestor.
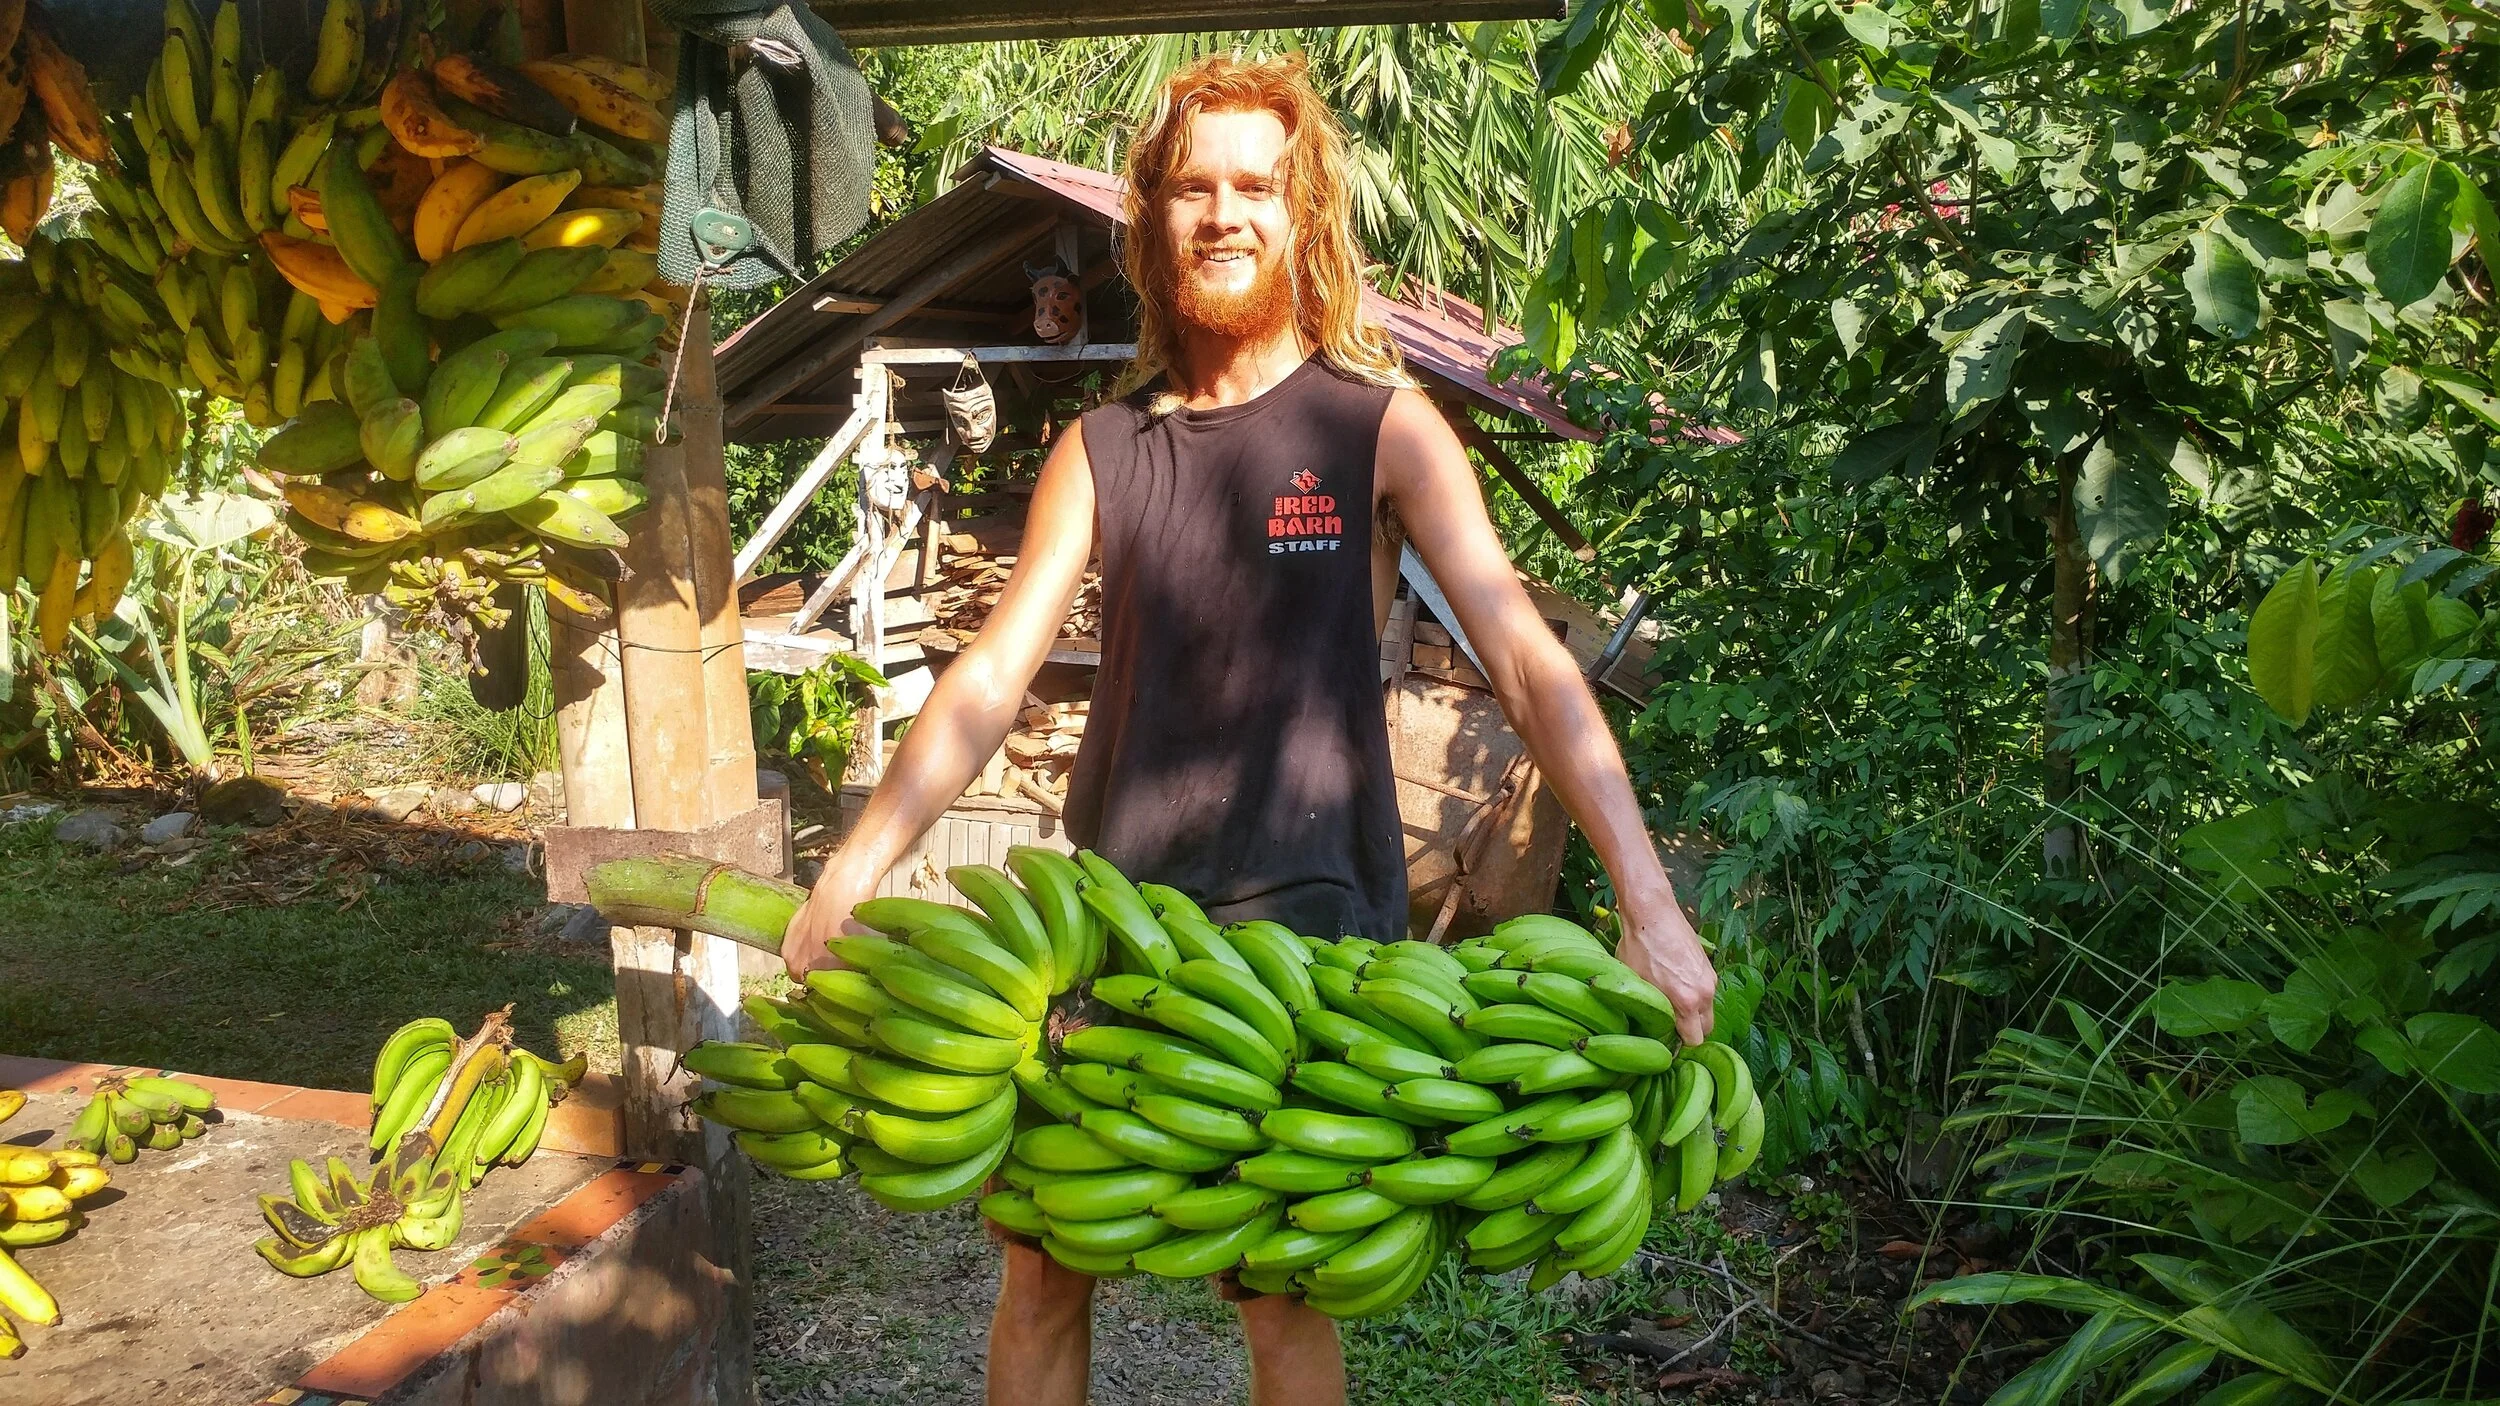
Farm to Table Banana Vinegar
I know, it sounds like a weird flavour combo. Sour banana? Whaaat? But it works and it’s tasty. This recipe is a very accessible way of doing farm to table whilst utilizing and transforming “waste” into something productive and delicious – permaculture 101.
By Marco, Apprentice 2020
Permaculture Vinegar?
I know, it sounds like a weird flavor combo. Sour banana? Whaaat? But it works and it’s tasty. This recipe is a very accessible way of doing farm to table whilst utilizing and transforming “waste” into something productive and delicious – permaculture 101.
What makes a Vinegar
Firstly, let’s take a quick look at what vinegar is. The word vinegar comes from the Latin vinum acer – literally “sour wine”. Alcohol is fermented by a large family of bacteria called Acetic Acid Bacteria (AAB), who turn ethanol into acetic acid. These little guys are everywhere - airborne and on the surface of most living things including me, you and, as it turns out, bananas! AAB are aerobic, which means they need air (oxygen) to do their thing, unlike Lactic Acid Bacteria for example (the main players in lactic acid ferments, such as kimchi and sauerkraut) which are anaerobic.


Check out our last blog on home-brewing your own alcohol.
Farm to Table Vinegar
So, here is a breakdown of how we make our farm to table banana vinegar here:

Go out and harvest them bananas, or maybe you already did that and you have far too many ripening… so next
With our main and only ingredient: bananas we don’t even need to peel them. You can just smoosh ‘em all up, skin n all, and chuck ‘em into a bucket. Beautiful. This process works best when they’re very ripe. We’re talking leaky, mushy and black. The ones nobody wants to eat, which sit around in the fruit bowl way too long, eventually they get picked up by the loser of rock, paper scissors and thrown out with an overly extended arm and a wincing face… Yeah. These are the ones that make great vinegar. Waste? Nay, but a resource in the wrong place. It’s farm to table, not farm to trash.
After you’ve smushed them all up and put them into a large container (we use a 5 gallon bucket, but you could use any large enough container), all you need to do is leave it and wait for the acetic acid bacteria to get to work on turning the alcohol into acetic acid. The time this takes varies depending on your conditions and the state of your bananas, but somewhere between 1-3 months. Remember that AAB like oxygen, so keeping a breathable lid on top of your vinegar, such as a muslin, will help speed up the process. o You could also attach an air pump and air stone (such as one that you’d use in an aquarium) to pump and diffuse air into your vinegar. This should significantly decrease fermentation time.
[TIP: you can hammer a nail into the bucket near the bottom. Leave the nail in until you’ve finished fermenting. Once your vinegar is ready, you can remove the nail and all the liquid in the bottom of the bucket will drain out.]

Upon opening your banana vinegar for the first time, you’re gonna get a bit of a shock as you see what appears to be a sprawling metropolis of mold growing all over your black bananas. Do not despair. Despite everything you were taught about rotting fruit, this is not a bad thing. Generally speaking, bright colored molds (pinks, yellow, greens etc.) are the ones to be wary of. Get another container and a sieve and pour whatever liquid you have into this second container through the sieve.

Next, take those moldy bananas into your hands and squish with all your might. Get in there! Don’t be afraid! Squish harder, dammit! Get all those lovely juices out and dispose of the solids.
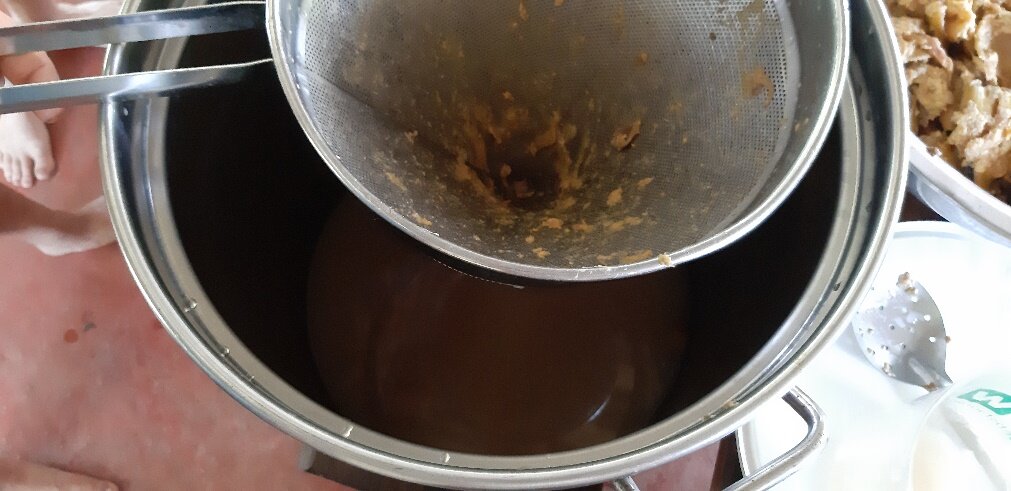
Finished squishing? Good. It’s time for your first taste test. If the vinegar tastes too sweet and not sour enough, it probably needs more time. If this is the case, you can add a little sugar – this is to allow the yeast present to convert more ethanol for our AAB friends to metabolise into more acetic acid. Another option is adding a little vinegar from a previous batch (this is called backslopping in fermentation lingo). If you don’t have a previous batch, you can use a shop-bought vinegar - white vinegar is a good bet as it has a neutral taste that won’t mess with the bananary-ness. Check back every week or so until your vinegar has reached the desired level of acidity. And there you have it! Easy-peasy farm to table banana vinegar using permaculture principles – there is no such thing as waste.
You can now bottle your vinegar and age them. This step is optional and will enhance the flavour profile of the vinegar. We use glass bottles that we recycle from the farm. It is important to use a sealed bottle and fill it as much as possible. If the AAB are exposed to oxygen they could begin to break down your acetic acid into carbon dioxide and water.
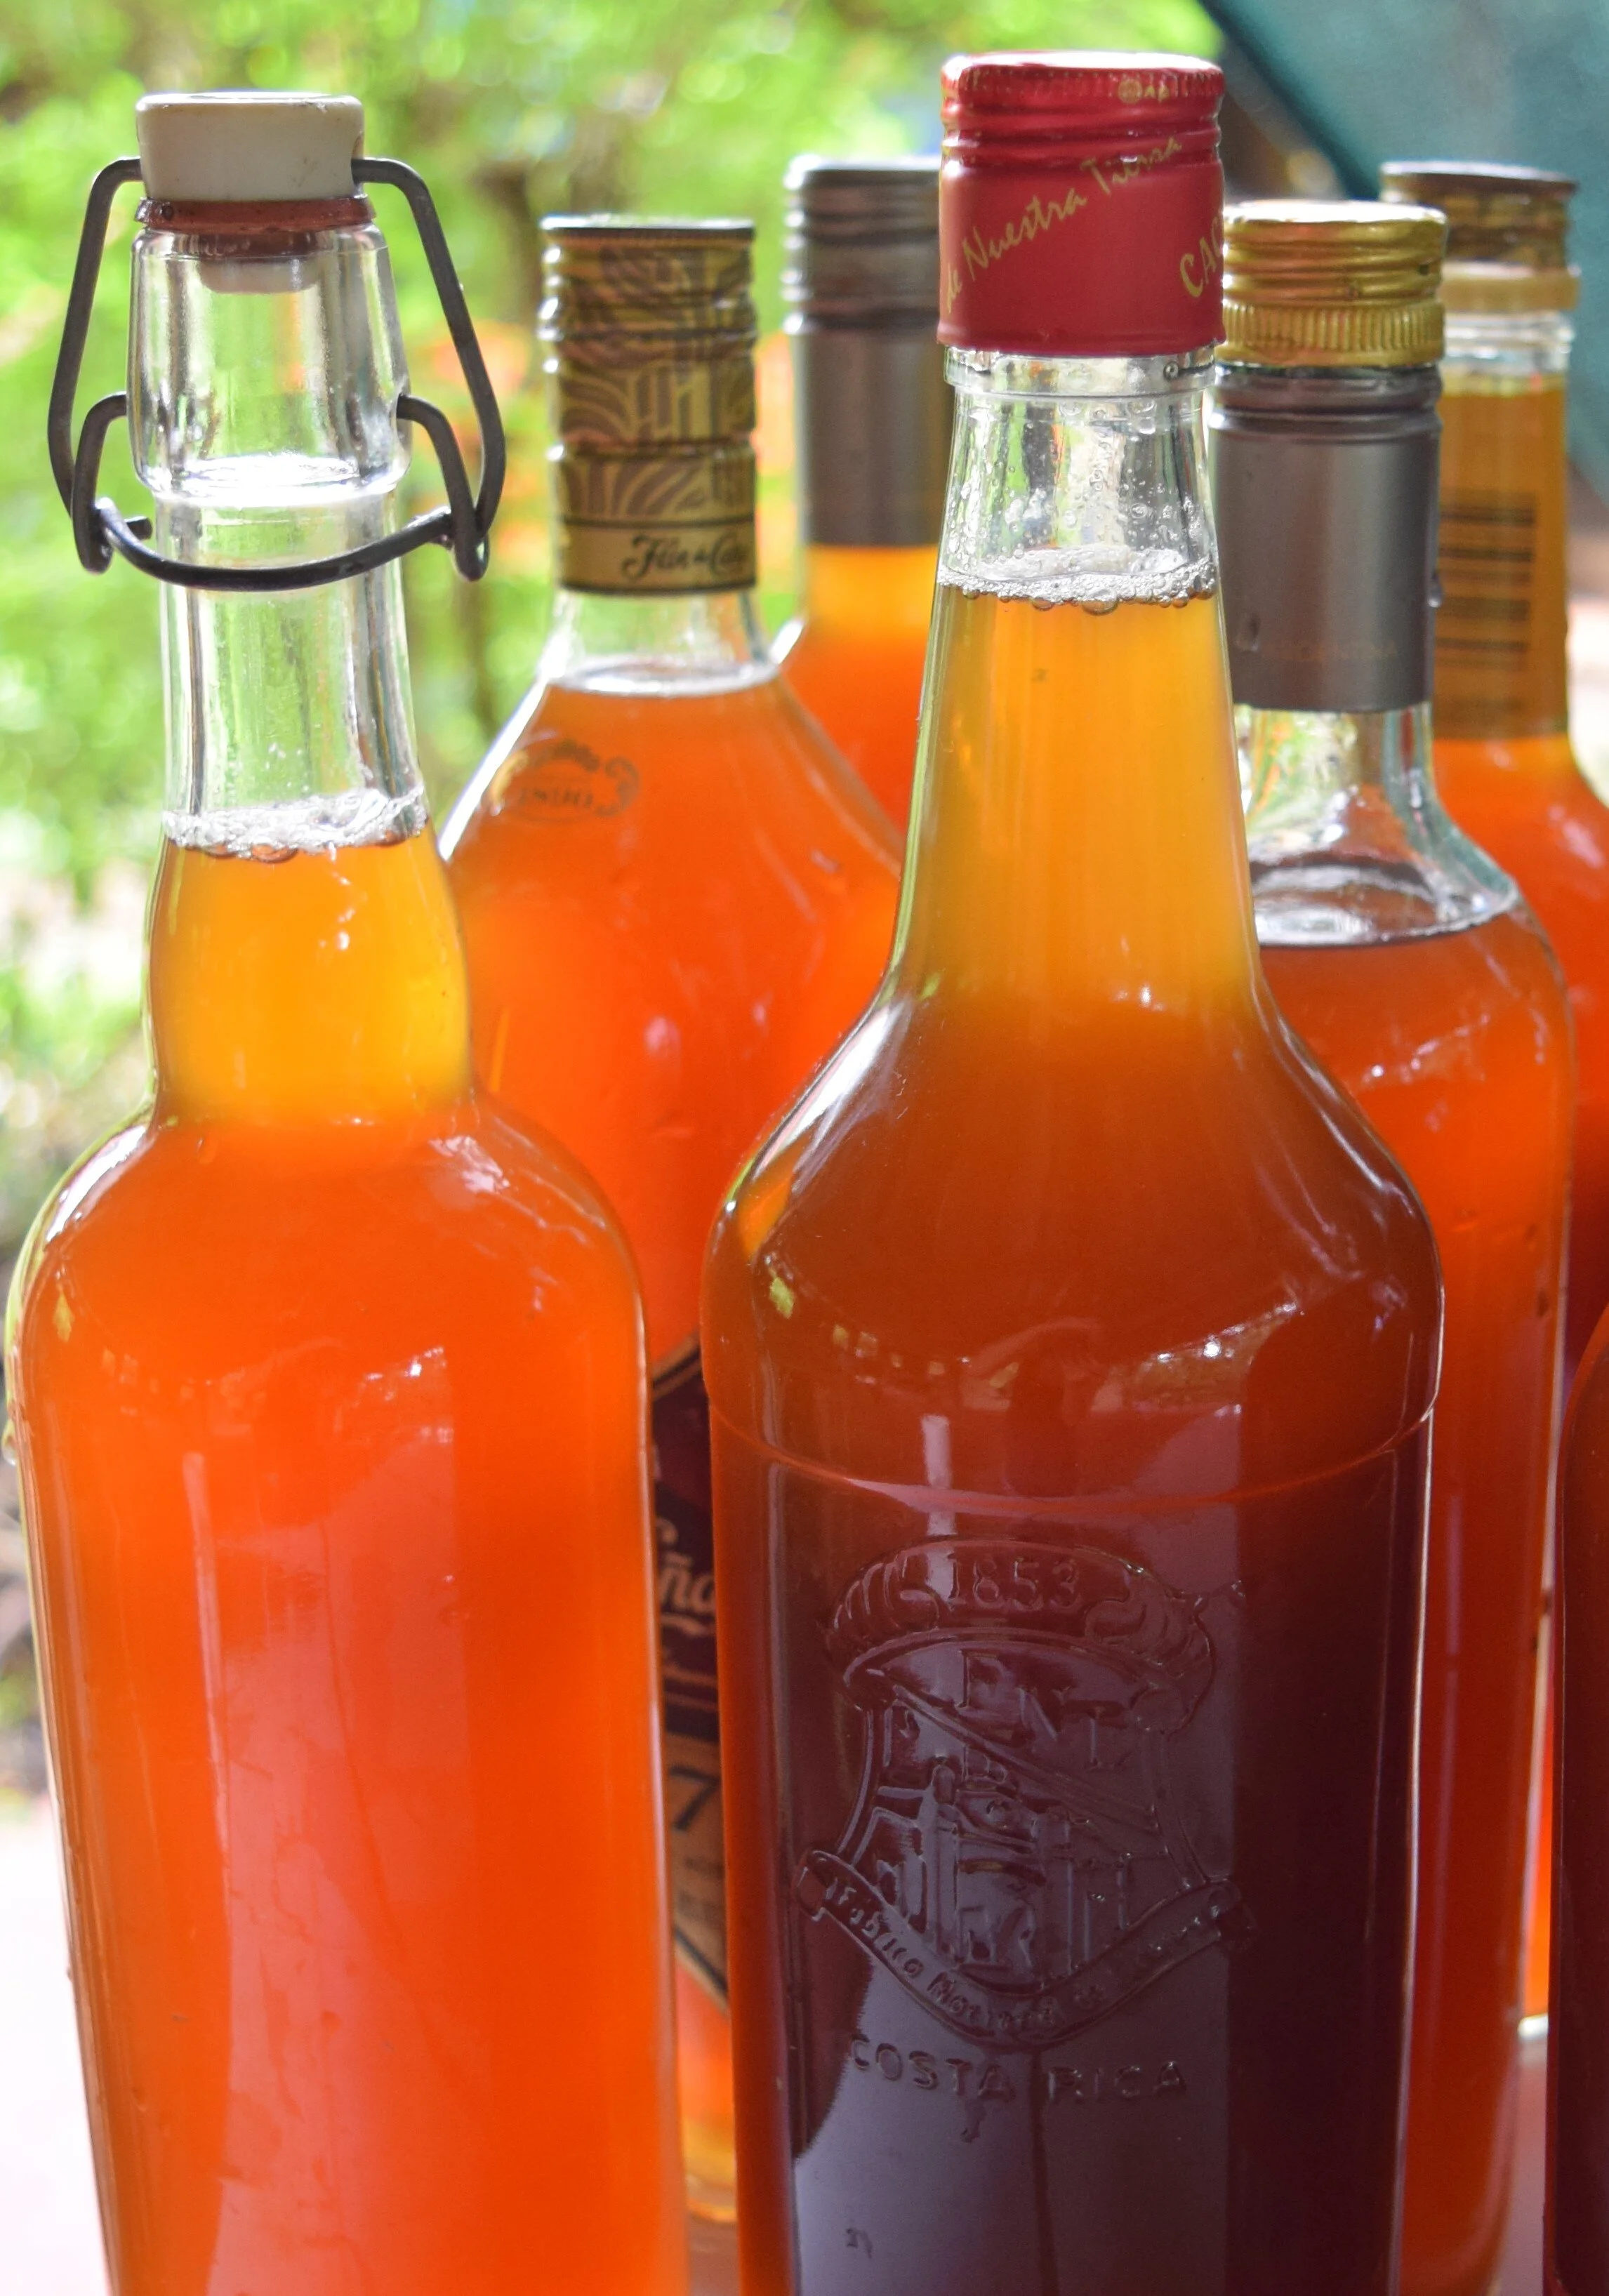
It’s that simple folks! This is a great way to use up all those old bananas.
Enjoy your farm fresh, homemade vinegar! This can be done with a variety of fruits that you have in excess off the farm!
Stay tuned for more farm fresh recipes.

Awakening the student and teacher in us all
I like to think I’m open-minded and my ideas flow freely, but as a professor I can become stuck in the rigid model of preparing lectures, grading and academic writing. The opportunity to have my sense of wonder reawakened and be reminded that there are so many springs of knowledge available in the world in invaluable. Rancho Mastatal reminds me of this truth and has inspired every student I have brought to think bigger, make connections and consider what their role in addressing the climatic challenges we face.
By Mary Little, School for Field Studies
I like to think I’m open-minded and my ideas flow freely, but as a professor I can become stuck in the rigid model of preparing lectures, grading and academic writing. The opportunity to have my sense of wonder reawakened and be reminded that there are so many springs of knowledge available in the world in invaluable. Rancho Mastatal reminds me of this truth and has inspired every student I have brought to think bigger, make connections and consider what their role in addressing the climatic challenges we face.
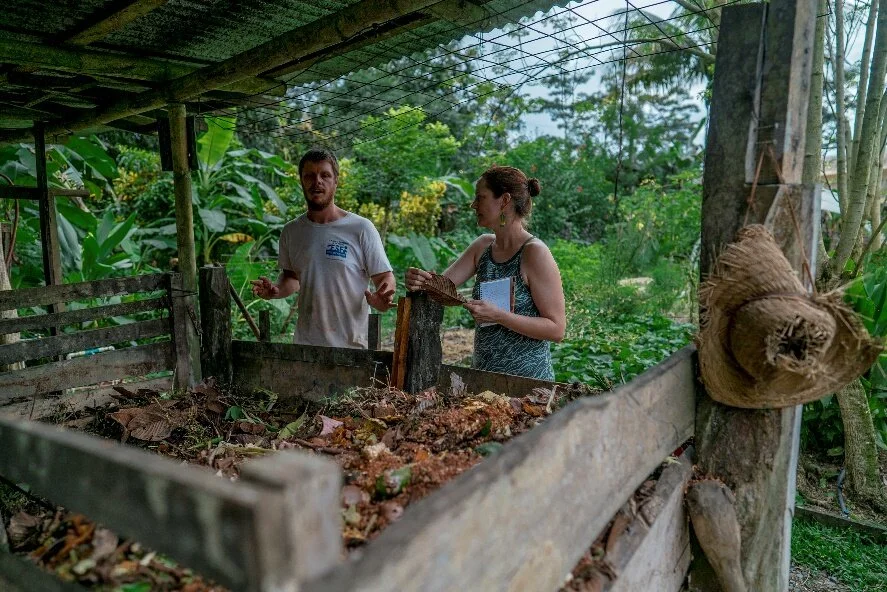
Nic Explaining the kitchen compost system
I am always looking for places that exemplify the principles of ecological justice we cover in my Environmental Ethics courses. Upon my first scouting trip to Rancho Mastatal I was introduced to a holistic education experience that I was eager to share with my students. It has inspired us to carry out research on the impacts of ecotourism on the local population and environment that can be used to ensure sustainable development. This community is a clear example of the possibilities and challenges of harnessing the abundance of local materials to feed, house and entertain themselves by collaborating with surrounding ecosystems.
This balance extends beyond ecological principles to Rancho Mastatal’s place in the community. Over nearly 20 years they have learned to listen and become a positive player that works with the needs of the committee to provide work, classes and support projects that are deemed meaningful by residents. Robin Nunes (co-owner and teacher) shared that the objective of Rancho Mastatal isn’t to be self-sustaining, it is to be community sustained.
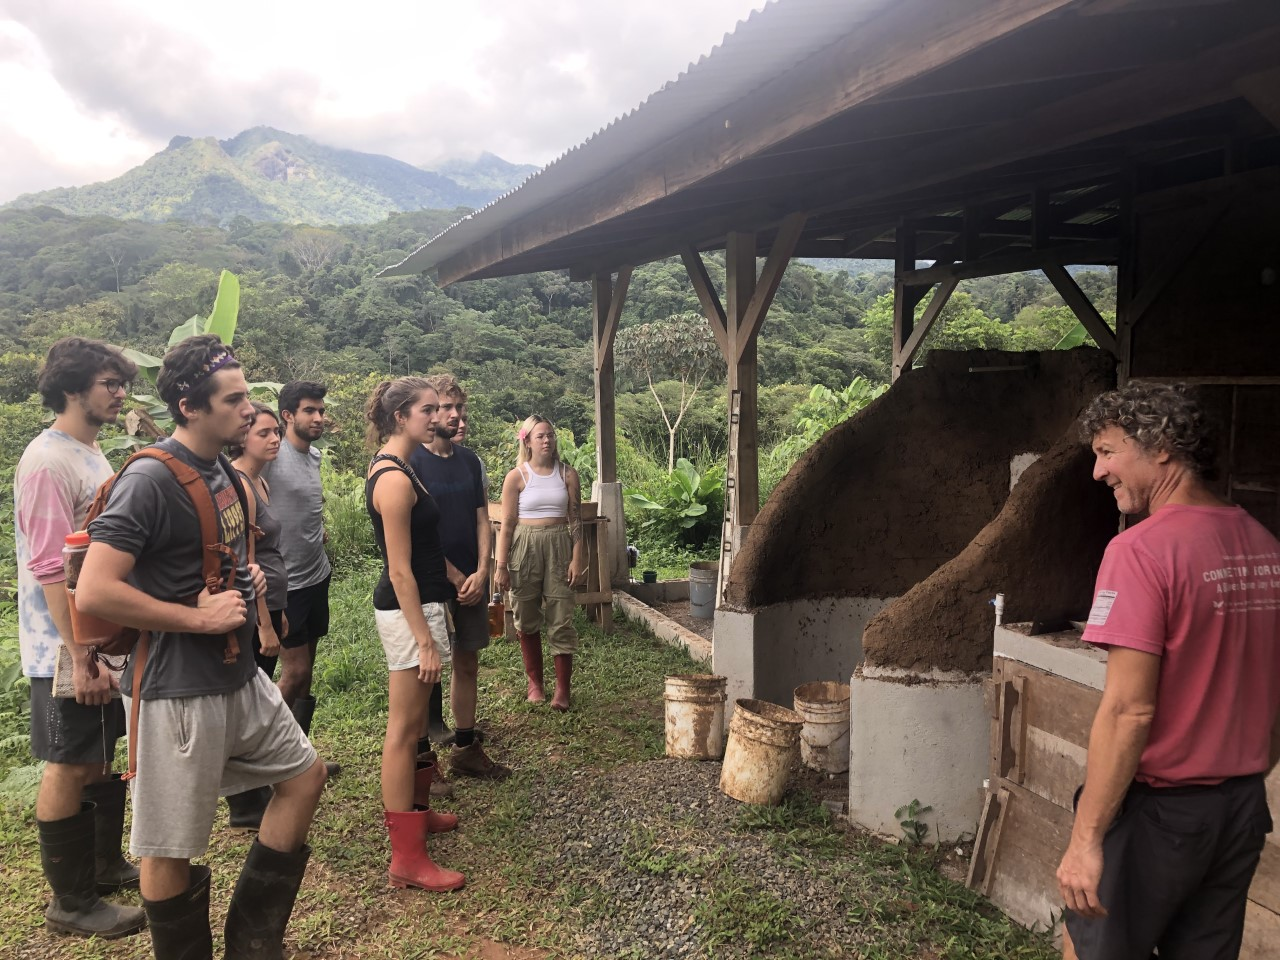
Tim showing the SFS students around on a tour.
This attitude has created a foundation for the community to take up ecotourism as a way of transitioning from conventional agriculture to permaculture and sustainable economic development. Once tourists began visiting the Rancho, one family revived their cacao farm, started making incredible chocolate bars and giving tours at La Iguana Chocolate farm. Another family created Siempre Verde Ecolodge and offers nature tours in the adjacent La Cangreja National Park and Spanish classes at their lodge. A local leader at the nearby Zapaton indigenous community offers presentations on medicinal plants and practices like basket weaving. All are local teachers with unique experiences and insights.
There is a powerful sense at Rancho Mastatal that community members are there to learn from one another. Tim and Robin begin each visit with a tour to demonstrate what they’ve learned and implemented at the Rancho, inviting the individual to think about what they expect to learn on their visit with possibilities as broad as composting and food preservation to natural building. From the first meal, apprentices begin to share their passion for the things they’ve learned and are willing to pass it on, either through conversation or a brief workshop. My students have taken fermentation and food preparation classes, gaining skills they can implement once they return home. There are also the other guests of all ages and walks of life that contribute their experiences and skills to the mix. I’ve shared insights with dancers, photographers and arborists, to name a few, at the massive communal dining table that seems to be built for just this purpose.

an SFS student taking advantage of the huge library
I appreciate that Rancho Mastatal organically fosters knowledge sharing. It reinforces that we are all simultaneously teachers and students and how to embrace both roles. Each time I visit, I’m reminded how much more there is to grasp and apply to make positive change. I return because it is a pleasure to learn from such diversity in nature and humanity in this dynamic setting.
(I’ll be writing about some of my research on waste issue the impacts of tourism in coming blogs.)
Mary Little is a Professor of Environmental Ethics at the School for Field Studies located in Atenas, Costa Rica. Her primary areas of interest are eco/agritourism, sustainable food systems and environmental justice. She can be contacted at mlittle@fieldstudies.org.

5 years on: an apprentice story.
It’s approaching five years since I started my apprenticeship at Rancho Mastatal. Looking back at the last five years lot of life has been lived, with many joys, personal development breakthroughs, and vulnerabilities, that at times felt so heavy, or were unbearably light.
By Anthony Wijeyeratne (Shea), Apprentice 2015
It’s approaching five years since I started my apprenticeship at Rancho Mastatal. Looking back at the last five years lot of life has been lived, with many joys, personal development breakthroughs, and vulnerabilities, that at times felt so heavy, or were unbearably light. However my time in Mastatal was a game changer, I came from an office environment to a ranch in the jungle, which eventually led me to find my passion for food that I turned into a farming career. I hope this is just the beginning of an ever-expanding life involved with food.

Being disgruntled and immersed in office culture, I felt my life was stagnant, and I needed a change. An opportunity presented itself, when I got an offer to be an apprentice at Rancho Mastatal. I accepted without hesitation and embarked on a year-long journey to learn about sustainable living.
My time at the ranch I met many amazing, and talented people, learned a set of skills that applies to a lot of what I am doing now, and got an amazing hands on education in cooking, fermenting, natural building and various system designs. However the biggest takeaway was from silencing myself, and turning into a listener, and observer. The Ranch gave me an opportunity to learn not just from great instructors, but also from my self, and about myself. It thought me how to be bored and turn that boredom to an enjoyable solitude of productivity, and critical thinking, which changed and expanded my perspective on everyday happenings in my day-to-day life. I was reading more books than I had ever read, which made me appreciate learning in silence so much more, and as well, I explored my creativity in the world of food, and writing.
I’m sure there are many positive testimonials about the ranch, but this is important, because it shaped me in getting to where I am now. Currently I am farmer for the YMCA, growing fruits, veggies and flowers for a 70 plus member CSA on a small-scale 3.5 acre farm. I have also decided to put myself in a vulnerable position to start my own business, and lease a piece of land to grow my own specialty veggies for restaurants.
Being vulnerable willingly can be difficult, but it can also be rewarding, and I learned a lot of that at the ranch. Pushing through jobs I wasn’t keen on or interested in, having difficult conversations with fellow apprentices because communal living can be straining, and coming across bittersweet realizations on the many realities of how being sustainable is difficult, and sometimes not the best or obvious option. My romancing, created a vulnerability I didn’t see coming, I was in a strange paradox. On one hand I was ideal and ready to learn and demonstrate the virtue of sustainability, on the other hand I was naïve, and ignorant to the realities of it, and that sometimes being sustainable won’t be the best option. This was a necessary realization, and the good folks at the ranch demonstrated, that they are not perfect or do have the best systems, but they try, and sometimes you have to compromise, and maybe later on down the road there will be an opportunity to remove yourself of that compromise.
Allowing my self to be vulnerable and crawling out of the vulnerabilities was at times how I felt my world needed to be. This can be both good, and bad. Good because I was determined to see my situations for what they were and learn, and improve from it, and finish what I started. It also helped me to be more resilient and resourceful. Bad because I was willingly accepting these vulnerable circumstances without critically thinking if there was a better option, and almost putting myself in a repetitive mental cycle. It almost brought me to a place where I gave myself a low ceiling.

My first farm experience after my year at the ranch was an internship at Foxglove Farm in British Columbia, where I earned a meager stipend of $500/month with room and board. This I romanticized, and it was easy to. Foxglove was a beautifully manicured farm with intelligent systems design that really showed me what the potential of and efficient and effective small-scale farm is capable of. But Foxglove also kicked my ass. I always felt I got drafted as a hot prospect and turned out to be a dud. I had no idea what I got myself into, and it was so overwhelming and much more physically demanding than I anticipated, I really wasn’t sure if I fit in this world. The only thing I knew is that I had to finish the season, keep trying and most of all learn. Although my time at foxglove came to premature end in September, I was determined to finish the season off, and found employment on another farm. In a strange way it was a weird accomplishment.
I came back to my home province of Ontario, determined to have a presence in the world of food. In the offseason, I worked at a restaurant and applied for various farm hand positions. Somehow I got offered a position growing vegetables for an order of Canada Chef. I don’t know how? I took the job because it was glamorous and exciting, but I made myself immensely vulnerable yet again. The farm barely had any infrastructure for growing crops. No nursery, no irrigation, no washing station, and old farm equipment that were not effective for the soil I was working on. Also, what am I doing growing veggies for one of Canada’s best chef’s? This could ruin me if I mess up. To add to that we had the wettest spring on record, and fell further behind on planting. On top of this, I discovered the strain of lightness, Growing veggies and putting in the labor, no problem. Being patient and allowing things to unfold however was unbearable, and to make it worse the chef and his staff were amazing individuals who made an amazing effort to integrate me, which created some guilt, and pressure to not let down these wonderful people. Somehow, it worked out. It wasn’t ideal, but I did it on my own, and was able to produce quality food, for a nice 10 week run.
The following season I moved closer to my family and got my job with the YMCA. I decided on the YMCA, because of my two past experiences. One was a model farm, and the other was one starting from scratch. The YMCA on the other hand is a cross between the two previous. It’s a young developing farm with descent infrastructure and equipment, which allows me autonomy to grow, experiment, and develop with the farm. There is an expectation of growth every year, in terms of clients, food, and revenue. These are puzzles that motivate me to not settle and create plans to try and improve if there is a sensible way to do so. In my short time at the YMCA I have helped spearhead ideas to grow more food, on less land, to manage better, and yield less waste, and to put a sustainable stamp to protect and nourish the land, which grows the food.
Through all the changes and the difficulties since my departure from Mastatal, the internal skills I acquired from the ranch, never left me. I have a greater thirst for continuous learning, and my resilience to persevere and finish what I started is at its highest motivation ever. This wouldn’t have been possible if not for my time at the ranch, and the relationships that I forged with the ranch and its directors, especially former ranch director Scott Gallant, who has been a great mentor and friend since I left the ranch and returned to Canada.
I feel at this point, sky is the limit for me, and being vulnerable gives me the opportunity for great discovery and virtue. Oddly enough this is how I feel about food, and it makes me romance and idealize about breeding new varieties of veggies, growing mushrooms, making art by way of grafting fruit trees, fermenting everything, and cooking just for the sake of, “I wonder what that would taste like”. It’s the same MO, but I’m better prepared to listen to the outcomes of the actions I take, and solve the puzzles that come my way.

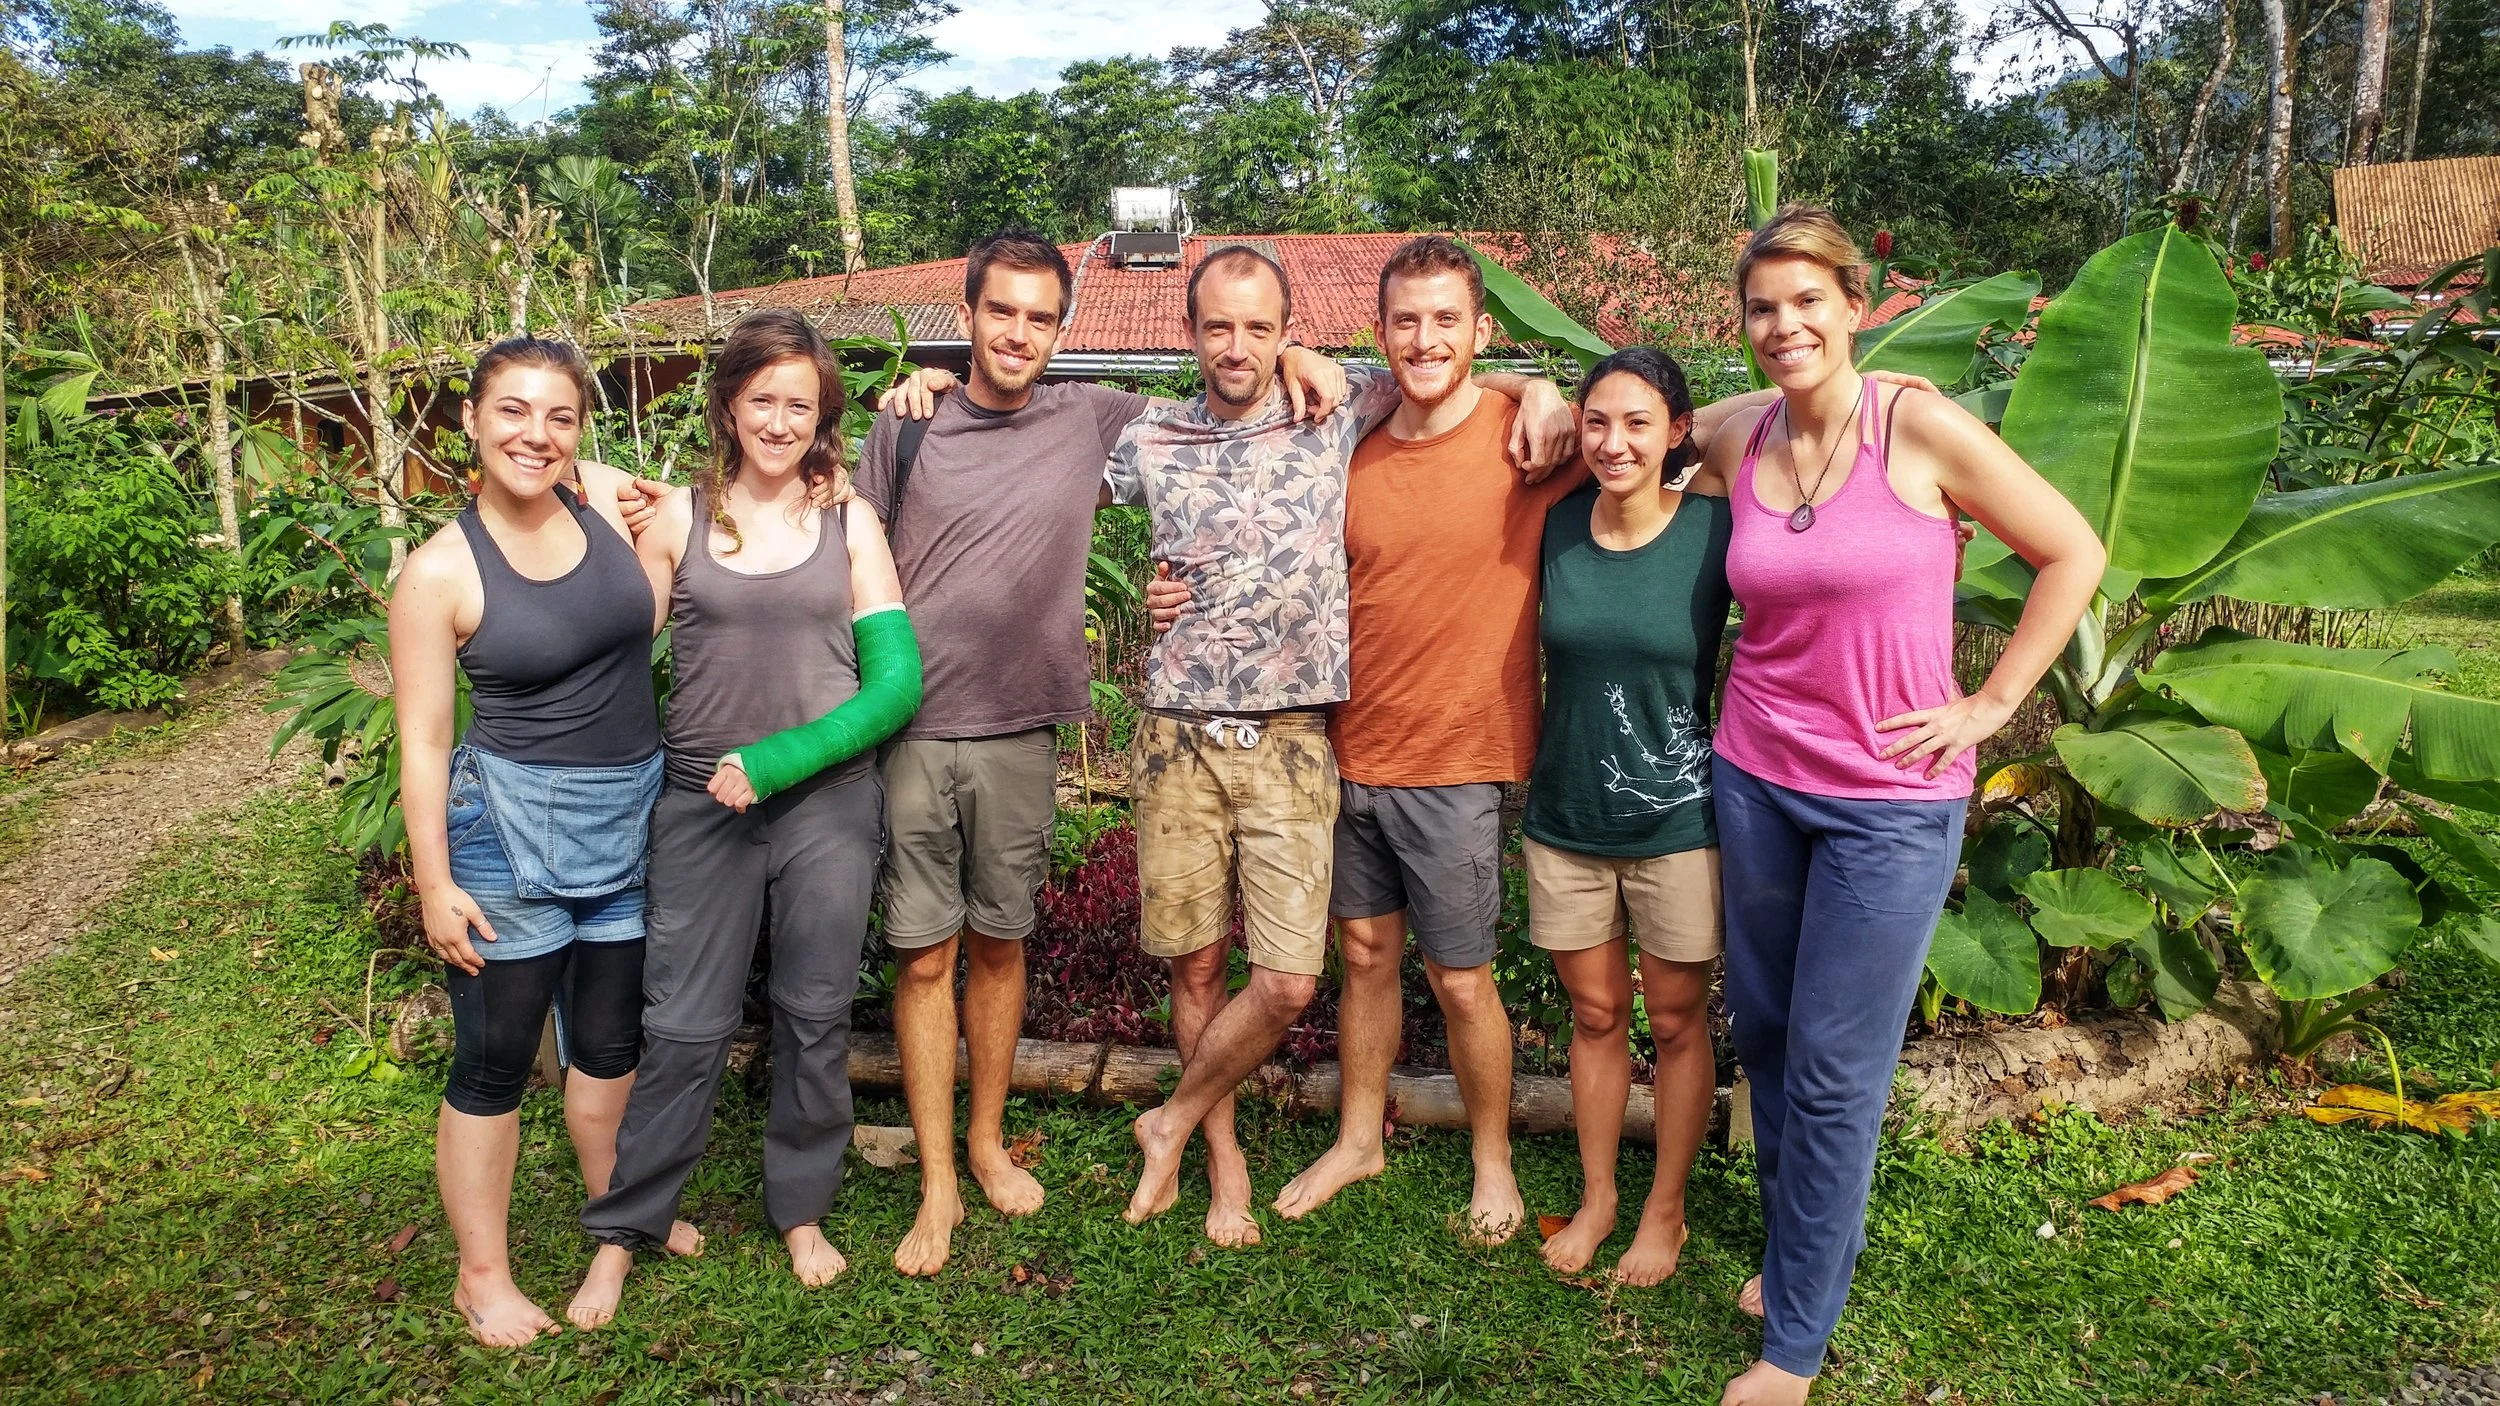
Life after the Ranch (Part 1: Day to Day Life)
The Ranch experience for me was completely life changing. This is the common feedback that is given from anyone that has stayed there, whether it was for a day, or a year. This place gets under your skin and awakens something inside you that makes you think differently.
By Marrissa Taylor
2018 Apprentice
The Ranch experience for me was completely life changing. This is the common feedback that is given from anyone that has stayed there, whether it was for a day, or a year. This place gets under your skin and awakens something inside you that makes you think differently. There is something very special about being given the space to learn, to question and to experiment with new information and skills. For the first 6-8 months we received a lot of training and workshops and in the second part of the apprenticeship we were all encouraged to take on our own projects in areas of interest, as well as continue the regular tasks and projects that we needed to do to contribute to the functioning of the Ranch. This was a great life balance – as you can never get away from the things you need to do to survive – but you can look at the ‘doing’ in a different way. So yes, you need to haul and lift the heavy bags of wet cow dung, then make a daily poop soup out of them to feed the Bio-digester. Most of us at the beginning did not look forward to our rotation on the Bio-D, but once you do it, and it becomes a part of your daily life. Something shifts.. You start to understand the extremely amazing system you are working on. That this task you are doing kicks off a very cool, yet simple, process of fermentation. The results of this both provide fuel you can feed 50 people on, and manure that you can feed your veggie seedlings with. It is at this point you also start to notice the tiny little delicate mushrooms that seem to magically come from nowhere, and how the birds congregate around the piles of manure for the worms underneath. Then finally in yourself, the smells that use to repel you suddenly become the smell of the earth at work, and the peace that surrounds this space is teaming with curious life. You learn to observe and experience the world differently. Something inside of you shifts… this is the Ranch.

One of the signs at the Biodigestor
Life after the Ranch, after this shift in perspective can be jarring for sure depending on where you are going. For me it was heading home to the cold winter of Canada. My newly strong body, my heart full of peace and nostalgia of leaving the Ranch and all my wonderful friends that are as close to family as you can get, now to enter the ‘real world’. This world is fast, full of social media, tv series bingeing conversations, food whose ingredients are barely recognizable and a taste that can only be described as chemical. Although it is balanced off because it is lovely to be reunited with family and friends and the familiar. It is as this point that others start to notice… you also start to notice, you are different now. Something inside you has shifted… You have an understanding of the effort that it takes to bring that food to your plate. How harmful the gobs of packaging is on the environment. You know what real un-chemically treated food tastes like – and even how that taste is further enhanced when you plant it, nurture it and wait expectantly for it to be ready to harvest. You have also spent the time on the ranch relatively disconnected from the web so the incessant surfing does not appeal like it used to. You crave real conversations, face to face, and even miss the gratitude dinner circle as you come to realize it is not common place to say thank you to people (even strangers) genuinely in the day to day. Something inside you has shifted…

The 2018 apprentice team
After the farm, I needed to find a job. It was the dead of winter and going to a farm was not an option. So I looked for casual work in my old career in international development. I ended up getting a 3 month contract in South Africa, so I left the cold. A part of me felt really guilty. I was ‘selling out’ on my farm life just to go back to my old career. Some of my other apprentice group were able to continue working on a farm – they could do it and they were happy for the most part. What was I doing?? So when I was offered a longer contract that also came with a feeling of major guilt. I needed to look at this opportunity differently. What I came to realize as I now sit in my new home in the mountains of Eswatini (Swaziland).. something in me had shifted and this cannot be defined by what I do on my daily, but rather how I do it – whether it be making poop soup or working with vulnerable communities – I have changed. I see and approach my life is differently. It is more whole hearted and with a sense of curiosity I did not have before.
On a practical note, there are permaculture groups EVERYWHERE in the world! So I am building linkages with some of these groups so that I can still continue to learn and connect in this way. I will have my own land one day, but until then I will continue to practice what I have learned when I can, teach what I know when I can.. and be forever grateful for how my experience at the ranch has shifted something in me.
Marissa

Why Permaculture?
What is Permaculture?
Permaculture is the design system for creating sustainable human environments. In a modern society, which is not sustainable could permaculture hold a solution?
by PJ Barton
2019 Apprentice
During our Apprenticeship at Rancho Mastatal we spend a year immersed in a working example of how Permaculture can work on a practical level. We take several workshops throughout the year including the annual Permaculture Design Certification (PDC).
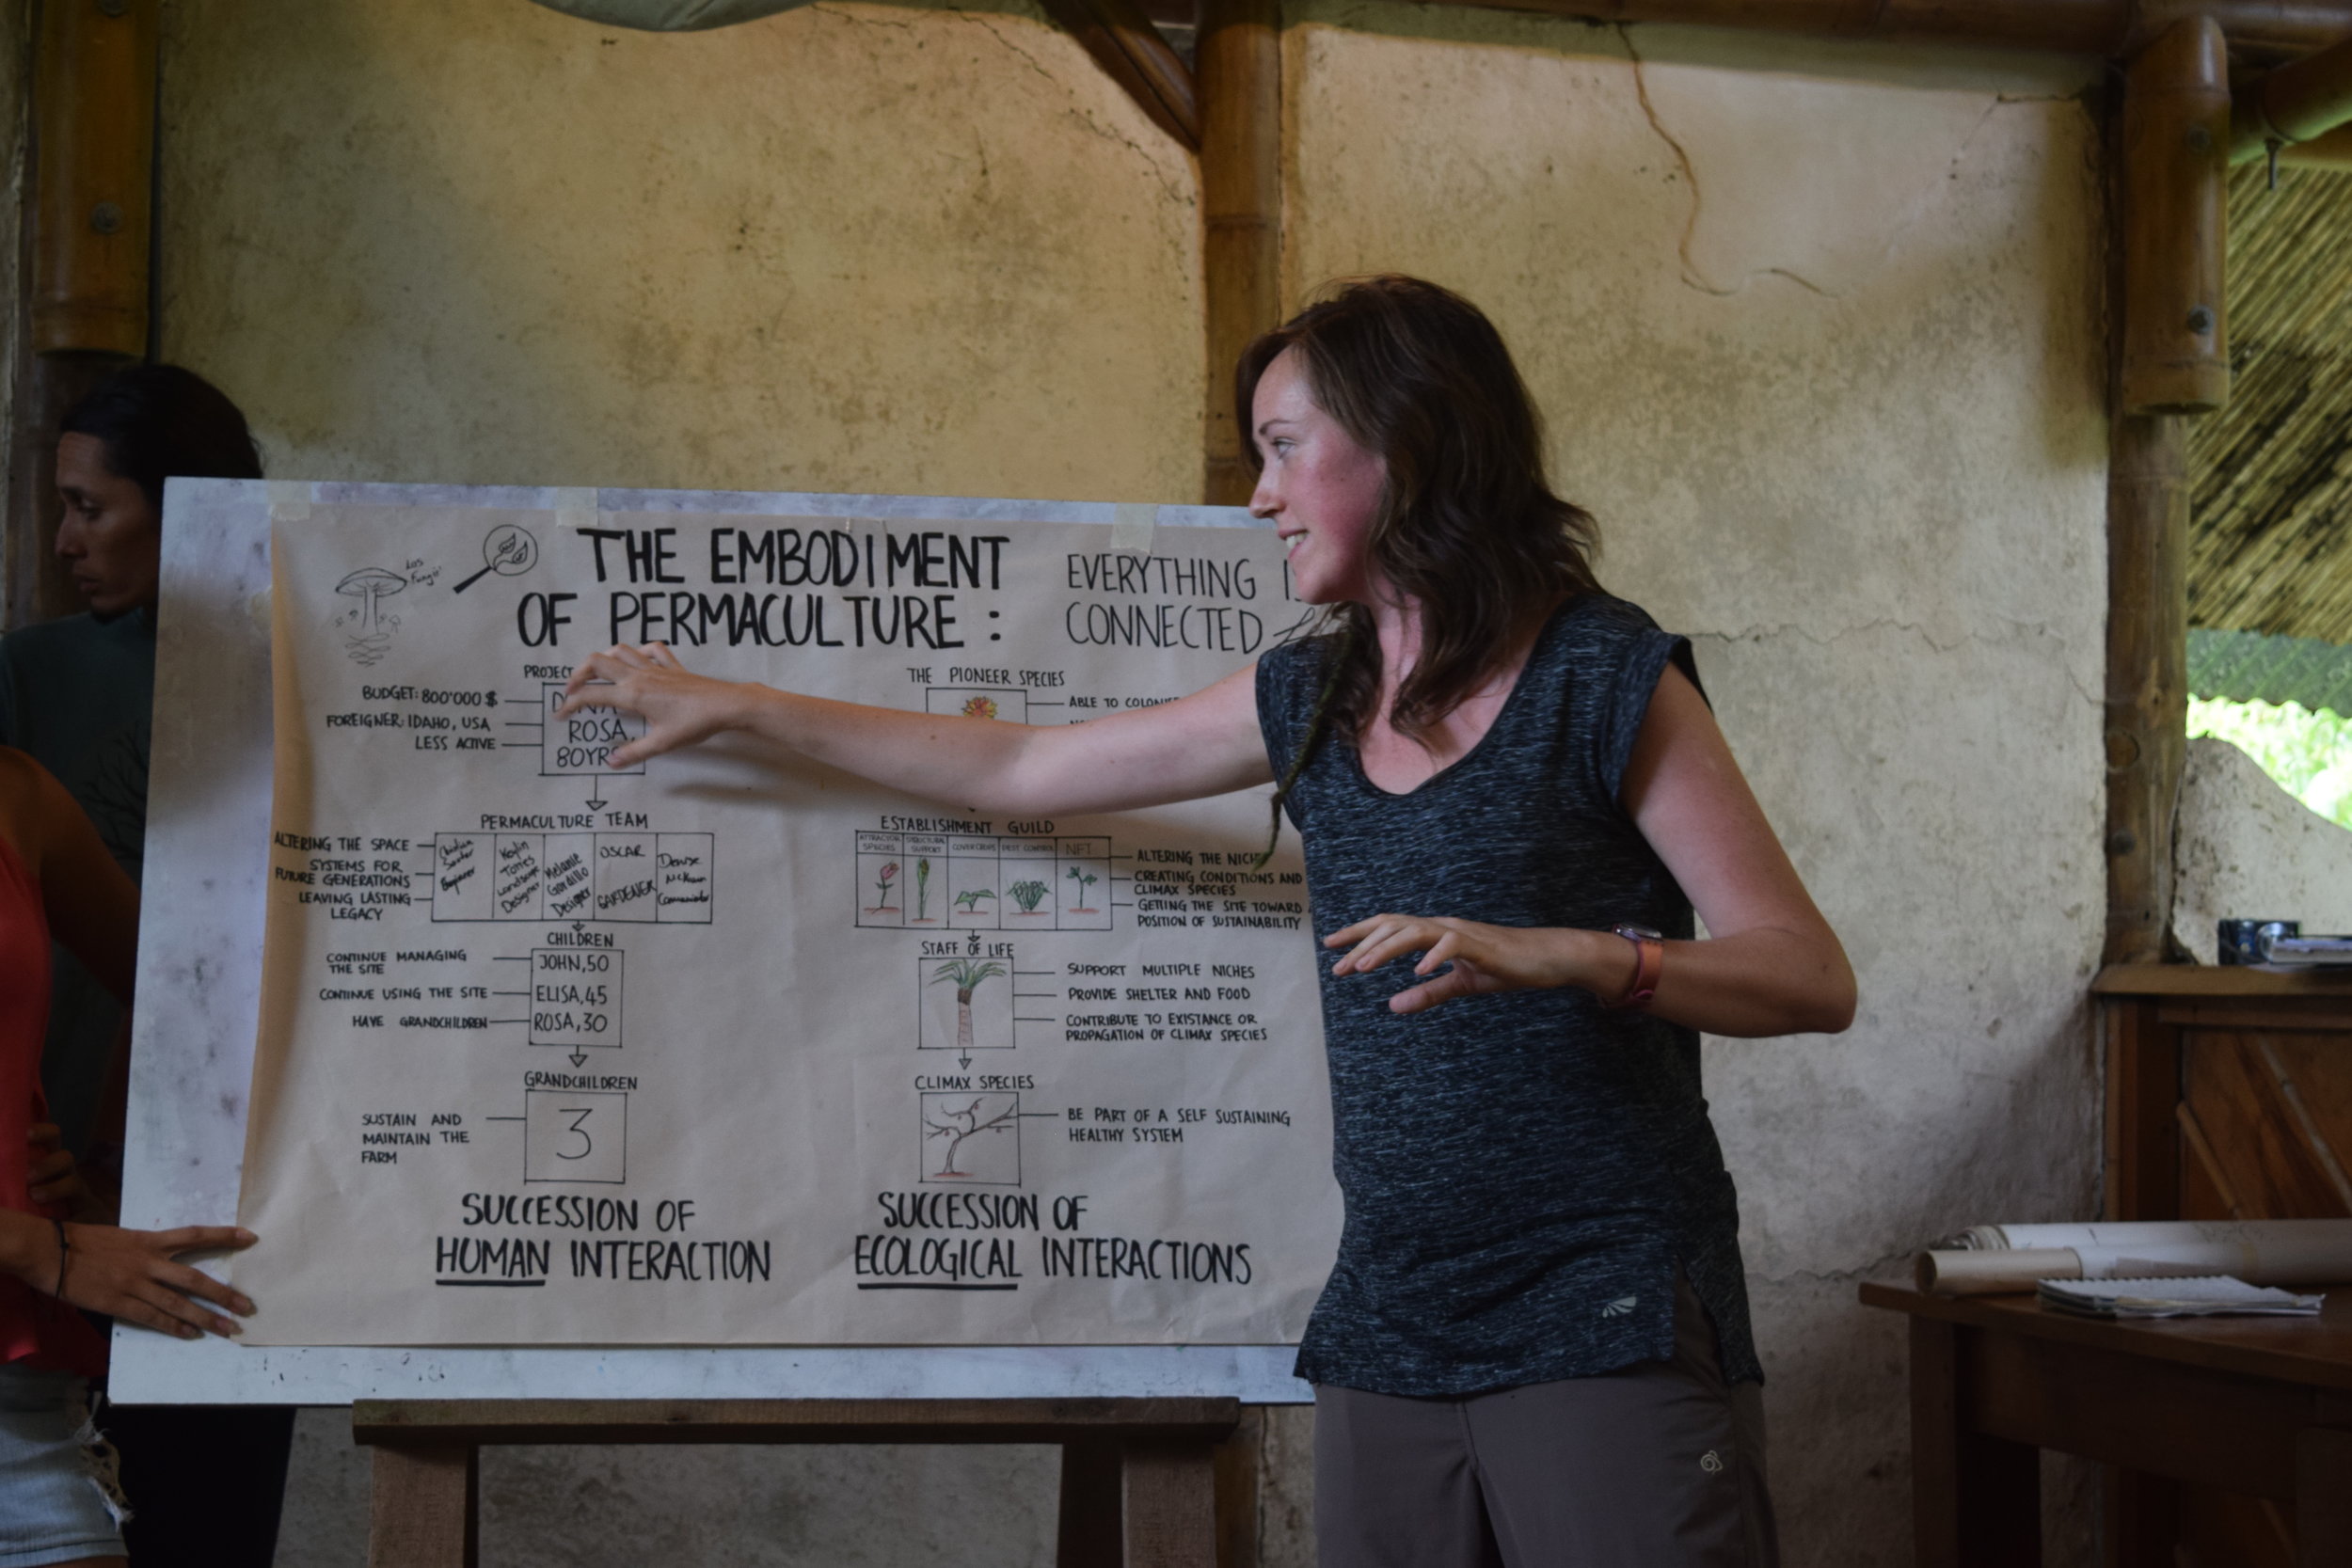
Presentation at the PDC
What is Permaculture?
Permaculture is the design system for creating sustainable human environments. In a modern society, which is not sustainable could permaculture hold a solution?
Permaculture was coined in the 1970s by Bill Mollison and David Holmgren, the word is a contraction of permanent agriculture and permanent culture which are intertwined in our history as a society. By pulling both culture and agriculture into our attention we a focusing on what the relationship is between them, how they function together as a whole. Permaculture looks at meeting the needs of the present in harmony with our environment. Although it is designed as a agricultural practices it also can be applied socially. The broad framework means it can include multiple parts of our society linking things together and how they function as a whole.
The 3 Core Ethics of Permaculture
1. Care of the Earth
Care of all living and non living things. By applying this ethic we can appreciate all organisms on earth. Invisible to the naked eye are all the mico-organisms upon which life is built; everything is alive. It is not obvious at first that a plant is breathing and under its roots there's an incredible network of organisms working together. If we view all things as beings our attitude and relationship will change towards them, developing respect for what we interact with.
2. Care of the People
As a society/ individual we need to meet our basic needs as humans: food, water and shelter. Considering our basic needs while creating systems that can sustain us in the long term. Permaculture uses these basic needs to design systems that can hold solutions for the growing inequality that is gathering pace on a global scale. Modern systems don't focus on care instead they're driven through profit. Many of our social programs designed to care for the less fortunate are being dismantled in an effort to create more profit; looking after one another and care are given little time into our busy society.
3. Contribution of Surplus
This ethic is a way of circulating the wealth back into the system. In a our conditioned society, rather than circulating wealth it is common to hoard it - the idea of spending all of your wealth is a radical idea, when is enough money or wealth enough to have surplus? By reinvesting surplus, it self perpetuates the movement. The system would be regenerative constantly sustaining itself. Like any system if you continually extract resources without replenishing them it will eventually collapse. When the needs of a society are not met from within the system we look to extra energy inputs and ultimately pay the price in increasing energy consumption and its resulting pollution.

The ethics of permaculture give us another way to view the world which is perhaps different from modern, conventional society. Observing and approaching situations guided by these ethics permaculture can be applied to help us steward the earth and guide our activities in a better direction. Our fragmented society often misses the connection that helps it function as a whole seeing only the tip of a large iceberg. Sometimes we make connections but fail as a whole. Moving together, finding patterns that work and what needs to be improved. We are surrounded by nature who we can observe and mimic. She becomes our inspiration helping us establish sustainable systems. Perhaps that is why we should use permaculture.
For more information about Permaculture check out some of the excellent free resources on David Holmgrens website get involved in you local permaculture movement and consider taking a Permaculture Design Certification near you or with us!

The Wonders of Vanilla
Vanilla is the second most expensive spice in the world. Being sold between $600-1200 per kilo, that is more expensive than silver!
What makes it so precious?
by Diana D, 2019 Apprentice
Vanilla is the second most expensive spice in the world. Being sold for between $600-1200 per kilo, that is more expensive than silver!
What makes it so precious?
Vanilla comes from the largest family of flowering plants, the orchids, as well it is the only orchid that produces pods. Every stage of vanilla bean production needs to be completed by hand, making it one of the world's most labor intensive crops.
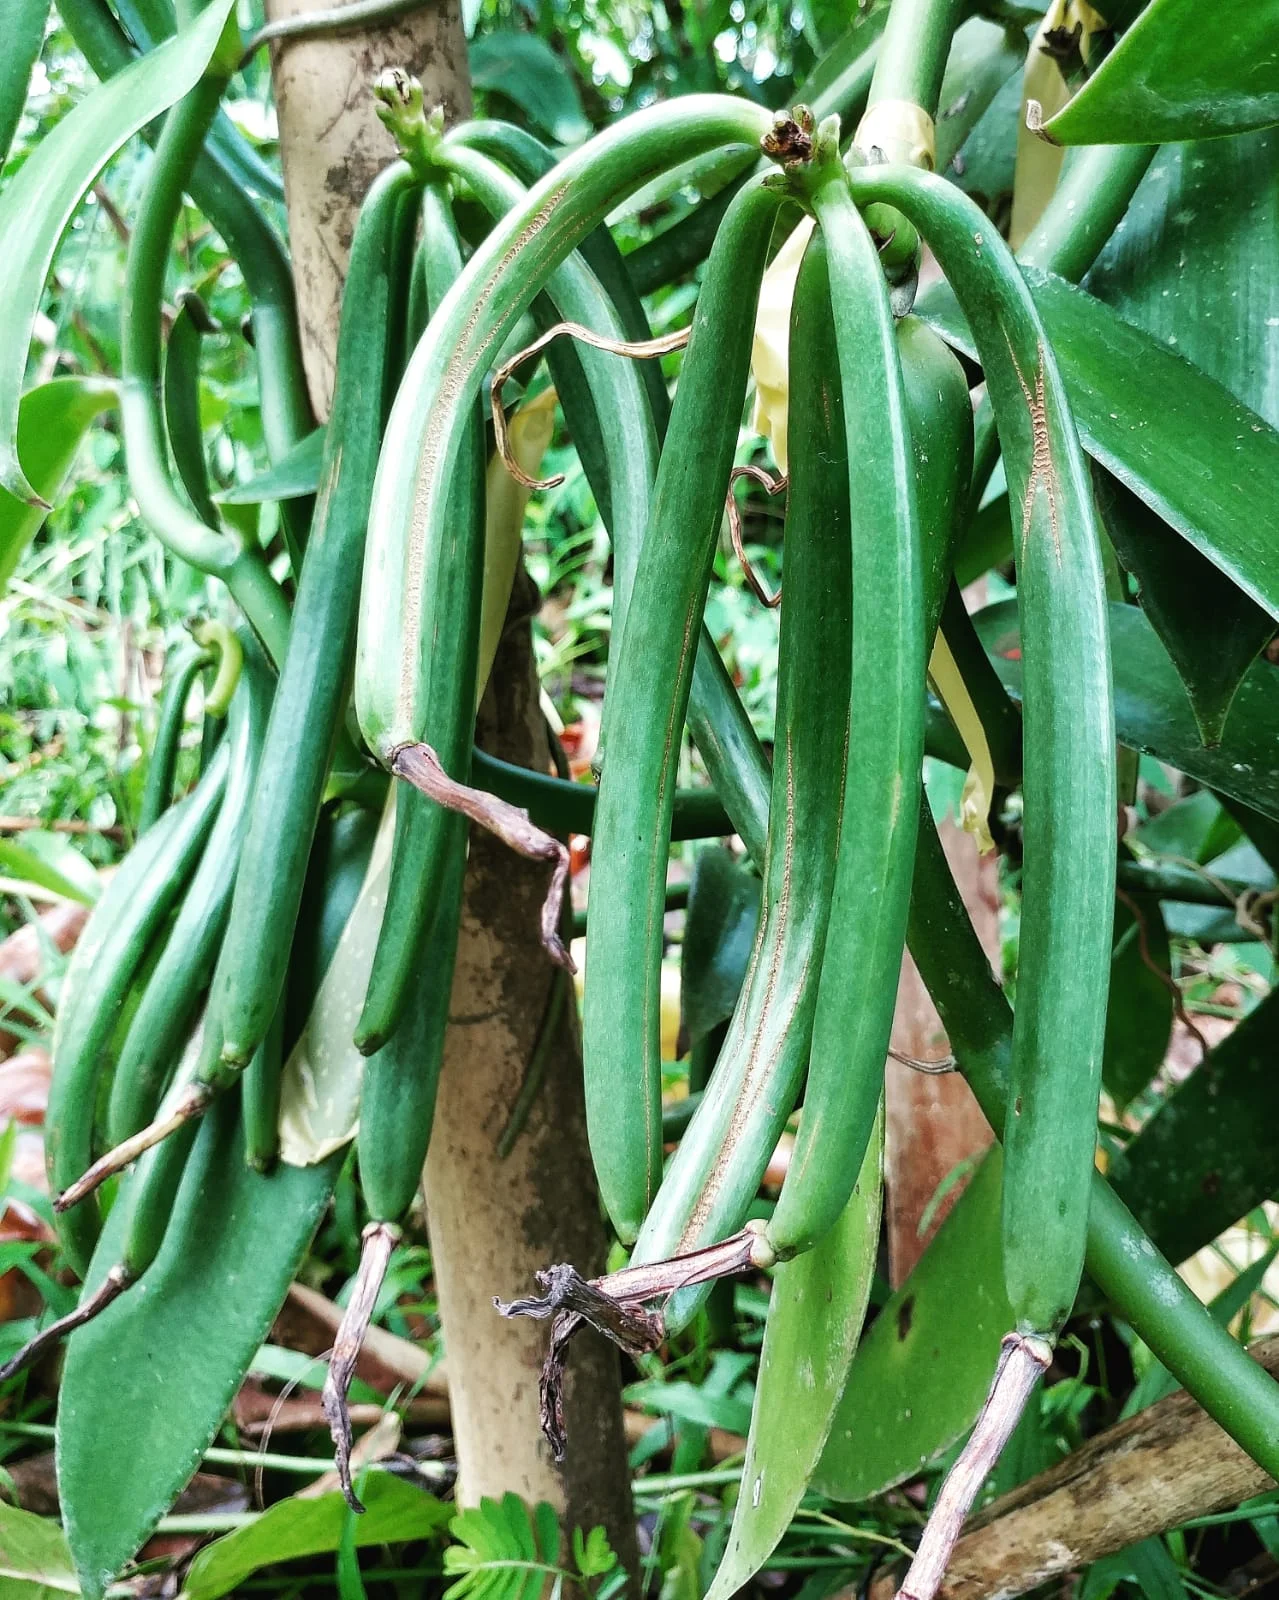
This orchid originated in Mexico, it's cultivation is being practiced from Mexico to India . Being producers and exporters to the world market these countries each produce up to 200 tons of vanilla annually. Madagascar is by far the largest producer of vanilla, accounting for over 80% of global production. Although the value of vanilla is very high this has had some unfortunate repercussions for vanilla farmers as crime and theft of their valuable product has increased. This has led to instability in the lives of the farmers. Natural disasters have also affected them deeply, wiping out entire crop yields for the year. With such a delicate and refined production system It could take up to 7 years to regenerate the vanilla and return to the same levels of production. As with any single crop production system, it is a high risk strategy to rely on one crop for all of your income. There is a growing awareness of these issue for vanilla farmers and some new more sustainable and resilient techniques are being adapted.

To learn more interesting facts about vanilla, its history, creating a sustainable way to grow vanilla and support the farmers read this great article. This article was written by the first company to have an integrated, sustainable, vanilla supply that began transforming the Malagasy vanilla business in 2006.
My interest in vanilla arose when I started to take care of it and pollinate it as part of my morning experiential learning tasks at Rancho Mastatal. The production of vanilla is a fascinating delicate and attentive process that if done successfully is extremely rewarding. I am able to experience the growth of the vanilla plant, the pollination of it's flowers , and after many stages of fermentation, curing and extraction we are able to enjoy the amazing product of this magnificent plant.
During my year long apprenticeship here in Costa Rica, I am able to immerse myself into the plant kingdom as well as learn the essential skills for self sufficient homesteading. I also get to apply and practice other skills such as carpentry and natural building which will allow me to lead a more sustainable lifestyle .
Vanilla is only one of the many fascinating things I have learned about here. I warmly invite you to come visit us in Rancho Mastatal in the rainforest of Costa Rica. There is so much to learn about how we can improve our lives within our communities and in harmony with nature. How we can all provide our own food and support our community with their projects.
What I have learnt from the vanilla plant is that I would love to grow it on my own land, it's prices are rising so why don't we grow it for ourselves? Let's take little steps to self sufficiency by growing our own food as much as possible and by supporting the companies that treat the farmers well.

Leon (2017 Apprentice) drying vanilla
I hope we keep growing vanilla and benefit from the heavenly smelling pods in our delicious deserts.
On that note I'm off to prepare a vanilla cocoa wine!
P.S This article contains the basic hooch recipe, check it out if you want to learn how to make delicious homemade hooch :)
Blessings,
Diana D

Tropical Brewing
The craft brewing movement has migrated to Central America and the Caribbean. A growing number of small scale artisanal producers are building on the American Craft Brewing tradition by incorporating local spices and fruits into traditionally brewed ales. To distinguish themselves, from their temperate counterparts, they are adding a tropical flare and creating innovative flavor combinations
by Connor Harron
The craft brewing movement has migrated to Central America and the Caribbean. A growing number of small scale artisanal producers are building on the American Craft Brewing tradition by incorporating local spices and fruits into traditionally brewed ales. To distinguish themselves, from their temperate counterparts, they are adding a tropical flare and creating innovative flavor combinations. For example Domingo7’s Maracuyá Pale Ale (that’s Spanish for Passionfruit) in Costa Rica, Ocean Lab’s B.O.B. - Blood Orange Blonde in Puerto Rico and Lu Bru’s Maiz Azul (Blue Corn) Ale in Mexico all demonstrate how local producers are beginning to incorporate regional ingredients into local craft beer movements. This is surely a positive development and one that leads us to consider other ways we might be able to further highlight local and seasonal ingredients into craft beers.

These efforts will help to make brewing both more sustainable and position craft brewing as a vehicle for more thoroughly exploring terroir, which describes the potential for fermentation to be used as a method of expressing the unique environmental conditions of the places in which our ferments are produced. By using exclusively local ingredients as well as wild captured yeasts, we have the power to capture the unique flavors of seasons and regional differences that allow for near infinite variation and creativity to explore new combinations of flavors that are rooted in cultural tradition while simultaneously pushing the frontier of artesian brewing. As much as I love finding good craft beer in places like Mexico and Costa Rica, I constantly find myself asking if it really makes sense to be brewing beer with imported German Barley and Hops from the Pacific Northwest United States when there are such a plethora of sugar sources and bittering herbs available locally in nearly every corner of the globe. Could we instead develop beers using a hybridized process and create products that are truly local while still maintaining the key characteristics that make beer, beer?
Speaking of, have you ever asked yourself what it is that really makes a beer? It turns out, the answer really depends on who you ask and where you live. In the most general terms, beers are fermented from carbohydrate rich starches (typically grains such as barley) that first need to be enzymatically converted into simple sugars and extracted into a liquid malt before the substrate can be fermented to produce appreciable levels of alcohol. Wines and Ciders on the other hand, are fermented from fruits and simple sugars that can be fermented into alcohol with limited or no processing. In the case of beers, bittering herbs such as hops are commonly added to provide antimicrobial properties, improve shelf stability and add complex flavors to ferments. In the United States, it turns out that hops are not required in the production of beer and that there are many malt substitutes that are allowed in the production of beer, including “rice, grain of any kind, bran, glucose, sugar, and molasses (TTB Ruling, 2008).” This definition is actually quite liberating, and creates the opportunity to experiment with non-traditional malts and bittering herbs in ways that will promote creativity and improve the sustainability of the craft brewing market globally. This flexibility in malt production will be especially important given that recent climate models suggest that the regional distribution of barley production will become increasing restricted over the next 20 years (Nature, 2018).

In Costa Rica, we have been experimenting and finding repeated success using a wide range of local ingredients including banana, corn, rice, cacao beans, coffee and local cane sugar for producing malts. Corn and bananas, for example, both have long cultural traditions of being used in the creation of local beers. In Eastern Africa, Bananas have long been used to create malt for the production of banana beer (Urwaga or Mubisi as it is locally known). Bananas make for an interesting malt base because they fall into a relatively unique category of fruits that when ripe are rich in both simple sugars and complex carbohydrates that can be easily fermented into a strongly alcoholic brew while maintaining a mouthfeel that is remarkably similar to beer brewed from barley. When the ripe bananas are boiled for several hours, the sugars begin to caramelize, transforming the flavor of the malt into a sweet, neutral flavored base that remarkably, tastes very little of banana, making it an ideal substrate for mixing with bitter herbs or other local products such as coffee and chocolate that can be fermented into either an Ale or Stout like brew.

Conversely, in many parts of South America, but perhaps most notably in Peru, Maize has been used for centuries to produce a corn beer called Chicha. Unlike barley, which when sprouted produces a large concentration of Amylase Enzymes (the key types of enzymes needed to convert complex carbohydrates into fermentable sugars), to make a corn beer, these enzymes need to come from another source. The indigenous peoples of South America developed an ingenious solution to this challenge when they discovered that chewing the cooked corn would transform the starchy, carbohydrate rich grain into a sweet masa that could then be re-boiled in water and strained to create a fermentable Wort made purely from Maize. Although many foreigners cringe when they first learn about the process, for the Inca’s, it was a powerful community building practice that would bring people together to sit around the fire, alternating between sharing stories and laughter while chewing the cooked corn and then depositing all of the masa into a large pot. Although they almost assuredly could not have fully comprehended the transformations that were taking place, their solution was so ingenious because human saliva is packed full of the enzymes needed to break down the carbohydrates in corn into fermentable sugars. I experimented with the traditional process a couple years ago, and I have to admit it was a powerful community building process that for me, took the idea of collective fermentation to a whole other level. Talk about terroir!
The problem with the traditional process is that it is incredibly labor intensive. If you are lucky, like me, you might be able to convince your friends to help you chew a few pounds of corn once or twice for the novelty of the experience, but you are likely to be hard pressed to find a consistent source of labor to chew through the many pounds of corn you will need to produce even a few gallons of Peruvian style Chicha. Fortunately, today we have access to many sources of amylase besides our saliva. As it turns out, ripe bananas (and in particular, ripe banana peels), contain a very high concentration of the same amylase enzymes needed to convert the starches in Maize into fermentable sugars. If you think about it, this actually makes a lot of sense. Unripened green bananas and plantains are a very starchy staple food crop that is used culinarily in a similar fashion to potatoes. As the skin yellows and the banana ripens however, the banana naturally transforms those carbohydrates into simple sugars that make dessert bananas so pleasant to eat directly out of hand.
Due to the high concentration of amylase enzymes present in ripe banana peels, they can be dehydrated and pulverized into an enzyme rich powder that can be mixed with ground maize and water and then mashed similarly to a barley based beer between 140-160 F for 2-24 hours (depending on the ratio of corn to powdered banana peels used) before being strained and boiled to make a fermentable wort. You’ll need to taste the Mash or use iodine strips to determine when the conversion has been completed. There are actually lots of fruits and vegetables that are rich in amylase enzymes. Sweet potato, for example, has such a high concentration of these enzymes that its peel is often used in the commercial production of Amylase.
Alternatively, instead of using the enzymes present in another product, it is also possible to ferment grains with certain types of molds that consume starches and in turn naturally produce the enzymes needed to convert the grains of carbohydrates into fermentable sugars. In Japan for example, Aspergillus Oryzae (or Koji as it is better known), is a humble yet miraculous mold that has been grown on rice for millennia in order to sweeten the rice and make Sake. It is also the key ingredient for making naturally brewed Soy Sauce or fermenting Miso due to the rich diversity of enzymes Koji produces that not only sweeten carbohydrate rich foods, but also break down proteins into amino acids that are the basis for savory foods and the flavor of umami. Due to these impressive properties, koji has now made it’s way out of Japan is slowly become increasingly familiar around the globe. This is assuredly a wonderful thing, because it has now been well established that Koji can be grown on a variety of substrates and virtually any grain, including rice, barley and corn, making it an ideal candidate for assisting in the brewing process anywhere on Earth.

To further explore local flavors and novel combinations, while boiling our worts we have been experimenting with using a variety of local bittering herbs and teas to add complex flavors to our beers, including ginger, turmeric, lemongrass, vanilla and many others. During either primary or secondary fermentations, we use nylon mesh bags weighed down with boiled volcanic rocks to infuse fresh fruit from the farm such as Pineapple, Soursop, Starfruit, or freshly roasted Cacao Nibs, just to name a few examples. Finally, by fermenting our beers with mixed cultures, wild captured yeasts and/or locally adapted strains, we have been able to produce ales with several layers of harmonious flavors, which provide depth and complexity that is only possible to achieve with mixed culture fermentation.
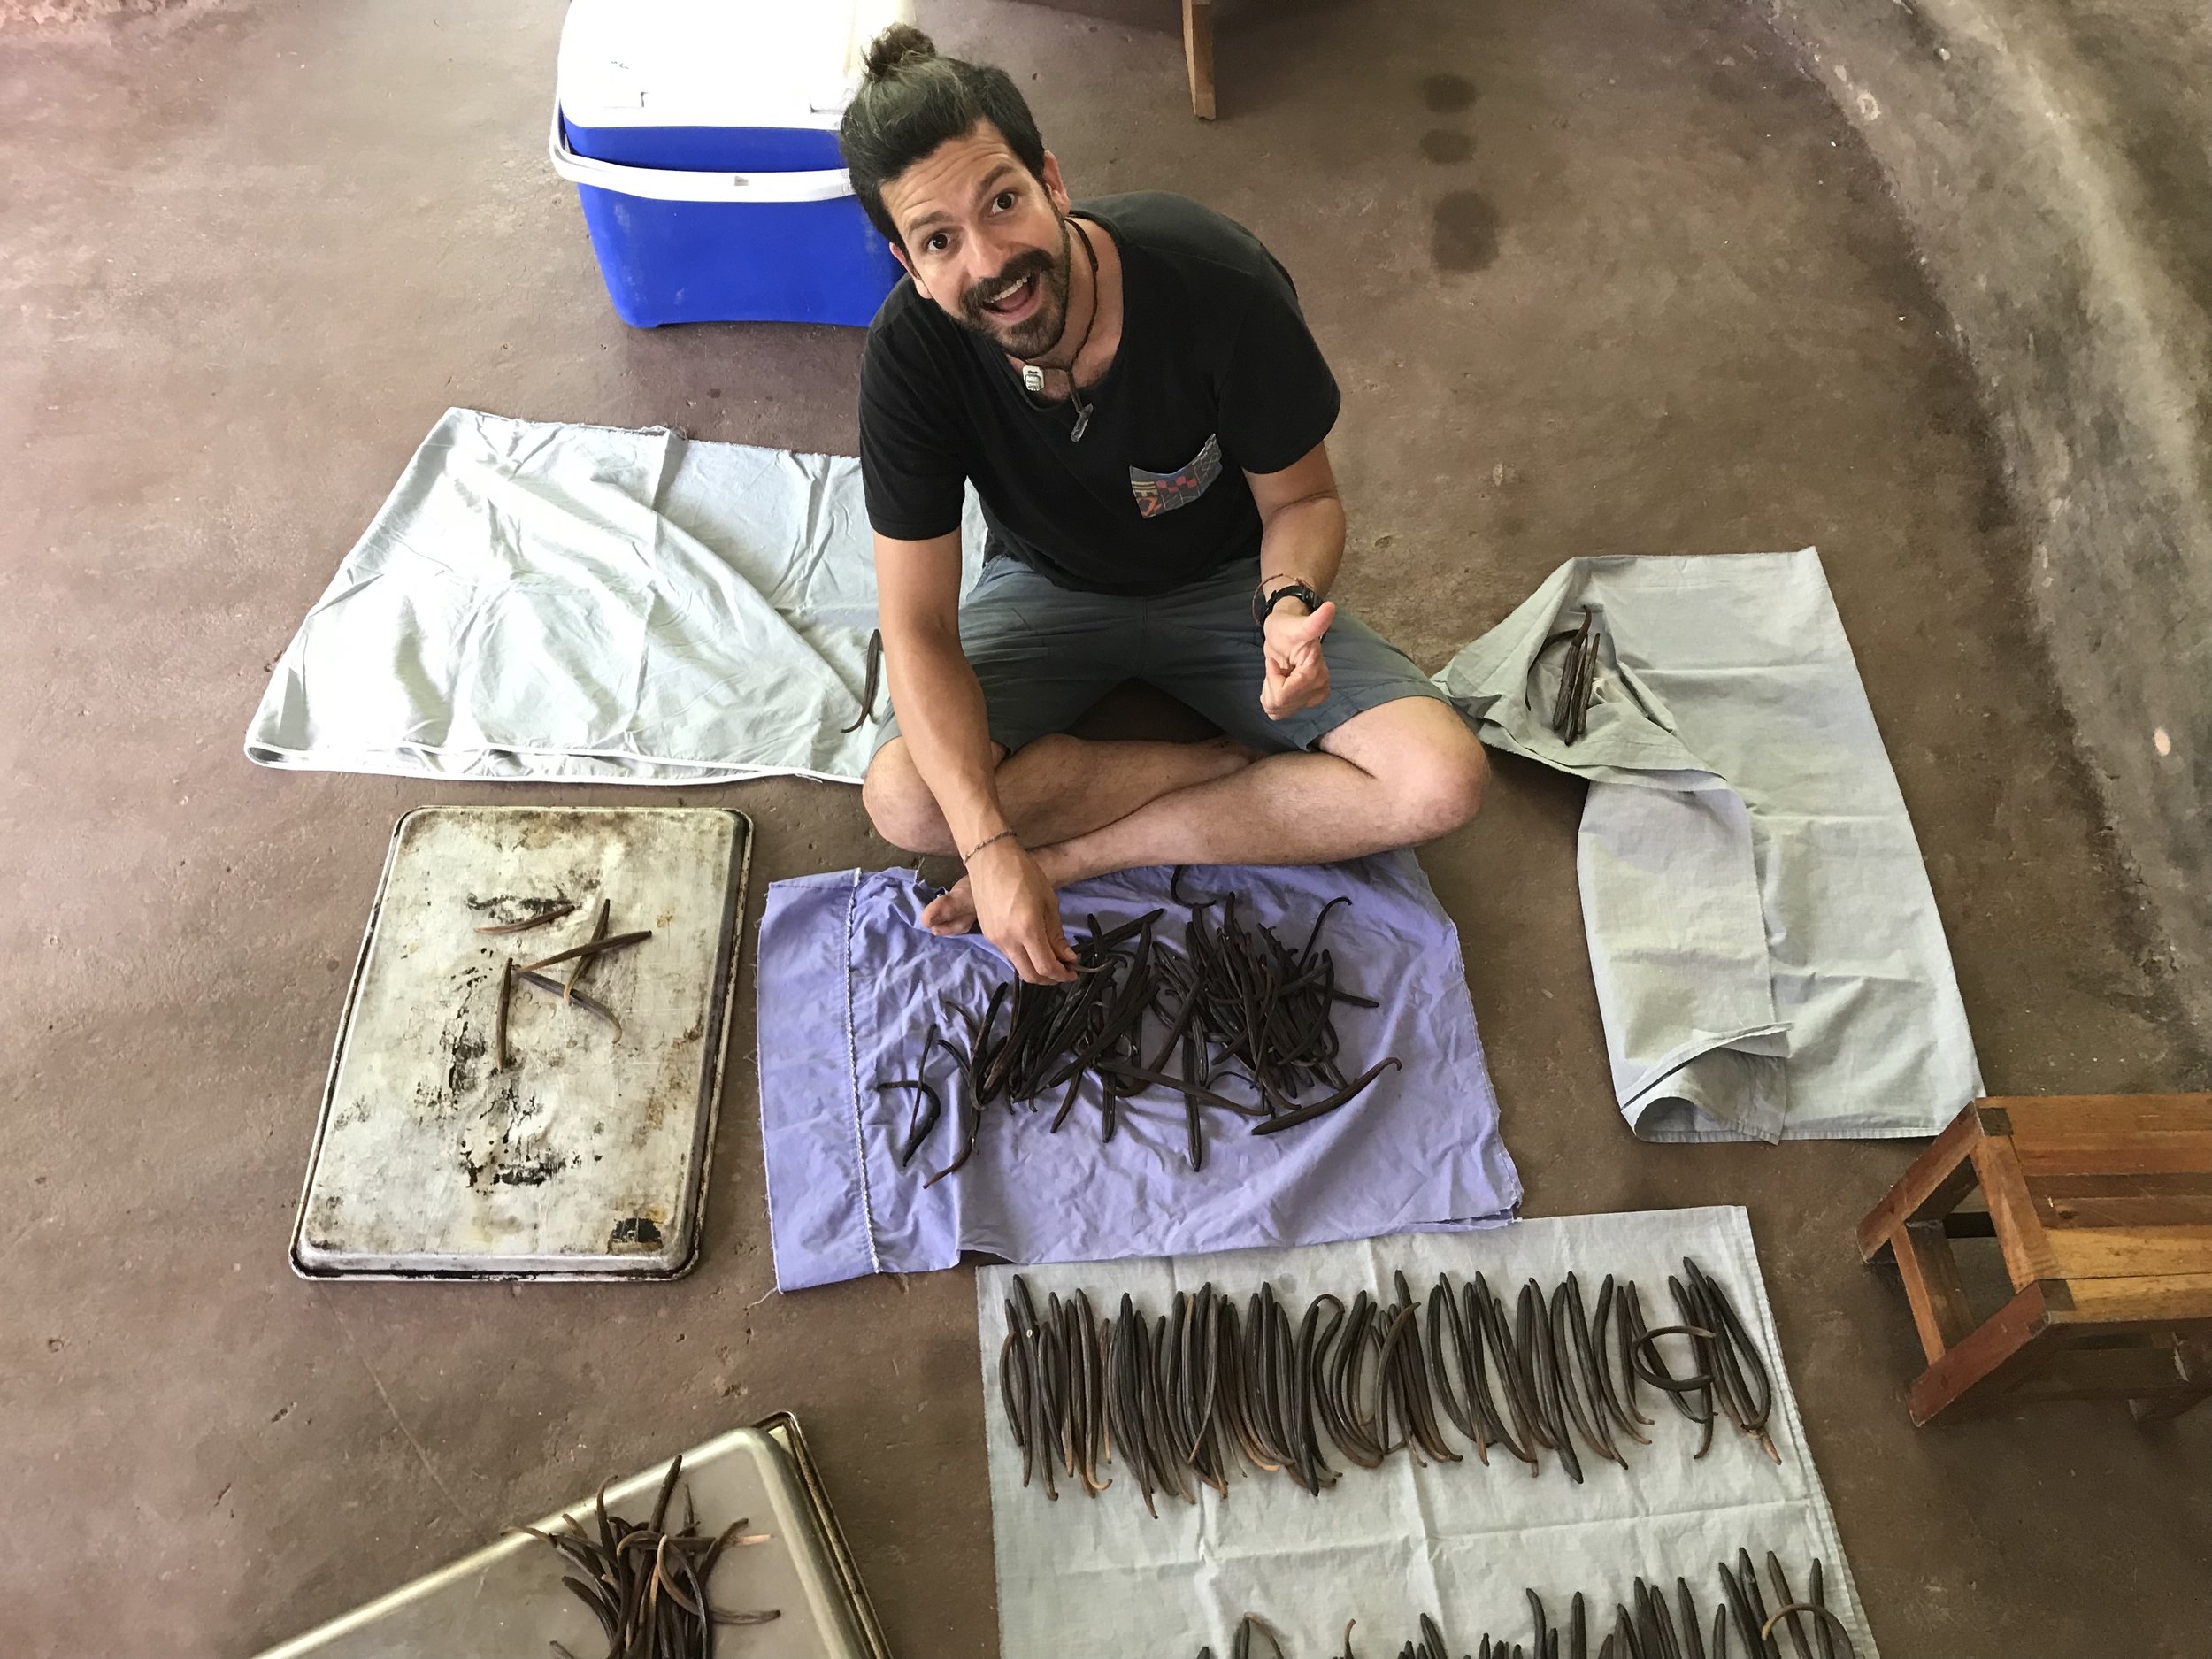
I would not have believed what a powerful role yeast and bacteria play in the creation of complex beers and wines when I first started brewing over a decade ago. Now however, I have learned first hand just what a difference the cultures we use can make. The experience of trialing yeast captured off of different fruits and flowers has led me to encounter flavors I never would have dreamed possible. Some have certainly been on the far side of the funky extreme, including cultures that produce the dreaded odor of sweaty feet or burnt rubber. This however, is exactly the reason for small scale trials rather than placing our faith in large scale spontaneous fermentation. Once you discover the joy of fermenting a simple malt of dissolved sugar or Dry Malt Extract with wild yeast and tasting apples, pears, or other citrus fruits magically appear in the finished product, I believe that like me, you will never want to use a commercialized yeast strain on it’s own again.
I believe that by drawing from the richness of our cultural traditions around the world, we have the potential to greatly expand the breadth of our palates and to more intimately link our brews to the time and place in which they were crafted. The craft brewing revolution is still in its infancy and if I am to have a part of to play in it’s development, then Ginger Hibiscus Sake Hybrids, Banana Coffee Stouts, and Mayan Chocolate Ales will be just the tip of the iceberg.

If you would like our simple Hooch recipe, read our blog article with step by step instructions. If you want to learn more about the wild world of fermentation consider joining us for our year long apprenticeship where apprentices go deep into advanced fermentation techniques.
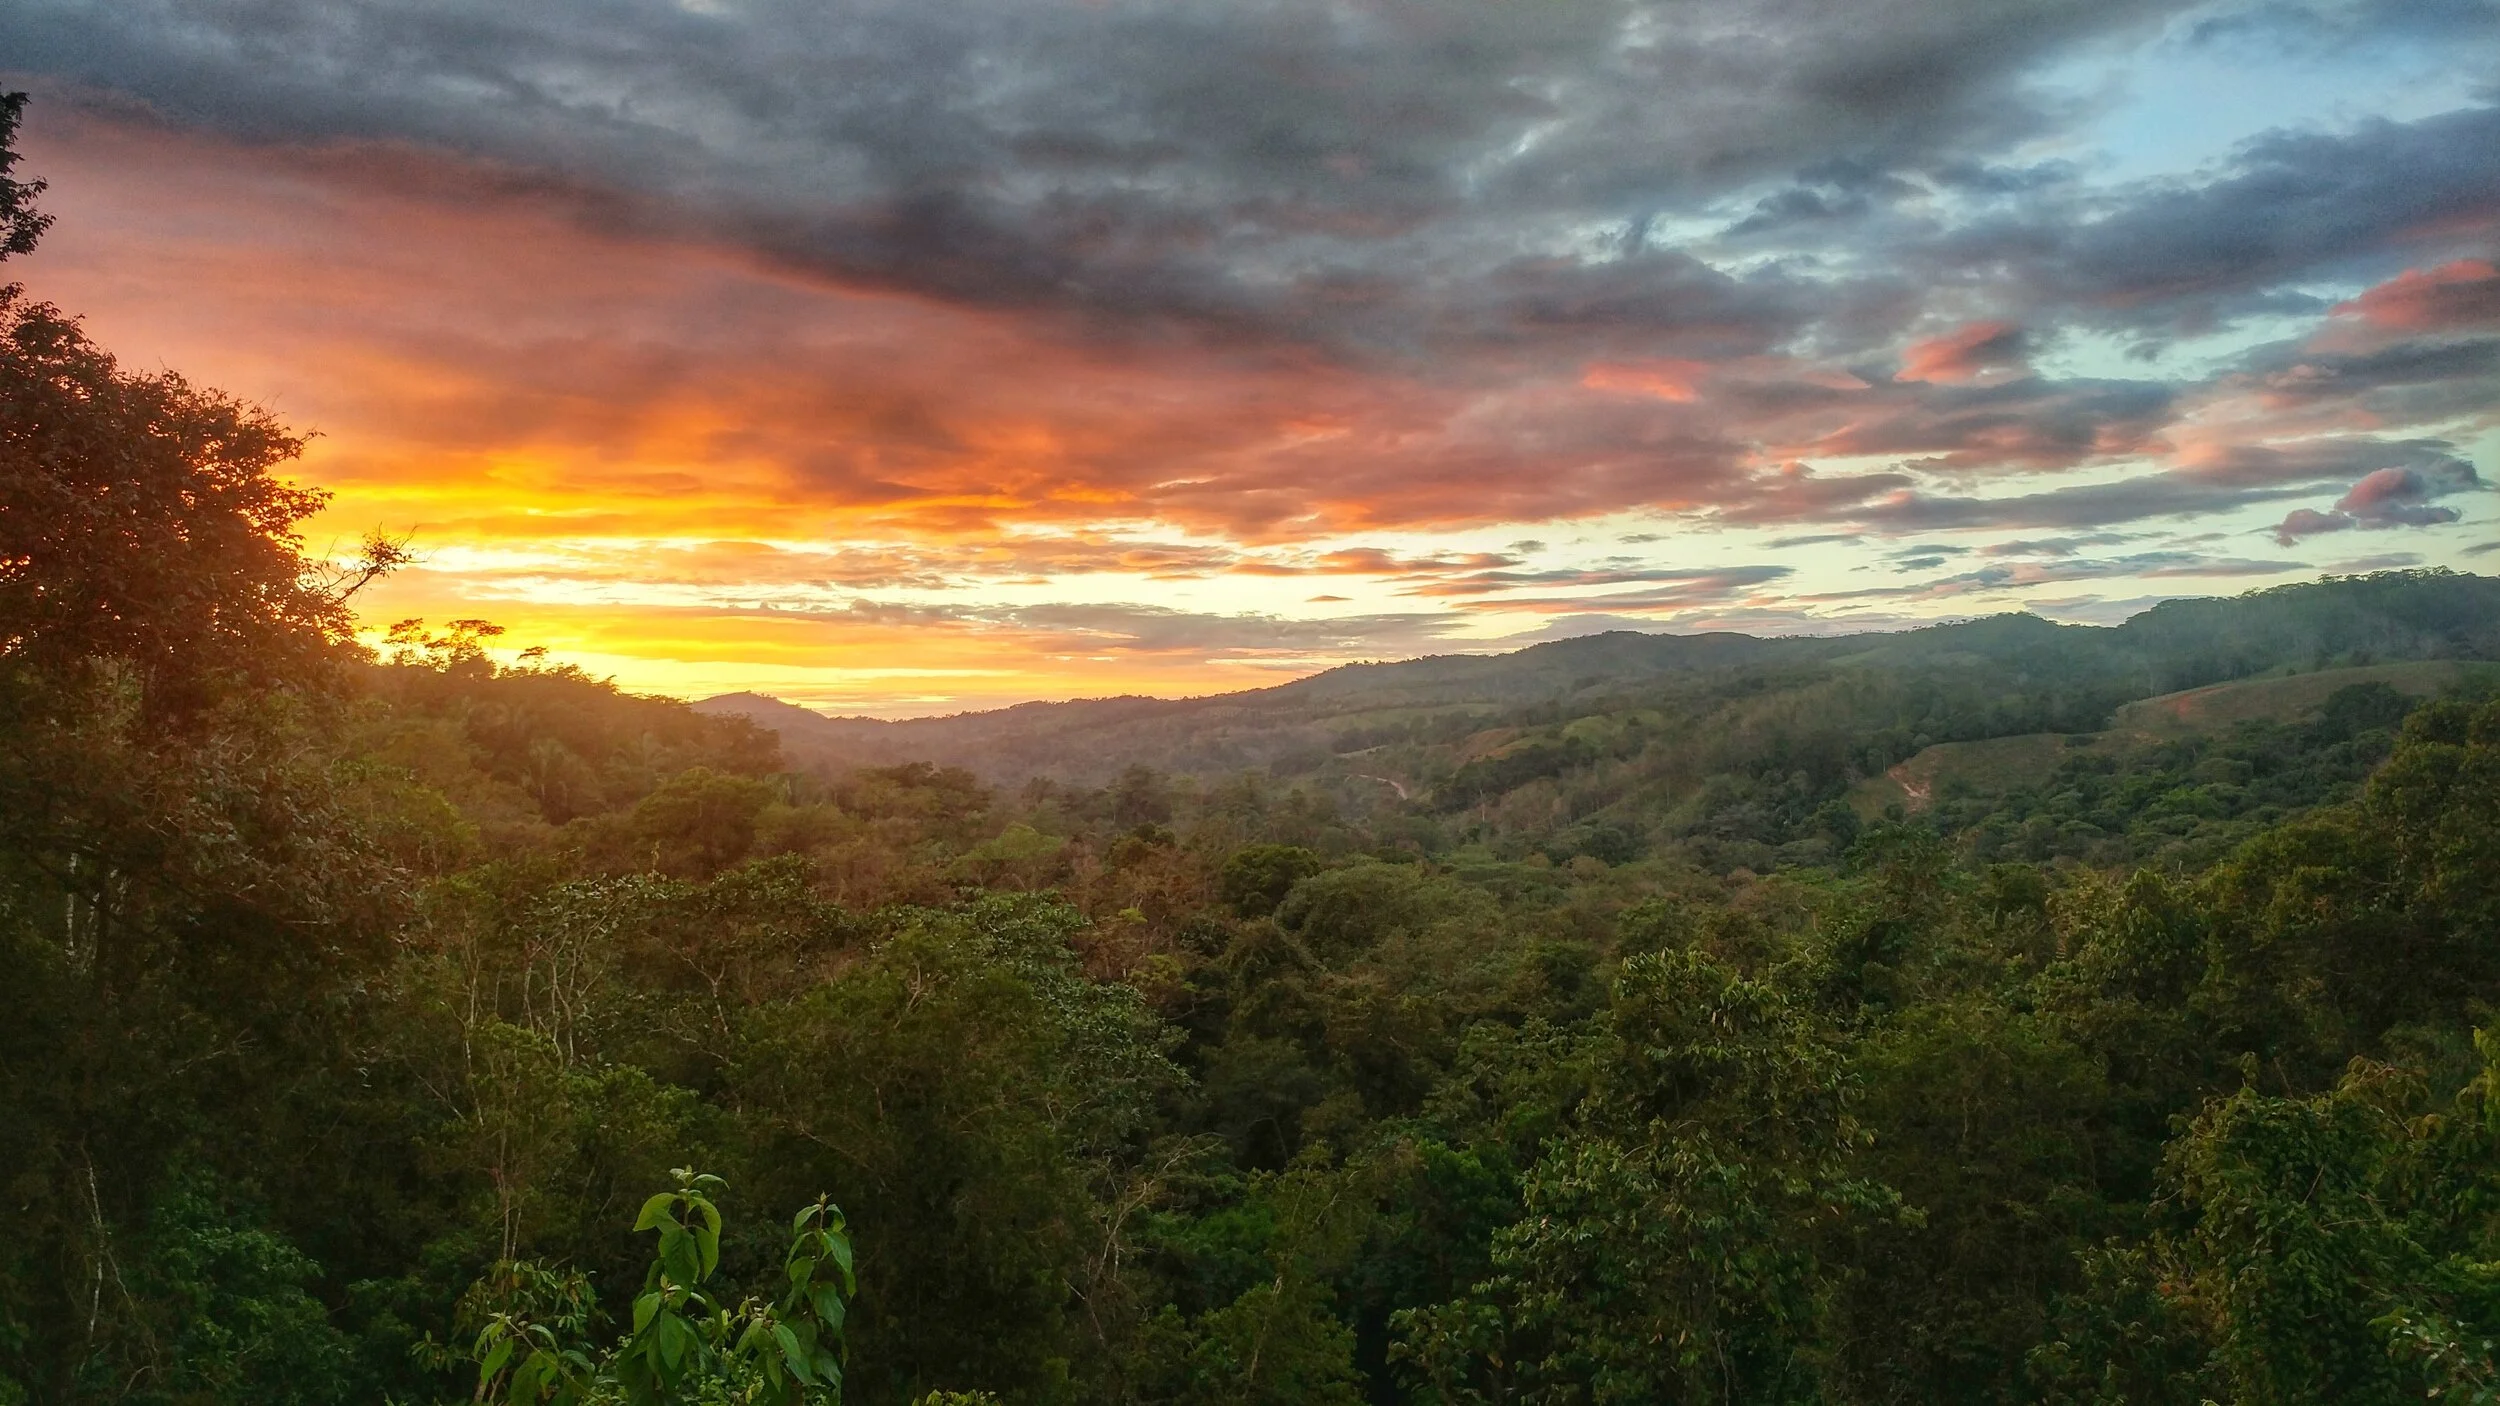
La Importancia de la Permacultura
La creciente crisis social y medioambiental nos ha obligado a buscar métodos y procesos alternativos que reduzcan el impacto humano en la naturaleza y nuestro entorno. Como una de las principales alternativas de cambio, la Permacultura constituye un sistema donde se combinan la vida de los seres humanos de una manera respetuosa y beneficiosa con los animales y plantas, y donde se logran implementar soluciones de menor impacto medioambiental para satisfacer las principales necesidades humanas
Rhina Guido Tellez, Estudiante de Permacultura
La creciente crisis social y medioambiental nos ha obligado a buscar métodos y procesos alternativos que reduzcan el impacto humano en la naturaleza y nuestro entorno. Como una de las principales alternativas de cambio, la Permacultura constituye un sistema donde se combinan la vida de los seres humanos de una manera respetuosa y beneficiosa con los animales y plantas, y donde se logran implementar soluciones de menor impacto medioambiental para satisfacer las principales necesidades humanas. Si bien el termino Permacultura suena nuevo o hasta desconocido para algunos, podríamos traducirlo en ecología, desarrollo sustentable, preservación del hábitat, practicas eco amigables, etc. Este término no es más que la compilación de éticas y principios de diseño universales en planeación, desarrollo, mantenimiento, organización y preservación del hábitat apto para sostenerse en el futuro.

La Permacultura reúne una seria de principios éticos y de diseño que aplicados en áreas como la Arquitectura hacen posible la creación de entornos sustentables. Los principios éticos están dirigidos al desarrollo de la conciencia en temas del cuido de la tierra, relaciones humanas y equidad. Por su parte, los principios de diseño son los que fácilmente podemos ver materializados, en el ambiente construido con la utilización de materiales y técnicas de construcción locales, la autoconstrucción, climatización natural, implementación de técnicas eco amigables como sanitarios secos, reutilización y reciclaje, generación de energías renovables y cultivo biointensivo.
¿Por qué es importante la Permacultura? Porque nos encontramos en ese punto de inflexión donde se hace necesario tomar medidas que nos permitan crear ambientes más seguros y sanos. El sistema permacultural nos ayuda a generar cambios a nivel personal y local para proceder con los niveles colectivos y global. Este como tal contribuye poco a poco a reducir las marcadas brechas sociales, los altos niveles de pobreza, la falta de acceso a viviendas dignas así como a lograr cambios en los sistemas económicos globales que producen y reproducen desigualdad y que limitan el acceso a bienes físicos y sociales.
La Permacultura nos permite crear sistemas productivos sostenibles en espacios de área reducida, lo que significa que puede ser fácilmente aplicado tanto en zonas rurales como urbanas mediante el reconocimiento de los patrones y procesos naturales para luego ser integrados en nuestra vida diaria sin alterar el orden natural de los elementos que constituyen los diferentes ecosistemas. Su principal importancia radica en que no solo genera cambios a nivel personal sino que una vez que es implementado produce una especie de efecto domino en los demás ámbitos de nuestras vidas como en las prácticas de consumo, relaciones humanas, niveles de respuesta ante temas sociales, etc.
Teniendo en cuenta que uno de los principales agravantes de las problemáticas sociales y ambientales lo constituyen en muchas casos los mismos gobiernos locales que se rehúsan a destinar los recursos necesarios para llevar a cabo políticas públicas que ayuden a contrarrestar las diferentes problemáticas que aquejan a nuestras sociedades; se hace necesario contar con espacios como el que nos brinda Rancho Matastal, donde haciendo uso del método de aprender haciendo, podemos adquirir una serie de conocimientos teórico-prácticos para luego ser capaces de brindar soluciones que pueden ser fácilmente aplicadas en nuestras comunidades sin la necesidad de contar con altos niveles de experiencia.

Rancho Matastal no solo nos brinda la oportunidad de obtener conocimientos básicos en temas como Permacultura, Bioconstrucción, Agroforestación, entre otros; sino que podemos experimentar en primera persona la oportunidad de convivir en un entorno sustentable y evidenciar los cambios que se pueden lograr con la implementación de sistemas amigables con la naturaleza y que a su vez propician la preservación de las costumbres y tradiciones que forman parte de la identidad de cada lugar donde son desarrollados. Además de su aporte a la preservación del medio ambiente este tipo de centros de educación nos ayudan a elevar nuestros niveles de conciencia acerca de los efectos que tienen cada acción individual y colectiva en nuestro entorno y que terminan convirtiéndose en verdaderas experiencias de vida que hacen replantearnos hábitos y costumbres que pudieran afectar directa o indirectamente nuestro entorno.


Dairy Dairies: How to Make Cream Cheese with Dairy Kefir
Dairy Kefir is so interesting to me because it embodies stacking functions - like alchemy, it's possible for 1+1 to equal 4. Milk, grains (scoby) and a days time and voila, you have a delicious base product better than the milk you started with. It's now lightly carbonated, stable in the fridge, resistant to microbial incursion, lower in lactose, tangy, creamy, probiotic and great for your gut.
By Ryan Roberts
2019 Apprentice
That's right folks, we're making cheese with the champagne of yogurts.
Dairy Kefir is so interesting to me because it embodies stacking functions - like alchemy, it's possible for 1+1 to equal 4. Milk, grains (scoby) and a days time and voila, you have a delicious base product better than the milk you started with. It's now lightly carbonated, stable in the fridge, resistant to microbial incursion, lower in lactose, tangy, creamy, probiotic and great for your gut.
Furthermore, that stable base product, can be used to create a wide variety of different specialty products that carry with it those unique value-added characteristics that we impart with our time, energy and expertise. During our last diary entry, we discovered Dairy Kefir Creme Fraiche, which you can read about here . This time we'll be making luscious, spreadable and customizable cream cheese out of dairy kefir.
In our first diary entry we discussed dairy kefir's characteristics and how it's made. You may recall that the dairy kefir scoby acidifies the milk as a defensive (or offensive) measure against other microbial life, which have difficulty surviving with such a low pH.
I've discovered for myself, though I don't claim to be first, that we can utilize that acidity to accomplish what is usually done with rennet, vinegar or citric acid: separating the curds (fats) from the whey (protein). Though the exact function of this process is unknown to me, the result appears to be the same. Left for a few days at room temperature, reveals to me that the dairy kefir will separate on its own. But there's a trick!
While leaving the scoby in the milk will speed the process of acidification, we want to be able to easily separate the scoby from the curds and from the whey. We do this with a sieve that catches only the grains, allowing the kefir to flow thru to your ready container. When the kefir is left to ferment longer and it separates, it makes it difficult to capture the curds and grains separately.
Instead, I remove the grains from the dairy kefir prior to separation. The dairy kefir will continue to acidify, though slower, but you'll be left without the headache of hunting thru the curds for your grains.
So starting with the previous step, here are the steps. Now that you have your dairy kefir and scoby separate we can begin:
1. Make your dairy kefir. Follow the instructions laid out in my first blog entry here (link 1st blog).
2. Remove scoby and place in a container with fresh milk.
3. Secure cheese cloth around the rim of a tall container. Make sure there is room for whey to drip to the bottom and accumulate.
4. Pour dairy kefir into fine cheese cloth hanging over the container.

5. Wait 24 hours, allowing time for the remaining whey to drain from the curds. I repeat this process a few times till it quits draining from gravity. The remaining cream is our cream cheese. The live-culture whey can be used in a variety of ways, including starting new ferments by inoculation, using as a probiotic protein supplement, and for cooking with in soups.

Dairy Kefir Cream Cheese

Whey - delicious for soup stock
6. Spread the cream cheese out on a pan with a rubber spatula. Sprinkle in salt and your choice of herbs or dried vegetables. Imagine sun-dried tomatoes, garlic, onions… yes please!

7. Now fold the cheese onto itself, repeatedly, which helps to mix the ingredients in evenly.

8. Place in a container and serve. Buen Provecho!
Categories
Topics
- Agriculture 6
- Agroforestry 21
- Animals 2
- Apprenticeship 19
- Appropriate Technology 6
- Backpacking 1
- Bananas 1
- Basic Pantry 4
- Biochar 1
- Books 3
- Build Your Own Home 1
- Central America 5
- Chiles 1
- Cinnamon 1
- Clay Carving 1
- Climate 2
- Climate Change 1
- Cob oven 1
- Communication 5
- Community 24
- Compost 2
- Composting Toilets 2
- Condiments 1
- Conservation 2
- Cooking 4
- Costa Rica 18
- Design 10
- Earthen Construction 10
- Eat Local 2
- Ecohome 1
- Education 9
- Environment 3
- Ethics 4
- Farm to Table 12
- Fasting 1
- Fermentation 14
- Food 22
- Food Choices 8
- Food Forest 8
- Food Processing 15
- Food Systems 12
- Gap Year 1
- Gardening 5
- Ginger Beer 1
- Harvest 2
- Health 12
- Healthy living 5
- Homemade 2
- Homestead 8
- Internet 2
Due to popular demand we have put together a document that outlines how our composting toilets are designed and made. The documents include
-dimensions for different size chambers based on number of people using it
-door design
-chamber design
We have spent years fine tuning our design and details based on what is easiest and what works. This is the culmination of building 11 different composting toilets and each time improving the design.
It is important that you understand that this design is only for the composting toilet element, it does not include any of the timber frame or bamboo framing that form the structure for the roof that covers these all over the ranch.