

BLOG
Stories, articles, and updates from the Ranch community.
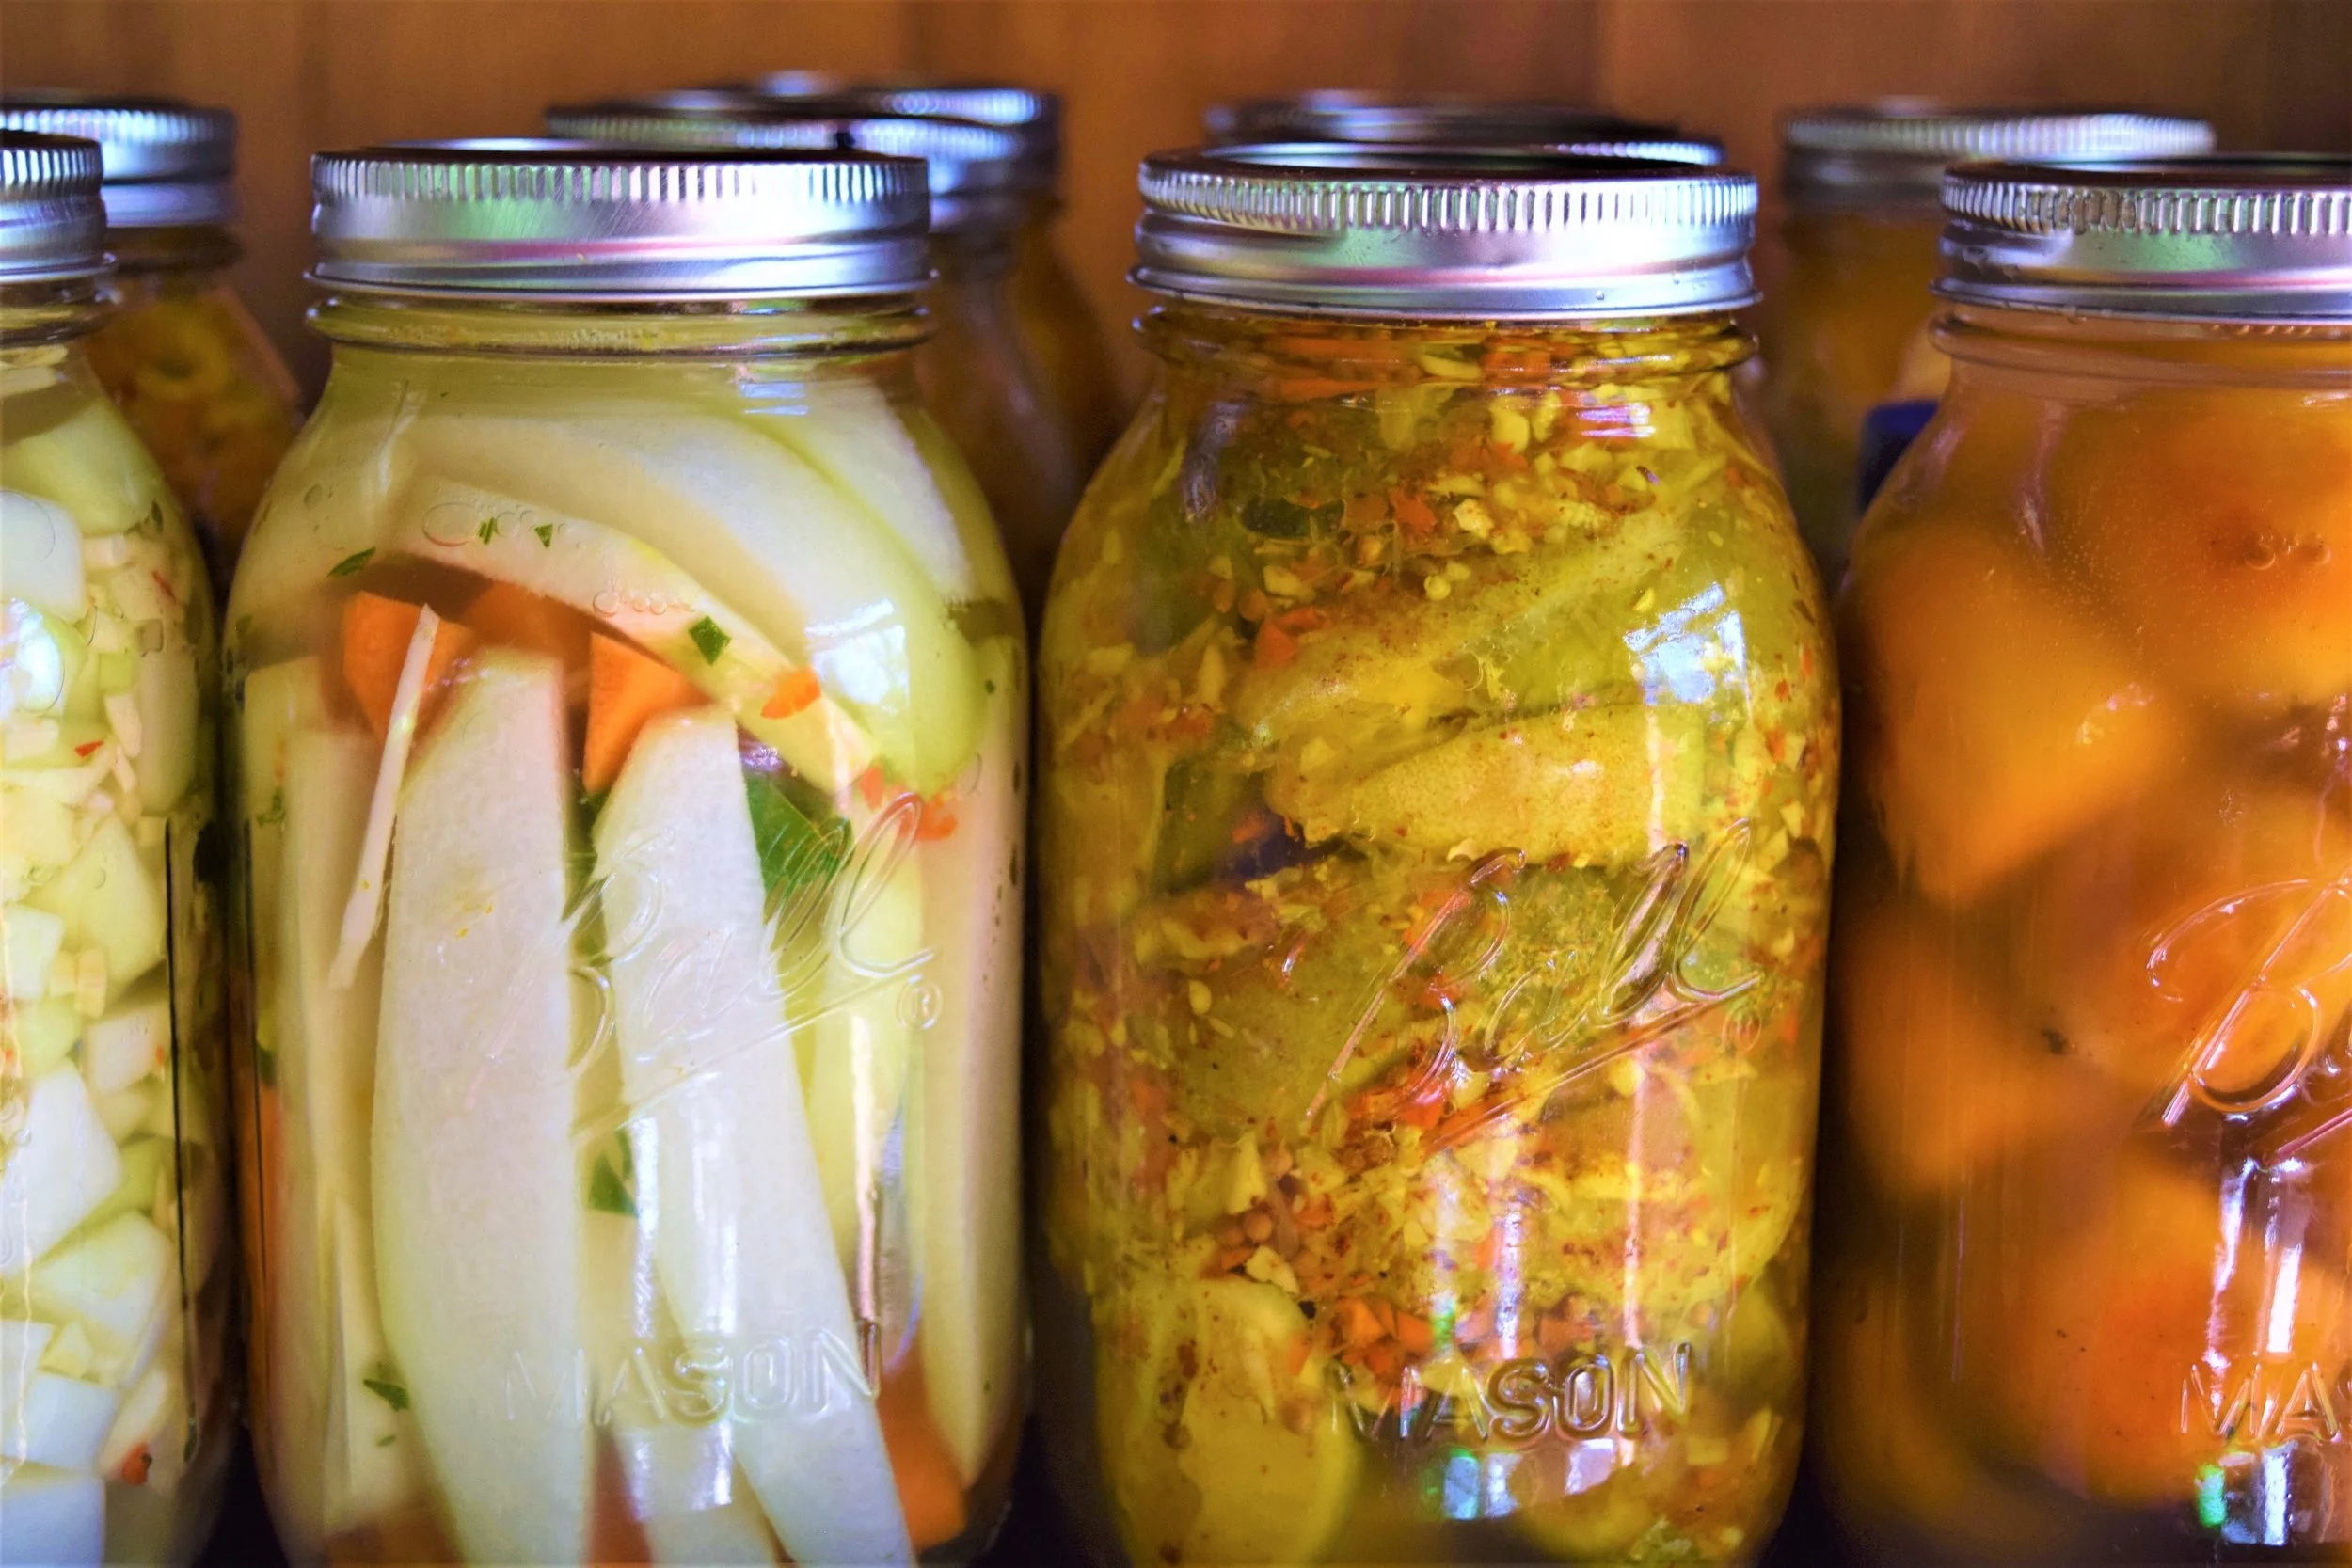
Los beneficios y los tipos de fermentación
La Fermentación es un proceso catabólico de oxidación incompleta, por el cual ocurre una transformación de los alimentos.
Escrito por el aprendiz 2024, Felipe
La Fermentación es un proceso catabólico de oxidación incompleta, por el cual ocurre una transformación de los alimentos. Esta transformación la realizan ciertos tipos de microrganismos que metabolizan estos compuestos de manera natural para su propia sobrevivencia. Este proceso se lleva a cabo a traves de la reacción bioquímica de la descomposición de moléculas de azúcar como: sacarosa, maltosa, fructuosa, entre otros, en compuestos mas simples obteniendo como resultado; energía, etanol, lactato, gas hidrógeno, enzimas, productos alimenticios fermentados, modificadores del sabor y productos farmacéuticos. Los principales productos de fermentación son ácidos orgánicos, alcohol etílico y dióxido de carbono.
Algunos de los productos finales obtenidos muy codiciados son: kimchi, chucrut, pan de masa madre, salsa de soya, vino, cerveza, Kefir, queso, salami, yogur entre otros.


La historia de la fermentación data de mas de 10,000 años A.C, donde los humanos utilizaron la fermentación para preservar los alimentos y en otras civilizaciones usaban las bebidas fermentadas para sus rituales y ceremonias. Este proceso se extrajo de la observación de la naturaleza, en donde los alimentos se trasformaban de manera natural y adquirían nuevas propiedades.
La fermentación posee un gran numero de beneficios para los seres humanos entre los cuales destaca:
Conservación de alimentos sin necesidad de químicos, al fermentar los alimentos, se crea un ambiente hostil para los microrganismos patógenos, ya sea un ambiente ácido producido por las bacterias, o un ambiente con presencia de alcohol de las levaduras.
Favorece las defensas de la mucosa intestinal, los probióticos (microrganismos beneficiosos para la salud) ayudan a fortalecer el sistema inmune, para prevenir las infecciones.
Restaura y conserva la flora intestinal, los probióticos proveen una colonia diversa y saludable a los intestinos, además de combatir y reducir el efecto de los pesticidas y sustancias químicas y tóxicas para el organismo.
Ayuda a la digestion y mejora la biodisponibilidad de nutrientes, de esta manera se incrementa la digestion de los alimentos y la absorción de nutrientes, ya que proporciona capacidades esenciales para la fermentación de nutrientes no digeribles como las fibras dietéticas. Ocurre una transformación de las largas cadenas e moléculas de los alimentos en compuestos mas simples de digerir. Rompe y degrada gran parte de las toxinas de las plantas y anti-nutrientes que dañan la salud.
Desarrollo de sabores y texturas únicos en los alimentos, esta es una característica única de este proceso ya que los microrganismo encargados del proceso producen compuestos aromáticos y ácidos orgánicos, pasando de sabores simples y planos a sabores complejos, deliciosos para los sentidos.

Existen dos formas de llevar a cabo una fermentación, fermentación espontanea o la fermentación inoculada. La primera se refiere a una fermentación con microrganismos que se encuentran en el habitat y podemos extraer, o ya sea fermentando algún material orgánico del lugar para utilizarlo como el catalizador o el cultivo primal de microrganismos a utilizar. La segunda corresponde al proceso que se ejecuta a traves de microrganismos que se obtienen comprándolos en tiendas de cultivos, que son controlados en laboratorios, donde han ido seleccionando y recreando ciertas especies mas resistentes o que tienen un objetivo en particular.
Dependiendo de la sustancia química formada en el proceso de fermentación se pueden clasificar en distintos tipos. Los siguientes son algunos de los tipos de fermentación que se practican en el Rancho:

Fermentación Alcohólica
Este proceso de fermentación está liderado por levaduras que consumen glucosa y la transforman en etanol y dióxido de carbono. Este es un proceso anaeróbico, es decir, sin presencia de oxígeno. Existe una regla general de 2:1 de azúcar a grados alcohólicos. Es decir, si partimos con una concentración de azúcar del 20% en nuestra solución (agua + glucosa (frutas, azúcar, panela, etc 20%)), obtendremos un vino de alrededor 10% de alcohol, es decir el porcentaje de alcohol es la mitad de la concentración de azucares en la solución. Tiempo de fermentación va depender de muchos factores, pero al menos un tiempo de entre 2 a 4 semanas.
Para llevar a cabo este proceso se deben tener las siguientes consideraciones:
Sanitizar los implementos y los ingredientes
Romper en estructuras pequeñas los ingredientes a utilizar
Las levaduras no pueden vivir en ambientes con un porcentaje de alcohol mayor a 14%, por lo tanto se debe partir con una solución que no exceda 28% de glucosa
La temperatura en la cual las levaduras están cómodas es de 18 a 25 celcius
PH no puede estar menos de 4
Algunos de los productos que el rancho crea a partir de este tipo de fermentación son:
Vinos de muchas de las frutas que se extraen de los sistemas agroforestales, algunos de estos ejemplos son: carambola, pitanga, canela, pitaya, piña etc.
Cerveza de jengibre

Fermentación Acido Láctica
Este proceso de fermentación es liderado por la bacterias láctica, que al igual del proceso anterior consumen la glucosa presentes en los alimentos y los convierten en ácidos lácticos. Este es un proceso anaeróbico y los beneficios de estos ácidos es la conservación de los alimentos ya que impide el crecimiento de patógenos y provee condiciones propicias para la aparición de los probióticos.
Algunos de los ejemplos de fermentación de este tipo que se practican en el Rancho,:
El kimchi de papaya verde, el cual se agrega la papaya y otras especies (ajo, jengibre, etc) bien trituradas, se pesa todo el conjunto y se calcula el 2% de ese peso, que sera la cantidad de sal que se debe poner los ingredientes, para estimular la salida del liquido al exterior de los ingredientes generando un caldo de cultivo ideal para que las bacterias se reproduzcan. Finalmente, después de agregar la sal, se estruja y se deja en un recipiente, percatándose que todo este sumergido en liquido exprimido de los vegetales. Dependiendo de diferentes factores el tiempo de fermentación varía, acá en el Rancho 0-es de una semana.

Fermentación Acido Acética
Este tipo de fermentación se lleva a cabo a partir de la bacteria acetobacter, la cual se desarrolla en un medio aérobico, la cual se alimenta de etanol, que es un tipo de alcohol que se genera en la fermentación alcohólica, convirtiéndolo en ácido acético, la sustancia característica del vinagre. Es el proceso de oxidación del etanol. Aca en el rancho la manera de producir vinagre, es mediante la exposición al ambiente de los vinos/productos de la fermentación alcohólica, y se añade la madre de vinagre que se ha generado en fermentaciones anteriores para acelerar el proceso. Finalmente se cubren con un paño para que no se infecten con otros insectos. El tiempo de fermentación varía de 1 a 3 meses.

Fermentación Simbiosis de Levaduras y Bacterias (SCOBY)
Es un tipo de fermentación donde participan un conjunto levaduras y bacterias que trabajan y coexisten en simbiosis. Acá los microrganismos transforman la glucosa en ácidos orgánicos, etanol y dióxido de carbono. Es un proceso aeróbico y anaeróbico a la vez.
Uno de los ejemplos del rancho en este tipo de fermentación es:
Kefir de agua, se utilizan una taza de granos de SCOBY y se agregan en una solución de 3 galones de agua y 3 tapa dulces, se dejan fermentar anaeróbicamente por 48 horas y están listos para ser embotellados y arreglados con jugos frutales locales. Se dejan por 5 horas en segunda fermentación y se ponen a refrigerar para bajar la actividad y er consumidos por los miembros y visitantes del rancho.

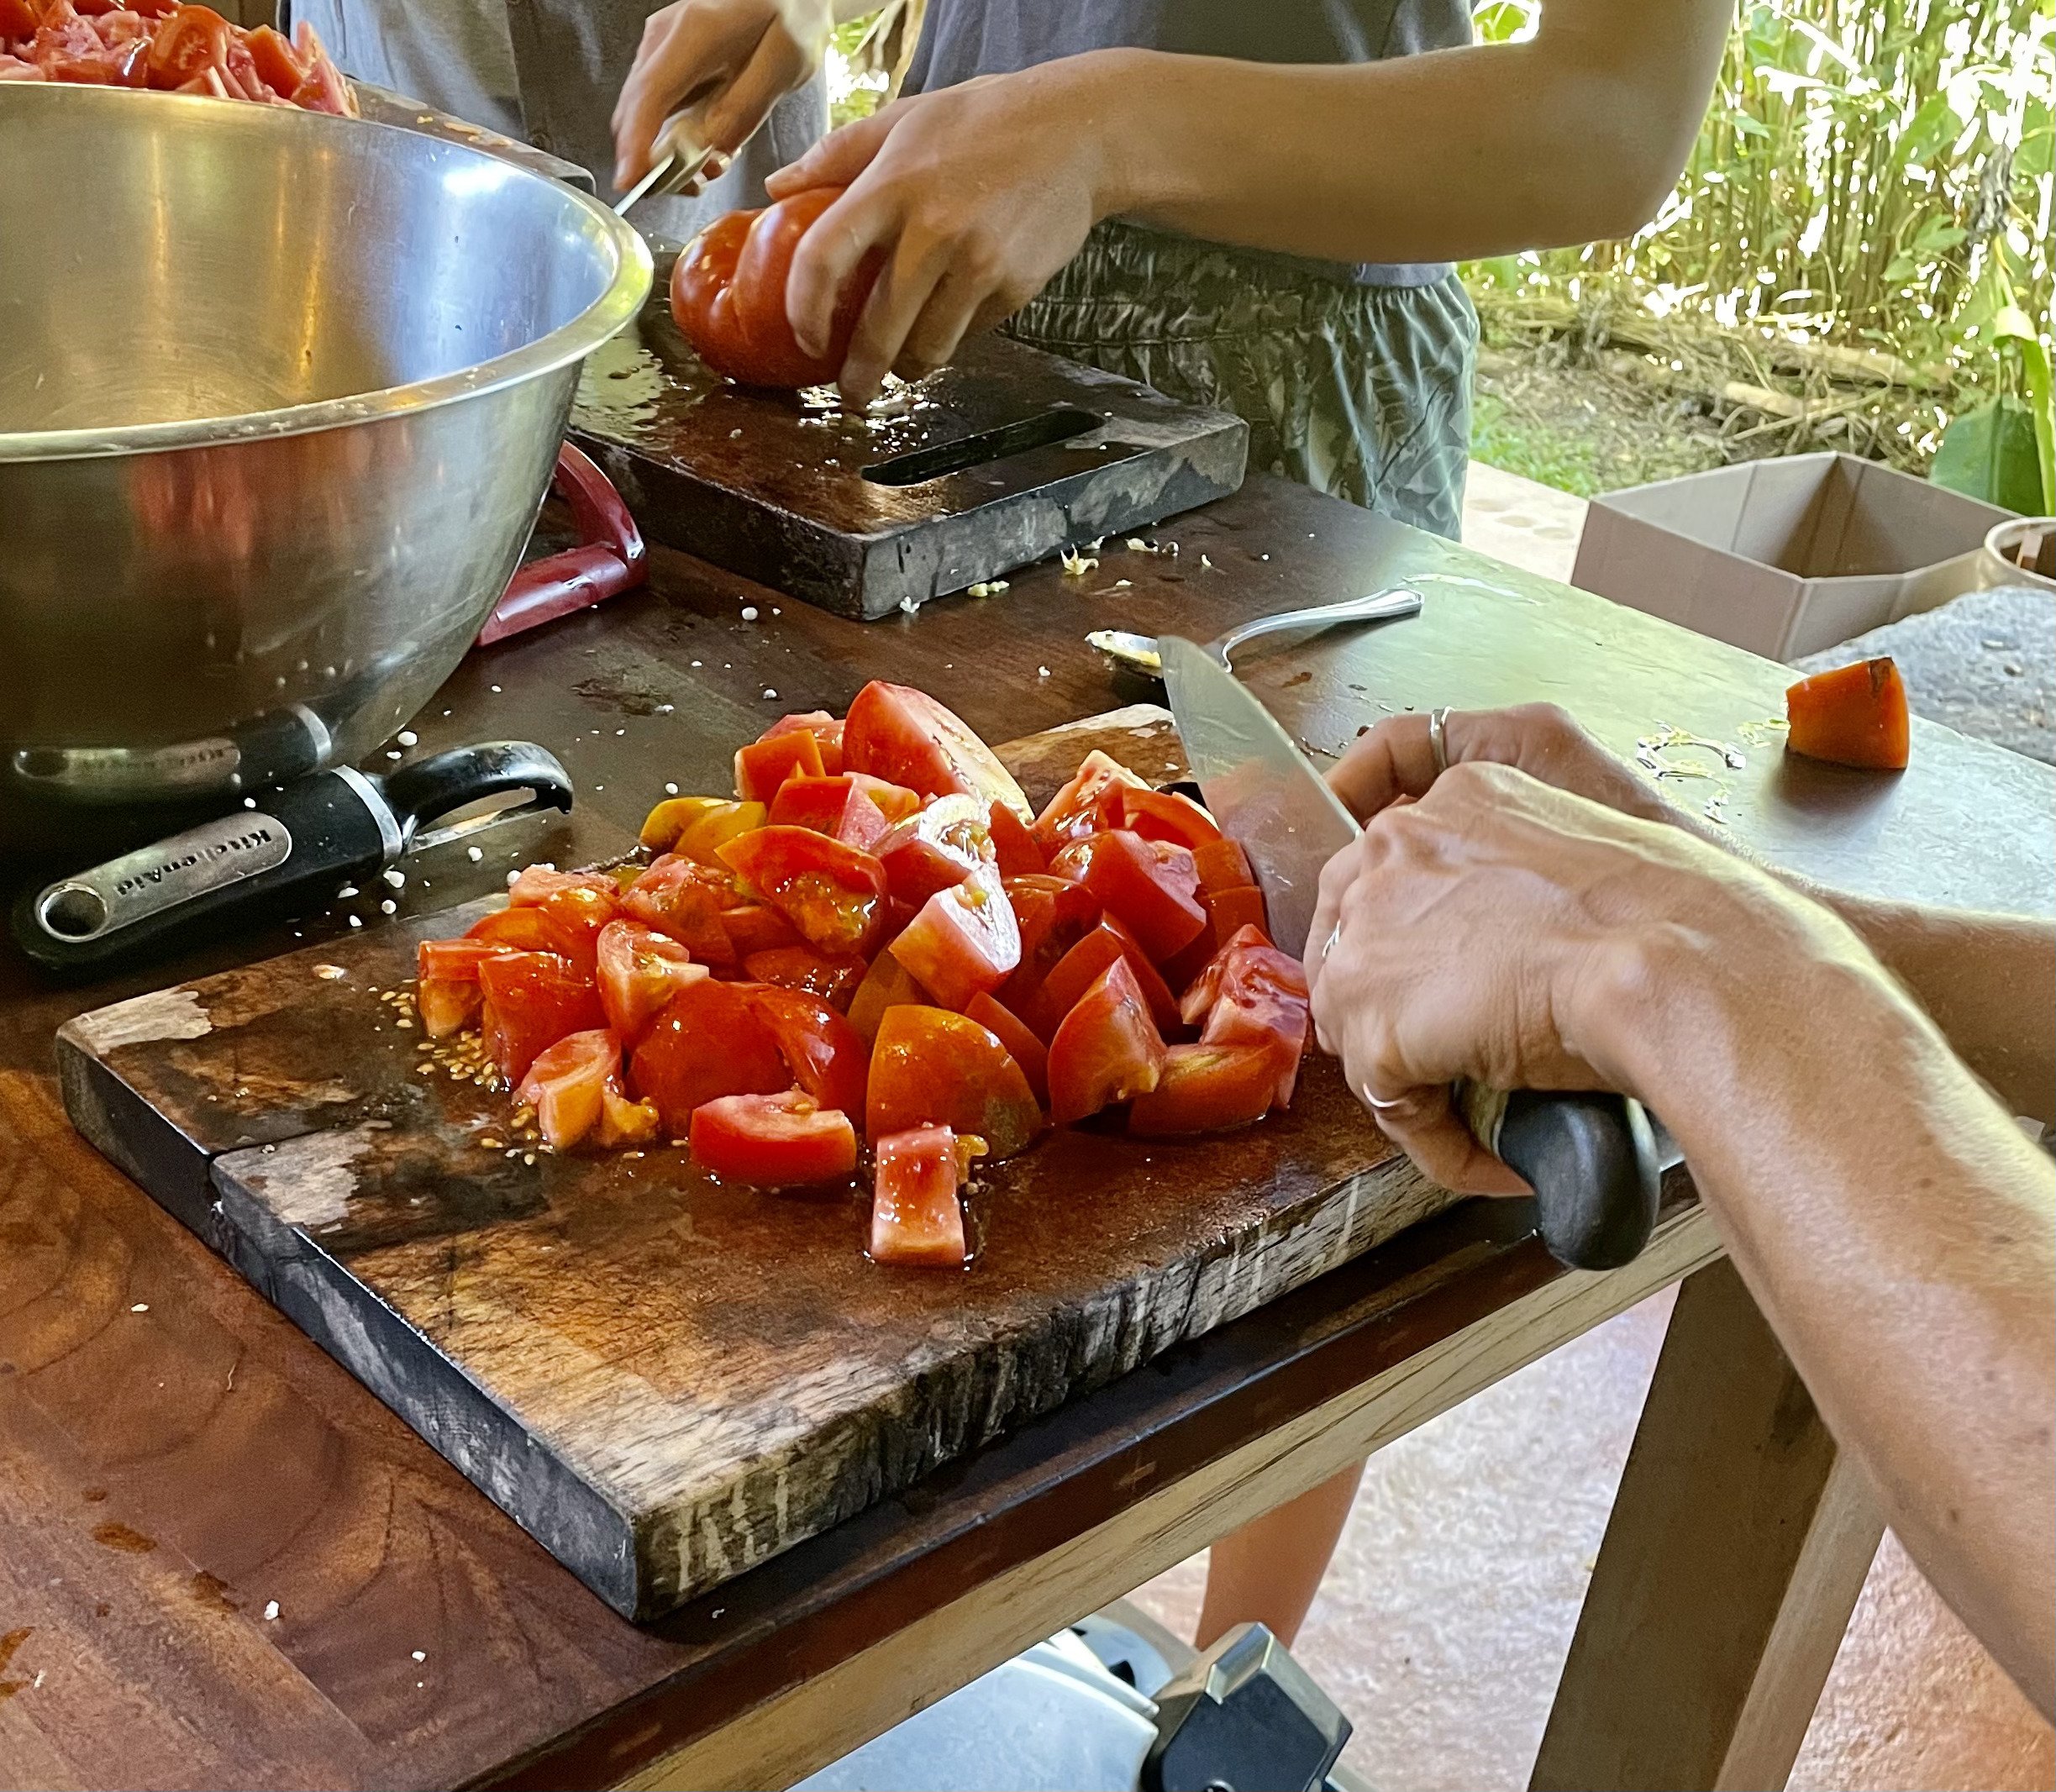
Homemade Ketchup Recipe
Ketchup over the years has been made in a plethora of different ways. The name originally comes from the Hokkien Chinese word ke-tsiap, meaning fermented fish sauce, and in Europe, the sauce has been recreated with mushrooms, walnuts, oysters, anchovies, and more.
By 2023 apprentice Emme Nederbrock
Ketchup over the years has been made in a plethora of different ways. The name originally comes from the Hokkien Chinese word ke-tsiap, meaning fermented fish sauce, and in Europe, the sauce has been recreated with mushrooms, walnuts, oysters, anchovies, and more. The first recipe that involved tomatoes was in 1812, and in 1876, the American Henry J. Heinz created his variation of ketchup. Today, about 97% of American households have a bottle of ketchup! Maybe the traditional Heinz ketchup isn't desirable to you, or doesn't taste good, try this fermented ketchup recipe made right here at Rancho Mastatal! Lots of the ingredients included in the recipe when it comes to spices and sweeteners can be altered due to desired taste, so get creative! This recipe is interpreted from the book “The Farmhouse Culture Guide to Fermenting” by Kathryn Lucas and Shane Peterson. We recommend checking out that book, learning from it, and trying out all their fun, sustainable recipes.
Before starting, there is an importance of making sure you are working in a clean environment. We are relying on natural bacterias to do their work and make a delicious ketchup, so keeping other random, possibly bad bacterias out of the mixture is key. Wash your hands consistently, wash all your produce, and make sure all vessels used for the fermentation have been disinfected properly.
Equipment Needed:
Food processor or blender
Kitchen scale
Pan for sautéing
Fermenting jar (for this recipe are using a 2 liter jar)
A stopper and weight for inside the jar
Pot for cooking down recipe after fermentation
Ingredients:
MAKES 2 LITERS (about 1/2 gallon or 2 quarts) will yield around 1 - 1.5kg of finished ketchup after boiling down
2 kg tomatoes
1 onion
2-4 cm knob of ginger
5 cloves of garlic
Salt (3% of total weight of ingredients above)
Brine (recommended but not a necessary factor)
Sugar (10% of total weight AFTER fermentation, about 200g)
1 Tbsp of cornstarch
Spices to your liking (mustard powder, pepper, smoked paprika, chili powder, etc)
Instructions:
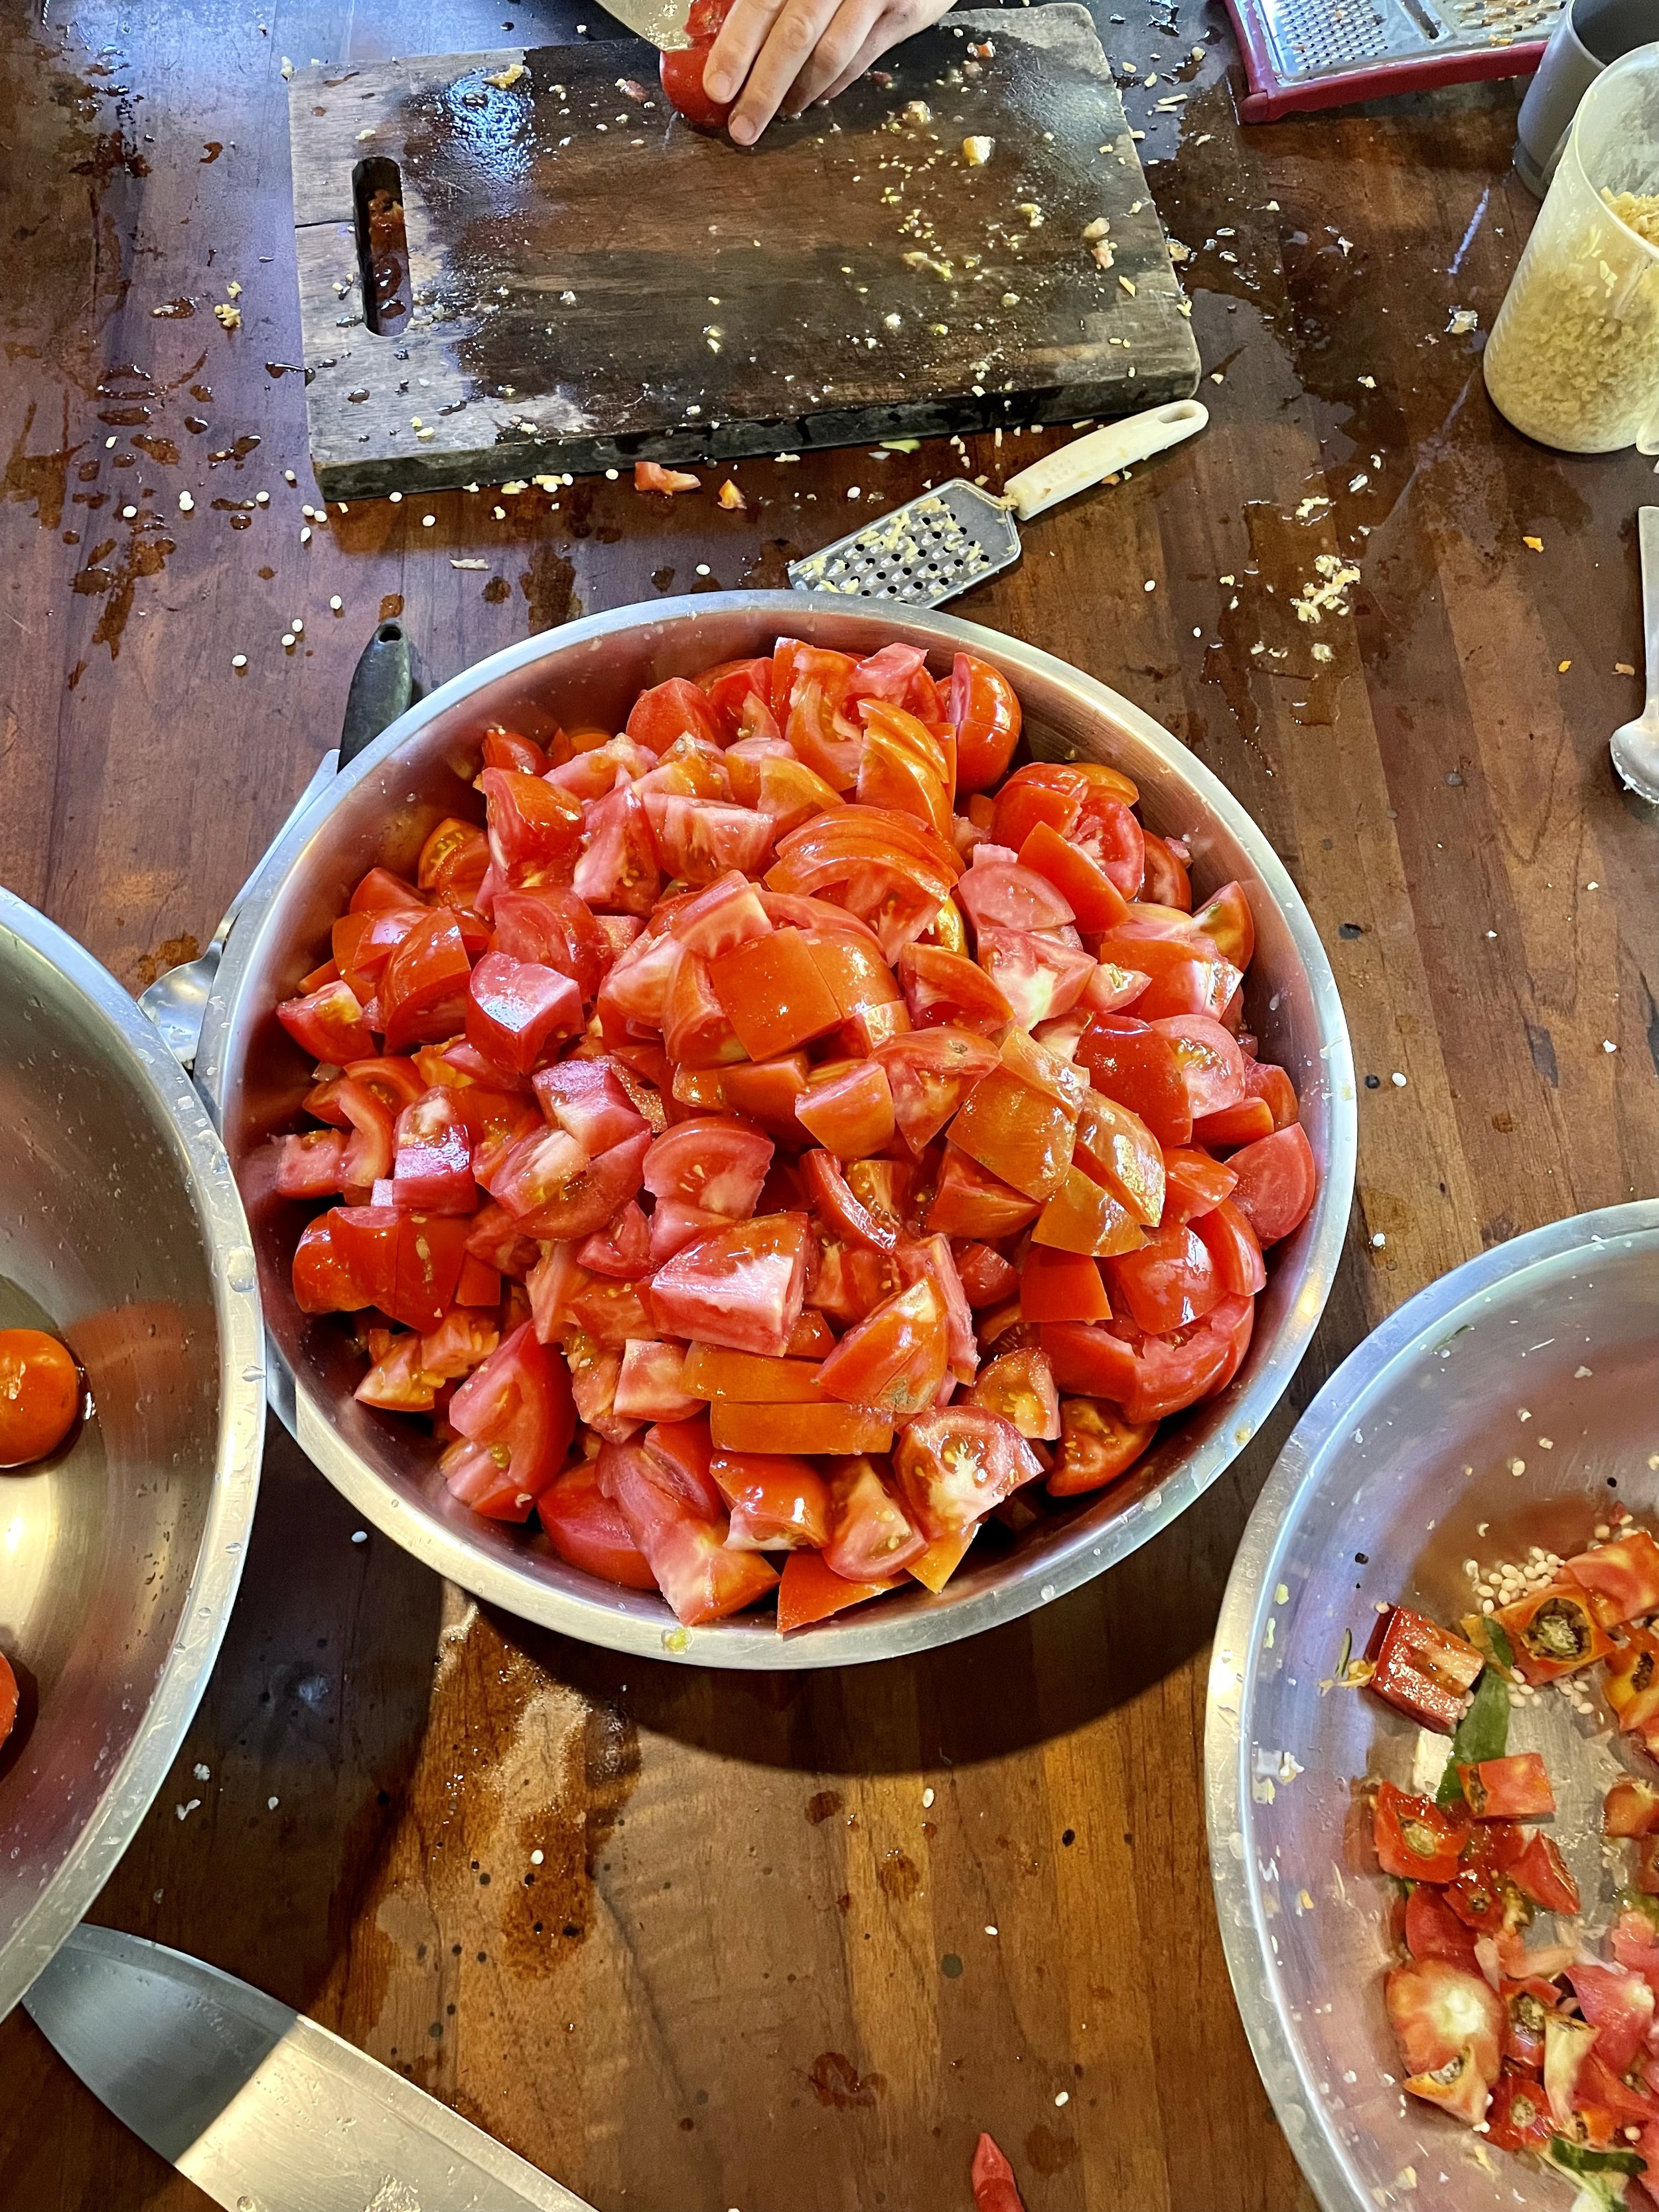
After washing, cut up all tomatoes and remove stems. These tomatoes will be processed in either a food processor or blender so size isn’t too important.
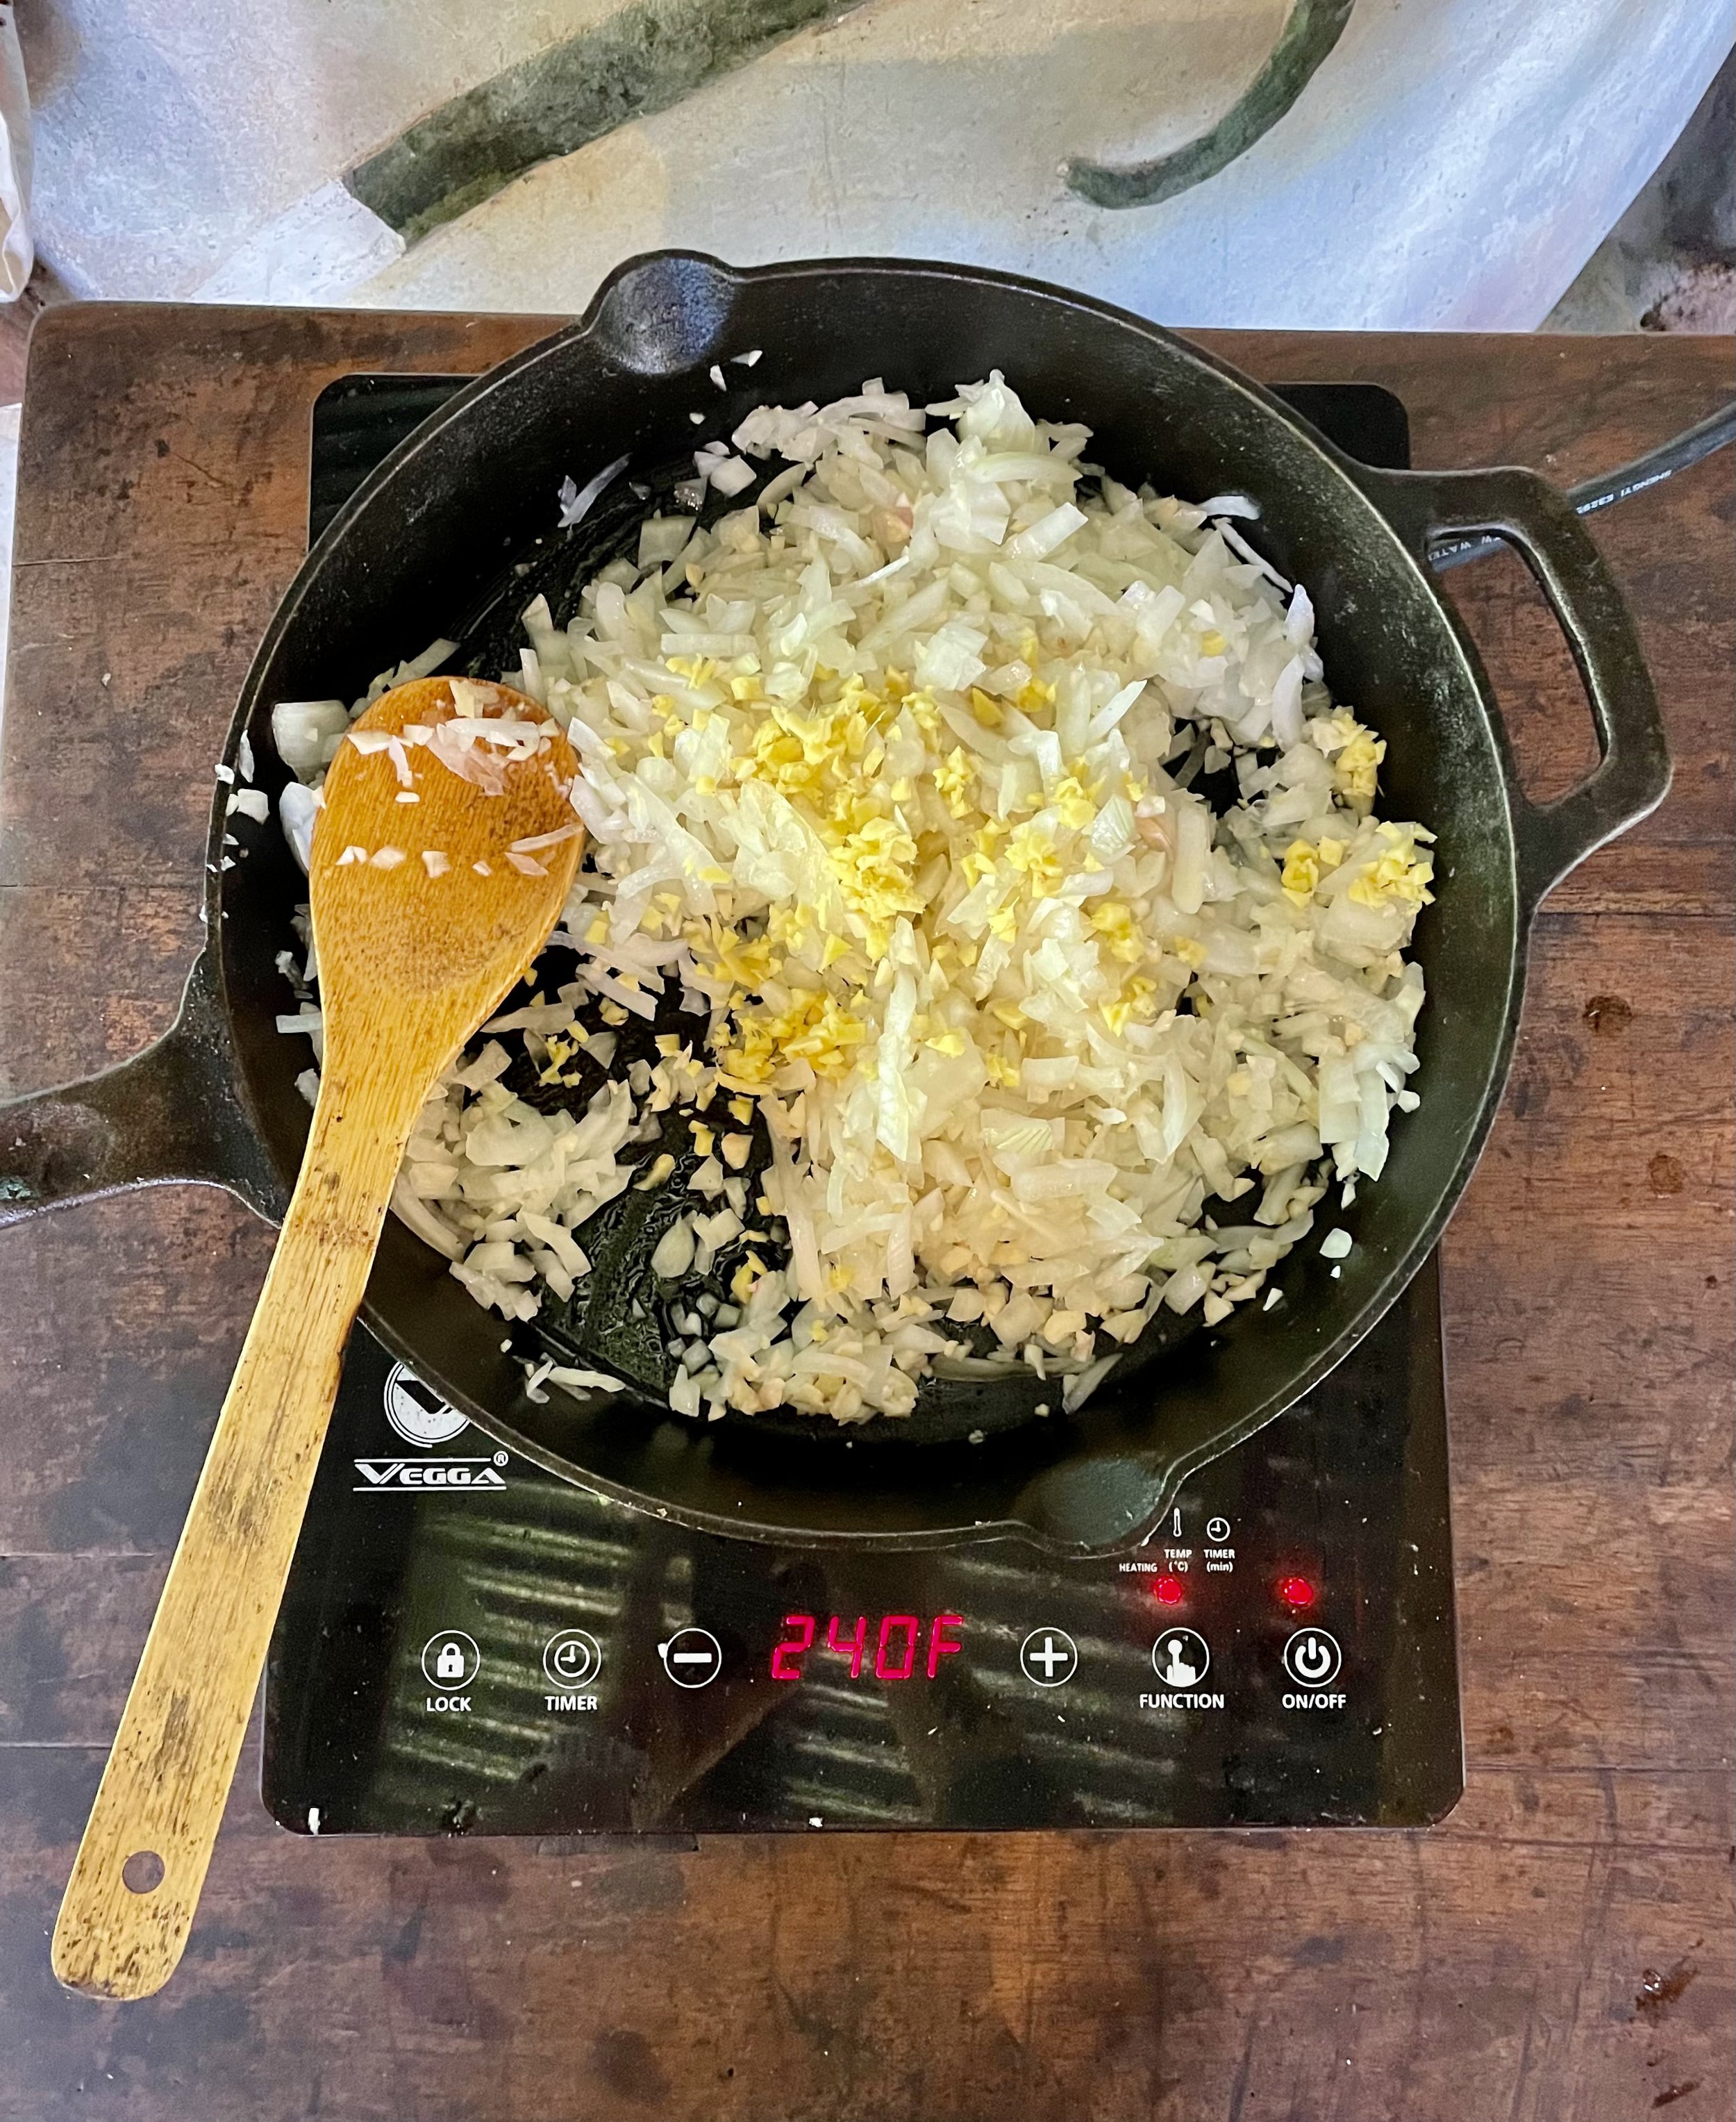
Wash and dice your onion, garlic cloves, and ginger. Add these 3 ingredients to a pan with a little bit of oil and sauté.
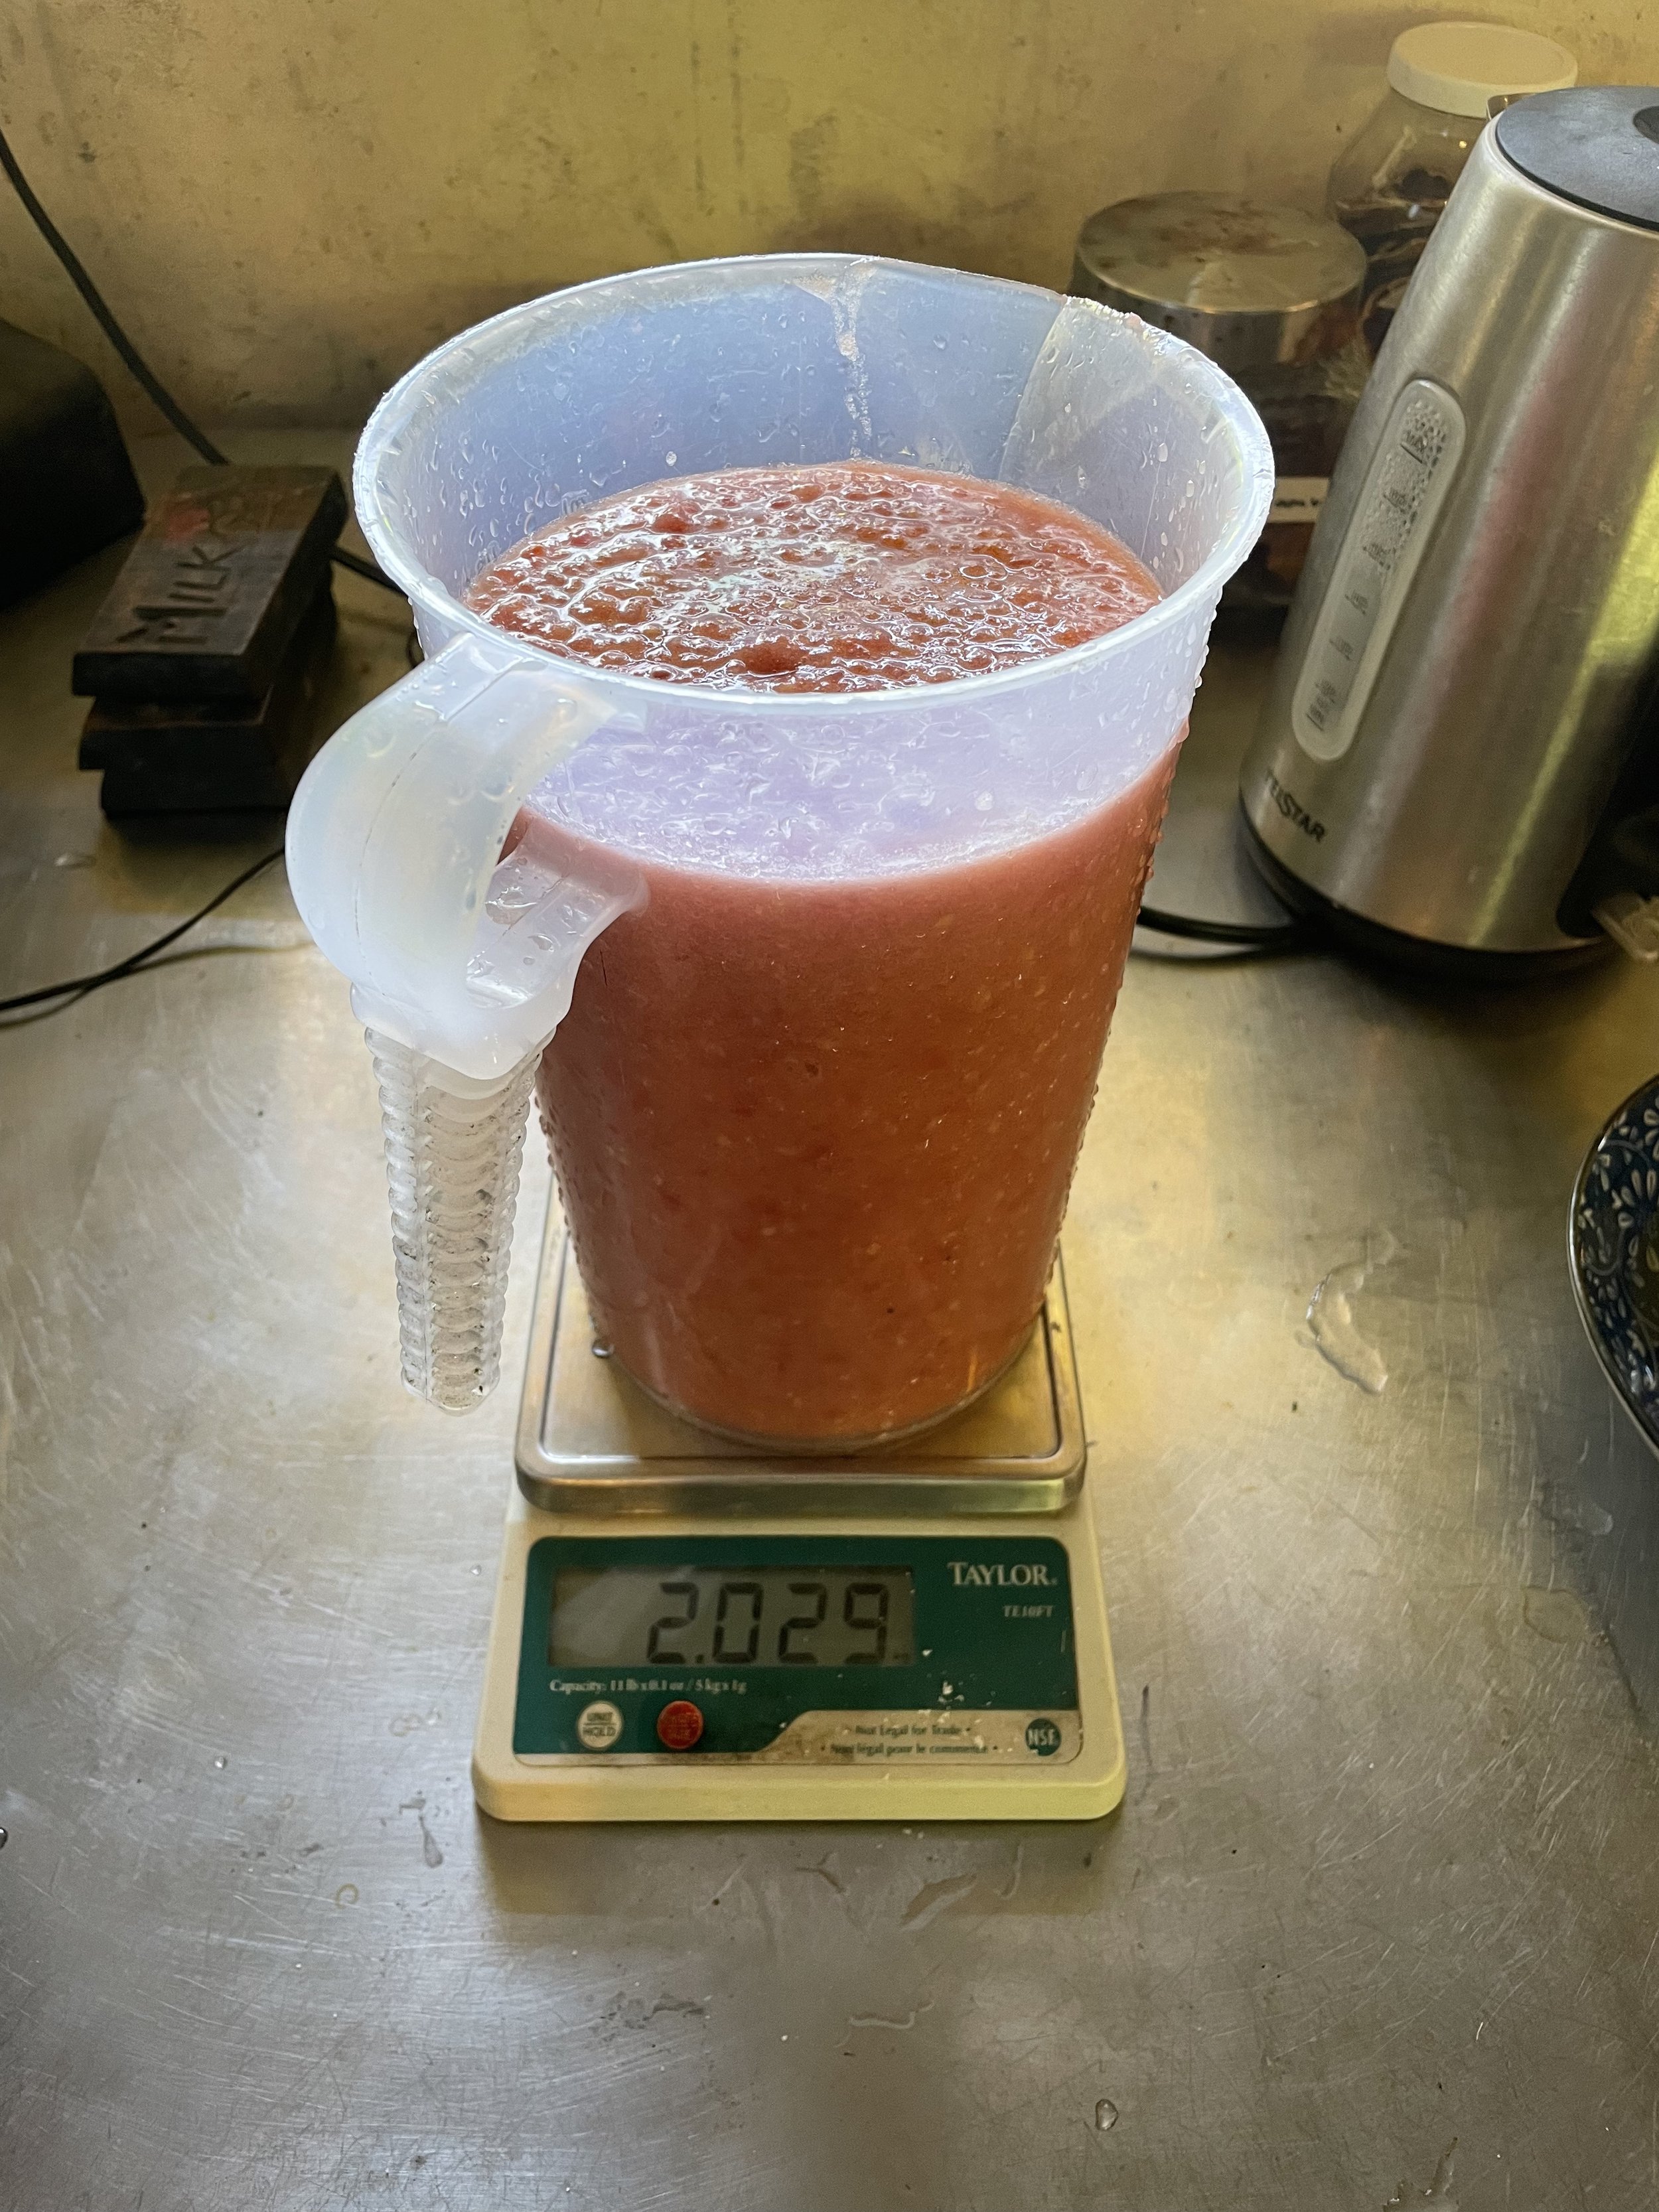
Combine your sautéed mixture and your pureed tomatoes and measure weight. Don’t forget to tare your scale with your glass.
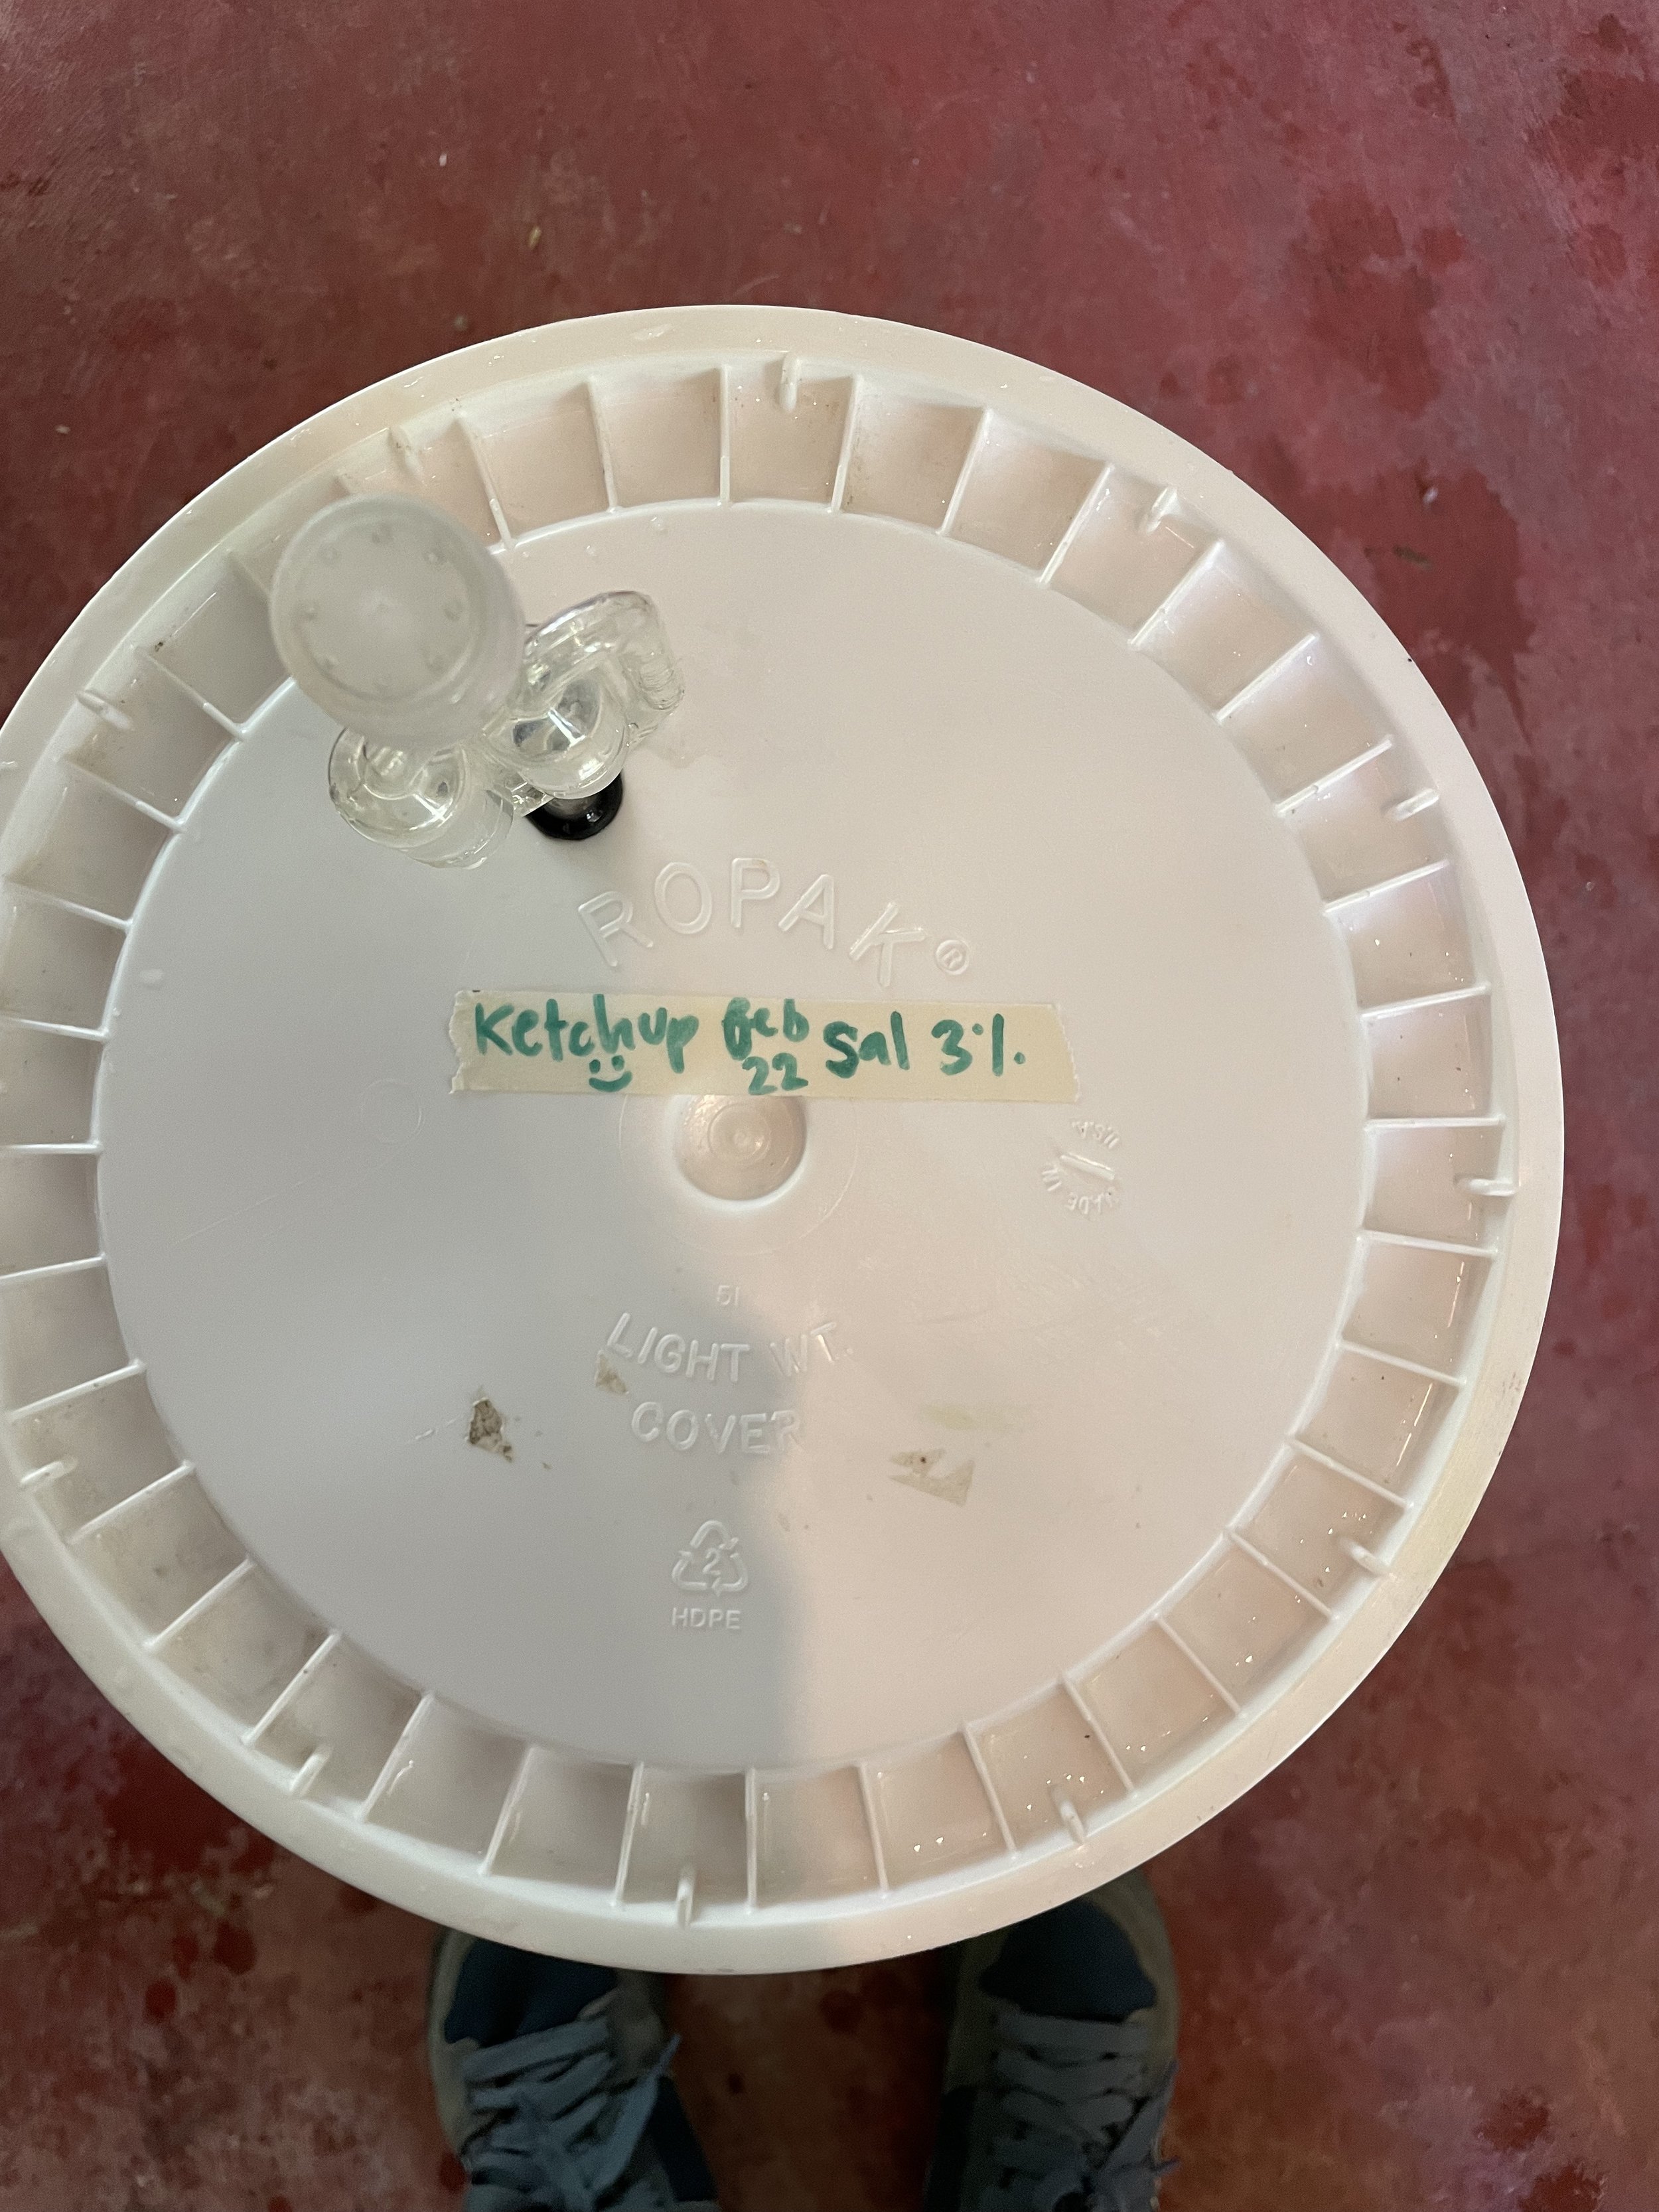
Calculate 3% of weight in grams and add that salt in grams. Don’t lose this number! You will need it again after fermenting to calculate how much sugar to add.
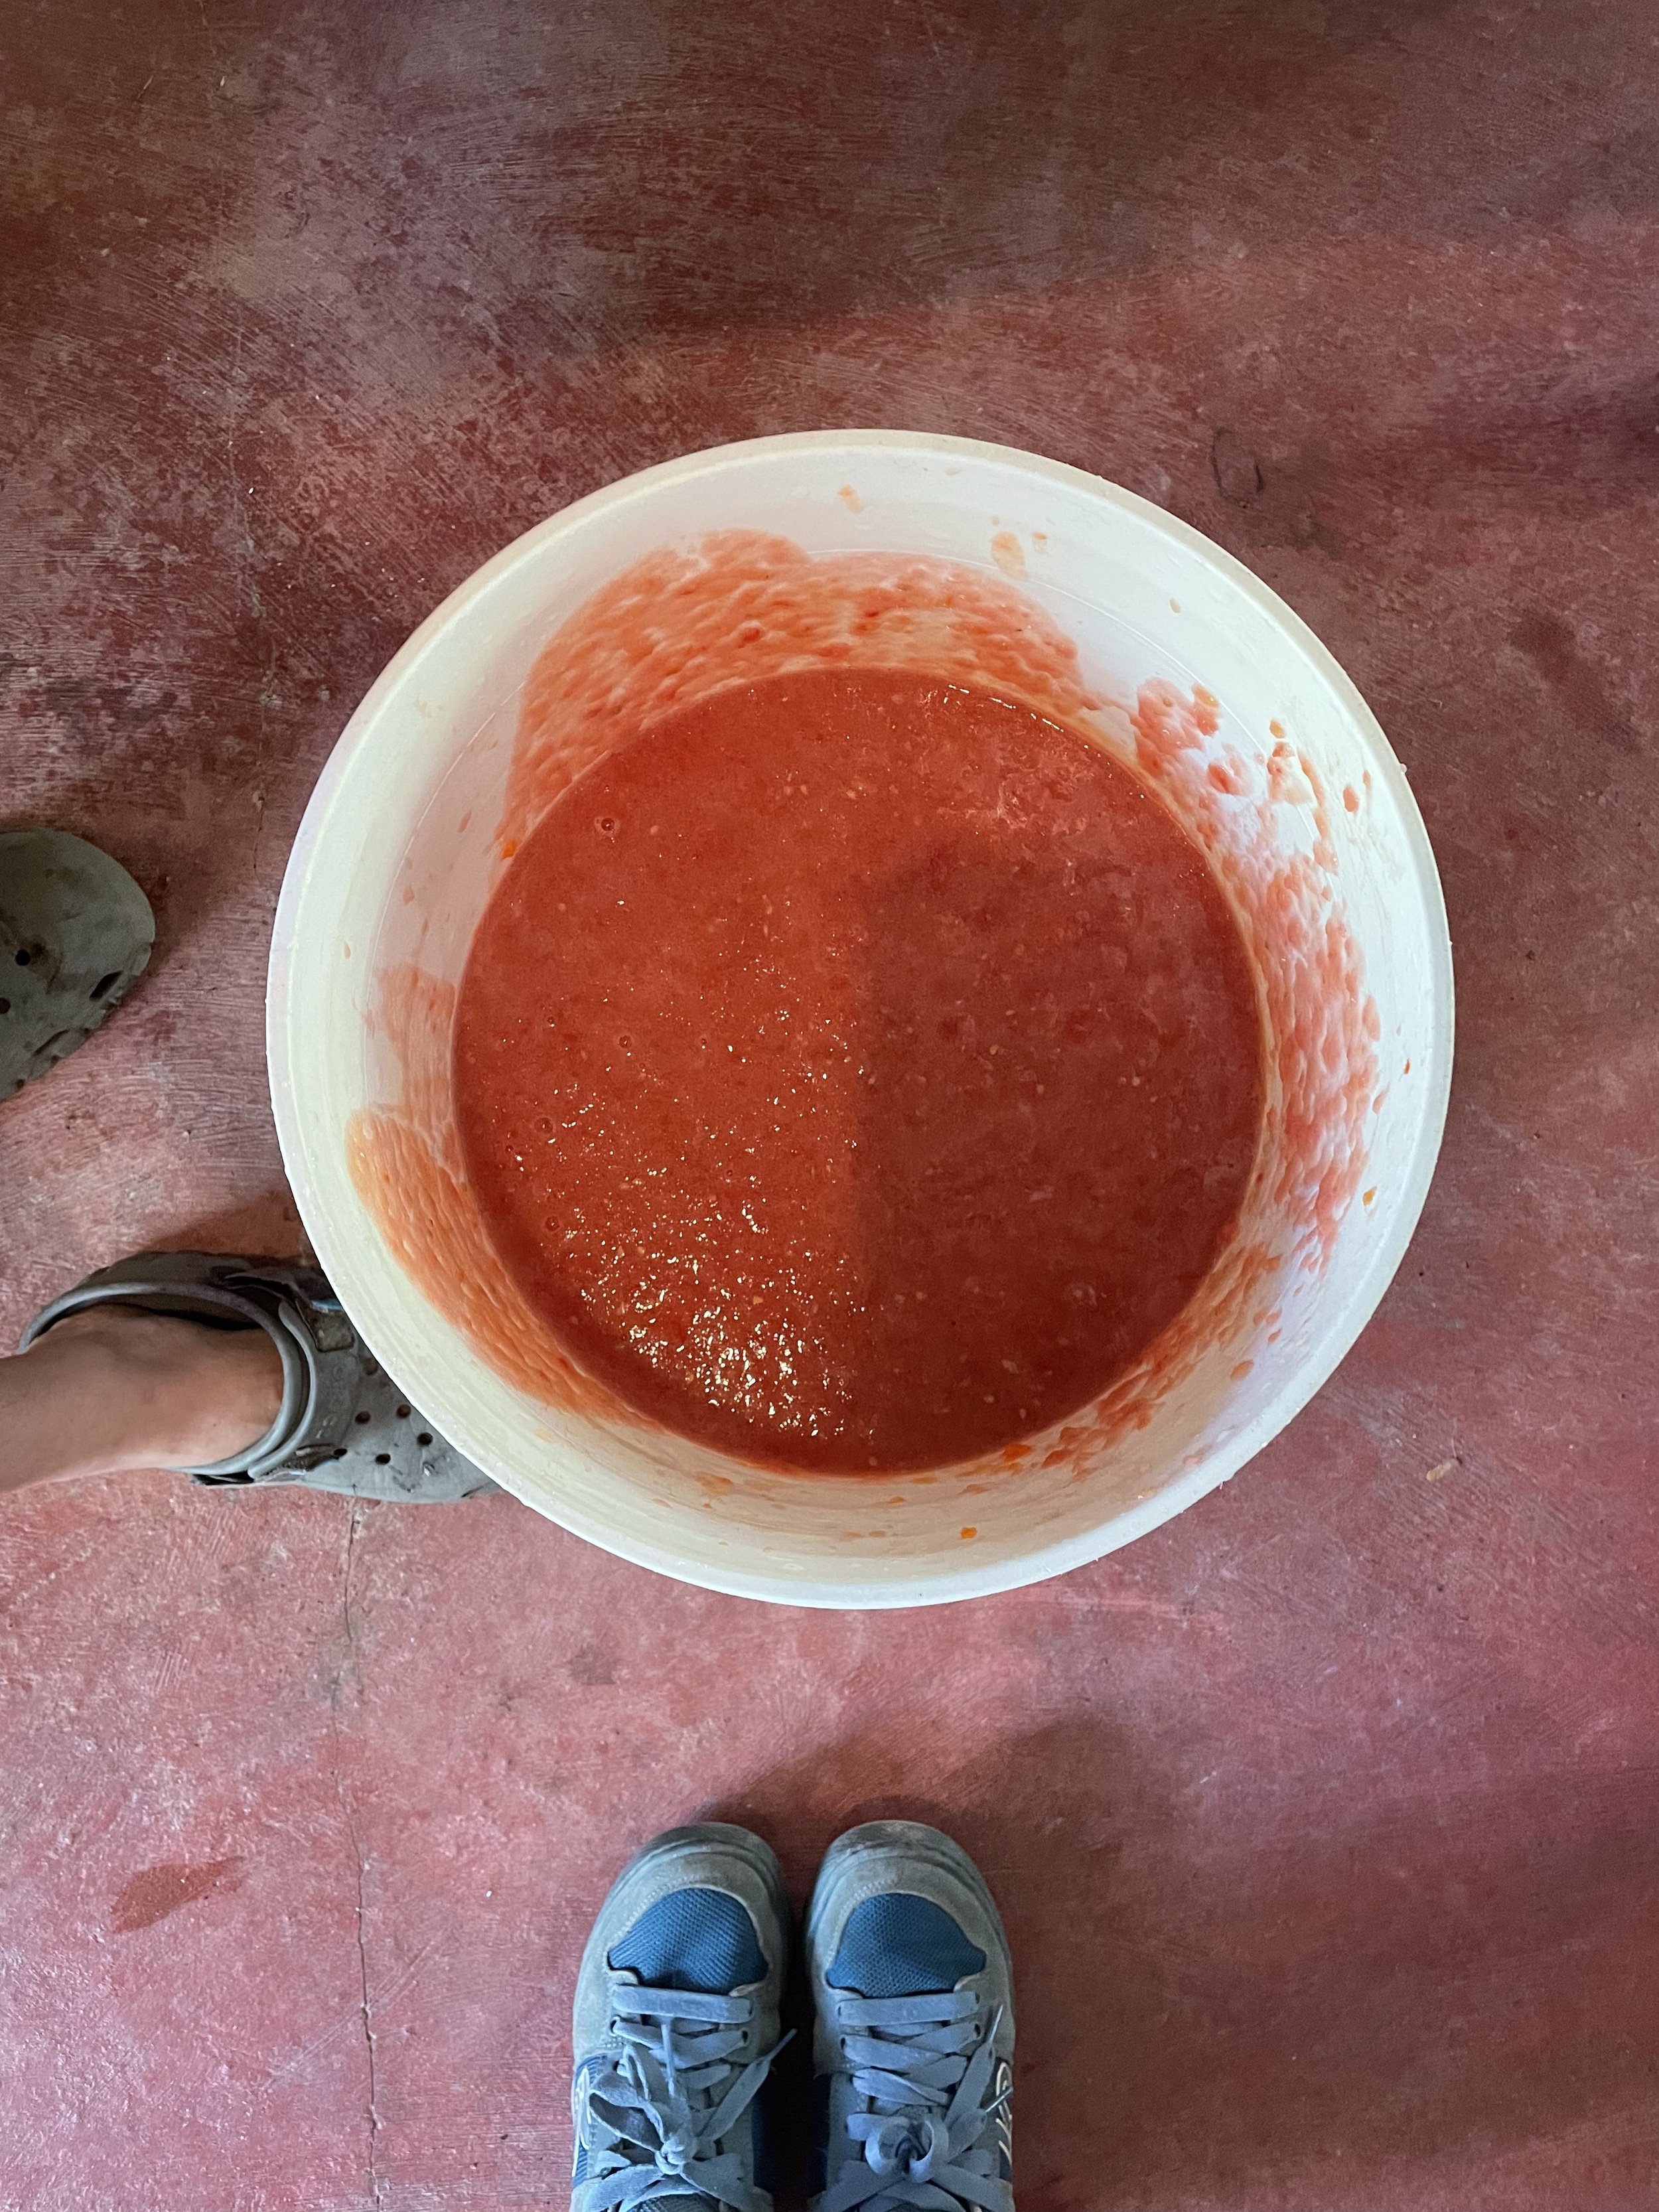
Thoroughly combine the salt into mixture and place into the container that will be used for the fermenting! Make sure the sides of the container are clean after adding mixture.
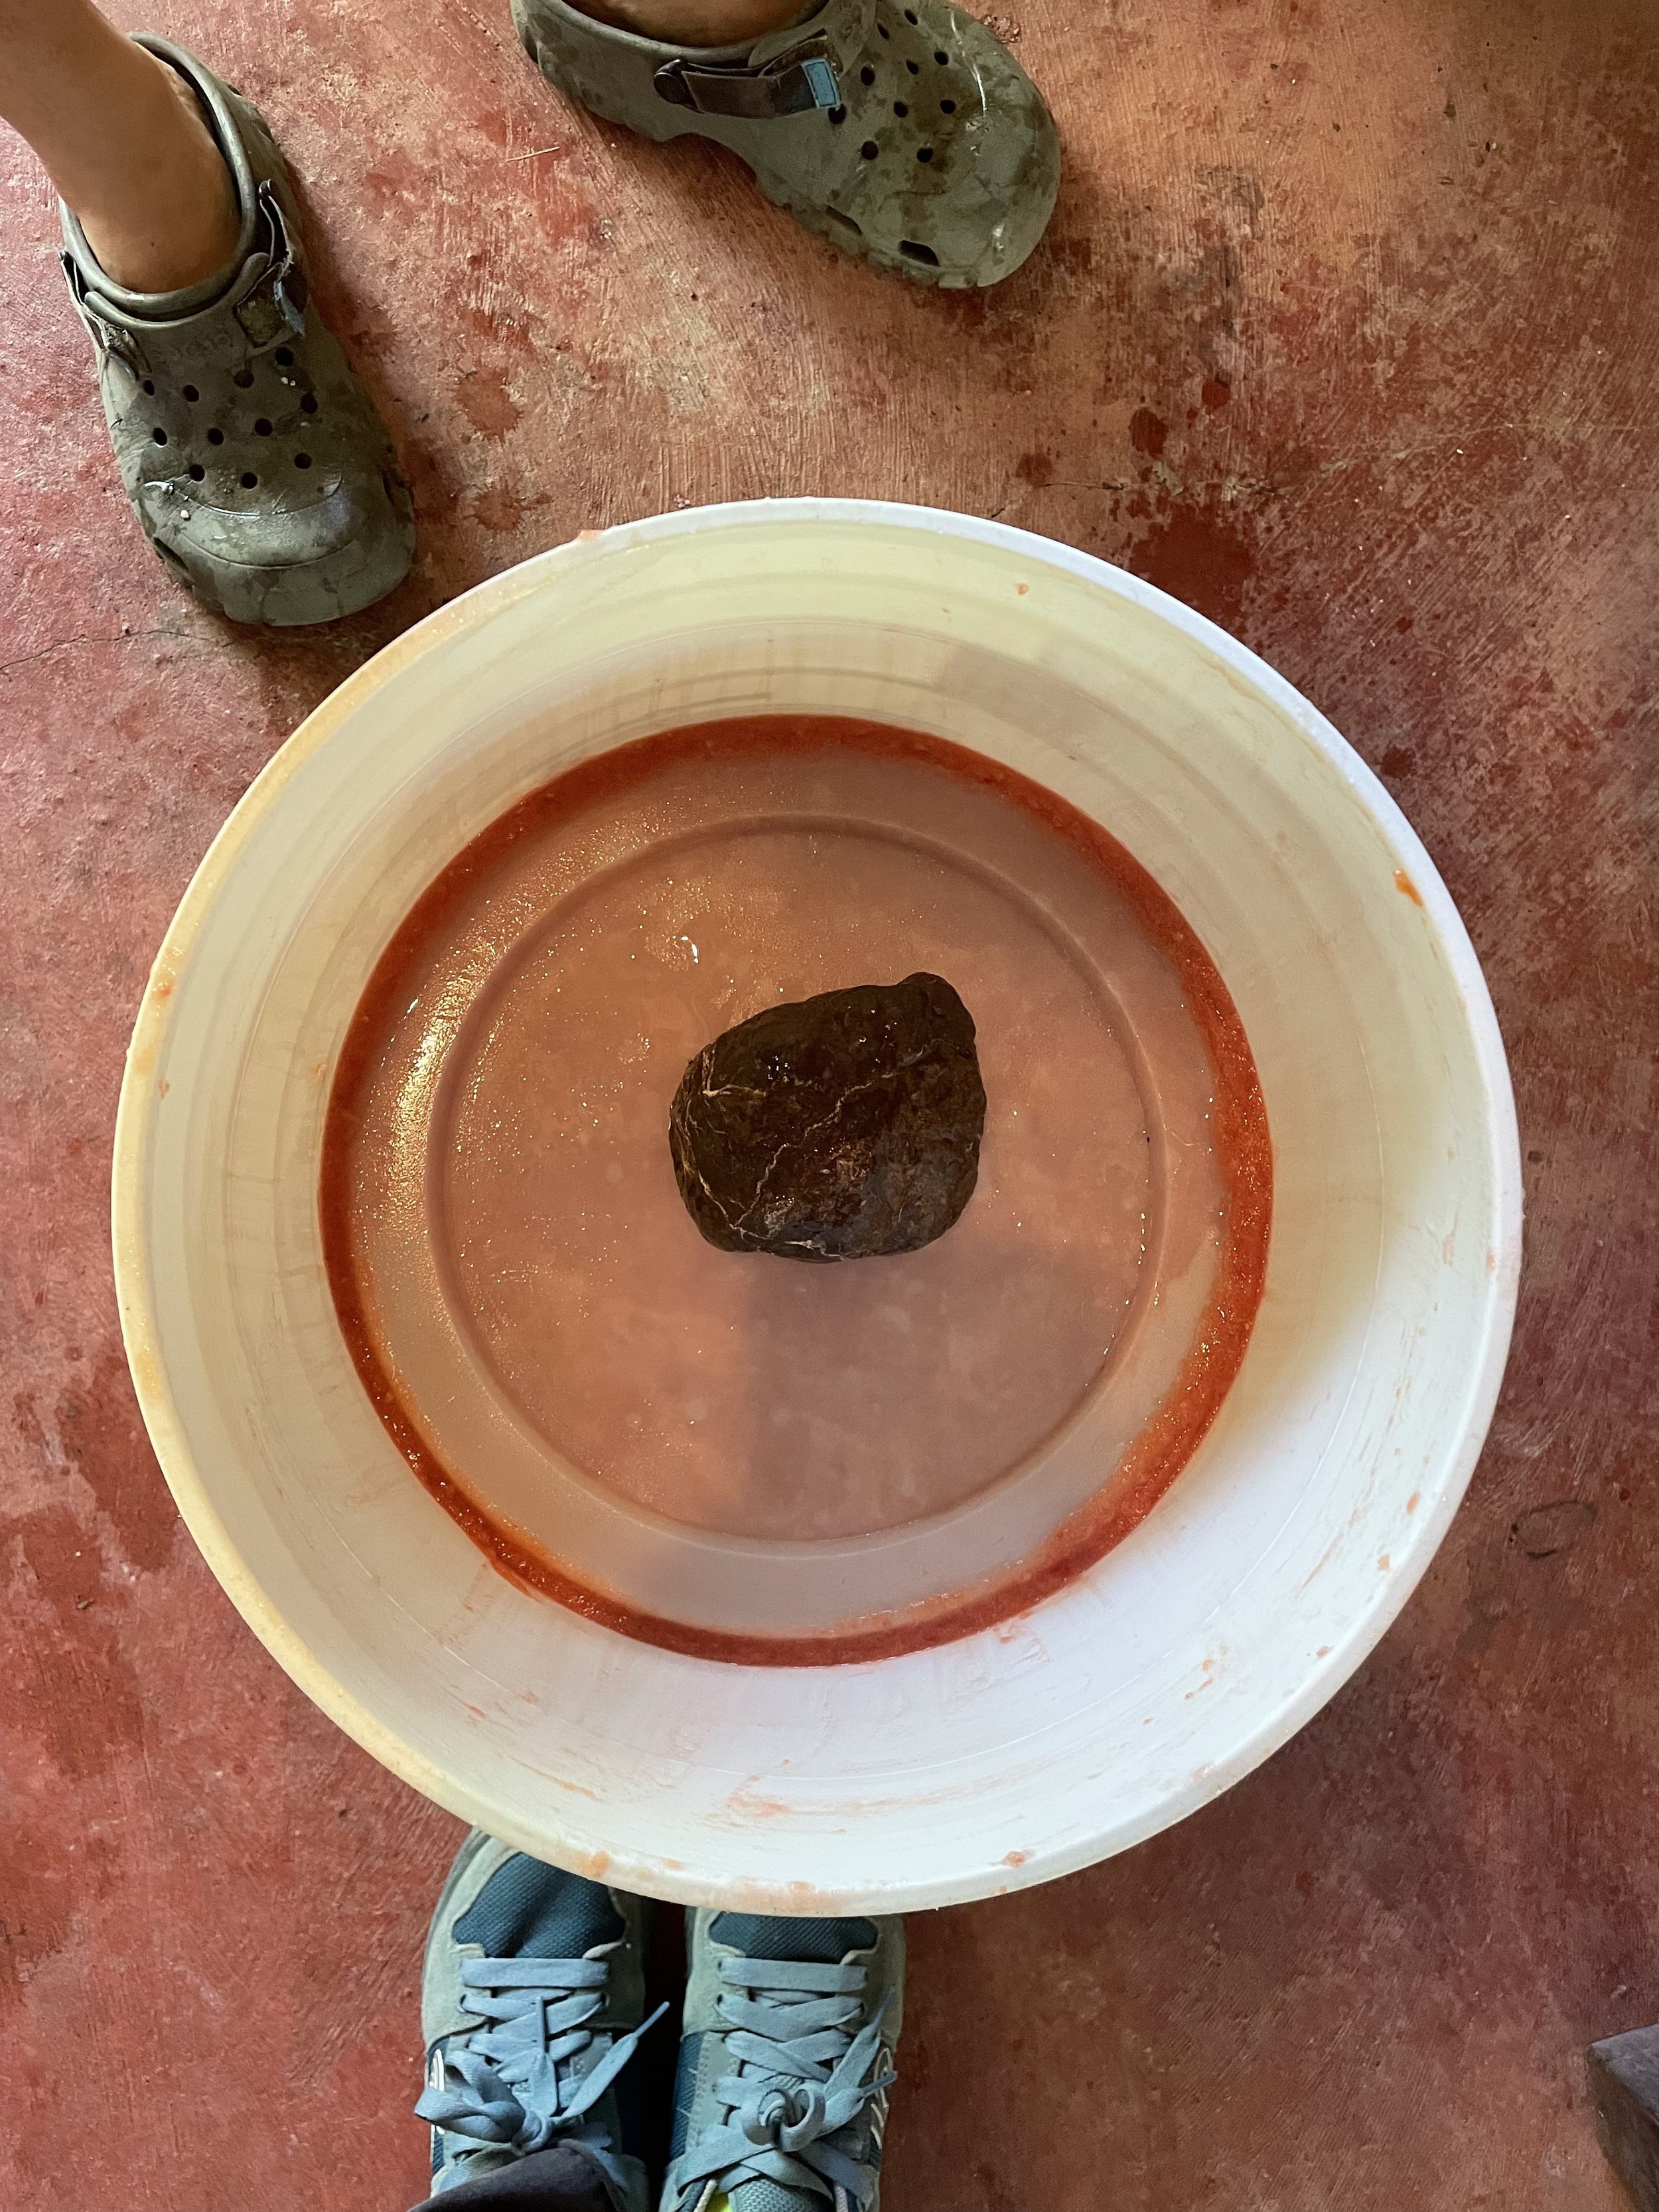
Now is the time to place your follower and weight to keep your new fermented friend submerged! Your follower should fit well into the mouth of your container. Maybe there is a household object that can be disinfected and reused, such as a smaller lid to another container, or a piece of thicker, food safe, plastic you can cut to the desired shape. The weight is extra support for submersion. In our case, we used a disinfected rock. The weight should not cause the follower to sink below the ketchup, but just sit on top and keep everything in place. Worse case scenario, remember this tune, “submerge in brine and all will be fine.”
Close your container and allow to sit in a cool, dry place for about a week, or until desired sourness is acquired. It is possible that kham yeast will grow. Kham yeast is a completely safe, white layer that can sometimes form, even with an airtight lid. You can leave the yeast where it is until the fermentation process is done. When you're ready to finish the recipe, the yeast can either be left in the mixture, or removed.
After about a week, pour your yummy, fermented ketchup into a pot and begin to boil. Stir pretty consistently.
Once in the pot, add your 10% sugar. Maybe a little more or a little less if you prefer more sweet or a more sour ketchup. For our ketchup we used tapa dulce, which is a natural cane sugar, but any sweetener of your choice will do. Support local… and continue to stir!
If the sweetener did not thicken the ketchup enough, adding cornstarch will help. Add your cornstarch to a little bit of cold water and mix together BEFORE adding to your boiling ketchup. Adding the cornstarch straight to a boiling substance will not produce the same result. Keep stirring!
Time to get creative! Add spices of your choice whether that be smoked paprika, pepper, chili powder, and so many more options depending on your palate.
Once you’re done adding seasonings, remove from heat and place your pot in a Bano Maria. This is an ice bath. We do this to cool the temperature of the sauce before we place in into the fridge. Try to stir the ketchup during this process to simultaneously cool the middle and outside.
Final step: Choose your vessel! You can reuse an old ketchup bottle for the squeeze effect, or get fancy by reusing some old glass containers. The cupboard is your oyster.
Place in fridge! This ketchup should last 3-6 months depending on how often the container is opened or left out for dinner purposes. Enjoy!
Check Out These Other Blog Recipes
Make Black Garlic in Your Compost
Homemade Hoisin Sauce and Other Recipes with Fermented Black Bean Paste
Making Compost 101
By 2022 apprentice Joshua Wright
Smelly, sticky, messy.
Perhaps these are some words to describe your experience with food waste. But it doesn't have to be! Enter the world of composting!
In permaculture we love composting and would never think about just throwing away our food scraps into the trash, because they aren’t waste, they are resources that will benefit our garden and our planet.
Composting is a great way of dealing with your kitchen scraps, autumn leaf litter and/or lawn trimmings, along with any other organic matter that may be in your garden. Dealing with a “waste” product and turning it into something beneficial. In permaculture we also call this stacking functions.

An apprentice flipping our compost pile
What is compost?
Compost is broken down, decomposed organic matter. It occurs naturally in the environment around us as living things decay. Through human interaction this natural process can be sped up.
Why should you be making compost?
Composting has several great benefits:
It improves soil health. Adding organic matter into soils allows them to better retain moisture leading to reduced irrigation costs. It lends itself to better aerated soils reducing the need to till and it provides habitat for beneficial fungi and micro-organisms to continue the work of decomposition and nutrient cycling.
It provides plants with nutrients essential for their growth. The main elements plants need are Nitrogen (N), Phosphorus (P) and Potassium (K), all of which are present in compost, along with a number of other elements in trace amounts such as Calcium (Ca), Magnesium (Mg), Iron (Fe) and Zinc (Zn).
Composting diverts waste from ending up in landfills and the incinerator. Both of these require lots of energy and resources to maintain and manage, so by composting you are freeing up time, money, and energy for better utilization elsewhere (building an abundant, regenerative future we can be proud of).
When in landfills food waste doesn’t have access to oxygen, becoming anaerobic. When decomposing in this airless environment it produces methane and carbon dioxide. When not in balance with natural cycles these gasses contributes to greenhouse gas overload in our atmosphere adding to our global climate crises.
In summary by composting not only are you doing less bad (by producing less pollution) you are actively doing good (building soil which is essential for a healthy planet)! Win, win!
So how do we go about getting started?

Our little wigglers that we use for our vermicompost!
First, let’s identify the best location: Ideally you will have a spot in your garden that is out of direct sun and protected from the rain. You will need something to contain the compost in. A wire cage or recycled wood pallet box will both work great. But you can use any containment method that is roughly 1m^3 and allows air to circulate. If you are limited in space or don’t have a yard, there are many great DIY options, such as a plastic bin with holes drilled out. Or check out vermicompost, which uses worms to help you out! Check out this blog article from Mother Jones to learn more about using worms to compost in a small space.
Next let’s look at what goes into your compost: We can break this down into two basic categories: "greens" and "browns". "Greens" are materials that contain higher quantities of nitrogen and "browns" contain higher quantities of carbon. Balancing this ratio of greens to browns is what will define the success of your compost operation.
This ideal ratio being 25-30 parts carbon to 1 part nitrogen.
Examples of “greens” are kitchen scraps or fresh lawn clippings. “Browns” can be dried leaves, wood chips, saw dust, etc.
Remembering that there is carbon in ALL organic material including materials that we classify as “green”, we can achieve our ideal ratio (25-30:1) by adding roughly 2 parts “brown” material to 1 part “green” material.
If your compost pile starts to smell, attract flies or is excessively wet add more browns, if it is too dry reduce that amount of brown material you add.
Your compost should have the same moisture content as that of a damp sponge. When squeezed firmly no more than a few drops should come out.
Excellent!
Armed with these basics outlined above you are ready to begin your journey into the underworld (soil).
Keep in mind that there is no teacher out there as good as direct experience so get your hands dirty and have fun with it.
One day, we too, shall be compost. And so closes the circle of life.
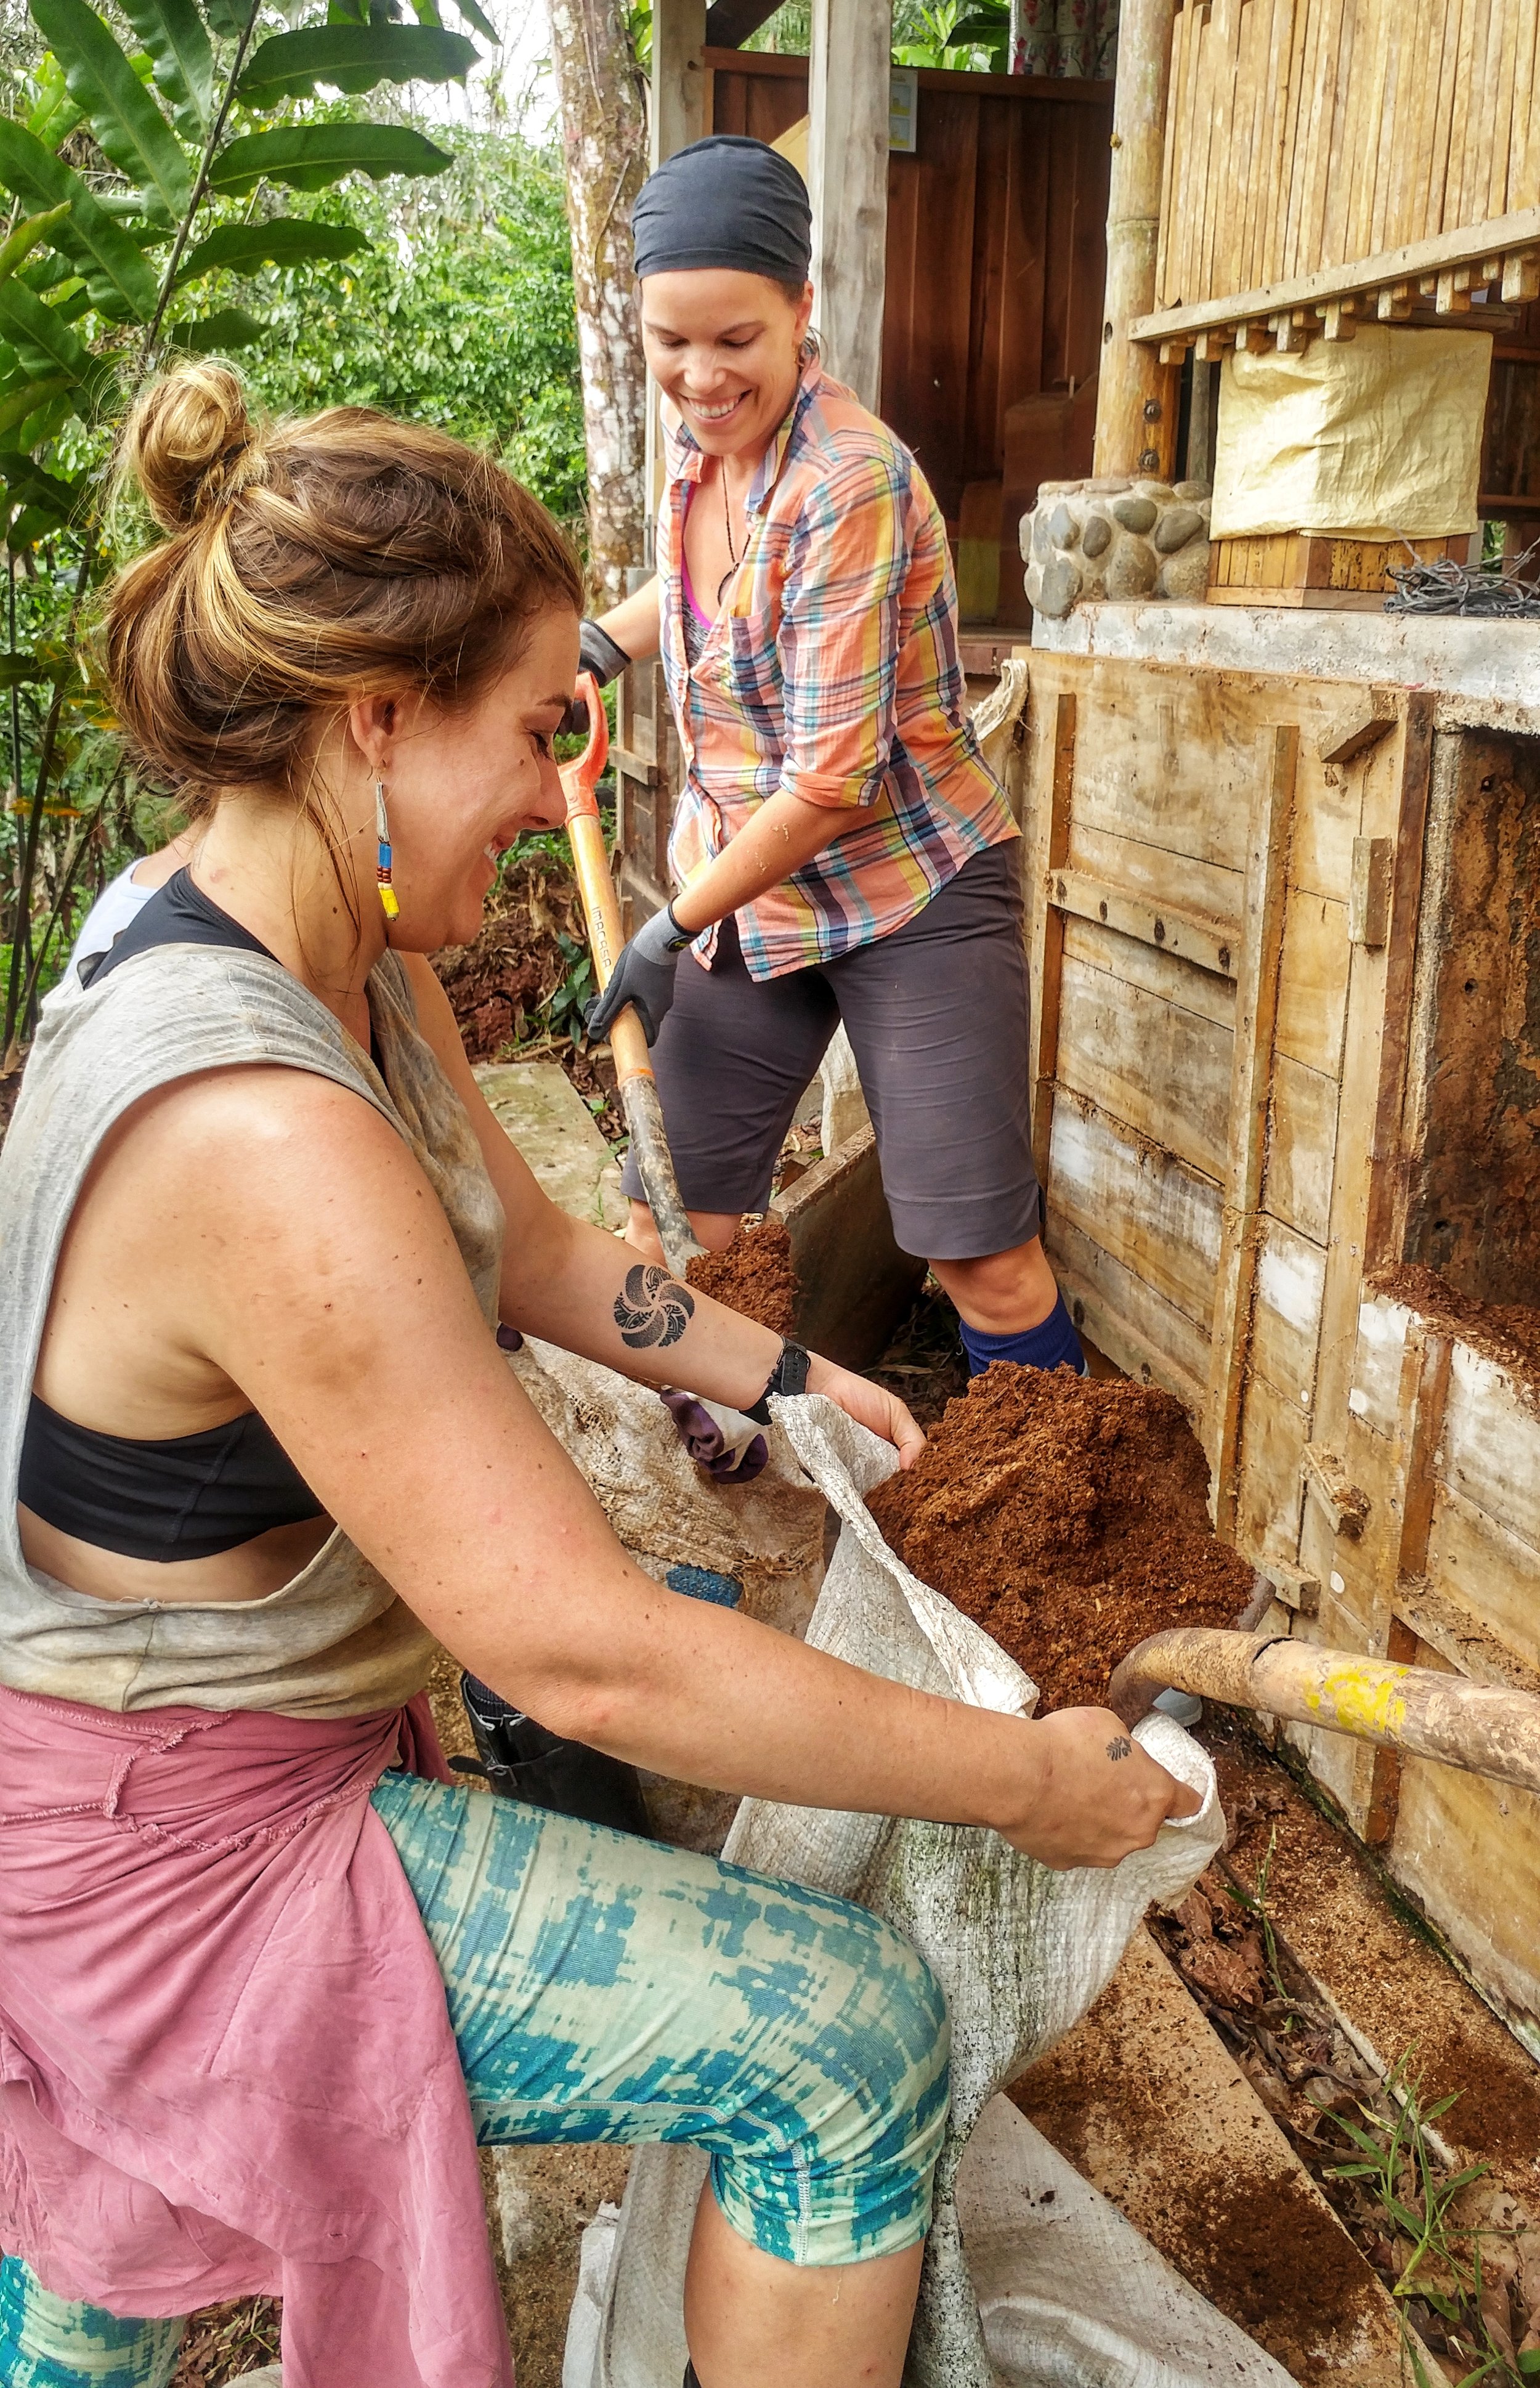
Emptying out one of our compost toilets
Other Related Blog Articles
Transforming Human Waste into Fertilizer: Compost Toilets
5 “Grow Your Own” Mulch Plants
Learn More
Join us for one of our educational workshops about permaculture design, natural bulding, fermentation, and more. Check out our yearly workshops here.

Fruity Ferments- How to Make Fruit Scrap Vinegar
You can make fruit vinegars from all kinds of different local, seasonal fruits. Using the scraps from the fruits (i.e. the peel and extra bits) is a way to value the marginal (permaculture principle) and turn a “waste” product into something of purpose.
By Hannah Knudson, apprentice 2021
You can make fruit vinegars from all kinds of different local, seasonal fruits. Using the scraps from the fruits (i.e. the peel and extra bits) is a way to value the marginal (permaculture principle) and turn a “waste” product into something of purpose. Here at the Ranch we often make fruit vinegar from bananas (recipe here) and pineapples. But have also done so with a variety of tropical fruits including: patanga, araza and mangosteen. In this article I will explain the process for pineapple vinegar, but this can easily be adapted to meet your local ingredients.
Pineapple Facts

Farm fresh pineapples
Costa Rica is well known for its wide variety of tropical fruits. One of the most loved of these is the pineapple. Many of us around the world are familiar with this tropical treat. The pineapple is one of Costa Rica’s largest exports, trailing close behind coffee and bananas.
Each pineapple plant only produces one fruit and ranges between nine to fourteen months on average for the fruit to be harvested. Here at the Ranch the cultivation of pineapples is an ongoing process. Due to the amount of people we share our space with, we balance between purchasing pineapples locally as well as harvesting what is grown on site.
There are many permaculture values that we try to put into practice in our daily lives here. One being we want to produce as little waste as possible. Even though we have an active composting system, we always try to stack functions - considering if something that normally has one purpose can also find life in other ways. So you can imagine our excitement when a pineapple is finally ready! This magical fruit has been growing for over a year, free of chemical inputs, which is key for this specific recipe. We only use pineapple peels that come from the fruit we grow here on the Ranch because we can ensure they haven’t been sprayed with any pesticides which allows us to give a second life to the peels.
We love our food at the Ranch and do a fair amount of experimentation on a weekly basis, finding new ways to enjoy different aspects of our diet. One way we do this is through fermentation. Each Wednesday we spend our entire day working on creating Kimchi, vinegars, alcohols, chili jams and many other jungle treats. Our pineapple vinegar is a tasty way to connect our love for food and our desire to use our gifts from the earth to their fullest potential.
Fermentation
Experimentations and fermentation go hand in hand in our kitchen here. As apprentices, one of the first things we learn about in our food work parties is the art of fermentation. The beauty of fermented treats is that the possibilities are endless, allowing us to turn our harvests into new recipes.
The word vinegar comes from the French word vinaigre, which translates into “sour wine”. Following the permaculture principle, “produce no waste”, vinegars are also a great way to save some of our alcohol experiments gone awry.
Vinegars are created through alcohol or sugars turning into acetic acid bacteria (AAB). These tiny bacteria are found on almost any surface making them incredibly easy to access. Pineapples are readily available to us so making vinegar from the peel is a quick and easy way to use the whole fruit. We adapted this recipe from one of our favorite books, Wild Fermentation by Sandor Katz. If pineapples aren’t readily available where you are, we hope that this recipe can give you some new ideas on how to preserve some of your own local fruits.

Our homemade fruit vinegars
Recipe
Ingredients:
1/2 cup sugar (we use locally sourced sugar known as tapa dulce, you can use a local sugar source too)
Peel of 1 pineapple (or an equivalent amount of your local fruit)
1 quart water
Instructions:
Mix the sugar and water in an open mouth glass jar.
Submerge the pineapple peels. Ensure all pieces of the peel are completely submerged in your sugar water mix. You can stab the pieces of pineapple peel through a chopstick or secure and wedge them into the jar so all of the peels stay beneath the surface of the water. Add more water and sugar to cover if necessary.
Cover the glass jar with a piece of cloth that is tightly secured (if it is too loose, flies will lay eggs inside which turn into maggots - and for some reason everybody hates maggots). We use a piece of string to tie the cloth around the container.
Stir the sugar water mixture at least once a day. This is in order to prevent mold from growing and to break the surface that is created to allow aeration to occur which is needed for the fermentation process.
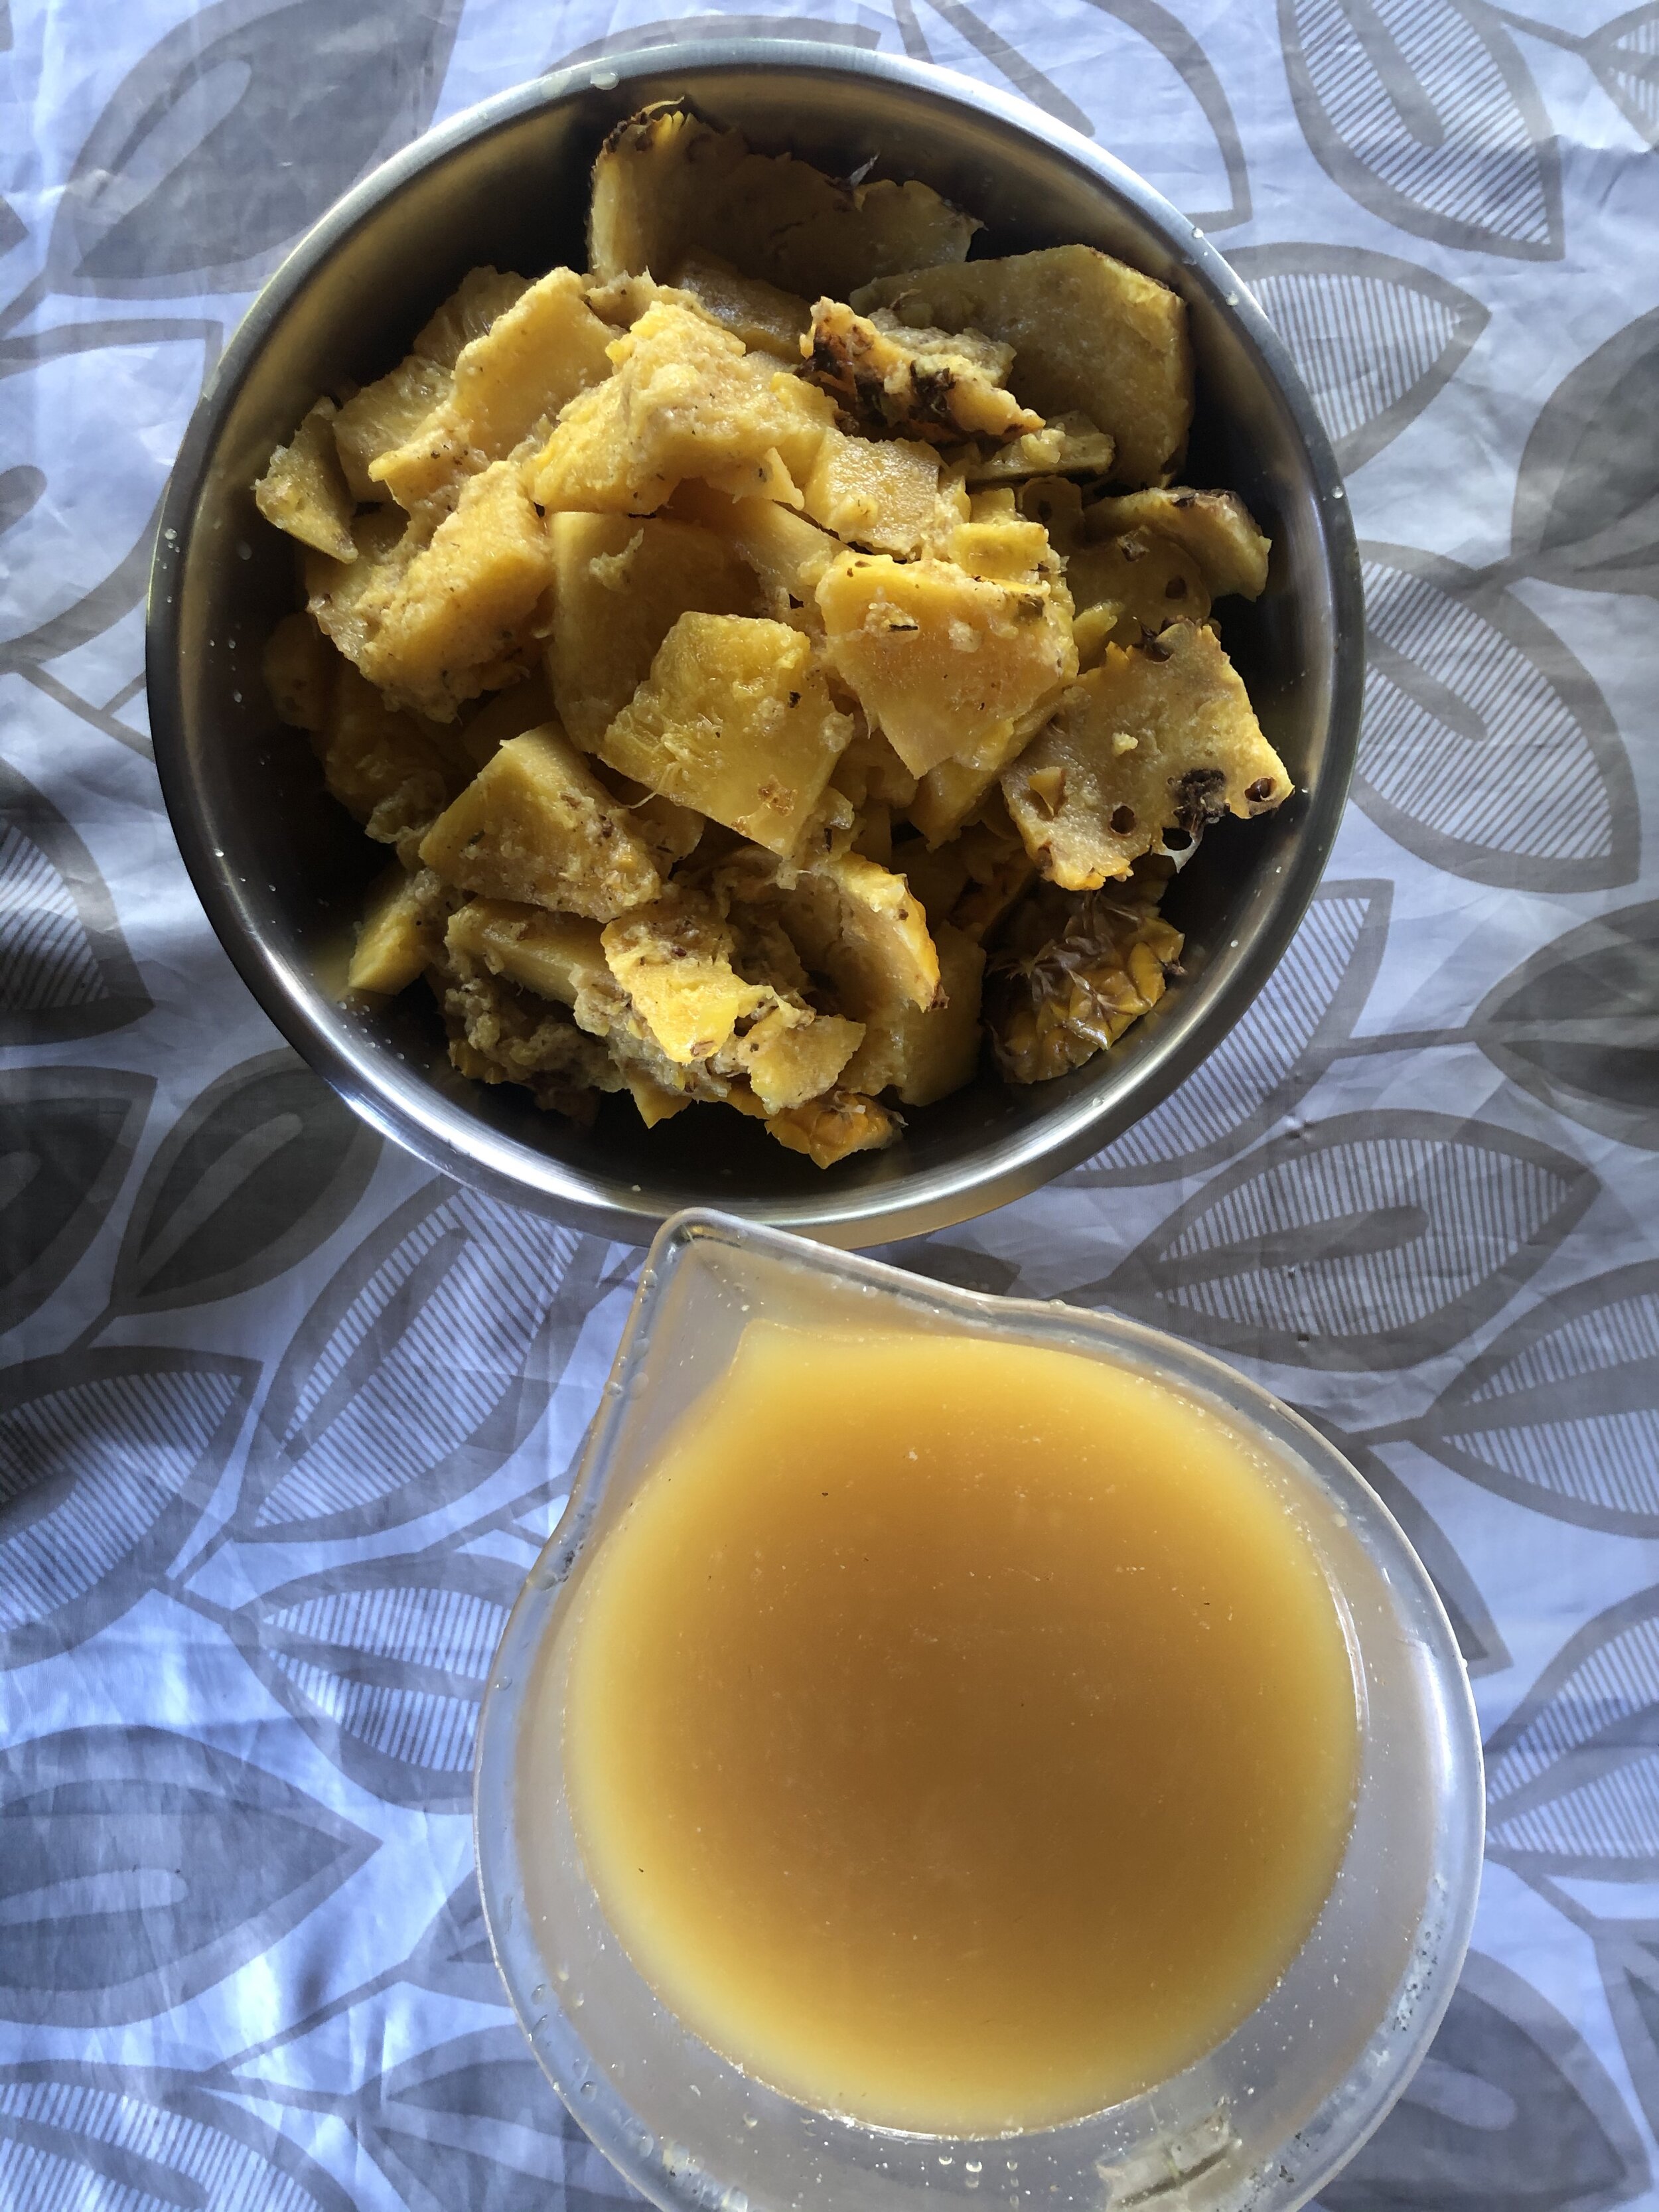
When the liquid darkens after about a week, strain out the pineapple peels and compost them.
Ferment the liquid 2-3 weeks more. A gelatinous “mother” may grow on top, which is great. When your vinegar is acidic, strain it into a bottle and cap. The mother can be composted or added to a new vinegar at step number five.
At this stage, you can start to use your vinegar or continue to let it age. We usually let our vinegars age around 6 months.
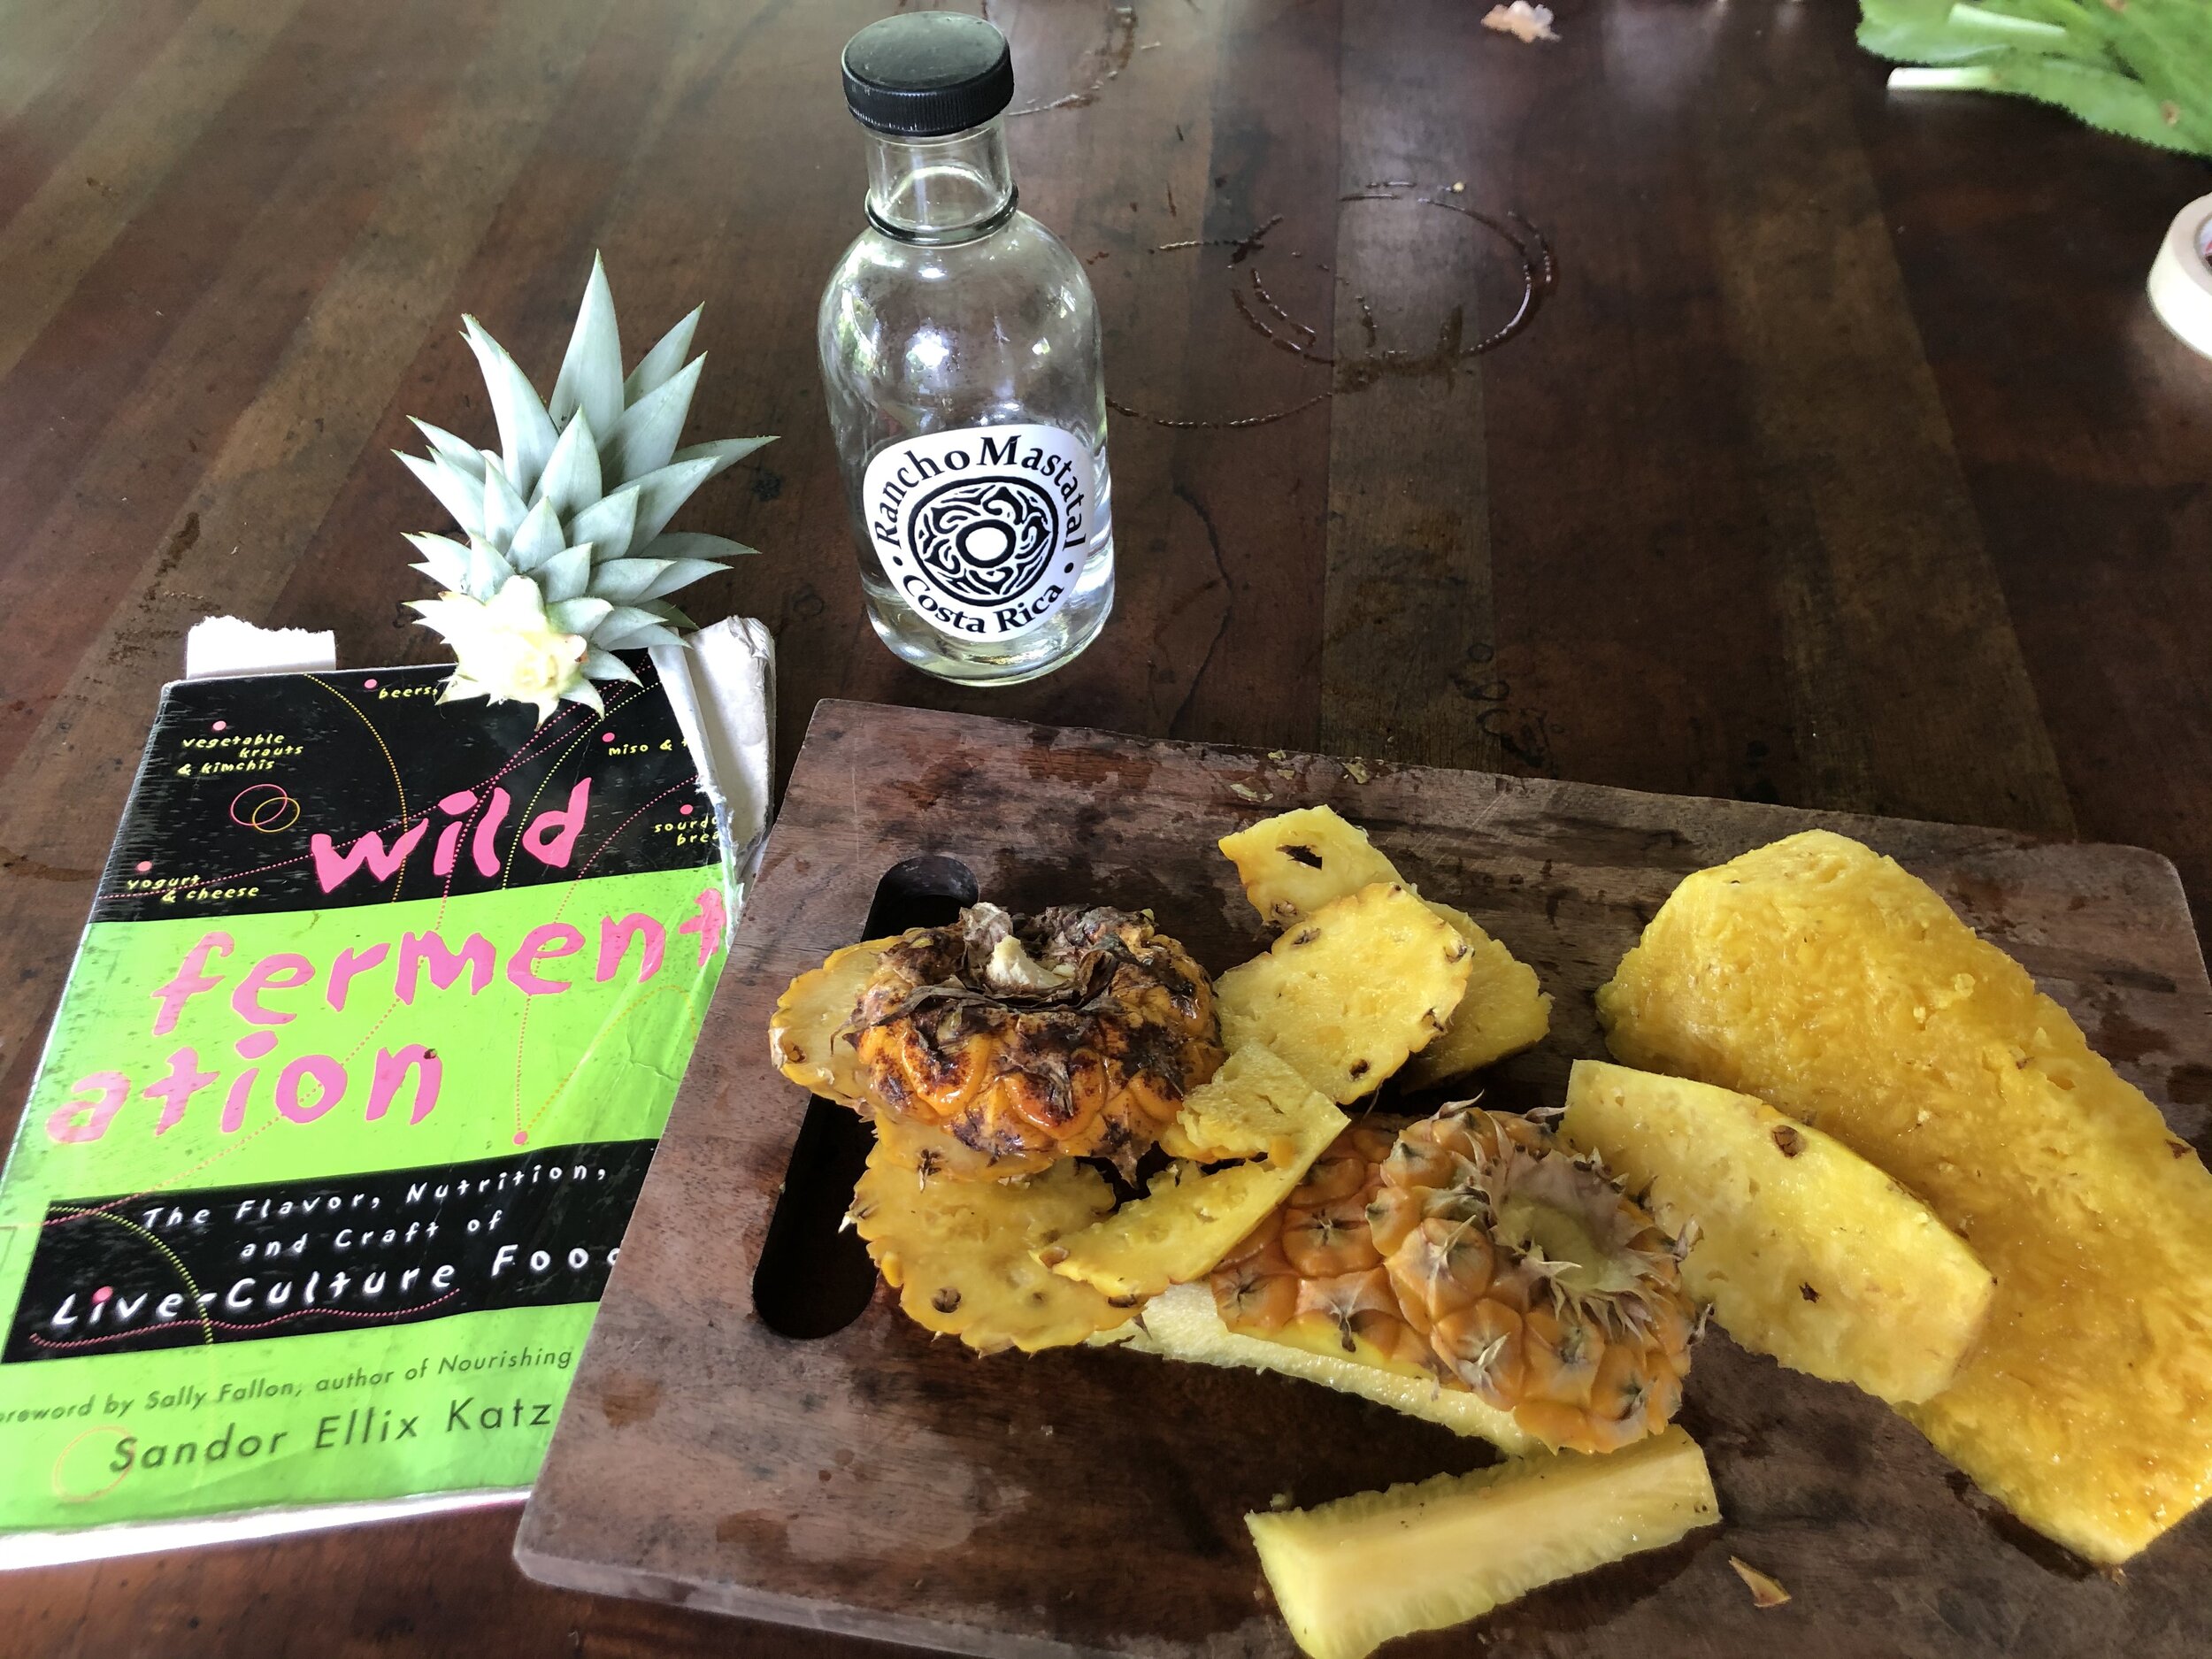
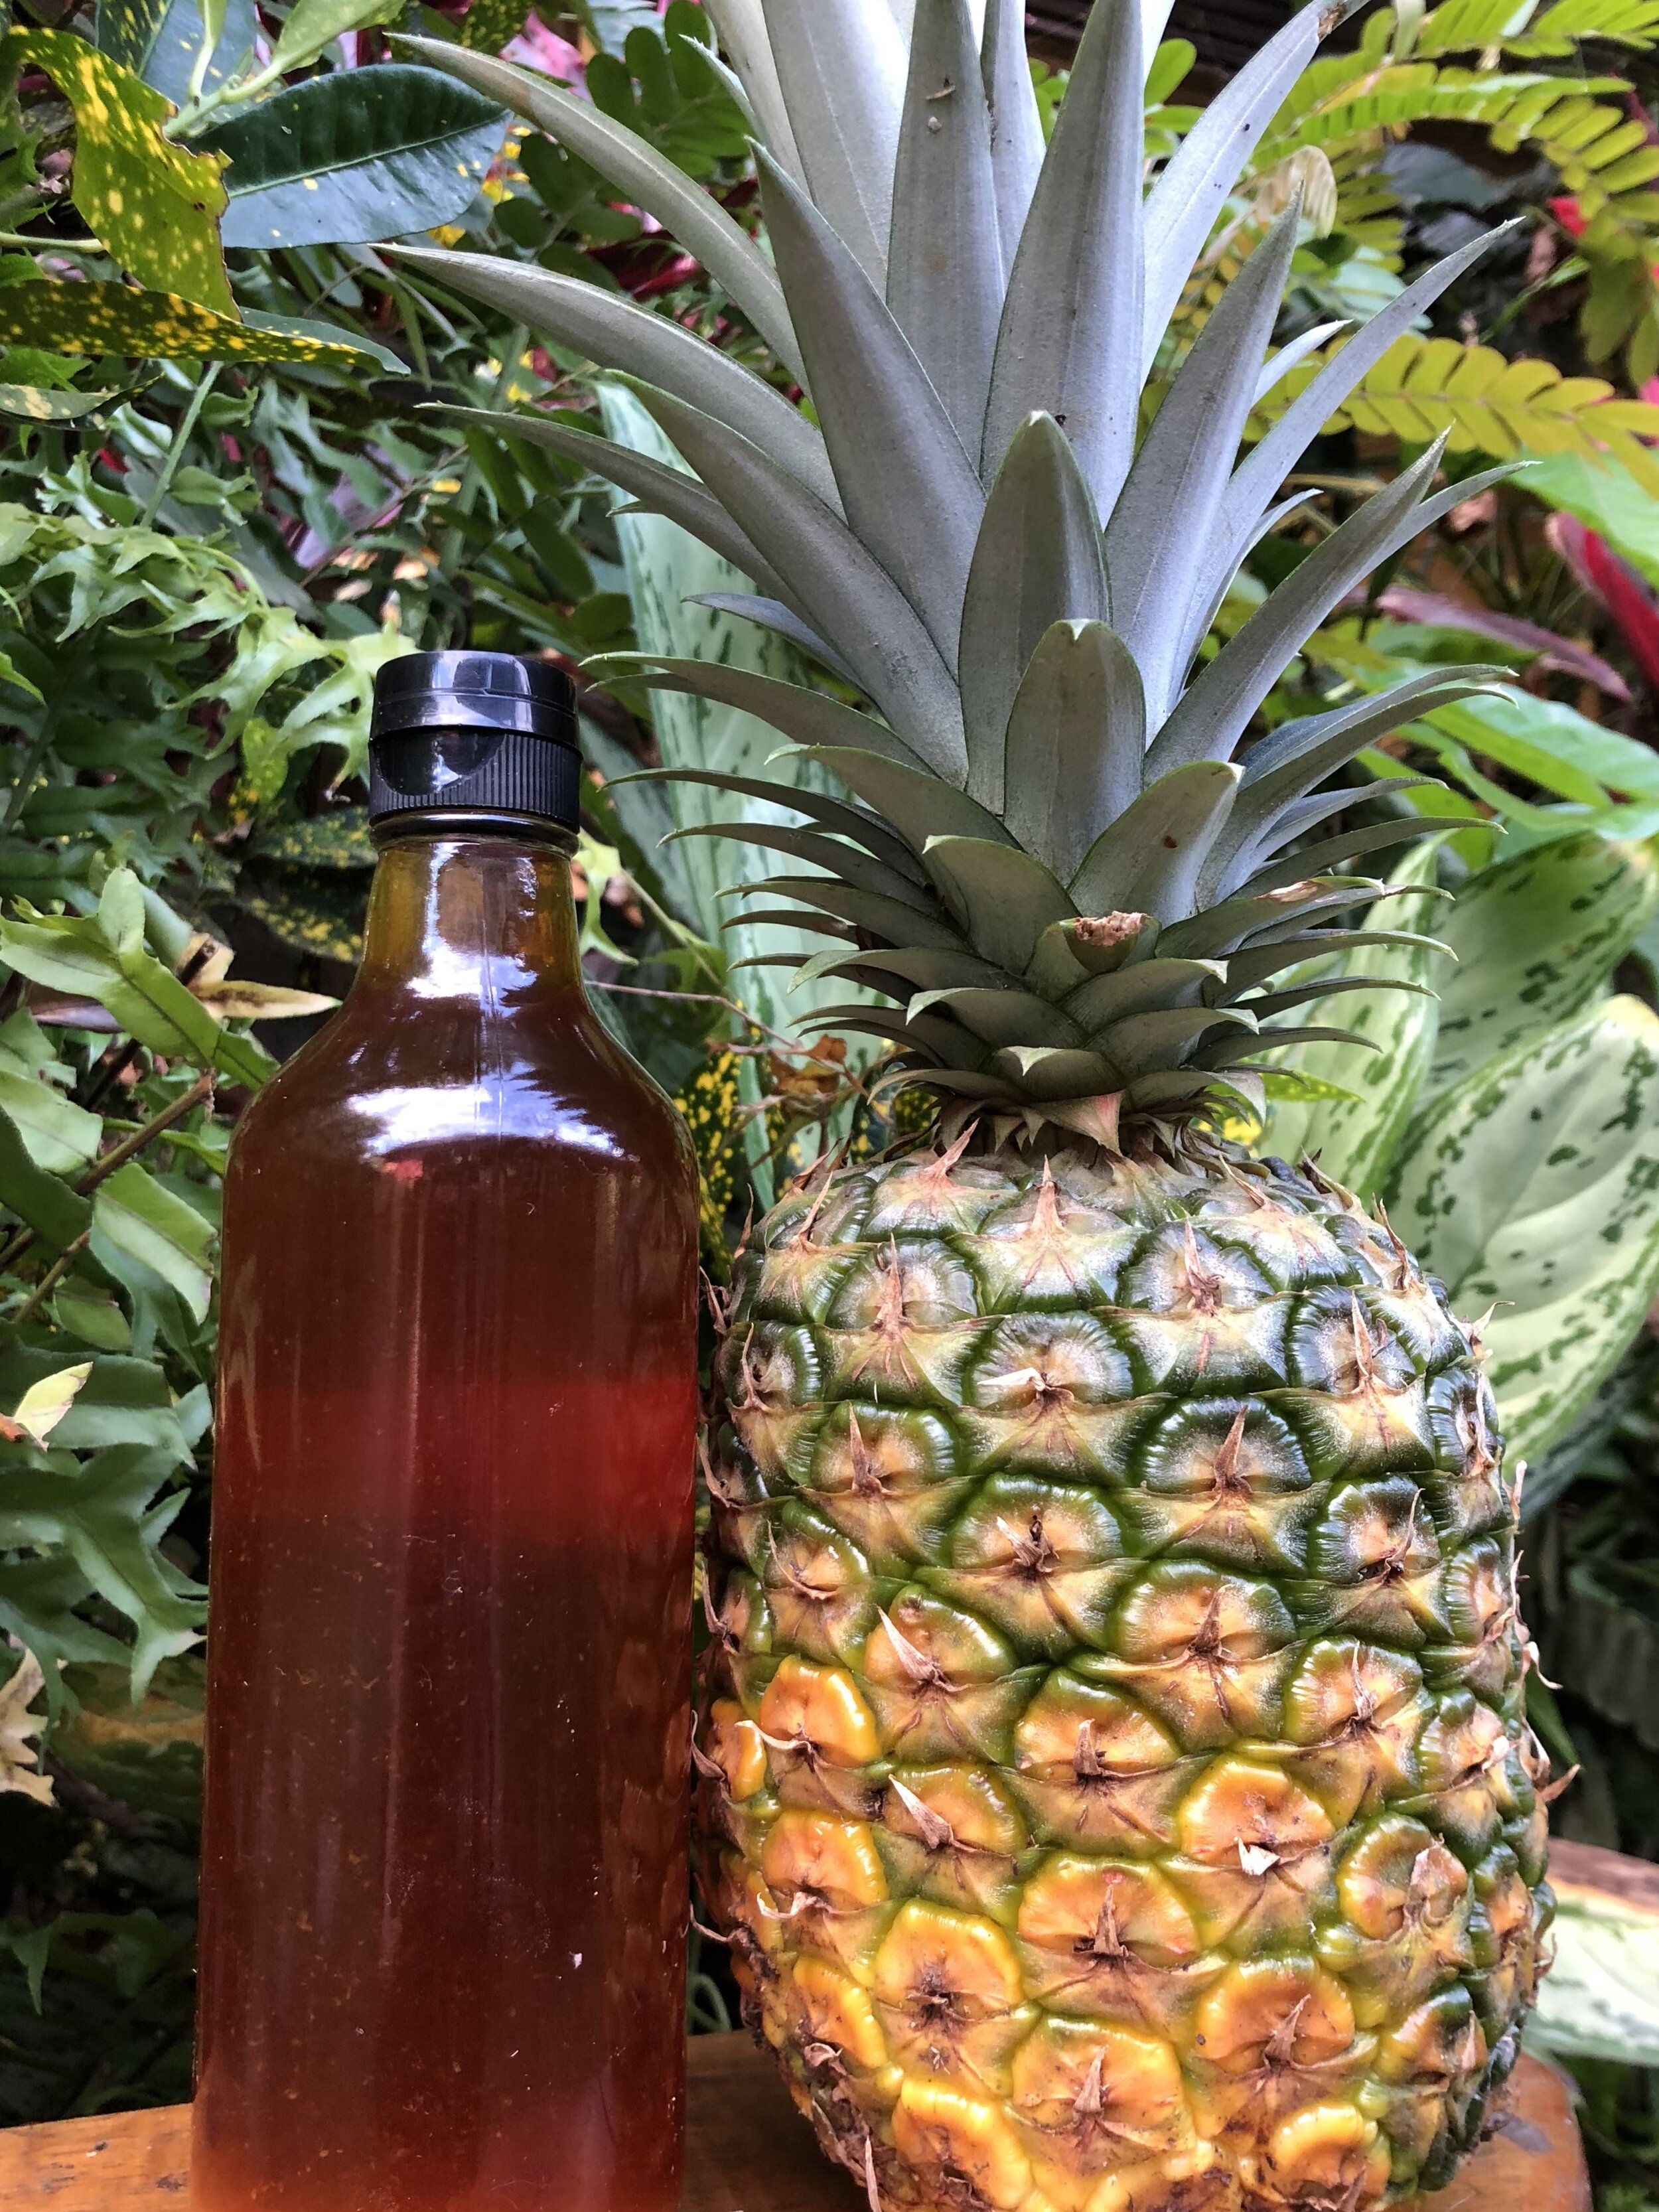
This recipe is adapted from Wild Fermentation by Sandor Katz.
The pineapples we are now harvesting were planted by previous apprentices and our current cooking vinegars were created by them as well. Many times the work we start here is created to be enjoyed by future Ranch dwellers. If this past pandemic year 2020 has shown me anything, it would be the reinforcement of the dangers of full reliance on our large industrial food system. Many of us have the desire to become more self sufficient in producing and conserving our own food. We know that access to healthy, fresh food is a privilege. We are lucky to have both the time and space to grow and experiment with ours. As this same interest and passion is also growing in others, we hope that our jungle experiments can be an inspiration on your journey.
Want to learn More
Join us for one of our workshops that sometimes include farm to table fermentation. Or consider applying to our year long apprenticeship or two month internship, where you will learn all the basics of fermentation, homesteading, growing your own food and lots more!
Happy ferments, happy microbes!

Water Kefir - The New Kombucha!
Before coming to the Ranch, I only knew of kefir as a tasty, sour, probiotic milk product - almost like a liquid yogurt. I loved it, and knew of it’s health benefits, but didn’t think kefir could be anything more. Turns out, kefir can refer to both milk kefir, the product I’ve known and seen in grocery stores, and water kefir, a delicious fermented soda and a staple for us here at Rancho.
By Cameron Conklin, apprentice 2021

Delicious, probiotic, fizzy and homemade soda (Water Kefir)
Kefir is more than just milk!
Before coming to the Ranch, I only knew of kefir as a tasty, sour, probiotic milk product - almost like a liquid yogurt. I loved it, and knew of it’s health benefits, but didn’t think kefir could be anything more. Turns out, kefir can refer to both milk kefir, the product I’ve known and seen in grocery stores, and water kefir, a delicious fermented soda and a staple for us here at Rancho.
Kefir “grains” are not actually grains at all, but instead a type of SCOBY (symbiotic colony of bacteria and yeast), a word you might recognize from researching or making kombucha. Kefir grains are shaped like little translucent miniature cauliflower florets - giving them their name. Milk kefir and water kefir grains look similar, but contain a different combination of bacteria and yeast. So if you want to make both, like we do, you’ll need a different source for each. If you are interested in milk kefir, check out Ryan’s blog post for some great milk kefir recipes here!
Some kefir makers have had luck with rinsing their kefir grains and changing the nutritive liquid they are fermenting. For example, using milk kefir grains with coconut milk instead of dairy milk. But as a rule of thumb, your grains will be trained to like a certain combination of ingredients, and in the case of water kefir grains, water and sugar is the magic recipe!
Making water kefir, what we call “balm”, was my first task here at Rancho. After my first week on balm duty, I thought to myself, “Why isn’t everyone making this stuff?!” It’s easy, delicious, refreshing, and serves as a great base for seasonal flavors, medicinal plants, and culinary creativity.
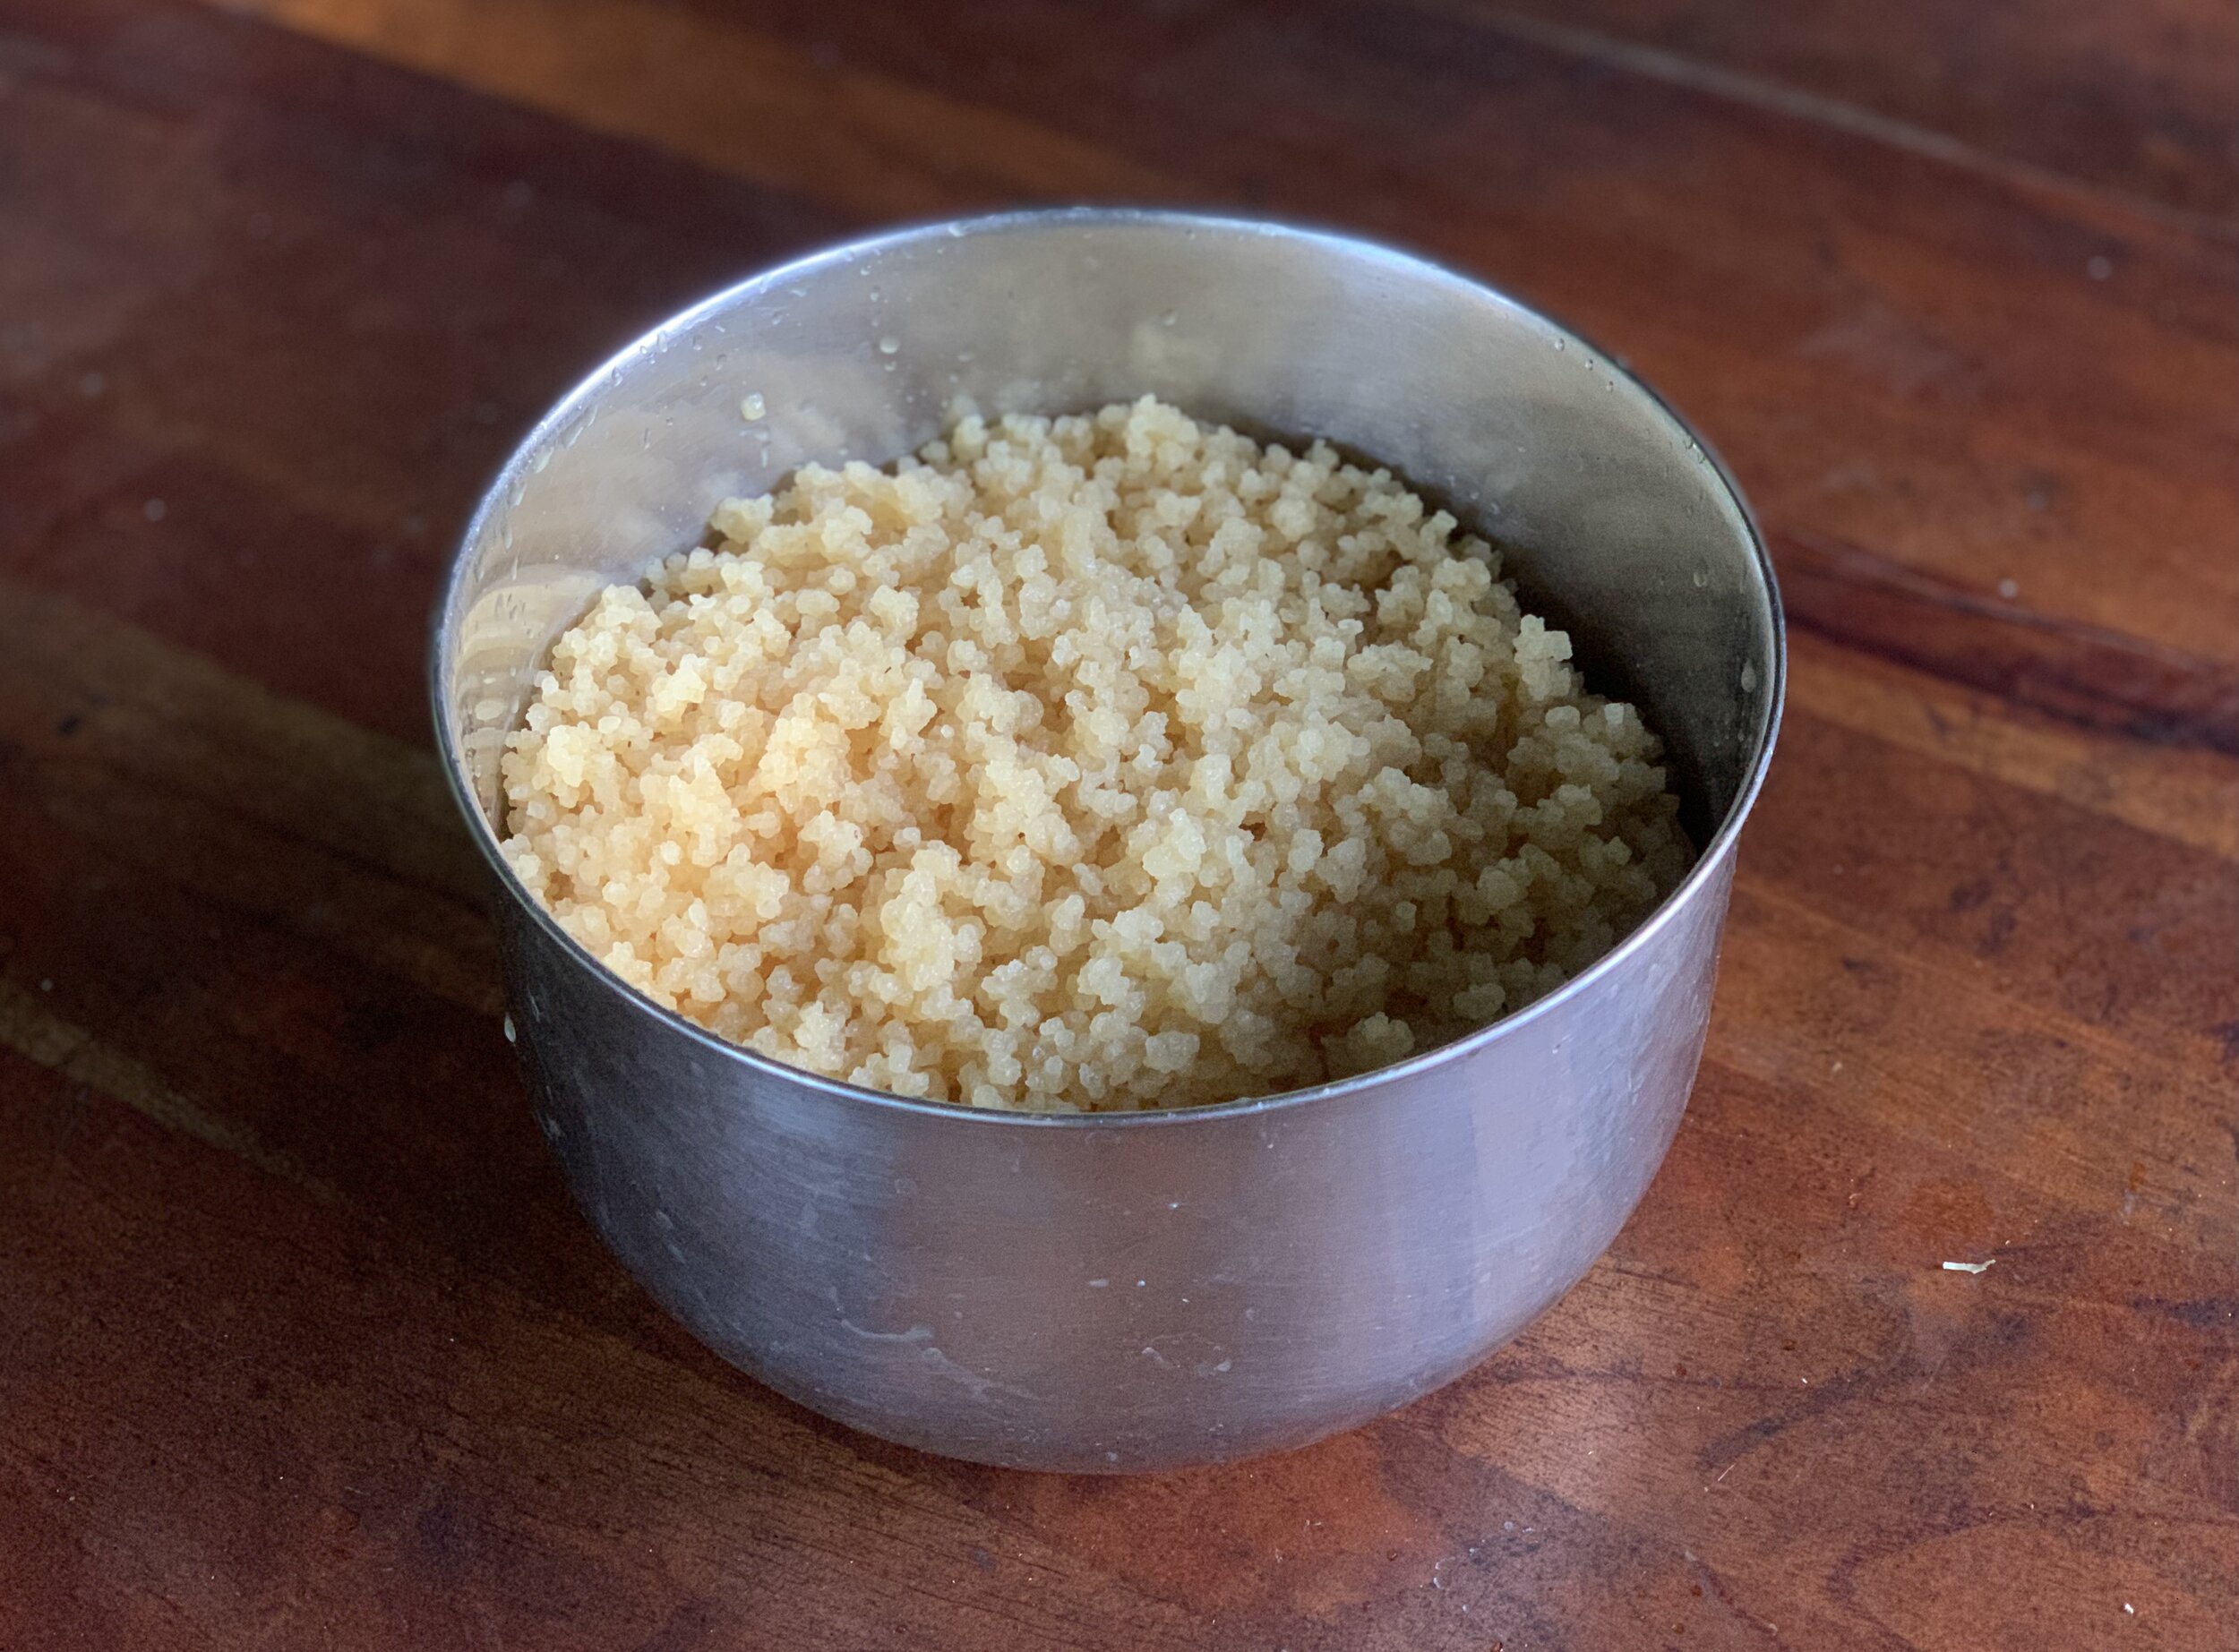
Water Kefir grains
The health benefits of water kefir
The exact origin story of kefir is unknown, but it is believed to have originated in the Caucasus Mountains. Kefir is Turkish for “good feeling” - which I can’t agree more with when I take a cold sip of bubbly kefir soda. Water kefir is high in probiotics, hydrating, and a great replacement for electrolyte sports drinks like gatorade, since it contains enzymes and minerals. It is known to aid in digestion, reduce inflammation, and relieve skin irritation such as eczema and acne. Water kefir is also said to help with detoxification by cleansing the liver (Mueller, 2014). What a magical concoction!
Water kefir serves as a great conduit for fruits and herbs. There are endless combinations of ingredients you can add to boost nutritional and medicinal potency depending on what your body needs!
How to make water kefir
**Note! If you do not have a water kefir making friend or local grain dealer, you can purchase dehydrated grains online. You will need to rehydrate them before following the recipe below.

Water Kefir SCOBY in the water/sugar solution
Primary Fermentation
Combine 1 gallon of water with 2 cups of sugar into a non-metal container (at Rancho we use tapa dulce which is a locally sourced sugar cane that our grains love, but you can use other sugar sources as well)
Pour in 1 cup of kefir grains
Cover with a cheese cloth or lid to keep out dust and bugs but not oxygen
Allow the mixture to sit for 2 days - this may be longer for you (up to 4 days) if you are in a cooler climate. Here in the tropics things move fast!
When your water kefir is ready you will notice a change in color and you may see bubbles rising to the top or foam settling on the surface
Strain your kefir into airtight bottles or jars (no metal) for the second fermentation, being sure to leave room for added fruit juices, herbs, and bubbles from the carbonation process
Set aside your kefir grains to begin your next batch - you can continue using these grains an infinite number of times if you keep them fed and healthy. You will see them start to multiply and this is a great time to give away extra grains to friends!
You are now ready to move on to the second fermentation and carbonation phase!
At this stage your kefir is ready to drink if you do not want to add flavor or carbonation - but in my opinion that is the best part!
Secondary Fermentation
**Note: This is where you can let your creativity shine! Read below to see some of our favorite recipes. You may wish to adjust the amount of fruit juice or sugar you use based on preference so start experimenting.

Passion fruit makes a great and easy flavor for balm!
Add 1/4 cup 100% fruit juice or fruit puree per liter of water kefir
Add 1/8 cup sugar per liter of water kefir
Add any herbs you’d like (I like to muddle them or blend with the fruit juice first)
Cap the airtight containers and let sit at room temperature for 1 to 3 days to let the secondary fermentation take place. In this stage of the process, the added sugar will be consumed by the SCOBY and create the carbonation as carbon dioxide builds up in the airtight container. The longer you wait, the bubblier and less sweet your beverage will be, so do a few trials to find your perfect combination.
Give your bottles a little burp to make sure you release some carbon dioxide to avoid your bottles exploding. Place your bottles in the fridge and enjoy! Don’t wait too long to burp your bottles and put your soda in the fridge, or your bottles might bust. The fridge will slow down the fermentation process significantly, allowing you to enjoy your balm for a longer period.
Watch out when opening your bottles again, the carbonation can be very intense depending on the ingredients so start slow as you unscrew the cap!
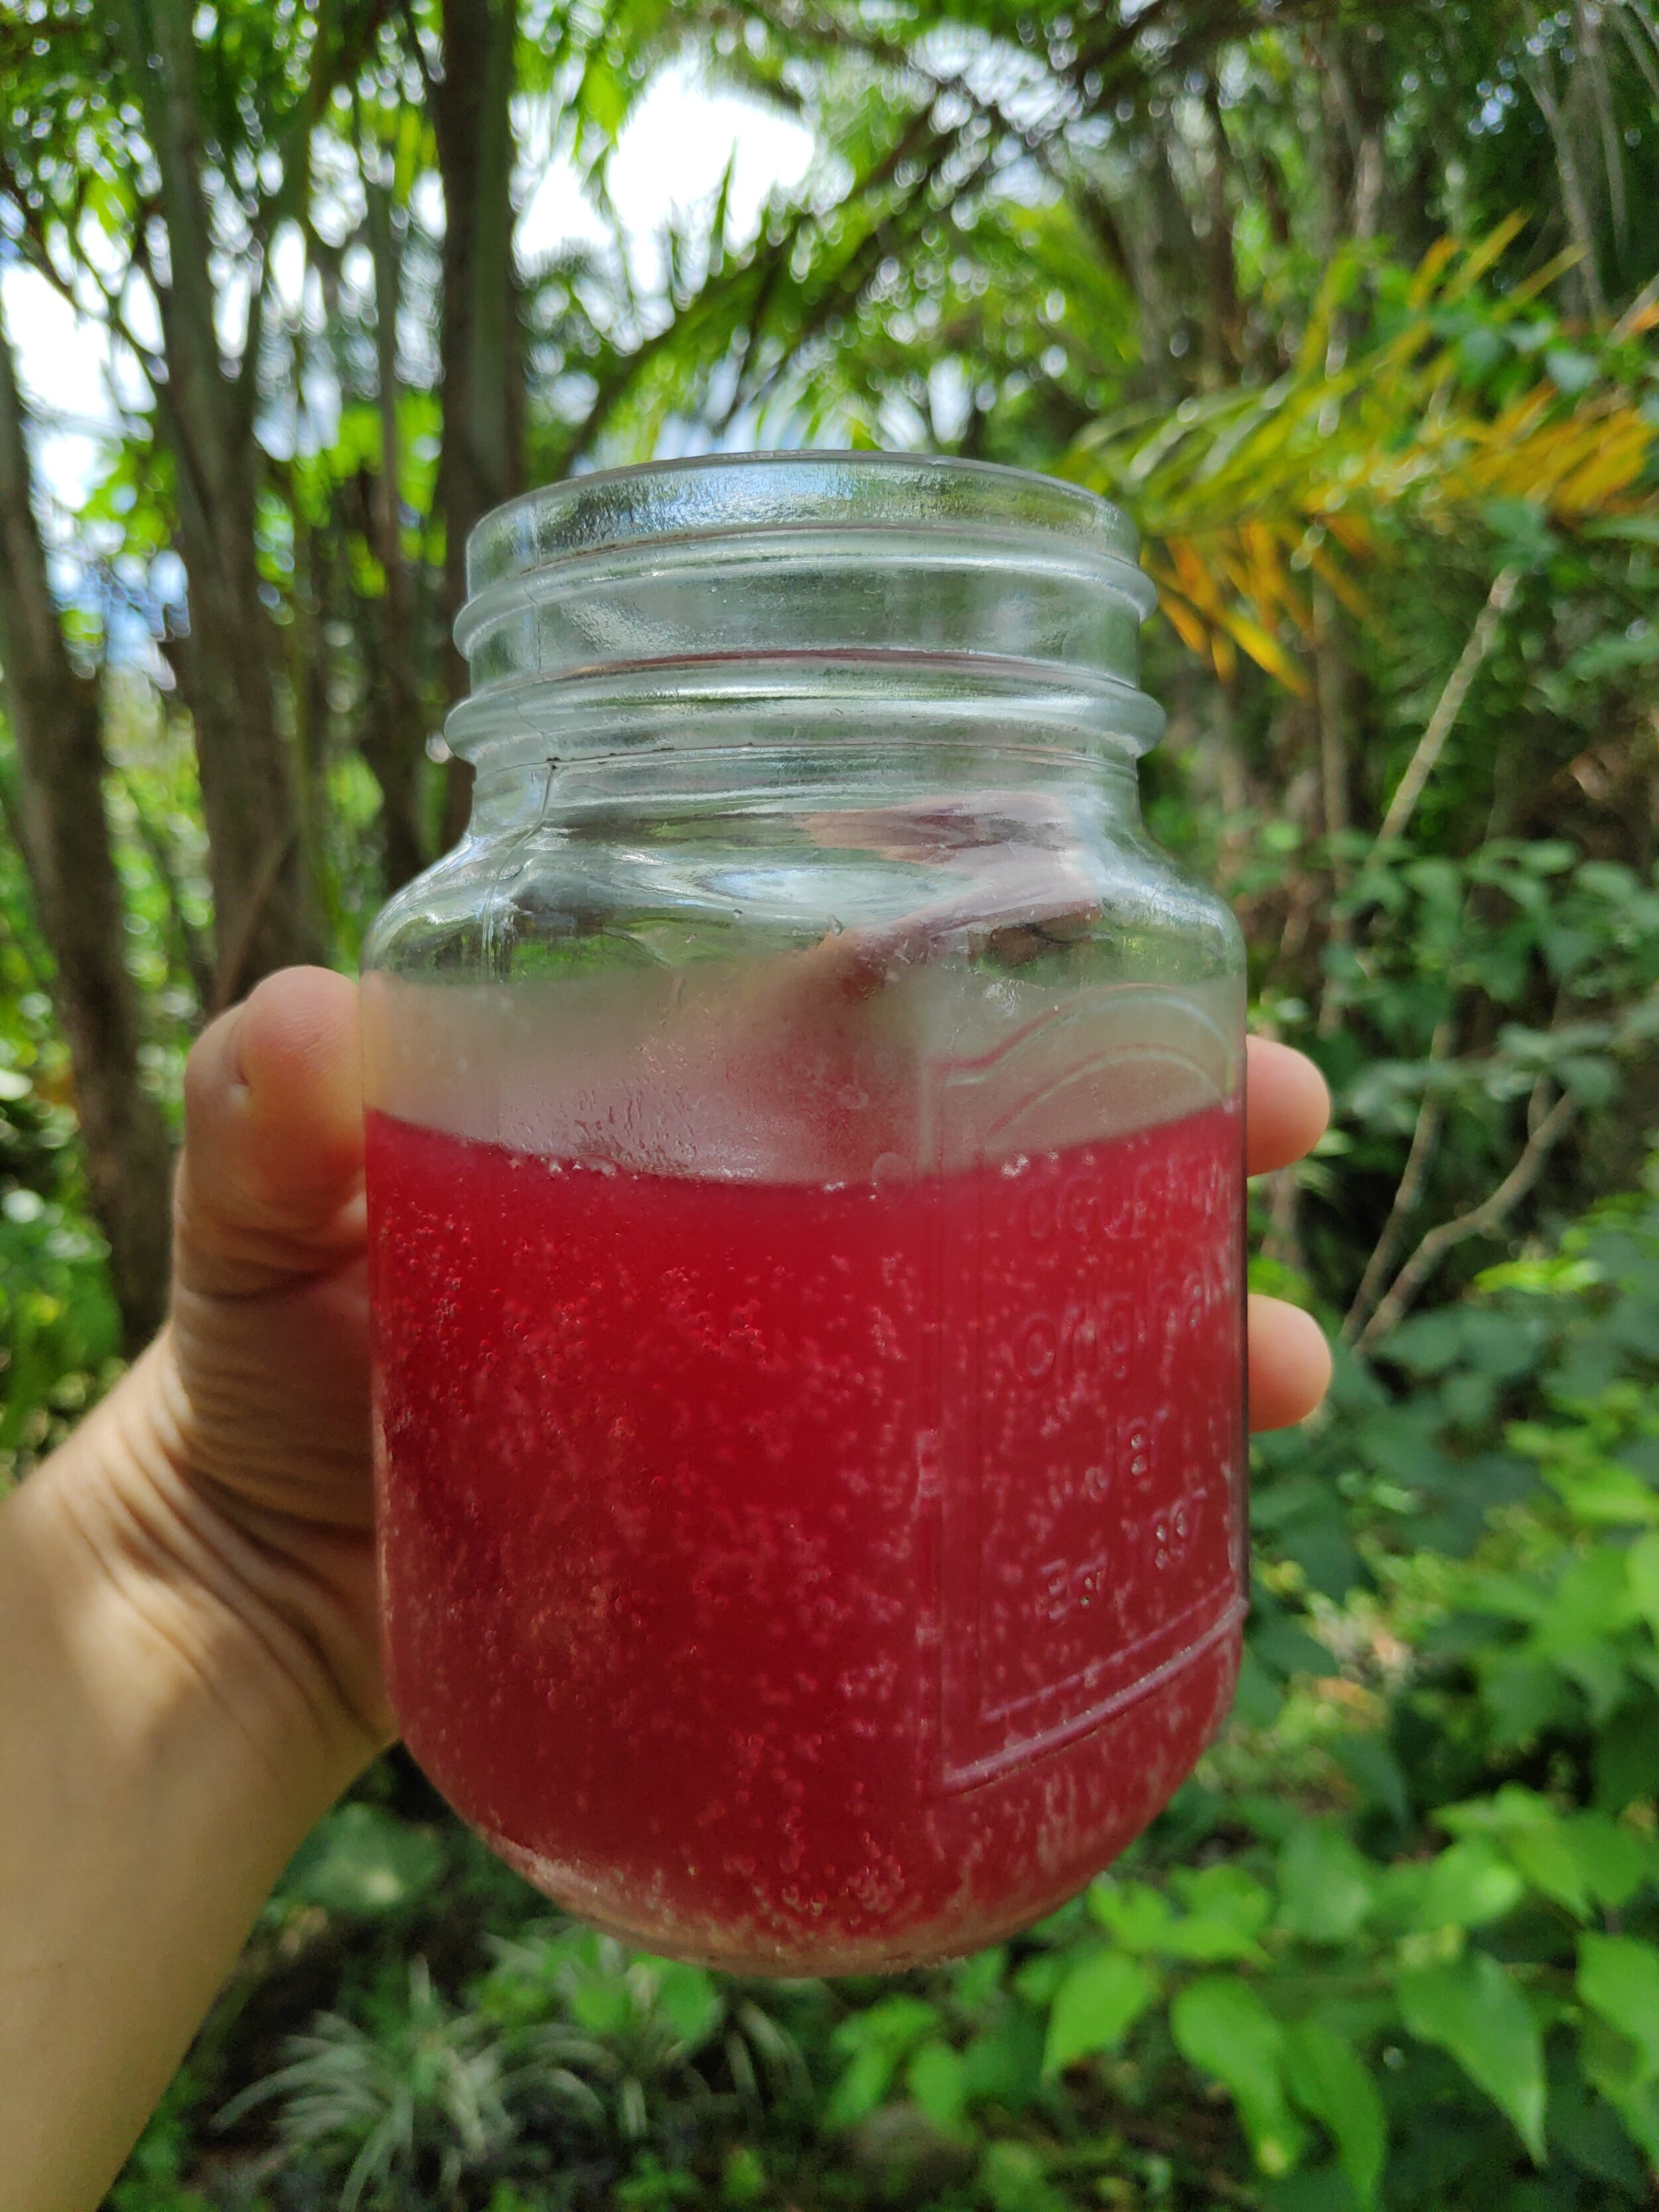
A refreshing, bubbly glass of balm
Our favorite variations
Below are a few flavor combinations that are staples here at Rancho. These flavors are absolutely delicious and come right from our farm. If you aren’t in the tropics and don’t have access to the below, I recommend using local, seasonal, ingredients to flavor your balm - there are so many different options!
Galaxy Bomb:
1/4 cup fresh squeezed starfruit juice
grated fresh ginger to taste
Sunshine Daydream:
1/4 cup fresh squeezed orange juice
1/8 cup fresh squeezed lemon juice
muddled mint to taste
muddled basil to taste
The Queen:
1/4 cup fresh squeezed and strained victoriana
1/8 cup fresh squeezed lemon juice
(be careful with explosions, this one is a firecracker!)
Resources:
Delicious Probiotic Drinks, Julia Mueller, 2014
Wild Fermentation, Sandor Ellix Katz, 2003
More Articles on Fermented Beverages you Can Make!
How to Brew Your Own Ginger Beer
Learn More
Check out our workshops that include farm to table fermentation, medicinal plants, permaculture and more!
Happy brewing and happy microbes!

The Magical Benefits of Fasting
Fasting is one of the strongest cleansing and healing natural methods existing. It has been used since ancient times in many cultures and religions either as a medicine or for spiritual reasons.
By Nico, Apprentice 2020
Looking for alternatives
Human behaviors are very hard to change. Especially in today’s world where everything goes so fast, our brains have to deal with hundreds and thousands of pieces of information each day. Overwhelmed by the capitalists’ ideals of growth, money and defining ourselves through our productivity, when do we really take the time to take a step back and reconsider what it is we truly want to engage in? But some things are changing. Each day, people all around the globe feel that wrongness and fight against it through learning, teaching and developing alternatives for sustainable housing, transportation, education and the food industry.

What’s wrong with our diet?
A couple of years ago I dedicated myself to finding alternative solutions that could help me build a lifestyle in harmony with my values. But where to start? Out of the many challenges we will have to face in the upcoming decades, the food system is one the most important. It is also the one where we, as individuals, can have the biggest impact through small changes is our everyday choices. We all know that those fast food chain restaurants surrounding us in the city are bad for our health, that the greenhouse gas emissions generated by the meat industry is nowhere near sustainable, that we should be paying more attention to the origin and process of how our food is made. The public’s’ hunger for nutritional information is more present than ever, diet books are perennial best-sellers, almost every popular magazine features nutrition advice, newspapers, radio programs and TV constantly discuss diet and health. But once again, there are so many sources, so many programs, so much contradictory advice, what should we be listening to? I believe that if we truly want to change the way we eat, we should start by listening to the one and only true expert of our health: our body.
Why fasting?

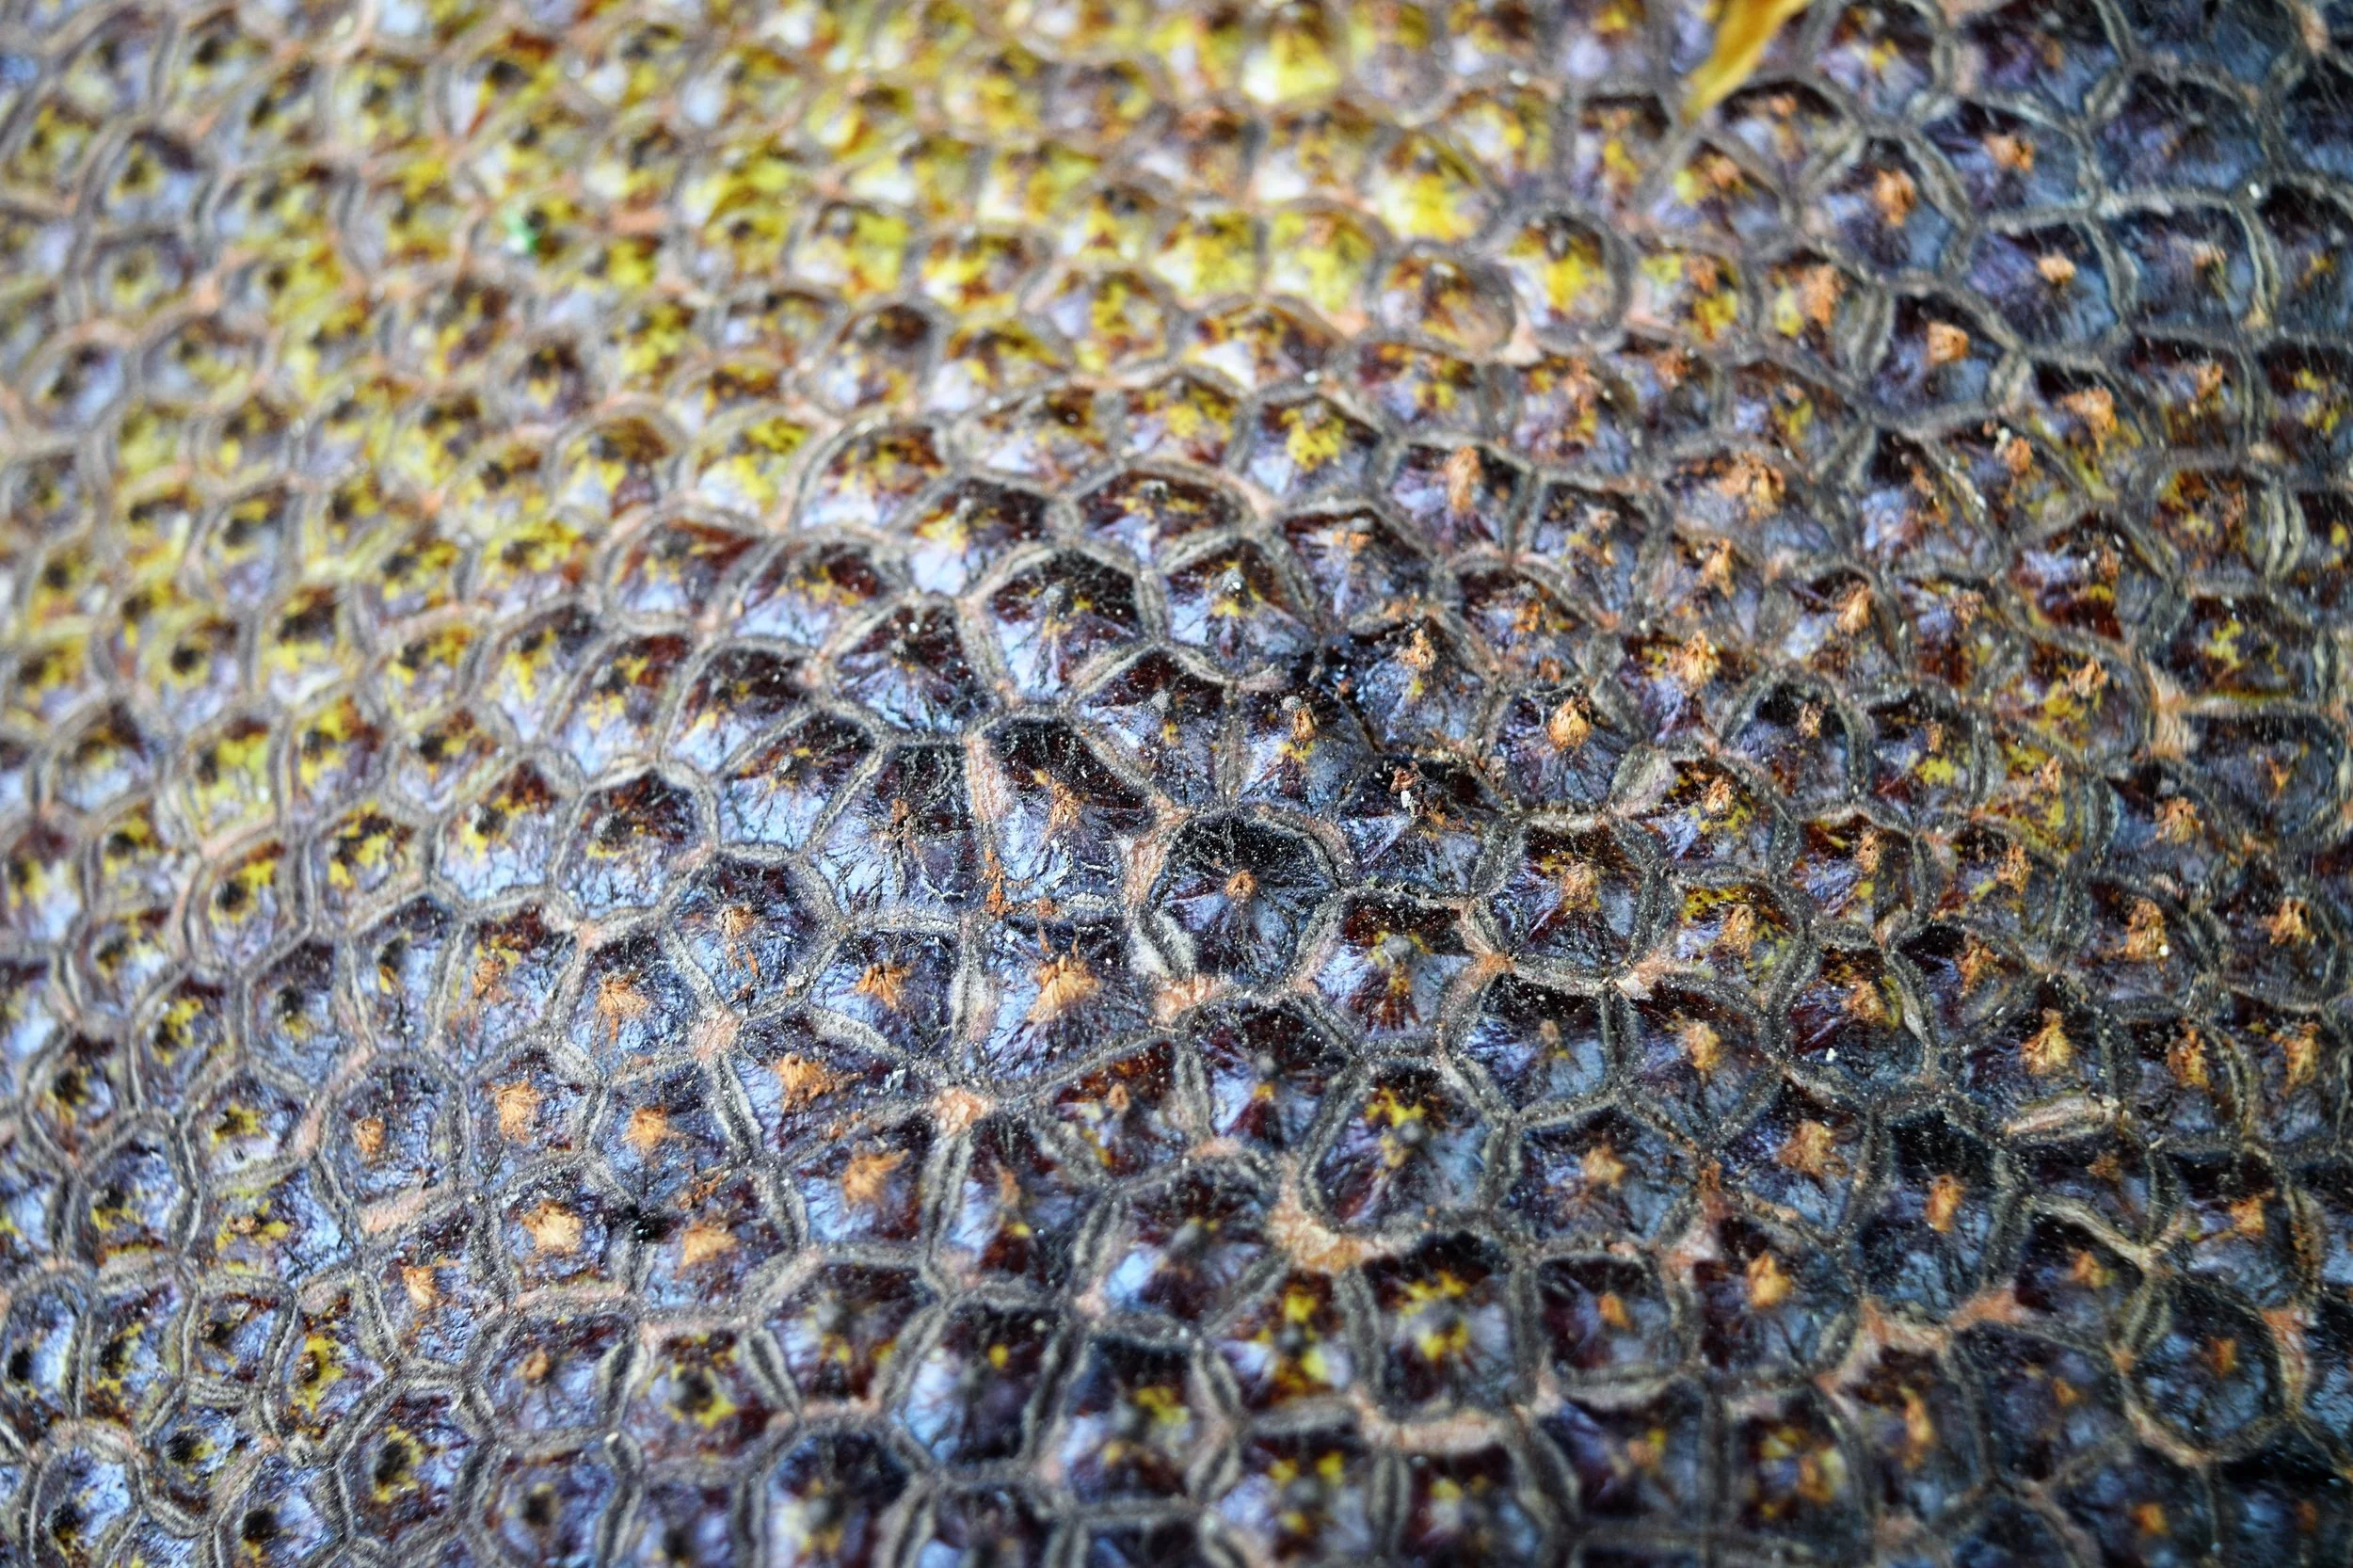
Jackfruit harvest
My goal was not to lose weight, nor to go vegan. I didn’t want to be on a diet restricting myself from certain foods. I wanted to redefine my relation to food so that I could start enjoying it more at each meal, and start feeling the benefits of eating healthy food on my everyday energy. I wanted to understand why my body feels so tired after some meals but not others, even though it seems like I’ve been eating the same quantity. I wanted to truly enjoy each delicious meal without just stuffing myself with twice the amount of food my body needed. That’s when I came across fasting (we will be talking here about long term fasting on water only, not about intermittent fasting which is a whole other process). The studies about its many health benefits from helping with allergies, skin diseases, cancer, how it helps with setting you in a special meditation mind-set, and the challenge it represented, immediately got my curiosity. I have always thought I couldn’t go more than a day without eating, yet so many people were able to spend weeks, sometimes months just surviving on water, so I decided to take the challenge and prove myself wrong.
As I am neither an expert on fasting, nor nutrition or health, I will not talk about the medical science behind fasting but more about my personal experience and what it has brought me. If you are considering a fast I do however recommend you to read as much expert’s advice about the process, how to start it, end it (the most important parts about fasting are before you start and after you break the fast), what the dangers are, and precautions to take. I do not recommend that you start your first fast if you are alone for it can be a very dangerous process if not properly prepared.
So what is fasting?
There are many kind of fasts but the original and purest one is when you stop eating any kind of food and only drink water for a certain amount of time, usually longer than 3 days. Fasting is one of the strongest cleansing and healing natural methods existing. It has been used since ancient times in many cultures and religions either as a medicine or for spiritual reasons.
What happens during a fast?
The first three days of fasting are mentally challenging. Because we have been so used to eating three times a day, at very specific hours, our brain will send signals through hormones telling your body, “hey dude, we usually have food coming in around this time, what’s happening?” You have to understand that this does not mean you are in danger and start seeing those signs and hunger as a signal, not as pain. Keep yourself busy, go for walks in your favorite place, do yoga, exercises (on the first day of fasting you still have a lot of energy from the remaining food in your digestive track so you should be able to still enjoy intense activities).
On the second day things start to slow down, you feel your energy level going down and hunger is present. I find that this is a nice opportunity to be a little by yourself, doing small activities you enjoy where time flies like drawing, reading, walking in the woods, etc.
The third day is the trickiest one, because you will reach the real fast. After three days that the body doesn’t receive nutrients from the outside, it moves to a kind of emergency mode and starts to digest all kinds of proteins from unnecessary cells, excess proteins from overeating, germs and bacteria. The body knows exactly where all the garbage is stored and start eliminating it. It enters a serious deep cleansing. During the fast, the body uses all the energy that is normally used for digestion and assimilation (which represent a great amount of energy, especially if you eat the average American diet) to clean and repair the tissues, and many organs have the chance to rest and recuperate. Make sure you have this day for yourself and rest, watch some movies, listen to relaxing music. This phase varies a lot in time and effects depending on each individual, but from my experience after three fasts I find that the better I prepare my fast (by gradually stopping all processed food before I start fasting), the easier this phase is. The first time I fasted I was so prepared and excited that I didn’t even feel any of the downside effects people talk about except just wanting to be on my own. In ancient times people didn’t need to prepare so much for fasting because they didn’t have the poisons of the 21st century, so they could go bravely into long fasts. With today’s food system, and depending on your diet and health, it is really important not to shock your body too hard by preparing adequately for your fast. You can find a lot of information and programs on the internet, but the most important thing is that you do it at a rate which correspond to you, by always paying attention to your body. I also find that whenever I start having small headaches and unpleasant sensations on the first three days, being a bit active helps, “Movement creates energy.” You’ve done the hardest part, all the rewards and benefits are yet to come, don’t stop there!
After those three days (sometimes it can take 2 days before reaching the “ketosis”), things get interesting: you don’t feel hunger anymore, your energy level goes up, and you truly enter the “fast trance” I like. I find it is important to start a fast with some ideas about what you want to dedicate the fast towards. It could be researching more about nutrition, focusing on your body and how you feel, thinking about things you want to accomplish in the future, etc. It’s important to live your fast with some ideas about what you want to be thinking about but not setting yourself goals or objectives, since the fast is challenging and you never know what you will come across during the process. Keep an open mind, be focused on what your body is telling you and what it is asking for and enjoy the time you have dedicated to yourself. Don’t be afraid to change your initial plans according to the situation, fasting is all about yourself and how you feel, it might feel a bit selfish to cancel plans you have made with your friends, but I think it is important you realise that before starting the fast. Tell those around you about your plan to fast and that you might cancel last minute. It is better for you, better for your fast and also better for your friends since nobody wants to be around someone that doesn’t truly feel like being there in the first place. This doesn’t mean you shouldn’t do anything social during the fast. After 6 days of fasting I was going to parties and dinner without any problem, but pay attention to what you feel like doing, not what is expected of you.
Breaking the fast
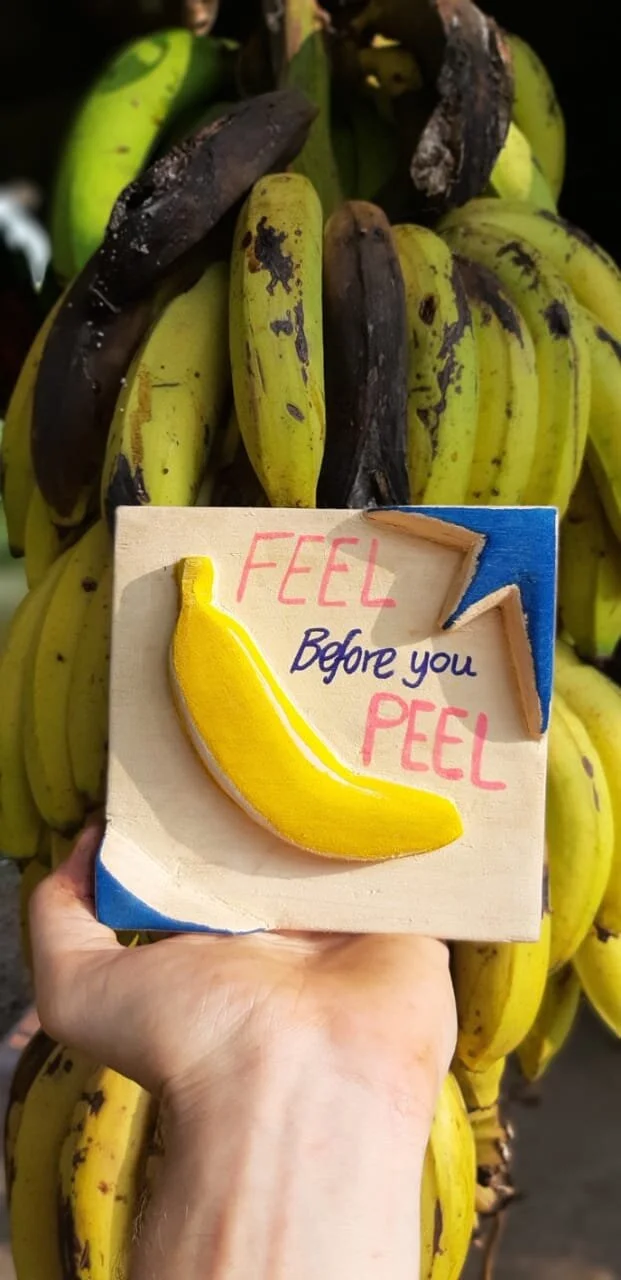
After several days without consuming any food, it is essential to break the fast wisely. Your body will not handle it if the first thing you eat is a huge hamburger with fries and mayonnaise, I guarantee you’ll be sick. Plus, you’ve gone through all the process of cleansing your body, do you really want to start off a fresh start by putting some unnaturally heavily processed food in your system? You want to start with something very light and easy to digest but flavourful, some fruit you truly enjoy. Take the time to choose it wisely, smell it and feel it, and start eating it only when you feel that you are ready. I find that during the fast my smell sense is way more developed than usual, and when you start eating, each bite will feel like heaven. Eat only one fruit and pay attention to the amazing taste, feel it going down your throat and sense all your digestive organs starting to work again after so long. They will truly thank you for the first rest you have given them in years, maybe decades, and your whole body is not craving food: it is craving good food. Think about all those delicious natural fruits and vegetables and all the amazing nutrients they will bring to your body. Enjoy each food like it’s the first time you had it, for me it truly tastes like that.
What fasting brought me
Fasting helped me redefine my relationship towards food. It helped me realize most of the time we don’t eat because we need it but by automatism. Sometime we are not even hungry, or we think we are hungry but we don’t truly need to eat, we just eat because it is the common thing to do. Our brain tricks us into thinking we want something while everything about our health tells us something is wrong with that. Like Paul Nison said: “Listen to your own body sense. If you listen to common sense, you will end up like common people in today’s world.”
Fasting also helped me enjoy more the food I eat. It helped me rediscover flavors I stopped tasting because I couldn’t see the beauty behind it anymore. Enjoying food is not about what your taste buds are receiving, but about how you are receiving those flavors and how you pay attention to them. It’s all about the setting. The best meal you’ll ever have will probably not be the most sophisticated or expensive one, but the one you took time to enjoy because you were with people you liked, in a place you like, like your grandmother’s homemade casserole, or the first time your dad took you out for ice cream. Like Anthony Bourdain says in his book, a cook’s tour “Nothing illustrates them more than the Last Meal Game.” You’re getting the electric chair tomorrow morning. […] You’ve got one meal left. What are you having for dinner? When playing this game with chefs – and we’re talking good chefs here – the answers are invariably simple ones.” Imagine you could rediscover the sensations you had the first time you took a bite out of your first pizza, your first ice cream, or the first apple pie you ever ate.
Fasting also brought me a lot of unexpected things not related to eating. It helped me push my limits and increase my willpower. It taught me that whatever people think is good or bad for you, the only true way to find out is to experience by yourself. It reaffirmed the idea that we shouldn’t be doing things blindly because it is the “normal” thing to do, because we have been doing it for a long time or because of social convention, but we should put everything in perspective and ask ourselves why is it that we do this. Only when we understand fully why we do something can we change it, improve it, or just decide that this is the way we want to go, and then human behaviour becomes easy to change.
People sometimes ask me how did I stop eating meat so easily after so many years as a meat lover? Not eating meat was not the hard part, just as spending 7 days without eating is not the hard part for me. The hard part was putting everything I have learned until here in perspective, unlearn what I thought was true and questioning the fundamentals about nutrition. It might be a hard and tiring process, but only from there can we start building on new foundations, towards a lifestyle in harmony with our values.

Apprentices doing yoga in the Hankey House
What is Lacto-Fermentation
What would a traditional Korean Barbecue be without kimchi, your scrambled eggs without Tabasco and a hot, sunny afternoon without a fresh pickle? Lacto-ferments are around us every day. Often they are made into dishes that we don’t even consider as fermented.
By Constantin Demuth, apprentice 2021

One of our favorite lacto-fermented condiments- Green Papaya Kimchi
What would a traditional Korean Barbecue be without kimchi, your scrambled eggs without Tabasco and a hot, sunny afternoon without a fresh pickle? Lacto-ferments are around us every day. Often they are made into dishes that we don’t even consider as fermented. Many of which are staples that have backed up our diets for hundreds of years. Try and think of the last lacto-fermented goodie you ate.
Recently, lacto-fermentation is going through a renaissance. People are realizing how easy it is to recreate flavors of their cultural ancestry. Kraut is just cabbage, salt and water. Pickles are just cucumbers, salt and water. It’s easy to make at home and much better than the stuff you buy in the supermarket. In this article I would like to take you on a little journey through the wide world of lacto-ferments, share some of the Ranch’s deepest secrets, and how we take foods from the farm and transform them into delicious, nutritious, and long lasting dishes.
History
In a time where we can buy produce all year around from every corner of the world and store them conveniently in the fridge, the reason why people ferment their food is becoming obsolete. In the beginning, they were not looking for the most incredible flavors that people at Noma’s Food Lab try to create. They were more interested in preservation, keeping their produce edible, eliminating molds and buffering cold winters without harvests. As farm to table cooking is becoming more popular again, being able to preserve foods through the year is increasingly important. The easiest method of preserving large quantities of raw vegetables is by using salt. Salt creates an environment that allows good bacteria to survive while killing bacteria harmful to humans. Today, we know salt preservation also makes nutrients bioavailable, increases digestibility and creates a great source of raw foods in our diets.
Preservation

Lacto-fermented pickles
Let’s go into a bit more detail of what happens in our jars when we mix vegetables with salt. Adding salt or salt brine to vegetables helps Lactic Acid Bacteria (LAB) to develop. LAB then turns the natural sugars of the vegetables into lactic acid. This acidified environment inhibits the growth of bacteria that makes the vegetables go bad and mold. This way we can store lacto-fermented vegetables for long periods of time without worrying about spoilage. The acidity gives these ferments their original flavor and preserves the satisfying crunch that we all crave.
As opposed to other fermentation methods, lacto-fermentation does not require any input of certain bacteria. When using fresh (preferably organic) produce we are able to work with LAB that is native to the vegetables and helps create the environment we want. As a result of their work, LAB often produce oxygen that makes our ferments bubbly. In case you find bubbles in your jars, don’t worry. That’s a sign that it works!
Lacto-ferments at the Ranch
Here at the Ranch we use lacto-fermentation every week and we eat it basically every day. Our favorite staples are Green Papaya Kimchi, Salsa Starter and some sort of pickled vegetables. The most recent and exciting experiments in the test kitchen include pickled Katuk (our daily salad green) and fermented black beans for our home made Hoisin Sauce.
We use lacto-fermentation for three basic reasons. Reason one: It’s good for us. It makes all the nutrients that fresh vegetables have to offer available to us. Reason two: We can store fresh harvests and consume them later, which is super convenient when you have an amazing orchard that produces a variety of things all year around. Reason three: It is delicious and we love delicious food!

Green jackfruit processing
Green Jackfruit
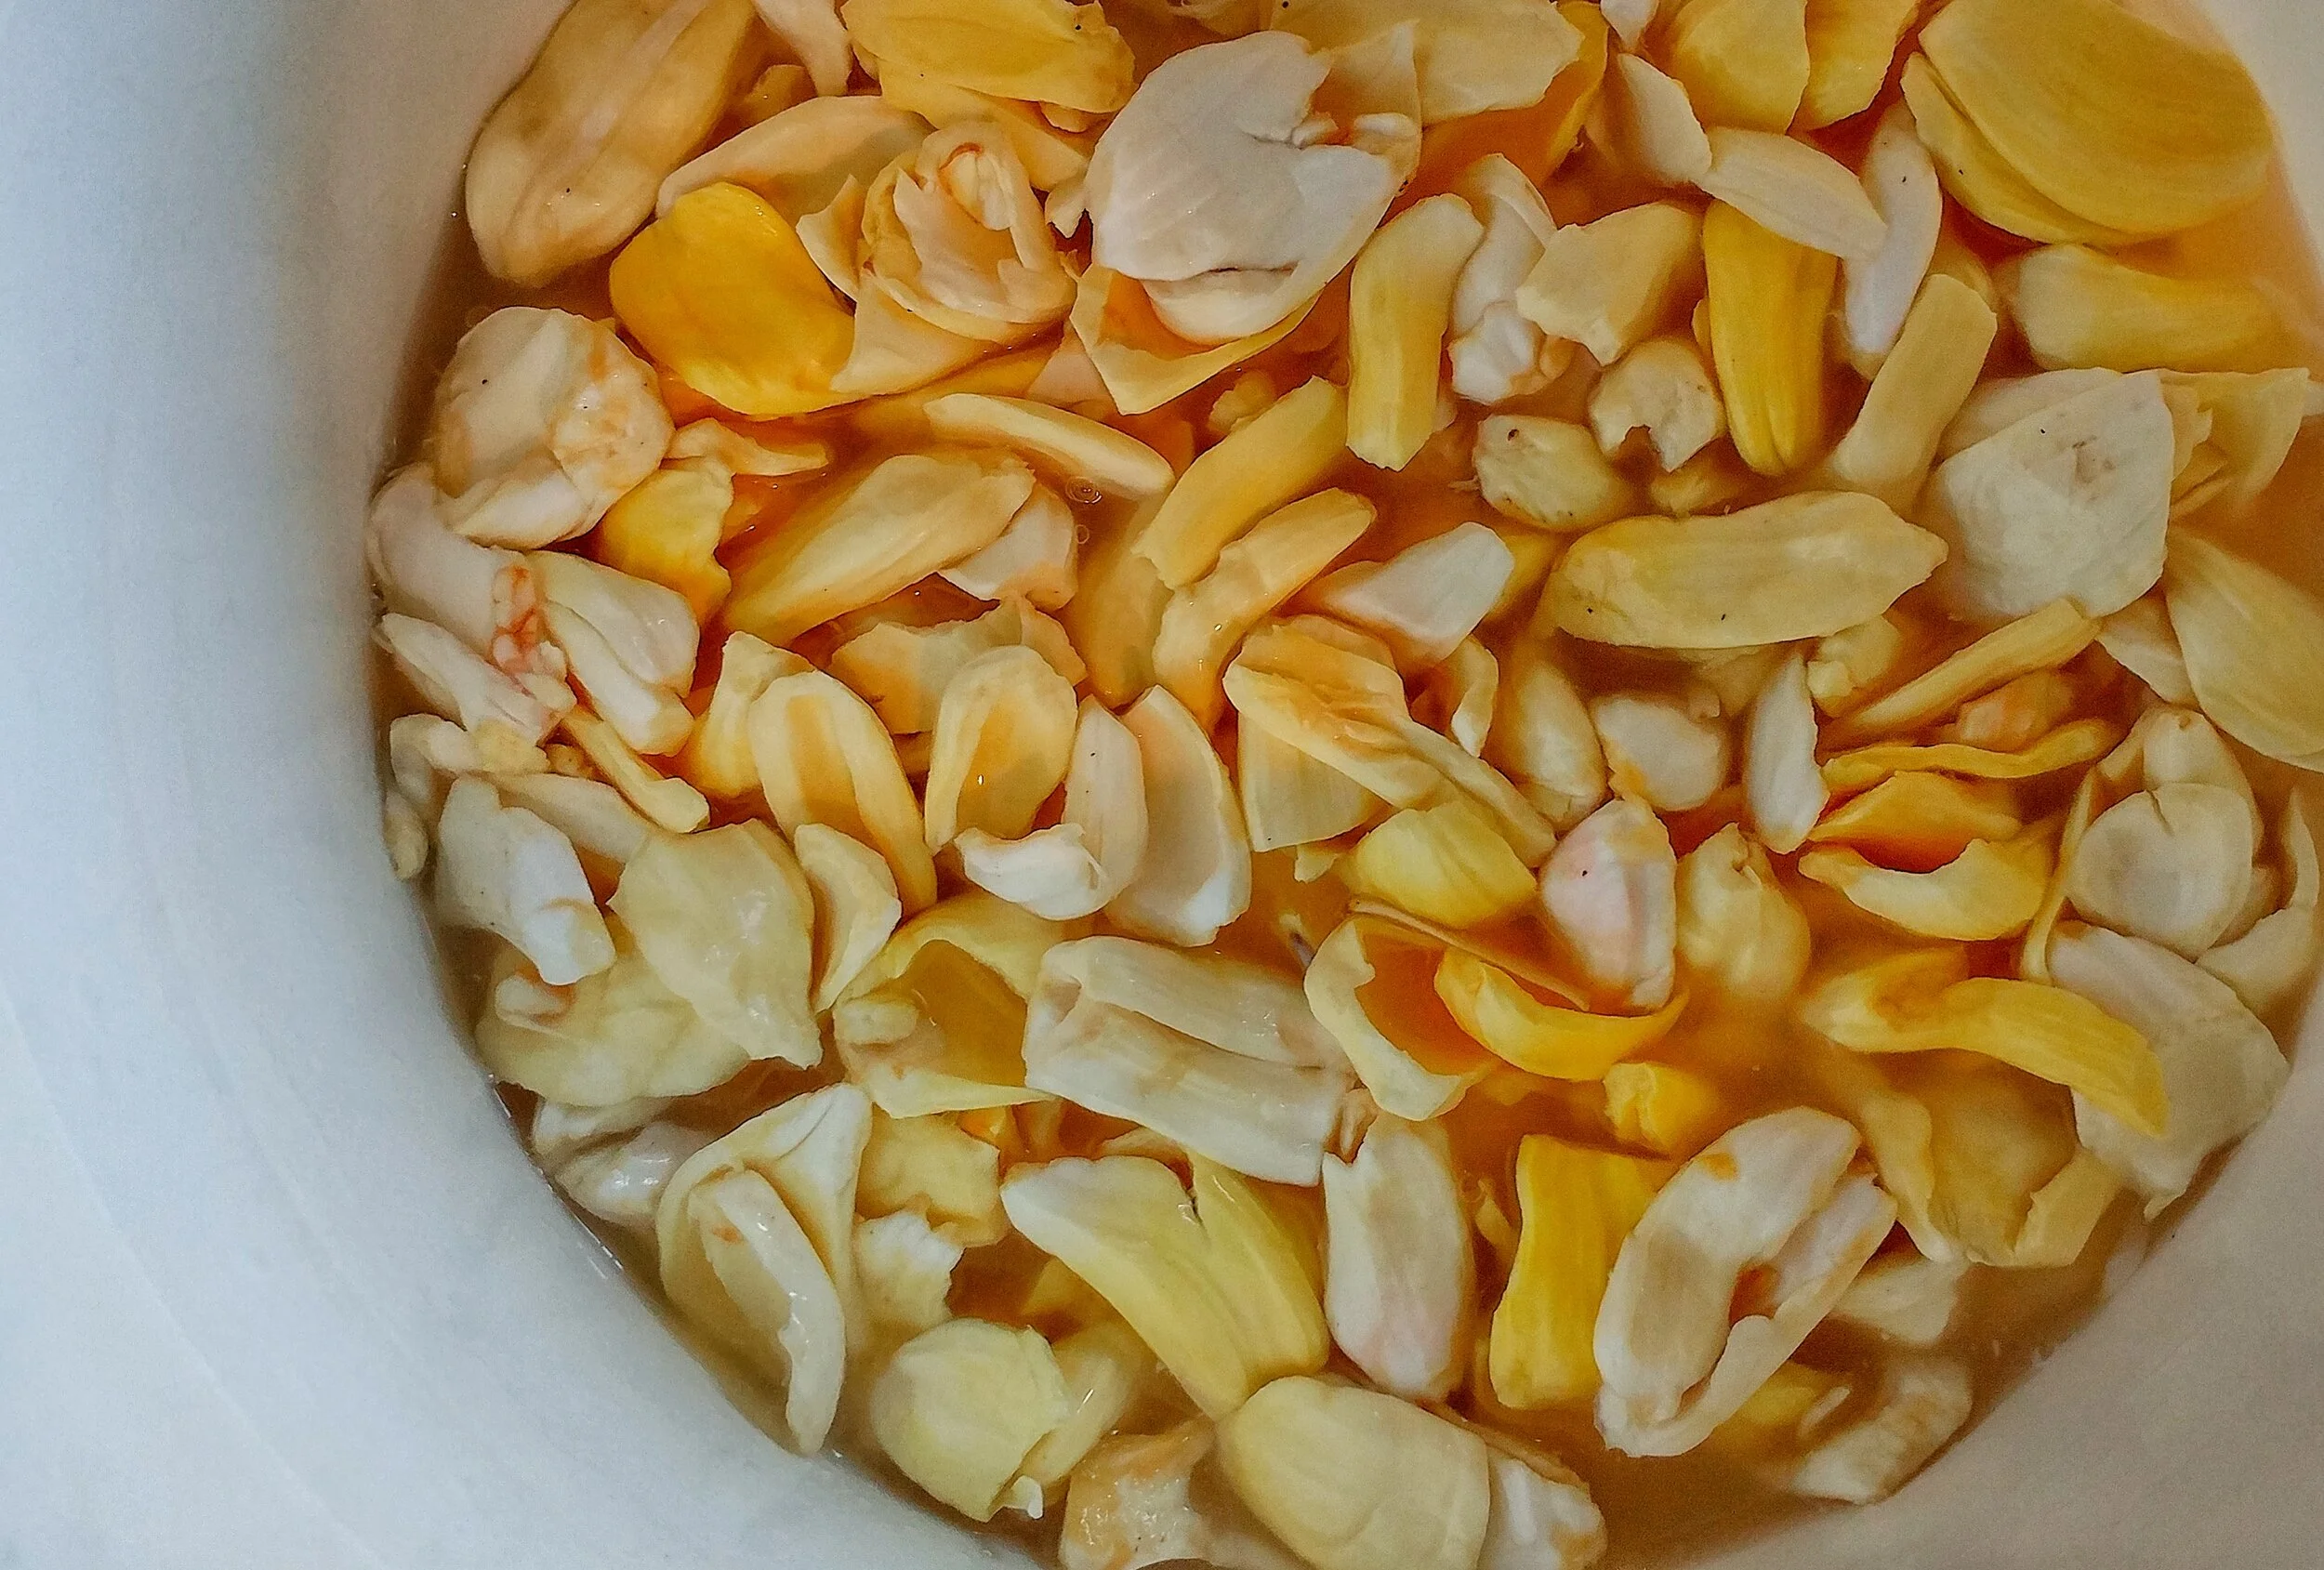
Jackfruit is a perfect example of how we use lacto-fermentation as a way to preserve fresh produce. Jackfruit is the biggest fruit in the world and we have several trees in our orchards. Once jackfruit is ripe, it goes bad relatively quickly and some people don’t like its flavor when ripe. We started harvesting them when they are still green to incorporate them as a vegetable into our diet. Even here where we feed many hungry souls every day, we cannot consume the amount of jackfruit we harvest. This is where our friend lacto-fermentation comes into play. We submerge all the jackfruit meat in a 2% salt brine, which inhibits growth of undesirable bacteria, prevents oxidation and gives a deep, rich salty flavor that we want in our dishes.
Green Papaya Kimchi
The purpose of our Kimchi is less for preservation and more for the “ooh “and “ahh” moments when we serve fresh condiments with all our foods. The kimchi accompanies eggs in the morning, hearty slow roasted pork on special occasions and provides the freshness in our weekday burritos.

We use green papaya, but you can use any local, seasonal, crunchy vegetable
As opposed to jackfruit, where we submerge the flesh in a brine, for Kimchi we use its own juice. Again, salt is our partner in crime. Shredding 20 kg of green papaya on Wednesday mornings is not everyone’s favorite exercise, but the result makes up for the work. We used to do this all with hand graters, but recently we purchased an industrial hand cranked shredder by Nemco Food Equipment. We highly recommend this tool if you are making large batches of sauerkrauts, kimchi, etc. By shredding the fruit, we make it easier for the salt to penetrate. After mixing papaya, salt and spices (aka the *flavor bomb) enough brine is being produced for the ferment to be safe. Three days in the fermentation bucket and voila, kimchi is ready. Pack this into glass jars that can be stored in the fridge.
Now it’s time to reveal the big secret you’ve been waiting for. Rancho Mastatal is giving out its kimchi recipe for the first time. Two things that are important: First, if you cannot find green papaya, use any type of cabbage. It’s important to use fresh, local and seasonal (when you live in a temperate climate please, please do not go to the supermarket and buy green papaya!). Second, fermentation is no science! Don’t get overwhelmed by ratios, phrases or utensils. Trust your senses; look at it, smell it and taste it. Your nose knows best.
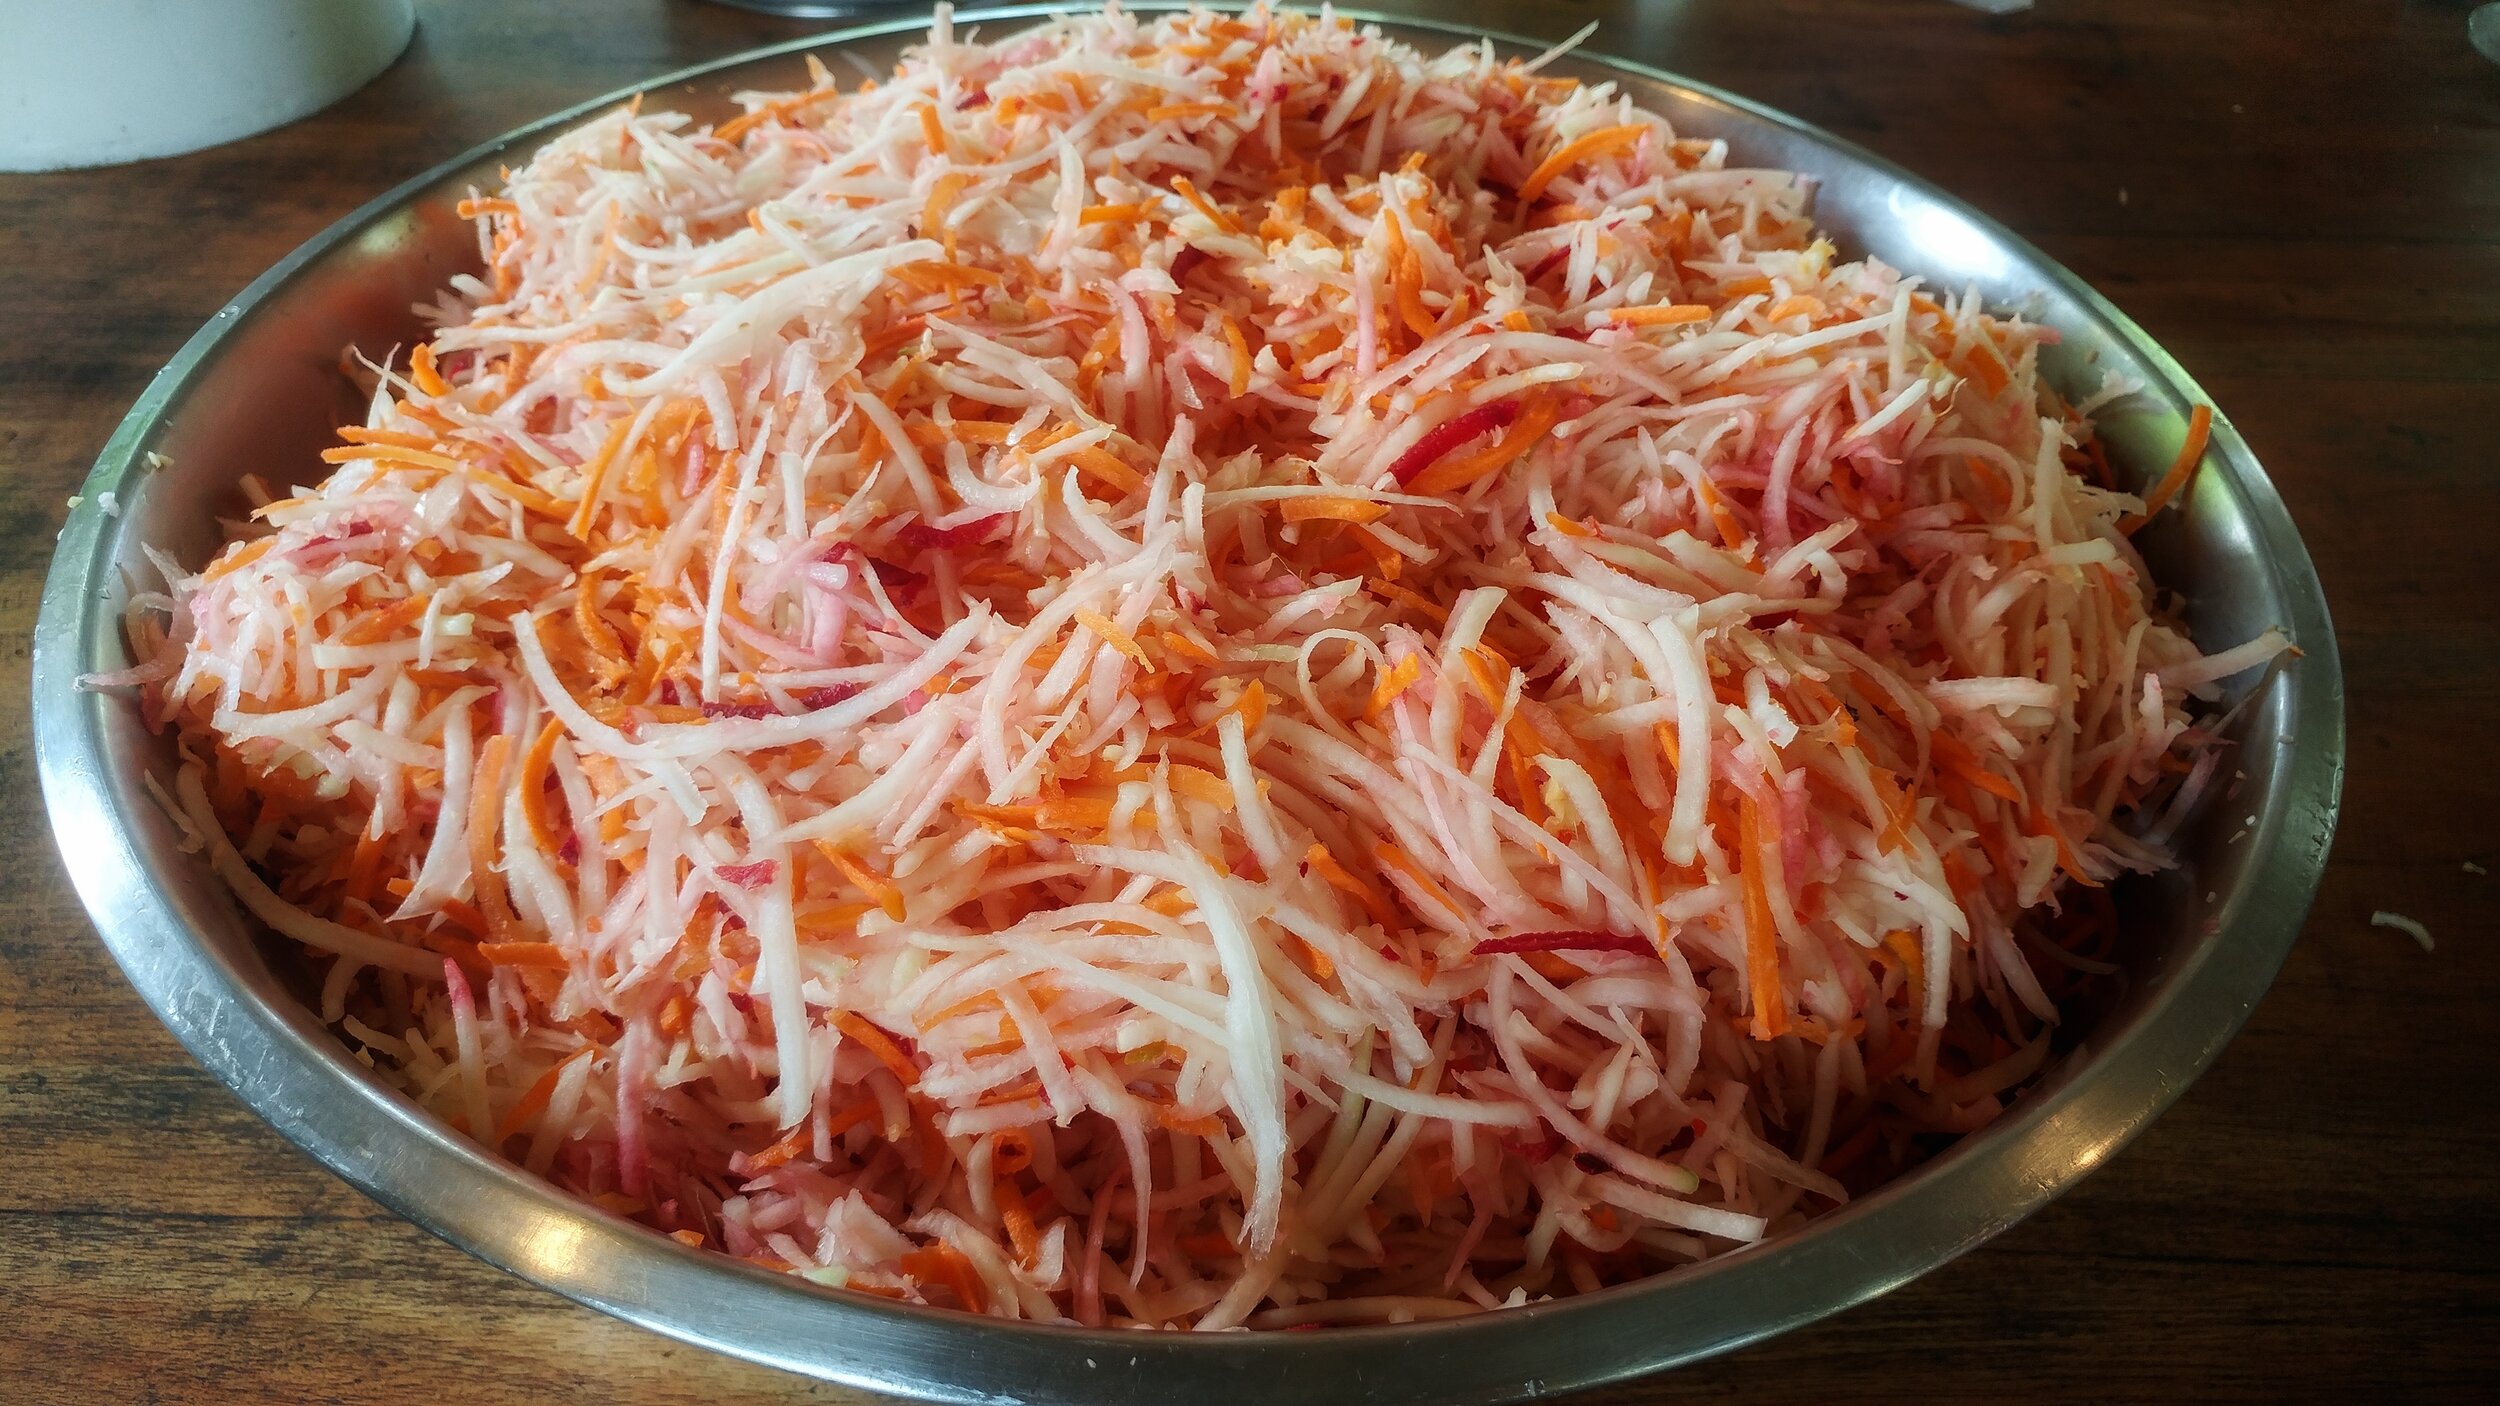
Shredded ingredients ready to be combined with salt and flavors
Recipe
3 green papaya, peeled and seeded
1 carrot and/or 1 beet
Salt (2% of the total weight)
*Flavor Bomb
1/2 cup peeled ginger
1/2 cup peeled garlic
1 chili (optional)
Equipment
Fermentation vessel: A food safe container that can hold all the vegetables plus at least 20cm of headspace (buckets, mason jars, big Tupperware all work perfectly fine).
Instructions
1. Cut the papaya in half and discard the seeds. Peel the papaya.
2. Using a kitchen grater, grate the papaya, carrot and/or beet and set aside.
3. Peel the ginger and garlic. Cut the chili in half and discard the seeds. Blend all the ingredients for your flavor bomb in a food processor.
4. Weigh out all your vegetables and place them in your fermentation vessel.
5. Add 2% Salt to the total weight of the vegetables (e.g. if you have 1kg of vegetables, use 20g of salt) and mix the salt in. Stirring it helps to break up the papaya and releases the brine.
6. Make sure your Kimchi is submerged in brine. Keep it on the counter at room temperature and wait for at least three days (this will depend on your climate). You will see bubbles and be able to smell the acidification after a few days. When it’s reached your desired flavor, bottle the Kimchi in jars and keep them in the fridge. Enjoy!

Green papaya cut in half
Learn more
Those are just a couple of the many vegetables we lacto-ferment. Lacto-fermentation has made our farm to table cooking and preservation more efficient, produce less waste, and create delicious, unique and fun foods.
Join us for a workshop to learn more about fermentation, farm to table cooking, permaculture and more.
Other Farm to table blog articles
Eating Local: Reconnecting to Food
Turn Local Rice and Beans into Fermented Bread
Happy fermentation, happy microbes!

Farm to Table Chocolate Bonbons
It wasn’t long into my apprenticeship that Robin handed me a piece of a chocolate bonbon, made with raw cacao picked from the farm down the road, that I experienced something like awe; and that in the old sense of both amazement and terror. This is what chocolate is supposed to taste like?
By Kara, Apprentice 2020
Beautiful beaches, abundant wildlife, fresh fruit, incredible coffee, and local chocolate; these are some of the things I anticipated experiencing in Costa Rica. While everything but the beaches has been a part of my experience here at Rancho Mastatal so far, one thing in that list stands out to me. The chocolate.
I’ve splurged on the good chocolate bars back home in Canada, the fair trade, single-origin, handmade stuff- and I enjoyed every bite to get my $10 worth- but I know now that I had never truly experienced chocolate. As fair-trade and handmade as all of that was, it was still flown halfway around the world and had sat on a store shelf for who-knows-how-long.

Cacao being toasted
It wasn’t long into my apprenticeship that Robin handed me a piece of a chocolate bonbon, made with raw cacao picked from the farm down the road, that I experienced something like awe; and that in the old sense of both amazement and terror. This is what chocolate is supposed to taste like? And I’ve been missing out on it for the last 27 years? Memories of foil-wrapped bunnies and coins surfaced, and I tried to make the connection between that waxy-sweet substance and what I had in my hand now; something subtle, complex, layered with sweet and smoky and earthy and bitter- no additives necessary.
I was hooked after that first taste, and when Robin said that she wanted a flight of bonbons for her
birthday dessert, I was ready to take on that challenge. The recipes we created for that event were truly a farm-to-table experience- nearly everything sourced from the Ranch property or from farms
around Mastatal (salt and peanuts being our exceptions). The focus on sustainable, local sourcing did nothing to impede the quality of our bonbons, in fact, it’s that parameter that brings out the most creativity (and the best flavors, oftentimes) of most food made at the Ranch.
So instead of going on waxing poetic about chocolate, I want to share those recipes we made and some tips on working with raw cacao. The funny thing about these recipes is that I don’t intend for them to be followed, not exactly, at least. We used what we had on hand; fruits in season, experimental condiments and flavorings from other projects- and I want to encourage the same approach in you. Look through the foods you have available, both in your pantry and in the local market. Can something be dehydrated? Fermented? Powdered? Turned into wine, vinegar or syrup?
Get creative, play, then eat some chocolate.

A productive harvest of cacao at our local family run chocolate farm, La Iguana Chocolate
Basic Chocolate mix
1 cup raw cacao
1 tsp salt (or to taste)
1 Tbsp grated tapa dulce (or sugar)
1. In a hot, dry skillet toast the raw cacao. They will blacken as they toast, and become wonderfully fragrant. You will know they are done when they start to make popping sounds as the skin separates from the seed.
2. Remove from heat, and let the cacao cool until you can comfortably handle them. Once cool, remove the outer skin by pinching the seed between thumb and forefinger of each hand, and twisting in opposite directions. Remove the skin, but don’t discard it! The little flakes of toasted skin make a wonderful cacao tea.
3. Grind the cacao. We use our hand-cranked corona coffee grinder, but a food processor or a mortar and pestle could work, too. Add the salt and tapa dulce to the cacao as you’re grinding to incorporate it into the resulting mix. You should end up with a mix the texture of gritty sand.
4. This is the base mix to which you will add all of your flavorings. For any bonbon flavor, you
will need something sticky to bind the cacao mixture. Syrups, dulce de leche, finely chopped gooey dried fruits such as dates, have all worked successfully for us. If you add liquids as flavoring, make
sure to watch the texture of the resulting mix. It needs to be wet and sticky enough to bind the cacao together, but not so wet that it slumps.
5. Roll your bonbons into spheres, or any shape of your choice, decorate, then refrigerate until serving.

Cacao seeds being crushed

A freshly picked cacao pod. The white pulp around the seeds is delicious!
Recipe Ideas
*all made with basic chocolate mix
Ranch-oreo: Make two small balls of chocolate mix per bonbon, mixing in dulce de leche to bind, then flatten them into bite size discs. Add a dollop of dulce de leche between the disks, and top with cinnamon and grated tapa.
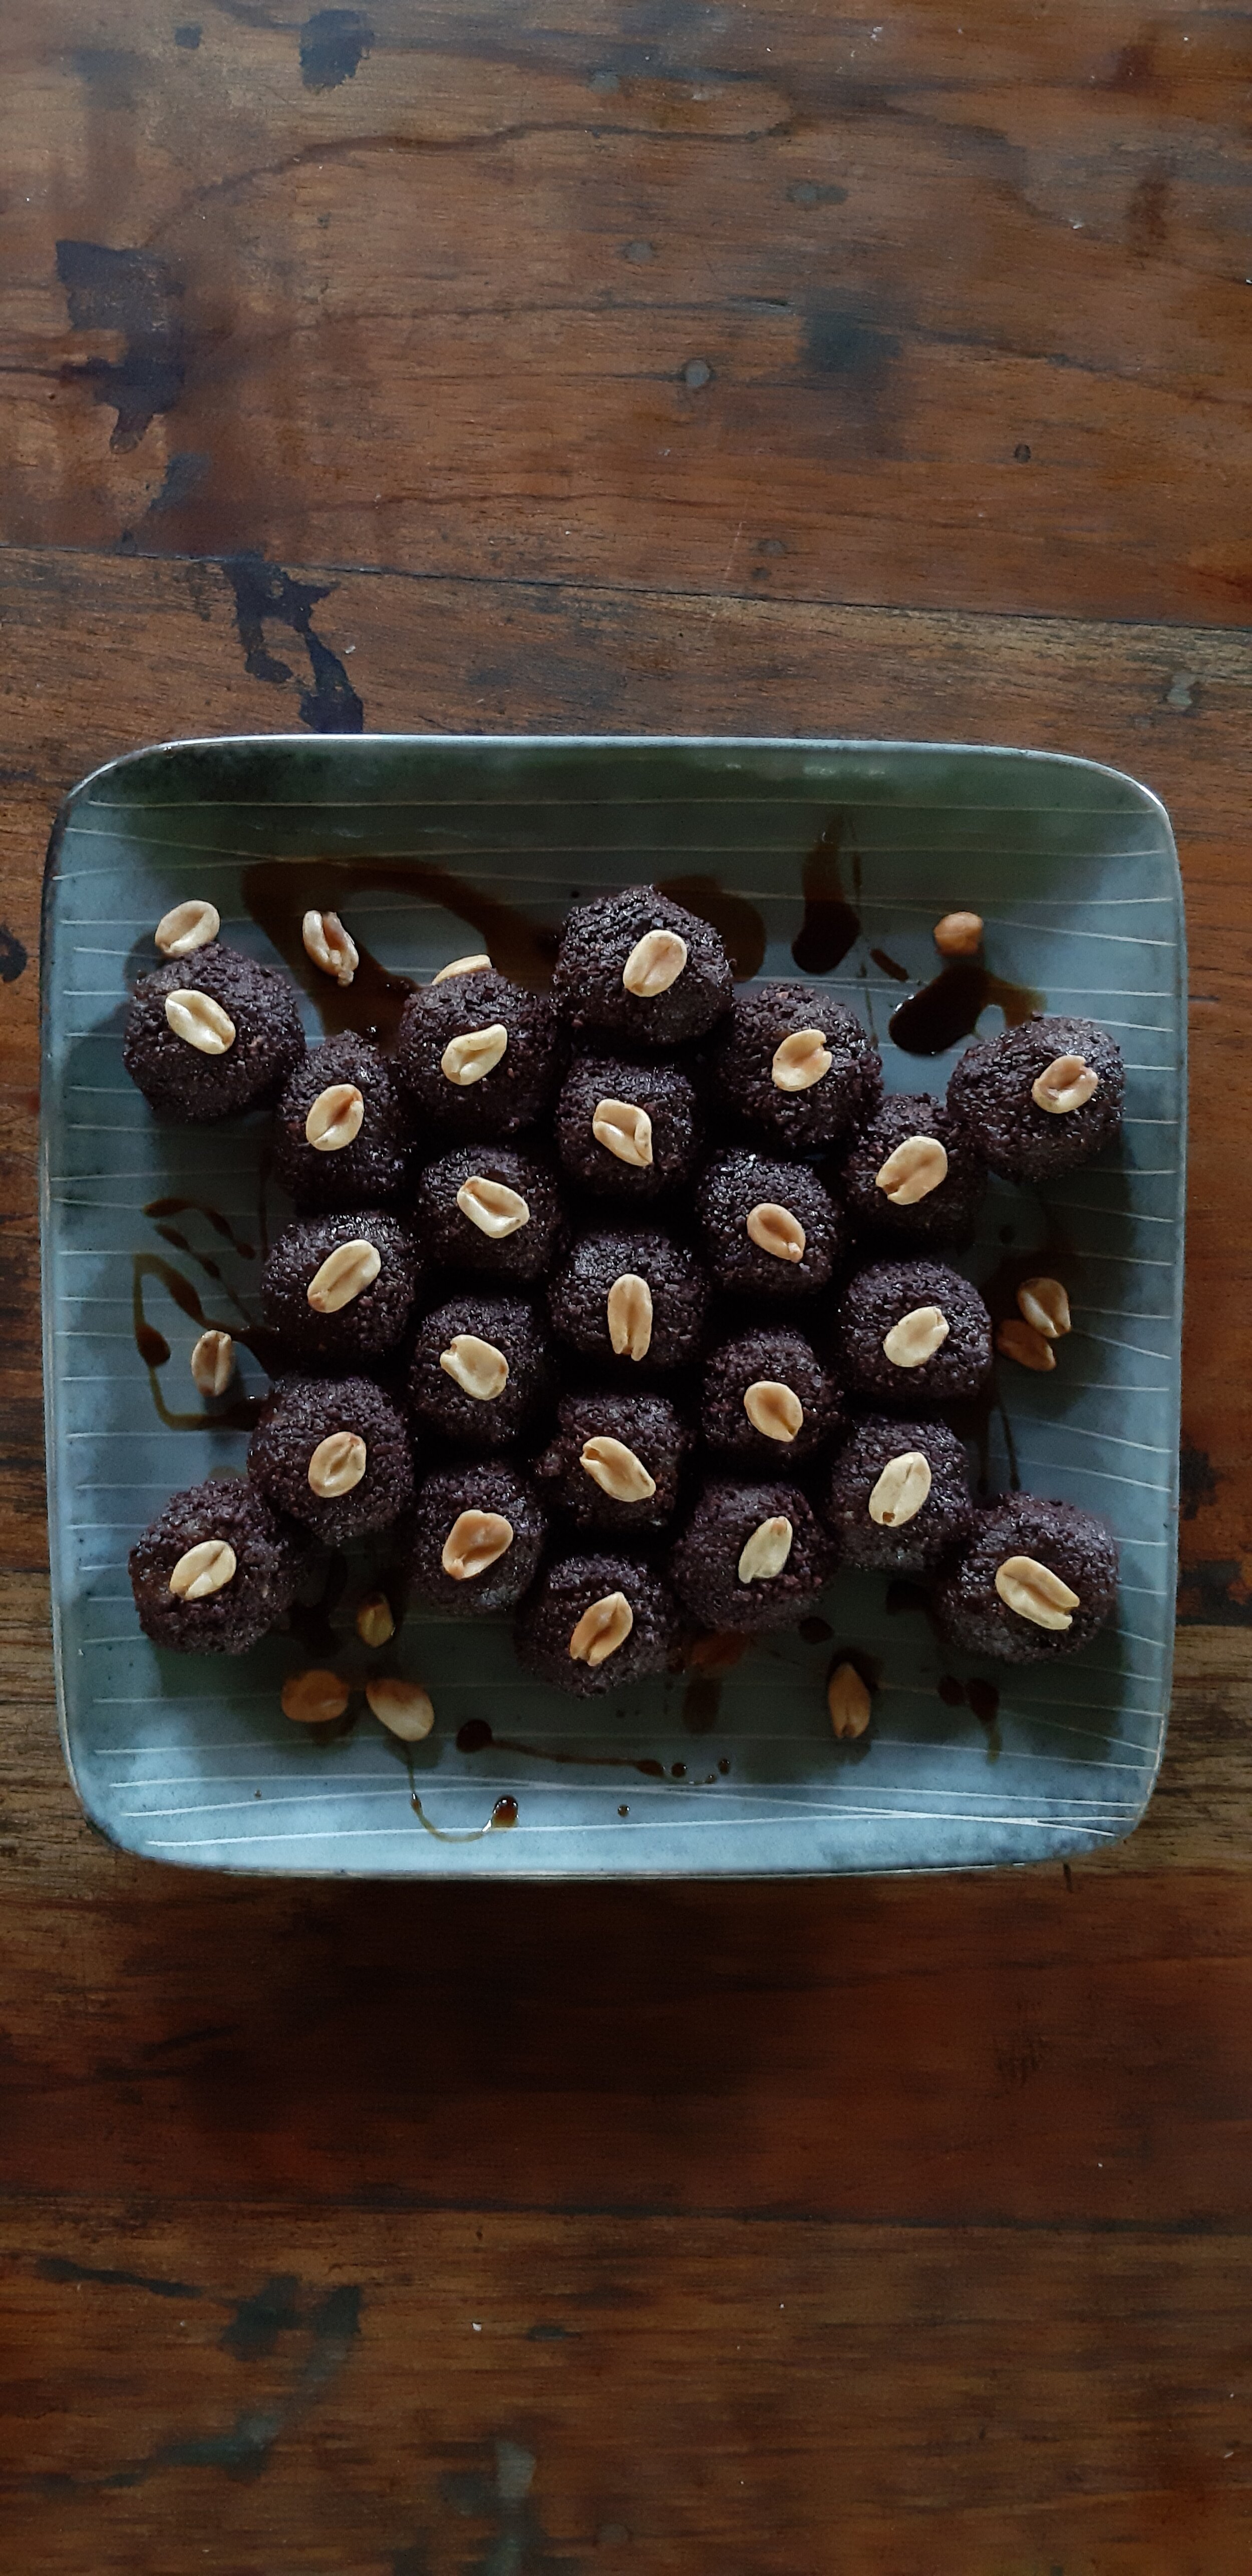
Peanut Butter Balls: Bind the chocolate mix with coffee flavored syrup (we used a coffee kombucha reduced with tapa dulce), and make a quick peanut butter to fill the bonbon. Toast peanuts with salt, and put them in a food processor with sour cream until it reached your desired texture. Make a ball of the peanut butter, then wrap a layer of the chocolate mix around it.
Ginger Jack Bites: Add ginger syrup and lime (we used powdered) to the chocolate mix, then incorporate finely chopped dried jackfruit. Roll into balls, and top with a slice of dried manzana de agua.
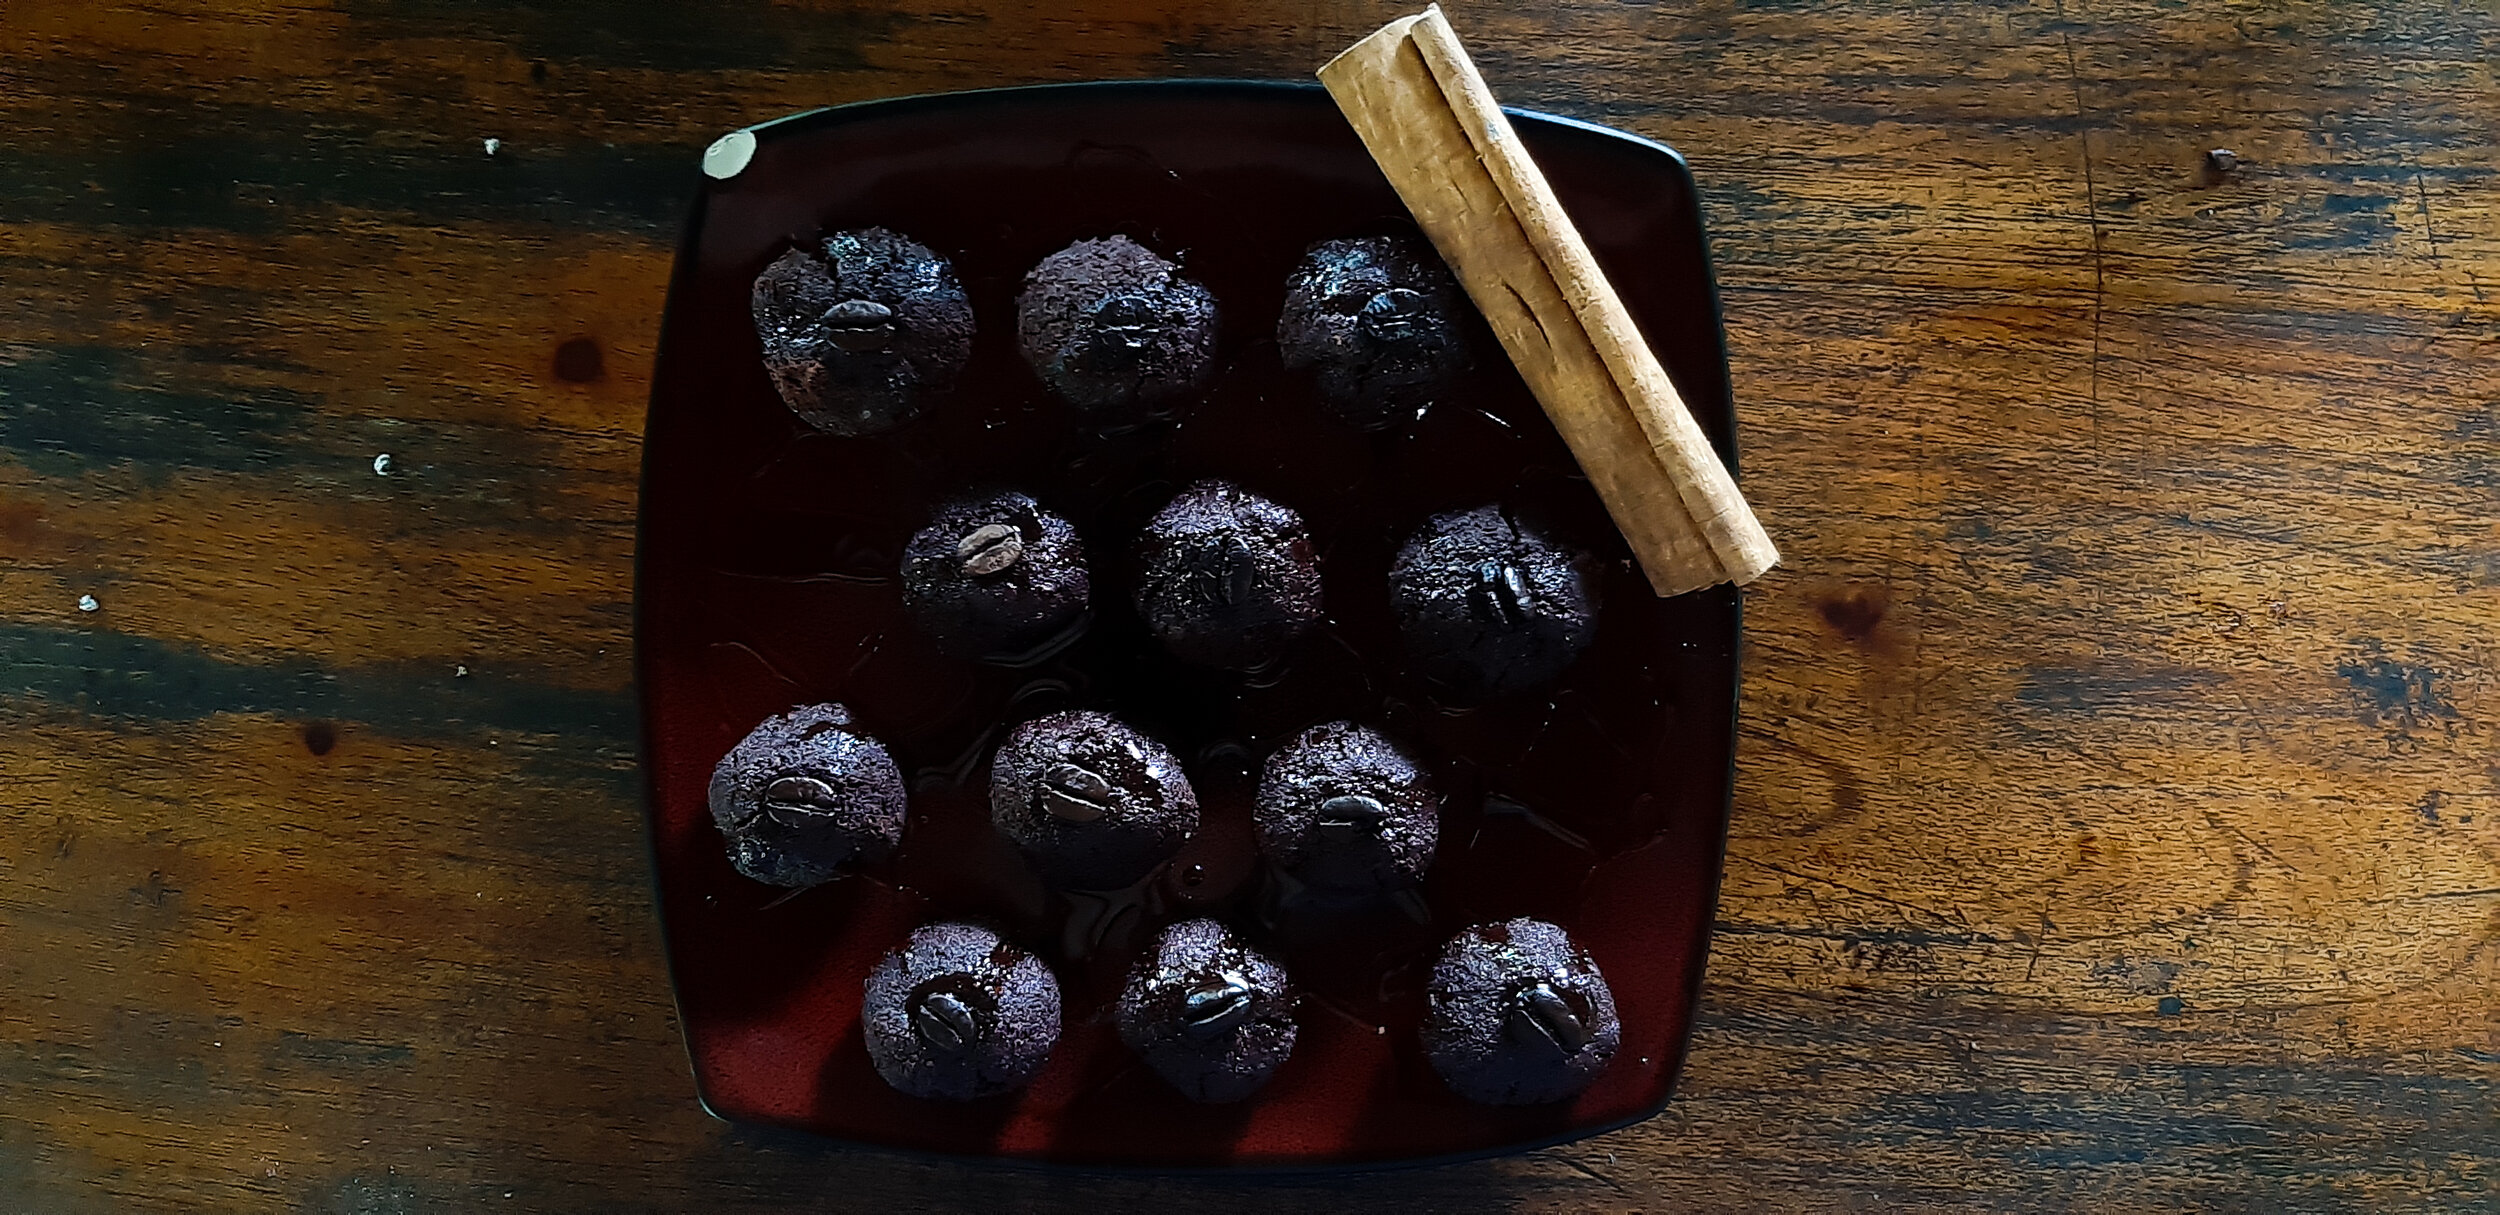
Coffee Cinnamon Balls: Mix the chocolate with coffee kombucha syrup to bind, roll into balls and top with a coffee bean and sprinkled cinnamon
Chilli Chocolate Bites: Mix the chocolate with starfruit syrup, chilli infused vinegar, lime, and dried chilli flakes. Roll into balls. Careful, this one gets hotter the longer you leave the chilli flakes infusing in the chocolate!
Simply Sweet: Mix the chocolate with dulce de leche, roll into balls, then create an indent with your finger in each bonbon, and fill it with a dollop of dulce de leche.
want to learn more?
Come stay with us as a guest and you’ll get to enjoy and make these tasty treats on a day trip to La Iguana Chocolate.
Visit our guest page for more info on coming and being a part of the Ranch and Mastatal community.
Past blog articles about cacao and farm to table products:
From Tree to Bar: How to Process Raw Cacao
Life of Spice: Farm to Table Cinnamon
Vanilla Cultivation: A Practical Guide for the Tropical Homestead
Workshops we host and teach that are related to agriculture and homesteading:
Permaculture Design Certification
Agroforestry Skills
Plants as Medicine
Syntropic Farming
And more! Visit our website for more information on our upcoming workshops.
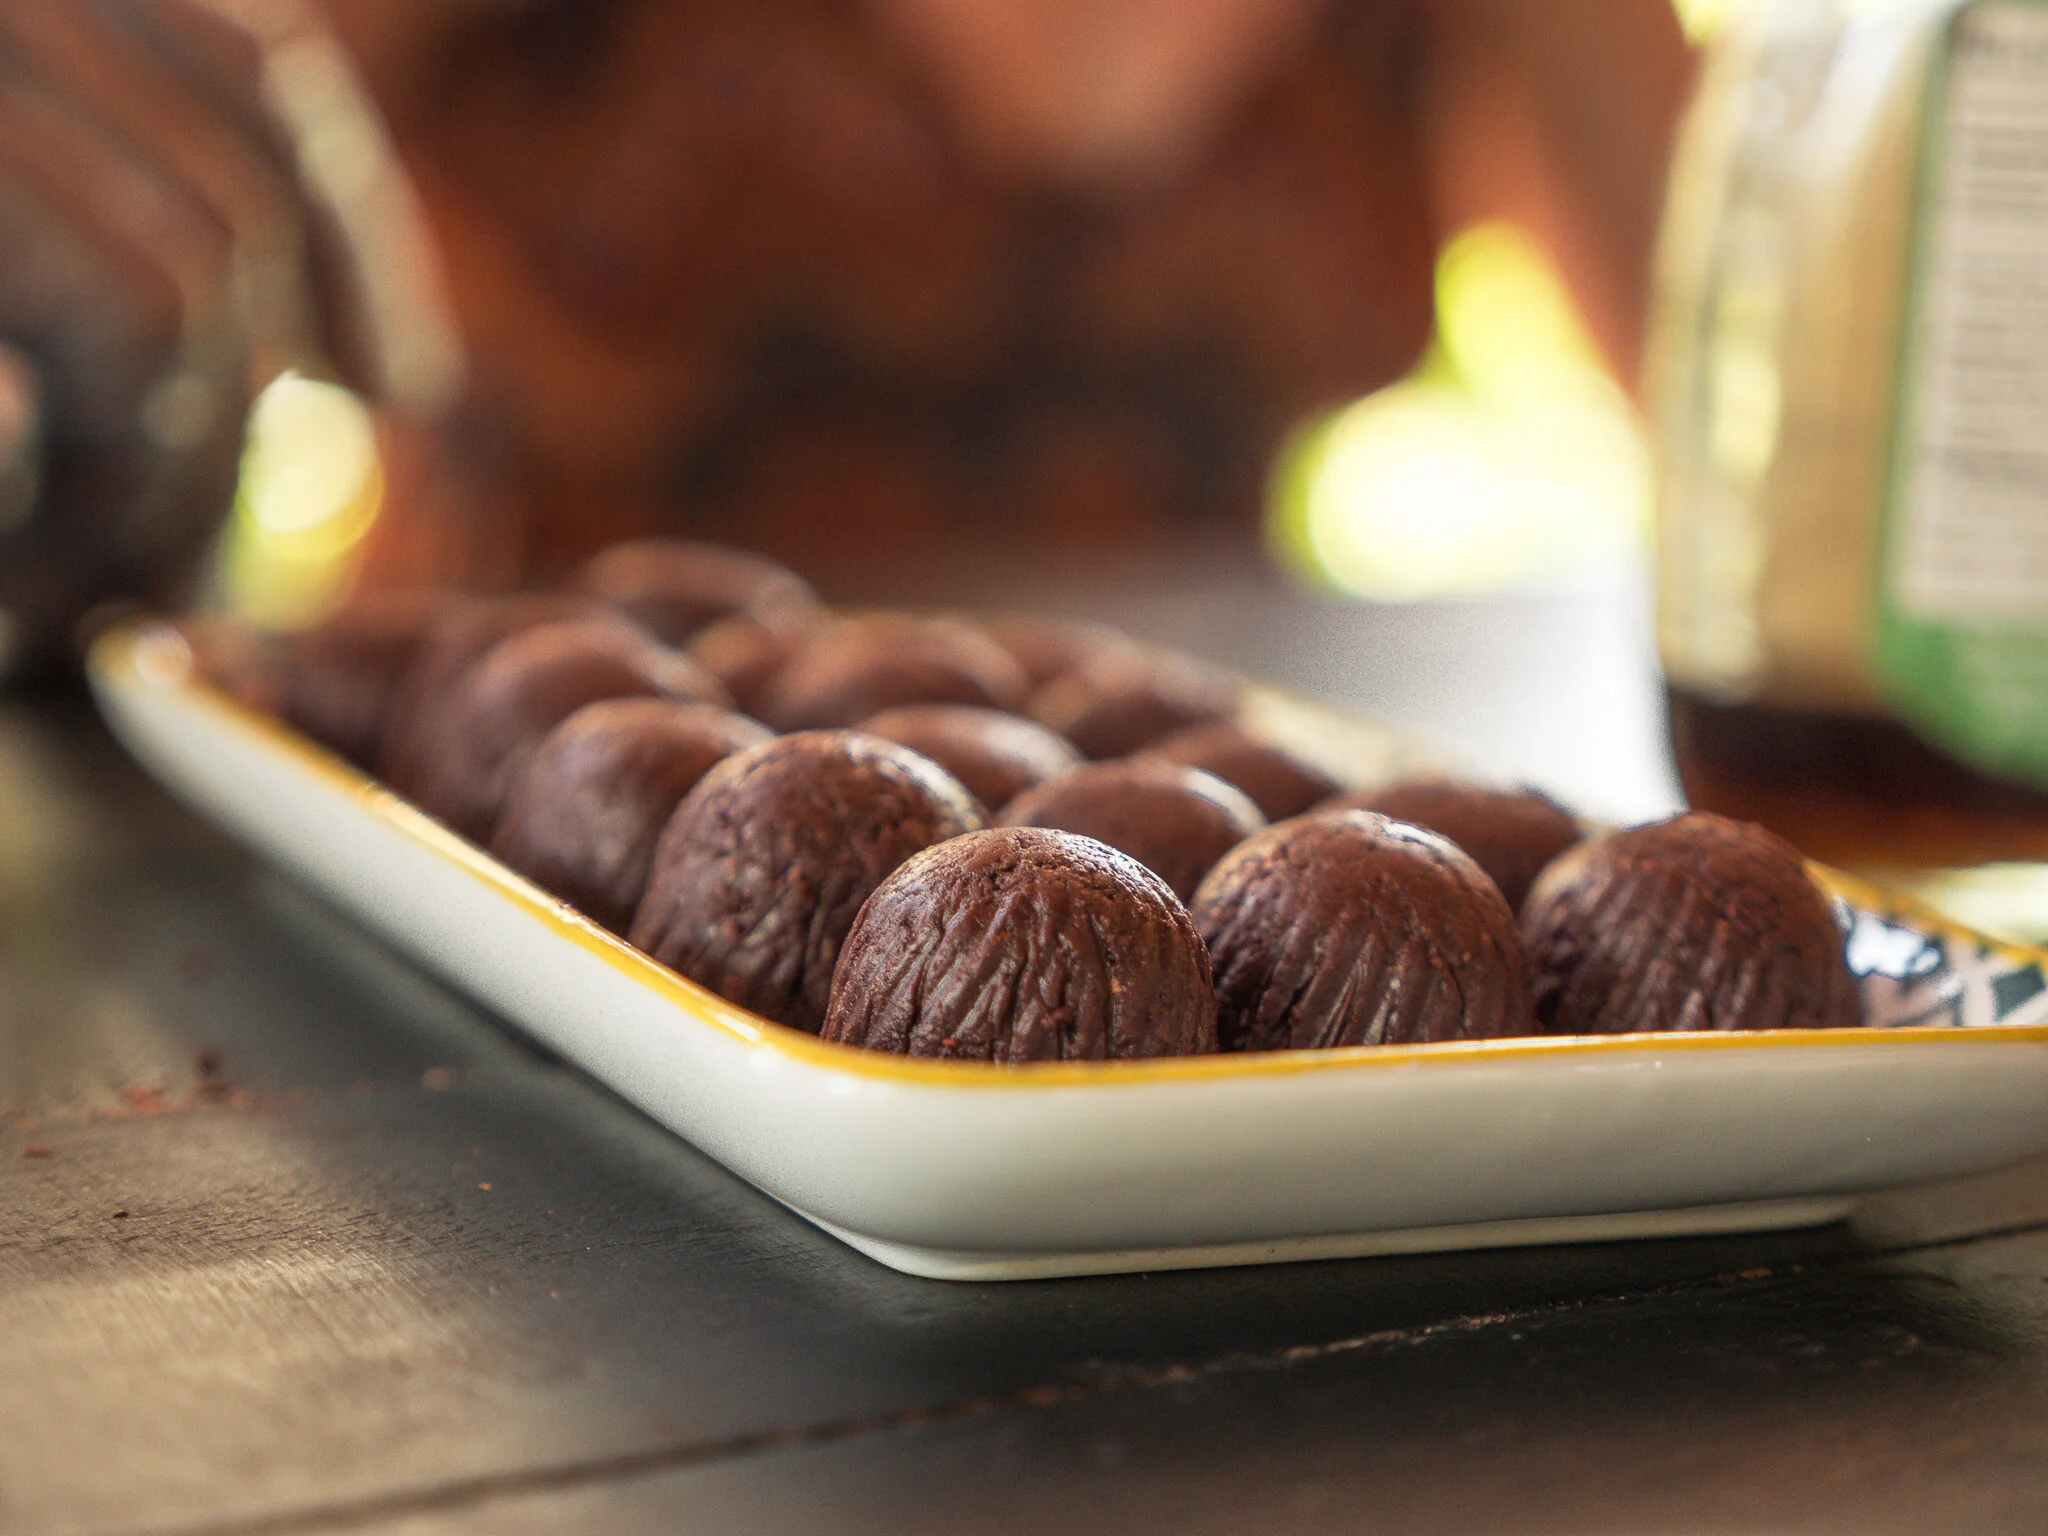
Locally sourced and made chocolate from our neighbors at La Iguana Chocolate

Natural Log Cultivation of Shiitake Mushrooms in the Tropics
Even though growing shiitake in bags of synthetic logs is more common due to labor and material costs for bigger scale production, we decided to go for the traditional natural log cultivation, as it has been grown for thousands of years. So if you’re thinking about starting mushroom cultivation, here are a few tips on how to do it:
By Nico, Apprentice 2020

Apprentices inoculating the logs
Managing an orchard space involves dealing with a lot of biomass, especially here in the tropics. From weeding, to pruning, chopping down NFTs that are getting way to big, etc. We are then left with a lot of plant material. Most of this biomass is returned to the soil around our beloved fruits trees, decomposed by microorganism and turned into a nutritious soil, hence completing the life cycle of our healthy ecosystem. But, every once in a while we are faced with the dilemma of having to take down bigger trees. At the Rancho we always try to honor the life of those trees by using them in the best way possible. Following permaculture principles, we don’t see any by-product as waste but rather as a resource. So when we had to take down a magnificent Pau d’arco for safety reasons, we took this opportunity to give it second life. The biggest logs were milled by 2 local sawyers, and are currently drying in the barn to be turned into the next piece of beautiful furniture. We used the smallest logs/branches to make a tincture, since the tree has so many wonderful medicinal properties. The bark, a powerful botanical medicine that restores the immune system, has been cited traditionally to treat the following health problems: anaemia, arteriosclerosis, arthritis, asthma, bronchitis, boils, cancer, candida, colitis, colds, constipation, coughs, cystitis, diabetes, diarrhoea, emphysema, dysentery, eczema, fevers, flu, gastritis, gallbladder problems, infections, liver problems, lung problems, leukaemia, pain relief, parasites, prostatitis, pyorrhoea and wounds!
*Learn more about Plants as Medicine in our annual workshop*
Finally, having noticed that the wild Oyster mushrooms are growing pretty well on this species once dead, we decided to use the medium sized logs that were too small to be used for furniture, to tackle one of my many long-time wishes: growing shiitake mushrooms. Shiitake is one of the most popular and important mushrooms in many countries. It has a long-standing history as a culinary delicacy and an immune system booster that produces lentinan, which is recognized in Japan as an
anti-cancer drug. An anti HIV property has also been detected along with other health benefits that are still being studied. It is widely cultivated not only in Southeast Asia but also North America, Europe, Australia and New Zealand, and each year more and more small scale farms are popping up.
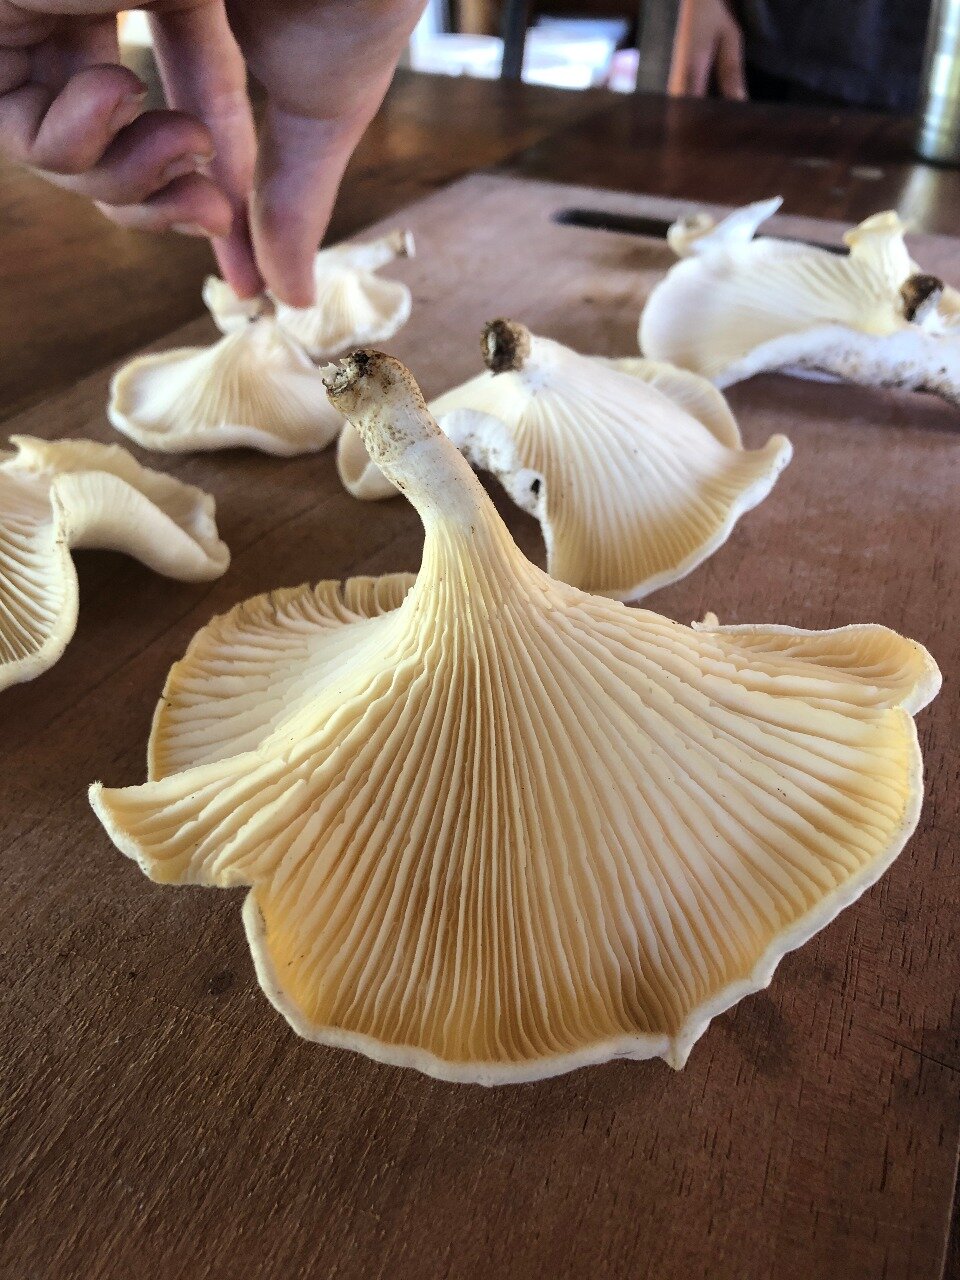
Wild oyster mushroom harvest
Even though growing shiitake in bags of synthetic logs is more common due to labor and material costs for bigger scale production, we decided to go for the traditional natural log cultivation, as it has been grown for thousands of years. So if you’re thinking about starting mushroom cultivation, here are a few tips on how to do it:
Selecting the logs
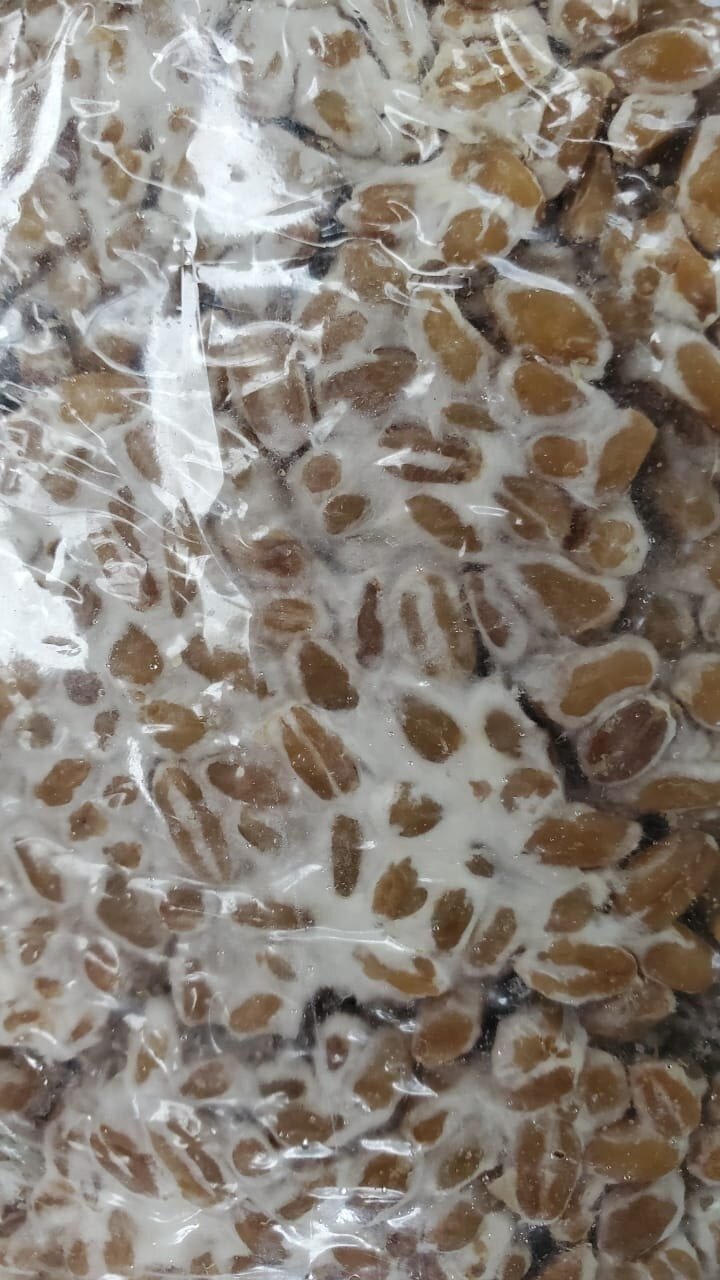
Mushroom spores
The most common species for growing shiitake in temperate climates are Oaks, Poplar, Alder, Maple, Birch, Elm and Sweetgum. On softwoods such as alder and birch, the mycelium will colonize the logs faster, but hardwood will give you a longer production time and less risk of contamination by other undesired mushrooms or molds. Growers should check to see what kind of suitable trees are available locally. Once you know which tree you will use as a substrate, you can start selecting and cutting the logs. Shiitake grows best in the sapwood and cambium because they contain the most readily available nutrients and have higher moisture content than the heart-wood, so the larger the sapwood area, the better. As Shiitake is a saprophyte, it can only grow on dead wood, so you want to make sure you inoculate your logs at least 2 weeks after the tree was chopped down so all the wood cells are dead. If inoculated sooner, the trees' natural chemical defenses against invasion may still be active and could prevent the shiitake fungus from growing. It is a good idea to soak the logs in water 24h before inoculation in order to increase the moisture content above 40%. The Ideal size for logs is about 1m in length so they are easy to manipulate, and a diameter somewhere between 7 and 15 cm (3”-6”). You want to select logs with an intact bark and try to keep it on as long as possible, as it creates an extra layer of protection against other wild molds, fungus or contaminants. Lime water can be applied on the exposed surface at the end of the logs for the same reasons, or you can also seal them with wax when doing the next step.
Inoculating the Logs
Inoculation is the introduction of the live fungus into the log. This live fungus is mixed with sawdust, grains, and other nutrients or is grown on a wooden dowel. This mixture, called spawn, is the mycelium of fungi growing on a substrate and prepared for propagation of mushrooms.

Brushing wax onto the ends of the logs
To inoculate, simply drill holes into the logs and fill them with spawn. The holes should be 0.8 cm in diameter and about 3cm deep. As mycelium spreads faster along the wood grain than across, you can place those holes 5cm apart around the log, and 10 to 15 cm apart lengthwise. Place the next row of holes diagonally, creating a diamond pattern and fill them with the spawn. Once all the holes are filled, seal them with melted beeswax to prevent drying and contamination.
Contamination is the most common reason of failure in mushroom cultivation, hence it is really important to always work in a clean environments and with sterilized tools. The more you pay attention and dedicate time towards this, the higher the chance of success.
Aftercare
Once all your logs are inoculated you want to let them sit in a warm and shaded area, in order to give the spawn the best conditions for propagation. What you’re looking for is a good balance of humidity, shade, ventilation and temperature. Each strain of mycelium has its optimal conditions, so make sure to get as much info as possible to find the perfect place. Too much heat with high humidity increase the risk of contamination, and you can balance that with good ventilation, but too much ventilation will dry out your logs, and you want to keep a stable humidity level. Think of it as having to choose a place to hang your hammock if you had to spend a whole day in it: you want it to be warm and cozy, but not in direct sunlight so you don’t start sweating. You want to have access to water (humidity) and a nice small breeze to rock in your hammock while you fall asleep.

Inoculated logs in a warm, shaded area
Give it Some Time
There you have it! Your logs are now freshly inoculated with the shiitake spawn (or any other variety you choose). The only thing left to do is give it some time to propagate and colonize the log before fruiting starts. Don’t forget to control humidity level and temperature, and check for any contaminants that might spread and steal the thunder from your precious shiitake. For fruiting to start, you can either let nature do the work or induce fruiting through different techniques that we will develop in next post, when or shiitake spawn is ready to fruit. Stay tuned for more info about fruiting, harvesting and all the next steps in your mushroom cultivation!
want to learn more?
Don’t forget to check out our yearly workshops and our apprenticeship program to get some hands on experience in sustainable living in the tropics!
Yearly workshops related to plants and homesteading include:
Happy mushroom growing!

Life of Spice: Farm to Table Cinnamon
When cooking over a fire, I often imagine that I am a witch brewing a potion. As I stirred with a big wooden spoon, the cinnamon began to sizzle, wafting its wondrous fragrance into the air and taking me to another place.
By Dani, Apprentice 2020

Farm to table cinnamon sticks!
Local Cinnamon
One morning at the Rancho, I was toasting some cinnamon to try to spice up an orange kefir water concoction. When cooking over a fire, I often imagine that I am a witch brewing a potion. As I stirred with a big wooden spoon, the cinnamon began to sizzle, wafting its wondrous fragrance into the air and taking me to another place.
The scents of spices are fantastical, and I have always thought that the spice rack is a mystical, magical place of otherworldly ingredients. As I learn more about spices , that magic has not faded, but rather has revealed new perspectives. We grow cinnamon in the permaculture orchards at the Ranch, and using this magnificent spice from tree to table has made me appreciate it so much more.
The cinnamon in my potion that morning is about as local as you can get. As the cinnamon toasted, the aroma traveled into my nose, triggering my memory, as scents often do. I was captivated by the smell when someone walked into the food smithy and exclaimed, “It smells like Christmas!” I snapped out of my cinnamon induced daydream and concurred. Even though it was a hot February day in the tropics, with temperatures around 85 degrees Fahrenheit, I could almost taste the crisp cold air of Wisconsin. It took me home. To me, the scent of cinnamon evokes feelings of cold winter nights with Christmas cookies by the fire. It feels like cool fall air and spiced apple cider at the orchard. It tastes like pumpkin pie at the dinner table. Cinnamon is for days of wool socks and sweaters. It smells like home to me. It is cozy. It is comfortable. It’s nostalgic.
But I had never even seen a cinnamon tree until coming to the tropics. So how did I come to associate this tropical flavor with with cold cozy evenings in Wisconsin? How did it become the holiday flavor of a climate where it doesn’t grow?
Origin of the Spice
By definition, spices come from the aromatic parts of tropical plants: roots, flowers, seeds, or bark. Unless you live in the tropics, the likelihood of consuming local , farm to table spices is slim to none.
Cinnamon comes from the bark of an evergreen tree which is native to Sri Lanka (Ceylon), and in ancient times, it was one of the most sought after spices. Like pepper, it has thousands of years of history in the globalization of foods and was known in China as early as 2700 B.C. It is even mentioned in the old testament as well as in Sanskrit texts. The globalization of cinnamon is not new, and the magical qualities of cinnamon ignited ideas of paradise in the minds of many, causing them to set sail in search of the heavenly lands from where they believed the magical spice must have come.
Cinnamon has a powerful scent, so powerful that it played a part in progressing the sharing of cultures and globalization as we know it. Some wonderful new cuisines came out of the spice trade, but it was not without a cost; the spice trade was also linked to slavery and centuries of abuse towards the local producers. It is important to remember both the fascinating and dark histories of the foods we eat.
Today, Great Britain is the leading consumer of cinnamon, followed by the United States and Spain, all places where the spice does not grow. The word, cinnamon, comes from the Greek word for spice and the prefix ‘Chinese’. Cassia is another spice, closely related to cinnamon, and they are often sold interchangeably, though cassia has a more delicate taste. Most of the cinnamon sold in the United States is actually cassia. Cassia is native to Myanmar and northern India as well as some Indonesian islands. Records of this spice date back over 6,000 years, and it was grown around present-day Hanoi during the Han Dynasty.
Cinnamon and Cassia can be distinguished by their color, true cinnamon being tan and cassia being more of a darker reddish brown. I had no idea that most of the cinnamon I have consumed in my life was probably not even cinnamon
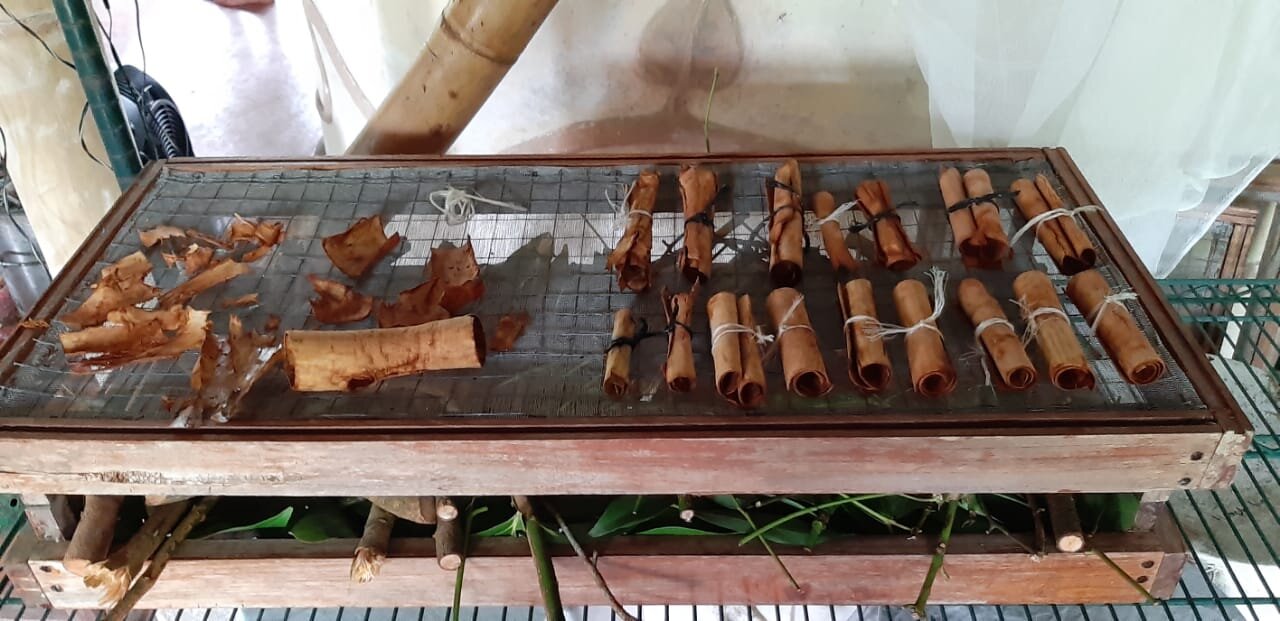
Cinnamon sticks rolled and drying
Permaculture Processing
The journey of cinnamon from the farm to our tables is neither short nor simple. After harvesting and processing cinnamon here at the Ranch, I would argue its processing is truly an art.
Ideally, cinnamon is grown to be long and straight to maximize yields. The offshoots should be pruned as they take energy away from the trunk, which is where the good stuff is. The darker bark is harvested to use as the spice. Once the tree reaches about 2 meters and the trunk is about 2-4 inches thick, it is ready to harvest. It’s good practice to chop the tree down to 10-15cm at a 30-degree angle for water and sun protection. After the tree is chopped, it will produce 2-6 new shoots, increasing the yield of the next harvest which will be ready in about 2 years. This practice can be continued for the lifespan of the tree. With a permaculture mindset, we harvested some cinnamon at the Ranch with hopes that in a few years, yields will increase with the new shoots. After chopping the tree, we took off the lateral branches and leaves. The wonderful cinnamon flavor is also contained in the stems at the base of the leaves so we saved and dried these for tasty tea. We then chopped it into smaller, more manageable pieces, and using a knife, we shaved off the outer bark. The next layer down is called the cambium, and that is the stuff you want in your carrot cake.
The cambium is the part of the tree between the outer bark and the heart wood and what we know as cinnamon. To separate it from the heart of the tree, we made an incision using a knife down the entire length of the piece. Then, we slowly began to peel it off using a spoon, trying to keep it is one piece. It was not easy, especially if there was a knot in the wood. Finally, we rolled the cinnamon cambiums and tied them, and put them to dry. Sometimes cinnamon is cut into quills of over three feet in length! Though I have always thought that cinnamon sticks were beautiful in form, after struggling with my three-inch piece, I realized there is a whole layer of beauty I had not seen. I was blind to the artists behind them, the growers and processors of this special tree.
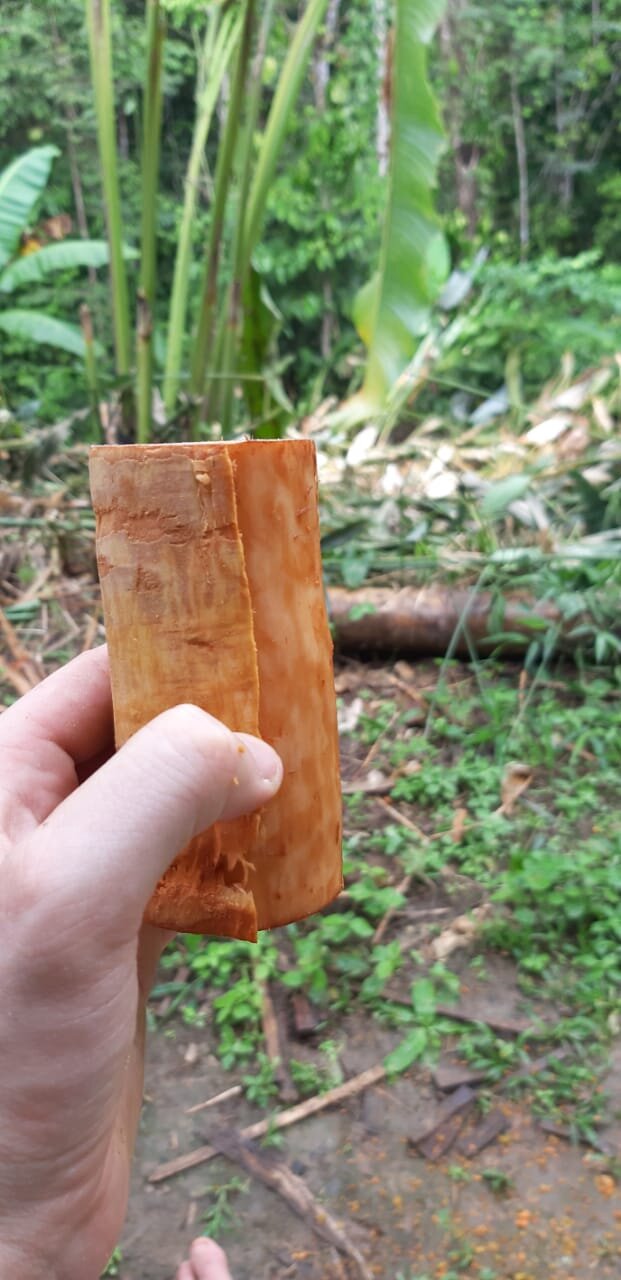
The outer bark shaved off, exposing the cambium layer
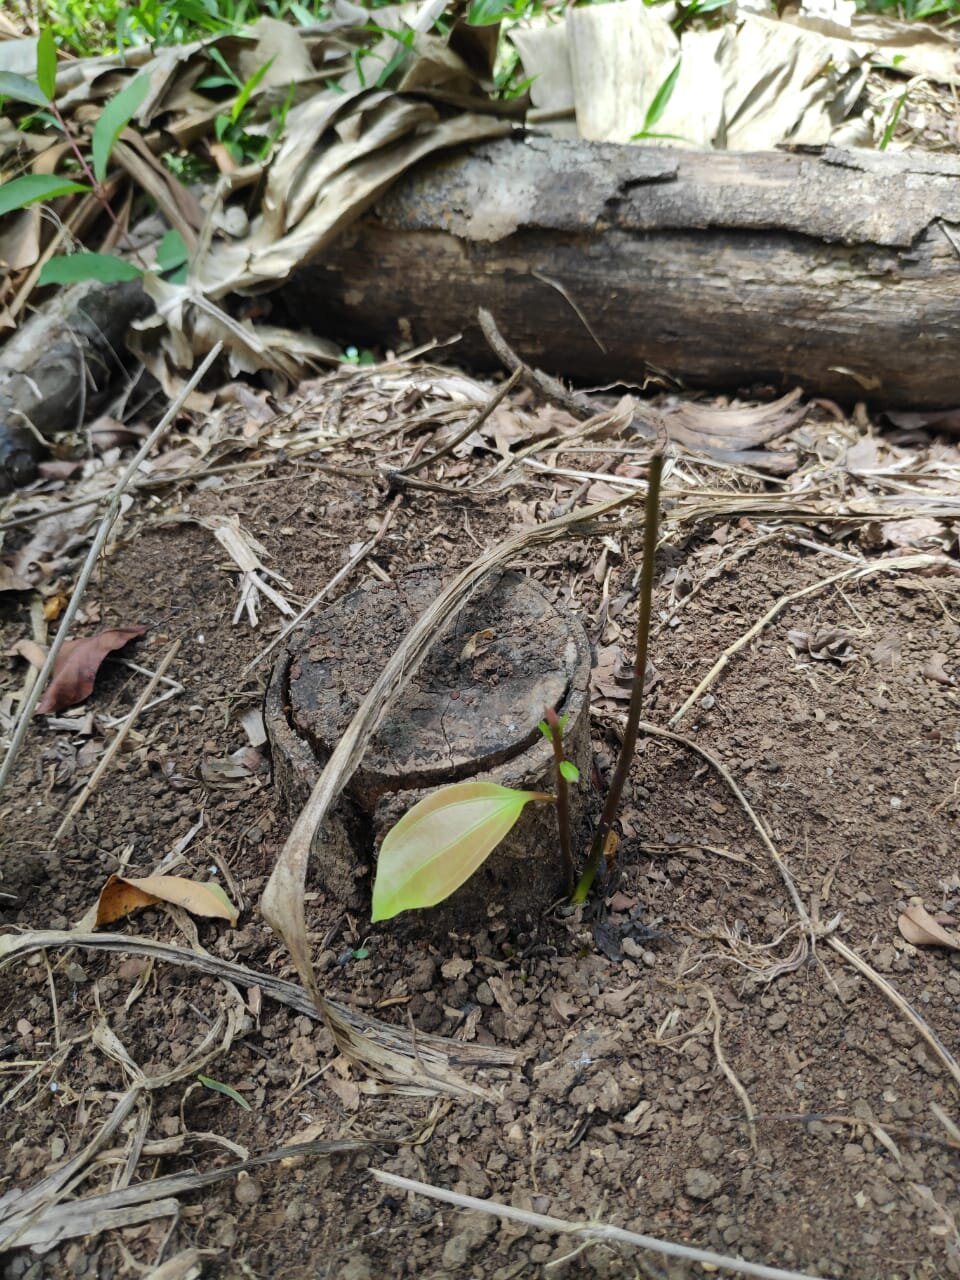
The new shoots coming up
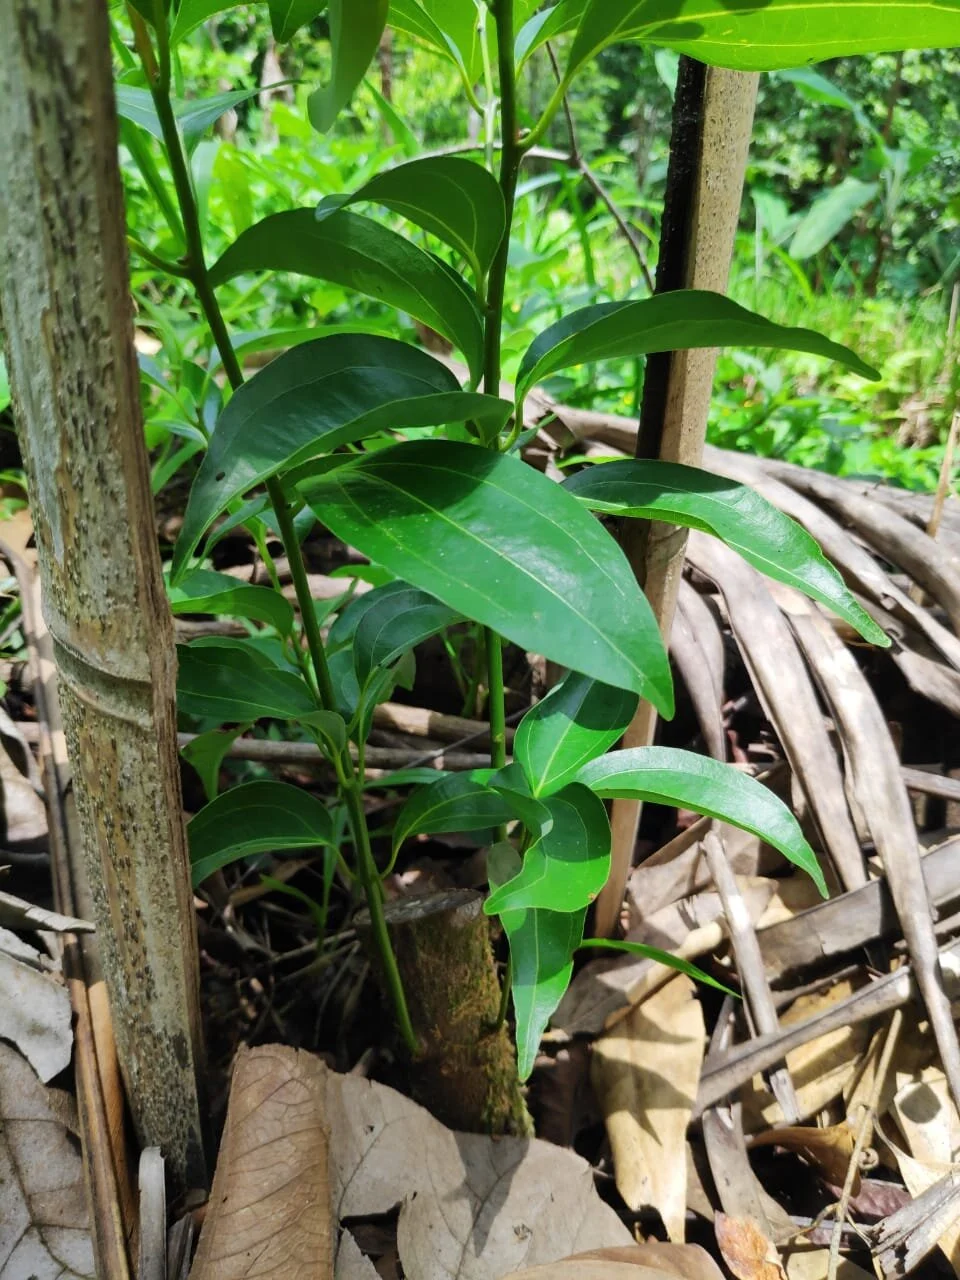
A healthy cinnamon tree re-growing
Conscious Consumption
There is so much in the food we eat: natural resources, back-breaking labor, rich traditions, culture, history, and beautiful artistry. It is important to consider where our food comes from, not only for our health, but for the well-being of those who grow and process our foods, and for the sake of our planet.
I think this is more difficult when it comes to spices. But these days, there are companies striving to produce fair trade spices through sustainable farming practices. Vermont-based Forestrade, started in Sumatra, demonstrated to local farmers how cinnamon can be grown without clearing huge sections of land that would endanger the surrounding national park. They now collaborate with 6,000 indigenous producers in Indonesia and Guatemala. Another example is a group of Hindu People on the mainly Buddhist island of Sri Lanka, the Salagama, who traditionally peeled the cinnamon bark from the trees. These people were devastated by the spice trade, controlled by the English, the Dutch, and the Portuguese. Today, the situation has changed, and they are able to sell their product to a fair trade association for 4o percent above the market rate.
These programs only work if we as consumers are aware of where our spices come from and are willing to pay a little more for our products. Through our consumption habits, we have the power to improve the lives of so many. I encourage everyone to enjoy cinnamon in their hot chocolate on a crisp cold evening, but as the aroma fills the room be mindful of how it got there. Spices truly are incredible, and I hope that while we are doing our best to eat local, we can be conscious of the magic contained in the spice rack.

Achiote to be made into paste

Fresh turmeric harvest

Farm to table peppercorns
Want to learn more?
Stay tuned for my next Life of Spice blog! And if you didn’t read my last blog about farm to table black pepper, read it here!
Want to learn more about growing your own foods and spices? Join us for our annual Permaculture Design Course or Agroforestry Skills Workshop, you can find more info on both these workshops here.
Check out these past articles about farm to table foods we are planting and processing here:
Sources and Further Reading
Heinerman’s Encyclopedia of Healing Herbs and Spices by John Heinerman
Spices – A Global History by Fred Czarra
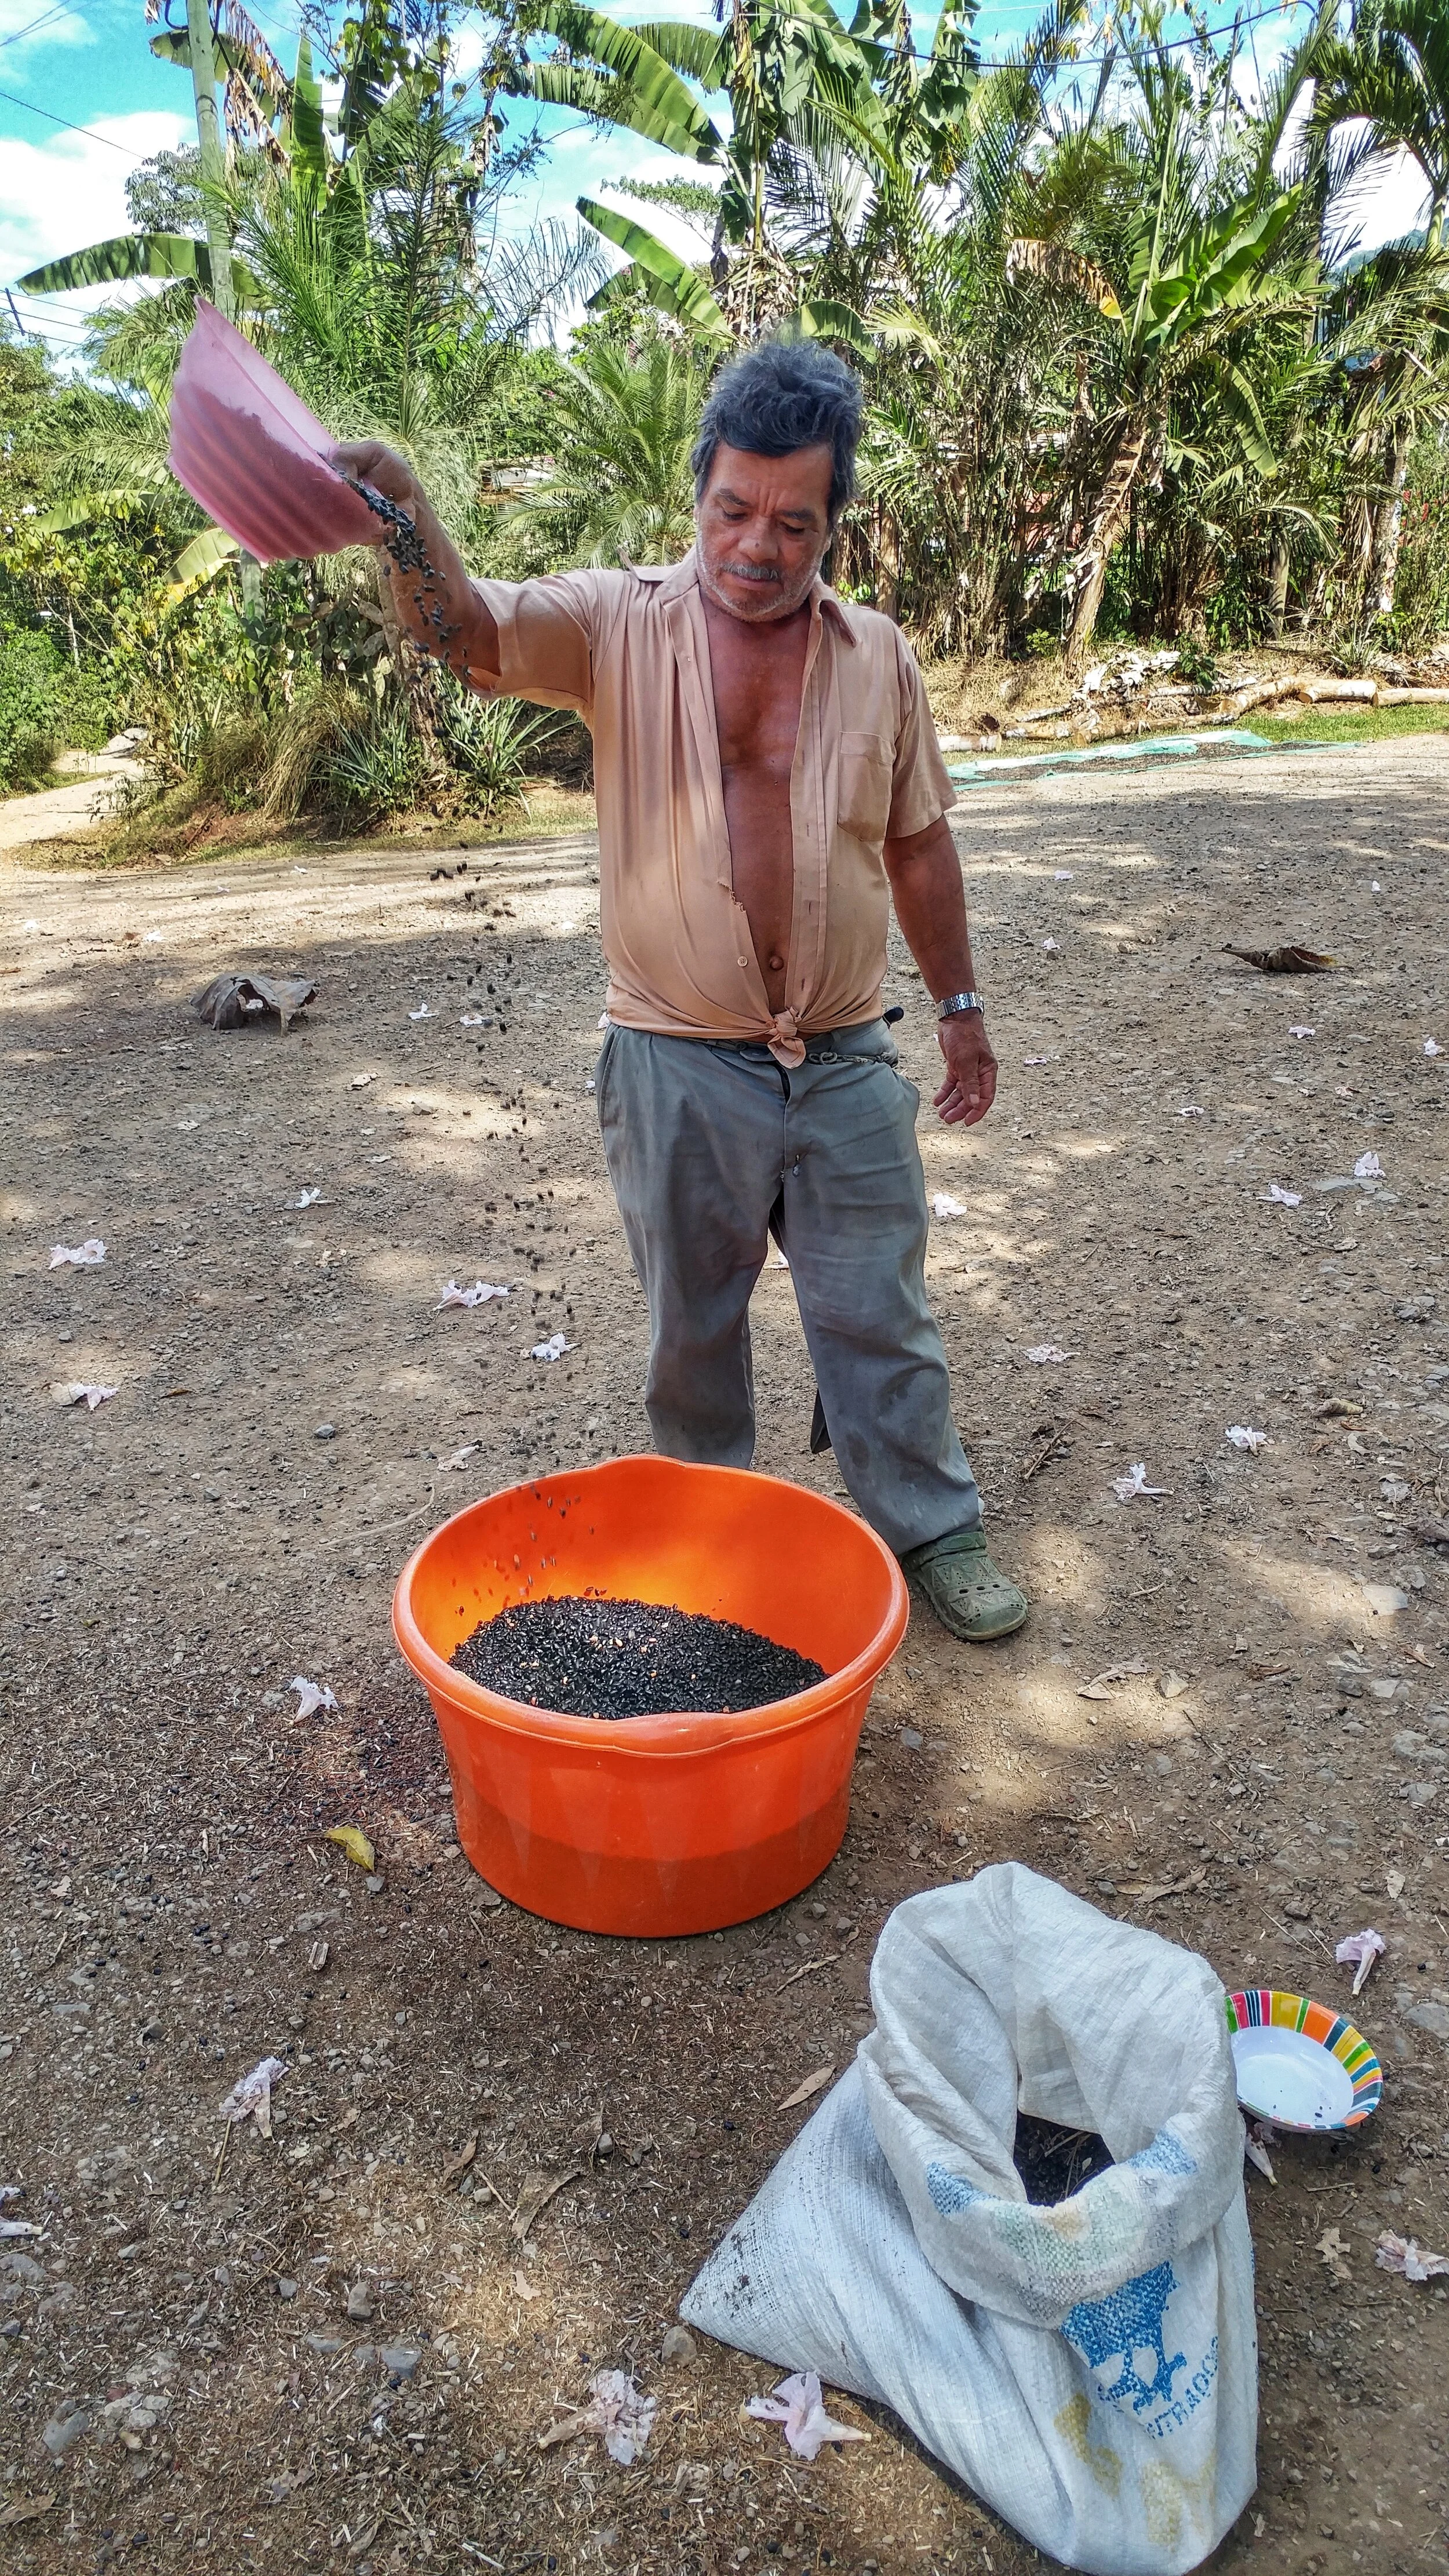
Eating Local: Reconnecting to Food
Food nourishes us and forms the heart of our community. Understanding where it comes from, how it is grown, and who has grown it helps us value our food in a way that we have lost in the modern era. We can get overwhelmed by the challenges of the modern world and food can provide us with some of the easiest and most accessible ways that we can begin to regenerate our planet.
By Nic, core team member
Food nourishes us and forms the heart of our community. Understanding where it comes from, how it is grown, and who has grown it helps us value our food in a way that we have lost in the modern era. We can get overwhelmed by the challenges of the modern world and food can provide us with some of the easiest and most accessible ways that we can begin to regenerate our planet.

Pejibaye: One of the delicious, nutritious and locally available staple tree crops
Since the agricultural revolution, our communities have been molded by the food we produce. Thriving when abundant and starving when scarce. The quest to guarantee our food security has led to mass population movements, wars, terrible famines and giant metropolises. But as we stand on the edge of environmental catastrophe, does it also hold the key to our own redemption? Does revisiting and re-valuing what has become just another commodity on the store shelf give us the opportunity to take back the power that we have given up with our disassociation from our food production and provide real tangible solutions to the current climate crisis? In Paul Hawken’s excellent book Drawdown: The Most Comprehensive Plan Ever Proposed to Reverse Global Warming, 2 of the top 3 solutions are food based (reducing food waste and eating a plant based diet). Each one is totally achievable on an individual level and something that we must demand on a wider commercial and political level.
Working at the Ranch people often ask me what they can do to be more sustainable or environmentally friendly when they return home. This is a question that I could answer in any number of ways. The answer that is the easiest and most accessible is to simply “eat local”. This is by no means the only answer, but today I am going to discuss just this one, simple act. that could help us move to larger changes for our climate and population.
Eat Local
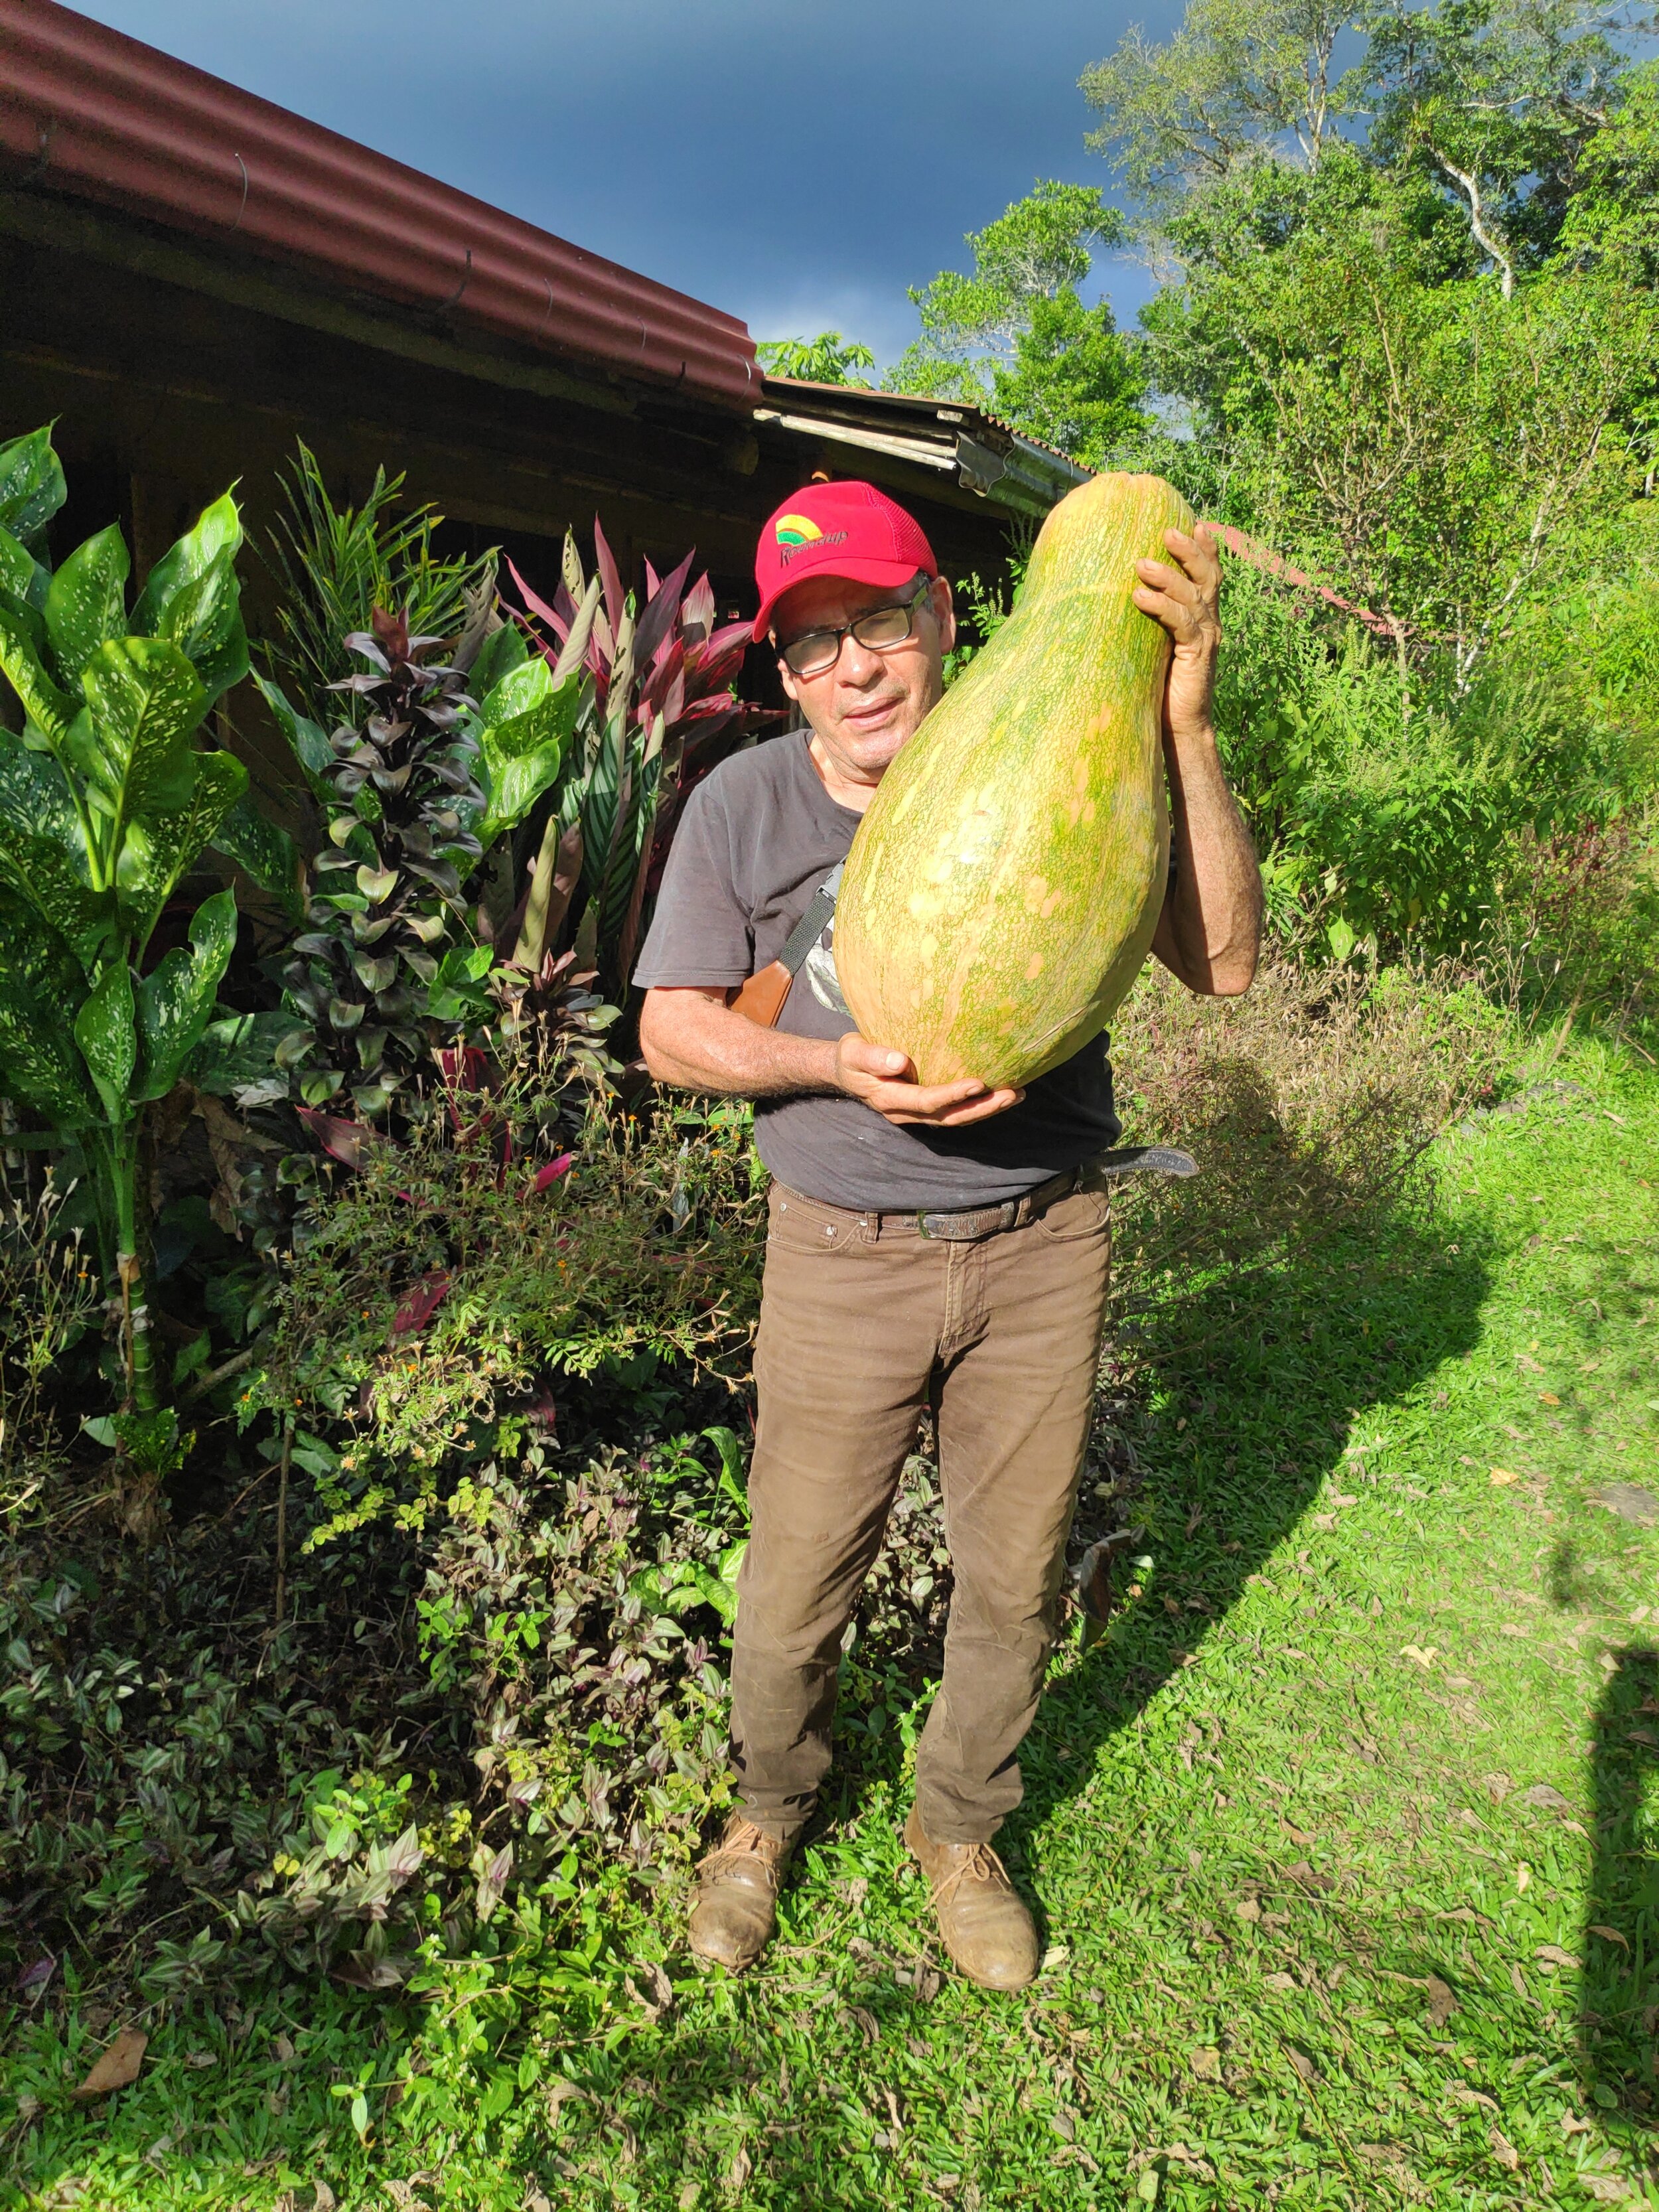
Nelson holding a giant squash he grew for us.
Since the early days of the Ranch, local foods have been a cornerstone of our cuisine. One of our goals is to create an easy market where local producers can sell their products. Not only does this reduce the carbon footprint of our meals, it helps to ensure that this region’s farmers continue to grow food. Unfortunately, people worldwide are moving to urban areas and abandoning the farming practices of their parents. Essentially, by buying whatever is brought to our door, we are saying to the local community; “if you produce it, we will buy it.” We want to let them know that we value their products and are committed to work with them to maintain the food security of our region. After 20 years we continue to buy from many of same producers. This results in delicious, locally grown food for our table, while providing an essential income to numerous households in our community.
Over the years the Ranch has produced increasing amounts of its own food as our agroforestry systems have matured and our understanding of tropical agriculture has evolved. We serve over 20,000 meals yearly with about 90% of our calories coming directly from the Ranch, the community of Mastatal, or the local area (within a 20 km radius from the Ranch). We are fortunate to still enjoy food security regionally. We purchase the following directly from the producers themselves: milk, eggs, cheese, sour cream, tapa dulce (unrefined sugar cane), coffee, corn, beans, rice, squash, yucca, plantains, avocados, chicken, pork, lard, peach palm, citrus, papaya, pineapple, citrus, mango, palm heart, lettuce and chocolate. We have created a diverse and delicious menu based on what we can either grow or buy from our friends and neighbors. We have taken the cuisine of the “ticas” and tweaked it a bit while adding an international flare.

One of our indulgences: wheat based pizza party!
This transition to eating a local based diet has taken some adjustments. As Westerners, our diet is heavily dominated by wheat products. Wheat comes in the form of cereal for breakfast, bread in a sandwich for lunch and pasta for dinner. Wheat is by far the most heavily consumed grain in the western world. After moving to Central America we needed to adapt to a new food culture full of new ingredients and tropical comestibles. We look to the wonderful traditions of our region and Asia to inspire our new diet and to create new and wonderful food that is based on locally available ingredients. We are not purists however, and of course we love to have a pizza party every now and again, but we have spent much time experimenting with wheat free, local doughs (read about our Permaculture pizza quest).
Why is eating local so important?
There are many pieces that make eating local such powerful change. I think one of the most appealing is that it is relatively easy to do, it is not really much of an inconvenience and does not require huge changes to your lifestyle. What follows are some of the reasons I believe eating local to be important.
Local Economy
By creating a market for local producers to sell their agricultural products we are supporting the local economy. This happens on many levels that are all intertwined. Firstly, you are valuing agricultural products that people know how to grow successfully. This means that farmers in our region can continue to do what they know how to do and are not forced from their land to cities to find other work. Secondly, they can get a much better price selling their products direct to the consumer as this removes the middle man (the supermarket) from the equation. When you buy a $3 head of lettuce, how much of that do you think goes to the farmer and how much goes to the supermarket? Thirdly, it keeps the money in town. By keeping transactions local the money tends to stay in our community, creating a circular economy that can support more than just the farmer. In this scenario the farmer can now buy products from other local people who can develop businesses that further support the community that in turns creates more economy!

We have been purchasing local eggs for Doña Flor for as long as I can remember.
Transportation and Carbon Footprint
This may seem obvious, but by buying local food you are reducing the carbon footprint and the transportation inputs that are associated with that food product. Unfortunately, in our globalized world, many of our products are shipped all over the world before making it to the final consumer. This is not just true of food, but also of many consumer goods. Cotton is often grown in the US and then exported to a country with a cheap labor force and poor working conditions so that it can be fabricated into a t-shirt, only to be shipped back to the US to be sold in the US market! Isn’t that crazy? If we buy our food from a local farmer then we know where it has come from and we know that the transportation of that food is minimized.
Fresh Food

Farm fresh: these bananas are simply delicious, ripening naturally.
By reducing transportation, you also increase freshness! Did you know that the majority of fruits are shipped when they are still unripe in order to reduce damage during shipping? The banana is a classic example. When the banana arrives to its destination it is gassed with a chemical that induces the fruit to turn ripe so that it can be sold at the market. This effects freshness and flavor massively, not only because these commercial fruit varieties have been selected for good shipping quality rather than taste, but also because when the banana ripens like this it tastes totally different. I have eaten many supermarket bananas and after now living in the tropics can confidently say that they’re weird. They never hover in the perfect ripe zone like a farm fresh banana does, and it goes straight from green to brown and bad tasting. A banana that is harvested freshly and allowed to ripen naturally has a far superior flavor and hovers in that perfect zone of ripeness for many days.
Developing Relationships
By interacting directly with your farmer you can have your say about what is grown and how it’s grown,. You can visit their farm and see for yourself the practices that they use. This is a powerful tool as there are many misunderstandings as to how food is grown and where it comes from. This can only be reconciled through personal experience and empathy. Maybe you really love blueberries, but the organic type only come from far away, whereas all the local blueberries are not organic. Why might that be? Maybe this is worth further investigation that developing a relationship with some local berry farmers might shed some light on. Maybe this will lead you to understanding something that you didn’t know about berry farming in your area, or maybe it won’t, but you won’t know until you investigate!
Creating Community
Our globalized world has broken up small communities where everyone traditionally knew one another. It is not uncommon now to not know your neighbors or the people who live on the same street as you. This has broken down the fabric of our communities and our relationships with one another. It is up to us to rebuild those relationships and it is going to require time and effort. A great place to start is with your food choices. If you can buy food directly from farmers then you can begin to create that direct relationship with your food and the land that grows it. Maybe it will be with a local butcher, or a local shop, where you get to know the person or people who are selling the food. Once you have formed this relationship you can cultivate a mutual understanding of what you are looking for in your food. You will begin to see the same people also shopping in these places and this is the way that we can begin to cultivate community for ourselves in urban and rural environments. Another fantastic place to develop community is at your community gardens, “pea patches” or allotments. Food is so fundamental to us as humans that communities based around food are incredibly powerful and resilient.
Connection to Place
The average American moves 12 times in their lifetime. This is a long way from our lives just 100 years ago when most people grew up and died in the same house or the same town. By moving so frequently we lose our connection to place. Our homes, our food, our street are just commodities to be bought and sold. This loss of connection to our local environment creates a disconnect between our realities of the world and the limitations of our land. Avocados, believe it or not, are not in season all year round. You wouldn’t know it by going to the store though, as they are pretty much available all year round. In fact most food products are available all year round and we don’t even think about it. By eating locally you are by default also eating seasonally and this will allow you to truly connect to your place and environment, deepening your connection to the land and local climate.

Lights on in the food smithy!
How Can I Eat Local?
What follows are some of the simplest and most accessible ways that we can begin the transition to eating local.
Farmer Markets
In most urban centers now there are farmers’ markets. Usually they take place just a day or two a week so you might need to schedule time to go to these markets when they are open. Here you should be able to find local, seasonal and fresh food.
Directly from Farmers
If you live in a rural area it is likely that you have farmers all around you. You can approach them directly, ask them what they are cultivating and see if they already have a farm stand or go to farmers’ market on certain days. This is an opportunity to get know your neighbors! If you live in an urban center, check out if there is some innovative commercial urban or city farm that is selling their produce.

Tapa Dulce: locally sourced sugar - purchased directly from the local farmers
Grow your Own
Depending where you are, this could be on your balcony, at a community garden or in your yard! The scale of your new garden will have to be proportional to your available space and your time. Growing herbs on your window sill is a great place to start!
Local Business
Try and buy as much as you can from local business rather than going to a supermarket. It is not always cheaper from the supermarket and the quality and freshness can vary massively.
CSA or Veggie Box
If you can’t find a farmers’ market you could look into a veggie box or CSA (community supported agriculture). These are great ways to directly support farmers and you can often get the food delivered or pick it up close to your house to make it more convenient.
Farm to Table
Lastly, where do you choose to eat out? It might be worth exploring a local farm-to-table restaurant and make that your special treat for birthdays or special occasions.

Farm to Table meal at the Ranch, green banana chips, pejibaye dip, starfruit pickles and jackfruit salsa….Yummy!
I hope this has inspired you to think about your food and where it comes from and how to incorporate more locally available foods into your diet. Next time you see a farm stand, stop, buy your weekly fruits and veggies from there, and skip the supermarket. It wasn’t long ago when we all had a hand in the food we ate. To think about the separation that the majority of the world has from food now is astounding. So, plant something whether it’s big or small, find out where the nearest farms are to you, and change your diet to eat locally available products. I bet you’ll enjoy fresher, more delicious food and make a few connections along the way.

Farm to Table Permaculture Pizza
Being a permaculture and sustainable education centre, we try to source as many of our ingredients either directly from the farm itself, or from the local community. Some parts of the pizza are easy to source locally, others not so much. This has come to pose a few challenges at times, and often we make some compromises for the sake of indulgence.
By Marco, Apprentice 2020
Why pizza?
Pizza. What a concept. Basically just some bread with tomato and cheese on top. But, we all know it’s so much more than that. I’d go as far as to say it’s probably one of the, if not the, most widely adored foods in the world. In fact, it sometimes feels like people answer “what’s your favorite food?” with something other than pizza just to not come across banal, even though deep down they know all they really want is a calorific disk of doughy deliciousness. At the Ranch we don’t kid ourselves. We know what we want and we satisfy that desire whenever we find a good enough excuse to fire up the cob oven – i.e. birthdays, leaving parties and periods of over a month without pizza.
Rancho Pizza Parties

Our new cob oven with just a few finishing details left
Our farm-to-table pizza parties are pretty epic, and not just because of the pizza (though, obviously, they’re awesome). No, a pizza party entails the whole community coming together and working towards a common goal. They take up most of the day and require a fair amount of coordination. We divide the labor up like so: 3 people on toppings, 3 people on dough, 1 person on tomato sauce, 1 person on fire building, and 1 person cooking. The fire alone takes 3-4 hours to get the cob oven up to the right temperature (800-900°F); the dough must be prepared 4-5 hours in advance to give the dough enough time to rest and the dough makers enough time to mix, knead and roll 40+ pizzas; sauce is usually made a day in advance to give it a chance to really cook down and yummify, and the toppings…well, you get the picture. All of this we try and do with permaculture principles in mind, which is what drives the evolution of our pizzas forward…
Farm to Table Pizza
Being a permaculture and sustainable education centre, we try to source as many of our ingredients either directly from the farm itself, or from the local community. Some parts of the pizza are easy to source locally, others not so much. This has come to pose a few challenges at times, and often we make some compromises for the sake of indulgence. However, it has encouraged us to become creative with our recipes; trying to find local, tropical alternatives to some of the classic Italian
ingredients. So, below is a break-down, top to bottom, of our permaculture pizzas…

Cheese
The cheese we use on our pizzas comes from our friends’ farm about 1/2km down the road. It’s the same place where we get our milk (learn to make dairy kefir here) and the cow manure for our biodigester. Needless to say, they make good sh*t.
Toppings
Easy. You can put anything you want on a pizza! Here are some examples of toppings we make on the Ranch:
Fried banana flower – tastes a bit like artichoke when it’s been lacto-fermented for a few days and then fried with a bit of garlic (and soy sauce, if we’re feeling naughty). Learn about how amazing bananas are here.
Katuk shoots – katuk is an edible green that grows abundantly on the Ranch. The new, young shoots from these are crunchy and slightly nutty, reminiscent of asparagus. Learn about greens that thrive in the tropics here.
Grilled pineapple – Classic. Suffice to say that I am 100% a fan of pineapple on pizza *Italian ancestors turn in their graves*. Sorry, not sorry. Sweet and salty combo. It’s delicious. Plus, we grow a lot of them so, perfect for farm to table.

Farm fresh papayas
Tomato Sauce
A tough one. Tomatoes don’t grow well in this area, so we have to buy our tomatoes from elsewhere, they are typically coming from the highlands of Cartago about 100km away. Can’t be having pizza without tomato sauce, it’s just not right. And hence, this was one of the areas where we compromised… was. Then, we discovered papaya sauce! I must admit, I was skeptical at first. Being half-Italian, I grew up with nonna’s and mamma’s sugo di pomodoro, and a good tomato sauce is a rite of passage in my family… but this papaya stuff is really good! In fact, when it’s on a pizza with the cheese and toppings, it’s quite difficult to tell the difference. It’s also way quicker to cook than a tomato sauce as there’s less moisture in papayas. The recipe is the same as it would be for a tomato sauce – oil, onions, garlic, oregano, basil, splash of vinegar (banana vinegar recipe)/lemon juice – just that you replace the tomatoes with papaya and add a little more vinegar and salt to compensate for the added sweetness of the papaya. We also tried a 50-50% mix of tomatoes and papaya, which actually was my favorite of the 3 sauces we trialed (tomato sauce, papaya sauce, tomatoes + papaya sauce) as it had a great balance of sweet and sour. Now, with every passing pizza party, we are reducing our dependence on regional tomatoes and turning towards our locally grown, tropical, farm to table variation, and that’s alright with me.

Rolling dough
Dough
This is the biggie. How to replace wheat flour, which has to be imported from the US or Canada, with something from the farm? A question that has no doubt tormented many apprentices before me, and one that will probably continue to torment those after me.
Wheat’s going on?
The thing about wheat is that it’s great. It’s just great at what it does. Or, more precisely, what
we’ve bred its seeds to be able to do for us over millennia. You see, plants want to provide their seeds with the best chance in life and so they store energy in them in the form proteins, which the seed can access, once germinating is triggered, to power its growth. It’s sort of like a tiny packed lunch that it can take with it into the wide world before foraging its own food from the ground with roots. Most grasses have a protein called globulin in their packed lunch, but in wheat’s packed lunch there are two different proteins - glutenin and gliadin. Yum. When wetted these two form an elastic mesh structure known as gluten. They work in unison in dough – one allows the dough to be stretched (gliadin), while the other helps the dough contract back in on itself (glutenin). When baked, this elastic mesh helps trap gases and aromas created by the yeast and bacteria present in the dough, which is why bread rises, or in the case of pizza, why you get those lovely little puffy bits in the base. The trouble is that gluten is difficult to replace and so replicating wheat-based pizza dough is tricky… did we let that deter us? Pff. As if.

Dough experiments
This past pizza party we experimented with a few different doughs. Keeping permaculture principles in mind, I wanted to make use of the resources we have readily available on the farm. In this case, I decided on cuadrado (type of Musa sp.) and yuca. First, we peeled, sliced and dehydrated the cuadrado and yuca. Next, we milled the dried slices in a corona mill to create the two flours (one of each). I then divided them into 6 bowls (3 for each) and mixed them with equal parts water. Each bowl was to be a different combination – solo flour, 50-50% with wheat, dried water kefir SCOBY. (Dried SCOBY is supposedly a sort of faux xantham gum, which we’ve read may provide some of the same characteristics as gluten… worth a shot!). Below is a summary of the various combinations we tried:
Cuadrado flour + water (5-day ferment)
Cuadrado flour + wheat flour + water (5-day ferment)
Cuadrado flour + water + dry SCOBY (5-day ferment)
Yuca flour + water (5-day ferment)
Yuca flour + wheat flour + water (5-day ferment)
Cuadrado flour + water + dry SCOBY (5-day ferment)
Cuadrado flour + water (no ferment)
Yuca flour + water (no ferment)
Cuadrado flour + water + baking powder (no ferment)
Yuca flour + water + baking powder (no ferment)
Cuadrado flour + yuca flour (no ferment)

Local pizza dough trials
There was enough dough to make one small pizza of each. The results? Quite varied, actually, and
surprisingly successful. I must say that I wasn’t particularly hopeful, but was very pleasantly surprised. They had a kind of store-bought frozen pizza vibe about them… not amazing, but also not awful. There didn’t seem to be any outstanding winners either, and people were choosing different ones as their favorites, implying that there is potential to please a variety of palettes. In my personal opinion, the Cuadrado sourdough was the best one as it had a beautiful dark, whole-grain look and a unique but not overpowering aroma and taste. The Cuadrado-yuca mix was also quite popular and seemed to have the closest resemblance to actual pizza dough.
So, in conclusion, I think there is definitely potential and progress has been made… but, that wheat
pizza is still on top. To be continued…
Conclusion
So, there you have it folks, farm to table permaculture pizza, Rancho style. Please comment if you’ve
had any experimental pizzas you’d like to share! Pura vida.

Robin cooking the dough in our cob oven
want to learn more?
Join us for one of our upcoming workshops to learn more about sustainable living and ideas.
Or come stay as a guest and maybe you’ll luck out being here when we have a pizza party! Either way you will enjoy farm fresh meals, access to our beautiful property and facilities including acres of wildlife refuge, and be welcomed into an alternative community living in the rural jungle of Costa Rica. Hope to see you here someday!
Stay tuned for more farm to table recipes and ideas!
Check out past blog articles on food, fermentation and more:
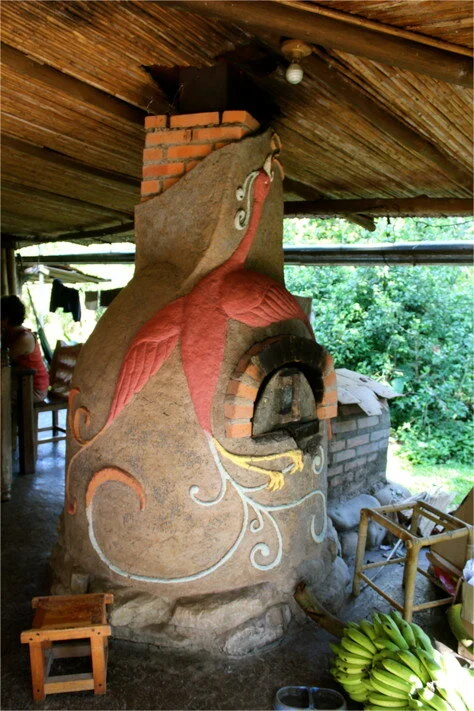
Endeavors to End Propane: Local Fuel Sources and Efficient Cooking Technologies
Cooking food can make it tastier, easier to digest and absorb nutrients, and safer and healthier to eat. Cooking at the Ranch happens multiple times a day, and on some days, pretty continuously throughout the day. We generally have a lot of hungry bellies to fill! Over the decades we have been steadily reducing our use of propane to meet our cooking needs.

Self-made rocket stove at the Ranch
By Tim O’Hara
Ranch Core Team Member
Endeavors to End Propane: Local Fuel Sources and Efficient Cooking Technologies
Cooking food can make it tastier, easier to digest and absorb nutrients, and safer and healthier to eat. Cooking at the Ranch happens multiple times a day, and on some days, pretty continuously throughout the day. We generally have a lot of hungry bellies to fill! Over the decades we have been steadily reducing our use of propane to meet our cooking needs. Propane is a refined product that comes from crude oil or natural gas. The negative environmental impact from its extraction and refinement on communities and the earth are well documented. We have lessened our dependency on this imported product (Costa Rica has few crude oil resources and a moratorium on oil drilling) through the production and use of our own biogas, the utilization of solar cookers, dehydrators, and hay boxes and perhaps most importantly by incorporating efficient wood burning stove technology into our culinary domain.

Our woodshed
Wood is renewable and abundant in and around Mastatal. That’s not to say that wood can’t and isn’t managed poorly in many parts of the world where it is used for cooking. For us, fortunately, we have a plentitude of this resource in a country that does a commendable job of taking care of its timber resources. We have almost limitless supplies of firewood coming from our woodshed, local small-scale bandsaw mills that operate in the region, and our own agroforestry systems.

Common open cook stove
According to the World Health Organization, approximately 3 billion people worldwide still cook using solid fuels such as wood and dung in open fires and on inefficient stoves. Poorly designed stoves and age-old cooking practices can produce high levels of small soot particles and other pollutants that penetrate deep into our lungs. Exposure is particularly high among women who cook indoors and their children resulting in 3.8 million premature deaths a year from pulmonary illnesses. The extensive use of wood for cooking can also contribute severely to deforestation and its associated devastating social and environmental impacts. It can also consume precious and considerable time to gather and haul.
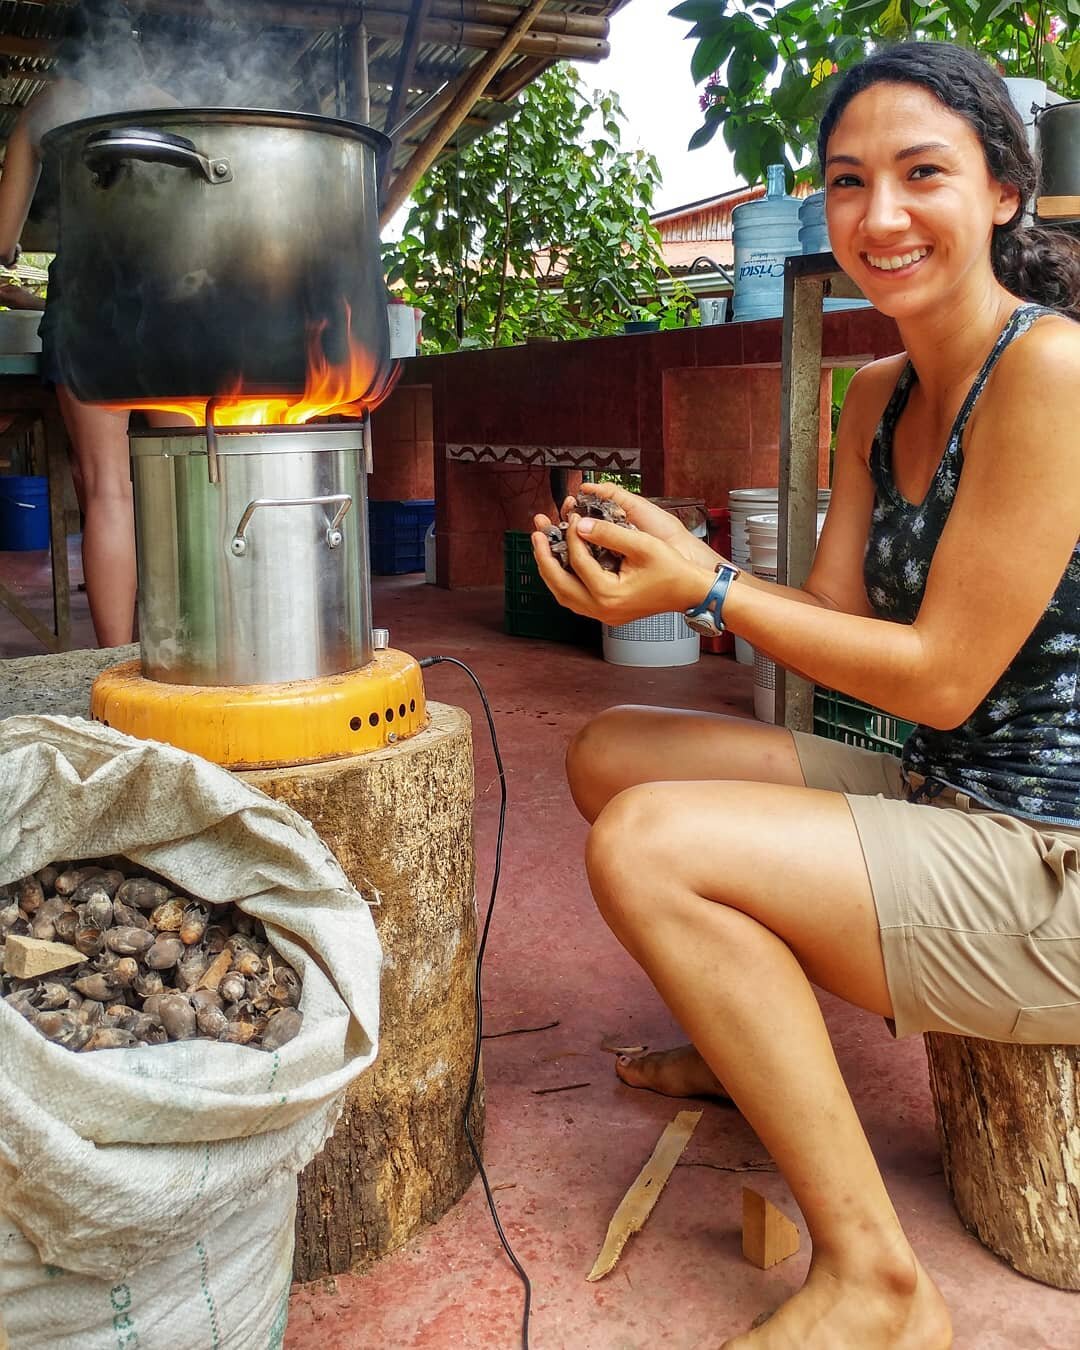
ACE One in action!
These worrisome facts have led us to build and invest in efficient wood burning technologies and food production methods that allow us to sustainably and safely use this local resource to cook with. Our alternative cooking workhorses are our 5 rocket stoves; 3 purchased ACE Ones, and two adobe/cob stoves designed and built in-house. These stoves produce little to no smoke based on a design that features an air intake or fan that produces extreme heat in the combustion chamber that ignites and “burns away” any smoke that is produced. This can be referred to as “complete combustion” and reduces or eliminates soot from the cooking process. The ACE One stoves use small pieces of wood whereas the home-built versions use slightly larger pieces of wood. These efficient stoves burn smaller quantities of wood and produce less or no smoke while retaining the many benefits of cooking with this local and accessible resource.

One of Ranch’s agroforestry systems
When possible, efficient rocket stoves can be coupled with a well-managed agroforestry system that through the extensive planting and pruning of nitrogen-fixing and food producing trees can yield a steady supply of accessible firewood and the food that will be cooked on the rocket stoves. This is yet another example of the closed-loop systems that we oftentimes strive for on our farm.

Adobe rocket stove being built at Ranch
Rocket stoves can be small or large, take many shapes, and can be made from a wide variety of materials. What’s common to all of them is the their ability to efficiently produce extremely hot combustion chambers. To improve performance, your rocket stove chamber can be insulated and your burning surface sized and designed to effectively support your favorite cooking pot. You can even buy rocket stoves for camping these days though if you’re a do-it-yourselfer or on a tight budget, we’d encourage you to design and build your own. There are plans all over the internet.

Our cob oven
In addition to our repertoire of rocket stoves, we have a self-built cob oven that we use for pizza parties and other baking endeavors, 3 Wonderbags, a solar and electric dehydrator and of course our magical biogas stove. We’ll tell you more about these in a future article but in the meantime I’d encourage those that love simple solutions to check out the wonders of the Wonderbag and see how you can help transform a family’s life in Africa while saving a considerable amount of cooking fuel.
Let us know if you have any questions and come and check out are array of alternative cooking technologies if you find yourself in our neighborhood. We love to share our experiences and hope that this has found you well well.

Simple rocket stove being built in community of Mastatal

Just KIS Me: A Neighboring Project focused on Plants and Indigenous Culture
About eight years ago, Kealy and Ivannia were talking about how they wanted to continue to be strong, badass women. They wanted to support one another and thrive, and step outside the stereotypical woman’s role that is often seen in the Mastatal community. Kealy was once again visiting for a few months from the States and was leaving in a few days so plans needed to happen soon!
Just KIS Me: A Neighboring Project focused on Plants and Indigenous Culture
By Kealy Rudersdorf
About eight years ago, Kealy and Ivannia were talking about how they wanted to continue to be strong, badass women. They wanted to support one another and thrive, and step outside the stereotypical woman’s role that is often seen in the Mastatal community. Kealy was once again visiting for a few months from the States and was leaving in a few days so plans needed to happen soon!
The previous year, they had decided to go to the river at night to catch shrimp together--the snakes and darkness under the new moon never scared them off. This year, they were going to bushwhack to the top of La Cangreja National Park mountain. If you have gone in recent years, this was before the path was maintained and the hike was truly an adventure in the jungle. They needed a guide, as neither had ever been. Ivannia suggested her cousin, Solin, who was incredible with the machete and always full of jokes. It was bound to be a great day!
That day marked the very beginning of KIS Botanicals, as Solin described different uses of a variety of plants and Solin and Ivannia shared stories about how their family used the different plants they found along the trail. It was an immemorable day, filled with laughter, love, and the sharing of stories - the same energy we strive to bring with us into KIS Botanicals today!

What is KIS Botanicals?
KIS Botanicals is a growing herbal business, up the road from the well-known Rancho Mastatal. We are focused on the preservation of plant knowledge and culture in the Mastatal/Zapaton region of Costa Rica. As Solin and Ivannia say, our ancestors have a beautiful interwoven history with plants from the rainforest; our goal is to awaken and share this history.
In our project, we make a series of plant-based, herbal products (to heal the skin, aide in sleep…), using recipes we learned from our grandparents and community members. We also provide educational programs for locals and tourists through medicine making workshops, medicinal plant tours, and food-as-medicine classes.

PRODUCTS
Our artisanal products are inspired by tried-and-true recipes. All of our plants are hand-harvested and our products are handmade – by us! We have access to nearly 100 different medicinal plants that Solin farms sustainably, using traditional agriculture and permaculture techniques.
We currently have 8 artisanal herbal products that we absolutely love! These include a skin healing salve, a muscle and bruise salve, a sleep aide tincture, a tincture for colds and flus, a cough tincture, a bug repellent, an immune booster tincture, and a bug bite relief roll-on. There are many more products in the works, for example an aphrodisiac spray, an anti-fungal spray, stomach calming tincture, energy clearing spray, anti-anxiety tincture, etc. With so many plants to choose from, it’s hard to know where to start! As our apothecary grows, we will continue to add to our line of products.

When we start to make a new product, first, Solin and Ivannia remember plant uses they’ve witnessed throughout their lives. In addition, we frequently talk to community elders or remember conversations from years past. With these memories and conversations, we make a list of plants. We spend time trialing recipes and researching to make sure our products are stellar. The stories and memories are shared on the back of our products, so you too can share in the story!
Currently, we are selling our products at our wonderful friends and neighboring projects: Rancho Mastatal, Villas Mastatal, La Iguana Chocolate and La Choza del Mundo.

EDUCATIONAL PROGRAMS
We are excited to offer a variety of educational programs. Come, partake in our programs - we can’t wait to learn with you! Here are our current and future offerings:
A Cultural and Medicinal Plant Walking Tour: Come walk leisurely with us while we share with you our local history and culture. We will bring artifacts and stories from our grandparents' lives and describe the uses of many of our medicinal plants. We will provide a tasty and traditional treat or drink!

Medicine Making Workshop: Together, we will enjoy a short leisurely walk to explore medicinal plants. We will share with you an ancestral recipe (or two!). Tradition will be combined with modern herbal techniques. You will leave with an herbal product, made by you!
Food is Medicine – A Traditional Cooking Class: Come to a cooking class, using traditional techniques and foods. Over a wood burning stove, we will share a traditional recipe (or two!), laughs and stories.

In the future, we plan to offer an intensive two-week long course on cultural and medicinal plants. We will offer the opportunity to learn from us and other community members, as well as play and experiment with our farm of medicinal tropical plants. Your teachers will be primary-source voices!
Once we are properly on our feet, we plan to provide classes to the local schools. We will teach students about how their/our ancestors used plants to cook, to clean, and to heal. Students will learn new and old techniques with hands-on lessons and tutorials. We hope that they take these lessons back home with them and share their enthusiasm with their parents and grandparents, calling forth memories and providing inspiration. We are SO excited about providing this service to our community.

Who is KIS Botanicals?
The original KIS Botanical team consists of three people: Ivannia, Solin and Kealy. Ivannia and Solin are cousins and lifelong members of the Mastatal / Zapaton community and grew up learning about the medicinal plants in the area. Ivannia is a wiz in the kitchen. She is the one responsible for processing the plants, making the products, and giving thanks to the plants as we compost them. Solin has been working with plants his entire life, being handed a machete as a 2-year-old. The depth of his plant knowledge, understanding of nature, and love of plants is key to KIS’s success. Kealy has been visiting the Mastatal / Zapaton area for over 11 years, and Solin and Kealy are now married with a baby. Her role in KIS is to research plants, formulate recipes, share her knowledge of making shelf stable herbal products, translate our programs into English, promote KIS with marketing, and give the plants extra love.

Why we started KIS Botanicals?
From the words of Ivannia and Solin: We started KIS because we saw our generation and the following generations pull away from plants and the environment. We witnessed the high schoolers obsessed with their new cell phones and motorcycles, littering the street with their chip wrappers and soda bottles. Our community was changing dramatically. Starting in the late 1980s, houses received electricity, running water, and phones, but also within that same generation, the community received access to the internet, cell phones arrived, and all of a sudden there was almost a motorbike or car per person in town. In most of the United States and Europe, these changes happened over several generations.
We have witnessed a huge disconnect from our ancestors and the understanding of how they lived in harmony with the rainforest. This younger generation has mostly left the area for other opportunities after high school, leaving the community void of a generation. With KIS Botanicals, we hope to show that our ancestor’s way of life continues to have value. We aim to re-awaken our ancestral plant knowledge in the younger generations with our products and educational programs within local schools. We also want to be an example of how to be a successful, locally owned business, making our local economy stronger and more diverse.

How to help us??
We have come a long way from 3 friends bushwhacking to the top of the La Congreja mountain to making KIS Botanicals a reality. To be successful in preserving and sharing our ancestral knowledge, we need your help!! This is what would be most helpful to us:
When you visit Costa Rica, come to the town of Mastatal to buy our products and learn with us by signing up for one of our educational programs.
Help us spread the word. Tell your friends and family about us. If they plan to visit Costa Rica, encourage them to take a workshop or tour with us and check out our products.
DONATE! Keep your eyes peeled. Shortly we will be fund raising to build a Ministry of Health approved processing kitchen. We would greatly appreciate your assistance in reaching this goal!!
Send us love and positive energy.
Like us on Facebook and follow us on Instagram @KISBotanicals
We can be contacted at KISBotanicals@gmail.com.
Thanks for your support! We hope to see you soon.
With love,
Ivannia, Solin and Kealy

Life of Spice: Pepper
Farm to table is an inspiring movement whose time has come. As anxiety about our environment and health increases, awareness is spreading about the impact our diet has on not just own well-being, but the well-being and future of the entire planet. Alarms are going off worldwide. Our eyes are opening. People everywhere are waking up. We’re waking up… and eating breakfast.
By Dani, Apprentice 2020
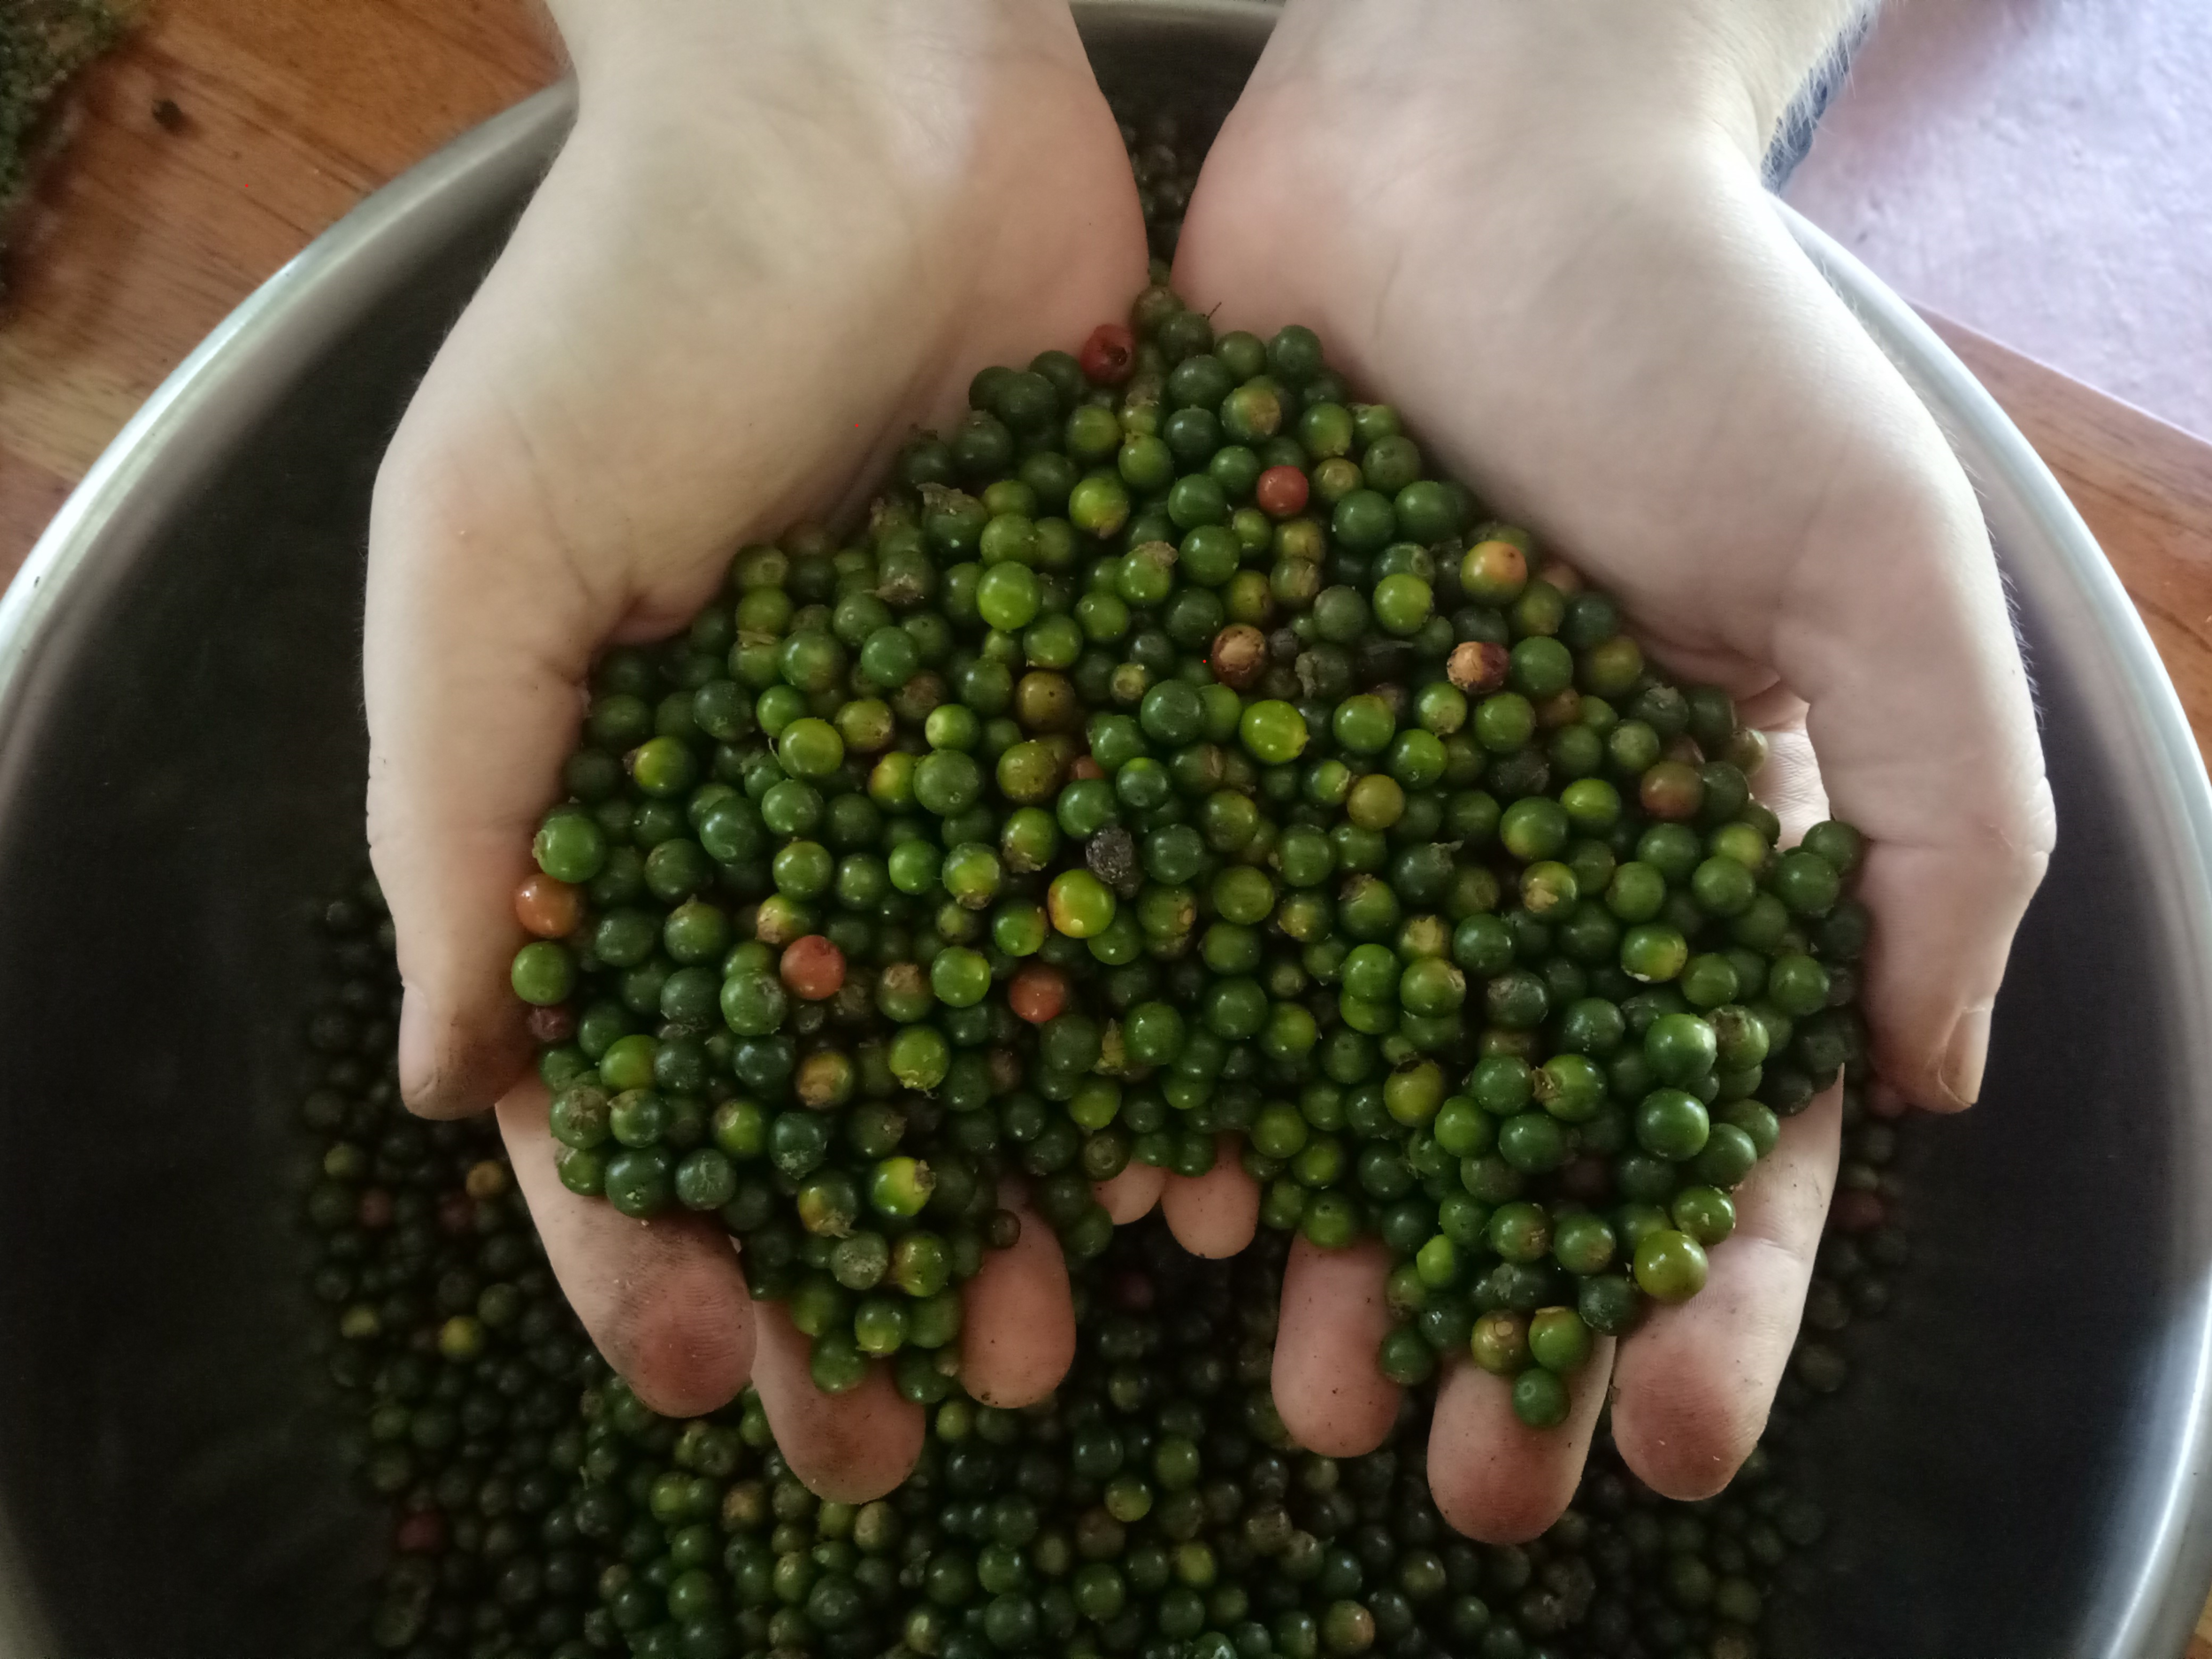
Farm to table is an inspiring movement whose time has come. As anxiety about our environment and health increases, awareness is spreading about the impact our diet has on not just own well-being, but the well-being and future of the entire planet. Alarms are going off worldwide. Our eyes are opening. People everywhere are waking up. We’re waking up… and eating breakfast.
Eating Black Pepper
It’s a typical morning in the conscious kitchens of North America. Today’s special is one of my favorites, a spinach omelet with caramelized onions and a side of roasted potatoes. The eggs are from a permaculture farm’s weekly CSA box, the onions and potatoes from the local farmers’ market, and the spinach is from the garden in the backyard. The omelet slides off the skillet, smothered in rich butter from a small scale dairy farm nearby. The potatoes, piping hot from the oven, make a great companion on the plate. It’s a mouthwatering sight, dotted with black pepper for a little bit of spice.
Mmmmmm, pepper: king of the spices, maker of meals, creator of cuisine. The pepper in our breakfast today came from… somewhere. Somewhere local? Probably not. Spices are the sorcery of every meal, turning bland into brilliant, mediocre to magical. Most of us are blessed with a diet full of spice, but when we talk about eating local, the spice rack often gets overlooked. One way we can work towards restoring the health of our bodies, our minds, our society, and our home planet is to bring more awareness into our diets. Think local. Practice permaculture. Eat farm to table. We hear these terms all the time now, but while people talk about where the eggs on their breakfast table came from, what about the pepper on the eggs?
Black pepper is consumed more than all other spices put together. It sits next to salt on the tables in every diner in America and in most people’s homes. It is hard to imagine a kitchen without pepper, but it hasn’t always been this way. The globalization of food has been happening for so long, a lot of us are completely unaware of which foods are native to where. Chickens originally came from the jungle. Asia used to be without chilies, Italy without tomatoes. What does eating local mean, and how long has it been since people actually ate that way? We’re making big efforts to be conscious consumers, but how often do we stop and appreciate the spice in our lives?
Origins of Black Pepper
Pepper is native to India and is one of the spices that sparked the global spice trade and in turn the globalization of food. Pepper has been traded for thousands of years, and there are even references to pepper found in Egypt from 2600 B.C. For centuries, it spun the wheels of the trade world and brought wealth to many merchants, and it wasn’t only a way of making money. Pepper itself became money and served as hard currency throughout much of the middle ages. In some places, people’s wealth could actually be judged by their pepper assets. Imagine if they could see the casual way in which it is consumed today.
The Value of Black Pepper
Currently, the average price of pepper across the globe is $4.34 per kilogram. These days, Vietnam is the leading country in pepper production, producing about one-third of the world’s pepper. It’s followed by India. Vietnam is also the leading consumer of pepper at 166 thousand tons per year. Again, India follows at 88 thousand tons. That makes sense, right? The places producing pepper are consuming it, local eating. The third biggest consumer of pepper is the USA at 68 thousand tons per year. That is a lot of pepper for a place that doesn’t produce any. On Amazon, a kilogram of McCormick’s Whole Black Pepper costs about $30. The biggest cost in pepper production is labor, but the average price farmers collect for pepper is just $2-$4 per kilogram.
Farm to Table Spices
Understanding where things grow, how they are processed, and who grows them is one way to create a deeper appreciation and understanding of the food we eat and nourish our connection to the earth from which it grows. Trying to live a life embodying permaculture values at Rancho Mastatal has given me a wonderful opportunity to see how different foods are grown and processed. Until recently, I had definitely taken spices for granted. My experience with pepper here has led to reflection on the spice in my life and an appreciation for the sources behind the sorcery. So how does pepper get from the farm to our table?
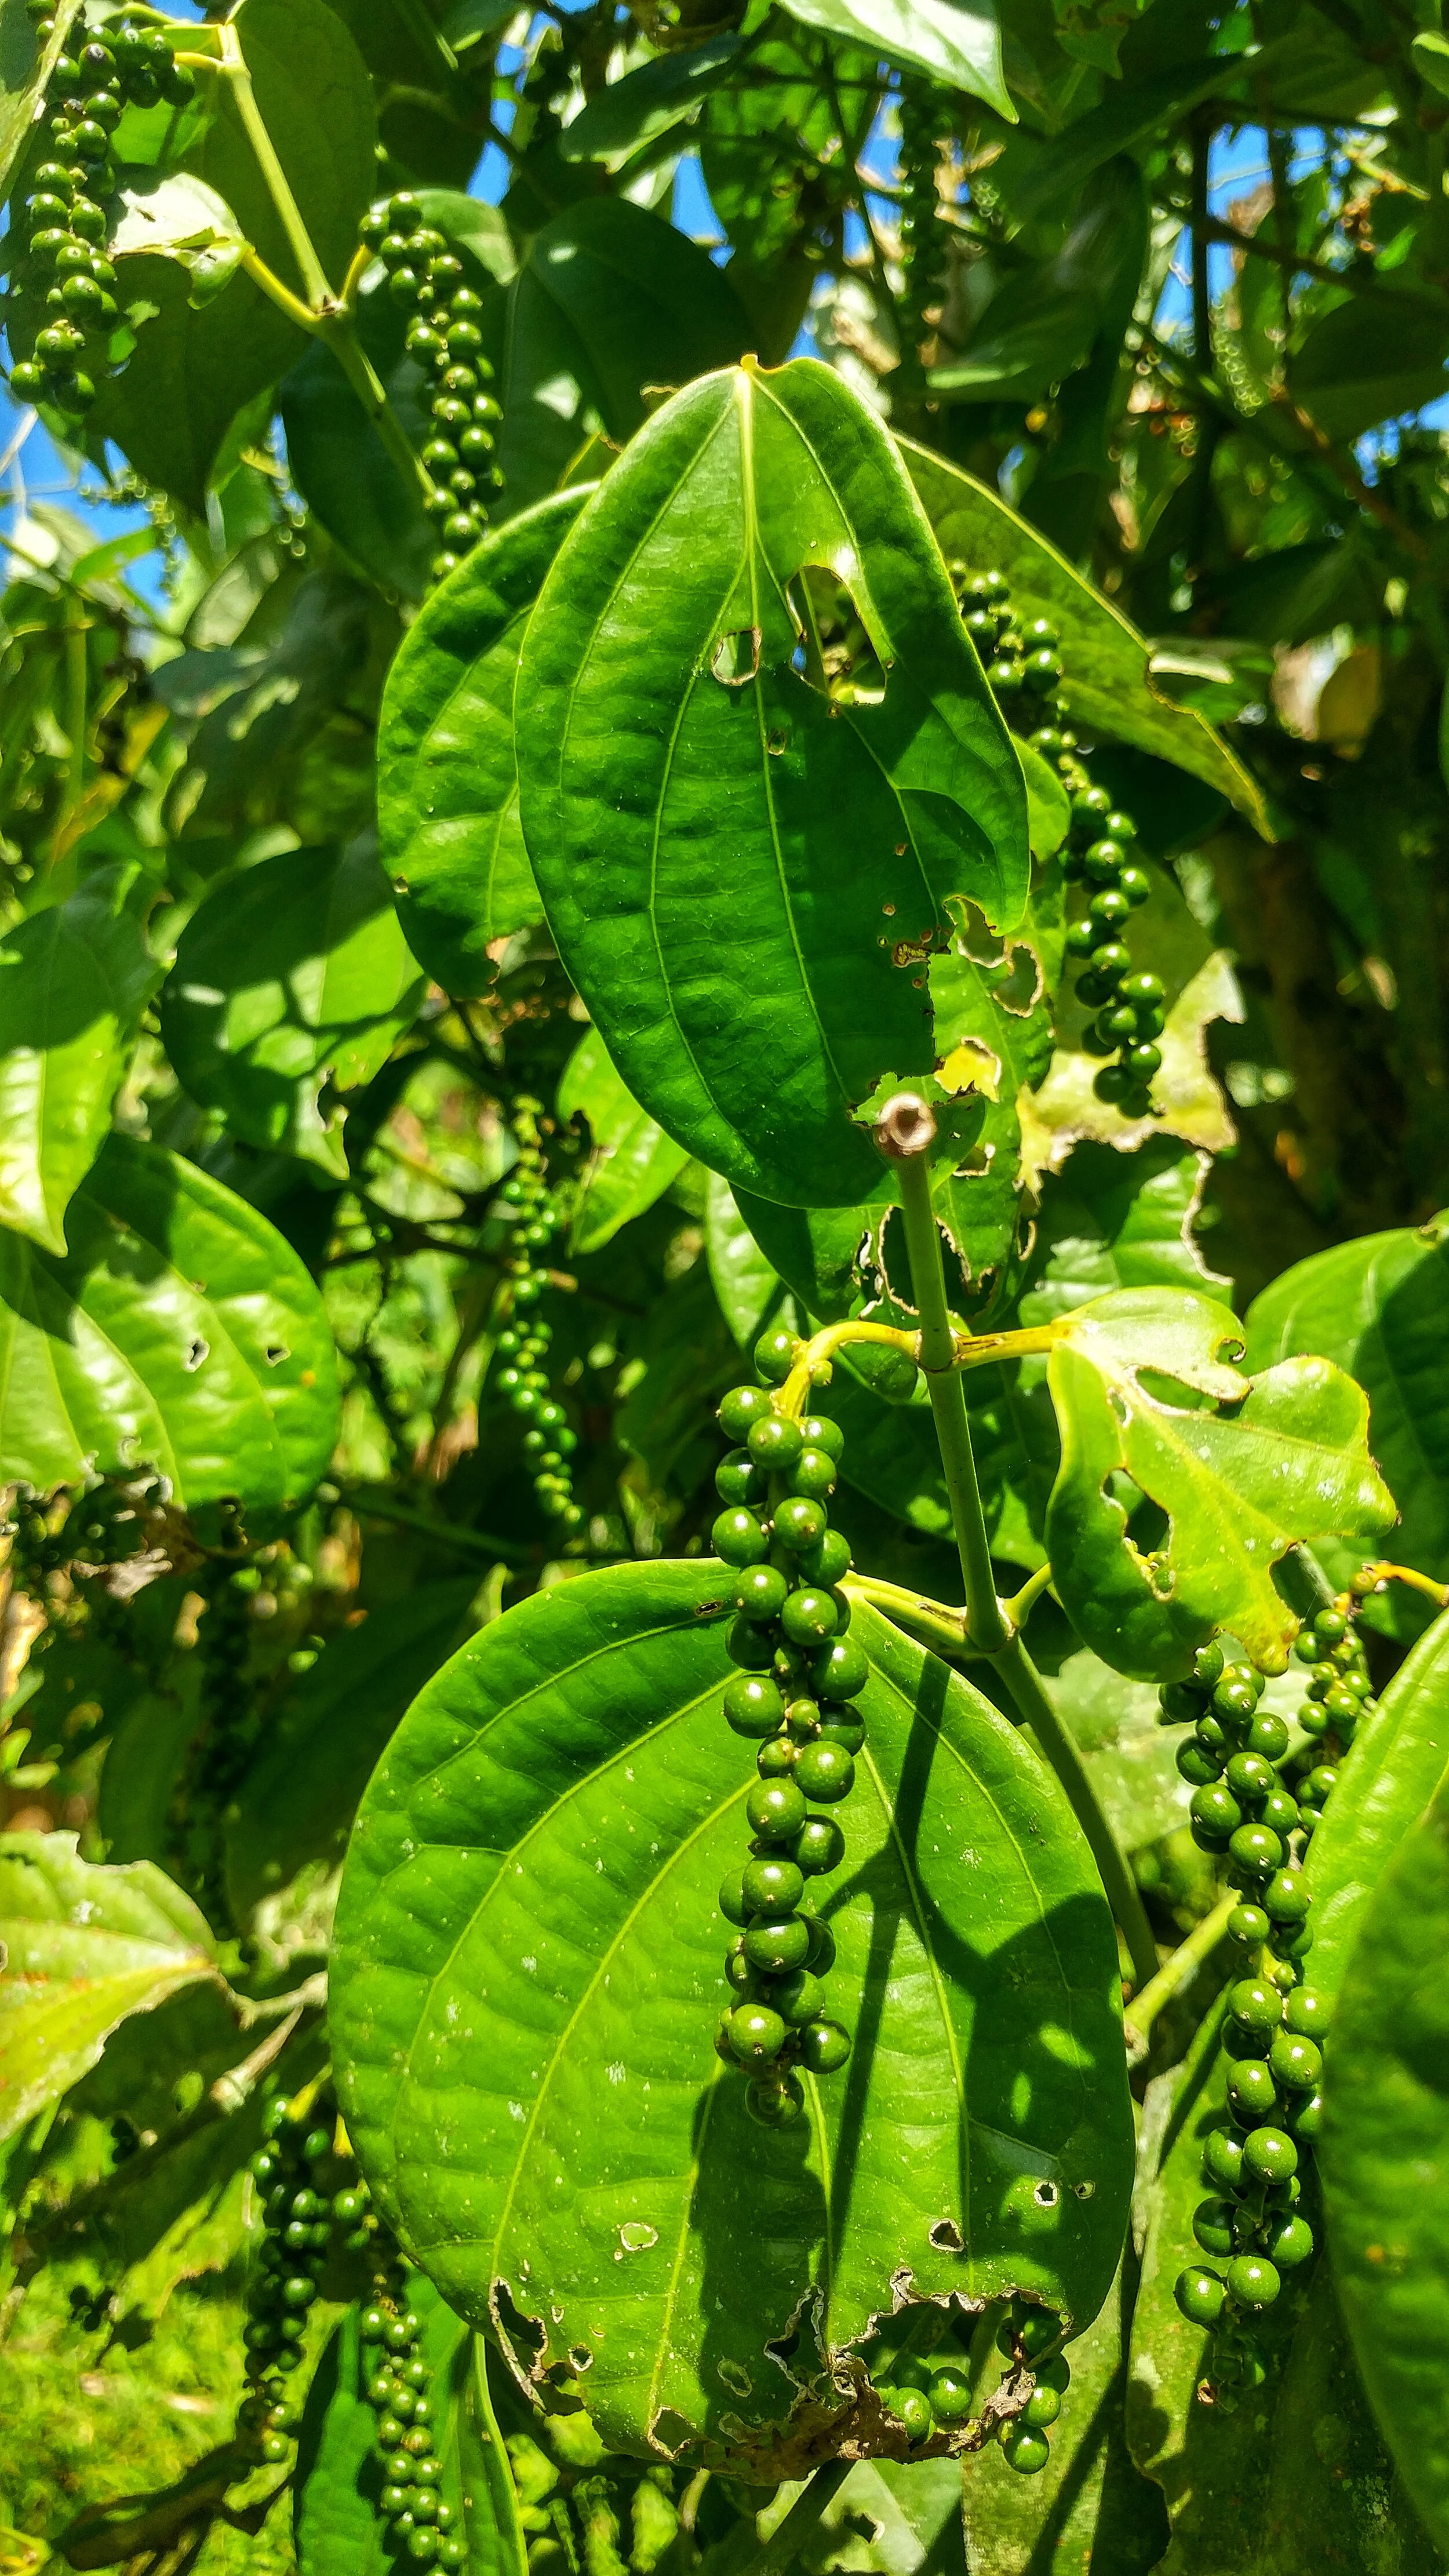
That black pepper on our omelet and potatoes is from a fruit, often referred to as a berry or peppercorn. It grows on a tropical climbing bush, and the white pepper in so many well-loved curries comes from the same plant. The pepper plant is a vine grown best on a living post, from small bushes to massive trees. Here at the ranch, we grow pepper on Gliricidia sepium, (known as madero negro in Costa Rica) a nitrogen fixing tree. Pepper has its origins in forest ecosystems, so it is a fitting plant for a permaculture food forest in the tropics.
How to care for your Black Pepper plant
To maximize yields, pepper plants need to be pruned properly. Once the vine is at least 8 nodes tall, it can be pruned from 3-4 nodes up from the base of the vine, just above a node. After pruning, the plant will send up two new shoots, and the vine cutting can be propagated by placing the stem in soil where it will grow new roots. People have given pepper new roots all over the world. Global trade increased the demand for pepper and sparked efforts to grow it in tropical places across the globe. Now, pepper is grown in 26 different countries, including Costa Rica.

Red Pepper and Green Pepper

White Pepper and Black Pepper
How to Process Peppercorns
The first time I had pepper that was farm to table was here at Rancho Mastatal where we spent a day harvesting and processing pepper. Pepper is ready to harvest once one of the fruits in a bunch has turned red. First, the we collected the peppercorns in bunches and took them off the branches. We then separated the red berries from the green ones. The red berries become white pepper by soaking them in water for a day and peeling off the red flesh to reveal the white seeds. The seeds are then dried to make the white pepper on our spice racks.
The green berries we picked were destined to become black pepper. We blanched these for 1-2 minutes which starts an enzymatic reaction that turns the pepper black. Then we spread them on a drying rack. They can either be sun-dried, or you can use a dehydrator. Pepper dries to one-third of its weight.

Though the steps may seem simple, this was a very labor intensive process. It took seven of us 3 hours to harvest and process 4.5kg of pepper which dried down to 1.5 kg of pepper. This is about 40 dollars’ worth of pepper. It is truly a wonder that pepper is relatively inexpensive and so readily available. I wonder how many working hands and how many miles it has taken to bring pepper to my meals all these years.
Farm to Table Black Pepper
Farm to table has become a mainstream movement, and the growing awareness about the connection between our health and the well-being of our planet in relation to our diets is such a positive shift in our consciousness. But how would all those amazing farm fresh, local foods taste without spices? What would our omelet be without the king of spice itself?
Permaculture & Spices
While I don’t think people should go into their kitchens and empty their spice racks, I do think it’s important to appreciate all the resources and labor that go into every food we eat as well as understand the history of how it got from the forest to our table. Part of the word permaculture is culture, and it is incredible how pepper affected cultures everywhere and added to a permanent globalization of foods. It influenced the way people prepare, experience, and appreciate food. It changed people’s tastes. It changed cultures’ cuisines. Pepper was a powerful initiator in the transition away from eating local. With the globalization of our diets going back millenniums, what does it mean to truly eat local these days? As I continue to live my life of spice, I will keep asking these questions.
Hope you have a better understanding of the process of black pepper and how it gets from the vine to your grinder.
Speaking of spice… check out our past blog posts about vanilla!
And stay tuned for Dani’s next article on Life of Spice, featuring cinnamon!
Sources and Further Reading
Heinerman’s Encyclopedia of Healing Herbs and Spices by John Heinerman
Black Pepper- Piper Nigrum edited by P.N. Ravindran
Spices – A Global History by Fred Czarra
How to Make Dairy Kefir Banana Creme Fraiche
Welcome back, it's Ryan again!
In our last conversation I shared a little about dairy kefir; the history, chemistry and process for making it. This time we'll talk about an exceptional use of dairy kefir - making banana kefir creme fraiche!
by Ryan Roberts, 2019 Apprentice
Welcome back, it's Ryan again!
In our last conversation I shared a little about dairy kefir; the history, chemistry and process for making it. This time we'll talk about an exceptional use of dairy kefir - making banana kefir creme fraiche!

Velvety smooth and udderly delicious, this topping is ideal applied atop crepes, pancakes, granola. Next time you're making a pancake breakfast-in-bed for your bae, you can blow their minds with this yummy topping.
Here's the kicker: the bi-product of this process will yield a delightfully flavorful and intensely proteus “banana-infused” whey. I recommend drinking it straight or adding it to your morning shake to spike it with great flavor and a boatload of protein.
If at this point your finding yourself lost on the fundamentals of dairy kefir, check out my first installment of Dairy Diaries here, before proceeding to the next section.
So diving back into the science for a moment; Dairy kefir is a specialized symbiotic colony of organisms, favoring lactose sugars, and adapted to consume them, but this doesn't preclude it from utilizing what sugars are available. Bananas are intensely sweet, potassium rich and full of minerals, making it a fine fuel for your SCOBY friends. The process will break down and alter the banana, unlocking new flavors and heightening nutritional qualities.
This process will take you through the steps of making dairy kefir first, then walk you through separating your two products and processing them to completion.
Ingredients
- Whole organic milk
- Spoonful of dairy kefir SCOBY (or “grains”)
- Glass container for your next batch
- Two medium-sized bowls: one for your creme fraiche, the other for your whey
- Spoon
- Funnel (optional)
- Fine mesh strainer
- Hand blender or food processor (optional)
Process
1. Sterilize your container, using boiling water for your first clean.
2. Chop bananas to your desired quantity and thickness. I chose to use three small bananas. Note that increasing the surface area of your banana by chopping it will make it easier for the SCOBY to access the sugars in the banana. In this step, I quartered the bananas then chopped them horizonally into thin pizza slices. Put the bananas into your container.


3. Put a spoon-full of dairy kefir SCOBY into your container.

4. Pour your organic whole milk into your container, taking care to minimize splashing.

5. Place a lid lightly over the container, creating only a light seal to allow CO2 to escape. Let sit for 12 - 24 hours depending on temperature. Warmer temperatures will yield a faster process. The goal here is to stimulate the mixture to self-separate into the whey on the bottom and the cream on top. It looks funky, but don't sweat it. The cream along with the bananas will become our creme fraiche and the whey, whatever you want to do with it.

6. Pour the whole mixture into a fine mesh strainer. Let the whey drip through the mesh, which will happen mostly on it's own because the cream is now chemically separated from the whey. Light stirring is ok, but seek to minimize the amount of cream that falls through the strainer!
7. Now hunt for your SCOBYs amongst the cream! The goal of this step is different from that of making plain dairy kefir. We want to recover our SCOBY, but we don't want our banana kefir cream to fall through into the whey, so we place our bowl under the strainer now. You may use a gentle scooping motion along the bottom of the strainer to find your grains. Whatever cream falls through should be added back once you've recovered your SCOBY babies. This step can be challenging and awkward.

8. Place your SCOBYs back into their home container, refill it with milk and lightly stir the milk with a clean spoon.
9. Now we have whey in one bowl, cream and bananas in the other and our SCOBYs happily in their new batch of milk.
10. The final step is optional and that is blending the mix. You can certainly enjoy the cream and banana bits mixture at this point, or you can thoroughly blend the bananas and the cream until you produce a uniform appearance. This final step is what yields your creme fraiche.

11. Keep refrigerated till consumption.
That concludes this little adventure into this novel dairy kefir product. Next installment, we'll be exploring a savory herbal cream cheese, YUM!
Have you always wanted to learn about SCOBYs, fermentation or brewing? Check out our upcoming workshops for anything that might be of interest!

Dairy Diaries: How I Make Dairy Kefir
My name is Ryan and I'm part of the apprentice team at Rancho Mastatal for 2019. I've been navigating my lactose-intolerance since I was a child and gluten-intolerance since I identified it approximately five years ago. In this and the following installments of Dairy Diaries. I'll be exploring dairy kefir, in my personal effort to find ways to make dairy products I enjoy healthier, more digestible and more delicious.
By Ryan Roberts, 2019 Ranch Apprentice
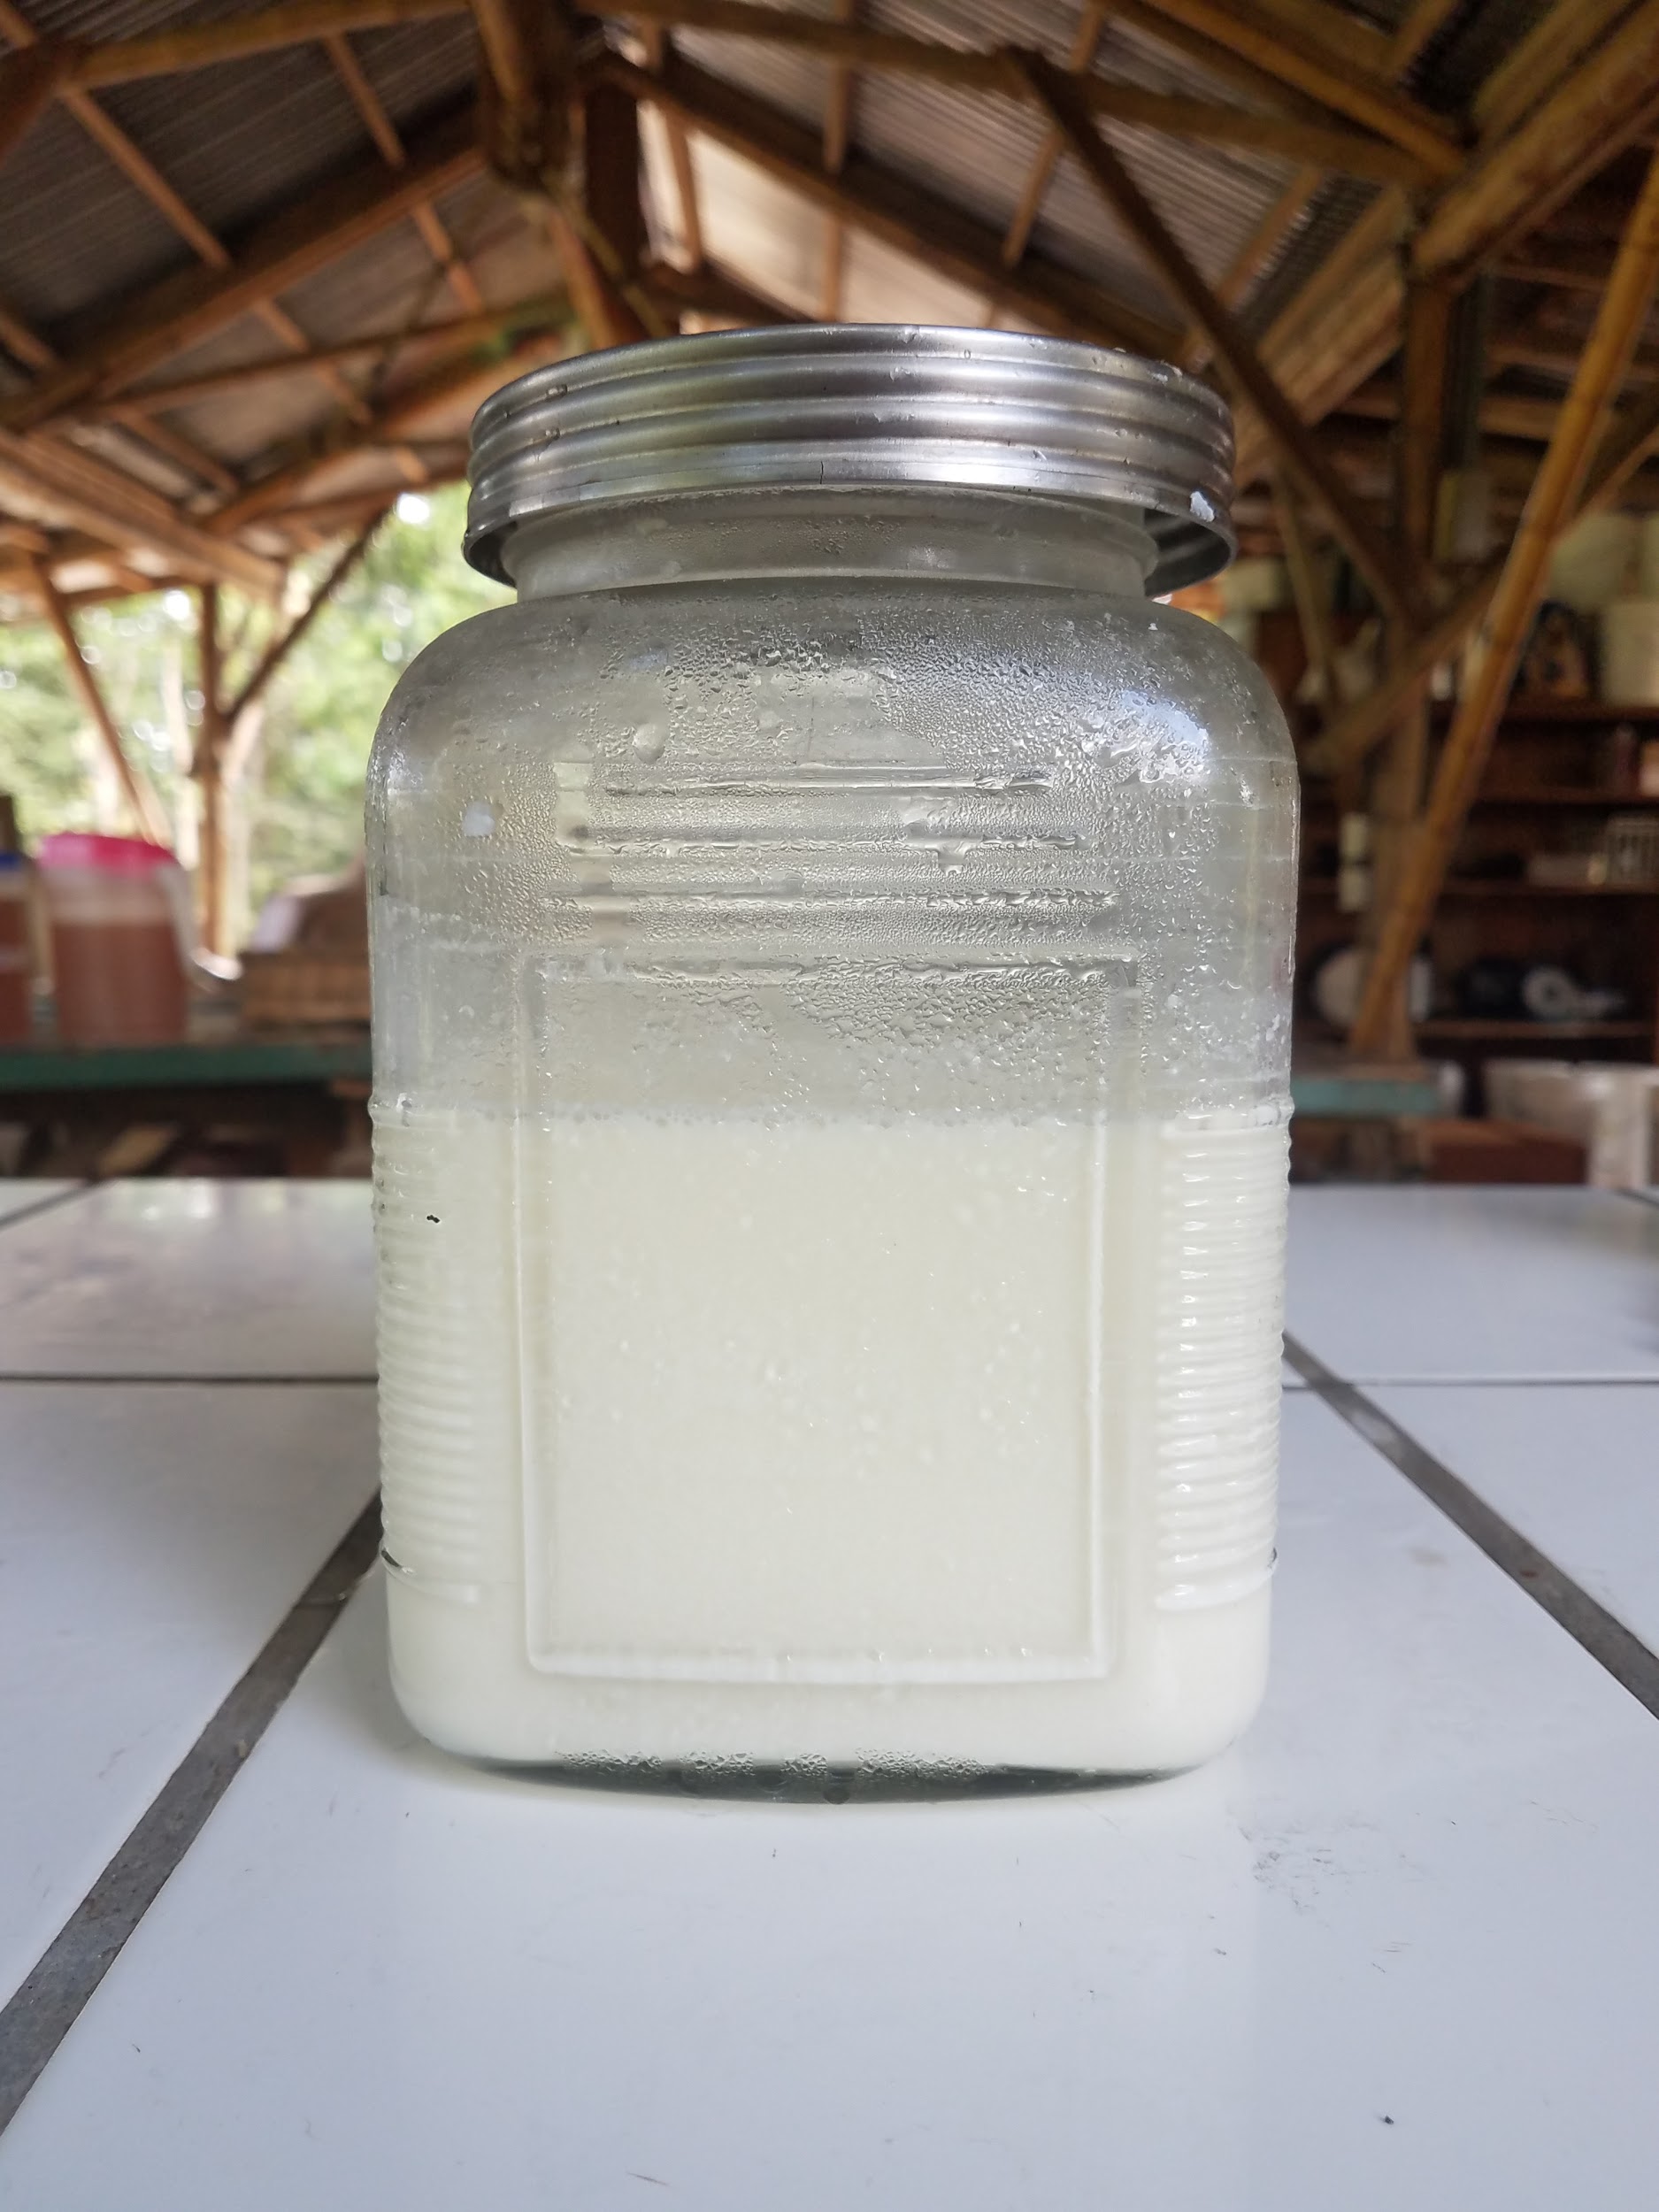
My name is Ryan and I'm part of the apprentice team at Rancho Mastatal for 2019. I've been navigating my lactose-intolerance since I was a child and gluten-intolerance since I identified it approximately five years ago. In this and the following installments of Dairy Diaries. I'll be exploring dairy kefir, in my personal effort to find ways to make dairy products I enjoy healthier, more digestible and more delicious.
I have a mixed understanding of my dairy sensitivity, in part because throughout my life I have chosen to accept the consequences of consuming dairy products that I enjoy such as cheese and ice cream. Over the last few years, in an effort to better understand the nuances of my sensitivity, I've taken to experimenting through exposure and carefully observing my reactions.
Since arriving at the Ranch, I've taken a fascination with dairy kefir, a cultured milk product which we make regularly as a base for salad dressing. My interest was piqued upon discovering that the salad dressing failed to upset my sensitive stomach.
Dairy kefir is tangy, effervescent and probiotic, closely comparable to yoghurt, with origins in the Caucasus Mountains of Eastern Europe. It is made using a dairy kefir SCOBY, which stands for a "symbiotic colony of bacteria and yeast", which are often called "grains" in the case of dairy kefir. Dairy kefir grains look like clumped grains of rice that are yellowish white. They tend to clump together in spongy, somewhat tough little colonies.
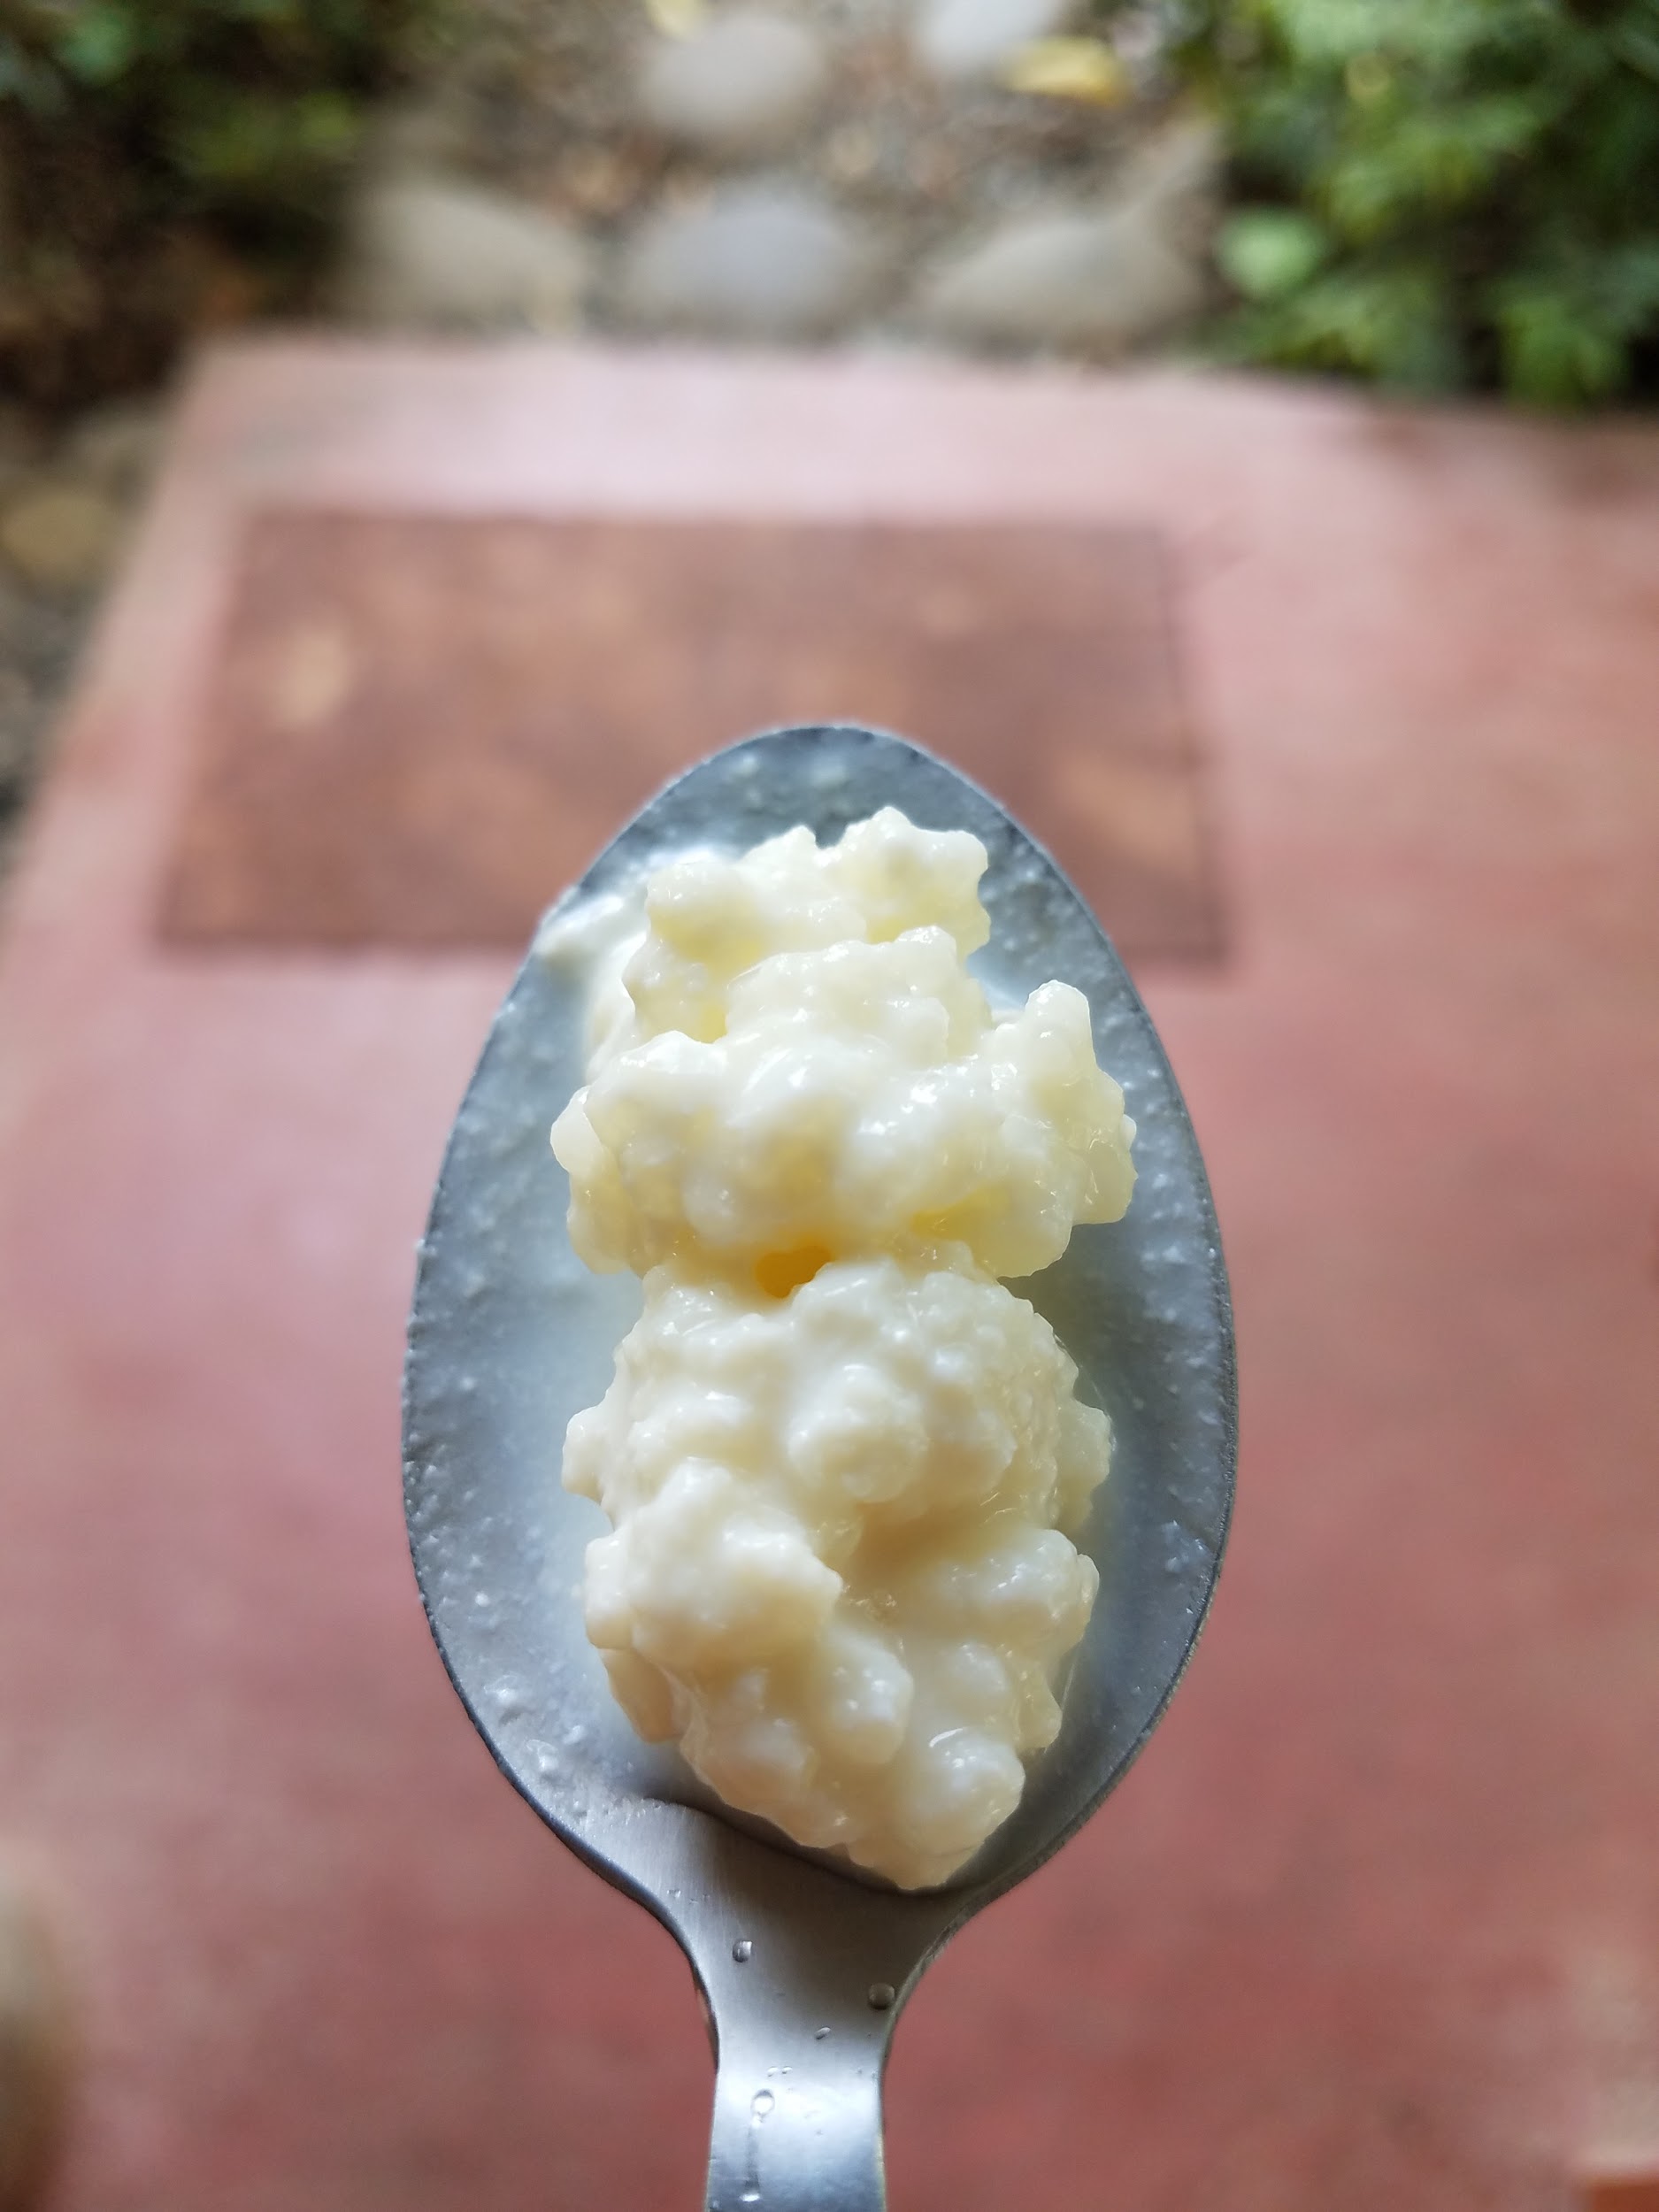
The SCOBY consumes the sweet lactose in the milk, converting in into lactic acid and multiplying the microorganisms beneficial to the health of our stomach, intestines and the whole ecosystem of our body. This makes it possible for folks with a sensitivity to lactose to consume delicious milk products fermented with this SCOBY.
It's delicious, it's great for you, and I'm excited to share that it is stupid easy to make and maintain.
It really is as simple as adding the dairy kefir SCOBY to your milk and letting the little SCOBYs get to work. When you are ready to consume your freshly fermented kefir, strain out the grains using a fine mesh strainer and a spoon, wash your container lightly and reintroduce the SCOBY and a new batch of milk.
The Process
1. Clean your container, using boiling water for your first clean. Let the glass cool.
2. Put a spoon-full of dairy kefir SCOBY into your container.
3. Pour your milk into your container, taking care to minimize splashing.
4. Place a lid over the container, creating only a light seal to allow CO2 to escape.
5. Let sit for desired level of tanginess.
6. Pour fermented milk and grains out through a fine mesh strainer.
7. Gentle rinse your container, ensuring you clean areas where the milk is splashed above the milk line.
8. Use a gentle scooping motion along the bottom of the strainer to find your grains.
9. Place them back into your container, refill with milk and lightly stir the milk with a clean spoon.
10. Enjoy your dairy kefir!

Here are some considerations when raising and caring for your dairy kefir babies:
Temperature:
Warmer temperatures accelerate the work of the dairy kefir SCOBY significantly. Here at the Ranch, we let our kefir sit for 12 hours to 20 hours through the heat of the day and the temperate evening. Generally after 12 hours, we put the fermented dairy kefir in the refrigerator overnight, but leaving it over night has led to a tangier, more desirable final product and an easier process.
Time:
The longer you let your dairy kefir SCOBY work, the tangier, thicker, more probiotic, and in my opinion, more delicious the kefir will become. Sit time varies based on your preference from 12 to 48 hours, depending on temperature. Refrigeration will allow you to store the kefir for up to a week. Note that while this significantly slows the metabolism of the SCOBY, the enzymatic activity remains active, breaking down the milk into more bioavailable and nutritious bits for our stomach.
Sanitation:
Like many ferments, the SCOBY creates an environment for itself that limits the growth of competing organisms through increased acidity and the production of ethanol (though in dairy kefir the alcohol is negligible). This means that the risk of contamination is limited to that which remains outside the milk. The best way to mitigate any rogue elements is to wipe away any splashed or remaining milk that won't be under the liquid. Other than that, thorough cleaning of the container for the dairy kefir is unnecessary - a simple water rinse will suffice.
The SCOBY:
The little yellow white SCOBY is actually quite durable and resilient, so don't worry about being terribly ginger with them. The only thing we want to avoid doing is pressing the grains through the fine mesh, which will cut and damage them. Prevent this by using a light scooping motion along the bottom of the strainer.
The SCOBY is also resilient to being left in the milk. If you want to take a break from the dairy kefir, you can do so by refrigerating the SCOBY in milk for weeks at a time. Every two weeks replace the milk with a little bit of new milk. It doesn't needed much.
The SCOBY will also grow in size and multiply. When you begin to find more grains, you can remove them and place them in a separate container to make even more kefir, or better yet, gift them to a friend! Dairy kefir, like many ferments, is the gift that keeps on giving.
So go forth and spread the love: for your taste buds, your gut, and your friends.
Check out Ryan’s other blog on dairy kefir crème fraiche
If you are interested in fermentation why not join us for our upcoming tropical homebrewing workshop?
Sources:
Rancho Mastatal Food Skills , Dairy Kefir, Laura Killingbeck
Brazilian Journal of Microbiology
https://www.ncbi.nlm.nih.gov/pmc/articles/PMC3833126/#!po=0.595238

The Basic Pantry Analysis: Design, Food, Sourcing
Cuisine is diet that's unique to a physical place and a human cultural group. We can taste the patterns of modern cuisine in the melding of characteristic ingredients into characteristic forms. Wheat noodles with tomato sauce points us in the direction of Italy. Fermented spiced cabbage leads us to Korean kimchi.
By Laura Killingbeck, Porvenir Design's Food System Designer
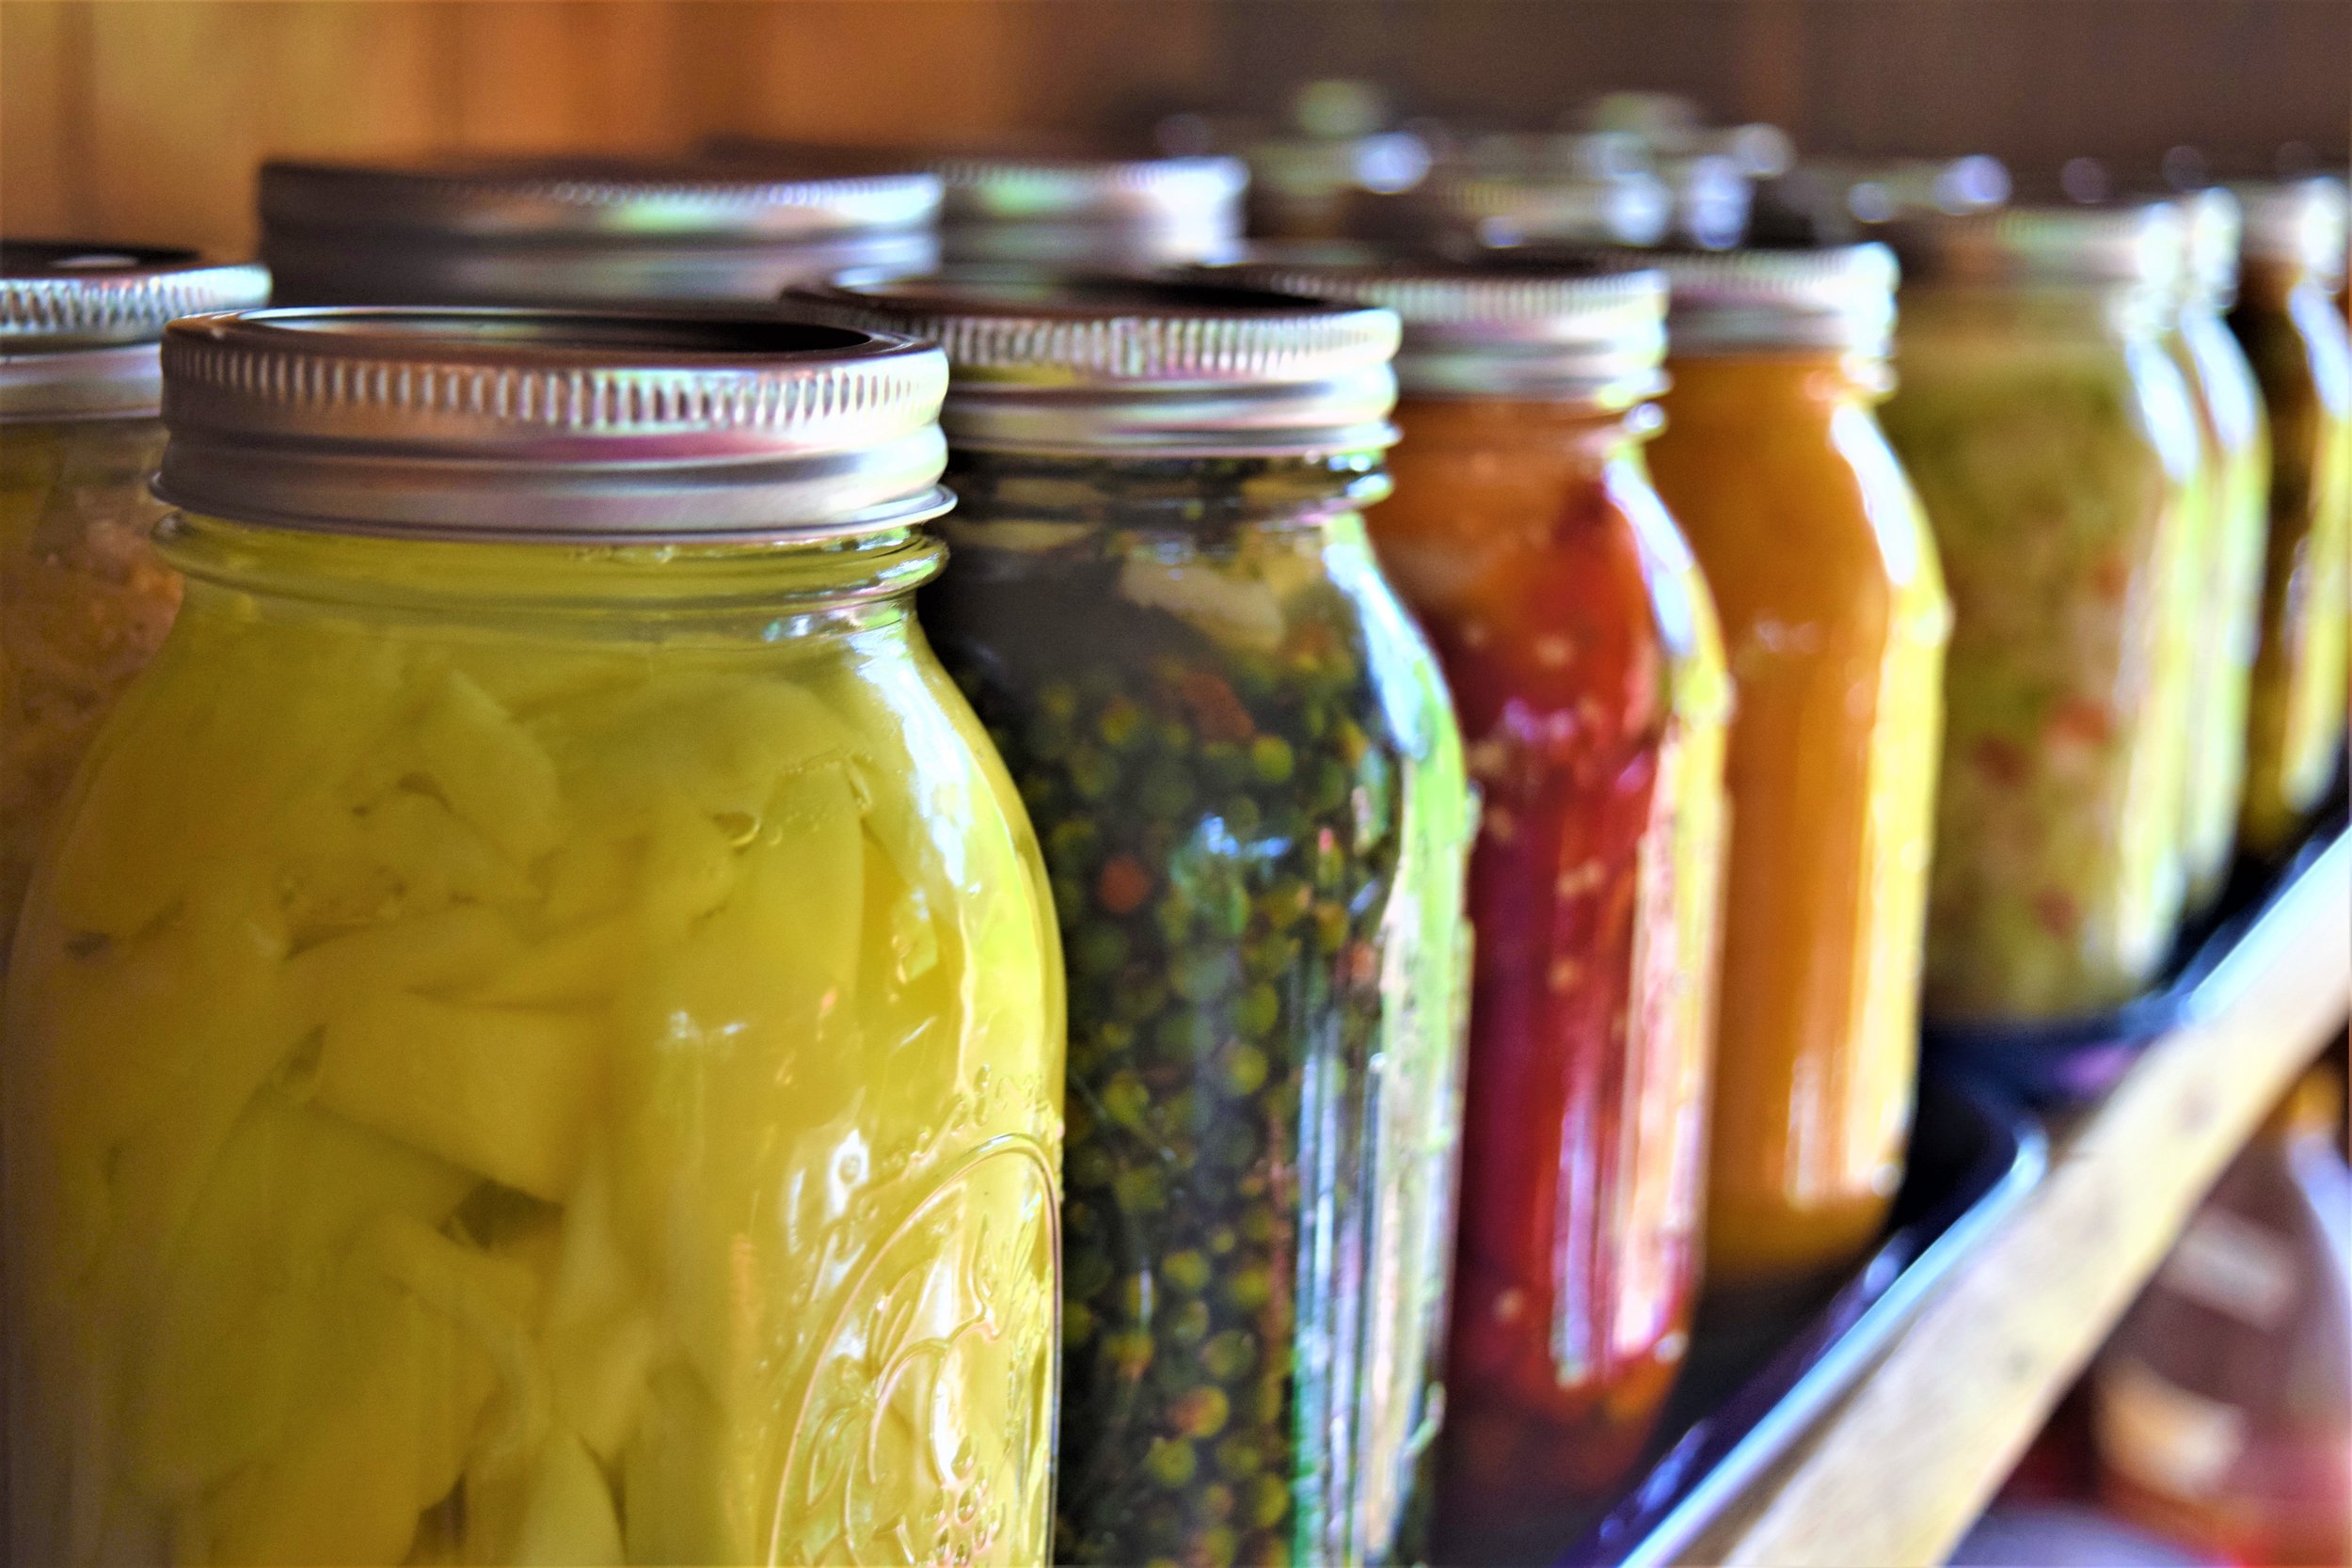
The Human Diet as An Ecological System
Cuisine is diet that's unique to a physical place and a human cultural group. We can taste the patterns of modern cuisine in the melding of characteristic ingredients into characteristic forms. Wheat noodles with tomato sauce points us in the direction of Italy. Fermented spiced cabbage leads us to Korean kimchi. Even amid tremendous variation, and even as these cultural foods are exported, appropriated, and evolve in different ways in different places, we are still able in many cases to recognize a cultural and geographical narrative embedded within relational patterns of flavors and forms.
Across the span of human agricultural history, cuisine sprung from ecological relationships—people ate what grew well in their area, and they grew what nourished them. Humans shaped the morphology of plant, animal, and microbial species by selective breeding; in turn, these foods changed the physiology of the human body. Cultural groups vary widely in their tolerance and desire for certain foods—these are genetic adaptations to their peoples' long history of evolution with specific cuisine. The co-transformation of people and food species was exquisitely mediated by the opportunities and limitations of the ecological niche of the place where they lived. Growth was balanced and calibrated within an ecological feedback loop of regenerating resources.
But in recent human history, globalization expanded our access to place and people, while simultaneously breaking this ecological feedback loop. We travel, and food travels; neither is linked, necessarily, in place. People are still connected with the world, but now we are connected differently. This shift is transforming the evolution of cuisine in unprecedented ways.

If you imagine the path of human ecology as a train traveling down a railroad track, globalization is the conductor turning the train onto a new track. Human relationships with food are now evolving in a different direction than they did before. The foundation for cuisine is no longer an ecological relationship between people and place; it is an economic relationship between people and business. Businesses grow or produce food and ship it around the world, where chains of distributors buy it and warehouse it in grocery stores. Surely this is not the only way that food works, and local food cultures still thrive in many areas. But it is a style of human-food interaction that is growing and replacing such local cultures. As we become increasingly separate from our direct relationship with the ecological patterns that once mediated food and diet, we become more deeply fused with a new, abstract, relationship with global commerce. The foods we like to eat often have less to do with healthy ecology, and more to do with macroeconomics and marketing.
We know there are a lot of problems with this. The Western Diet (aka, global cuisine) is correlated to chronic disease and poor health. Mass agriculture depletes soil and species diversity. Industrial pesticides and fertilizers damage ecosystems. There is a lot more to say but I don't have to say it—on some level we know, all the time, that this is bad. And even as we know, we still eat global-industrial foods, because we're hungry, its what we know, and its what's there.

Post-Harvest Permaculture Design
Permaculture design is essentially applied ecology for human development. It studies and teaches how life relates to place, with the object of sustaining that life and that place. A lot of the literature within Permaculture Design centers on the infrastructure development of building, landscape, and agricultural systems. It most often highlights the agricultural side, with ideas and methods of learning how to integrate human agricultural systems with the larger ecology of life on earth.
But interestingly, the focus on agricultural systems within Permaculture Design methodologies often only lightly brushes post-harvest food handling and cuisine development. The general thinking is that once people understand food production as a functional part of ecological systems, they will be able to grow more food. This has been very successful for many people, with one caveat—growing plants, animals, or microbial species that are edible does not mean you are growing food that is ready to eat. A a plot of wheat and a chicken pecking bugs can be wonderful parts of an agricultural ecosystem, but if you want a chicken sandwich there is still a lot of work to do.
Over the last nine years I've worked with two farms and education centers who dedicated themselves to the process of farm-to-table food production—one in temperate Massachusetts, and the other in tropical Costa Rica. This allowed me to study and practice food preservation and processing across climates, and see the similarities and differences that unfolded.

At Rancho Mastatal in Costa Rica, even very common foods, like malanga, tiquisque, cuadrados, pejibaye, and chaya were all new to us. And what do you do with a sudden hundred pounds of ripe bananas? At Round the Bend Farm in Massachusetts, we needed to preserve large quantities of food seasonally to last the winter, in a way that was totally different than in the tropics. We also transitioned from a home-scale cooking facility to one which could serve hundreds, and had to scale our systems up to meet new demands. At both organizations, it took us a lot of time, and a lot of trial and error, to acquire the skills, tools, and labor to do these things. And to do these things efficiently, it took structured seasonal planning. The teaspoon of ginger you need now in your recipe had to be grown a year ago, then harvested, dried, powdered, and stored. We had to learn how to organize ourselves in relation to local food, in ways that were intrinsically different from how we used to organize ourselves in relation to globalized foods.
The human element of how we interacted with food based on our personal and cultural backgrounds was another huge piece of the puzzle for local eating, especially in Costa Rica. We craved western-style bread products; people didn't always like Costa Rican cuisine; some people were afraid of new foods like fermented bananas. Eating locally meant coming to terms with the cultural references for desirability of foods we had brought with us, in relation to the ecological and cultural backdrop of a new country and climate. We had to adapt ourselves to new styles of cuisine, and adapt that cuisine to ourselves as newcomers.
Most of my work in Costa Rica and Massachusetts was to create, systematize, and implement post-harvest food processing and preservation strategies based on farm foods. I also worked with numerous farm owners, communities, and homesteaders who were and are in the process of divesting from their dependence on global-market food supplies. It is through these relationships and experiences that I began to notice consistent patterns in the challenges people faced in transforming their farms into food. I started comparing patterns of limitations and successes that people were reporting, with those of the organizations I was working with. I used permaculture design to organize these patterns into a systematic format that I could use to consult with people about how to achieve more efficient and accelerated farm-to-table food system success.

I call this consultation service the Basic Pantry Analysis. The title and process drew inspiration from many collaborators in the fields of permaculture design and farm-to-table cuisine; in particular the work of Costa Rican ethnobotonist Rafael Ocampo, as well as that of the Sat Yoga Institute. A similar process focused on family nutrition has also been promoted by the Instituto de Nutrición de Centroamérica y Panamá (INCAP). My version of this process is based on my experience working with farms and communities, and is an adaptation of a wonderful wealth of collaboration among many individuals and organizations.
The Basic Pantry Analysis
The Basic Pantry Analysis matches the ecological needs of your land, with your cultural and personal frames of reference, your dietary needs and desires, and your resource capacity, to form a “basic pantry” of ingredients, whole and value added, that you will use to develop your own dynamic cuisine—that is, the meals you eat every day to sustain yourself in the place you live. This process is useful for anyone who wants to accelerate their ability to grow, process, and eat local foods.
Your Basic Pantry will be designed through a combination of personal decisions and desires, which inform a multitude of what are often very simple tasks. Those big ideas and those little tasks are what build the complex whole. The consultation service is divided into four primary parts: Vision, Layout, Basic Pantry, and Adaptation. The scope of service varies depending on the client's needs and desires.

Sample Outline of Basic Pantry Service
Please note this varies based on client needs.
Vision
This is the overall concept of your cuisine. Exploration of goals and values, and how those relate to your capacity. Make decisions about priorities for ecological, cultural, dietary, financial, factors.
What the client receives:
• A one paragraph vision statement for your cuisine.
• A one page analysis of the factors and values that contribute to that vision.
• A sample set of meals you could expect to eat over the course of the year.
Layout
This is the architectural layout of your plan—it shows clearly how different food elements and tasks fit into your cuisine over time.
What the client receives:
• Daily, weekly, monthly, and/or annual list of post-harvest food tasks for your mature food system.
• Analysis of tools and infrastructure.
• Analysis of skills and labor needed.
• Basic five year analysis of how your food system transitions through time.
Basic Pantry
You need lots of ingredients to make meals—this is the list of those ingredients, whole and value-added. I work closely with the agricultural team to make recommendations about food species.
What the client receives:
• Sourcing and Growing list
• Processed and Preserved foods list
Adaptation
Your Basic Pantry Analysis is a starting point, not an end. It will grow and shift and evolve as you and your land do. This section is a structured feedback loop to help you grow and shift your cuisine based on your priorities.
What the client receives:
• Design concept follow up questions
• Blank harvest, processing, and/or other charts for feedback
• Supporting appendix—contains client-specific documents on further skills and strategies, and/or other supplementary documentation as needed.
For more information on costs and deliverables of this service please write our team at info@porvenirdesign.com.
For information on food related workshops at Rancho Mastatal please see go to our Workshops page.


Flexitarianism: Living and Sharing Solutions to Climate Change
DISCLAIMER: These are my thoughts and experiences on what can be a deeply cultural, charged and personal topic: diet. There is a lot we don’t know, especially when it comes to what a sustainable diet is. For one, most studies have been centred in high-income Western countries (Jones et al., 2016); it’s also still largely unclear exactly what a “healthy diet” should consist of, nevertheless what a truly sustainable society would look like. Integrating all of these concepts is an enormous challenge.
by Matthew Livingston
Matt is currently one of the Ranch's year-long apprentices.

DISCLAIMER: These are my thoughts and experiences on what can be a deeply cultural, charged and personal topic: diet. There is a lot we don’t know, especially when it comes to what a sustainable diet is. For one, most studies have been centred in high-income Western countries (Jones et al., 2016); it’s also still largely unclear exactly what a “healthy diet” should consist of, nevertheless what a truly sustainable society would look like. Integrating all of these concepts is an enormous challenge.
“Defining what represents a macro-nutritionally balanced diet remains an open question and a high priority in nutrition research.” (Song et al., 2016)
Before coming to the Ranch, I had been vegetarian for about a year and a half, predominantly for environmental reasons. Currently, I would probably classify as a “flexitarian” or “ethical omnivore”, as are most of the denizens here, with the majority of the diet being plant-based. Ideally ~95% of our calories would come from plants, due to extensive research on the health, longevity and environmental benefits of eating a predominantly plant-based diet (1, 2, 3). A 95:5 plant to meat ratio is manifest in all of the Blue Zones (4), examples being Okinawa & Sardinia, where people live the longest and most healthful lives in the world. Allow me to explain how I came to this decision and why I’m sticking with it for now…
My original swap to vegetarianism was influenced by my desire to live “more sustainably”, and healthily, as it is for many people now. I saw the documentary film “Cowspiracy” (bear with me) and this initiated my research into food and agriculture, which carried over into my environmental sustainability degree. It was also enough to shift one of my fundamental behavioural patterns – my diet. It was a little tough going at first, but I soon found that I didn’t miss eating meat much at all. I felt a bit better about myself, “knowing” that I wasn’t contributing as much to global warming, as my research indicated that changing one’s diet can be one of the most impactful ways of reducing your carbon footprint (Aleksandrowicz et al., 2016)…

Fast forward to May 2017, when I travelled to Ridgedale Permaculture farm in Sweden for my Permaculture Design Course with Richard Perkins. Richard is a proud meat-eater, being particularly fond of freshly line-caught fish, properly cured bacon & sausages, and a nice, juicy steak from locally reared, regeneratively farmed livestock, as viewers of his Youtube channel will know. He was keen to point out that there are in fact “no ecosystems on this planet that exist without animals driving the nutrient cycling” (Perkins, 2016). Ecosystems depend on the cycling of nutrients (and minerals) in order to function, and these nutrients can be accumulated, dispersed and concentrated by animals in such a way as to benefit the whole.
One beautiful example of this is the salmon of British Columbia, that feed the bears, eagles, forests and pretty much everything else that lives there with nitrogen and other accumulated minerals from the ocean when they return to their spawning grounds. Another was the Great Plains of North America, where tens of millions of bison roamed. These prairie lands were extraordinarily diverse habitats for a multitude of co-evolved flora & fauna, micro and macroscopic. Now they have predominantly been turned into endless fields of corn, wheat and soybeans, using fossil-fuel powered machinery and chemicals to maximise profit whilst depleting soil of not only its nutrients, contributing to erosion and nitrogen runoff, but its life too.
Regenerative Agriculture aims to work differently. The challenge is to maintain healthy yields and livelihoods whilst simultaneously enriching soil, biodiversity and ecosystems and improving the system’s ability to regenerate itself. Through various mechanisms, we can actually draw down carbon from the atmosphere and store it in soils and vegetation. What’s more, animals can help achieve this goal. Grazing animals such as bison co-evolved with grasses (which are extremely efficient sunlight accumulators, astronomically more so than our photovoltaic panels), such that massive herds would graze through perennial grasses whilst defecating and trampling the remnants down to create a mulch that left the soil covered, before moving on. The grasses would get a natural fertiliser boost but wouldn’t be eaten down completely, which meant that they could grow back and not have to deplete their soil nutrient reserves. Over time, this kind of rotational grazing, especially when well-managed, can build significant amounts of soil. At Ridgedale, they have employed it, along with other techniques such as Keyline Design, to build over 6 inches of soil in just four seasons. There is even a project called Pleistocene Park in northern Siberia that hopes to repopulate the Mammoth Steppe, which historically supported one of the largest densities of herbivores in history and could function as a massive carbon sink. Surely we need animals as a part of our (agri)culture, then?

Well, you might point out that ruminant animals like cows and sheep that we are now cultivating in extremely large numbers produce methane as a part of their digestion, a greenhouse gas with ~30 times more “global warming potential” than CO2. Greenhouse gas accountancy is a complex topic and there is still significant debate as to whether the sequestered carbon pays off the methane produced during the lifecycle of the animal (see Garnett et al., 2017 & P.P.S.); that said, it’s also possible that the earth historically supported much larger numbers of herbivores, many of which were likely driven extinct by humans thus contributing to ecosystem disruption, as discussed in Sapiens and elsewhere (7, 8).
Another common argument is that eating animals is calorically inefficient when we could eat what we feed them. I would say this is a partially valid point in that animals, especially cattle, often need more land and water to produce than their plant-based counterparts, but it’s less valid when discussing purely grass-fed animals whose rumens are evolutionarily designed to digest grass, which most of us humans obviously don’t do very well; this suggests that if you want to obtain food from a parcel of land that wants to be grassland, you could force it to be not grassland, or you could manage and eat animals that are designed to live in and perpetuate that ecosystem. The Sustainable Food Trust goes so far as to say “the only sustainable way to obtain food from grassland is to graze it with ruminants”, which does sound a bit extreme especially considering that rabbits and geese are just two examples of non-ruminants that can be grass-fed. Livestock especially are getting a lot of bad rap due to the significant environmental damages of deforestation for pasture (an example of forcing an ecosystem to be something it doesn’t want to be) and their methane and nitrous oxide emissions (Steinfield, 2006; Stoll-Kleemann, 2015; many others).

Whilst not negligible, I’m concerned that many of the livestock systems under scrutiny aren’t representative of best-practice regenerative methods and that there is definitely the problem of reducing a living creature to the efficiency metric of its greenhouse gas emissions per kg of meat without considering all of its other beneficial functions and services; this metric has led people to the conclusion that “landless systems” or feedlots are better for the environment (Garnett et al., 2017), despite animal welfare being known to be abysmal and where wastes are concentrated and rarely dealt with properly. These factors go against the principles of regenerative agriculture and thus wouldn’t be allowed to continue; yes, grass-fed cows and other ruminants require more land, but we could limit the amount of land devoted to raising them and thereby reduce the total stock and consumption. In this manner, by allowing animals and ecosystems to express their true functions and behaviours according to the co-evolutionary properties of the animals and their environments, it might be possible for humans to yield ethically sound animal-derived food that positively contributes to the whole-earth system.
There are also a few points I would like to discuss with regards to plant-based (especially vegan) diets. Vegetables and whole grains, which form the staples of most healthful plant-based diets, as well as fruits and nuts, obviously take some amount of energy to produce, thus we need to consider where this energy or fertility comes from. We also need to consider where the dietary fat, protein and vitamin B12 will come from (amongst other nutrients/minerals) when meat is abstained from completely; I believe it is possible to meet your protein needs on a plant-based diet (Ranganathan et al., 2016), but doing so in the dead of winter in a temperature climate in a sustainable manner might be more difficult (are the Inuits an unsustainable people?)

Even the “most sustainable”farming methods I am aware of (which may or may not be organic certified) acknowledge that the inputs to grow food ultimately have to come from biological nitrogen fixation, conversion via animals, or inorganic elements (chemicals). For example, compost is vital to almost all organic, traditional and regenerative farms, and often incorporates animal manure, which adds additional nitrogen and biology to the soil and ultimately to the plants. The only exceptions I can think of to this would be Jean-Pain compost (which uses only wood chips and water) and Masanobu Fukuoka style rice and winter wheat cultivation, where the straw from the previous crop was left on the field as mulch and nutrients. Even the ancient and incredibly successful Meso-american Chinampas systems, as well as the rice cultivating nations of China, South Korea and Japan, have utilised ferti-irrigation techniques comprised predominantly of the wastes of fish as nutrients. Thus, since no sustainable farming methods can use inorganic chemicals derived from fossil fuels, most consumers that eat a purely plant-based diet are still deriving their nutrients from (the functioning and inclusion of) animals… Perhaps the question then becomes can, should and how would we integrate animals into our farming systems without eating them?
I’m still considering the implications of these questions and my position on the frequency and type of my animal consumption. We’ve had four “Pig Parties” in the four months I’ve been here at the Ranch, and chicken about once a week on average, all of which was reared and slaughtered locally in Mastatal. This corresponds pretty well to a 95:5 plant:meat ratio (see P.P.P.S.). For the first of the two pigs I visited the farm where it lived, died and bore witness to how it was processed; for the second we had an intro on how to properly butcher a pig. I think this is a crucial missing link for the majority of meat consumers and we need to continue building awareness of the realities of industrial slaughterhouses. Both of the animals I visited lived outdoors in tropical home gardens, feeding on bananas and other food scraps, although I’ve now been told it’s likely they were fed some concentrated feed. Pigs will eat just about anything, including chickens – they are probably the ultimate organic material recycling animal. Feeding farm animals to other farm animals is illegal in many parts of the world, but we need to always be searching for ways to turn “waste” into food, and pigs are one effective way of doing so. They in turn provide manure to feed back into the ecosystem and, when the time is right, are themselves converted into protein, fat and flavour for dozens of people for multiple meals. They can also provide piglets so that the system can continue, perhaps indefinitely. Without pigs in this system, you would have to replace the dietary protein and fat, which in our climate would likely come from more annual beans and palm oil from cleared forest land, as well as find another method of recycling the food scraps (vermi-compost is great, but doesn’t provide food in return).

Based on this discussion, I would like to present my initial take on a scale to classify diets based on their ability to be sustained, from best to worst:
Local regenerative
Local organic certified
Non-local regenerative
Non-local organic certified (many vegetarians/vegans in cities)
Local conventional
Non-local conventional (most consumers)
Where locality is on a scale from hyper-local (within 5km), to local (within 50km), to regional (within 250km), to non-local (further than 250km). Another important variable that goes hand-in-hand with locality is seasonality. Thus a checklist for regenerative dietary choices might be something like:
Is it local? (as the crow flies to place of origin): <=5km — <=50km — <=250km — >250km — Don’t know
Does it come from your garden, your nearest farmer, your nearest market, or another country?
Is it in season?: Yes — No — Don’t know
Are you regularly eating avocado, chocolate or coffee in winter in a temperate climate? What can you eat and drink locally and seasonally to replace imported goods you habitually desire?
Are you consuming fermented foods and beverages? The Japanese have one of the strongest food cultures (called Washoku 和食) and longest lived people in the world, and 5/6 of their staple food ingredients are fermented foods. Fermentation is not only extremely beneficial for your health, but ties in beautifully with preserving the abundance of the harvest.
Was it produced regeneratively?
Did it build soil and/or sequester carbon?: Yes — No — Don’t know
Did its production support local farmer(s)/community? Yes — No — Don’t know
Did it use no chemicals and no or very little fossil-fuel powered machinery in its production? Yes — No — Don’t know

It is my guess that many consumers would tick No or Don’t Know for every field, whilst falling into the worst category (non-local conventional). We need to shift first from ignorance to awareness before we can shift to understanding and action – behavioural change is flipping hard! All I can say right now is the link between diet and planetary health is crucial in navigating our transition towards a sustainable prosperity.
Let me be clear: plant-based diets are absolutely a big part of the solution, and there are many cases (including the average Western diet) where meat consumption should be reduced, but nevertheless animals aren’t the enemy. Vegans, vegetarians and ethical omnivores have a common enemy, and that is industrial agriculture (especially feedlots, which are completely awful). Meat in moderation, i.e. Meat Mondays as opposed to Meatless Mondays, may be a way forward for many people, rather than jumping straight to 100% plant-based diets based on quinoa and avocados shipped in from someplace slightly more exotic. I think this better follows the Transition Ethic that Rob Hopkins thoroughly emphasises via the Transition Network, by meeting people where they’re at – there is an irrepressible demand for meat due to complex sociocultural factors that will take time to shift away from, but if we can make ethical compromises that simultaneously shift mindsets, we will be well on our way to a more symbiotic relationship between humans and Nature.

May The Triforce (Plants, Animals and Fungi!) Be With You!
P.S. Follow the debate here, and here.
P.P.S. For the adventurous you can read my Regenerative Agriculture Brief and explore the references there too!
P.P.P.S. Three meals a day with chicken for 52 meals and pork for 12 meals in a year = (365*3-(52+12))/(365*3)*100 = 94.2%.
References, a.k.a. some of the things I’ve read:
Badgley, C. et al., 2017. Organic agriculture and the global food supply.
Davis, K.F. et al., 2016. Meeting future food demand with current agricultural resources.
Garnett, T. et al., 2017. Grazed and Confused? Ruminating on cattle, grazing systems, methane, nitrous oxide, the soil carbon sequestration question – and what it all means for greenhouse gas emissions. FCRN, University of Oxford.
Jones et al., 2016. A Systematic Review of the Measurement of Sustainable Diets.
Perkins, R., 2016. Making Small Farms Work: A Pragmatic Whole Systems Approach to Profitable Regenerative Agriculture.
Ranganathan, J. et al., 2016. Shifting Diets for a Sustainable Future. World Resources Institute.
Smith, P.S. et al., 2014. AR5, WG3, Ch 11, Agriculture, Forestry and Other Land Use (AFOLU). Ar5, Wg3, pp.811–922.
Steinfield, H.G., 2006. Livestock’s role in climate change and air pollution. Livestock’s Long Shadow. Environmental Issues and Options, pp.79–123. Available at: http://www.fao.org/docrep/010/a0701e/a0701e00.HTM.
Stoll-Kleemann, S. & O’Riordan, T., 2015. The Sustainability Challenges of Our Meat and Dairy Diets.
Weber, C.L. & Matthews, H.S., 2008. Food-miles and the relative climate impacts of food choices in the United States. Environmental Science and Technology, 42(10), pp.3508–3513.
West el al., 2015. Leverage points for improving global
food security and the environment.


How to Make a Real Tortilla
When I was a teenager, I traveled for a few months with a Mexican shoe-shiner I met in Mazatlán. We thumbed rides across the country and were taken in along the way by a dozen or so of his relatives. I often found myself in the kitchen with his aunts, cousins, and nieces, making tamales, sopes, or other dishes that were new to me.
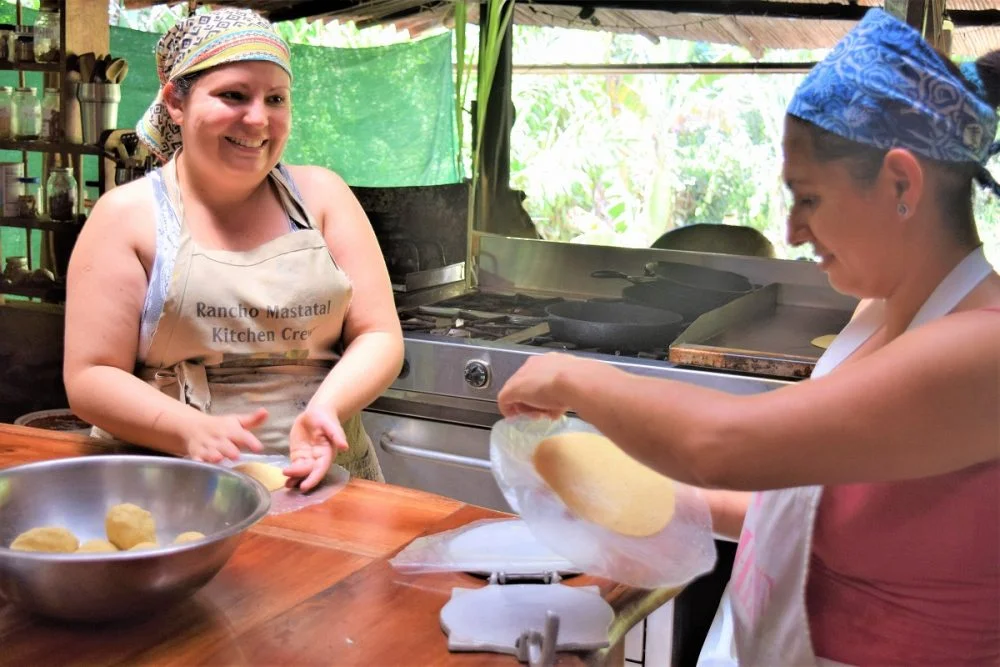
This article was originally published in the Tico Times. Please follow the link for the original article.
When I was a teenager, I traveled for a few months with a Mexican shoe-shiner I met in Mazatlán. We thumbed rides across the country and were taken in along the way by a dozen or so of his relatives. I often found myself in the kitchen with his aunts, cousins, and nieces, making tamales, sopes, or other dishes that were new to me.
Due to my lack of skill, the family often sent me to the local store to buy tortillas. Everywhere we went, no matter what town we stayed in, there was always some tiny store that sold stacks of them, fresh and hot. For me they came to represent the spirit of family and sharing in Mexican culture, and a deep pleasure in simplicity — there was really nothing better than those fresh tortillas with a slice of homemade cheese.
Most of the tortillas we bought or made were thin, six to eight inches in diameter, and made from corn. They tasted nothing like the giant flour disks from the grocery store that never went bad. They tasted original.
Later, traveling around Latin America, I came to realize that those corn tortillas really were original. In the different countries and communities I later visited, I tasted tortillas in vastly different forms. Some were fatter, some thinner, some made of yellow corn, or white, or blue, some pressed flat, others slapped into shape between two palms.
Most tortillas made by hand in Latin America are made with corn rather than wheat. This is because corn grows well here, whereas wheat in general does not. Some also incorporate pejibaye (fruits from a native palm, Bactris gasipaes) or ojoche (seeds from a a rainforest tree, Brosimum alicastrum). Variations stem from economy, culture, and landscape.
Tortillas do not have the same widespread status of daily consumption in Costa Rica as they do in Mexico or many other Latin American countries. But they do have a rich history here, and are still often eaten in the form of gallos (a tortilla curved in the hand around meat or a savory picadillo) or as an addition to a typical breakfast. There is no better way to impress your Tico and Tica friends than with a gallo made with a homemade tortilla! Where I live now in rural Costa Rica, a homemade tortilla is one made from whole corn that has been nixtamalized and ground into dough, also referred to as masa.
Corn
There are at least 150 different varieties of corn. They can be divided into four major types: sweet corn, popcorn, flint, and dent. Sweet corn is bred for its sugar content, and is eaten before the kernels are mature. Popcorn, which is usually round in size, has a specific protein ratio that makes it ideal for popping. Flint and dent varieties are generally flattish and oval, and are used to make corn flour, dough, and other foods for both humans and other animals. The corn used for making tortillas is usually a flint or dent variety that has been grown to maturity and dried. This is often referred to as field corn.
Many Costa Rican farmers still grow field corn for their families or to sell at market. A number of our neighbors grow corn and make tortillas and other corn dishes, such as tamal asada and chorreadas, at home. You can inquire about purchasing local corn at any major market, or ask your neighbors if you live in a rural area. Most people are usually quite excited to help you source this great product, and if you’re charming enough, someone’s grandma might help you make your first tortilla!
Nixtamalization
Mature dried corn presents a special challenge. Its outer seed coat, or pericarp, is hard and creates a strange texture unless you remove it. It also has a substance that can inhibit the body’s ability to uptake the vitamin niacin. You need to cook the corn in an alkaline substance to dissolve the seed coat and to ensure that niacin is bioavialable.
For populations that eat large quantities of corn, this process is essential to dry corn’s nutritional value. In addition to improving corn’s nutritional qualities, nixtamalization gives the corn structure and pliability, and improves the flavor. Ancient peoples cooked their corn in wood ash, or powders made from bones or shells, to achieve this. Many people around the world still use wood ash or other variations of alkaline substances to cook corn in this way. The following recipe calls for hydrated lime (calcium hydroxide). In Spanish this is referred to as cal.
There are many different methods to nixtamalize corn. The qualities of corn vary widely based on variety, post-harvest handling, and age of the dried kernel. The boiling time and temperature varies (15-90 minutes) depending on the type of corn you use. The following is a great recipe that works well for us with our local corn.
Nixtamalized Corn Recipe
Ingredients:
15 cups whole dry field corn
3 tablespoons hydrated lime (calcium hydroxide), sifted
Water

Instructions:
DAY 1
Rinse the corn thoroughly in water. Remove any particles, floating pieces, dirt, or corn silk.
Cover with at least four inches of water and let soak 12-24 hours in a covered pot.

DAY 2
Drain the corn, rinse again, and add nine liters of water. Mix in the 3 tablespoons of sifted lime. Stir. The corn should turn bright yellow-orange as you stir in the lime.
Put the corn and lime water on the stove and bring to a boil.
After the corn reaches a rolling boil, reduce the heat to a strong simmer and cook 30-60 minutes until the corn is tender and skins are separating and dissolving away from the kernels. The corn should be easy to bite into, but still have a bright white point in the center. The kernels should be firm and intact with the germ and tip still present.
Take the corn off the heat and let it rest for at least one hour. (We have tried many variations of this resting time, including letting it sit overnight, or not resting at all. Letting the corn rest in the alkaline solution after boiling is thought to further transform the starches and give the tortilla a better structure.)
Drain the corn into a sturdy metal colander and rinse with water. Rub the kernels between your hands and/or against the holes in the colander to remove all lime and the clear kernel skins. Use plenty of water. Once the corn is thoroughly rinsed and cleaned, it is called nixtamal.

Uses:
Nixtamal can be used whole in soups, casseroles, salsas, and side dishes; it can be ground for tortillas, corn crusts, or made into polenta, tamales, or atole. The whole nixtamal will keep for several days in the fridge, but once ground should be used within a day.
Tortilla Recipe
The dough used to make tortillas is referred to as masa. To make the masa, grind nixtamalized corn in a corona hand mill or other grinder. You may want to double grind for a finer texture. Mix with salt to taste and just enough warm water to make a dough that is soft and pliable, and adheres to itself but not to your hands. You should be able to roll it into balls that retain their form completely when you hold them in your palm.

The easiest way to make a tortilla is with a tortilla press, but if you don’t have one just substitute two cutting boards.
Grab a small chunk of masa and roll it into a ball. Use two sheets of plastic (zip lock bags work fine) and put the ball between them in the tortilla press. Press down the handle and open it back up. Carefully peel the tortilla from the plastic bag and flip it into a hot cast iron skillet.
Cook for about 40 seconds and then turn it over. If your masa is ground fine, you will see the tortilla puff up. If it is thick it won’t and that’s fine. Tortillas should be cooked through and golden (or another color depending on the color corn you started with).

“Food for Thought” is a Tico Times series from Laura Killingbeck, is the Director of Food Systems and Fermentation at Rancho Mastatal Sustainability Education Center. The Ranch is a community and education center in Mastatal, Costa Rica, that hosts residential workshops in food, permaculture, natural building, and more. Laura co-manages the Ranch facilities and programs, teaches fermentation workshops, and writes about the intersection between food, body, and place. To take a class with Laura or visit the Ranch, please visit www.ranchomastatal.com.
Categories
Topics
- Agriculture 6
- Agroforestry 21
- Animals 2
- Apprenticeship 19
- Appropriate Technology 6
- Backpacking 1
- Bananas 1
- Basic Pantry 4
- Biochar 1
- Books 3
- Build Your Own Home 1
- Central America 5
- Chiles 1
- Cinnamon 1
- Clay Carving 1
- Climate 2
- Climate Change 1
- Cob oven 1
- Communication 5
- Community 24
- Compost 2
- Composting Toilets 2
- Condiments 1
- Conservation 2
- Cooking 4
- Costa Rica 18
- Design 10
- Earthen Construction 10
- Eat Local 2
- Ecohome 1
- Education 9
- Environment 3
- Ethics 4
- Farm to Table 12
- Fasting 1
- Fermentation 14
- Food 22
- Food Choices 8
- Food Forest 8
- Food Processing 15
- Food Systems 12
- Gap Year 1
- Gardening 5
- Ginger Beer 1
- Harvest 2
- Health 12
- Healthy living 5
- Homemade 2
- Homestead 8
- Internet 2