

BLOG
Stories, articles, and updates from the Ranch community.
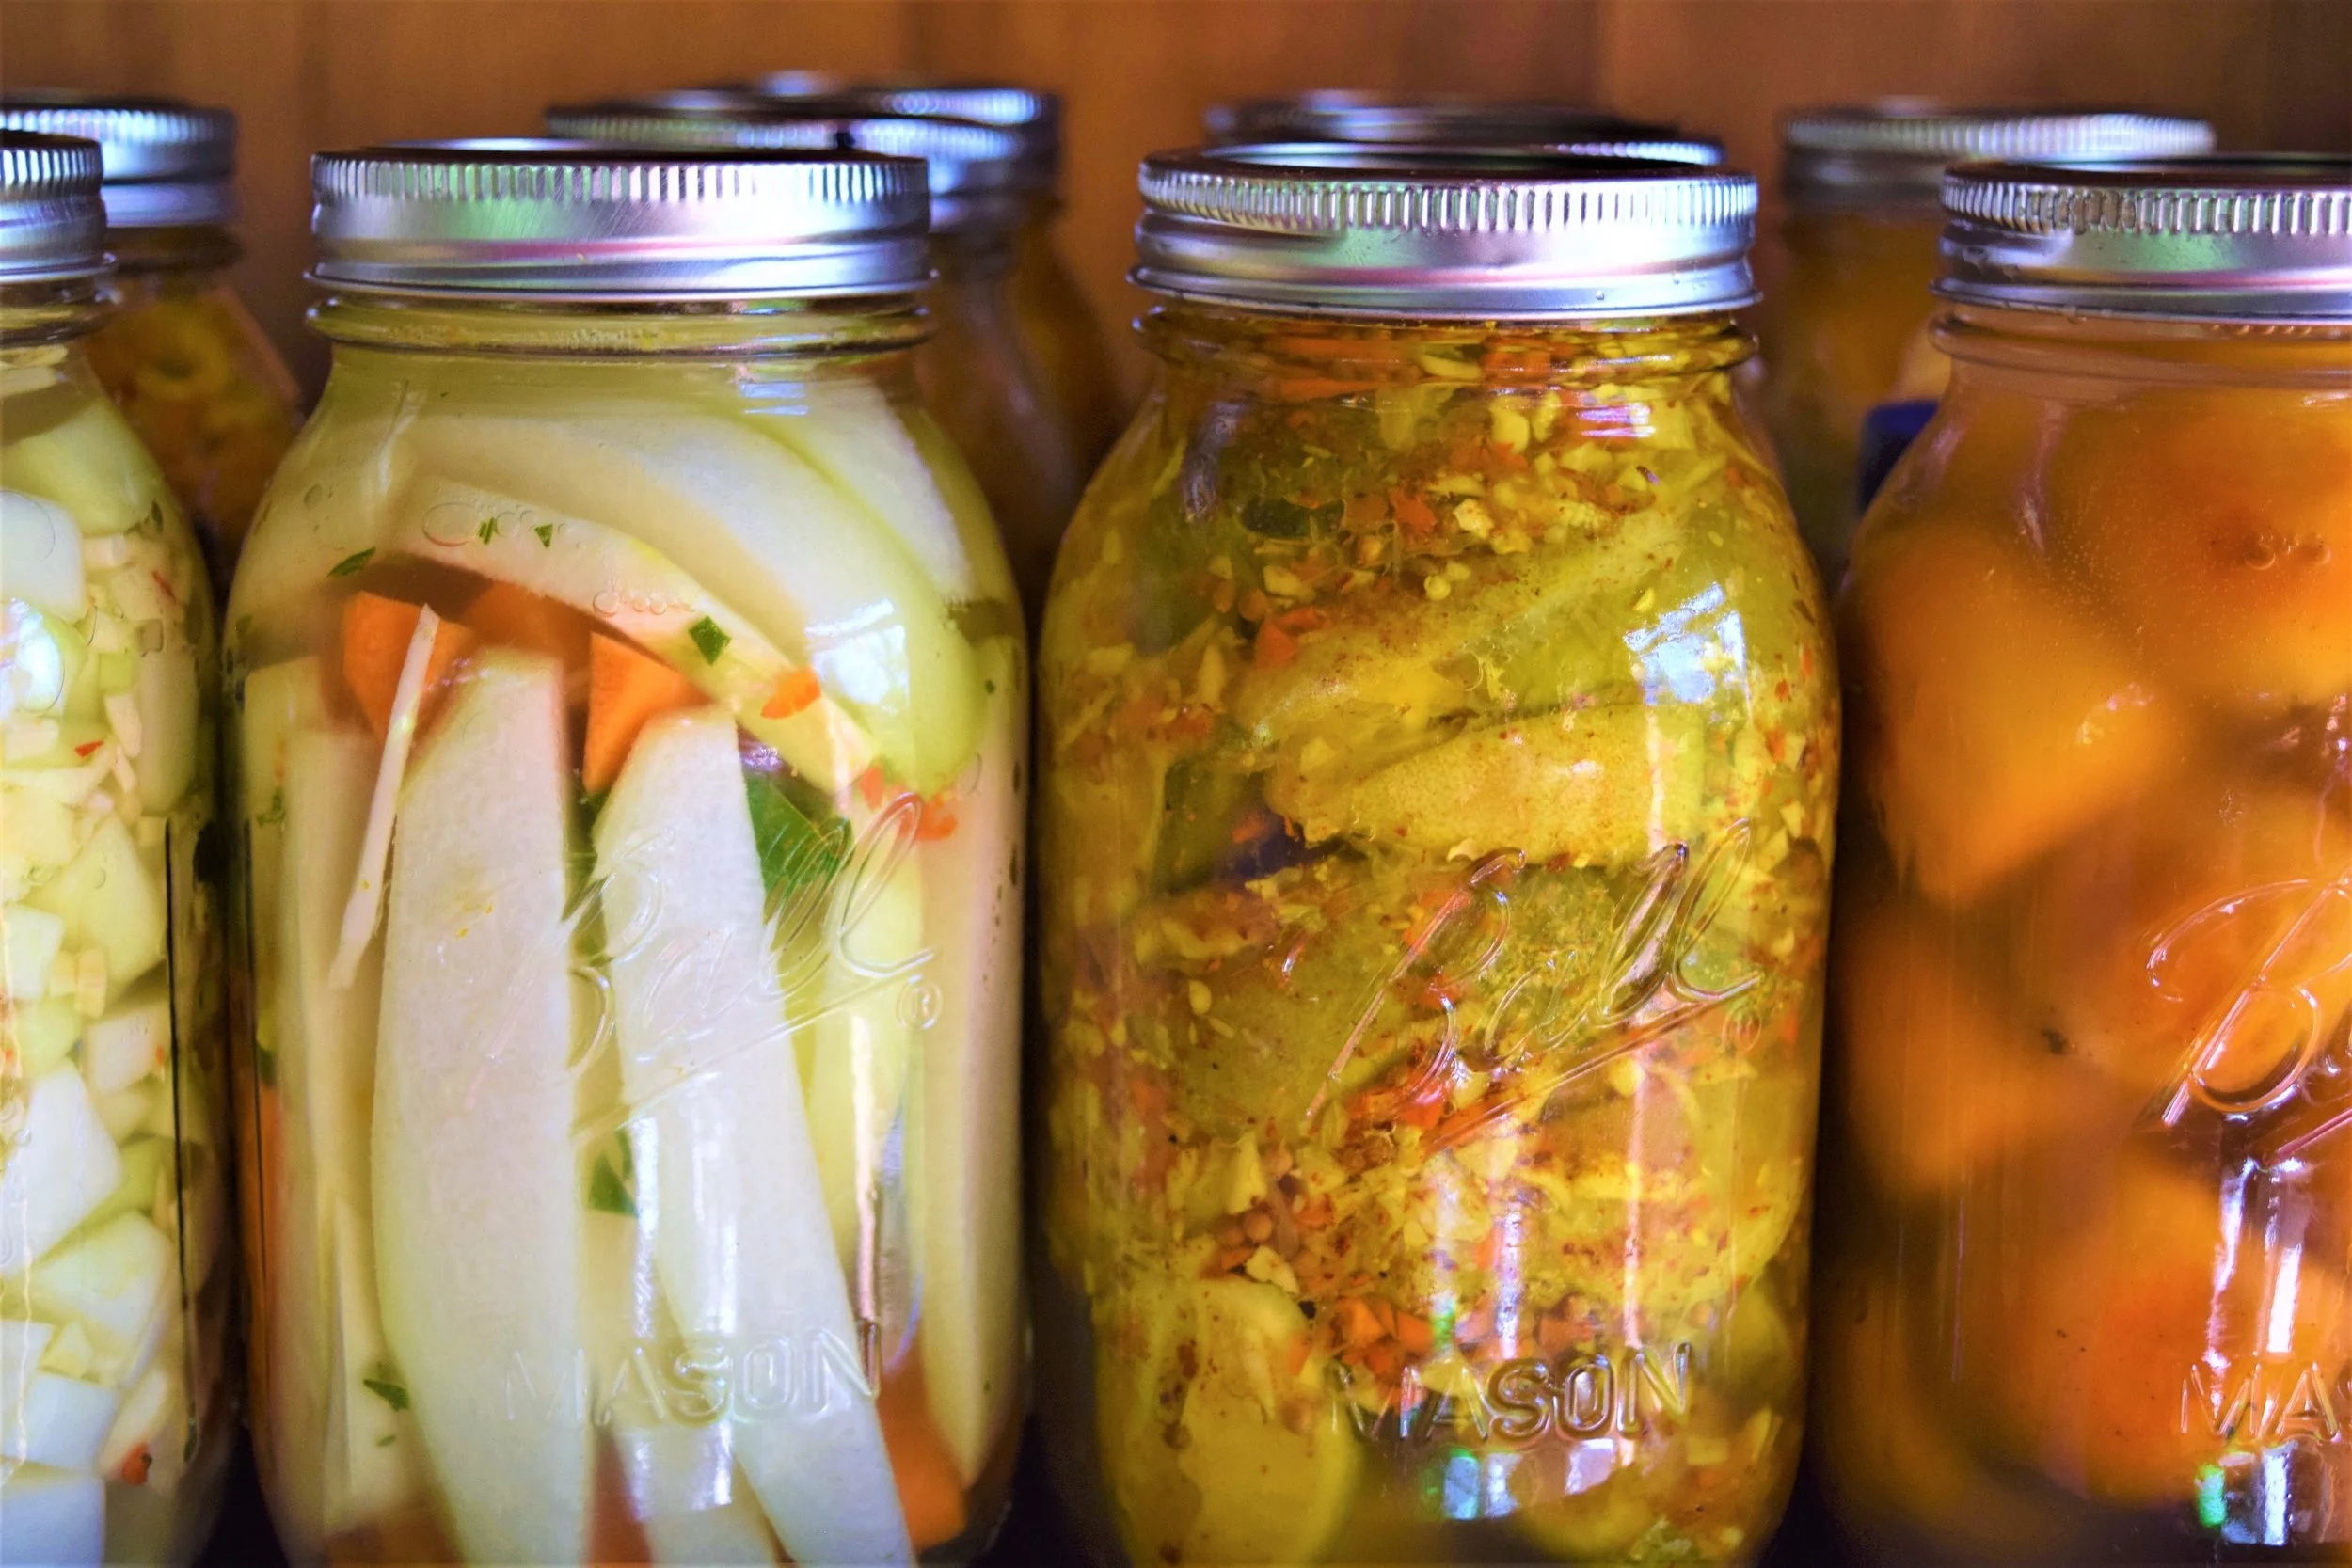
Los beneficios y los tipos de fermentación
La Fermentación es un proceso catabólico de oxidación incompleta, por el cual ocurre una transformación de los alimentos.
Escrito por el aprendiz 2024, Felipe
La Fermentación es un proceso catabólico de oxidación incompleta, por el cual ocurre una transformación de los alimentos. Esta transformación la realizan ciertos tipos de microrganismos que metabolizan estos compuestos de manera natural para su propia sobrevivencia. Este proceso se lleva a cabo a traves de la reacción bioquímica de la descomposición de moléculas de azúcar como: sacarosa, maltosa, fructuosa, entre otros, en compuestos mas simples obteniendo como resultado; energía, etanol, lactato, gas hidrógeno, enzimas, productos alimenticios fermentados, modificadores del sabor y productos farmacéuticos. Los principales productos de fermentación son ácidos orgánicos, alcohol etílico y dióxido de carbono.
Algunos de los productos finales obtenidos muy codiciados son: kimchi, chucrut, pan de masa madre, salsa de soya, vino, cerveza, Kefir, queso, salami, yogur entre otros.


La historia de la fermentación data de mas de 10,000 años A.C, donde los humanos utilizaron la fermentación para preservar los alimentos y en otras civilizaciones usaban las bebidas fermentadas para sus rituales y ceremonias. Este proceso se extrajo de la observación de la naturaleza, en donde los alimentos se trasformaban de manera natural y adquirían nuevas propiedades.
La fermentación posee un gran numero de beneficios para los seres humanos entre los cuales destaca:
Conservación de alimentos sin necesidad de químicos, al fermentar los alimentos, se crea un ambiente hostil para los microrganismos patógenos, ya sea un ambiente ácido producido por las bacterias, o un ambiente con presencia de alcohol de las levaduras.
Favorece las defensas de la mucosa intestinal, los probióticos (microrganismos beneficiosos para la salud) ayudan a fortalecer el sistema inmune, para prevenir las infecciones.
Restaura y conserva la flora intestinal, los probióticos proveen una colonia diversa y saludable a los intestinos, además de combatir y reducir el efecto de los pesticidas y sustancias químicas y tóxicas para el organismo.
Ayuda a la digestion y mejora la biodisponibilidad de nutrientes, de esta manera se incrementa la digestion de los alimentos y la absorción de nutrientes, ya que proporciona capacidades esenciales para la fermentación de nutrientes no digeribles como las fibras dietéticas. Ocurre una transformación de las largas cadenas e moléculas de los alimentos en compuestos mas simples de digerir. Rompe y degrada gran parte de las toxinas de las plantas y anti-nutrientes que dañan la salud.
Desarrollo de sabores y texturas únicos en los alimentos, esta es una característica única de este proceso ya que los microrganismo encargados del proceso producen compuestos aromáticos y ácidos orgánicos, pasando de sabores simples y planos a sabores complejos, deliciosos para los sentidos.

Existen dos formas de llevar a cabo una fermentación, fermentación espontanea o la fermentación inoculada. La primera se refiere a una fermentación con microrganismos que se encuentran en el habitat y podemos extraer, o ya sea fermentando algún material orgánico del lugar para utilizarlo como el catalizador o el cultivo primal de microrganismos a utilizar. La segunda corresponde al proceso que se ejecuta a traves de microrganismos que se obtienen comprándolos en tiendas de cultivos, que son controlados en laboratorios, donde han ido seleccionando y recreando ciertas especies mas resistentes o que tienen un objetivo en particular.
Dependiendo de la sustancia química formada en el proceso de fermentación se pueden clasificar en distintos tipos. Los siguientes son algunos de los tipos de fermentación que se practican en el Rancho:

Fermentación Alcohólica
Este proceso de fermentación está liderado por levaduras que consumen glucosa y la transforman en etanol y dióxido de carbono. Este es un proceso anaeróbico, es decir, sin presencia de oxígeno. Existe una regla general de 2:1 de azúcar a grados alcohólicos. Es decir, si partimos con una concentración de azúcar del 20% en nuestra solución (agua + glucosa (frutas, azúcar, panela, etc 20%)), obtendremos un vino de alrededor 10% de alcohol, es decir el porcentaje de alcohol es la mitad de la concentración de azucares en la solución. Tiempo de fermentación va depender de muchos factores, pero al menos un tiempo de entre 2 a 4 semanas.
Para llevar a cabo este proceso se deben tener las siguientes consideraciones:
Sanitizar los implementos y los ingredientes
Romper en estructuras pequeñas los ingredientes a utilizar
Las levaduras no pueden vivir en ambientes con un porcentaje de alcohol mayor a 14%, por lo tanto se debe partir con una solución que no exceda 28% de glucosa
La temperatura en la cual las levaduras están cómodas es de 18 a 25 celcius
PH no puede estar menos de 4
Algunos de los productos que el rancho crea a partir de este tipo de fermentación son:
Vinos de muchas de las frutas que se extraen de los sistemas agroforestales, algunos de estos ejemplos son: carambola, pitanga, canela, pitaya, piña etc.
Cerveza de jengibre

Fermentación Acido Láctica
Este proceso de fermentación es liderado por la bacterias láctica, que al igual del proceso anterior consumen la glucosa presentes en los alimentos y los convierten en ácidos lácticos. Este es un proceso anaeróbico y los beneficios de estos ácidos es la conservación de los alimentos ya que impide el crecimiento de patógenos y provee condiciones propicias para la aparición de los probióticos.
Algunos de los ejemplos de fermentación de este tipo que se practican en el Rancho,:
El kimchi de papaya verde, el cual se agrega la papaya y otras especies (ajo, jengibre, etc) bien trituradas, se pesa todo el conjunto y se calcula el 2% de ese peso, que sera la cantidad de sal que se debe poner los ingredientes, para estimular la salida del liquido al exterior de los ingredientes generando un caldo de cultivo ideal para que las bacterias se reproduzcan. Finalmente, después de agregar la sal, se estruja y se deja en un recipiente, percatándose que todo este sumergido en liquido exprimido de los vegetales. Dependiendo de diferentes factores el tiempo de fermentación varía, acá en el Rancho 0-es de una semana.

Fermentación Acido Acética
Este tipo de fermentación se lleva a cabo a partir de la bacteria acetobacter, la cual se desarrolla en un medio aérobico, la cual se alimenta de etanol, que es un tipo de alcohol que se genera en la fermentación alcohólica, convirtiéndolo en ácido acético, la sustancia característica del vinagre. Es el proceso de oxidación del etanol. Aca en el rancho la manera de producir vinagre, es mediante la exposición al ambiente de los vinos/productos de la fermentación alcohólica, y se añade la madre de vinagre que se ha generado en fermentaciones anteriores para acelerar el proceso. Finalmente se cubren con un paño para que no se infecten con otros insectos. El tiempo de fermentación varía de 1 a 3 meses.

Fermentación Simbiosis de Levaduras y Bacterias (SCOBY)
Es un tipo de fermentación donde participan un conjunto levaduras y bacterias que trabajan y coexisten en simbiosis. Acá los microrganismos transforman la glucosa en ácidos orgánicos, etanol y dióxido de carbono. Es un proceso aeróbico y anaeróbico a la vez.
Uno de los ejemplos del rancho en este tipo de fermentación es:
Kefir de agua, se utilizan una taza de granos de SCOBY y se agregan en una solución de 3 galones de agua y 3 tapa dulces, se dejan fermentar anaeróbicamente por 48 horas y están listos para ser embotellados y arreglados con jugos frutales locales. Se dejan por 5 horas en segunda fermentación y se ponen a refrigerar para bajar la actividad y er consumidos por los miembros y visitantes del rancho.

Homemade Ketchup Recipe
Ketchup over the years has been made in a plethora of different ways. The name originally comes from the Hokkien Chinese word ke-tsiap, meaning fermented fish sauce, and in Europe, the sauce has been recreated with mushrooms, walnuts, oysters, anchovies, and more.
By 2023 apprentice Emme Nederbrock
Ketchup over the years has been made in a plethora of different ways. The name originally comes from the Hokkien Chinese word ke-tsiap, meaning fermented fish sauce, and in Europe, the sauce has been recreated with mushrooms, walnuts, oysters, anchovies, and more. The first recipe that involved tomatoes was in 1812, and in 1876, the American Henry J. Heinz created his variation of ketchup. Today, about 97% of American households have a bottle of ketchup! Maybe the traditional Heinz ketchup isn't desirable to you, or doesn't taste good, try this fermented ketchup recipe made right here at Rancho Mastatal! Lots of the ingredients included in the recipe when it comes to spices and sweeteners can be altered due to desired taste, so get creative! This recipe is interpreted from the book “The Farmhouse Culture Guide to Fermenting” by Kathryn Lucas and Shane Peterson. We recommend checking out that book, learning from it, and trying out all their fun, sustainable recipes.
Before starting, there is an importance of making sure you are working in a clean environment. We are relying on natural bacterias to do their work and make a delicious ketchup, so keeping other random, possibly bad bacterias out of the mixture is key. Wash your hands consistently, wash all your produce, and make sure all vessels used for the fermentation have been disinfected properly.
Equipment Needed:
Food processor or blender
Kitchen scale
Pan for sautéing
Fermenting jar (for this recipe are using a 2 liter jar)
A stopper and weight for inside the jar
Pot for cooking down recipe after fermentation
Ingredients:
MAKES 2 LITERS (about 1/2 gallon or 2 quarts) will yield around 1 - 1.5kg of finished ketchup after boiling down
2 kg tomatoes
1 onion
2-4 cm knob of ginger
5 cloves of garlic
Salt (3% of total weight of ingredients above)
Brine (recommended but not a necessary factor)
Sugar (10% of total weight AFTER fermentation, about 200g)
1 Tbsp of cornstarch
Spices to your liking (mustard powder, pepper, smoked paprika, chili powder, etc)
Instructions:
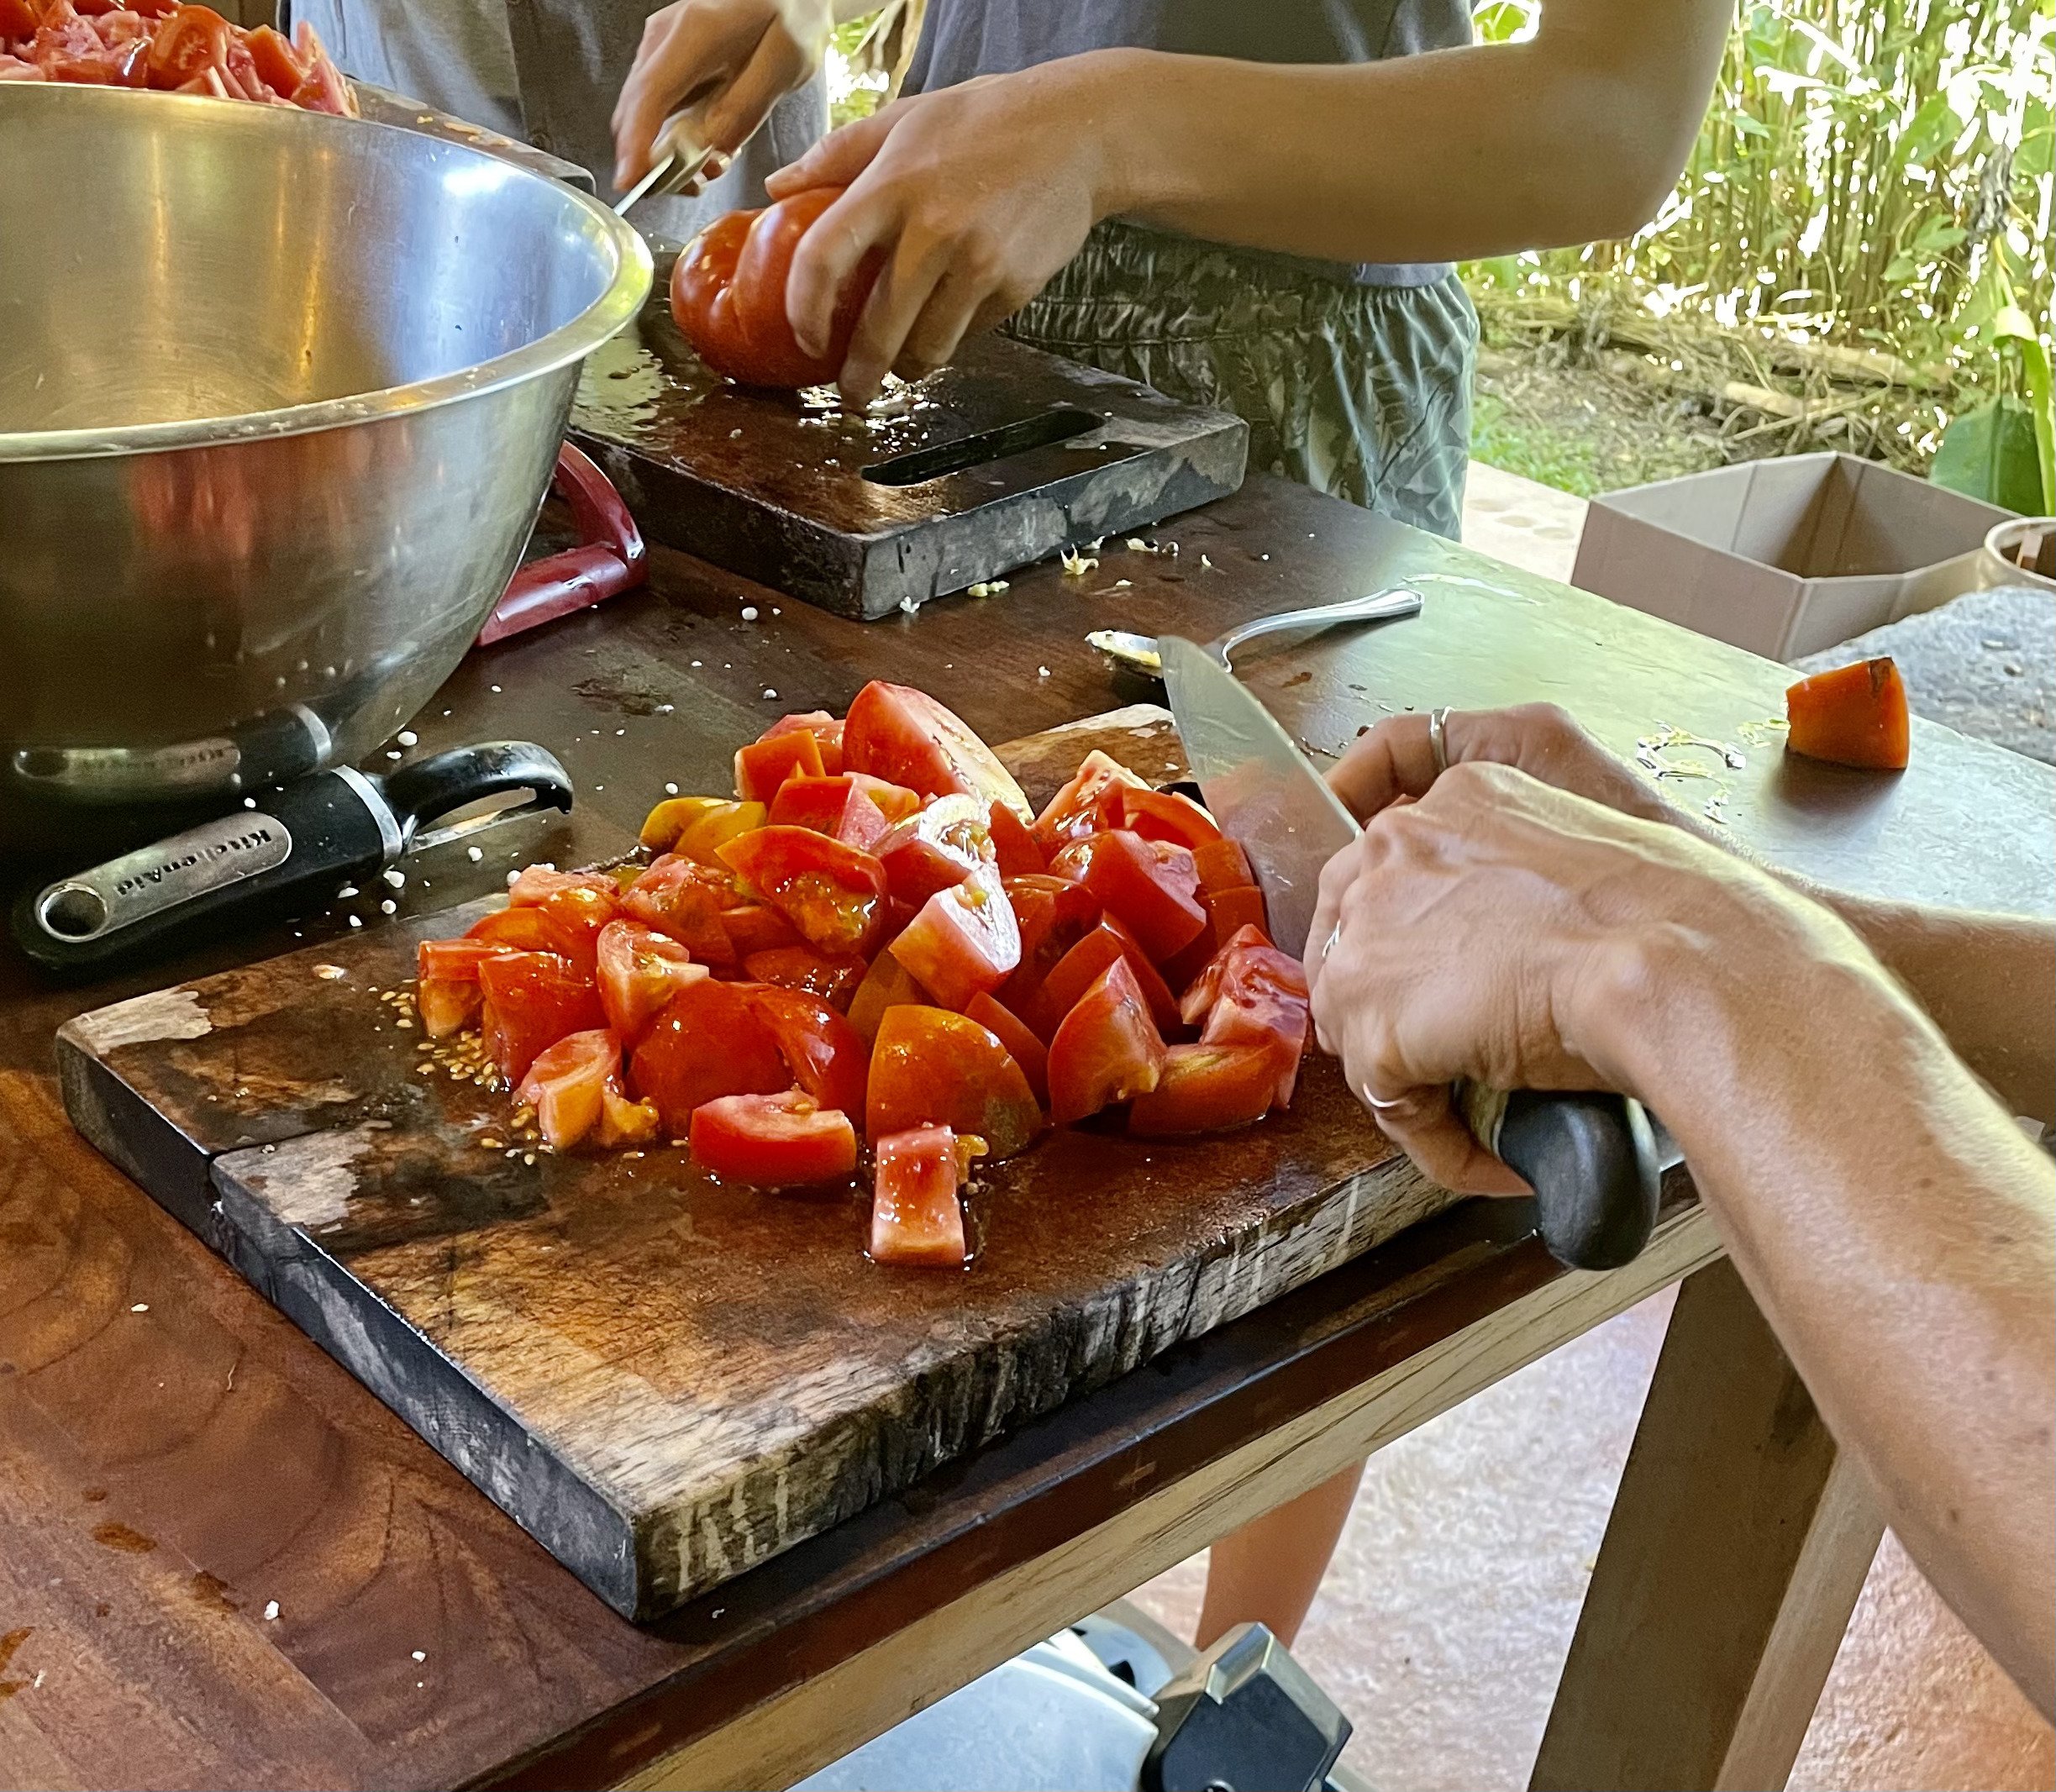
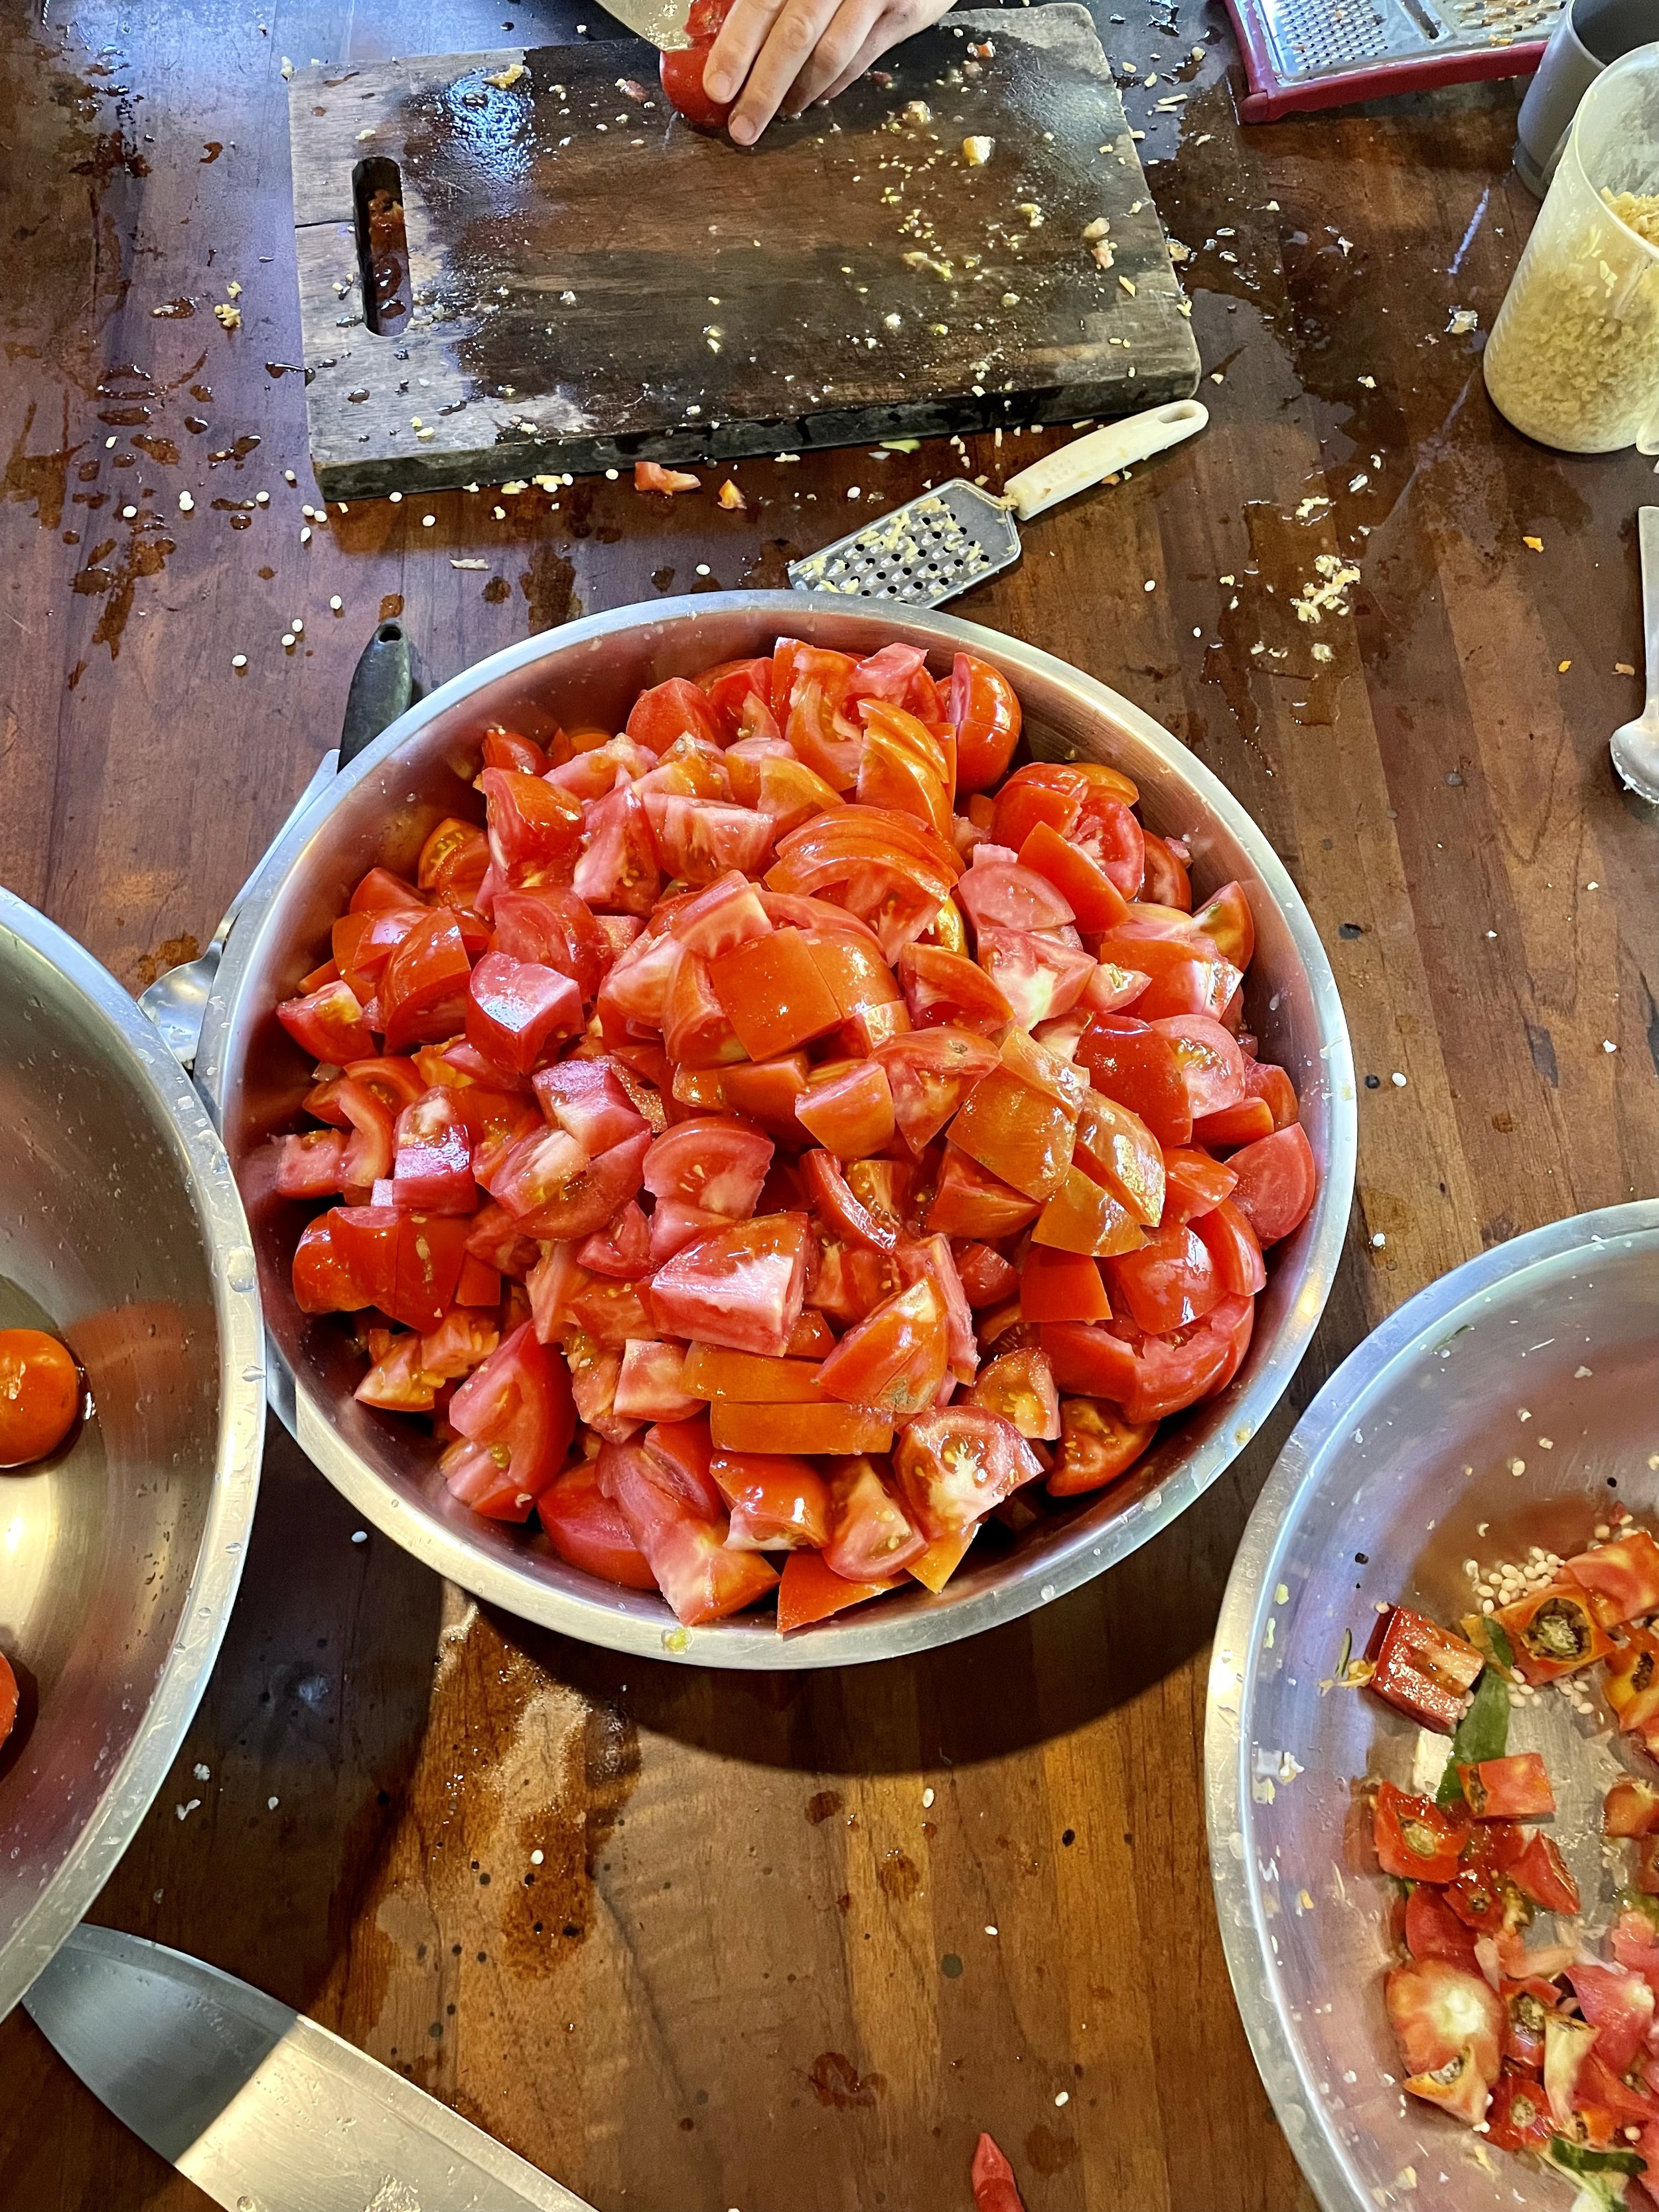
After washing, cut up all tomatoes and remove stems. These tomatoes will be processed in either a food processor or blender so size isn’t too important.
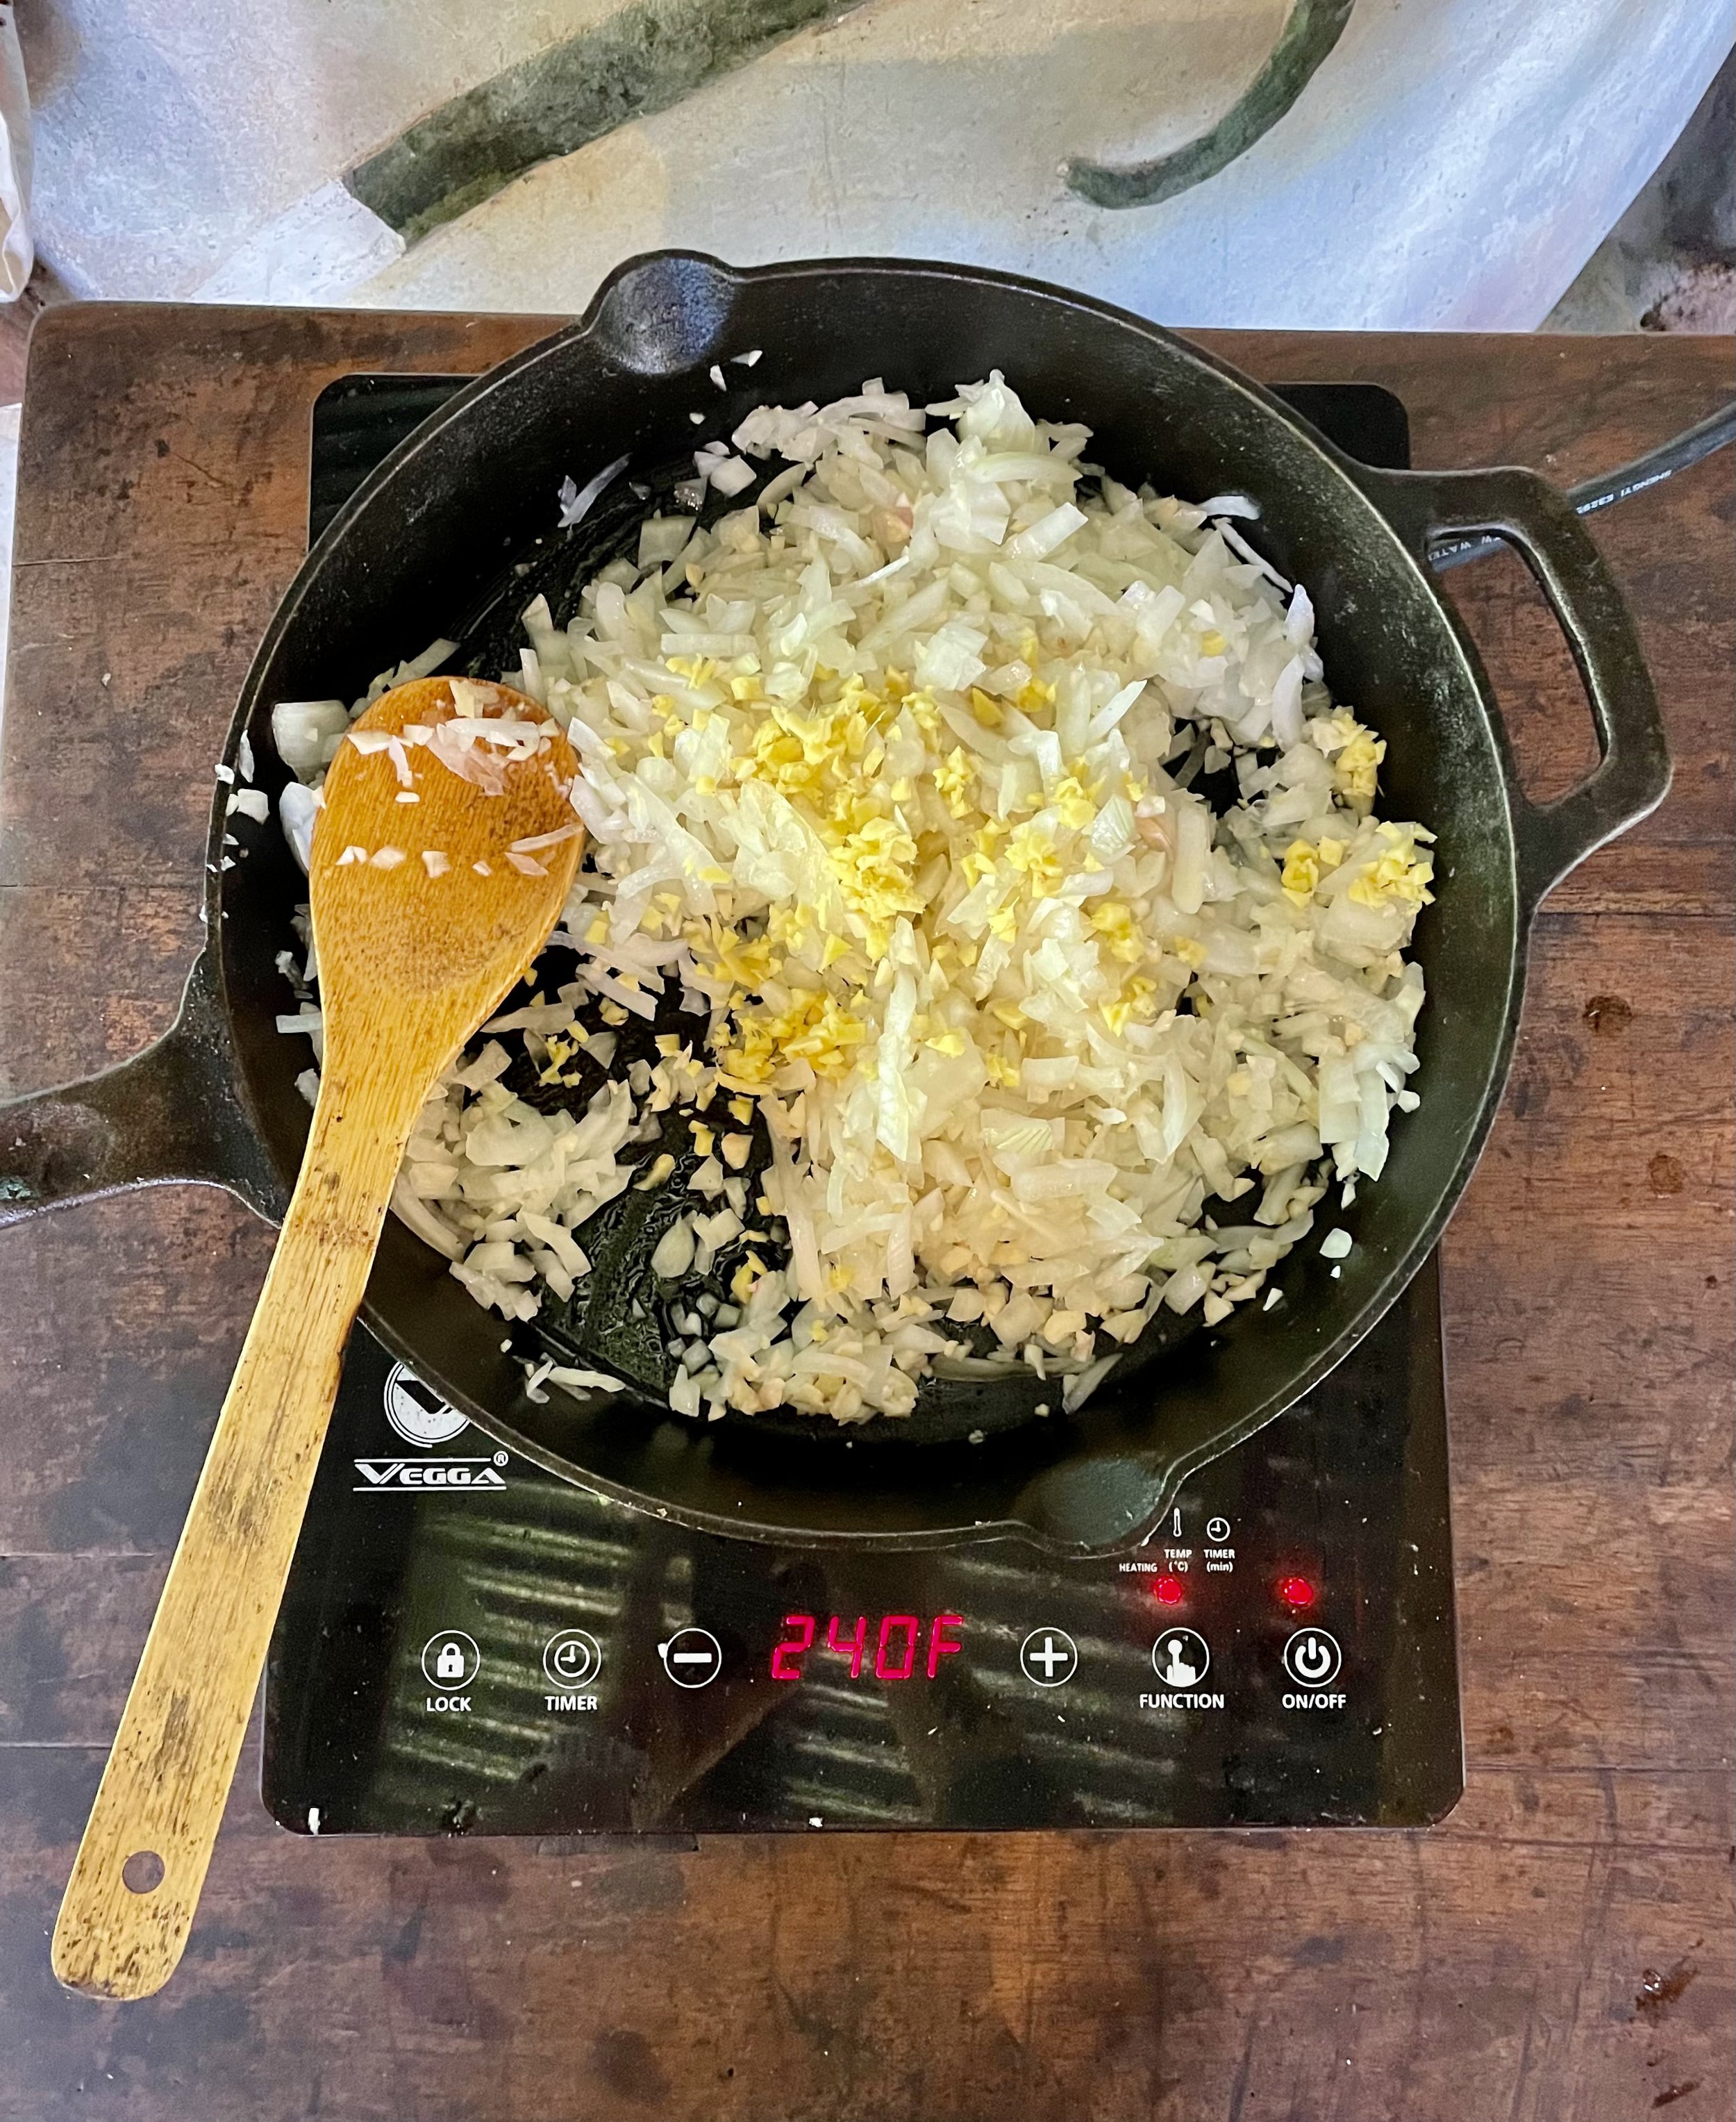
Wash and dice your onion, garlic cloves, and ginger. Add these 3 ingredients to a pan with a little bit of oil and sauté.
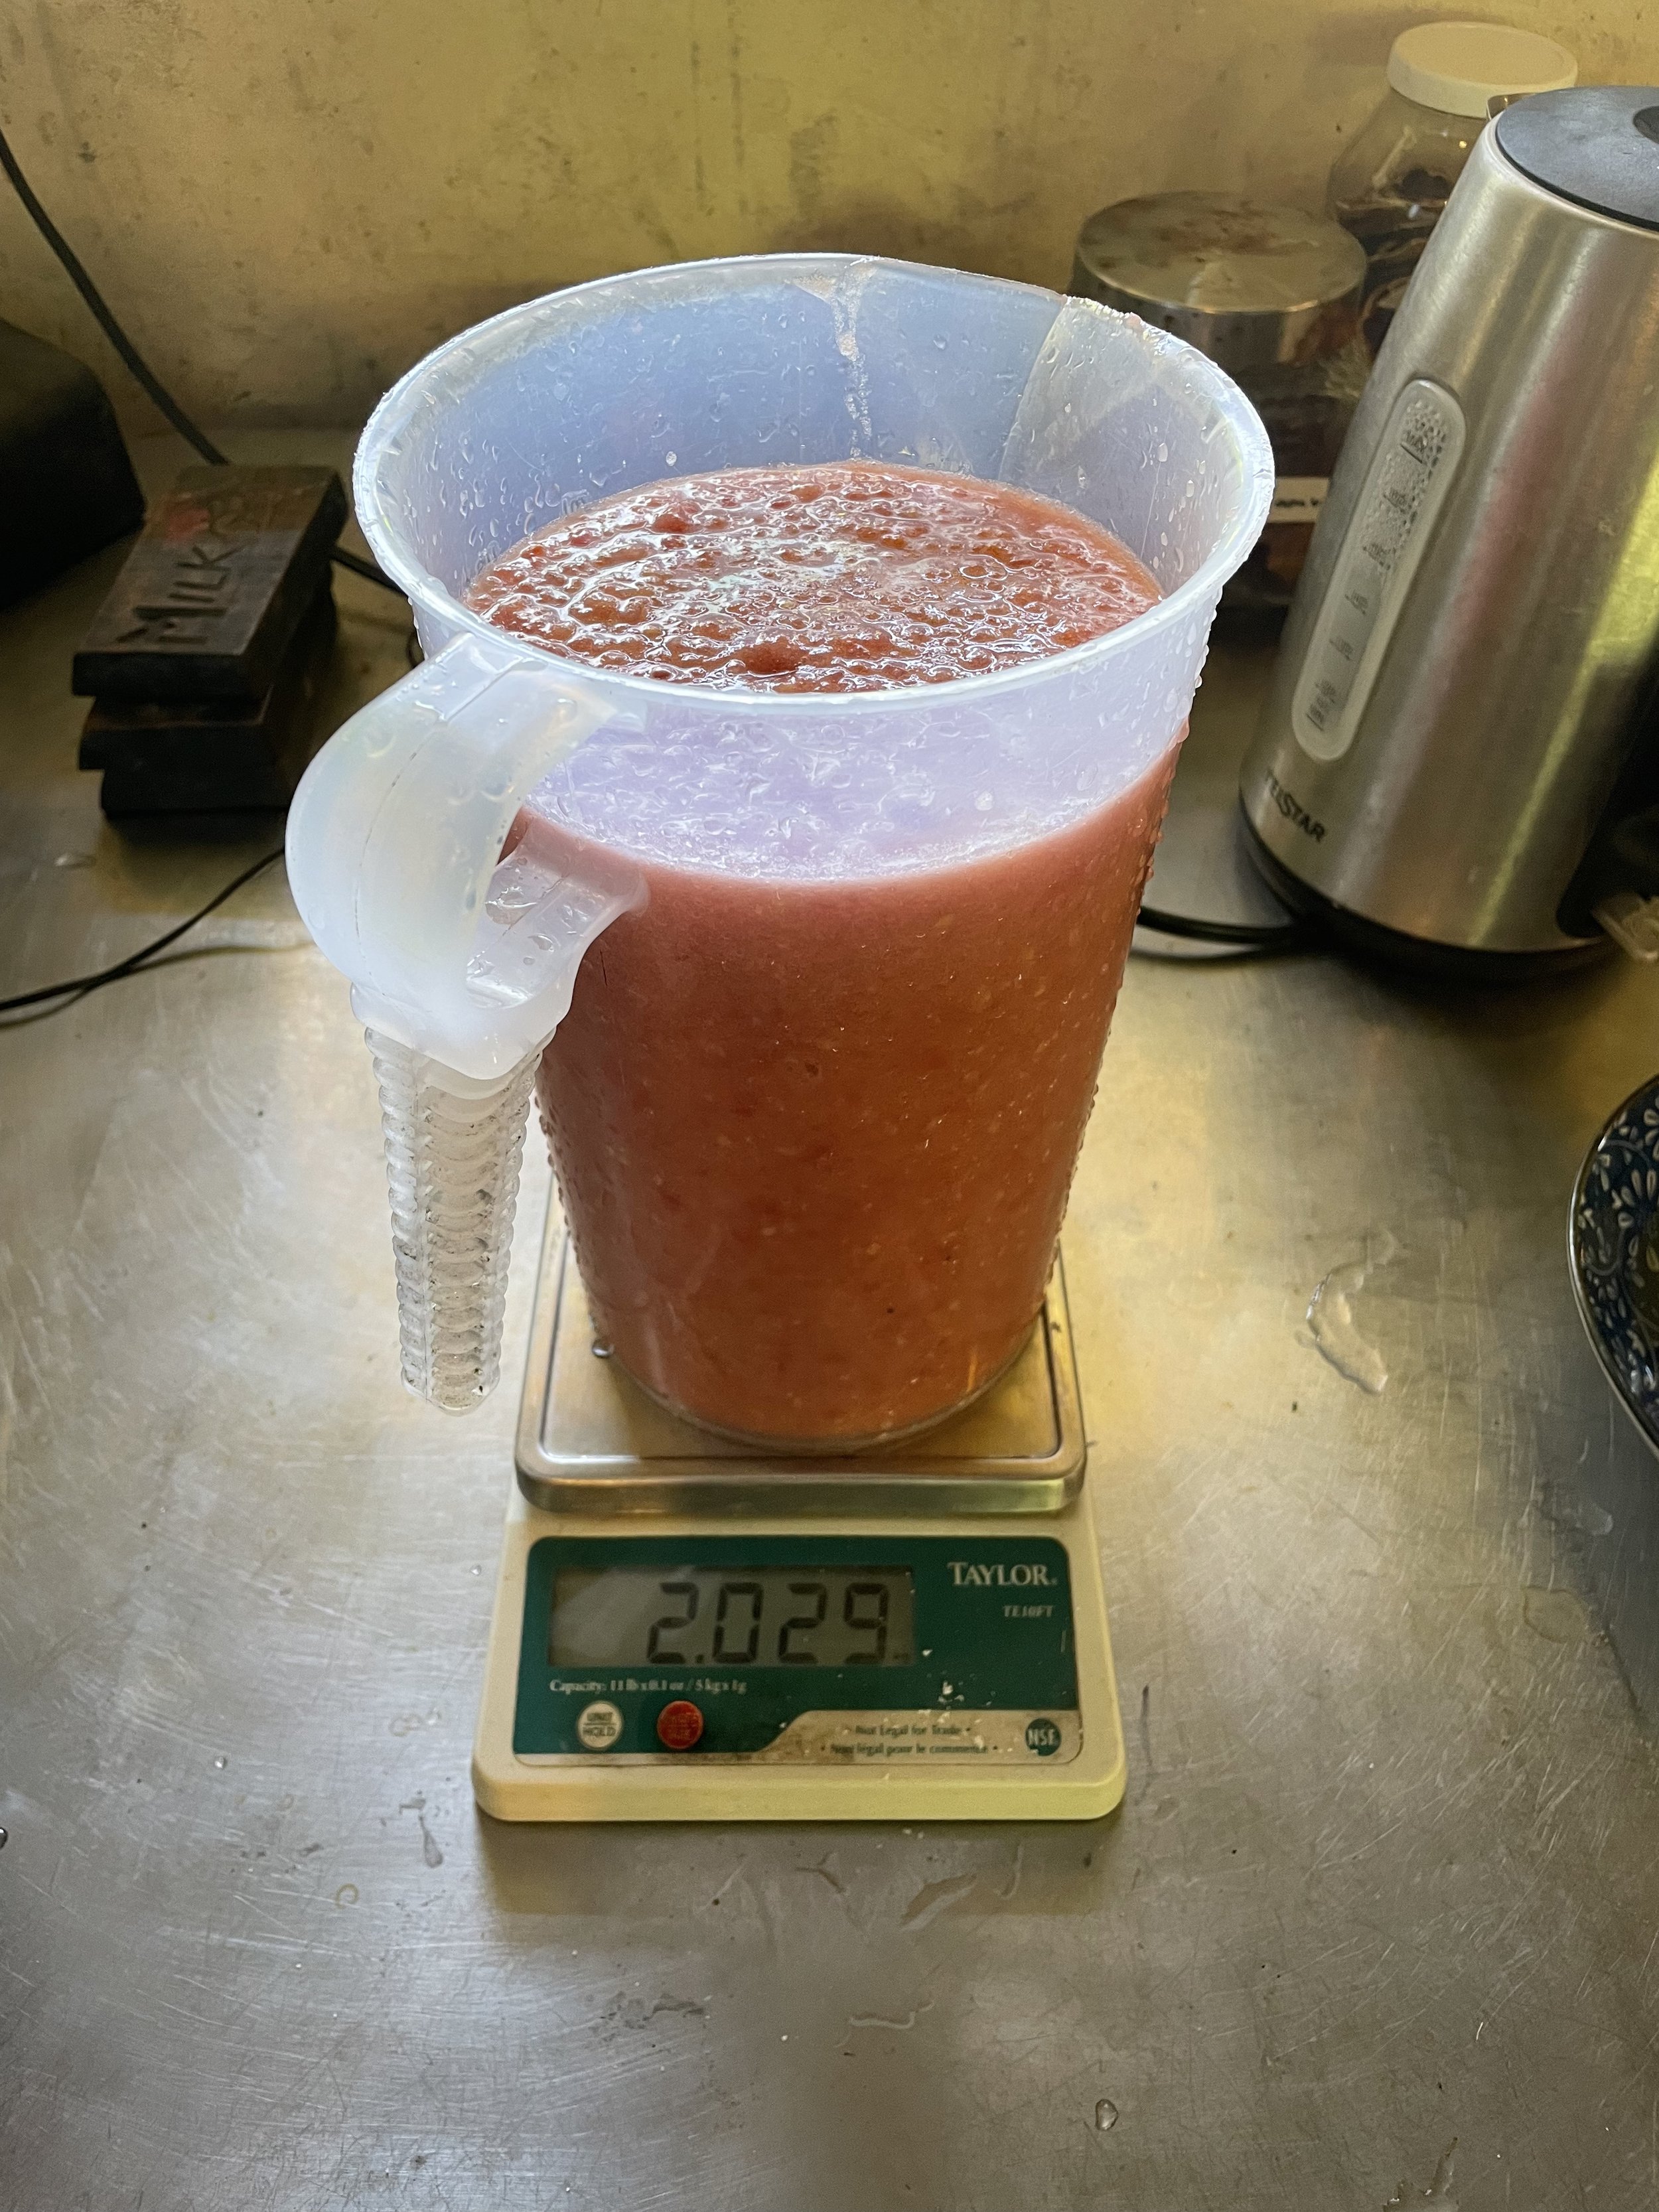
Combine your sautéed mixture and your pureed tomatoes and measure weight. Don’t forget to tare your scale with your glass.
Calculate 3% of weight in grams and add that salt in grams. Don’t lose this number! You will need it again after fermenting to calculate how much sugar to add.
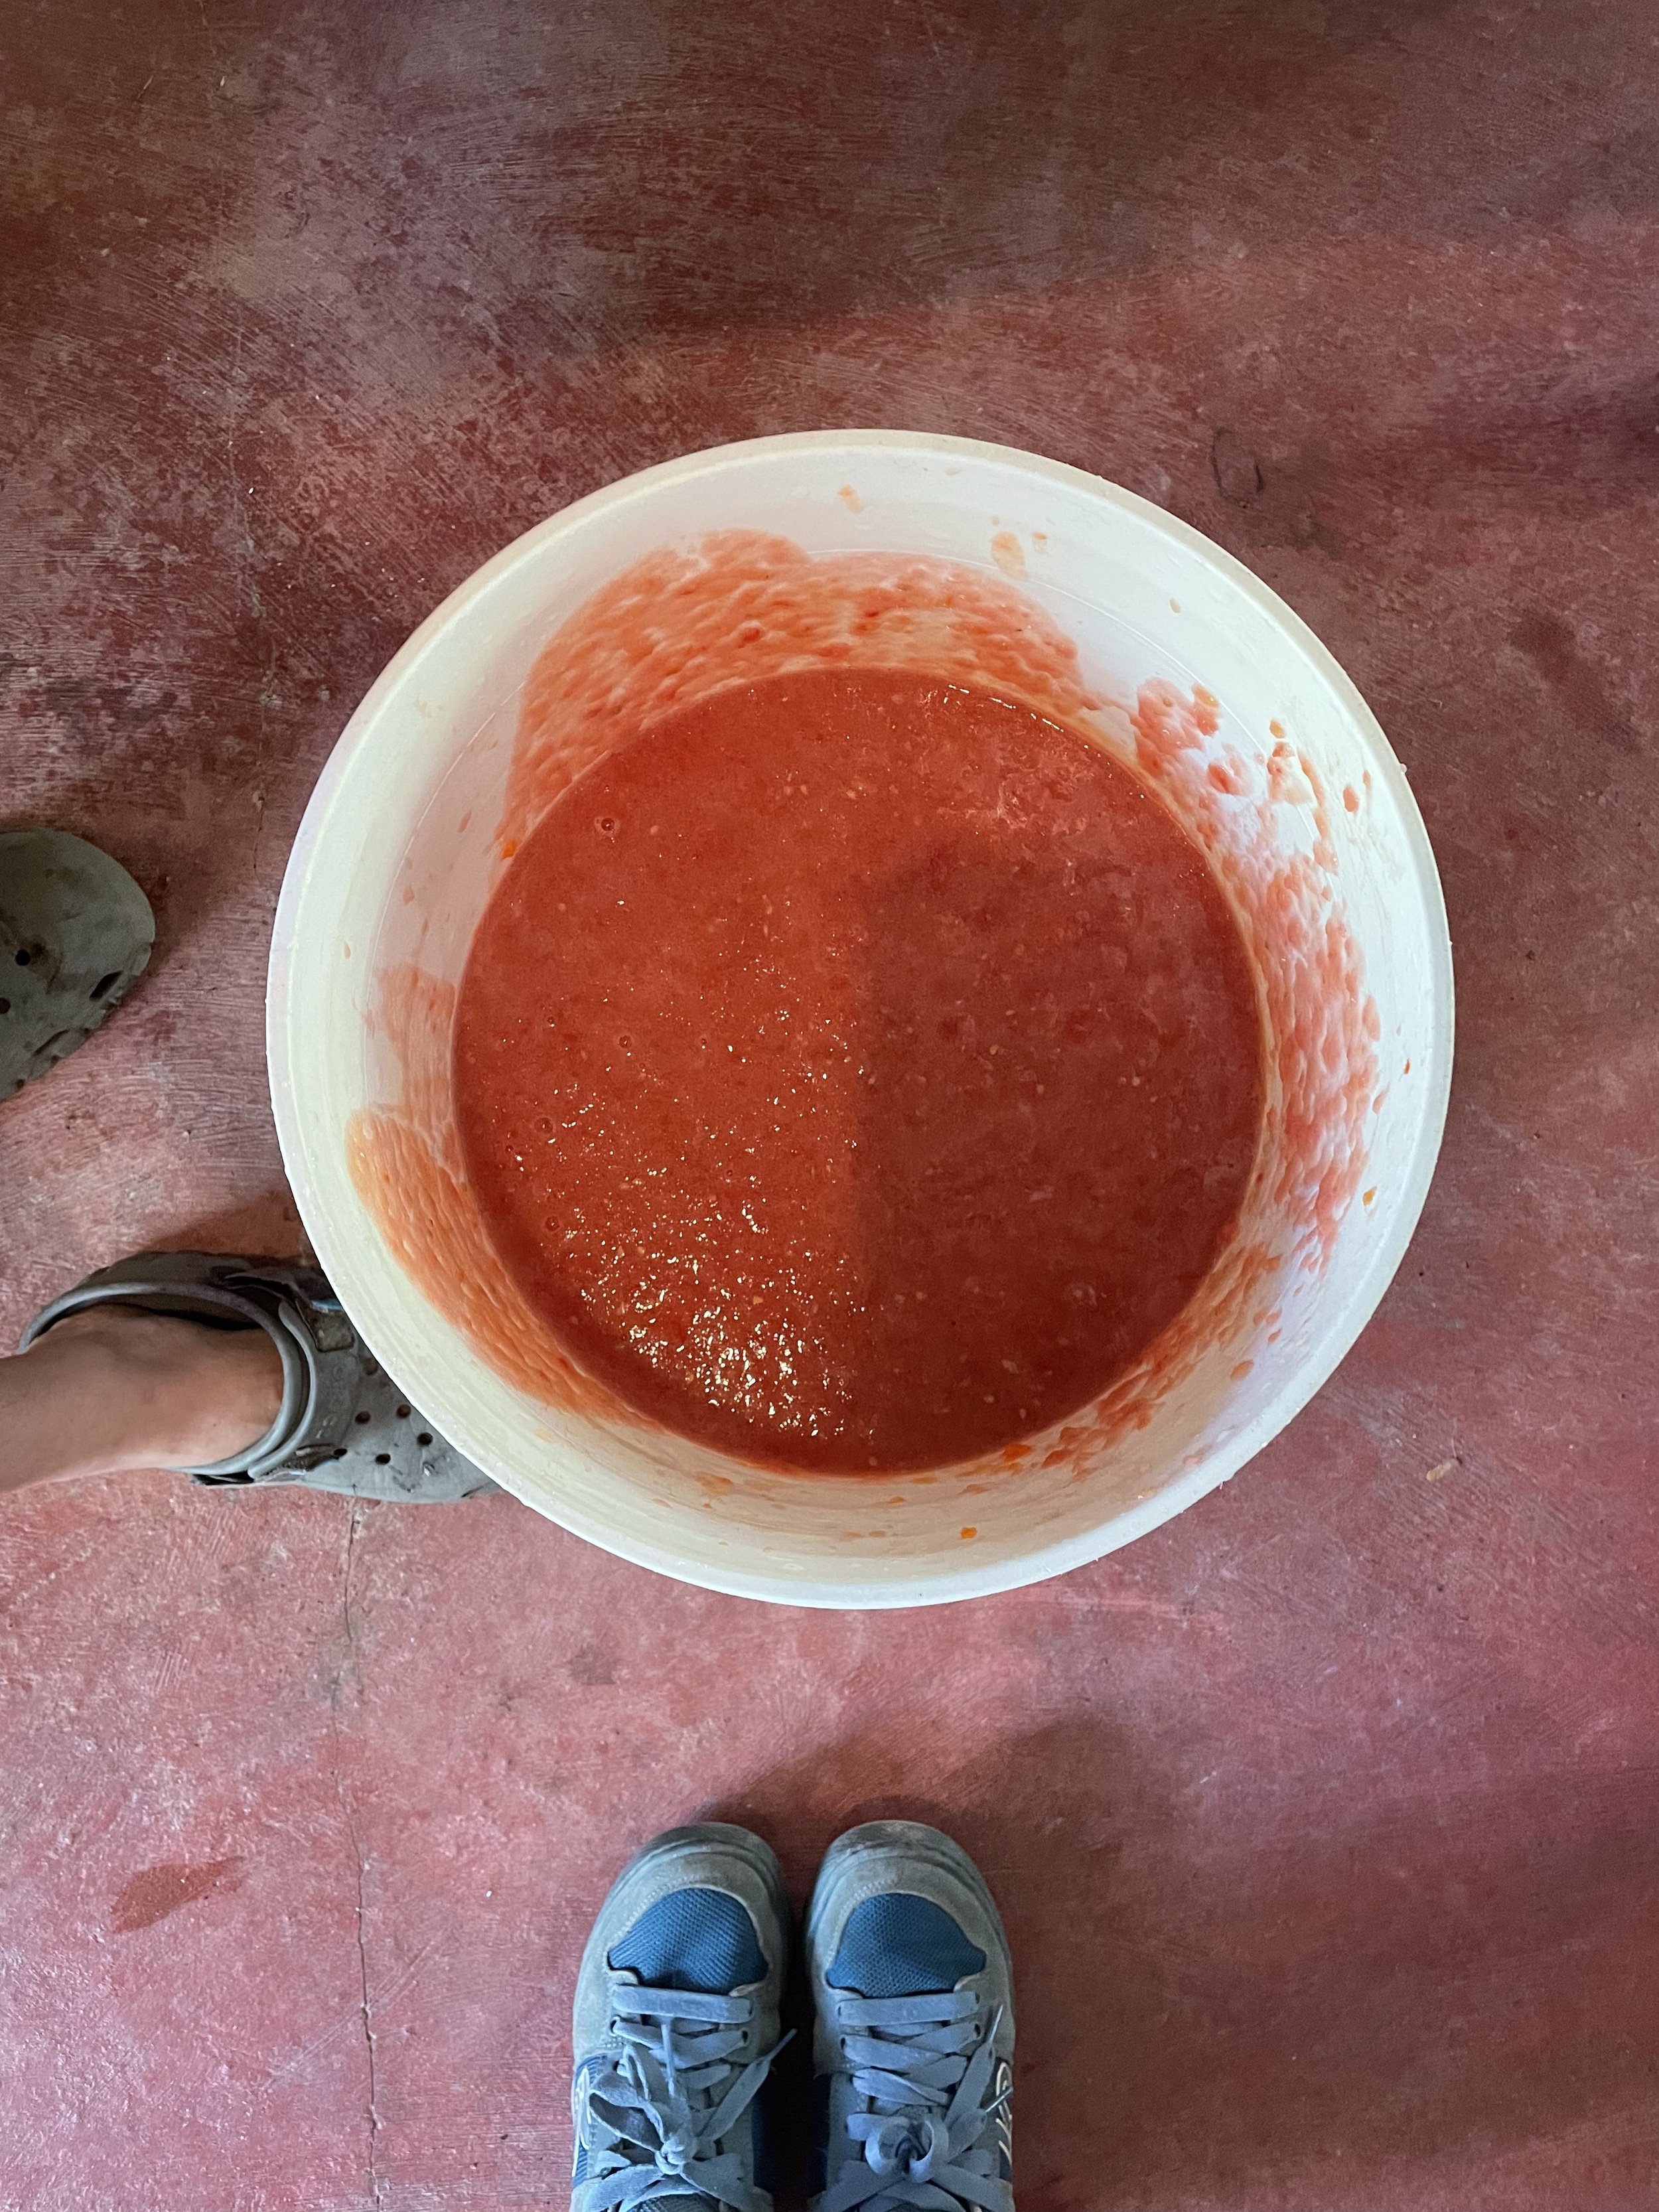
Thoroughly combine the salt into mixture and place into the container that will be used for the fermenting! Make sure the sides of the container are clean after adding mixture.
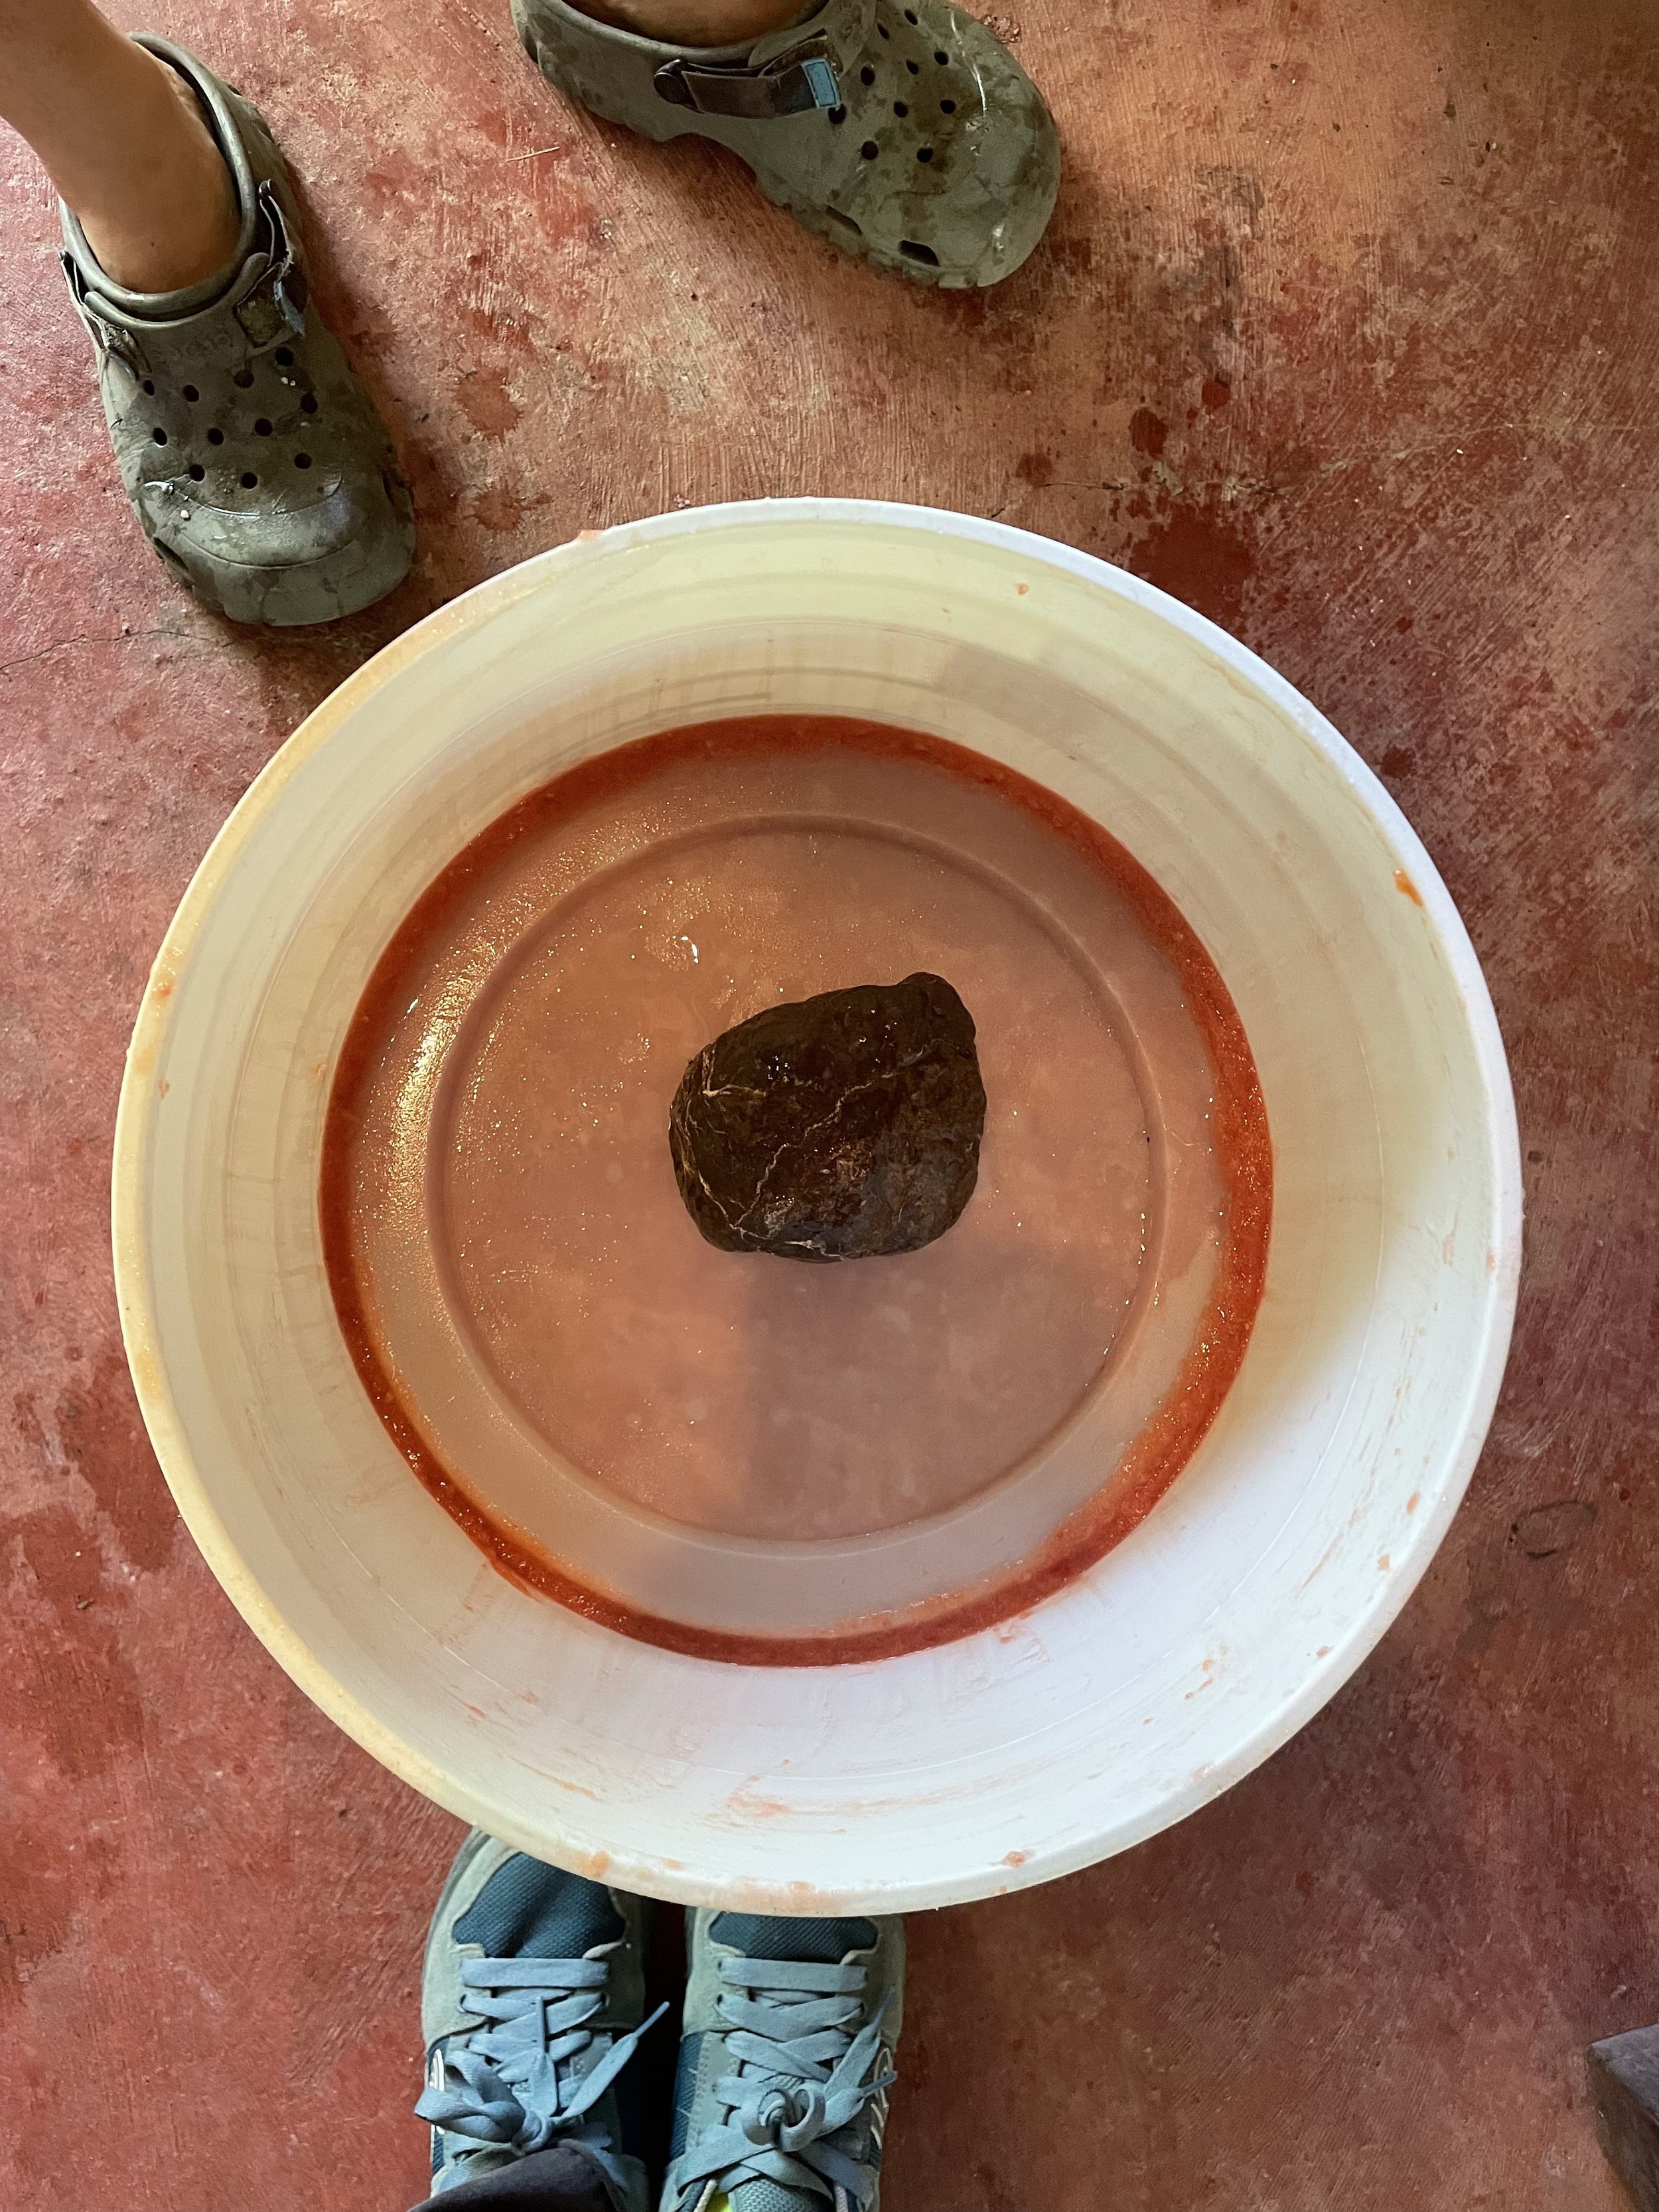
Now is the time to place your follower and weight to keep your new fermented friend submerged! Your follower should fit well into the mouth of your container. Maybe there is a household object that can be disinfected and reused, such as a smaller lid to another container, or a piece of thicker, food safe, plastic you can cut to the desired shape. The weight is extra support for submersion. In our case, we used a disinfected rock. The weight should not cause the follower to sink below the ketchup, but just sit on top and keep everything in place. Worse case scenario, remember this tune, “submerge in brine and all will be fine.”
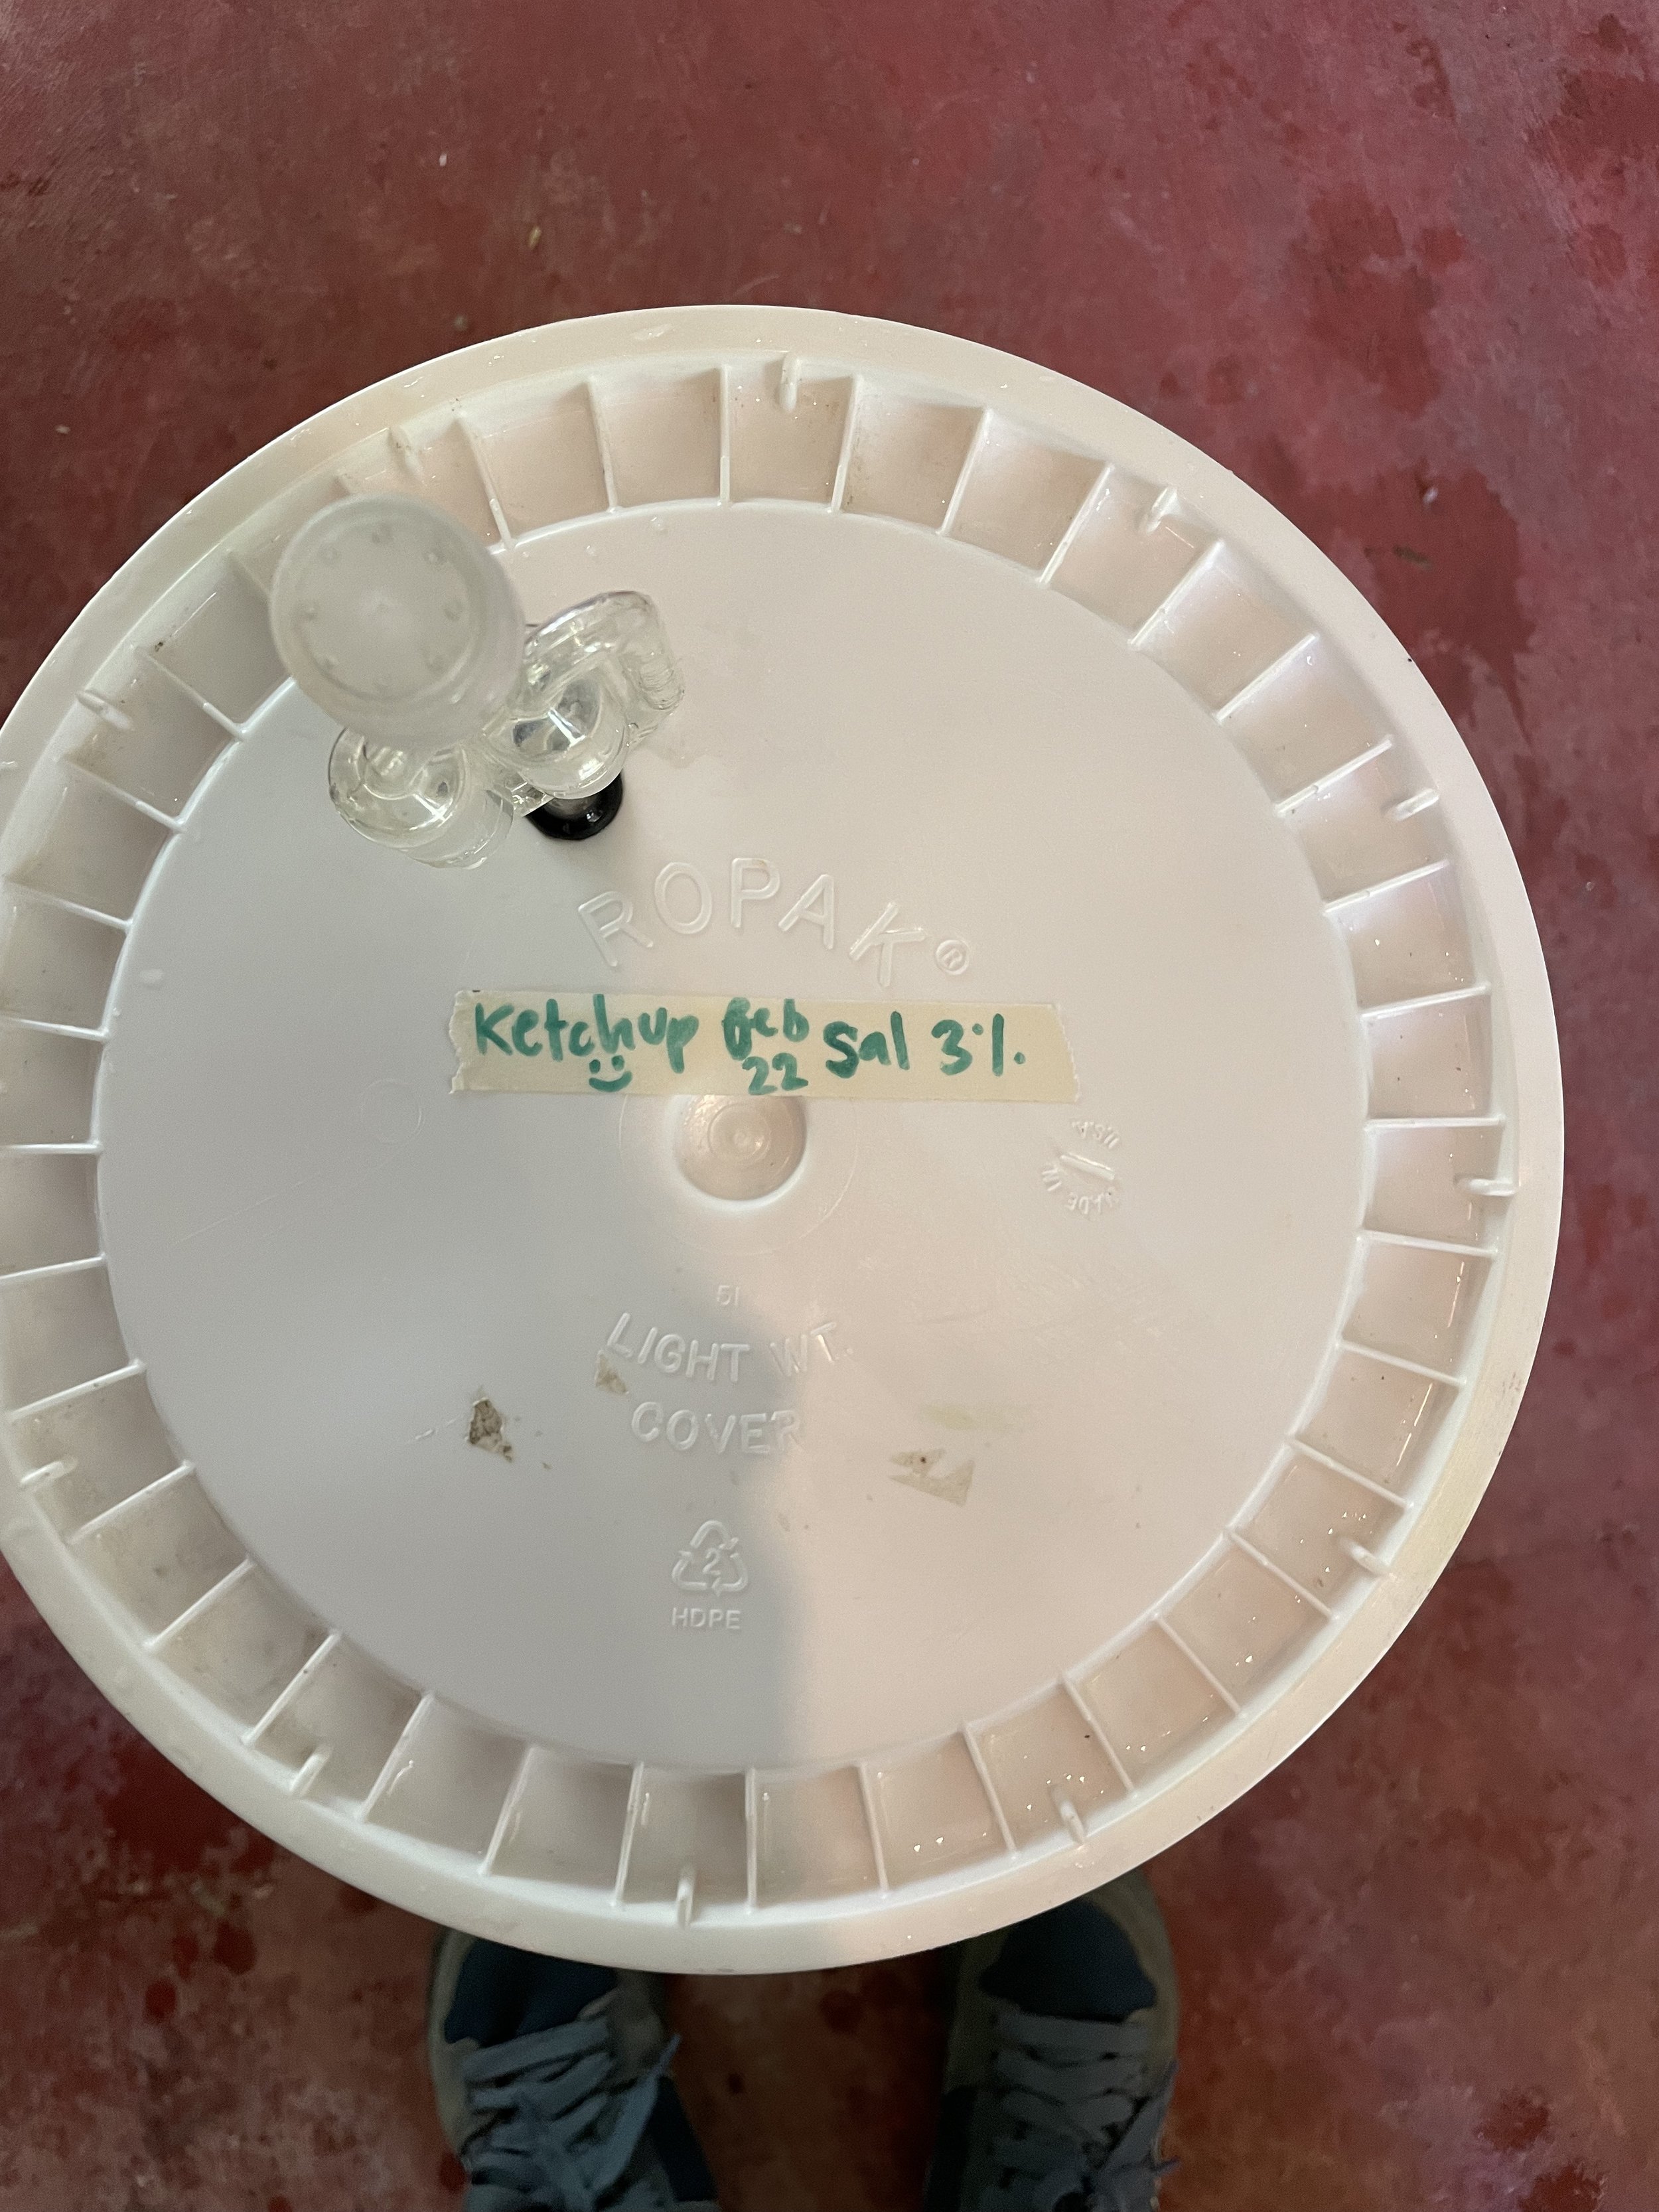
Close your container and allow to sit in a cool, dry place for about a week, or until desired sourness is acquired. It is possible that kham yeast will grow. Kham yeast is a completely safe, white layer that can sometimes form, even with an airtight lid. You can leave the yeast where it is until the fermentation process is done. When you're ready to finish the recipe, the yeast can either be left in the mixture, or removed.
After about a week, pour your yummy, fermented ketchup into a pot and begin to boil. Stir pretty consistently.
Once in the pot, add your 10% sugar. Maybe a little more or a little less if you prefer more sweet or a more sour ketchup. For our ketchup we used tapa dulce, which is a natural cane sugar, but any sweetener of your choice will do. Support local… and continue to stir!
If the sweetener did not thicken the ketchup enough, adding cornstarch will help. Add your cornstarch to a little bit of cold water and mix together BEFORE adding to your boiling ketchup. Adding the cornstarch straight to a boiling substance will not produce the same result. Keep stirring!
Time to get creative! Add spices of your choice whether that be smoked paprika, pepper, chili powder, and so many more options depending on your palate.
Once you’re done adding seasonings, remove from heat and place your pot in a Bano Maria. This is an ice bath. We do this to cool the temperature of the sauce before we place in into the fridge. Try to stir the ketchup during this process to simultaneously cool the middle and outside.
Final step: Choose your vessel! You can reuse an old ketchup bottle for the squeeze effect, or get fancy by reusing some old glass containers. The cupboard is your oyster.
Place in fridge! This ketchup should last 3-6 months depending on how often the container is opened or left out for dinner purposes. Enjoy!
Check Out These Other Blog Recipes
Make Black Garlic in Your Compost
Homemade Hoisin Sauce and Other Recipes with Fermented Black Bean Paste

Fruity Ferments- How to Make Fruit Scrap Vinegar
You can make fruit vinegars from all kinds of different local, seasonal fruits. Using the scraps from the fruits (i.e. the peel and extra bits) is a way to value the marginal (permaculture principle) and turn a “waste” product into something of purpose.
By Hannah Knudson, apprentice 2021
You can make fruit vinegars from all kinds of different local, seasonal fruits. Using the scraps from the fruits (i.e. the peel and extra bits) is a way to value the marginal (permaculture principle) and turn a “waste” product into something of purpose. Here at the Ranch we often make fruit vinegar from bananas (recipe here) and pineapples. But have also done so with a variety of tropical fruits including: patanga, araza and mangosteen. In this article I will explain the process for pineapple vinegar, but this can easily be adapted to meet your local ingredients.
Pineapple Facts

Farm fresh pineapples
Costa Rica is well known for its wide variety of tropical fruits. One of the most loved of these is the pineapple. Many of us around the world are familiar with this tropical treat. The pineapple is one of Costa Rica’s largest exports, trailing close behind coffee and bananas.
Each pineapple plant only produces one fruit and ranges between nine to fourteen months on average for the fruit to be harvested. Here at the Ranch the cultivation of pineapples is an ongoing process. Due to the amount of people we share our space with, we balance between purchasing pineapples locally as well as harvesting what is grown on site.
There are many permaculture values that we try to put into practice in our daily lives here. One being we want to produce as little waste as possible. Even though we have an active composting system, we always try to stack functions - considering if something that normally has one purpose can also find life in other ways. So you can imagine our excitement when a pineapple is finally ready! This magical fruit has been growing for over a year, free of chemical inputs, which is key for this specific recipe. We only use pineapple peels that come from the fruit we grow here on the Ranch because we can ensure they haven’t been sprayed with any pesticides which allows us to give a second life to the peels.
We love our food at the Ranch and do a fair amount of experimentation on a weekly basis, finding new ways to enjoy different aspects of our diet. One way we do this is through fermentation. Each Wednesday we spend our entire day working on creating Kimchi, vinegars, alcohols, chili jams and many other jungle treats. Our pineapple vinegar is a tasty way to connect our love for food and our desire to use our gifts from the earth to their fullest potential.
Fermentation
Experimentations and fermentation go hand in hand in our kitchen here. As apprentices, one of the first things we learn about in our food work parties is the art of fermentation. The beauty of fermented treats is that the possibilities are endless, allowing us to turn our harvests into new recipes.
The word vinegar comes from the French word vinaigre, which translates into “sour wine”. Following the permaculture principle, “produce no waste”, vinegars are also a great way to save some of our alcohol experiments gone awry.
Vinegars are created through alcohol or sugars turning into acetic acid bacteria (AAB). These tiny bacteria are found on almost any surface making them incredibly easy to access. Pineapples are readily available to us so making vinegar from the peel is a quick and easy way to use the whole fruit. We adapted this recipe from one of our favorite books, Wild Fermentation by Sandor Katz. If pineapples aren’t readily available where you are, we hope that this recipe can give you some new ideas on how to preserve some of your own local fruits.

Our homemade fruit vinegars
Recipe
Ingredients:
1/2 cup sugar (we use locally sourced sugar known as tapa dulce, you can use a local sugar source too)
Peel of 1 pineapple (or an equivalent amount of your local fruit)
1 quart water
Instructions:
Mix the sugar and water in an open mouth glass jar.
Submerge the pineapple peels. Ensure all pieces of the peel are completely submerged in your sugar water mix. You can stab the pieces of pineapple peel through a chopstick or secure and wedge them into the jar so all of the peels stay beneath the surface of the water. Add more water and sugar to cover if necessary.
Cover the glass jar with a piece of cloth that is tightly secured (if it is too loose, flies will lay eggs inside which turn into maggots - and for some reason everybody hates maggots). We use a piece of string to tie the cloth around the container.
Stir the sugar water mixture at least once a day. This is in order to prevent mold from growing and to break the surface that is created to allow aeration to occur which is needed for the fermentation process.
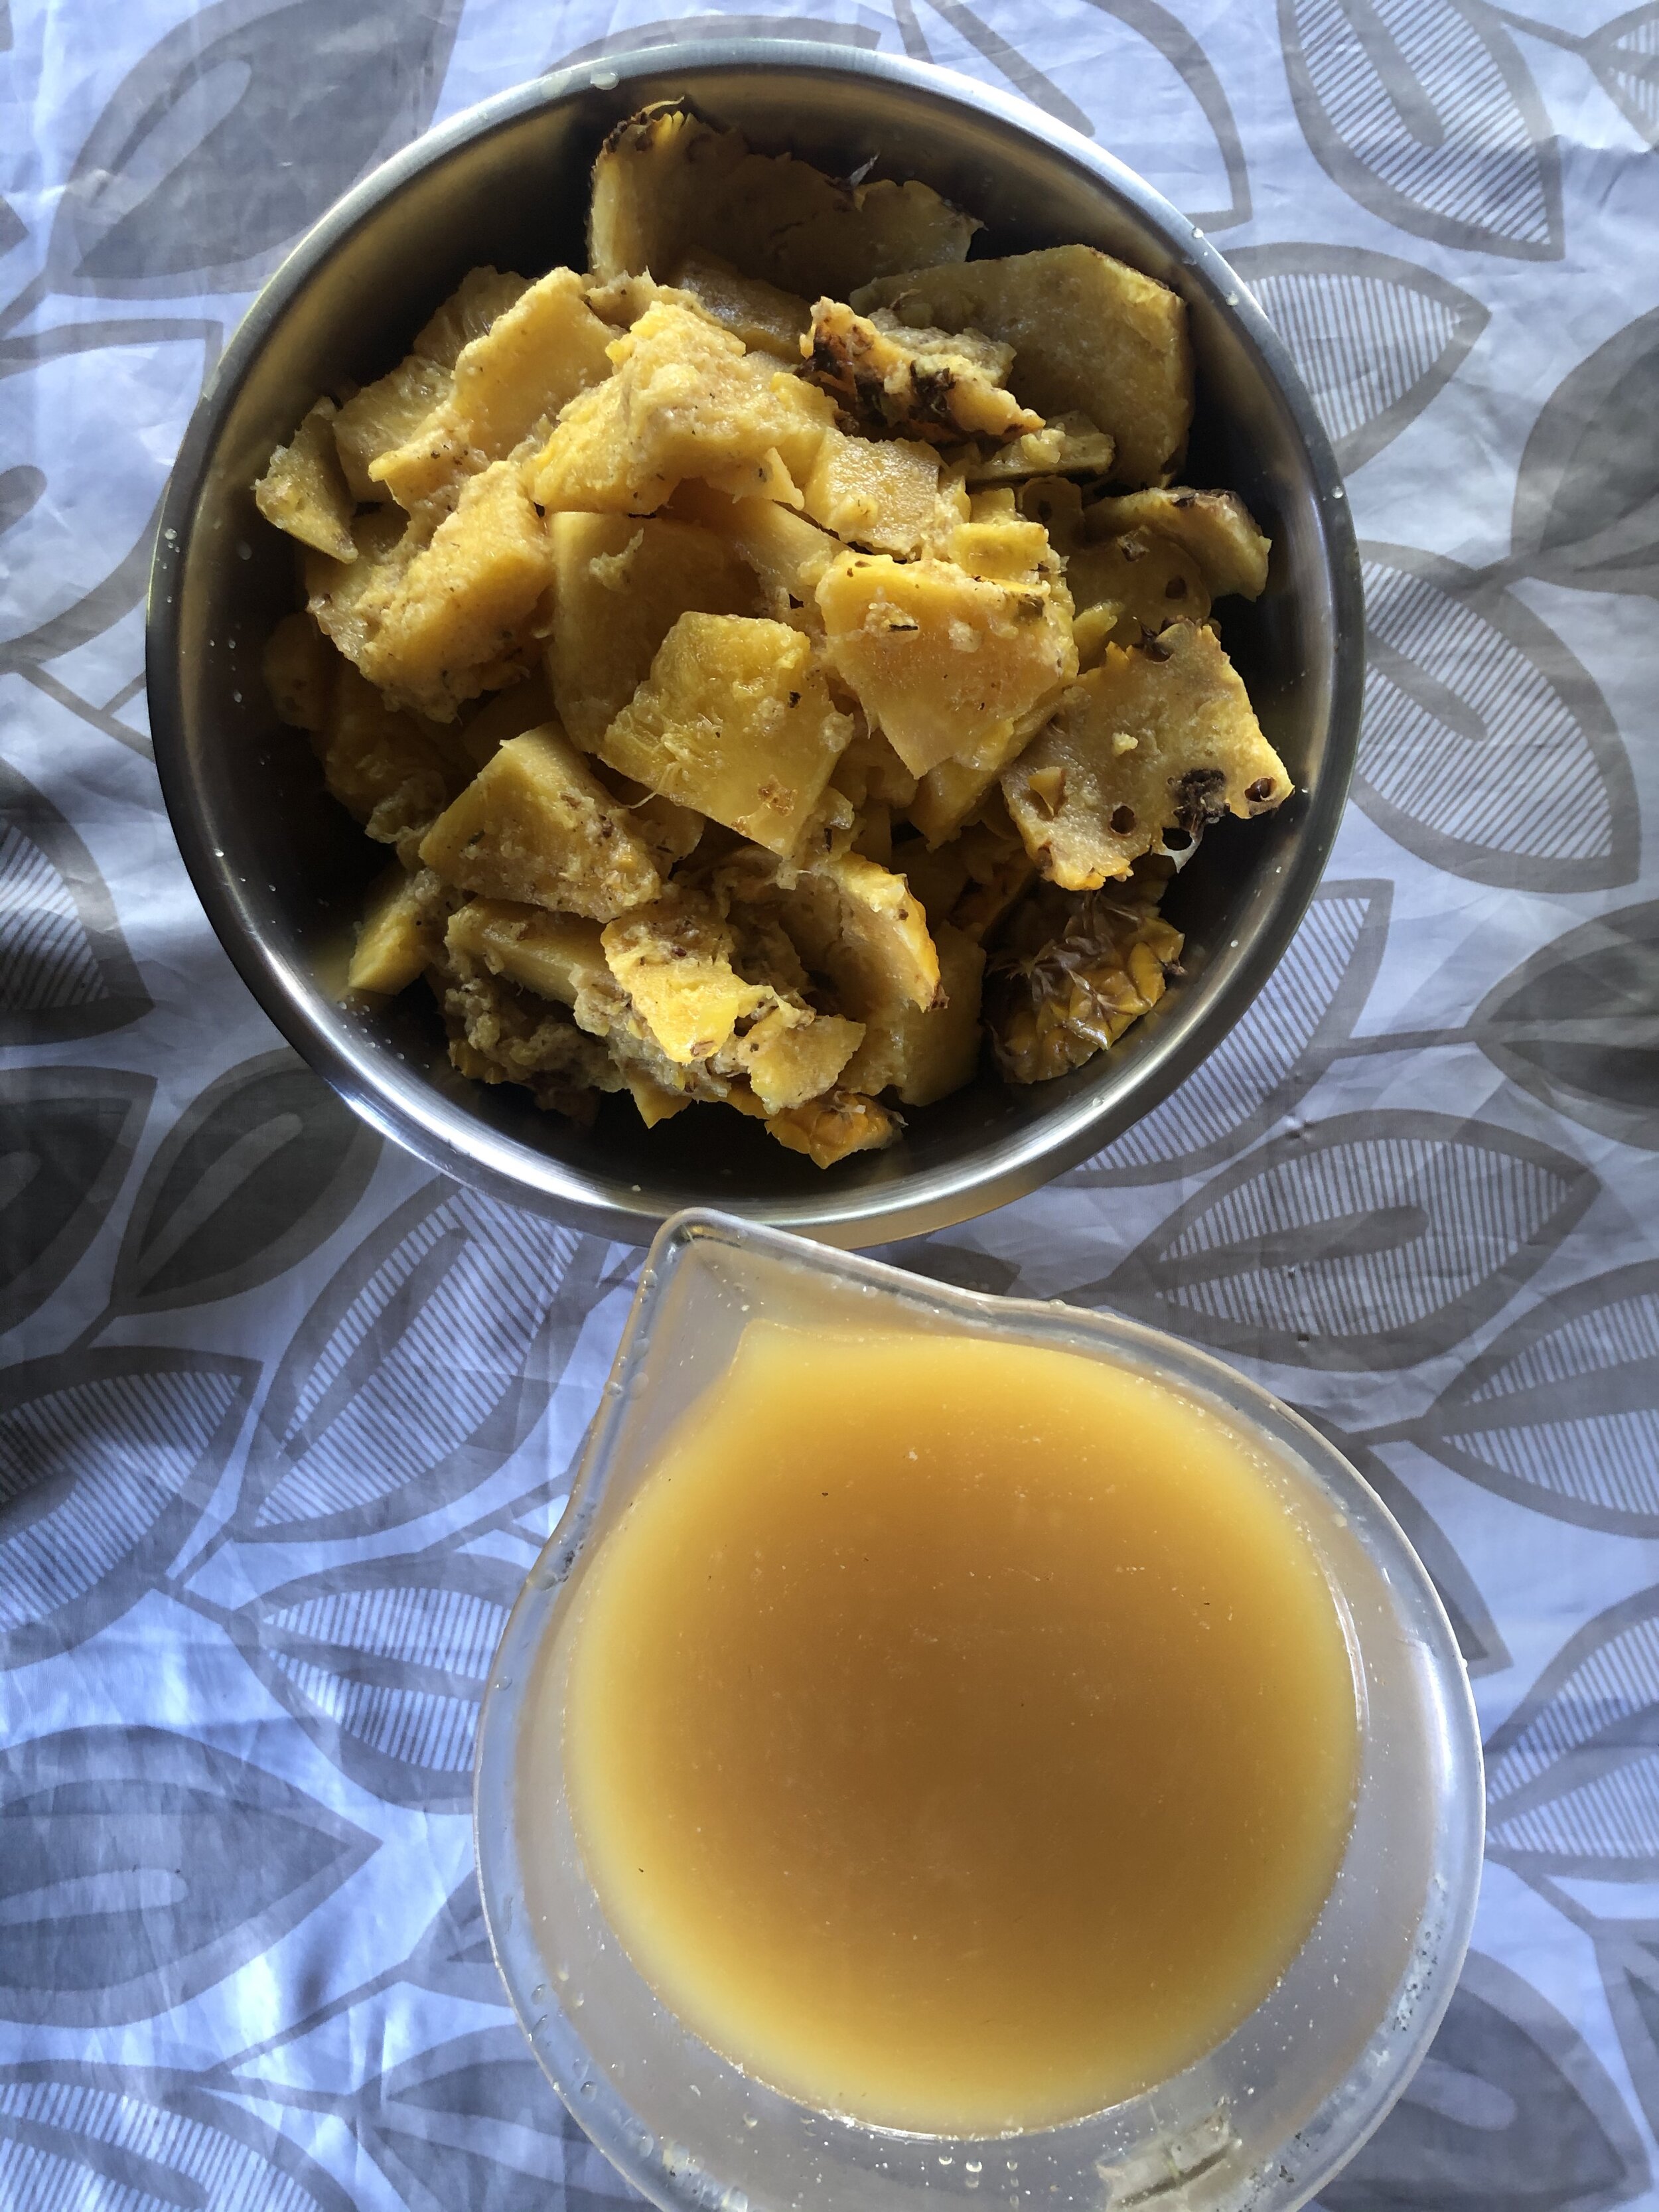
When the liquid darkens after about a week, strain out the pineapple peels and compost them.
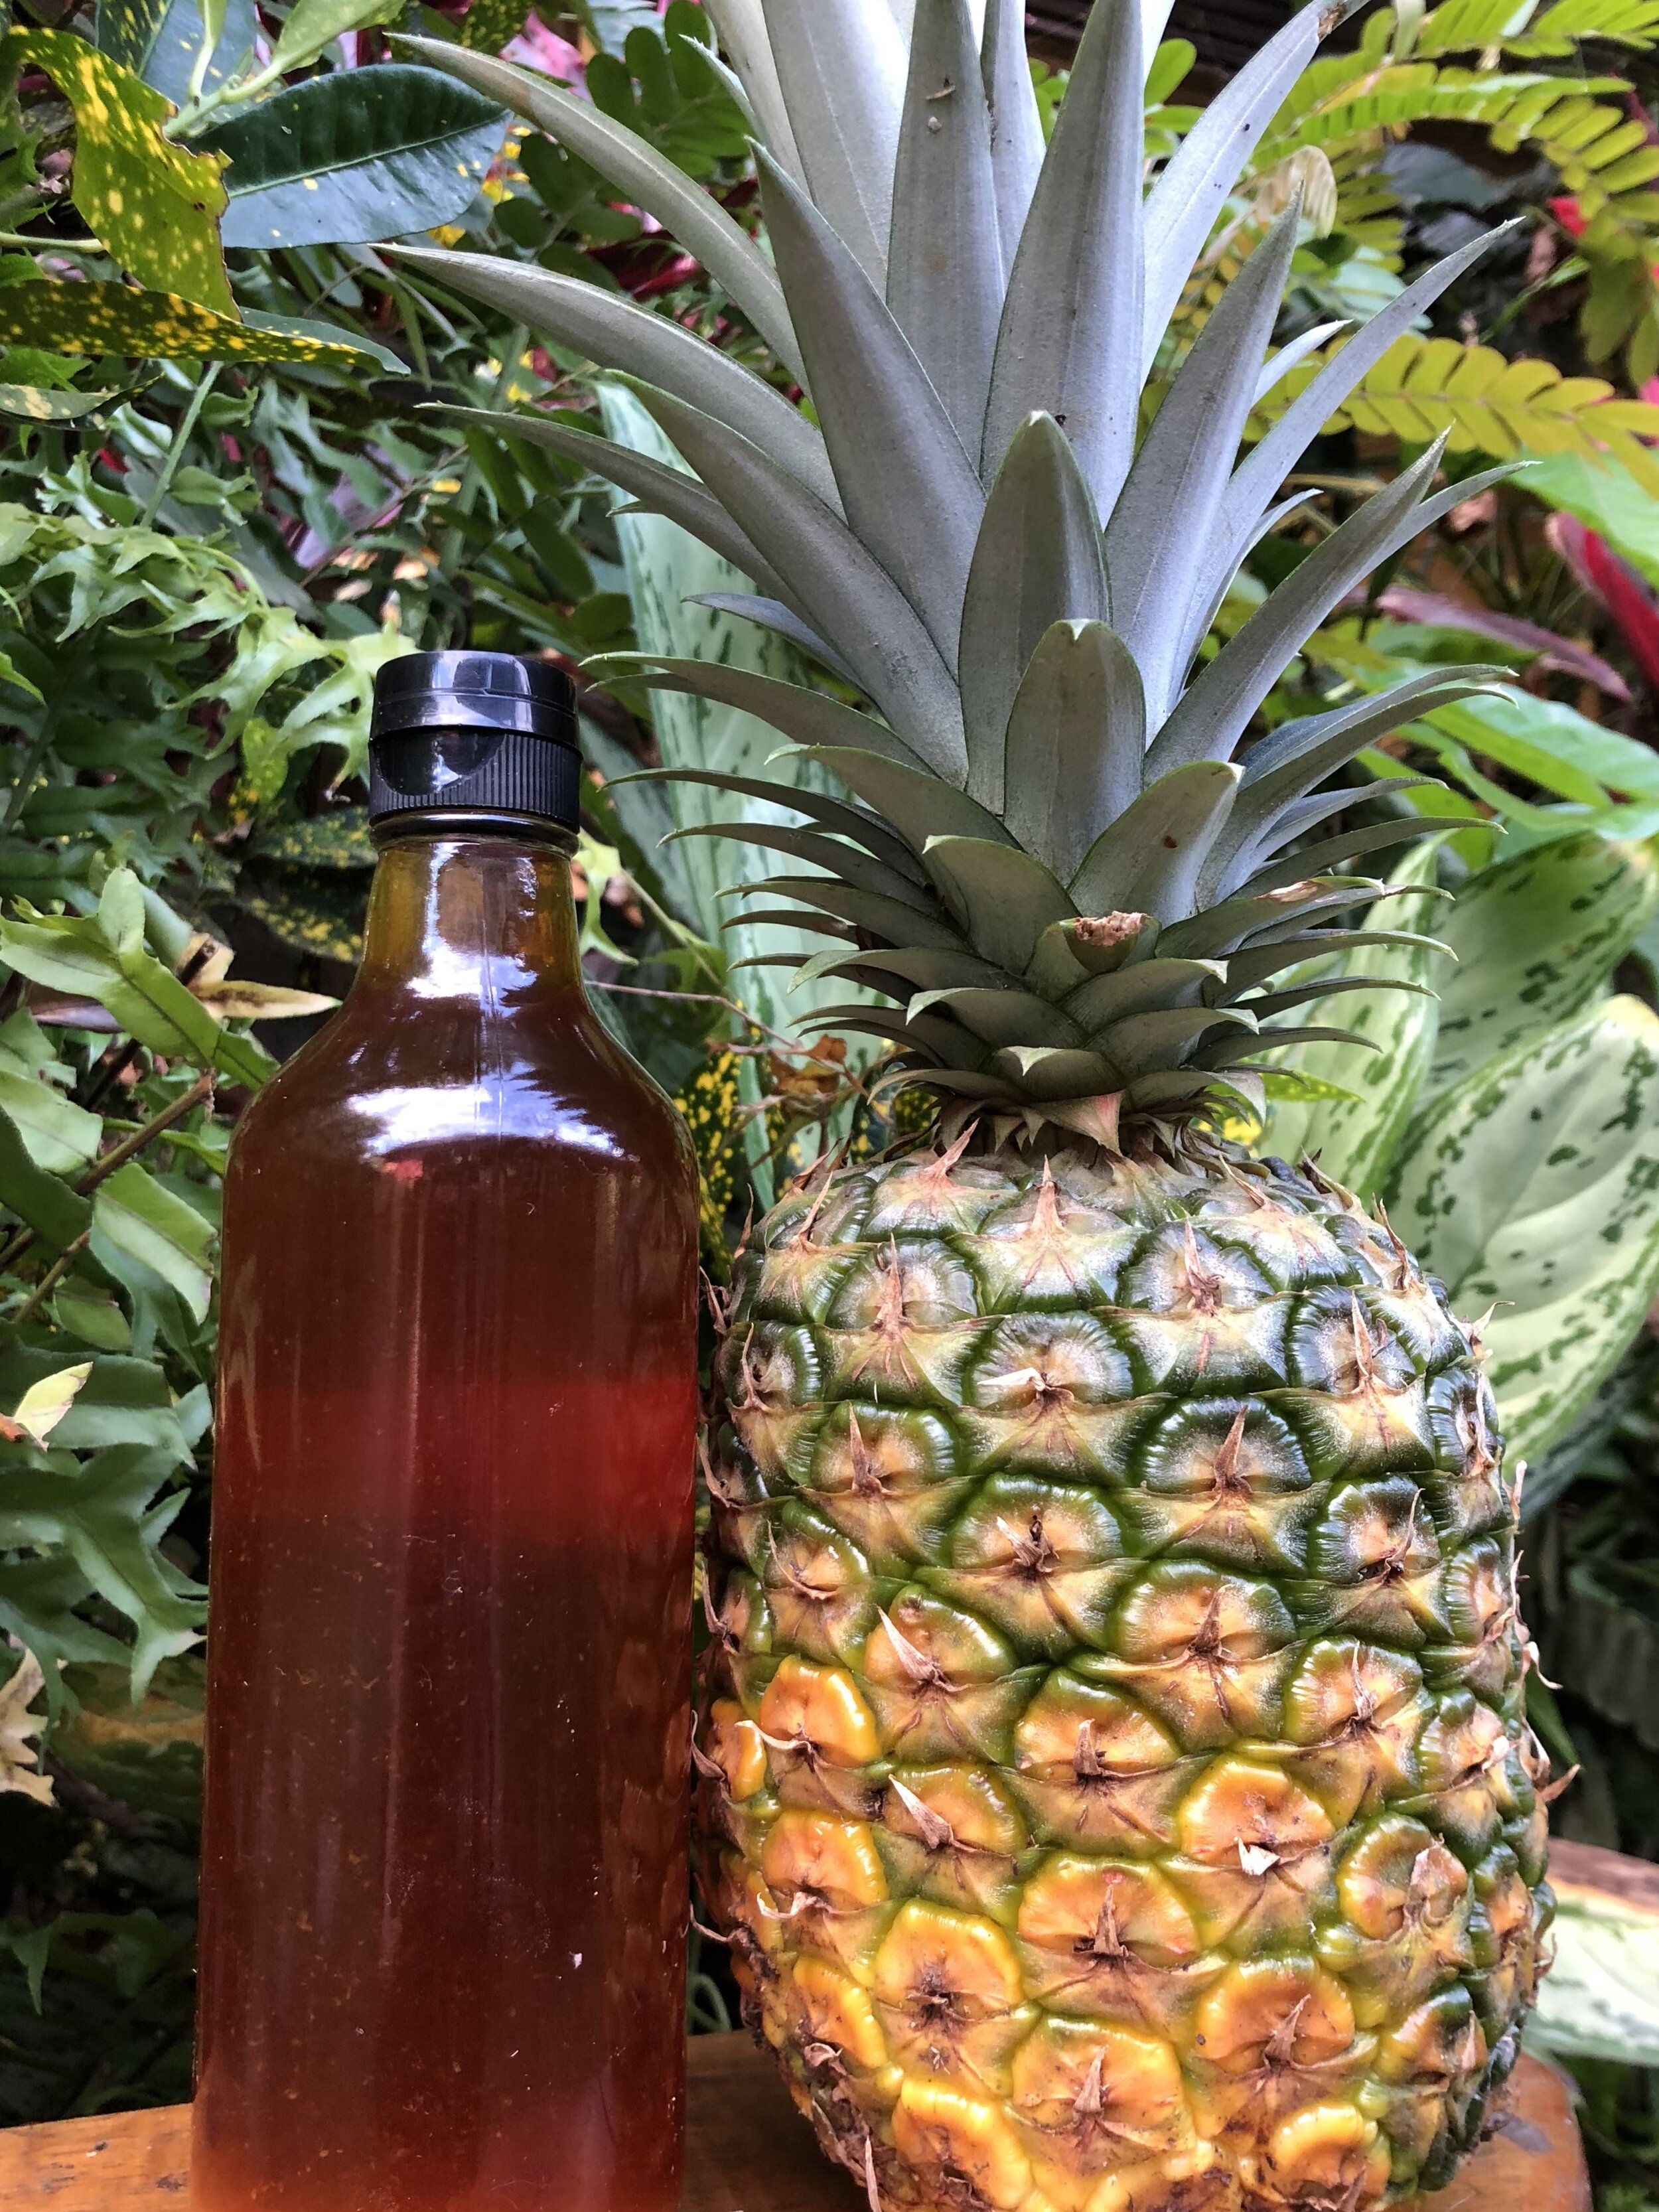
Ferment the liquid 2-3 weeks more. A gelatinous “mother” may grow on top, which is great. When your vinegar is acidic, strain it into a bottle and cap. The mother can be composted or added to a new vinegar at step number five.
At this stage, you can start to use your vinegar or continue to let it age. We usually let our vinegars age around 6 months.
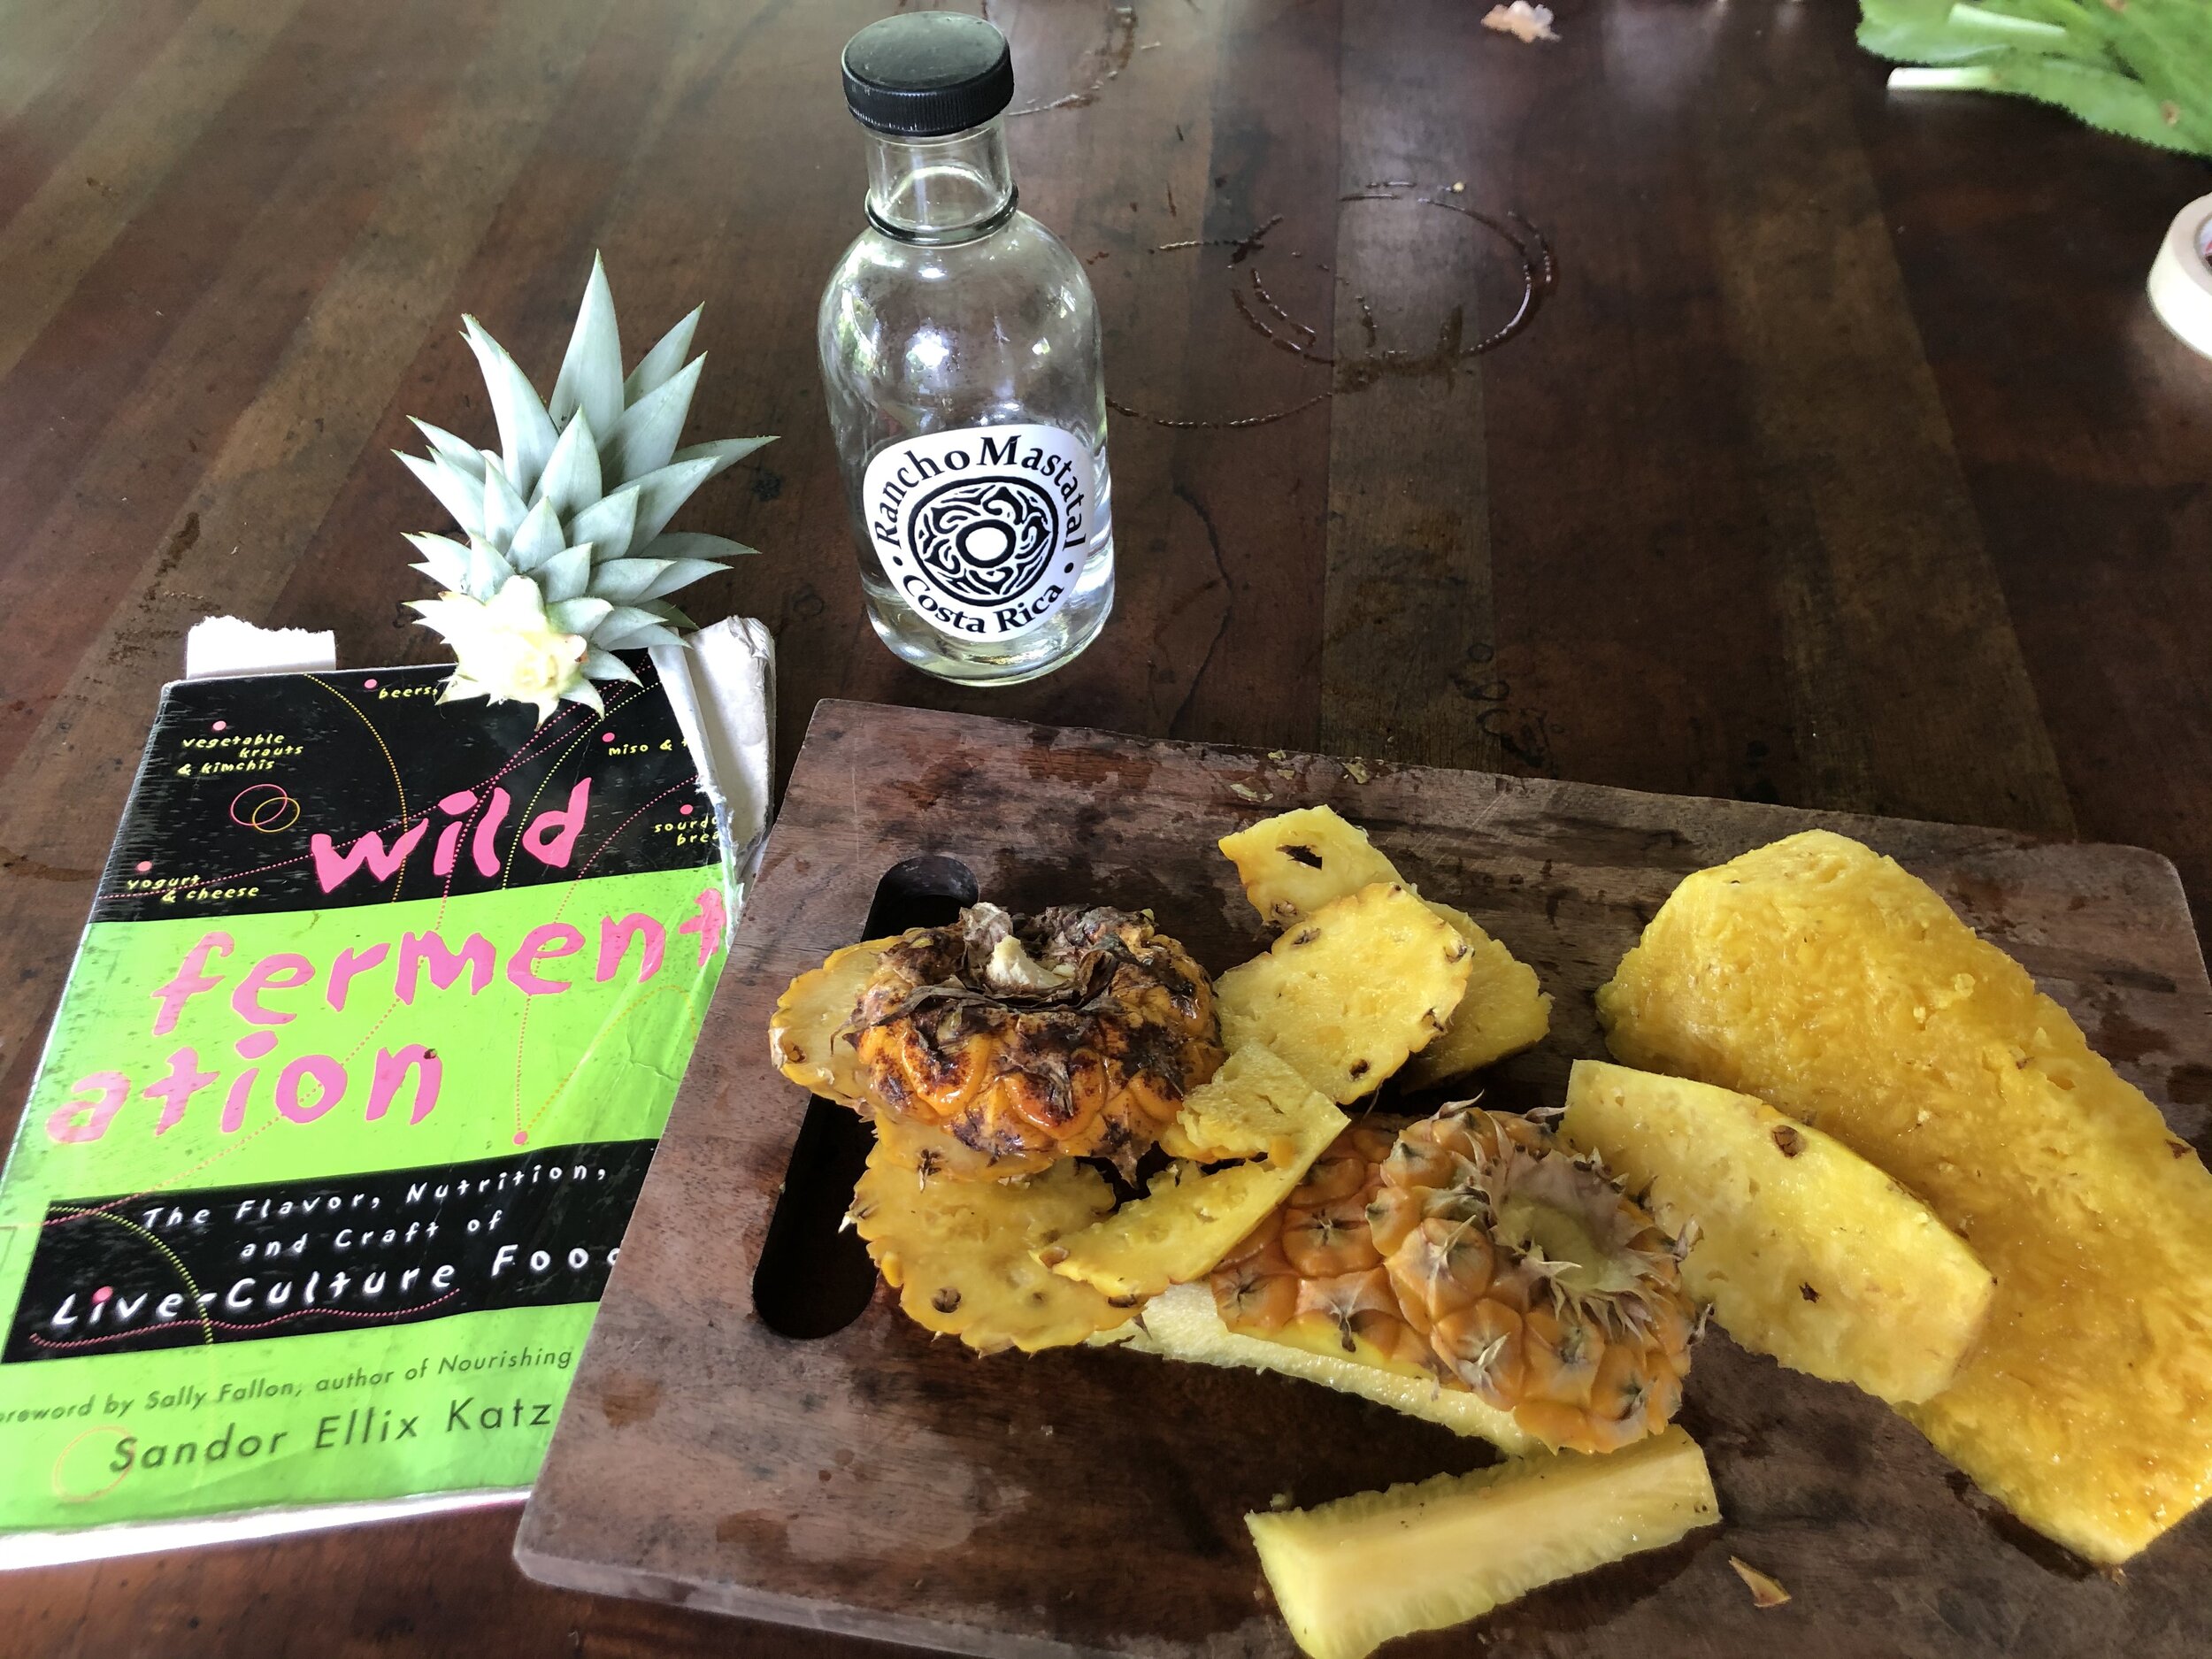
This recipe is adapted from Wild Fermentation by Sandor Katz.
The pineapples we are now harvesting were planted by previous apprentices and our current cooking vinegars were created by them as well. Many times the work we start here is created to be enjoyed by future Ranch dwellers. If this past pandemic year 2020 has shown me anything, it would be the reinforcement of the dangers of full reliance on our large industrial food system. Many of us have the desire to become more self sufficient in producing and conserving our own food. We know that access to healthy, fresh food is a privilege. We are lucky to have both the time and space to grow and experiment with ours. As this same interest and passion is also growing in others, we hope that our jungle experiments can be an inspiration on your journey.
Want to learn More
Join us for one of our workshops that sometimes include farm to table fermentation. Or consider applying to our year long apprenticeship or two month internship, where you will learn all the basics of fermentation, homesteading, growing your own food and lots more!
Happy ferments, happy microbes!

Water Kefir - The New Kombucha!
Before coming to the Ranch, I only knew of kefir as a tasty, sour, probiotic milk product - almost like a liquid yogurt. I loved it, and knew of it’s health benefits, but didn’t think kefir could be anything more. Turns out, kefir can refer to both milk kefir, the product I’ve known and seen in grocery stores, and water kefir, a delicious fermented soda and a staple for us here at Rancho.
By Cameron Conklin, apprentice 2021

Delicious, probiotic, fizzy and homemade soda (Water Kefir)
Kefir is more than just milk!
Before coming to the Ranch, I only knew of kefir as a tasty, sour, probiotic milk product - almost like a liquid yogurt. I loved it, and knew of it’s health benefits, but didn’t think kefir could be anything more. Turns out, kefir can refer to both milk kefir, the product I’ve known and seen in grocery stores, and water kefir, a delicious fermented soda and a staple for us here at Rancho.
Kefir “grains” are not actually grains at all, but instead a type of SCOBY (symbiotic colony of bacteria and yeast), a word you might recognize from researching or making kombucha. Kefir grains are shaped like little translucent miniature cauliflower florets - giving them their name. Milk kefir and water kefir grains look similar, but contain a different combination of bacteria and yeast. So if you want to make both, like we do, you’ll need a different source for each. If you are interested in milk kefir, check out Ryan’s blog post for some great milk kefir recipes here!
Some kefir makers have had luck with rinsing their kefir grains and changing the nutritive liquid they are fermenting. For example, using milk kefir grains with coconut milk instead of dairy milk. But as a rule of thumb, your grains will be trained to like a certain combination of ingredients, and in the case of water kefir grains, water and sugar is the magic recipe!
Making water kefir, what we call “balm”, was my first task here at Rancho. After my first week on balm duty, I thought to myself, “Why isn’t everyone making this stuff?!” It’s easy, delicious, refreshing, and serves as a great base for seasonal flavors, medicinal plants, and culinary creativity.
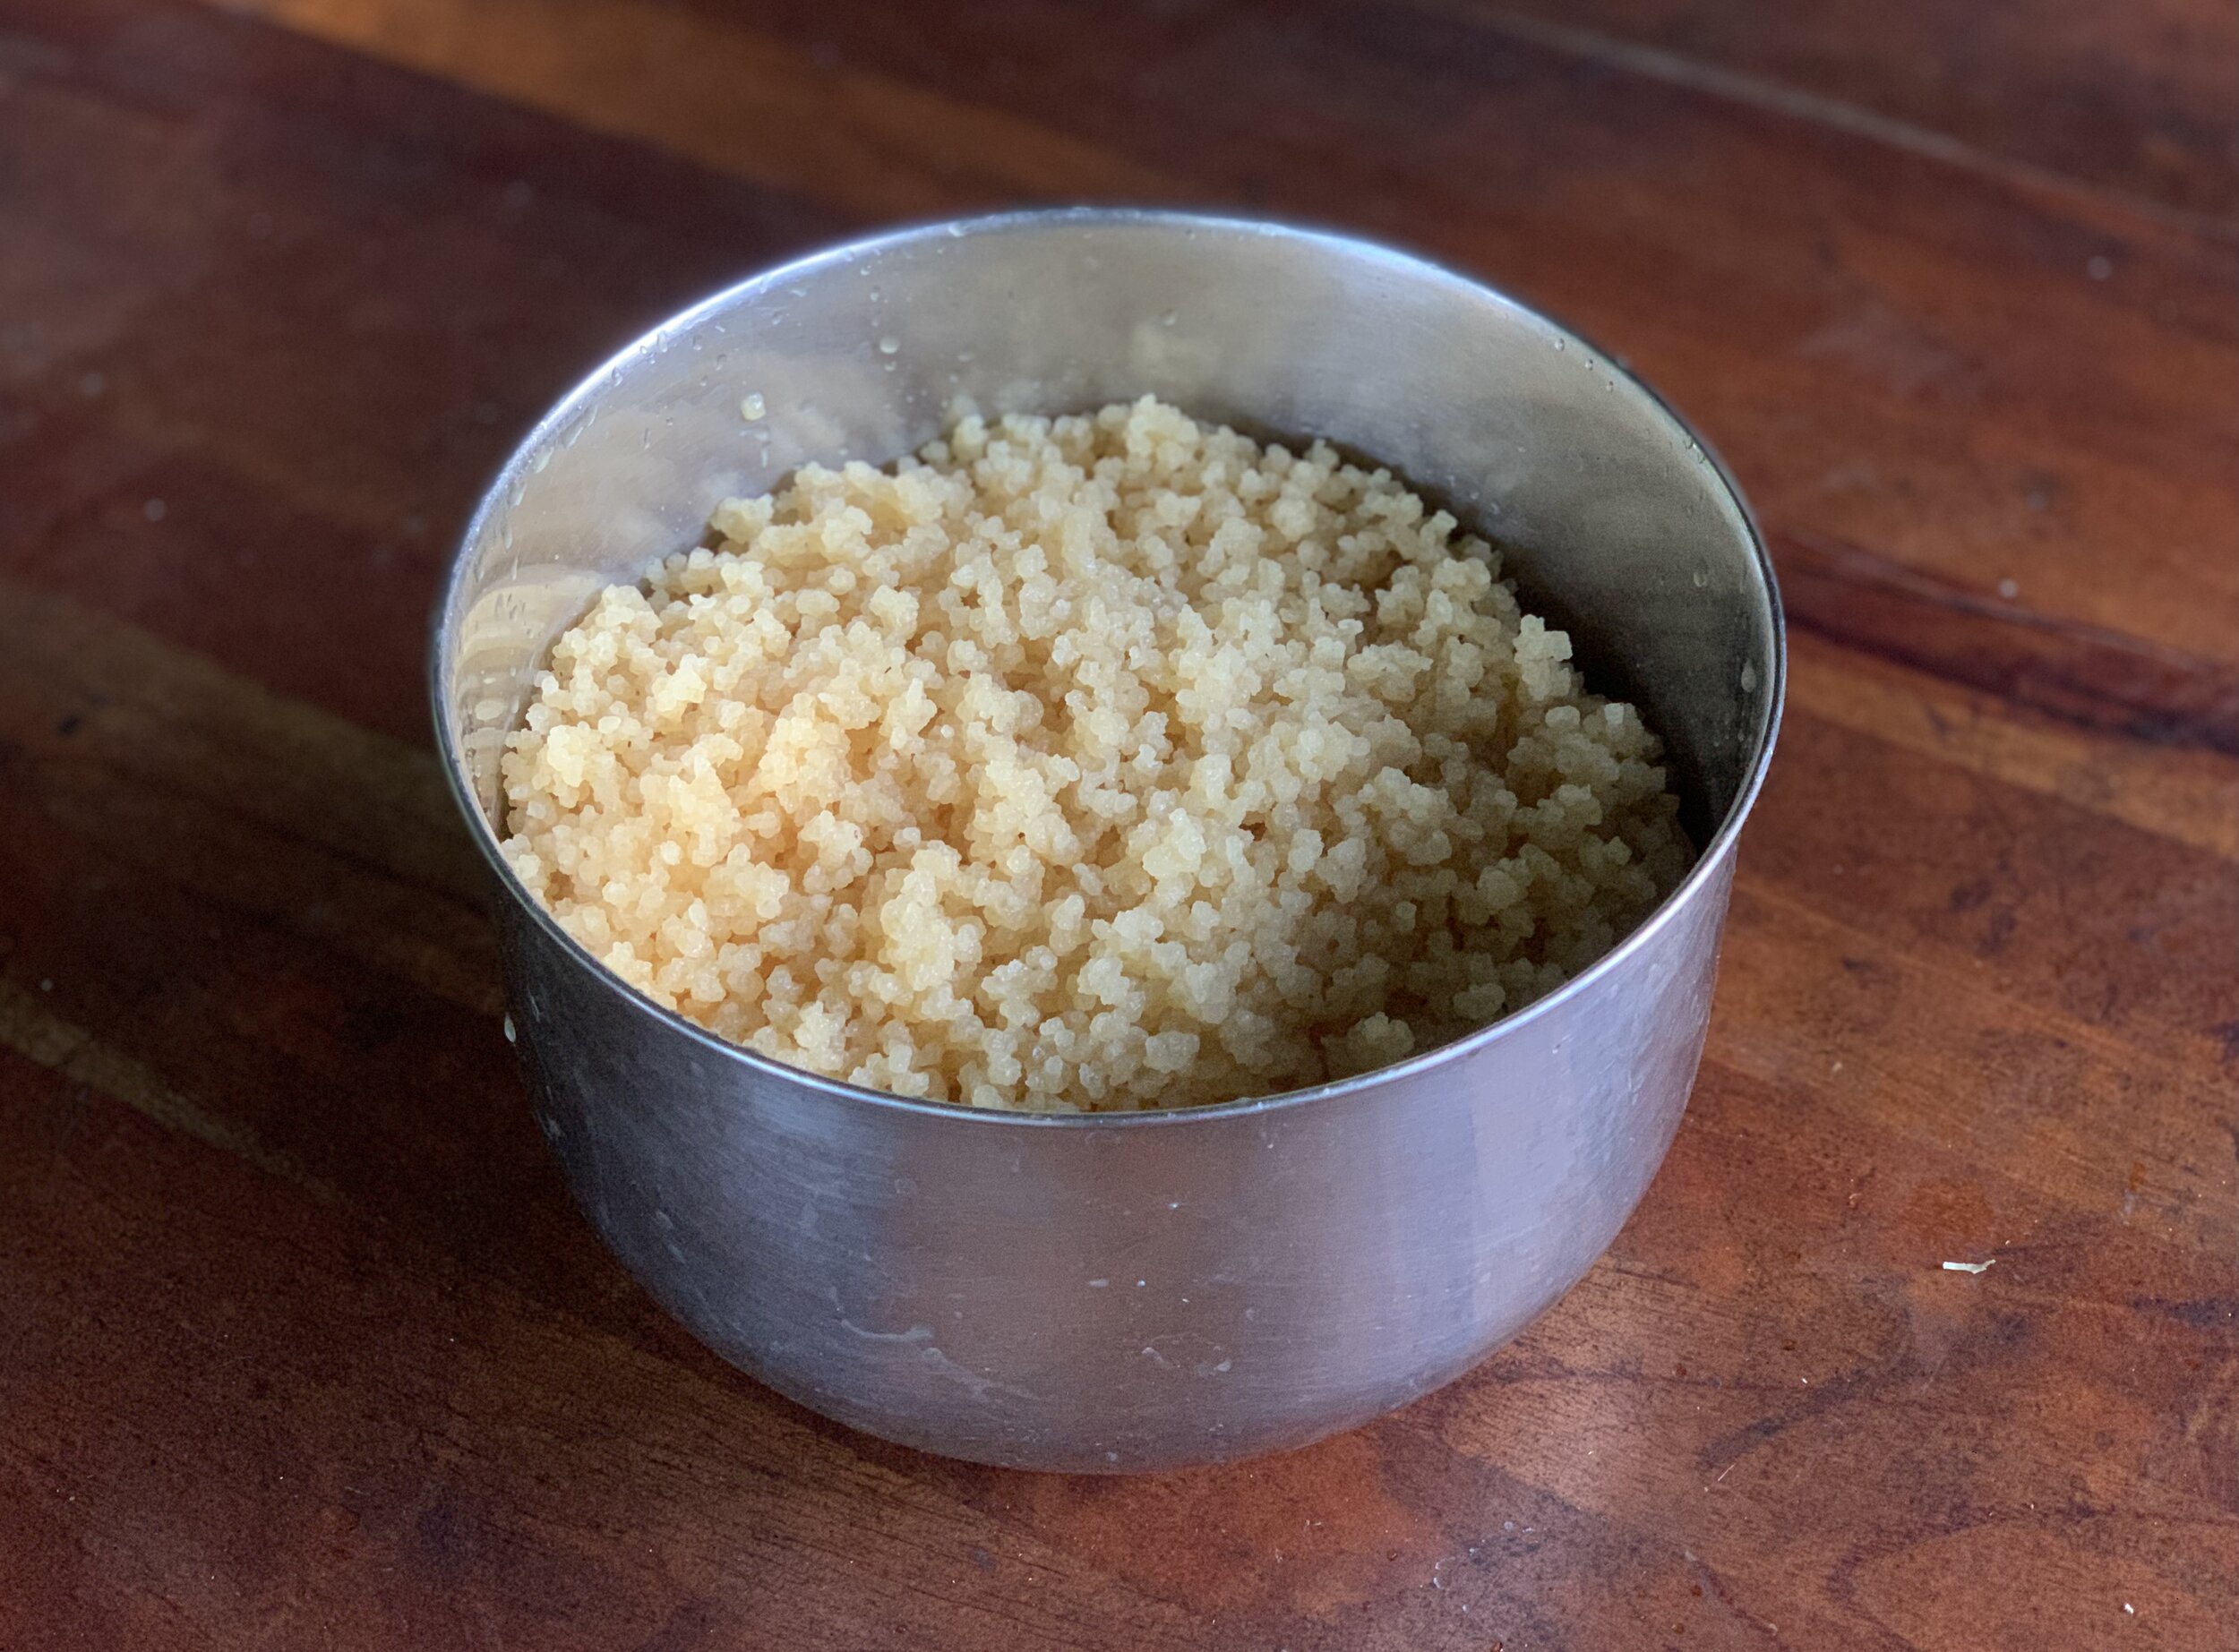
Water Kefir grains
The health benefits of water kefir
The exact origin story of kefir is unknown, but it is believed to have originated in the Caucasus Mountains. Kefir is Turkish for “good feeling” - which I can’t agree more with when I take a cold sip of bubbly kefir soda. Water kefir is high in probiotics, hydrating, and a great replacement for electrolyte sports drinks like gatorade, since it contains enzymes and minerals. It is known to aid in digestion, reduce inflammation, and relieve skin irritation such as eczema and acne. Water kefir is also said to help with detoxification by cleansing the liver (Mueller, 2014). What a magical concoction!
Water kefir serves as a great conduit for fruits and herbs. There are endless combinations of ingredients you can add to boost nutritional and medicinal potency depending on what your body needs!
How to make water kefir
**Note! If you do not have a water kefir making friend or local grain dealer, you can purchase dehydrated grains online. You will need to rehydrate them before following the recipe below.

Water Kefir SCOBY in the water/sugar solution
Primary Fermentation
Combine 1 gallon of water with 2 cups of sugar into a non-metal container (at Rancho we use tapa dulce which is a locally sourced sugar cane that our grains love, but you can use other sugar sources as well)
Pour in 1 cup of kefir grains
Cover with a cheese cloth or lid to keep out dust and bugs but not oxygen
Allow the mixture to sit for 2 days - this may be longer for you (up to 4 days) if you are in a cooler climate. Here in the tropics things move fast!
When your water kefir is ready you will notice a change in color and you may see bubbles rising to the top or foam settling on the surface
Strain your kefir into airtight bottles or jars (no metal) for the second fermentation, being sure to leave room for added fruit juices, herbs, and bubbles from the carbonation process
Set aside your kefir grains to begin your next batch - you can continue using these grains an infinite number of times if you keep them fed and healthy. You will see them start to multiply and this is a great time to give away extra grains to friends!
You are now ready to move on to the second fermentation and carbonation phase!
At this stage your kefir is ready to drink if you do not want to add flavor or carbonation - but in my opinion that is the best part!
Secondary Fermentation
**Note: This is where you can let your creativity shine! Read below to see some of our favorite recipes. You may wish to adjust the amount of fruit juice or sugar you use based on preference so start experimenting.

Passion fruit makes a great and easy flavor for balm!
Add 1/4 cup 100% fruit juice or fruit puree per liter of water kefir
Add 1/8 cup sugar per liter of water kefir
Add any herbs you’d like (I like to muddle them or blend with the fruit juice first)
Cap the airtight containers and let sit at room temperature for 1 to 3 days to let the secondary fermentation take place. In this stage of the process, the added sugar will be consumed by the SCOBY and create the carbonation as carbon dioxide builds up in the airtight container. The longer you wait, the bubblier and less sweet your beverage will be, so do a few trials to find your perfect combination.
Give your bottles a little burp to make sure you release some carbon dioxide to avoid your bottles exploding. Place your bottles in the fridge and enjoy! Don’t wait too long to burp your bottles and put your soda in the fridge, or your bottles might bust. The fridge will slow down the fermentation process significantly, allowing you to enjoy your balm for a longer period.
Watch out when opening your bottles again, the carbonation can be very intense depending on the ingredients so start slow as you unscrew the cap!
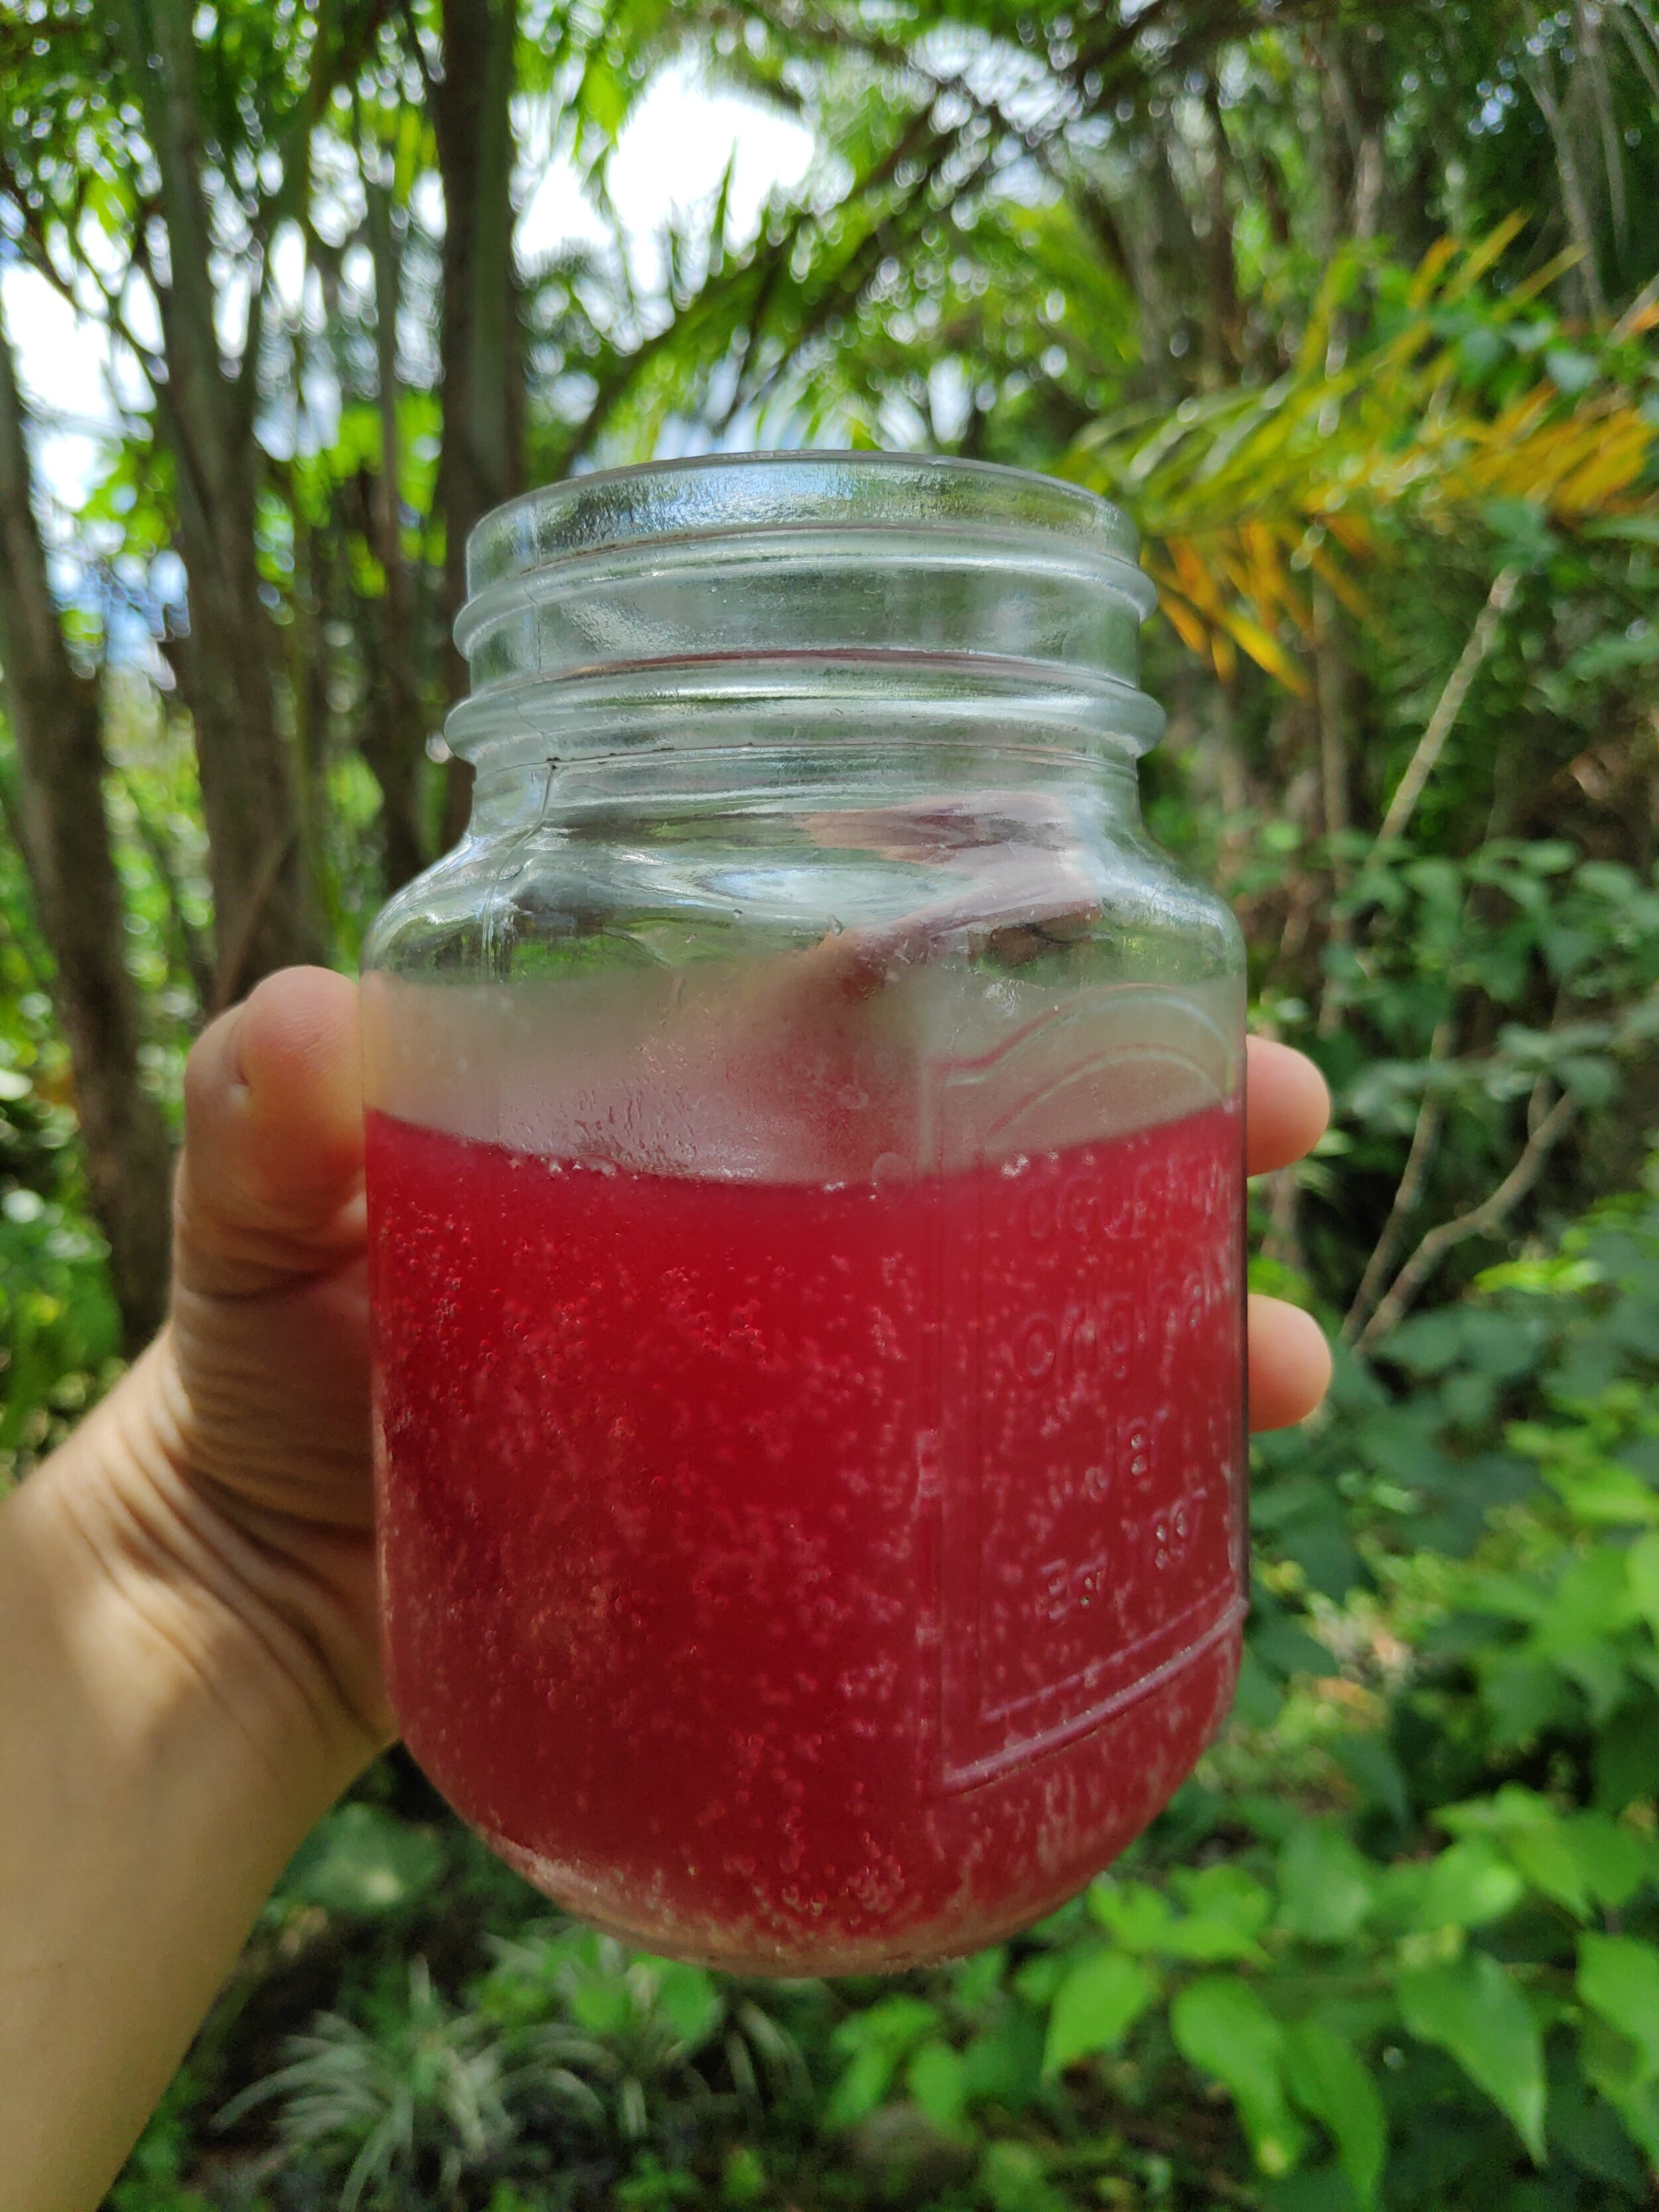
A refreshing, bubbly glass of balm
Our favorite variations
Below are a few flavor combinations that are staples here at Rancho. These flavors are absolutely delicious and come right from our farm. If you aren’t in the tropics and don’t have access to the below, I recommend using local, seasonal, ingredients to flavor your balm - there are so many different options!
Galaxy Bomb:
1/4 cup fresh squeezed starfruit juice
grated fresh ginger to taste
Sunshine Daydream:
1/4 cup fresh squeezed orange juice
1/8 cup fresh squeezed lemon juice
muddled mint to taste
muddled basil to taste
The Queen:
1/4 cup fresh squeezed and strained victoriana
1/8 cup fresh squeezed lemon juice
(be careful with explosions, this one is a firecracker!)
Resources:
Delicious Probiotic Drinks, Julia Mueller, 2014
Wild Fermentation, Sandor Ellix Katz, 2003
More Articles on Fermented Beverages you Can Make!
How to Brew Your Own Ginger Beer
Learn More
Check out our workshops that include farm to table fermentation, medicinal plants, permaculture and more!
Happy brewing and happy microbes!
What is Lacto-Fermentation
What would a traditional Korean Barbecue be without kimchi, your scrambled eggs without Tabasco and a hot, sunny afternoon without a fresh pickle? Lacto-ferments are around us every day. Often they are made into dishes that we don’t even consider as fermented.
By Constantin Demuth, apprentice 2021

One of our favorite lacto-fermented condiments- Green Papaya Kimchi
What would a traditional Korean Barbecue be without kimchi, your scrambled eggs without Tabasco and a hot, sunny afternoon without a fresh pickle? Lacto-ferments are around us every day. Often they are made into dishes that we don’t even consider as fermented. Many of which are staples that have backed up our diets for hundreds of years. Try and think of the last lacto-fermented goodie you ate.
Recently, lacto-fermentation is going through a renaissance. People are realizing how easy it is to recreate flavors of their cultural ancestry. Kraut is just cabbage, salt and water. Pickles are just cucumbers, salt and water. It’s easy to make at home and much better than the stuff you buy in the supermarket. In this article I would like to take you on a little journey through the wide world of lacto-ferments, share some of the Ranch’s deepest secrets, and how we take foods from the farm and transform them into delicious, nutritious, and long lasting dishes.
History
In a time where we can buy produce all year around from every corner of the world and store them conveniently in the fridge, the reason why people ferment their food is becoming obsolete. In the beginning, they were not looking for the most incredible flavors that people at Noma’s Food Lab try to create. They were more interested in preservation, keeping their produce edible, eliminating molds and buffering cold winters without harvests. As farm to table cooking is becoming more popular again, being able to preserve foods through the year is increasingly important. The easiest method of preserving large quantities of raw vegetables is by using salt. Salt creates an environment that allows good bacteria to survive while killing bacteria harmful to humans. Today, we know salt preservation also makes nutrients bioavailable, increases digestibility and creates a great source of raw foods in our diets.
Preservation

Lacto-fermented pickles
Let’s go into a bit more detail of what happens in our jars when we mix vegetables with salt. Adding salt or salt brine to vegetables helps Lactic Acid Bacteria (LAB) to develop. LAB then turns the natural sugars of the vegetables into lactic acid. This acidified environment inhibits the growth of bacteria that makes the vegetables go bad and mold. This way we can store lacto-fermented vegetables for long periods of time without worrying about spoilage. The acidity gives these ferments their original flavor and preserves the satisfying crunch that we all crave.
As opposed to other fermentation methods, lacto-fermentation does not require any input of certain bacteria. When using fresh (preferably organic) produce we are able to work with LAB that is native to the vegetables and helps create the environment we want. As a result of their work, LAB often produce oxygen that makes our ferments bubbly. In case you find bubbles in your jars, don’t worry. That’s a sign that it works!
Lacto-ferments at the Ranch
Here at the Ranch we use lacto-fermentation every week and we eat it basically every day. Our favorite staples are Green Papaya Kimchi, Salsa Starter and some sort of pickled vegetables. The most recent and exciting experiments in the test kitchen include pickled Katuk (our daily salad green) and fermented black beans for our home made Hoisin Sauce.
We use lacto-fermentation for three basic reasons. Reason one: It’s good for us. It makes all the nutrients that fresh vegetables have to offer available to us. Reason two: We can store fresh harvests and consume them later, which is super convenient when you have an amazing orchard that produces a variety of things all year around. Reason three: It is delicious and we love delicious food!

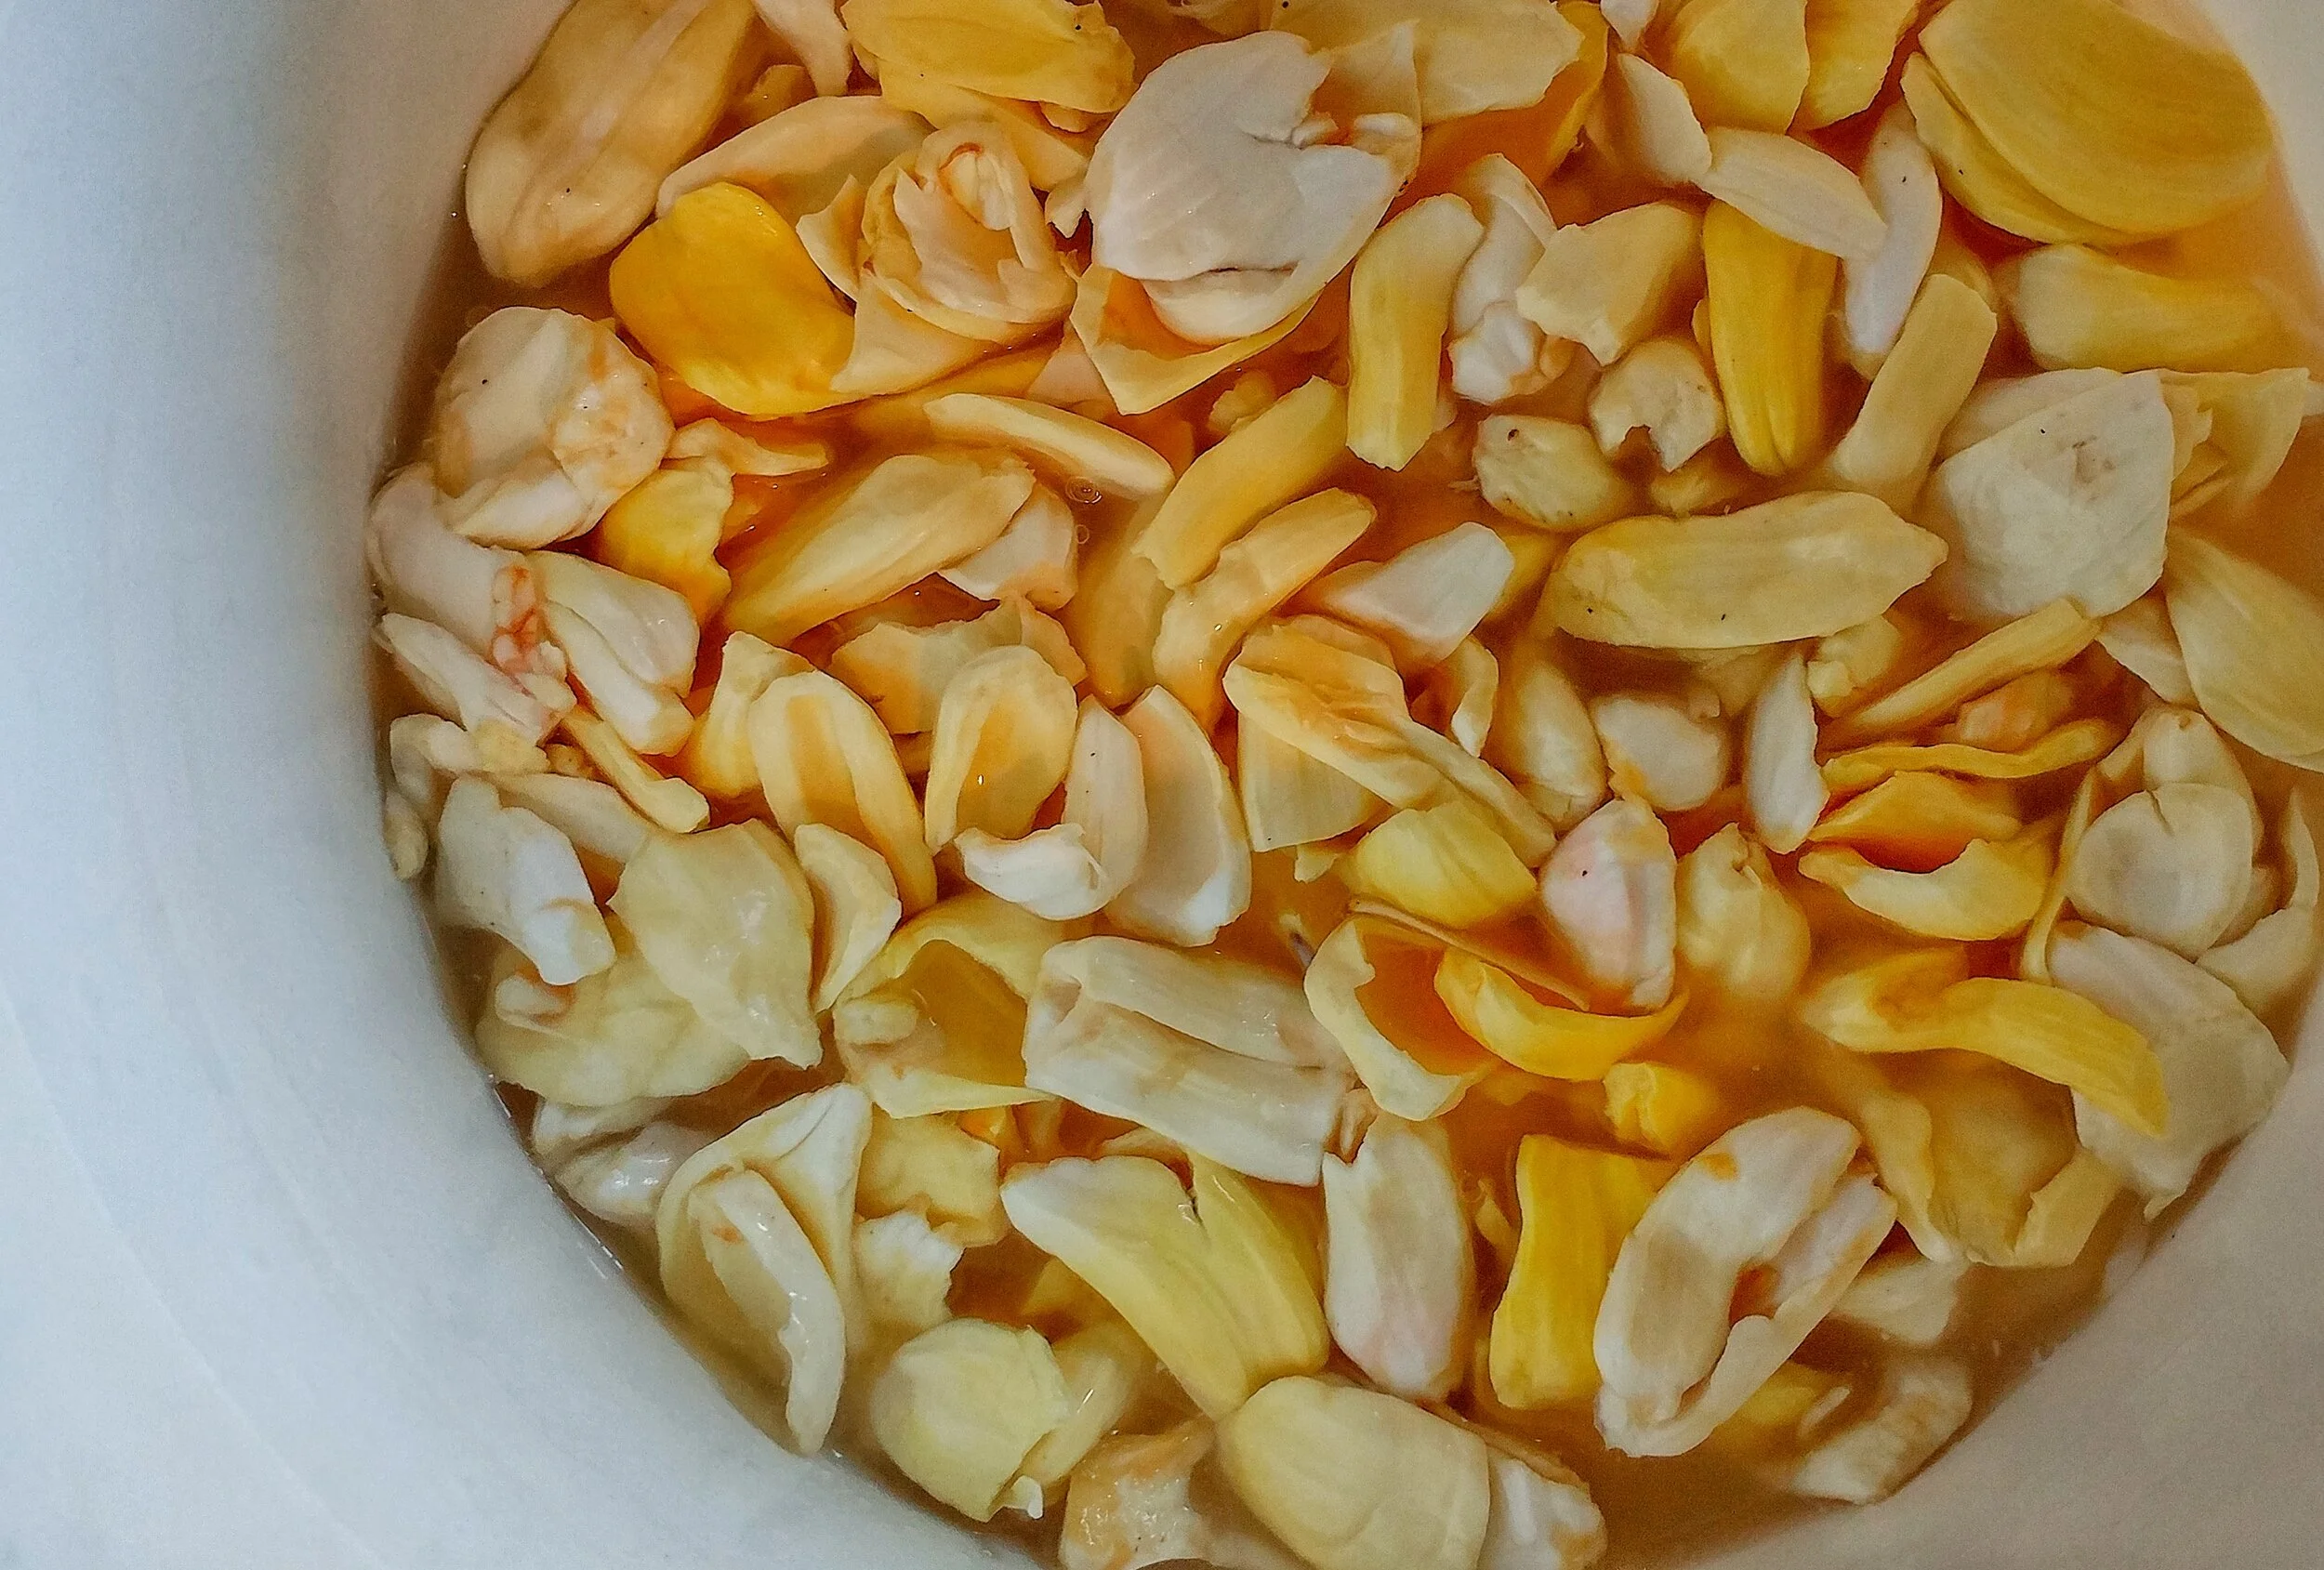
Green jackfruit processing
Green Jackfruit
Jackfruit is a perfect example of how we use lacto-fermentation as a way to preserve fresh produce. Jackfruit is the biggest fruit in the world and we have several trees in our orchards. Once jackfruit is ripe, it goes bad relatively quickly and some people don’t like its flavor when ripe. We started harvesting them when they are still green to incorporate them as a vegetable into our diet. Even here where we feed many hungry souls every day, we cannot consume the amount of jackfruit we harvest. This is where our friend lacto-fermentation comes into play. We submerge all the jackfruit meat in a 2% salt brine, which inhibits growth of undesirable bacteria, prevents oxidation and gives a deep, rich salty flavor that we want in our dishes.
Green Papaya Kimchi
The purpose of our Kimchi is less for preservation and more for the “ooh “and “ahh” moments when we serve fresh condiments with all our foods. The kimchi accompanies eggs in the morning, hearty slow roasted pork on special occasions and provides the freshness in our weekday burritos.

We use green papaya, but you can use any local, seasonal, crunchy vegetable
As opposed to jackfruit, where we submerge the flesh in a brine, for Kimchi we use its own juice. Again, salt is our partner in crime. Shredding 20 kg of green papaya on Wednesday mornings is not everyone’s favorite exercise, but the result makes up for the work. We used to do this all with hand graters, but recently we purchased an industrial hand cranked shredder by Nemco Food Equipment. We highly recommend this tool if you are making large batches of sauerkrauts, kimchi, etc. By shredding the fruit, we make it easier for the salt to penetrate. After mixing papaya, salt and spices (aka the *flavor bomb) enough brine is being produced for the ferment to be safe. Three days in the fermentation bucket and voila, kimchi is ready. Pack this into glass jars that can be stored in the fridge.
Now it’s time to reveal the big secret you’ve been waiting for. Rancho Mastatal is giving out its kimchi recipe for the first time. Two things that are important: First, if you cannot find green papaya, use any type of cabbage. It’s important to use fresh, local and seasonal (when you live in a temperate climate please, please do not go to the supermarket and buy green papaya!). Second, fermentation is no science! Don’t get overwhelmed by ratios, phrases or utensils. Trust your senses; look at it, smell it and taste it. Your nose knows best.
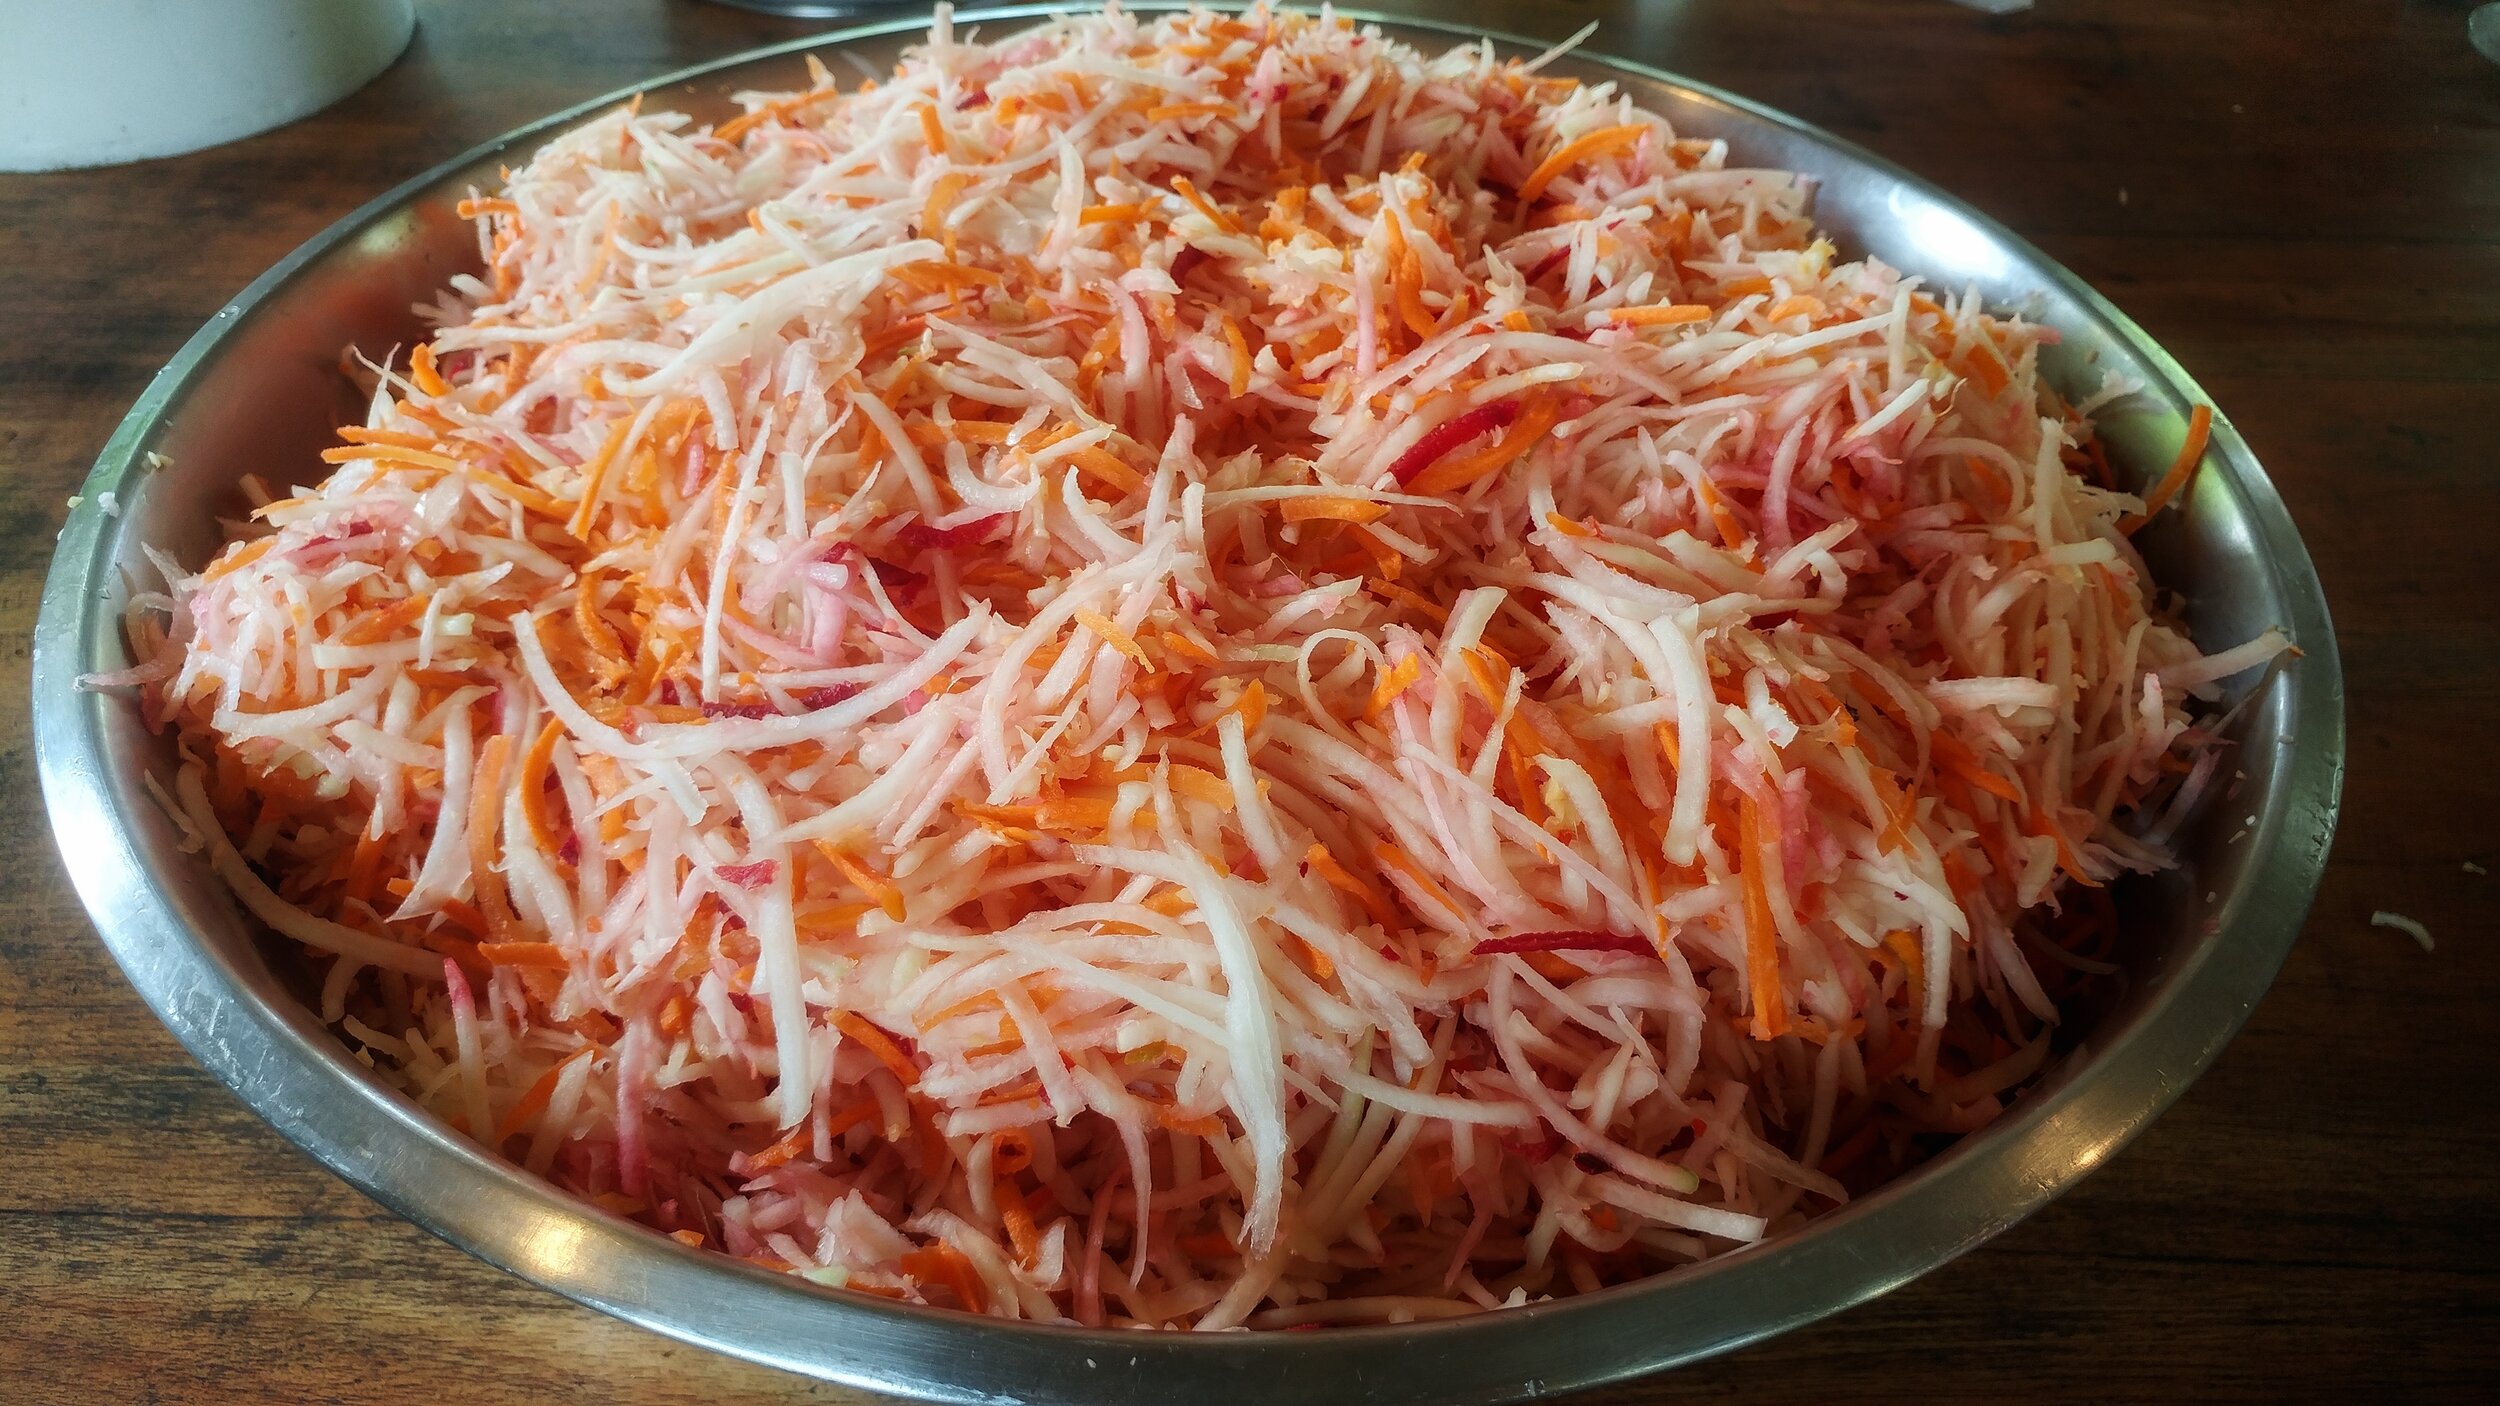
Shredded ingredients ready to be combined with salt and flavors
Recipe
3 green papaya, peeled and seeded
1 carrot and/or 1 beet
Salt (2% of the total weight)
*Flavor Bomb
1/2 cup peeled ginger
1/2 cup peeled garlic
1 chili (optional)
Equipment
Fermentation vessel: A food safe container that can hold all the vegetables plus at least 20cm of headspace (buckets, mason jars, big Tupperware all work perfectly fine).
Instructions
1. Cut the papaya in half and discard the seeds. Peel the papaya.
2. Using a kitchen grater, grate the papaya, carrot and/or beet and set aside.
3. Peel the ginger and garlic. Cut the chili in half and discard the seeds. Blend all the ingredients for your flavor bomb in a food processor.
4. Weigh out all your vegetables and place them in your fermentation vessel.
5. Add 2% Salt to the total weight of the vegetables (e.g. if you have 1kg of vegetables, use 20g of salt) and mix the salt in. Stirring it helps to break up the papaya and releases the brine.
6. Make sure your Kimchi is submerged in brine. Keep it on the counter at room temperature and wait for at least three days (this will depend on your climate). You will see bubbles and be able to smell the acidification after a few days. When it’s reached your desired flavor, bottle the Kimchi in jars and keep them in the fridge. Enjoy!

Green papaya cut in half
Learn more
Those are just a couple of the many vegetables we lacto-ferment. Lacto-fermentation has made our farm to table cooking and preservation more efficient, produce less waste, and create delicious, unique and fun foods.
Join us for a workshop to learn more about fermentation, farm to table cooking, permaculture and more.
Other Farm to table blog articles
Eating Local: Reconnecting to Food
Turn Local Rice and Beans into Fermented Bread
Happy fermentation, happy microbes!

Bamboo Shoots
Bamboo is of huge economic value and is not only used in the building industry, but it can be used also for eating (more on this later!), as a cooking device, burnt for charcoal, woven into a fabric, made into paper, used as a musical instruments, and much more!!
By Nic, Core Team member
Bamboo
Bamboo is a wonderfully sustainable building material due to the speed in which it grows and its weight to strength ratio (stronger than steel for its weight!!). Bamboo is of huge economic value and is not only used in the building industry, but it can be used also for eating (more on this later!), as a cooking device, burnt for charcoal, woven into a fabric, made into paper, used as a musical instruments, and much more!! At the Ranch we use it for many of these things; the most noteworthy being our use of it in our natural buildings (read here about how to treat your bamboo). We have 6 structures that are built almost entirely from Bamboo including a nursery, a meeting room, our classroom and the popular guest structure the Hooch. We have also used it as firewood and to make biochar and we have several bamboo instruments. Today however we are going to talk about the latest way we have learnt to use bamboo and that is in our farm to table world!
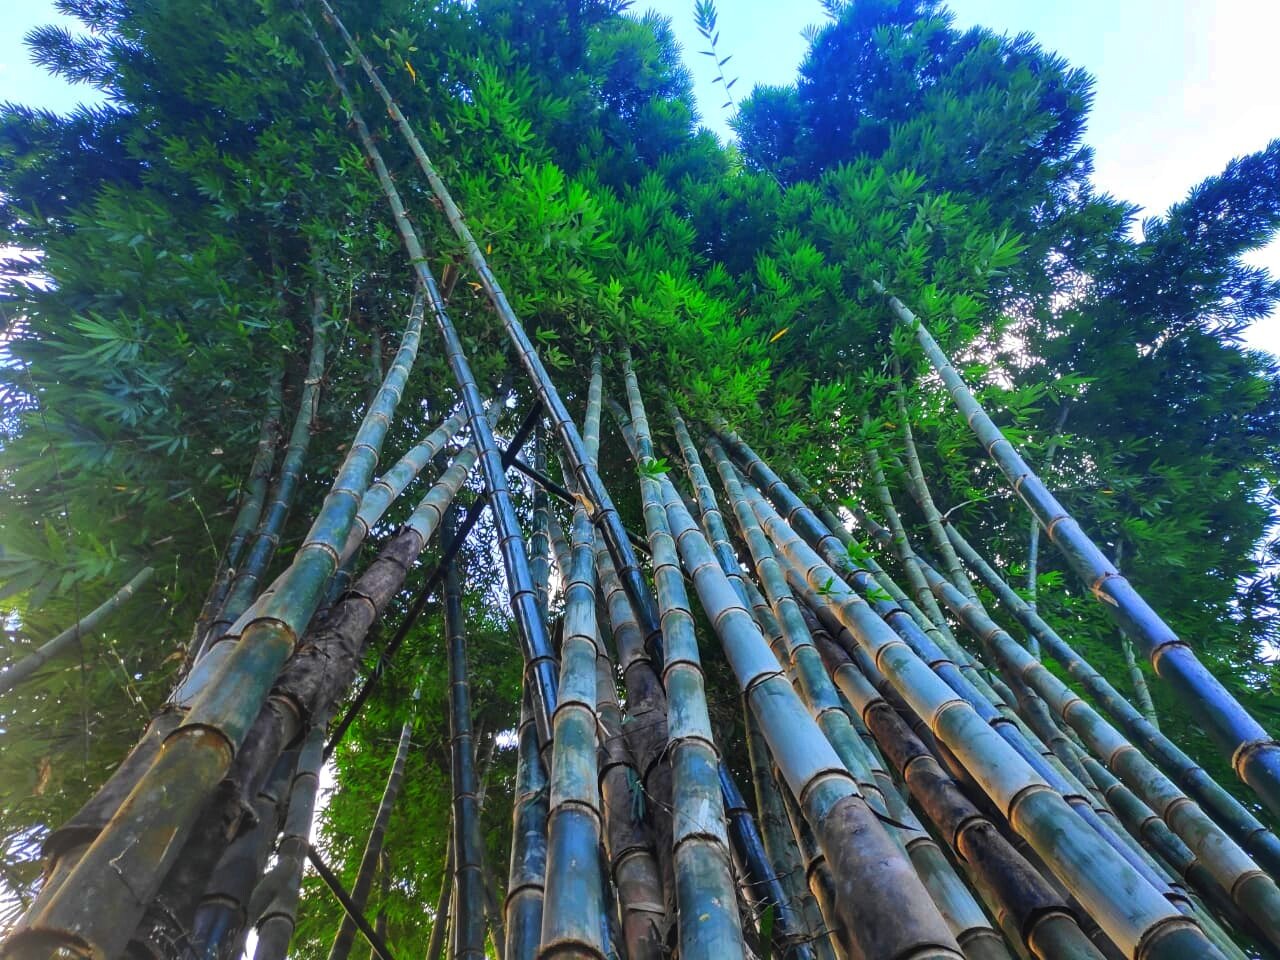
A clump of bamboo on our farm
Bamboo as Food
Humans have a long history of eating bamboo, but we are not the only animals that love eating bamboo. The Giant Panda loves eating the young bamboo shoots as well as the leaves and stems, along with a number of other animals including the bamboo lemurs of Madagascar and mountain gorillas in central Africa. Chimpanzees have also been seen drinking fermented bamboo sap which has turned alcoholic. It will not be a surprise then to hear that Yes! we can eat bamboo too, in fact its delicious and during the beginning of the wet season it is an abundant source of food.
At Rancho Mastatal we have some of the most revered species of bamboo for eating and for building. The species that we have that are known for providing tasty bamboo shoots are Dendrocalymus asper, Gigantochloa sp. and Bitcheeyana sp.

These are just 2 week old bamboo shoots!
Farm to Table Bamboo Shoots
Bamboo shoots contain a cyanogenic glycoside that produces cyanide in the gut. This is not good for you as you might know, cyanide is very poisonous, so we have to be careful to process our bamboo shoots carefully in order to make them edible. As it turns out this is relatively simple! Just boiling the bamboo for around 10 minutes removes that compound and can also remove any bitterness that can be present in the shoot. We found that adding ample salt and some sugar to the water before boiling makes them instantly a delicious crunchy snack! We have also lacto-fermented them (make a very pungent ferment!), pickled them in vinegar, and just boiled them and added them to dishes. But before you get to eat the bamboo shoots you have to know when to harvest them and how to prepare them.
Harvesting bamboo shoots

Peeled bamboo shoot
Generally speaking you want to harvest them as young as possible as they can become bitter if they are too old. As you may know bamboo grows incredibly quickly, so you will need to keep an eye on your clumps as a daily practice. As the rains start here in Costa Rica around April/May (on the pacific side) we found that initiated the growth of the new shoots. There is a delay though between the start of the rains and the shooting of the bamboo and this will vary be species and by the year. So its safe to say that once it starts to rain you need to start checking your clumps regularly. We found that this year the Guadua started shooting first (not a good bamboo to eat) and Dendrocalymus was the last one to start shooting in late June/July. Ideally you will want to harvest the bamboo shoot when it is around ~10-15” (~25-35cm) tall. Cut it at an angle as low as you can. This will then shed water and is less likely to lead to disease entering the plant. Generally speaking from a well-managed clump you should be harvesting about 33% of the new shoots. Take them from the places where they are not as ideally situated ie. Close to another shoot, with a blocked path etc… To learn more about how to manage you bamboo, join us for our bamboo management workshop.
Processing Bamboo Shoots
Take the bamboo shoot back to the kitchen and cut it lengthwise in half. You should be able to get your thumb and then your hands between the outer layers and the inner solid part and pry off the sheathing. This will leave you with a rather alien looking shoot. At this point it’s a good idea to chop it into strips several inches wide and then slice across the strips into thin pieces. The thinner the pieces the more bitterness is removed by cooking. At this stage you have the option to lacto-ferment the bamboo in a 2-3% by weight salt brine. This produces a very pungent ferment that smells very reminiscent of canned bamboo shoots from the grocery store. By lacto fermenting the shoots you also remove the cyanogenic glycoside and you gain the nutritional value of a raw bamboo and the probiotic qualities of the ferment.
By cooking these thin pieces of bamboo in a salty and slightly sweet brine we were able to produce a delicious treat with a great crunch, the flavor is not too dissimilar to Heart of Palm, although there was a large spectrum of views on what it tasted like. Everyone agreed that it was a delicate flavor that had an excellent texture.

Cut lengthwise
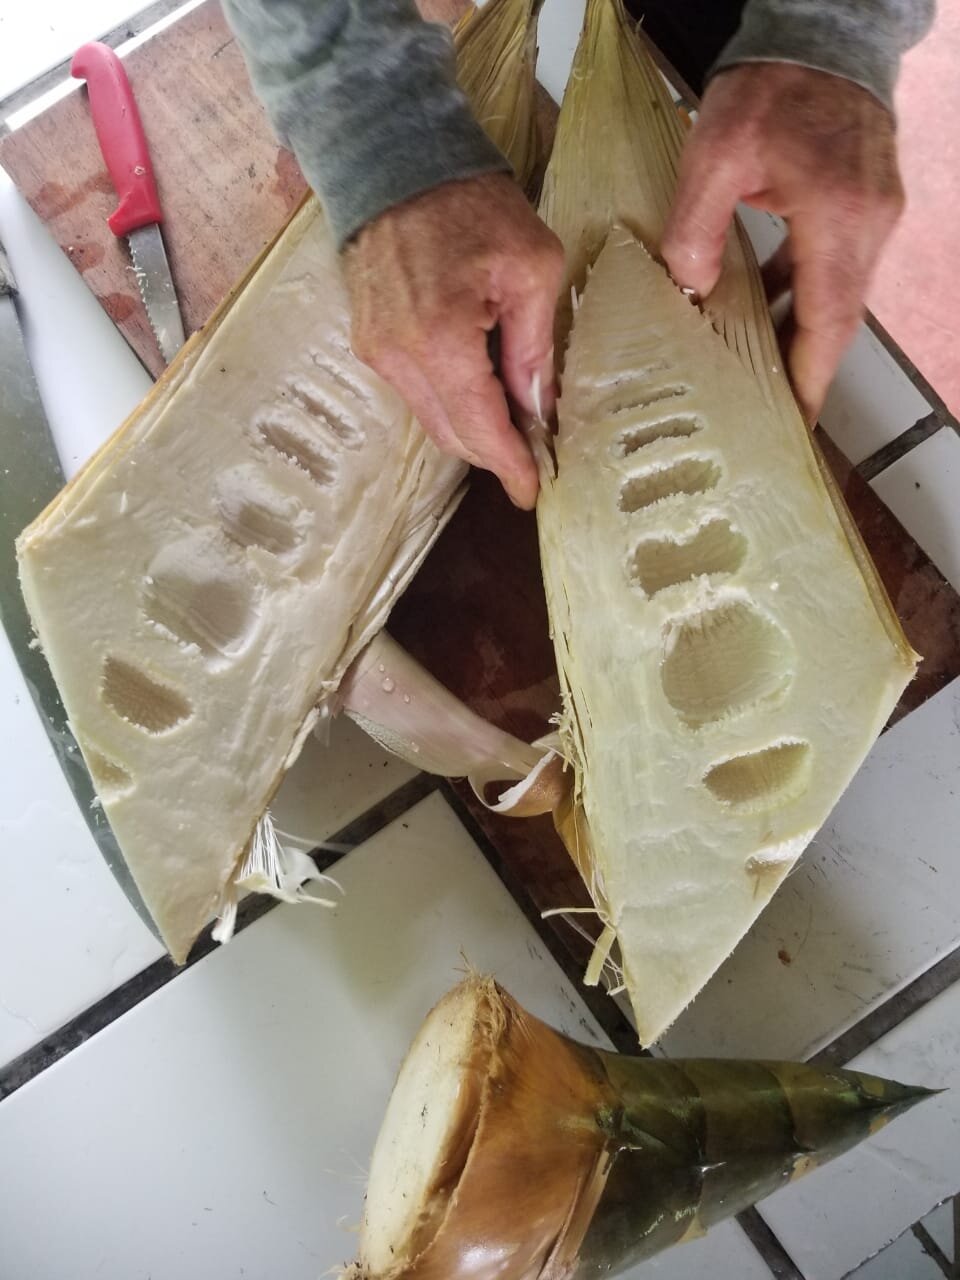
Then using your thumbs peel off outer layers
Bamboo Tea
The upper parts of the shoot that will have been left attached to the sheathing when you pried it out makes a very nice and refreshing tea. By taking a paring knife you can remove any of the soft parts still attached to the sheathing and dry them in the sun (or a dehydrator). This can then be added to hot water and left to steep.

Fresh bamboo shoot
Want to Learn More About Bamboo?
Join us for one or both of our upcoming bamboo related workshops!
Bamboo Management April 6 - 9, 2021
Bamboo Construction April 12 - 17, 2021
Stay tuned and up to date on what’s happening around here by subscribing to our monthly blog and visiting our website.
Check out our past blog article on Bamboo Treatment
Farm to Table: Chilie Recipes
What do you do with all those chiles?!
Farm to Table: Chile Recipes
By Marco, Apprentice 2020
Before we get hot and saucy…
…is it chile, chilli, or chili? Good question. I usually hedge my bets and switch between the three spellings. Actually, all of them are correct. They all come from the Aztec Nahuatl word “chilli”, which became chile in Spanish and eventually the anglicised chilli. Chili, with one l, is the American spelling and is the reason my spell check is red-lining me right now. Anyway, glad we got that out the way. Moving on…
A Brief History of Chiles
When Columbus first landed in the West Indies (in modern-day Dominican Republic and Haiti) in 1492, he noted that the locals (Arawak) were preserving meat using pepper juices, specifically one type called “axi”. This is where the Spanish word aji was derived. (It was around this time that they noticed the Nahuatl word “chilli” being used as well). These plants were very valuable to the natives and were used extensively in most of their cuisine. The Spanish discovered that the peppers were easily preserved when dried and that the seeds kept well, leading to their far, wide and rapid dissemination throughout the world. (Thanks also, in no small part, to birds, of course. Cheers guys.)
Peppers vs. Chiles
One last bit of nomenclature clarification is the common confusion between the various peppers – bell peppers, black/white pepper (peppercorn) and chilli peppers. This goes back again to Columbus and his crew. Back in the day, peppercorn was as valuable as silver to Europeans. Thus, when they arrived in what they thought was India, they also expected to find peppercorn. Instead they found chillies. Nobody’s sure whether they dubbed them “pimiento” (pepper in Spanish) because they mistook them for peppercorn, or if they were trying to pull a fast one…my money’s on the latter. Learn more about black pepper from Dani’s last article “Life of Spice.”
Farm to Table Chile Recipes at the Ranch
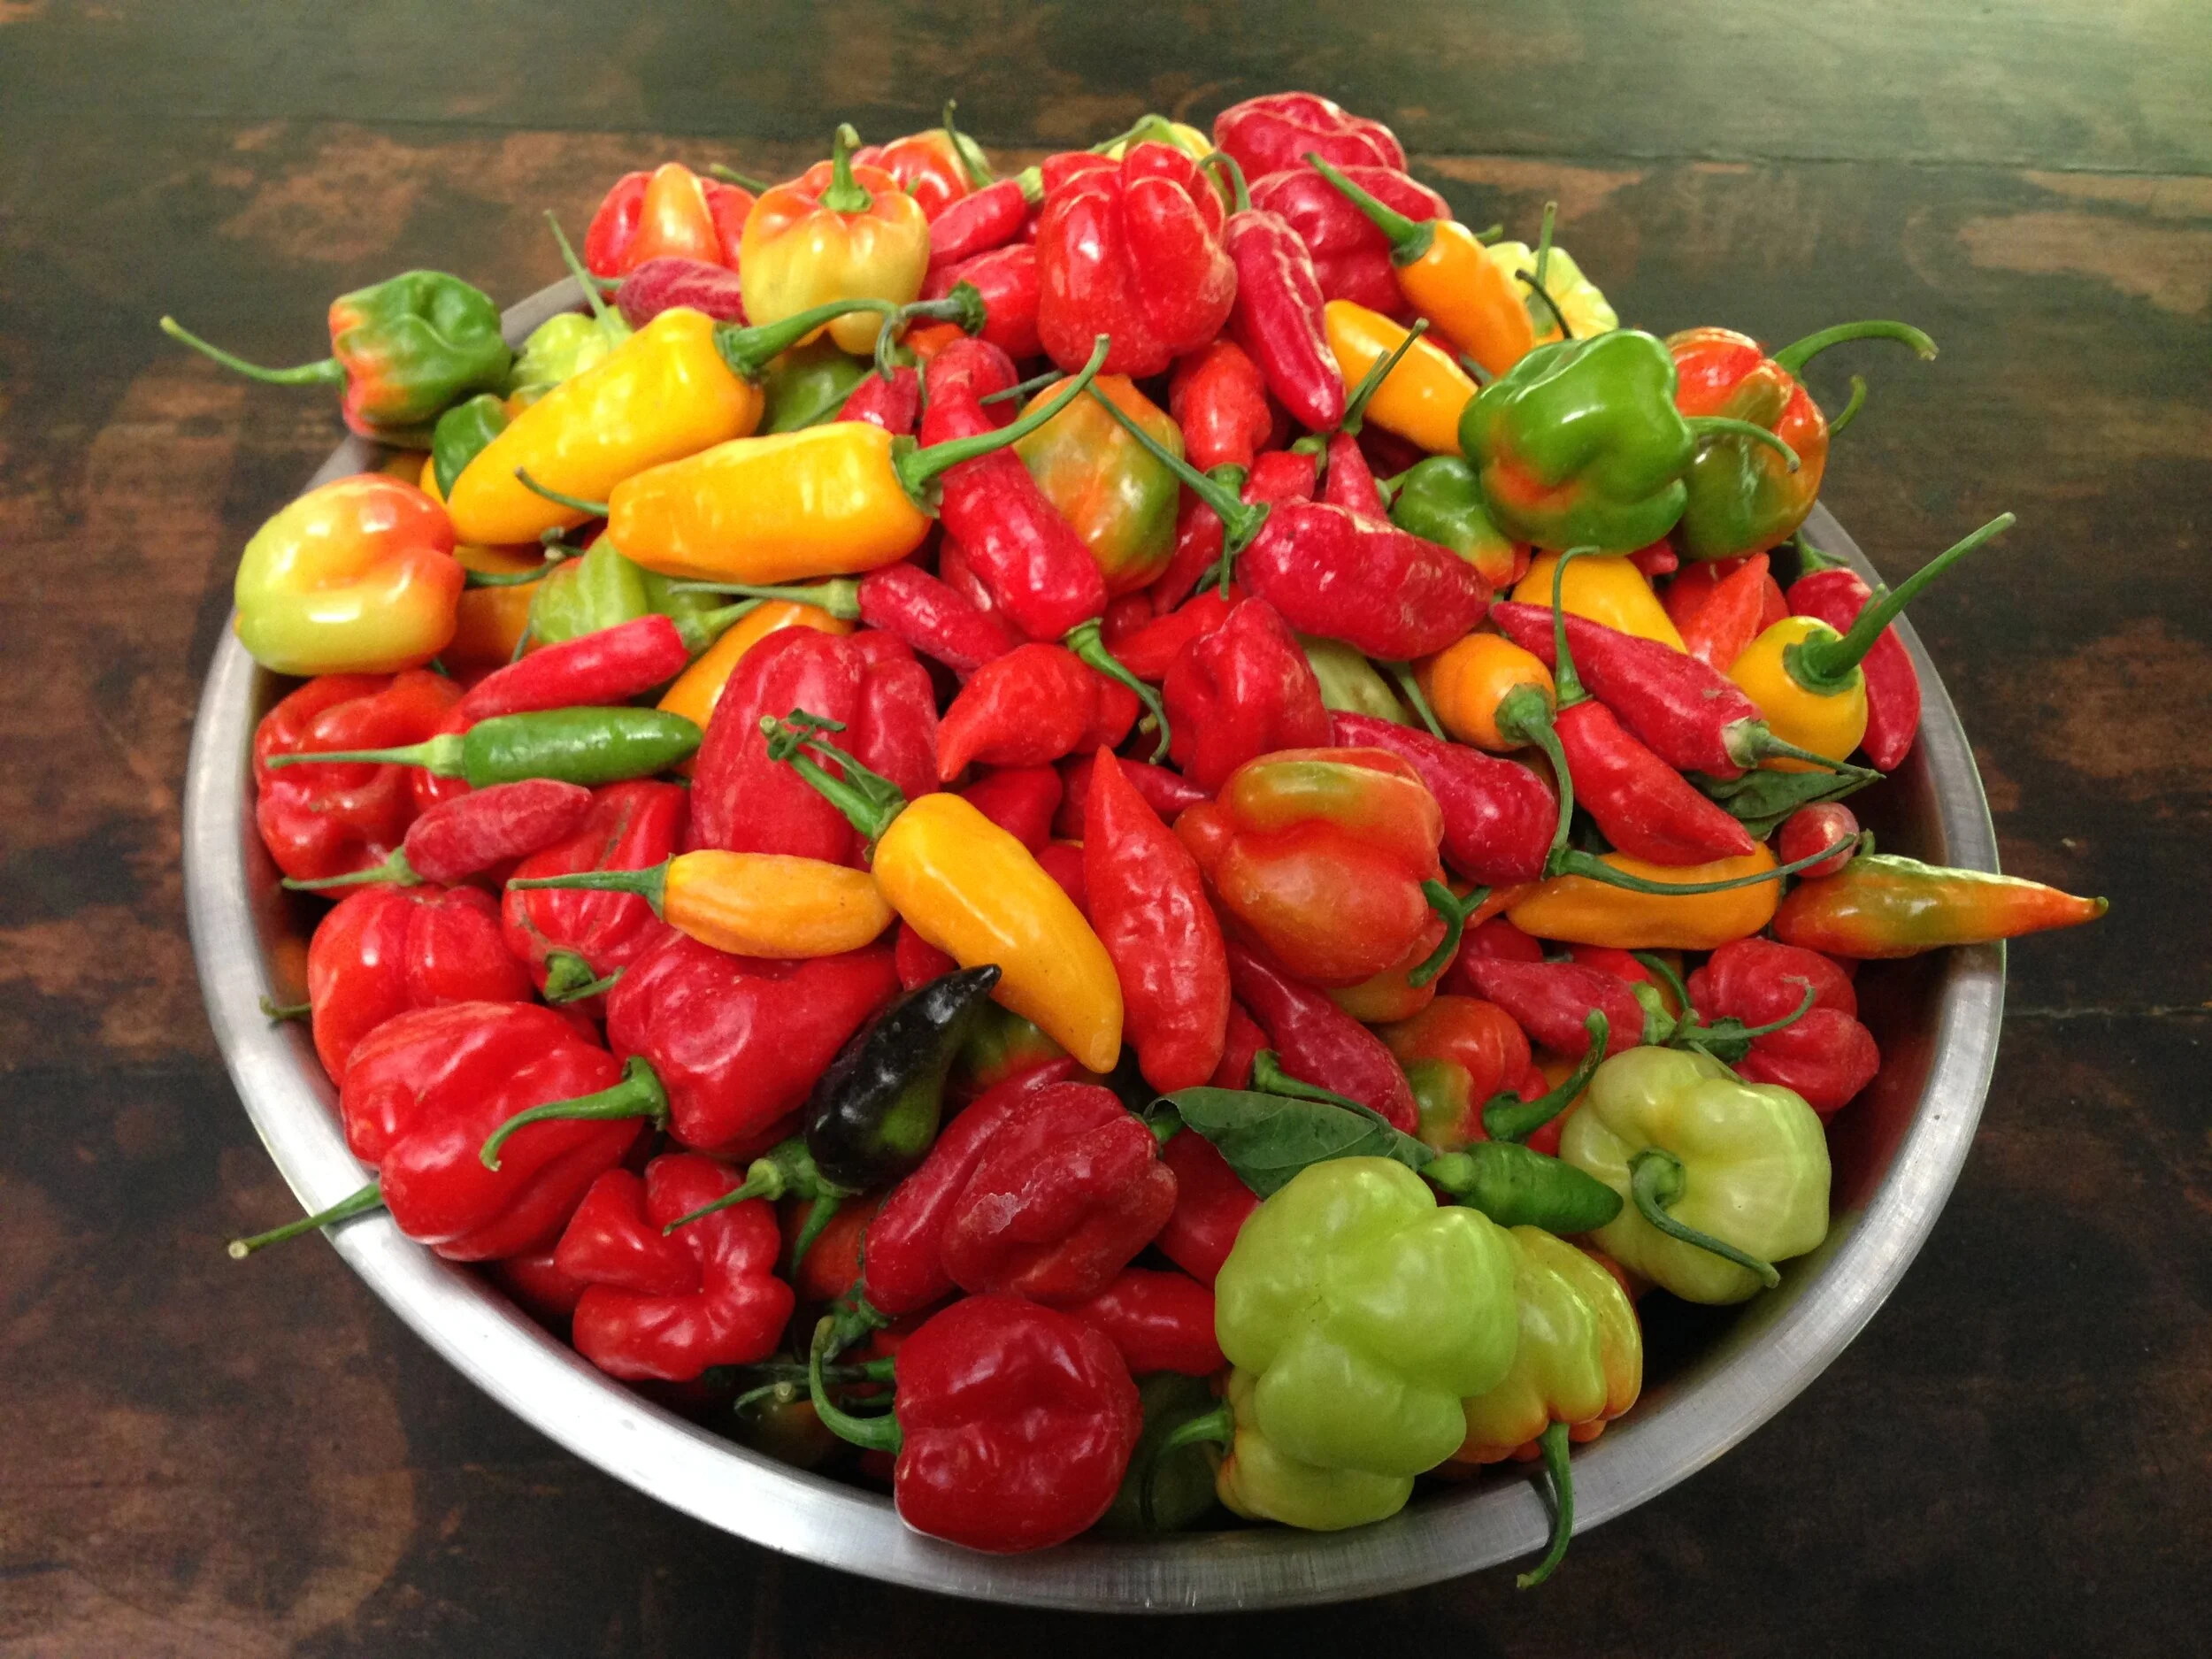
At the Ranch, we try our best to follow permaculture principles. A couple of big ones are obtaining a yield and transforming/repurposing waste. Hence farm to table recipes abound and we are consistently trying to find novel ways of using our yields and decreasing our reliance on outside produce. This dry season has been particularly productive for our chillies and has hence inspired some spicy condiment creations. Below are a few spicy specials you can try at home:

Different types of chiles drying
Tabasco Sauce
Tabasco is perhaps the most famous hot sauce ever made. First synthesized in 1850, when Maunsel White decided to boil and mash up some chiles he’d brought back from Tabasco, Mexico and add vinegar and salt. The peppers found their way into middle-aged banker Ed McIlhenny’s hands whence they were blended, lacto-fermented for 30 days (nowadays they are fermented for 3 years in oak barrels) and then put into wine vinegar, creating the hot sauce we all know and love today. It’s a simple and delicious way to preserve chiles and comes in two varieties: quick and slow.
Ingredients:
· Chiles
· Vinegar
· Salt
Method 1 (quick version)
Step 1:
Chop up the chiles and weigh. Add 2% salt by weight (e.g. 100g chiles = 2g salt) and mix. Put them into a large container and make sure they are completely submerged in brine – you might have to add brine to achieve this. [Brine = water + 2% salt]. Leave the chilies to ferment for 1-2 weeks.
Step 2:
Remove chiles from brine (keep the brine!) and blend them into a chunky paste. Put the chiles back in their brine and add vinegar. Leave to ferment another week.
Step 3:
Strain off the liquid – this can be bottled and used as (quick) Tabasco.
[Pro-tip: The chilli solids can be dehydrated (in the sun or in an electric dehydrator) and used as chili flakes!]
Method 2 (slow/proper Tabasco version)
Step 1:
Same as quick version
Step 2:
Same as before - strain, blend and put into a jar but don’t add vinegar or brine this time. Place a muslin cloth (we just use a repurposed pillowcase) over the top of the jar and press down.
Step 3:
Add a thick layer of salt on top of the cloth – this will help seal the sauce whilst absorbing much of the moisture. This salt can then be dried and used as chile salt, once the sauce is ready.

Place cloth on top of jar and press down

Add thick layer of salt

Fold edges into the jar and cap
Step 4:
Leave to ferment for 6 – 36 months.

Chiles fermenting away

Finished Tabasco Sauce!
Chilli Jam (approx. 800ml)
This is one of my favorite condiments. It goes great with anything fried, meaty, cheesy and/or salty. Yum. The ingredients are few and the method easy. You can play around with this one as much as you like, substituting, adding and subtracting ingredients to your heart’s (and tongue’s) desire…
Ingredients
- 4 tomatoes
- 4 bell peppers
- 20 chiles
- 2 onions
- 2 heads of garlic
- 5-10grams of ginger
- 700grams sugar
- 300ml malt/balsamic vinegar
- [fruit of your choice]

You can smoke your chiles to give it a smoky taste!
Method
- Start by blending everything (except the tomatoes, sugar and vinegar) to a chunky consistency.
- Roughly chop the tomatoes and chuck them into a pot over medium heat. Cook them until they are softened up and the skins are starting to come off (5mins).
- Throw in the rest of the blended ingredients. Stir and cook (2mins).
- [You can throw in any fruit of your choosing here to give a unique flavour to the jam. We've had success with: pineapple, passion fruit, pickled limes, papaya and roasted zucchini.]
- Add sugar. Stir until dissolved (2mins).
- Add vinegar. Stir.
- Cook on a low-medium heat stirring occasionally until the jam has cooked down to a jammy consistency (30-45mins).
- Leave to cool - flavours will combine and take on new dimensions once the jam has cooled!
- Put in a glass jar and store in the fridge. Should keep for at least 3 months.
Jalapeno & Lime Pickle Hot Sauce
This is a two-step recipe that involves an initial lacto-ferment. Like the chilli jam, you can get creative and substitute the lime pickle for other fruits.
Ingredients
- 20+ Jalapeno peppers (or another chile of your choosing)
- 2 onions
- 2 heads of garlic
- 5-10grams ginger
- 2 carrots
- 250ml orange juice syrup*
- 2 lime pickles / juice of 2 limes

Lime Pickle
Method
Step 1 - Lacto-ferment:
- Roughly chop the: 20+ Jalapeno peppers, 2 onions, 2 heads of garlic, 5-10cm ginger, 2 carrots
- Weigh the total and add 2% salt. Mix.
- Put into a jar and submerge in brine (salt water).
- Leave to ferment for 1-3 weeks.
Step 2:
- Take your lacto-fermented ingredients and blend them (brine 'n all) to a paste.
- Mix in orange juice syrup.*
- Finely chop lime pickles / squeeze the juice of 2 limes and mix into sauce.
- Bottle it up and enjoy!
*Make the syrup by mixing 1 part orange juice to 1 part sugar. Cook over a low heat until the liquid reduces down to a syrupy texture.
So, there you go. Three simple chili sauce recipes to spice up your meals and make your grandmother proud. Hope you enjoy them as much as we do! Stay tuned for more farm to table tips, tricks, and recipes!

Farm to Table Banana Vinegar
I know, it sounds like a weird flavour combo. Sour banana? Whaaat? But it works and it’s tasty. This recipe is a very accessible way of doing farm to table whilst utilizing and transforming “waste” into something productive and delicious – permaculture 101.
By Marco, Apprentice 2020
Permaculture Vinegar?
I know, it sounds like a weird flavor combo. Sour banana? Whaaat? But it works and it’s tasty. This recipe is a very accessible way of doing farm to table whilst utilizing and transforming “waste” into something productive and delicious – permaculture 101.
What makes a Vinegar
Firstly, let’s take a quick look at what vinegar is. The word vinegar comes from the Latin vinum acer – literally “sour wine”. Alcohol is fermented by a large family of bacteria called Acetic Acid Bacteria (AAB), who turn ethanol into acetic acid. These little guys are everywhere - airborne and on the surface of most living things including me, you and, as it turns out, bananas! AAB are aerobic, which means they need air (oxygen) to do their thing, unlike Lactic Acid Bacteria for example (the main players in lactic acid ferments, such as kimchi and sauerkraut) which are anaerobic.


Check out our last blog on home-brewing your own alcohol.
Farm to Table Vinegar
So, here is a breakdown of how we make our farm to table banana vinegar here:

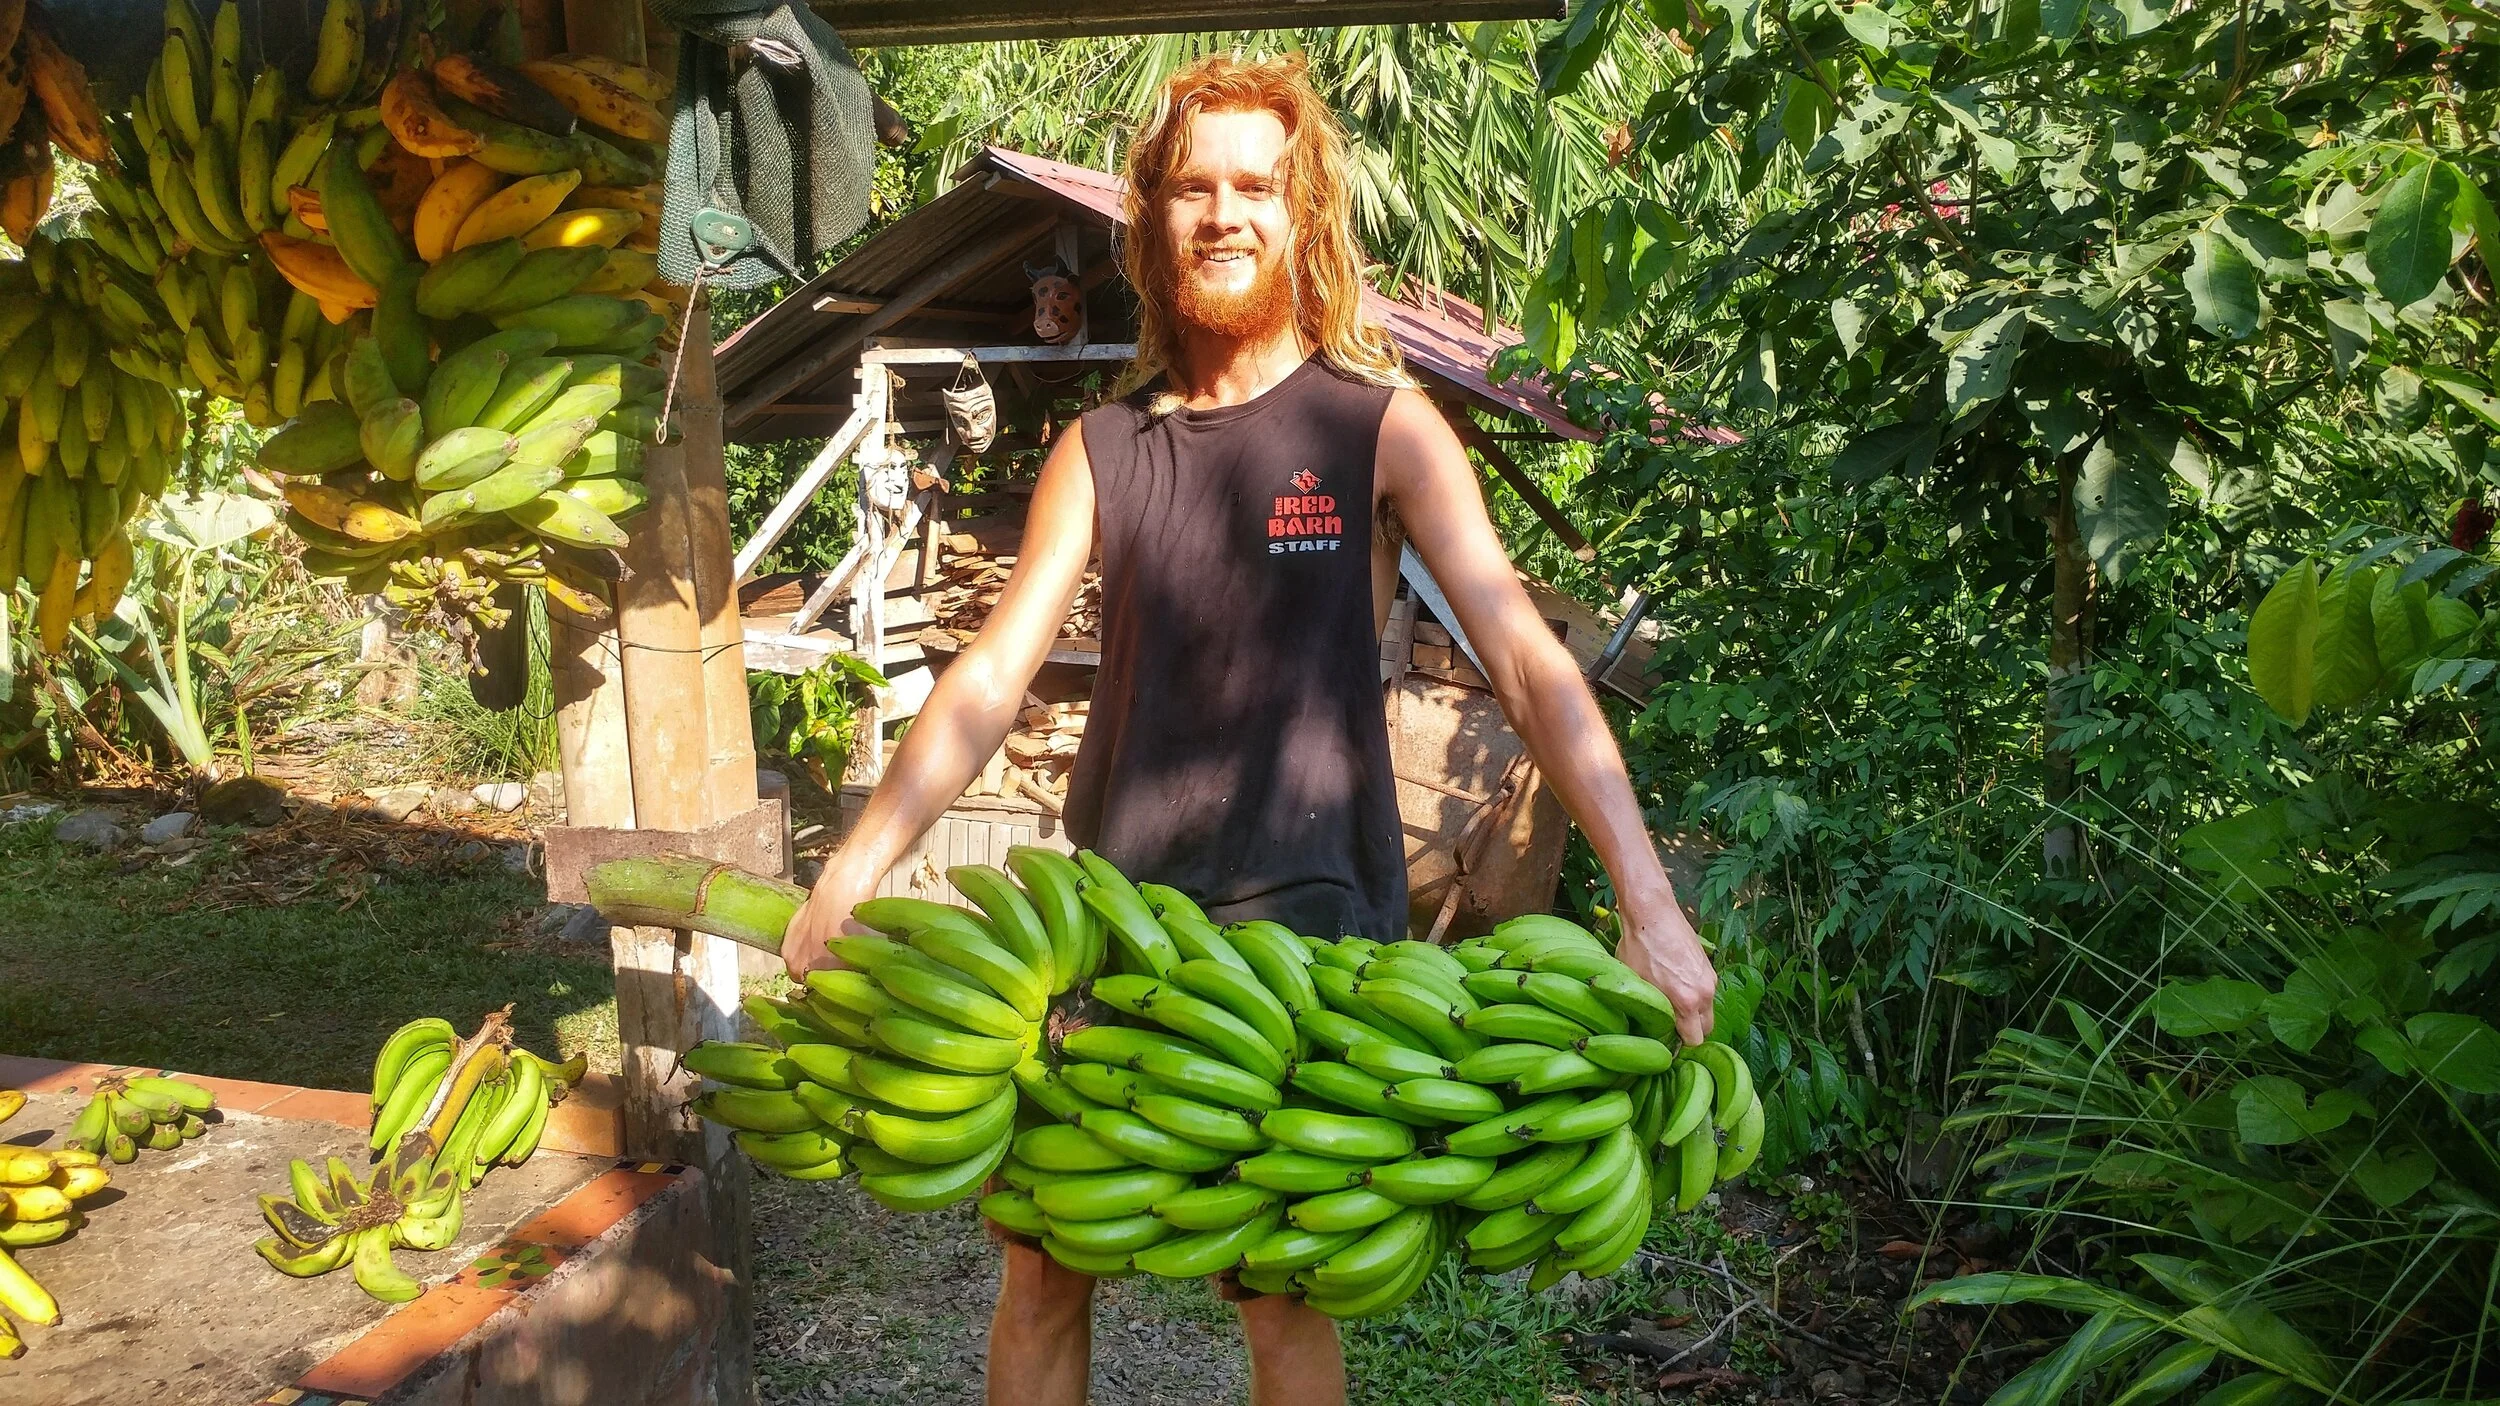
Go out and harvest them bananas, or maybe you already did that and you have far too many ripening… so next
With our main and only ingredient: bananas we don’t even need to peel them. You can just smoosh ‘em all up, skin n all, and chuck ‘em into a bucket. Beautiful. This process works best when they’re very ripe. We’re talking leaky, mushy and black. The ones nobody wants to eat, which sit around in the fruit bowl way too long, eventually they get picked up by the loser of rock, paper scissors and thrown out with an overly extended arm and a wincing face… Yeah. These are the ones that make great vinegar. Waste? Nay, but a resource in the wrong place. It’s farm to table, not farm to trash.
After you’ve smushed them all up and put them into a large container (we use a 5 gallon bucket, but you could use any large enough container), all you need to do is leave it and wait for the acetic acid bacteria to get to work on turning the alcohol into acetic acid. The time this takes varies depending on your conditions and the state of your bananas, but somewhere between 1-3 months. Remember that AAB like oxygen, so keeping a breathable lid on top of your vinegar, such as a muslin, will help speed up the process. o You could also attach an air pump and air stone (such as one that you’d use in an aquarium) to pump and diffuse air into your vinegar. This should significantly decrease fermentation time.
[TIP: you can hammer a nail into the bucket near the bottom. Leave the nail in until you’ve finished fermenting. Once your vinegar is ready, you can remove the nail and all the liquid in the bottom of the bucket will drain out.]

Upon opening your banana vinegar for the first time, you’re gonna get a bit of a shock as you see what appears to be a sprawling metropolis of mold growing all over your black bananas. Do not despair. Despite everything you were taught about rotting fruit, this is not a bad thing. Generally speaking, bright colored molds (pinks, yellow, greens etc.) are the ones to be wary of. Get another container and a sieve and pour whatever liquid you have into this second container through the sieve.

Next, take those moldy bananas into your hands and squish with all your might. Get in there! Don’t be afraid! Squish harder, dammit! Get all those lovely juices out and dispose of the solids.
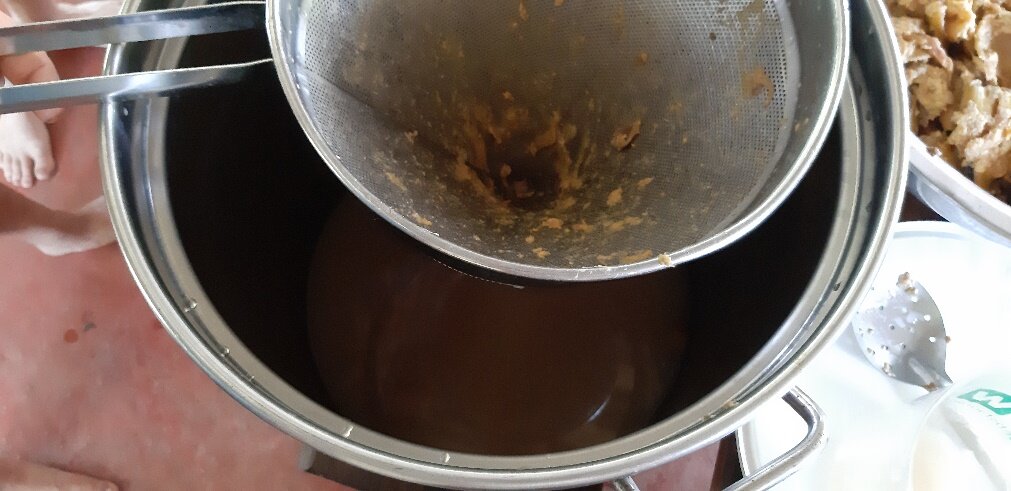
Finished squishing? Good. It’s time for your first taste test. If the vinegar tastes too sweet and not sour enough, it probably needs more time. If this is the case, you can add a little sugar – this is to allow the yeast present to convert more ethanol for our AAB friends to metabolise into more acetic acid. Another option is adding a little vinegar from a previous batch (this is called backslopping in fermentation lingo). If you don’t have a previous batch, you can use a shop-bought vinegar - white vinegar is a good bet as it has a neutral taste that won’t mess with the bananary-ness. Check back every week or so until your vinegar has reached the desired level of acidity. And there you have it! Easy-peasy farm to table banana vinegar using permaculture principles – there is no such thing as waste.
You can now bottle your vinegar and age them. This step is optional and will enhance the flavour profile of the vinegar. We use glass bottles that we recycle from the farm. It is important to use a sealed bottle and fill it as much as possible. If the AAB are exposed to oxygen they could begin to break down your acetic acid into carbon dioxide and water.
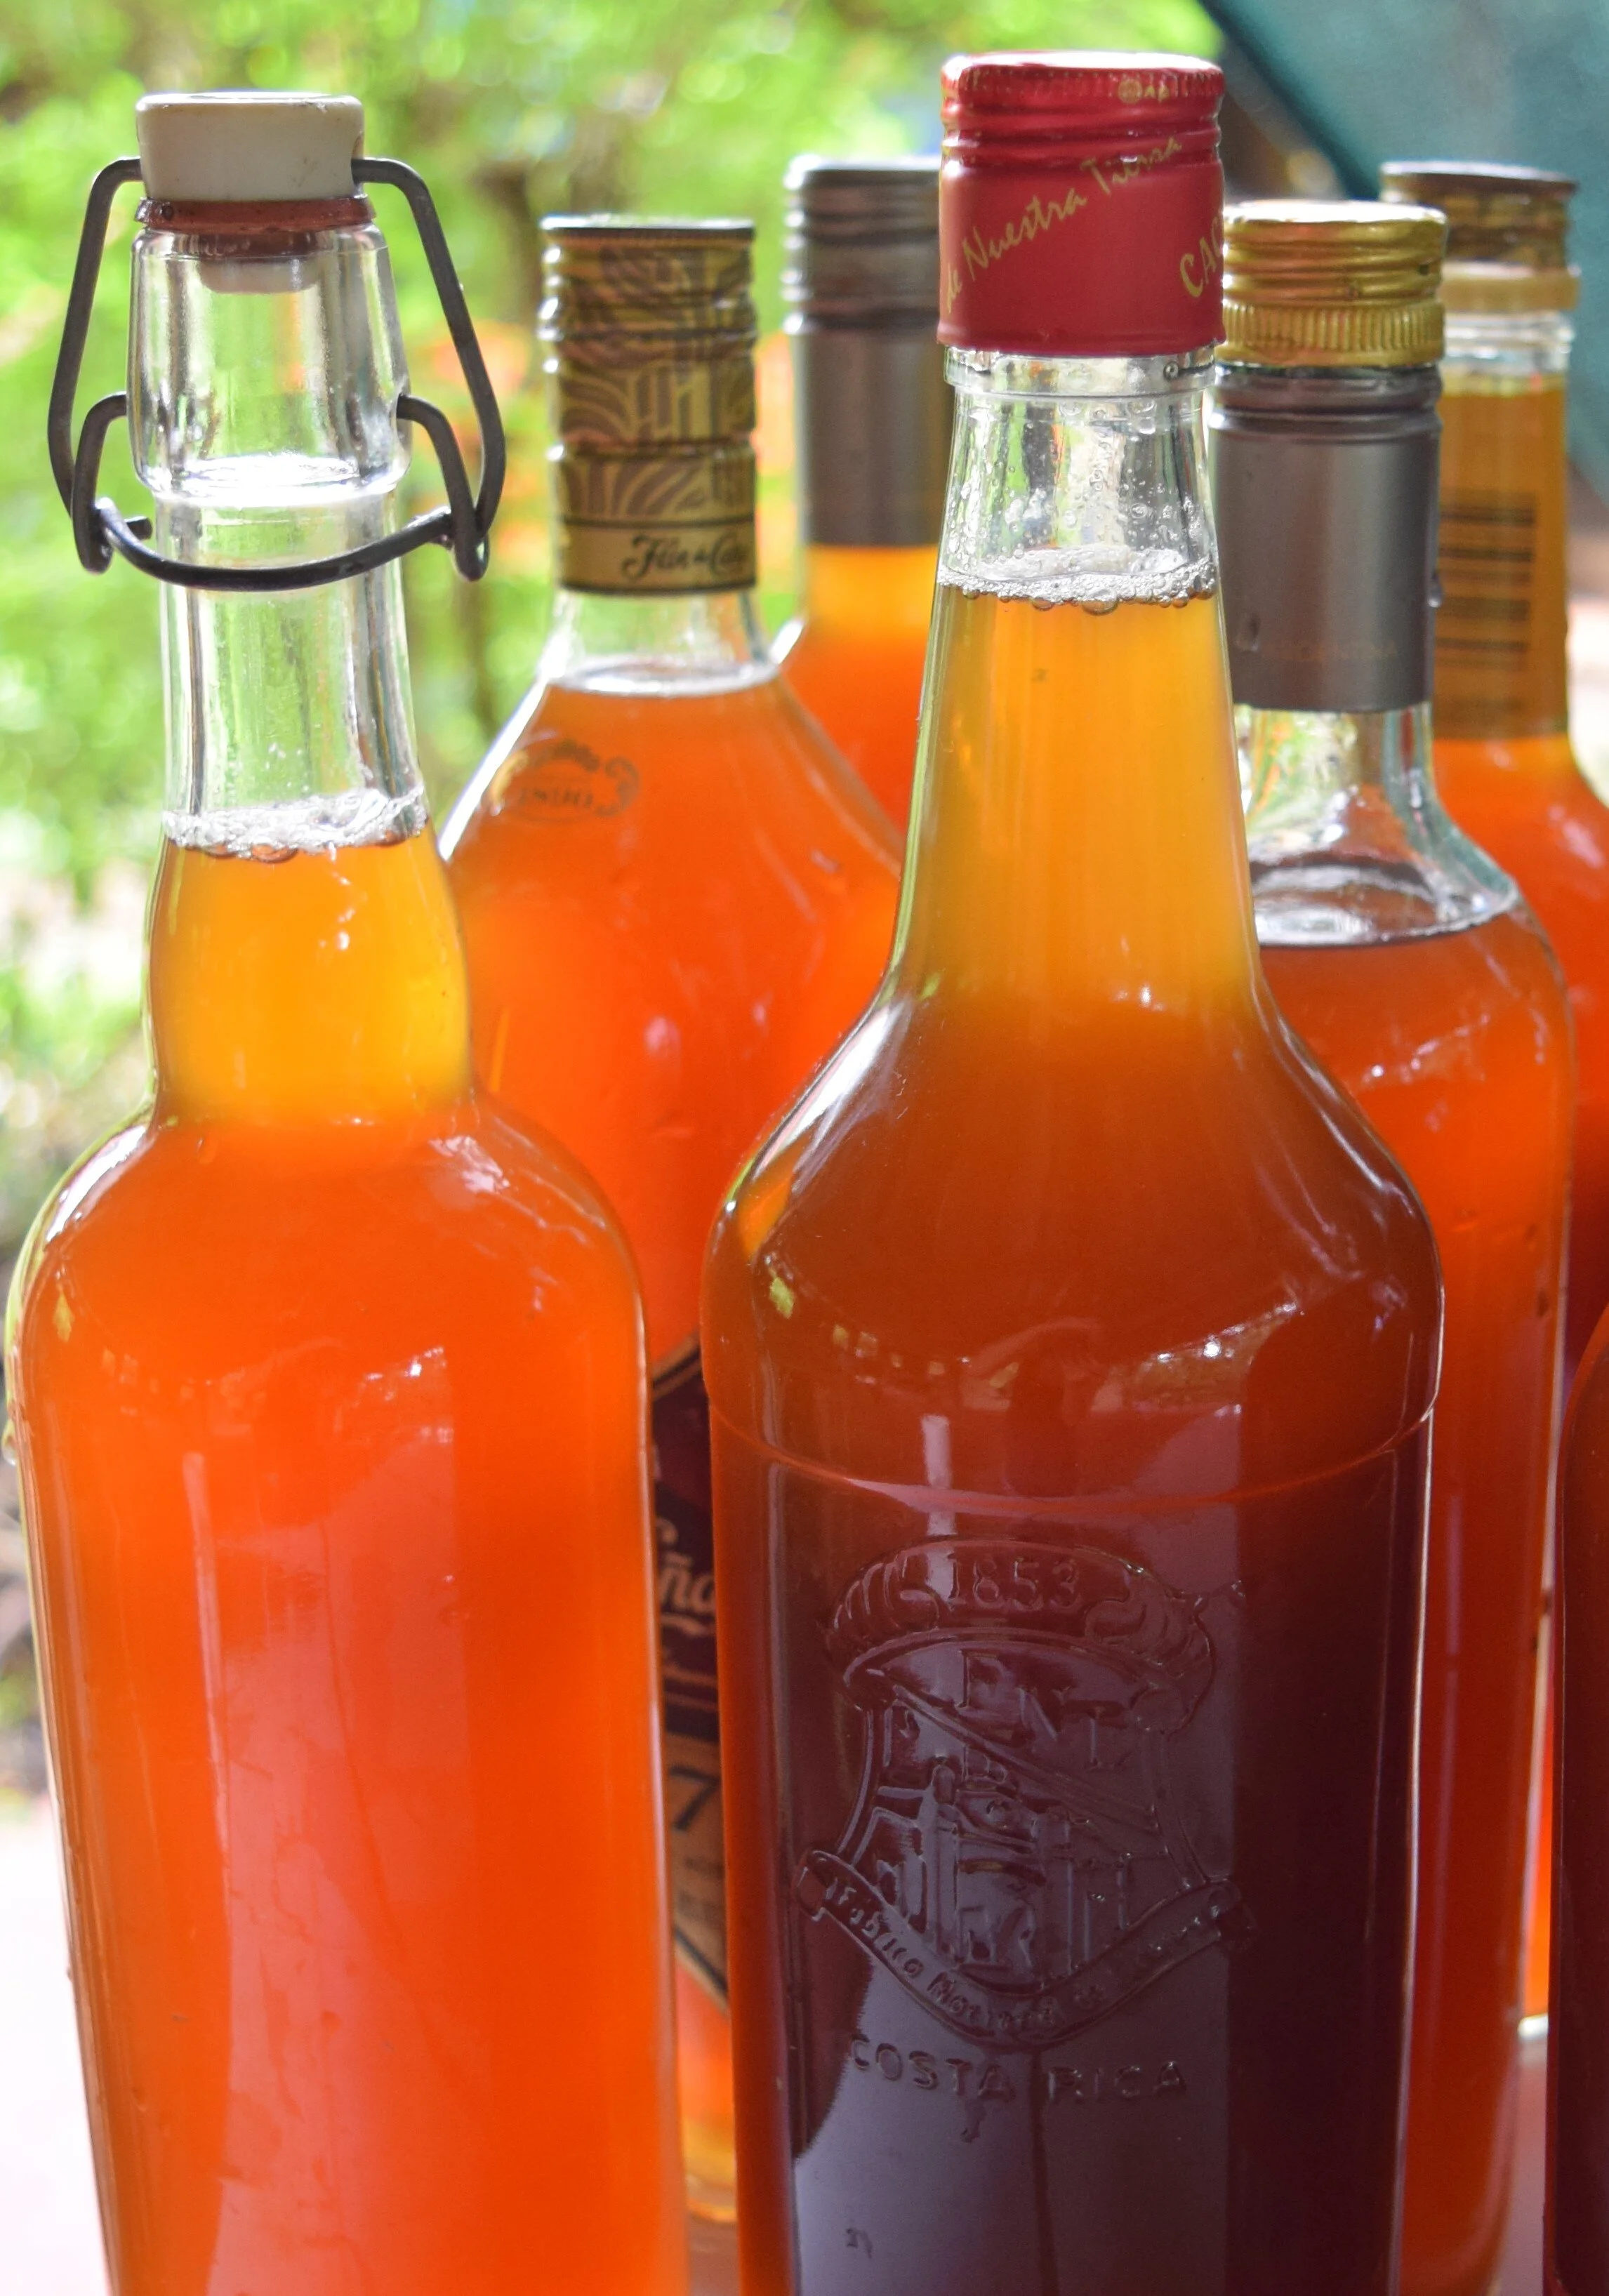
It’s that simple folks! This is a great way to use up all those old bananas.
Enjoy your farm fresh, homemade vinegar! This can be done with a variety of fruits that you have in excess off the farm!
Stay tuned for more farm fresh recipes.

Tropical Brewing
The craft brewing movement has migrated to Central America and the Caribbean. A growing number of small scale artisanal producers are building on the American Craft Brewing tradition by incorporating local spices and fruits into traditionally brewed ales. To distinguish themselves, from their temperate counterparts, they are adding a tropical flare and creating innovative flavor combinations
by Connor Harron
The craft brewing movement has migrated to Central America and the Caribbean. A growing number of small scale artisanal producers are building on the American Craft Brewing tradition by incorporating local spices and fruits into traditionally brewed ales. To distinguish themselves, from their temperate counterparts, they are adding a tropical flare and creating innovative flavor combinations. For example Domingo7’s Maracuyá Pale Ale (that’s Spanish for Passionfruit) in Costa Rica, Ocean Lab’s B.O.B. - Blood Orange Blonde in Puerto Rico and Lu Bru’s Maiz Azul (Blue Corn) Ale in Mexico all demonstrate how local producers are beginning to incorporate regional ingredients into local craft beer movements. This is surely a positive development and one that leads us to consider other ways we might be able to further highlight local and seasonal ingredients into craft beers.

These efforts will help to make brewing both more sustainable and position craft brewing as a vehicle for more thoroughly exploring terroir, which describes the potential for fermentation to be used as a method of expressing the unique environmental conditions of the places in which our ferments are produced. By using exclusively local ingredients as well as wild captured yeasts, we have the power to capture the unique flavors of seasons and regional differences that allow for near infinite variation and creativity to explore new combinations of flavors that are rooted in cultural tradition while simultaneously pushing the frontier of artesian brewing. As much as I love finding good craft beer in places like Mexico and Costa Rica, I constantly find myself asking if it really makes sense to be brewing beer with imported German Barley and Hops from the Pacific Northwest United States when there are such a plethora of sugar sources and bittering herbs available locally in nearly every corner of the globe. Could we instead develop beers using a hybridized process and create products that are truly local while still maintaining the key characteristics that make beer, beer?
Speaking of, have you ever asked yourself what it is that really makes a beer? It turns out, the answer really depends on who you ask and where you live. In the most general terms, beers are fermented from carbohydrate rich starches (typically grains such as barley) that first need to be enzymatically converted into simple sugars and extracted into a liquid malt before the substrate can be fermented to produce appreciable levels of alcohol. Wines and Ciders on the other hand, are fermented from fruits and simple sugars that can be fermented into alcohol with limited or no processing. In the case of beers, bittering herbs such as hops are commonly added to provide antimicrobial properties, improve shelf stability and add complex flavors to ferments. In the United States, it turns out that hops are not required in the production of beer and that there are many malt substitutes that are allowed in the production of beer, including “rice, grain of any kind, bran, glucose, sugar, and molasses (TTB Ruling, 2008).” This definition is actually quite liberating, and creates the opportunity to experiment with non-traditional malts and bittering herbs in ways that will promote creativity and improve the sustainability of the craft brewing market globally. This flexibility in malt production will be especially important given that recent climate models suggest that the regional distribution of barley production will become increasing restricted over the next 20 years (Nature, 2018).

In Costa Rica, we have been experimenting and finding repeated success using a wide range of local ingredients including banana, corn, rice, cacao beans, coffee and local cane sugar for producing malts. Corn and bananas, for example, both have long cultural traditions of being used in the creation of local beers. In Eastern Africa, Bananas have long been used to create malt for the production of banana beer (Urwaga or Mubisi as it is locally known). Bananas make for an interesting malt base because they fall into a relatively unique category of fruits that when ripe are rich in both simple sugars and complex carbohydrates that can be easily fermented into a strongly alcoholic brew while maintaining a mouthfeel that is remarkably similar to beer brewed from barley. When the ripe bananas are boiled for several hours, the sugars begin to caramelize, transforming the flavor of the malt into a sweet, neutral flavored base that remarkably, tastes very little of banana, making it an ideal substrate for mixing with bitter herbs or other local products such as coffee and chocolate that can be fermented into either an Ale or Stout like brew.

Conversely, in many parts of South America, but perhaps most notably in Peru, Maize has been used for centuries to produce a corn beer called Chicha. Unlike barley, which when sprouted produces a large concentration of Amylase Enzymes (the key types of enzymes needed to convert complex carbohydrates into fermentable sugars), to make a corn beer, these enzymes need to come from another source. The indigenous peoples of South America developed an ingenious solution to this challenge when they discovered that chewing the cooked corn would transform the starchy, carbohydrate rich grain into a sweet masa that could then be re-boiled in water and strained to create a fermentable Wort made purely from Maize. Although many foreigners cringe when they first learn about the process, for the Inca’s, it was a powerful community building practice that would bring people together to sit around the fire, alternating between sharing stories and laughter while chewing the cooked corn and then depositing all of the masa into a large pot. Although they almost assuredly could not have fully comprehended the transformations that were taking place, their solution was so ingenious because human saliva is packed full of the enzymes needed to break down the carbohydrates in corn into fermentable sugars. I experimented with the traditional process a couple years ago, and I have to admit it was a powerful community building process that for me, took the idea of collective fermentation to a whole other level. Talk about terroir!
The problem with the traditional process is that it is incredibly labor intensive. If you are lucky, like me, you might be able to convince your friends to help you chew a few pounds of corn once or twice for the novelty of the experience, but you are likely to be hard pressed to find a consistent source of labor to chew through the many pounds of corn you will need to produce even a few gallons of Peruvian style Chicha. Fortunately, today we have access to many sources of amylase besides our saliva. As it turns out, ripe bananas (and in particular, ripe banana peels), contain a very high concentration of the same amylase enzymes needed to convert the starches in Maize into fermentable sugars. If you think about it, this actually makes a lot of sense. Unripened green bananas and plantains are a very starchy staple food crop that is used culinarily in a similar fashion to potatoes. As the skin yellows and the banana ripens however, the banana naturally transforms those carbohydrates into simple sugars that make dessert bananas so pleasant to eat directly out of hand.
Due to the high concentration of amylase enzymes present in ripe banana peels, they can be dehydrated and pulverized into an enzyme rich powder that can be mixed with ground maize and water and then mashed similarly to a barley based beer between 140-160 F for 2-24 hours (depending on the ratio of corn to powdered banana peels used) before being strained and boiled to make a fermentable wort. You’ll need to taste the Mash or use iodine strips to determine when the conversion has been completed. There are actually lots of fruits and vegetables that are rich in amylase enzymes. Sweet potato, for example, has such a high concentration of these enzymes that its peel is often used in the commercial production of Amylase.
Alternatively, instead of using the enzymes present in another product, it is also possible to ferment grains with certain types of molds that consume starches and in turn naturally produce the enzymes needed to convert the grains of carbohydrates into fermentable sugars. In Japan for example, Aspergillus Oryzae (or Koji as it is better known), is a humble yet miraculous mold that has been grown on rice for millennia in order to sweeten the rice and make Sake. It is also the key ingredient for making naturally brewed Soy Sauce or fermenting Miso due to the rich diversity of enzymes Koji produces that not only sweeten carbohydrate rich foods, but also break down proteins into amino acids that are the basis for savory foods and the flavor of umami. Due to these impressive properties, koji has now made it’s way out of Japan is slowly become increasingly familiar around the globe. This is assuredly a wonderful thing, because it has now been well established that Koji can be grown on a variety of substrates and virtually any grain, including rice, barley and corn, making it an ideal candidate for assisting in the brewing process anywhere on Earth.

To further explore local flavors and novel combinations, while boiling our worts we have been experimenting with using a variety of local bittering herbs and teas to add complex flavors to our beers, including ginger, turmeric, lemongrass, vanilla and many others. During either primary or secondary fermentations, we use nylon mesh bags weighed down with boiled volcanic rocks to infuse fresh fruit from the farm such as Pineapple, Soursop, Starfruit, or freshly roasted Cacao Nibs, just to name a few examples. Finally, by fermenting our beers with mixed cultures, wild captured yeasts and/or locally adapted strains, we have been able to produce ales with several layers of harmonious flavors, which provide depth and complexity that is only possible to achieve with mixed culture fermentation.
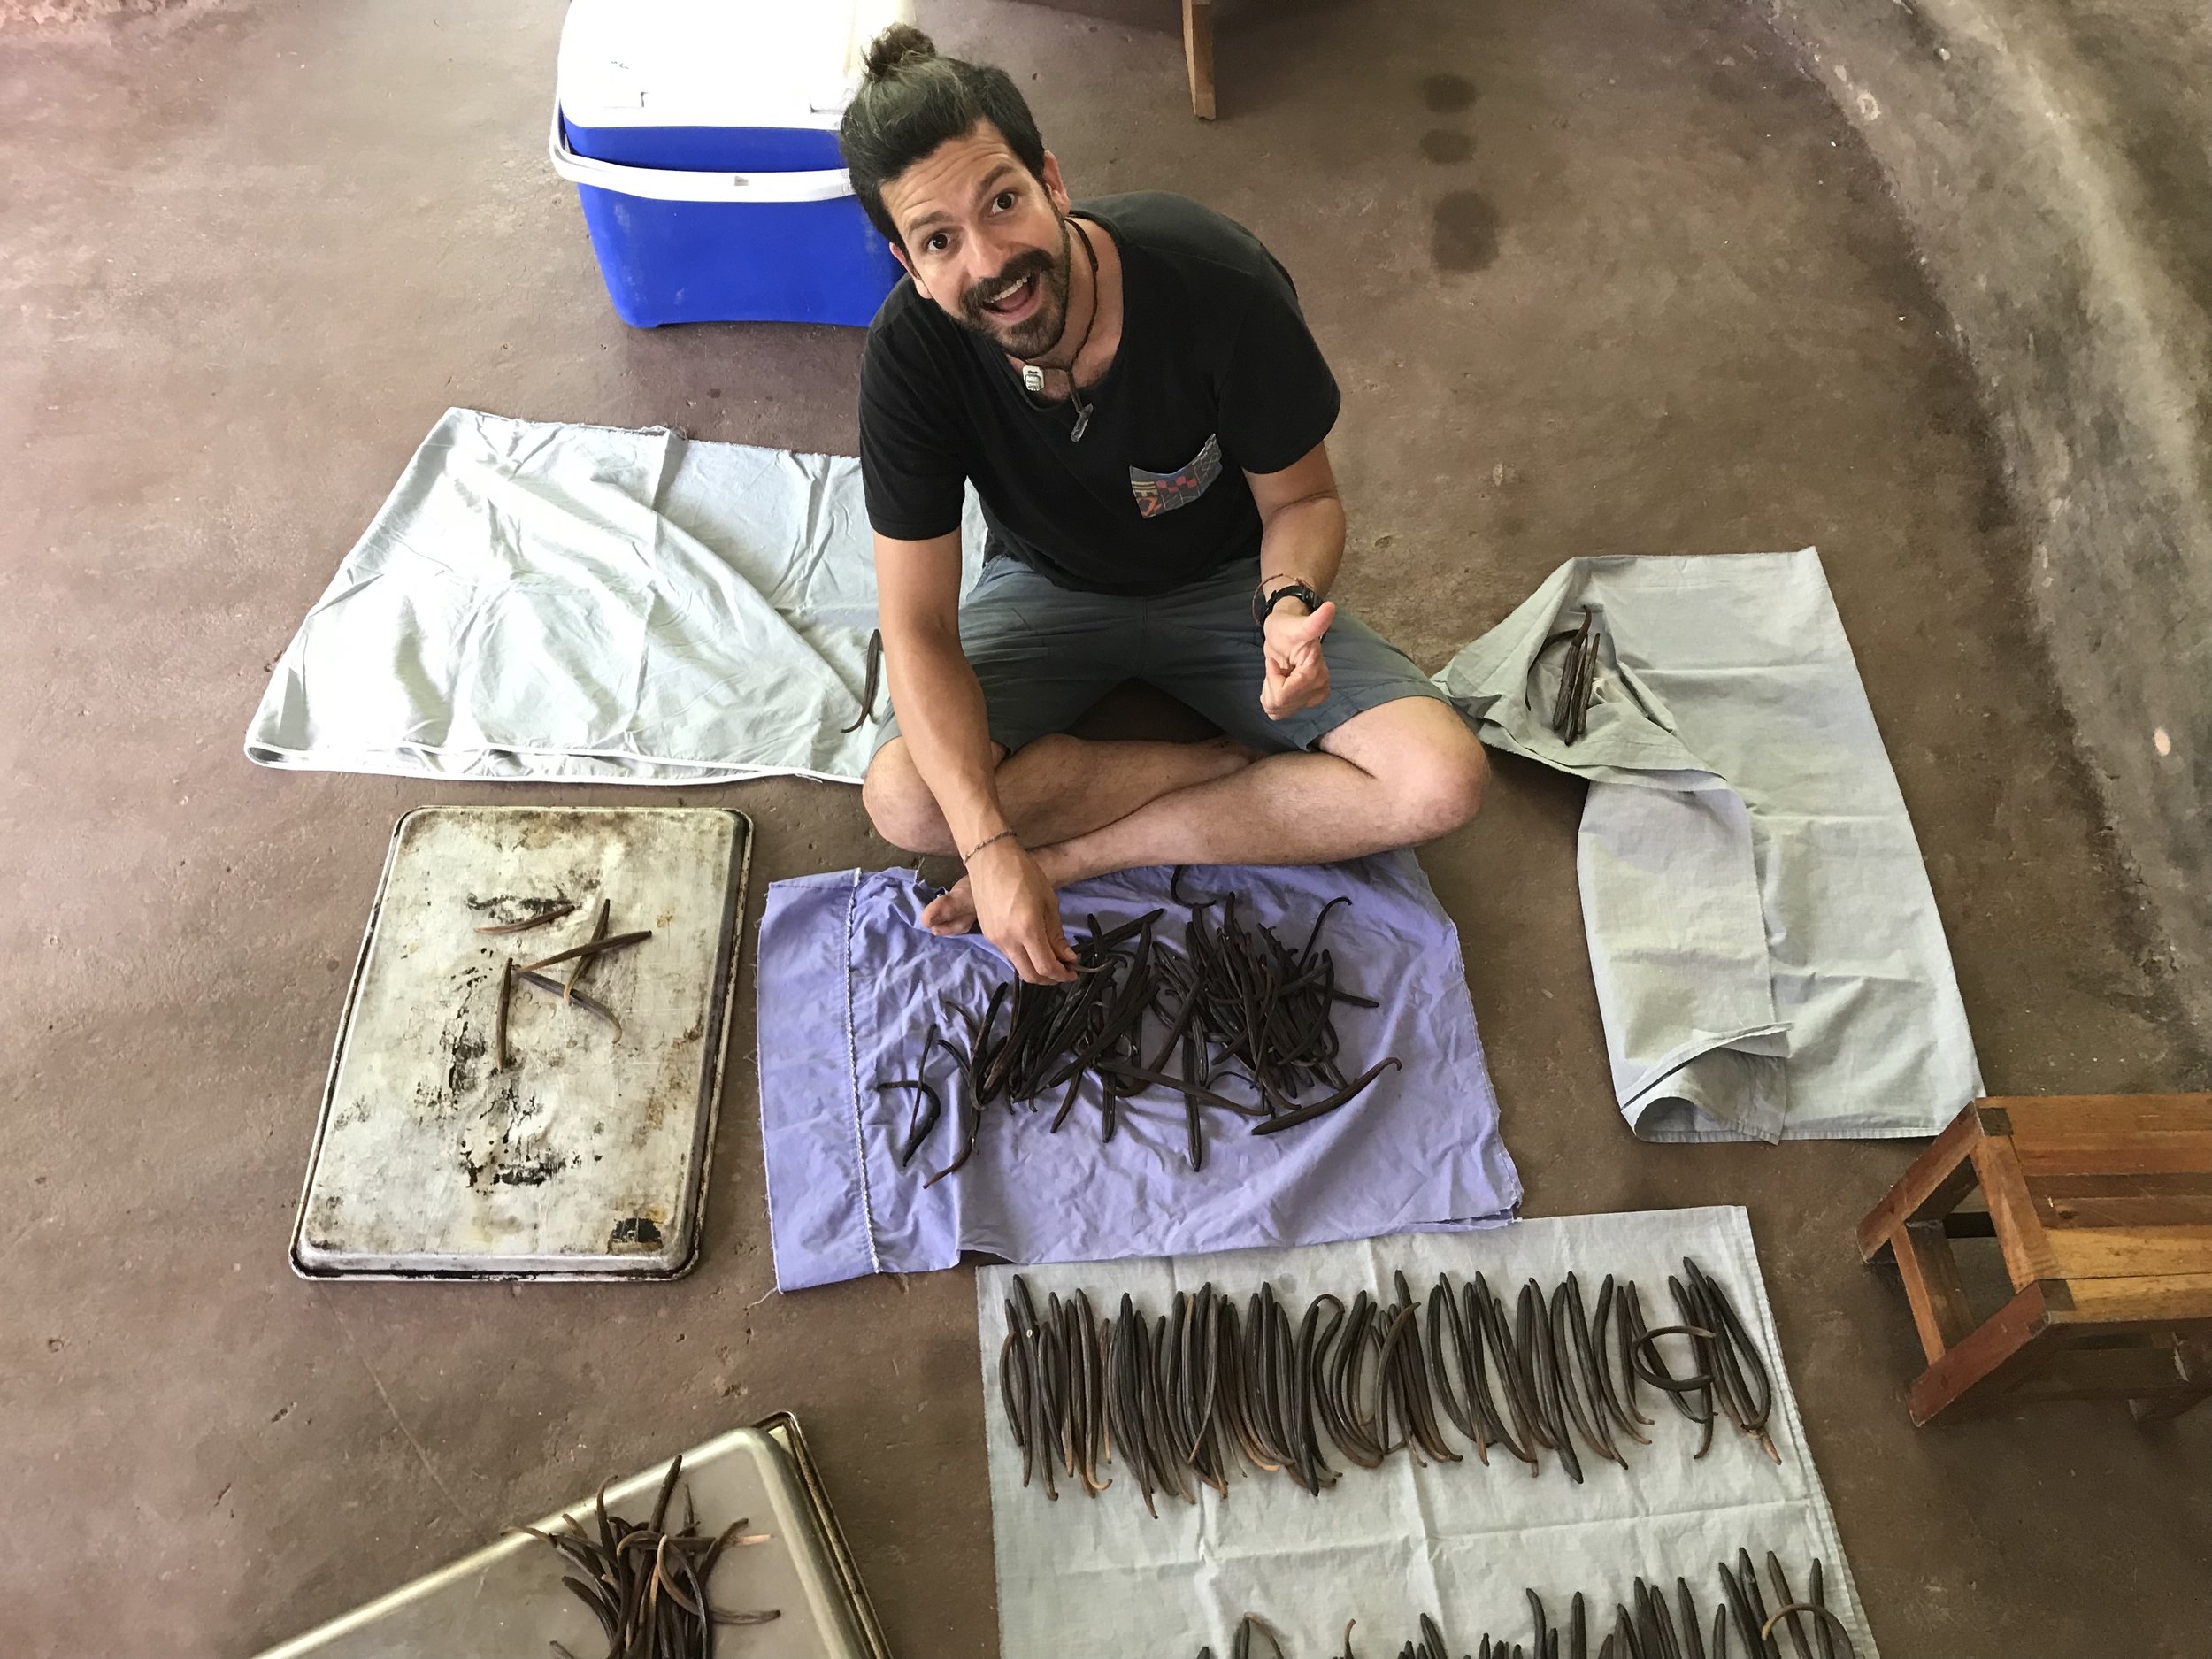
I would not have believed what a powerful role yeast and bacteria play in the creation of complex beers and wines when I first started brewing over a decade ago. Now however, I have learned first hand just what a difference the cultures we use can make. The experience of trialing yeast captured off of different fruits and flowers has led me to encounter flavors I never would have dreamed possible. Some have certainly been on the far side of the funky extreme, including cultures that produce the dreaded odor of sweaty feet or burnt rubber. This however, is exactly the reason for small scale trials rather than placing our faith in large scale spontaneous fermentation. Once you discover the joy of fermenting a simple malt of dissolved sugar or Dry Malt Extract with wild yeast and tasting apples, pears, or other citrus fruits magically appear in the finished product, I believe that like me, you will never want to use a commercialized yeast strain on it’s own again.
I believe that by drawing from the richness of our cultural traditions around the world, we have the potential to greatly expand the breadth of our palates and to more intimately link our brews to the time and place in which they were crafted. The craft brewing revolution is still in its infancy and if I am to have a part of to play in it’s development, then Ginger Hibiscus Sake Hybrids, Banana Coffee Stouts, and Mayan Chocolate Ales will be just the tip of the iceberg.

If you would like our simple Hooch recipe, read our blog article with step by step instructions. If you want to learn more about the wild world of fermentation consider joining us for our year long apprenticeship where apprentices go deep into advanced fermentation techniques.

Dairy Dairies: How to Make Cream Cheese with Dairy Kefir
Dairy Kefir is so interesting to me because it embodies stacking functions - like alchemy, it's possible for 1+1 to equal 4. Milk, grains (scoby) and a days time and voila, you have a delicious base product better than the milk you started with. It's now lightly carbonated, stable in the fridge, resistant to microbial incursion, lower in lactose, tangy, creamy, probiotic and great for your gut.
By Ryan Roberts
2019 Apprentice
That's right folks, we're making cheese with the champagne of yogurts.
Dairy Kefir is so interesting to me because it embodies stacking functions - like alchemy, it's possible for 1+1 to equal 4. Milk, grains (scoby) and a days time and voila, you have a delicious base product better than the milk you started with. It's now lightly carbonated, stable in the fridge, resistant to microbial incursion, lower in lactose, tangy, creamy, probiotic and great for your gut.
Furthermore, that stable base product, can be used to create a wide variety of different specialty products that carry with it those unique value-added characteristics that we impart with our time, energy and expertise. During our last diary entry, we discovered Dairy Kefir Creme Fraiche, which you can read about here . This time we'll be making luscious, spreadable and customizable cream cheese out of dairy kefir.
In our first diary entry we discussed dairy kefir's characteristics and how it's made. You may recall that the dairy kefir scoby acidifies the milk as a defensive (or offensive) measure against other microbial life, which have difficulty surviving with such a low pH.
I've discovered for myself, though I don't claim to be first, that we can utilize that acidity to accomplish what is usually done with rennet, vinegar or citric acid: separating the curds (fats) from the whey (protein). Though the exact function of this process is unknown to me, the result appears to be the same. Left for a few days at room temperature, reveals to me that the dairy kefir will separate on its own. But there's a trick!
While leaving the scoby in the milk will speed the process of acidification, we want to be able to easily separate the scoby from the curds and from the whey. We do this with a sieve that catches only the grains, allowing the kefir to flow thru to your ready container. When the kefir is left to ferment longer and it separates, it makes it difficult to capture the curds and grains separately.
Instead, I remove the grains from the dairy kefir prior to separation. The dairy kefir will continue to acidify, though slower, but you'll be left without the headache of hunting thru the curds for your grains.
So starting with the previous step, here are the steps. Now that you have your dairy kefir and scoby separate we can begin:
1. Make your dairy kefir. Follow the instructions laid out in my first blog entry here (link 1st blog).
2. Remove scoby and place in a container with fresh milk.
3. Secure cheese cloth around the rim of a tall container. Make sure there is room for whey to drip to the bottom and accumulate.
4. Pour dairy kefir into fine cheese cloth hanging over the container.

5. Wait 24 hours, allowing time for the remaining whey to drain from the curds. I repeat this process a few times till it quits draining from gravity. The remaining cream is our cream cheese. The live-culture whey can be used in a variety of ways, including starting new ferments by inoculation, using as a probiotic protein supplement, and for cooking with in soups.

Dairy Kefir Cream Cheese

Whey - delicious for soup stock
6. Spread the cream cheese out on a pan with a rubber spatula. Sprinkle in salt and your choice of herbs or dried vegetables. Imagine sun-dried tomatoes, garlic, onions… yes please!

7. Now fold the cheese onto itself, repeatedly, which helps to mix the ingredients in evenly.

8. Place in a container and serve. Buen Provecho!
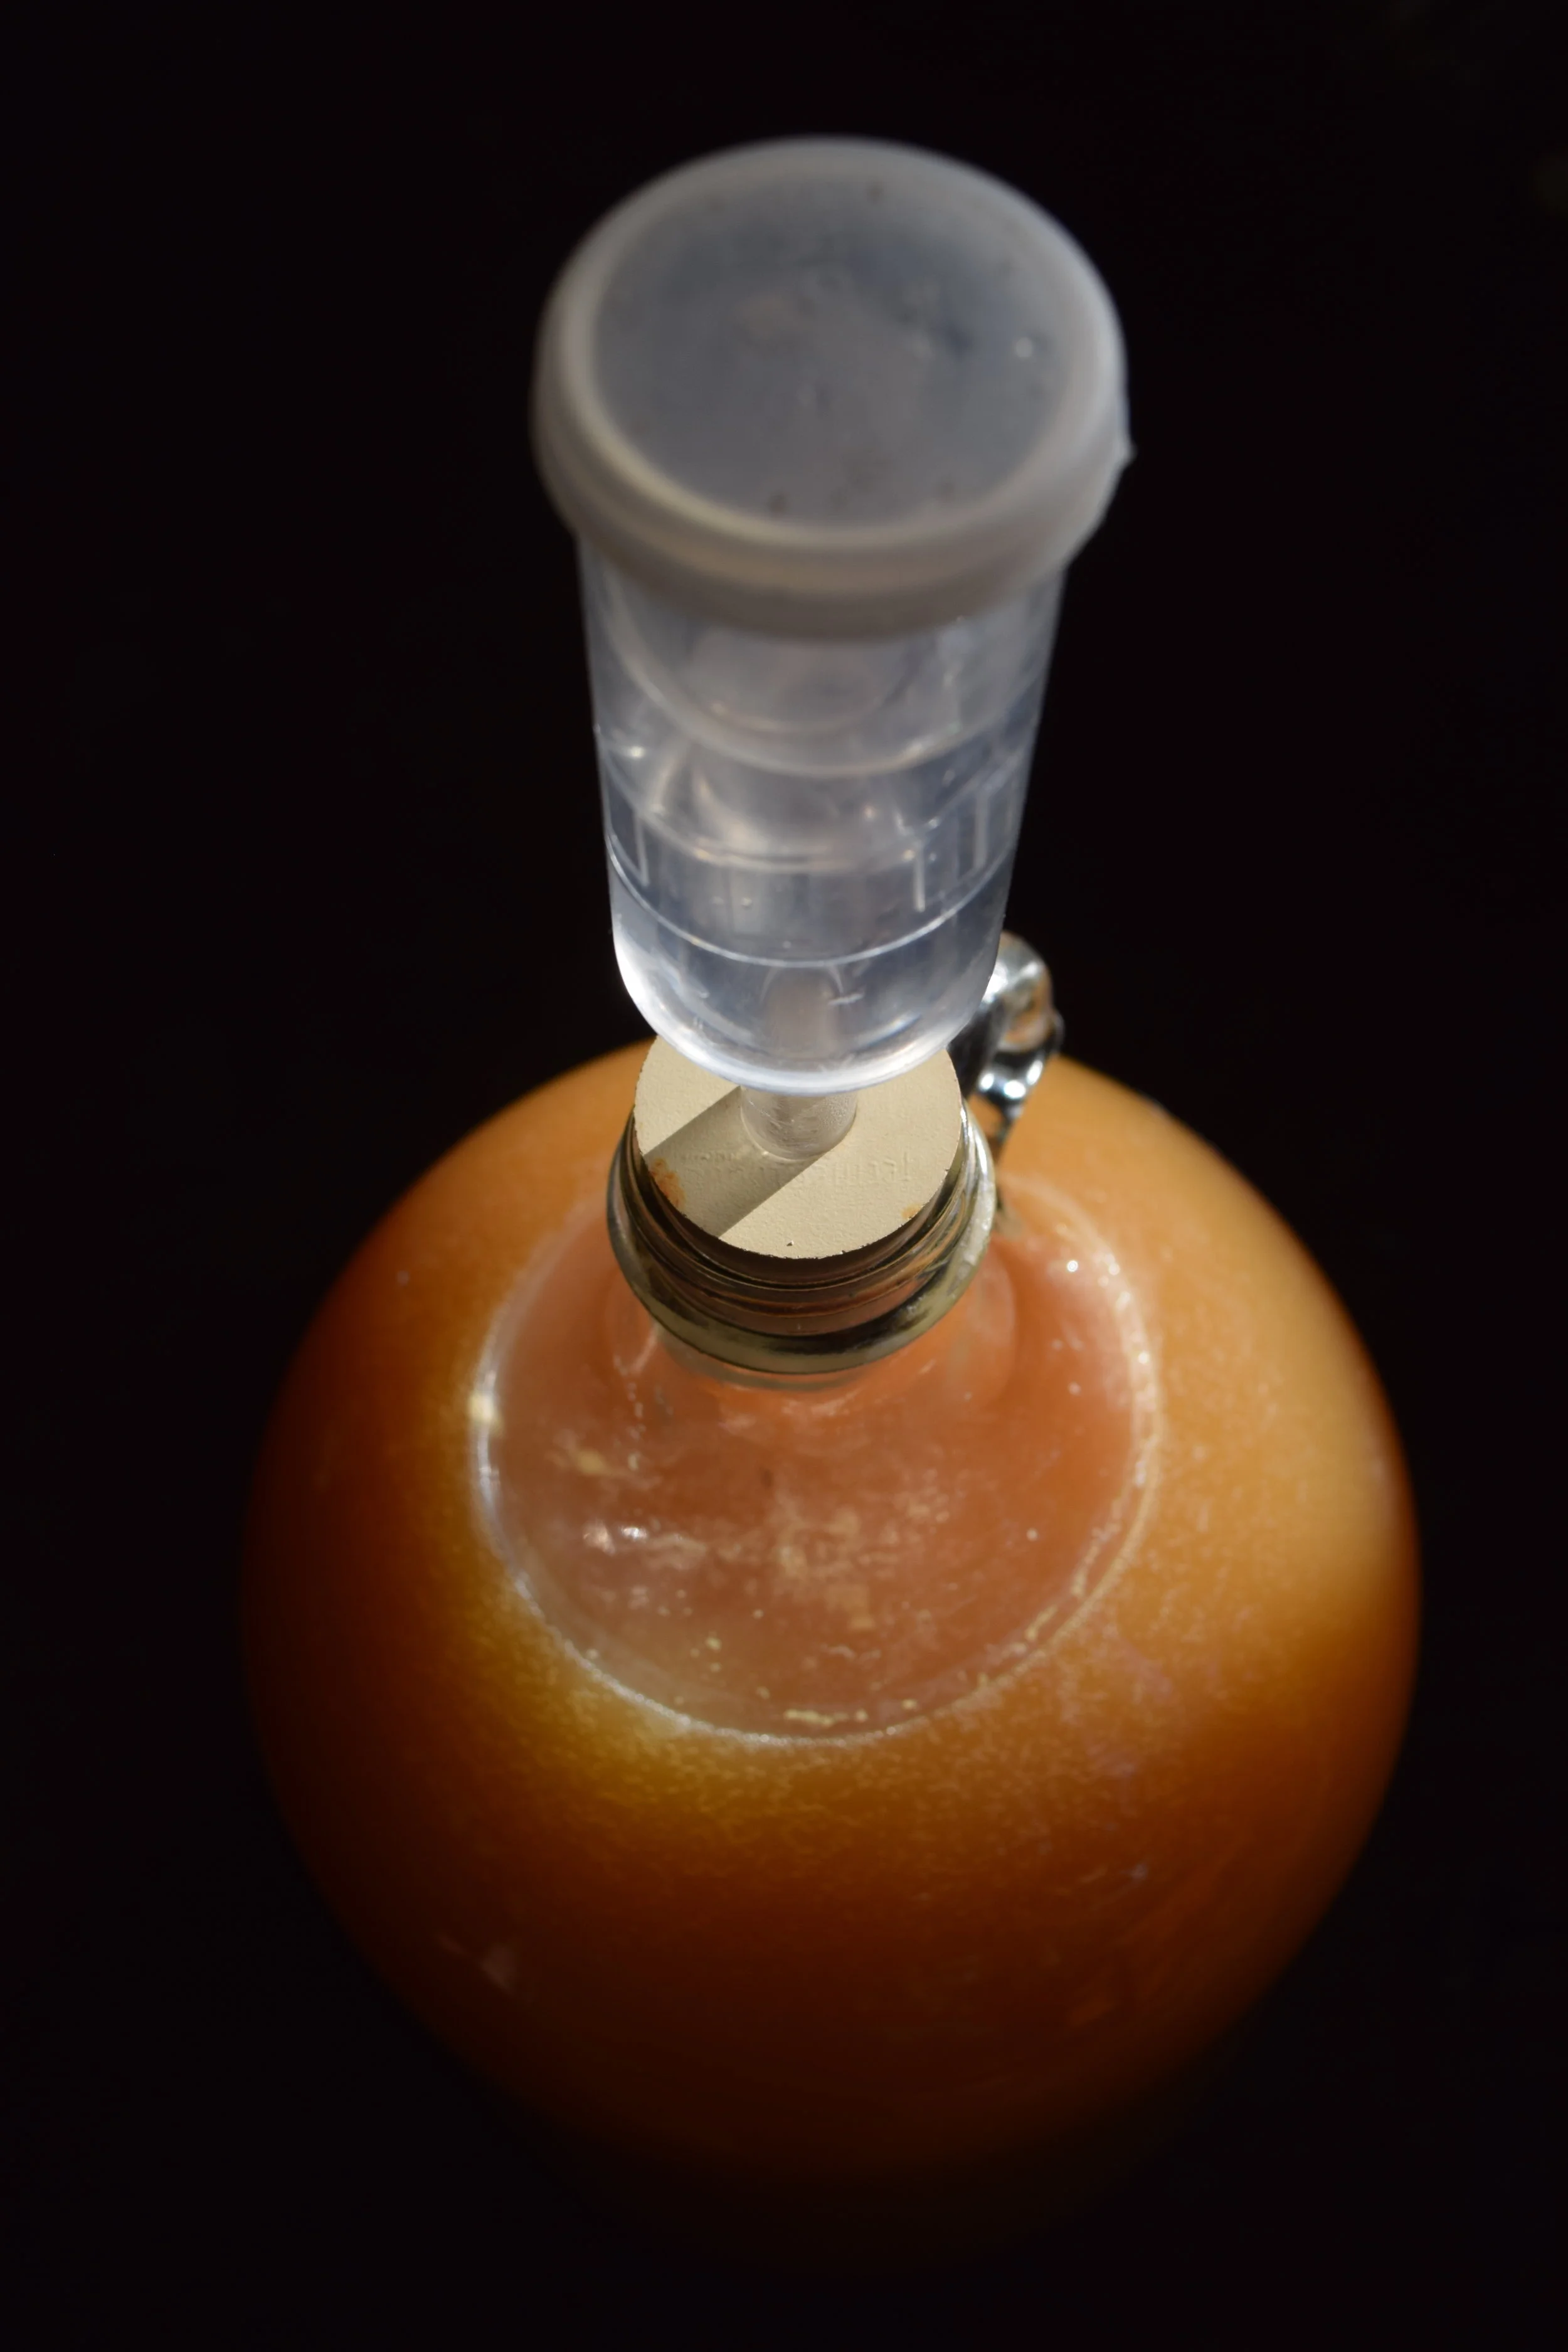
How to Make a Simple Hooch
Hooch is a homemade alcoholic beverage and in this blog I’m going to explain how to make it.
For thousands of years humans have been fermenting for recreational, spiritual and medicinal uses. Fermentation allowed humans to store and use ingredients they’d harvested later in the year. Although hooch is an alcoholic beverage, it can also be brewed for medicinal purposes.
by PJ Barton, 2019 Apprentice
Hooch is the name we use to refer to our own homemade alcoholic beverages. In this blog I am going to explain how we make our delicious home brew. Interested in Fermentation? join us for our upcoming workshop THE ART OF FERMENTATION.
During the peak season at Rancho Mastatal we drink around 15 gallons of Hooch a week. We brew our Hooch in Corny kegs, these are great as they are made of stainless steel, they are easy to clean and easy to maintain as you can easily purchase all of the replacement seals.

Our Corny Kegs
For thousands of years humans have been fermenting for recreational, spiritual and medicinal uses. Fermentation allows us to safely store ingredients without the need for refrigeration and prior to the advent of electricity it was the primary way to store certain foods and drinks. Although hooch is an alcoholic beverage, it can also be brewed for medicinal purposes, by adding herbs and spices with the desired properties. By actively harvesting fresh fruits and yeasts from our surrounding area, creating and exploring new brews, we are able to connect to our environment in a fun and practical way. Hooch is a great way to use up fruits which are already naturally fermenting and processing them into something enjoyable to consume, turning our waste into something useful.

Yeast is a culture that is one of the base ingredients for making Hooch. It feeds on sugars when we mix it with sugar and water creating carbon dioxide and alcohol. We can buy commercial yeast strains, which are sold for brewing or we can harvest our own wild yeasts from our environment. Different wild yeasts will impart different flavors and characteristics to our homemade brew, try experimenting with these wild yeasts and see which ones produce flavors you enjoy most!
Harvesting Wild Yeast
To harvest wild yeasts from fruits and flowers
Collect them in a sterile jar and leave in a dilution of 20 percent sugar to water (eg 40g of sugar to 200ml of water).
After 48 hours (although this will depend on the ambient temperature), sediment should start form on the bottom of the jar, bubbles will start appearing, and your solution will begin to ferment. this is a sign of a healthy solution!.
Remove the fruit or flower from the liquid.
Continue feeding with sugar every day for a week and you will have you own yeast culture that you can use to start brewing with.
Basic Hooch recipe
This basic Hooch recipe is really simple and uses 3 simple ingredients. You can add fruits or herbs to extract the taste that you desire. There are many opportunities for experimentation when you start making your own alcohol and hopefully you can create delicious beverages to enjoy with your family and friends.
Simple recipe to make your homemade hooch:
For a 2 gallon batch
· 2 pounds unrefined cane sugar (we use Tapa Dulce)
· 2 gallons of water – 1 gallon tea
· 2 cups of wild yeast solution (see above instructions on how to harvest wild yeasts)

Tapa Dulce
How to prepare:
Melt the sugar into a gallon of hot water, until the sugar has dissolved.
Mix in the remaining gallon of water to help cool off the sugar water, make sure you cool it down to 100F degrees. This process is creating a wort in which you pitch the yeast.
Once the liquid has cooled down pitch the yeast. Stir it well and transfer it to a container with an airlock for a minimum of 1 week before consuming
This is a standard hooch consumed on the ranch other enjoyable combinations such as coca, vanilla and ginger or oranges, cinnamon ginger. In every available resource there’s a new taste to explore. Enjoy and have fun experimenting
Want to learn more? Join us for a day workshop or a longer residential workshop


Making Microbes: Fungal vs Bacterial Soil Life
Organic gardeners and farmers understand the need to cultivate and protect soil microorganism life. The strategies to do this involve mulching, composting, and avoiding soil disturbance as much as possible. We know that these strategies, in addition to many others, encourage a healthy soil-food-web.

Organic gardeners and farmers understand the need to cultivate and protect soil microorganism life. The strategies to do this involve mulching, composting, and avoiding soil disturbance as much as possible. We know that these strategies, in addition to many others, encourage a healthy soil-food-web.
The soil-food-web is the interconnected matrix of invisible (fungi, bacteria, protozoa, nematodes) and visible (earthworms, beetles, arthropods) creatures that have a whole host of functions which create a healthy ecosystem for plant growth. They aerate the soil, decompose organic matter, make nutrients available, prevent nutrient leaching, break down toxins, protect plants from pathogens, fix nitrogen and so forth.
What we can take away from this bit of knowledge is that we want these organisms operating on our garden or farm. The best way to do this is by creating the habitat and food they need in order to thrive. This seems simple, but it quickly becomes complicated when we explore the details.
Each of these organisms does better with different food sources and each of them change their environment in different ways. In addition each species of plant we are growing thrives in different soil environments; apples and arugula have evolved very differently and the more we can support their evolutionary requirements the healthier the plants will be.
That becomes our starting point; where we ask:
What type of soil environment do our crops desire?
How can we then encourage the specific type of microorganisms to create that environment?
Fungal-Bacterial Ratio
Here at the Ranch we are growing tree crops, which as I've written in this blog before, thrive in an environment that mimics the forest ecology surrounding our orchards. One measure we can use to understand this ecology is the fungal to bacteria biomass ratio (F/B).
This is a measure of the portions of the microbial biomass, ie. all the living organisms in the soil, that is fungal vs that which is bacterial. The F/B ratio is primarily used to study the impact of human land disturbance on the soil-food-web. It can therefore also be used to determine what individual plants desire. For example annual grains and vegetables like a ratio of 0:3 to 1:1 and orchard trees thrive in 10:1 to 50:1 soils
Depending on the types of crops we are growing, again in our case tree crops, we may want to alter the dominance of fungi or bacteria in our soil. These microorganism, particularly fungi, are quite sensitive to changes in land usage, therefore we need to understand how different techniques affect this ratio and why we want the ratio to be high or low in the first place.
Ecosystem Mimicry
Forest soils have a higher fungi to bacteria ratio. Looking at quantities of each, as measured in a teaspoon of soil, we find that bacteria remain steady in quantities through the spectrum from agricultural soils to prairie soils to forest soils. In one teaspoon of soil there are 100 million to 1 billion individuals. Fungi, measured in yards of hyphae, though increase significantly along this spectrum. In agricultural soils they are measured in several of yards, while in deciduous forest soils hundreds of yards are found, and in coniferous forest this actually increases to miles.
Fungi love high carbon materials, think cellulose and lignin which are the primary building blocks of tree leaves and wood. Most bacteria struggle to break this down. Bacteria instead thrive with high nitrogen food sources, think manure, incorporated cover crops, etc.
We can gather from this how different gardening and farming techniques affect this ratio. Fox example mulching with wood chips encourages fungi, tillage kills fungi and encourages bacteria, and incorporating organic material into different soil horizons shifts the ratio toward bacteria.
Mineralization/Immoblization Balance
This makes it apparent as well that fungi and bacteria have different roles in the soil-food-web. Fungi are better are taking in and retaining nutrients as part of the mineralization/immobilization process. This is the process where microbes consume nutrients, thereby immobilizing them in their bodies and preventing nutrient leaching.
As they live their lives, producing waste and eventually being consumed further up the food chain, these nutrients re-enter the soil-food-web in a form that is soluble to plants. This is called mineralization. Fungi and bacteria are immensely important to different stages of this process and are each most effective depending on what they are being feed.
Knowledge to Practice
In our orchards we want to cultivate an F/B ratio between 10:1 and 50:1. There are many ways for us to work toward this goal, the simplest being understanding the ecology of fungi and providing the necessary shelter and food source. We do this by consistently mulching our trees with woody materials.

We can get more specific in the process by cultivating our own indigenous microorganisms from the forest and inoculating them directly into our orchards. This practice is called Mountain Microorganism (MM). We have been applying MM to our orchards consistently over the past year in order to shift our F/B ratio higher and gain the benefits, such as pathogen control, that these microorganisms provide to the native forests.
Next steps for us in this process is to use our microscope to analyze the biological content of our soil. With the proper training and experience we expect to be able to determine rough F/B ratios in both our soils and the MM we are applying as a foliar drench. We will be sure to let you know what we find.
For anyone interested in making their own microbes, below is the recipe we use. If you would like to learn more about this process you should consider joining us for our upcoming Permaculture Design Certification course in April/May of 2017.
Mountain Microorganisms Recipe
Phase 1: MM Solid

Ingredients
3 sacks microorganisms (duff layer of primary forest)
2 sacks semolina, yuca flour, or green banana flour
1 gallon molasses, cane juice, or fruit juice
1 gallon water
Instructions
Spread a layer of duff on a top and cover with a layer of semolina. Mix well with hands. Dilute the molasses with the water and sprinkle on top as you continue to mix. If you grab a fistful of the mixture it should be lightly damp and fall apart easily after you squeeze it.
Next, have someone stand in a 55 gallon plastic drum (never metal), while you shovel the material inside. As you shovel, the person stamps the mixture down with their feet to compress it and remove any air pockets. Seal the barrel and leave at least one month, stored in the shade.
The mixture should be good for three years. When ready, it should have a strong smell of lactic acid.
Phase 2: Liquid MM

Ingredients
5 kilos MM Solid
1 gallon molasses
55 gallon plastic drum filled with water
Instructions
Mix the molasses into the water. Put the MM into a screen sack and let hang in the water. Seal the drum and let sit 4 days.
Between day 4 and 15 this can be used as a foliar spray (between 10 and 100% ratio to water). After 15 days use the MM as a soil drench and after three weeks the product should be fully used up.
Once you have used the MM Liquid, you can make one more batch with the same sack of microbes. Just add 1 gallon molasses and refill the drum with water.
References
Lowenfels, Jeff, and Wayne Lewis. Teaming with Microbes: The Organic Gardener's Guide to the Soil Food Web. Portland, Or.: Timber, 2010. Print.
"Soil Health." Soil Health. N.p., n.d. Web. 15 Oct. 2016. <http://www.soilhealth.com/>.
News from around the Permaculture Community
Matt Duffy, from our 2015 PDC, wants to capture your story with his new film company No Mad Films. Duffy is an incredible story teller who we hope can come back to the Ranch, bring his cameras and capture our life in action.
Our collection of cast iron kitchen skillets and dutch ovens is extensive. A good cast iron skillet is by far the most basic but essential kitchen item for our team. Over the years we have learned a trick or two about their maintenance. This article, from Permies.com, sums up nicely how to use and clean cast iron.
The many Ranch friends at Round the Bend Farm, located in southeast Massachusetts are hosting a series of Fermentation Workshops with our very our Core Team member Laura Killingbeck. These come highly recommended for anyone in the area.
Abrazos
The Ranch Crew

The Peace in Knowing Yeast: How to Brew Your Own Ginger Beer
I knew there was something wrong when the fraternity brothers put codeine in the keg, when my friends got so sick that they went splat, when thirteen year old me took a sip of every wine bottle in the house when mom and dad weren't looking and I felt like I had done something naughty. European culture is renown for serving alcoholic beverages to children, yet in the USA where I grew up, something about alcohol is taboo. The cultural history reflects just that. Alcohol in Native American early history is absent, contraband could put you behind bars or blind you, prohibition made speakeasies a mischievous and alluring excursion, and even today a cultural lag in how we enjoy alcohol still exists.
By Doro

I knew there was something wrong when the fraternity brothers put codeine in the keg, when my friends got so sick that they went splat, when thirteen year old me took a sip of every wine bottle in the house when mom and dad weren't looking and I felt like I had done something naughty. European culture is renown for serving alcoholic beverages to children, yet in the USA where I grew up, something about alcohol is taboo. The cultural history reflects just that. Alcohol in Native American early history is absent, contraband could put you behind bars or blind you, prohibition made speakeasies a mischievous and alluring excursion, and even today a cultural lag in how we enjoy alcohol still exists.
It became very apparent to me in college that with alcohol, etiquette falls flat on its face. Why? Japanese tea ceremonies, to draw a stark comparison, dedicate hours to enjoying a tablespoon of liquid in the most refined fashion, yet the common bar pumps out wasted resources, wasted fools, and wasted dreams. People may drink so much as to make themselves sick, both physically and mentally.
The Origins of Homemade Hooch
Alcohol is actually an ancient substance that has been intentionally brewed since the beginning of mankind itself. Some people even go as far to claim that alcohol IS the reason for civilization. One theory suggests that contaminated drinking water in Europe warranted humans to grow grains and ferment them to cleanse the water. In this process, humans needed to orient themselves to the earth's growing cycles, work together to organize and specialize in different tasks, then celebrate communally with a drink because clever Homo sapiens managed to retrofit their pollution problem.
Health is a major benefit to why people drink. Medicinal plants have traditionally been brewed into alcoholic beverages and can prevent or cure illnesses. In the "blue zones"- regions of the world where people have measurably longer lifespans--one of the factors is that residents enjoy moderate alcohol intake. Blue zone residents also benefit from strong social relationships, so community is a major piece of healthy alcohol enjoyment. Sharing drinks with other people also lubricates and warms a gathering. So-- yes! You can have your brew AND drink it too. Alcohol gets the psychological, physiological, and sociological stamp of approval. Where did clever man go astray?
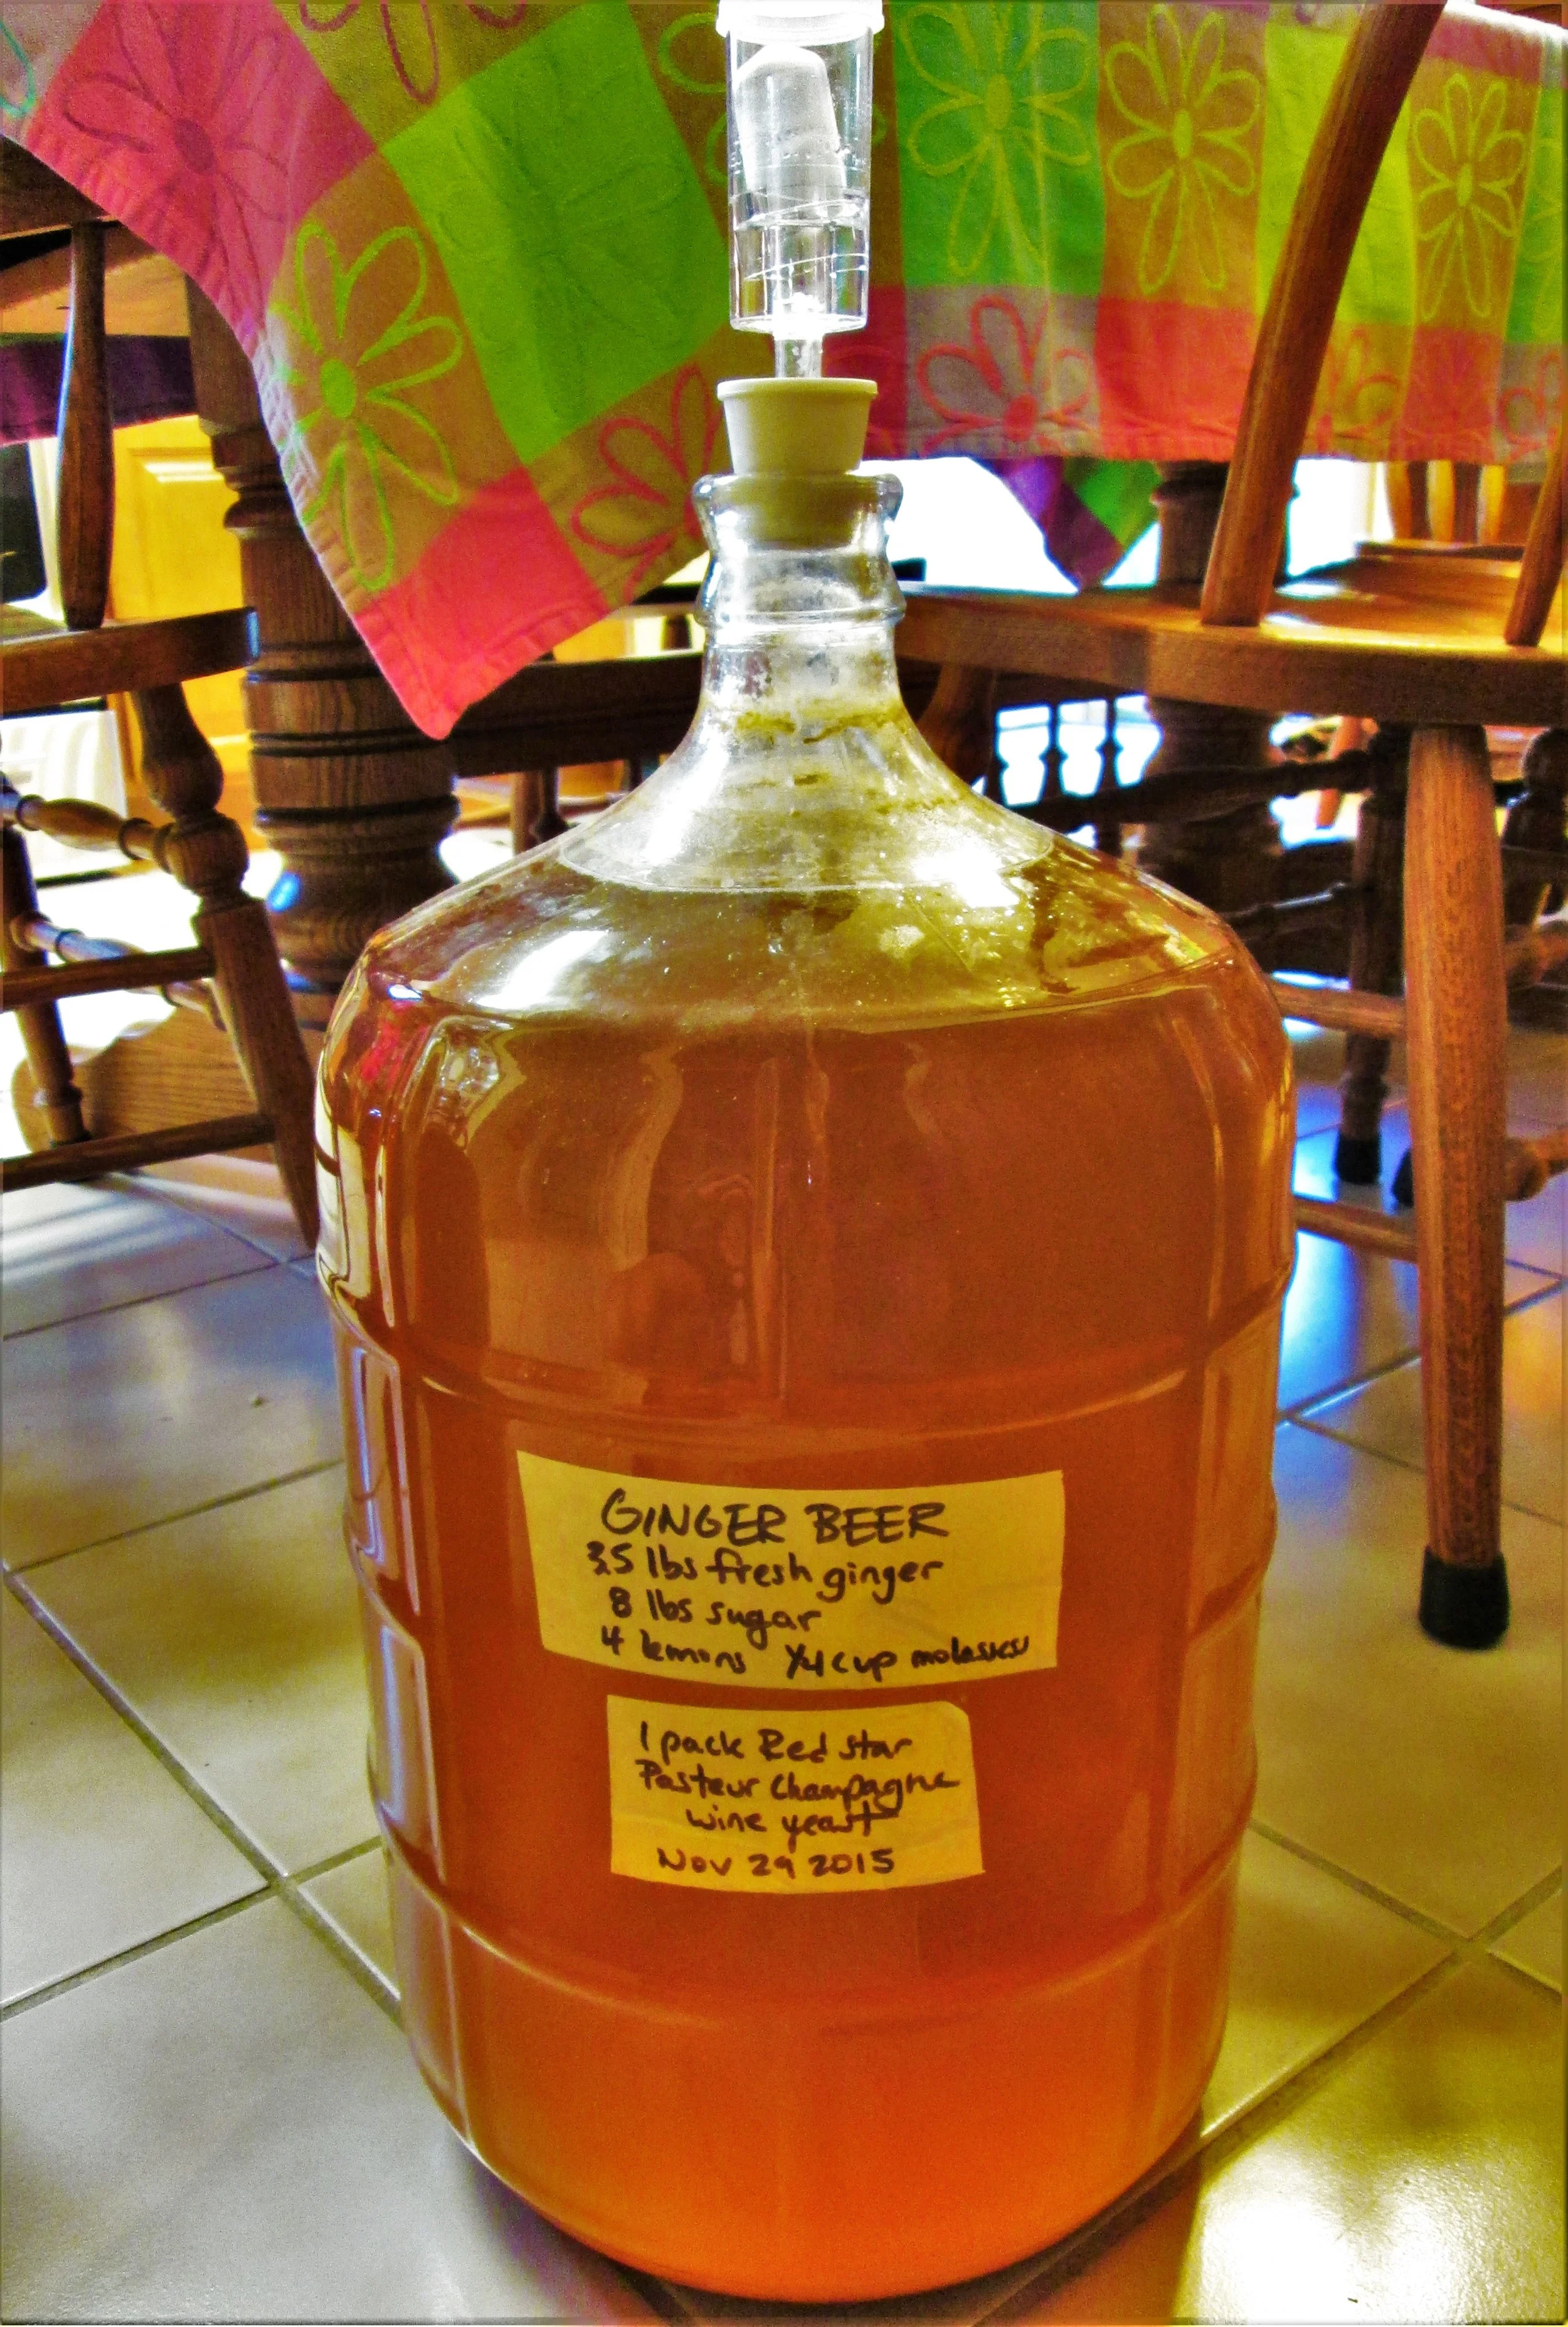
Time is the essential difference in how we relate to a drink we make ourselves and share compared to a drink we buy commercially. Like many good things in life, it takes a lot of time to see a good brew from start to finish-- or in the grand scheme, from seed to chalice. Modern "conveniences" allow people to buy Budlight from the cornerstore, then smash a can to the forehead before thinking twice about going for more. Woah, Nelly! Lack of restrictions on consumption could cost an eye, a tooth, and a frontal lobe if you're not careful, and then what kind of Homo sapiens would that be? Anthropologists suggest that it's our frontal lobes that allows our brains to use foresight and therefore be more aligned with the process of time. My suggestion goes beyond sipping more consciously, more graciously; start from the beginning and make the whole brew yourself.
Meet your Microorganisms
Did you know that one in ten cells of your body share the same human DNA. As for the rest, they are trillions of bacteria and yeasts that live symbiotically with your body. Microorganisms are a great tool for living in your body, or they can be a great tool for brewing the brews that will satisfy your body. There are numerous strands of yeasts that eat sugar and through their metabolic processes, they create alcohol as a waste. What a life! Some of these yeasts are more effective at creating alcohols than others. For example, the yeasts that you can buy in the grocery store were grown in sanitized laboratories to ensure that a very specific strain is repeatedly created. This is an effective means for getting a brew consistency. If you live in the middle of the Costa Rican jungle and cannot access such luxuries, or if you have pride in your local yeasts as San Fransciscans have in their sour dough bread, then you can easily grow your own brewing yeast.
The Ginger Bug

A ginger bug is the first step in brewing your own alcohol. Think of it as a little pet, like a fish in a bowl that you feed everyday. You nurture your ginger bug, and your ginger bug will nurture you. This is how you can deepen your awareness for the beverage that gave rise to humanity, and could propel it forward, or send it tumbling back down to dust.
Step 1: Locate fresh ginger. We happened to dig this rhizome up in our Zone 2 garden. The fresher the better, as it means more active enzymes that ultimately will nourish your bug, and in turn your body.
Step 2: Grate the ginger to increase the surface area. You're going to want about 2 tsp of ginger for 8 oz of water, which will yield a decent size ginger bug.

Step 3: Add 2 tsp of sweetener to your bug. If you can avoid heavily processed and pasteurized sugars, then do so. Honey, maple syrup, and fruit syrups are excellent choices. For this recipe, I used our locally preferred option, tapa dulce, or sugarcane. Bleached white sugars can impose genocide on your microbial populations and are best to be avoided.
Step 4: Stir your water, sugar, and ginger "bug" gently, then cover with a cloth and rubber band. This will allow yeasts in the air to get in, but keep larger creatures out.
Step 5: Carefully observe the nature of your bug. If it starts bubbling, this is a great sign that "it's working". Carbon dioxide, like alcohol, is a process of the yeasts' respiration, and it creates a fizzy bug.
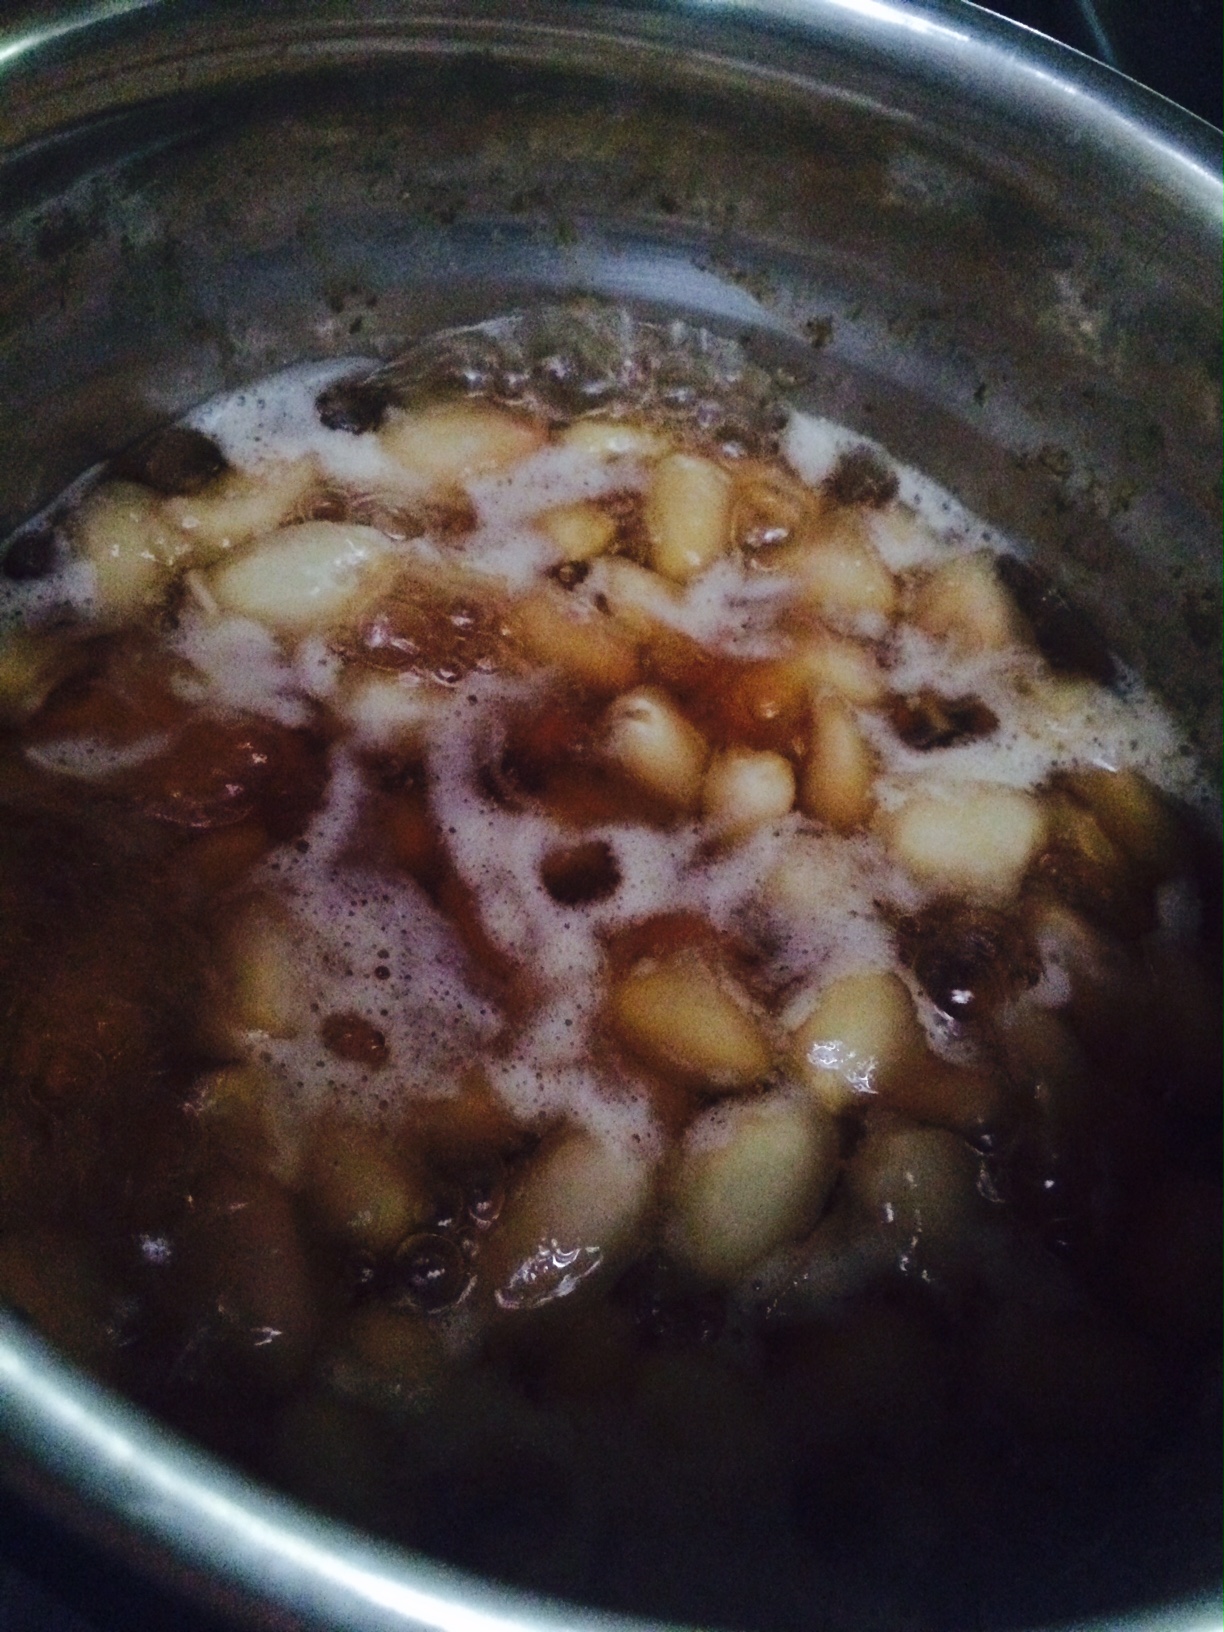
What's happening is that you are creating a mini ecosystem that allows local yeasts from the air a free place to get some lunch (sugar), hang out in a safe environment, maybe meet some cool other microbes; and if all goes well, fall in love, divide, and start a yeasty family. That's right, you are creating a yeast breeding ground, and because ginger tea is the base of the medium, the antibacterial properties of the ginger are keeping the population of "bad" microbes at bay. You can feed your ginger bug once every two days with the same ratios of sugar and ginger as before, but only if necessary. Avoid over feeding your bug and creating a viscous solution. Your bug is your pet. Know it, feed it, and it will reward you with love and affection. If your bug has some fizzy action-- congratulations!-- your pet is ready to use.
Fermentation Experimentation
Ginger bugs are good for inoculating teas with yeasts that will allow them to ferment into alcoholic beverages. The next step in creating a brew is to find a tea recipe or make one up using locally available resources. Fruits and herbs make great tea flavors. I brewed two separate teas for this occasion. The first is a ginger sour guava tea, in which the ingredients were chopped, boiled, and strained. The second is a cacao tea that used the same process except using the fruit that bears the infamous chocolate seed.

Once the tea is prepared, add a sweetener, just as in the ginger bug process. Sugars will continue to feed the microbial populations you are brewing. Like mentioned before, the less processed the sugar the better. Sometimes sugars even carry wild yeast colonies. This will encourage your brew to ferment.
Once you have your ginger bug and sweet tea, you can use the bug's yeast to inoculate the tea. Like a small fish released from bowl to small pond, your ginger bug yeast is off to fend for itself. Ensure that it is going into a safe, clean environment, and that your tea is not too hot. Room temperature to 105 degrees F is a safe range. Since you know that the health of your yeast will ultimately intertwine with the health of your own being, you continue to monitor the brew.
Thus, you have entered the experimental phase. The ultimate flavor and quality of your brew is at fate's discretion. Proceed valiantly! Check your brew at least once a day to ensure nothing is growing inside of it except for good microbes, that the texture is liquid and not thick, and that there is enough sugar.

It may take one day, it may take ten, but you will try your home brewed alcohol and realize that all that time you spent caring for your ginger bug and your brew was very well worth it. "This is delicious!" you'll say one day, "And my gift to humanity." A successful brewer is an artist-- one who reorders the chaos of water, sugar, plants, and airborne yeasts, and transforms them into a product that brings humans together. It turns out that it was never about the buzz, or the story the morning after-- it was always about the process. As humans face the coming challenges of the environment that our culture has shaped, it is important that we remember that each of our actions continues to evolve our relationship with the natural world. Even something as simple as brewing gives proof that the things we provide care for will in turn care for us. Sit back, sip back, and celebrate the pleasure of good brew and good company. Cheers!
News and Notes from around the Permaculture World
We are scheming and dreaming about expanding our chicken program in 2017. More eggs, meat, better breeding strategies, and figuring out how to get the birds to weed our orchards has got us motivated. If any of you are trying to do the same, you should check out the Permaculture Chicken Film from the guys and gals at Permies.com.
One of Scott's past PDC students, Levi Gardner, from a course taught in Nicaragua, is doing some excellent urban farming work in Grand Rapids, Michigan. Check out this article about Urban Roots. Levi states that for him, "a big turning point was going to Nicaragua for a month last year to study permaculture. I left there going, ‘I’m not just a guy that wants to be an urban farmer anymore. I want to build something.'" We are inspired!
As you know we practice agroforestry at the Ranch and love sharing our experiences with others. The USDA Inside Agroforestry publication is full of similar experiences from the states and around the globe which we are hope to contribute to in the future. Considering signing up for their quarterly publication to up your agroforestry skills!
Abrazos
The Ranch Crew
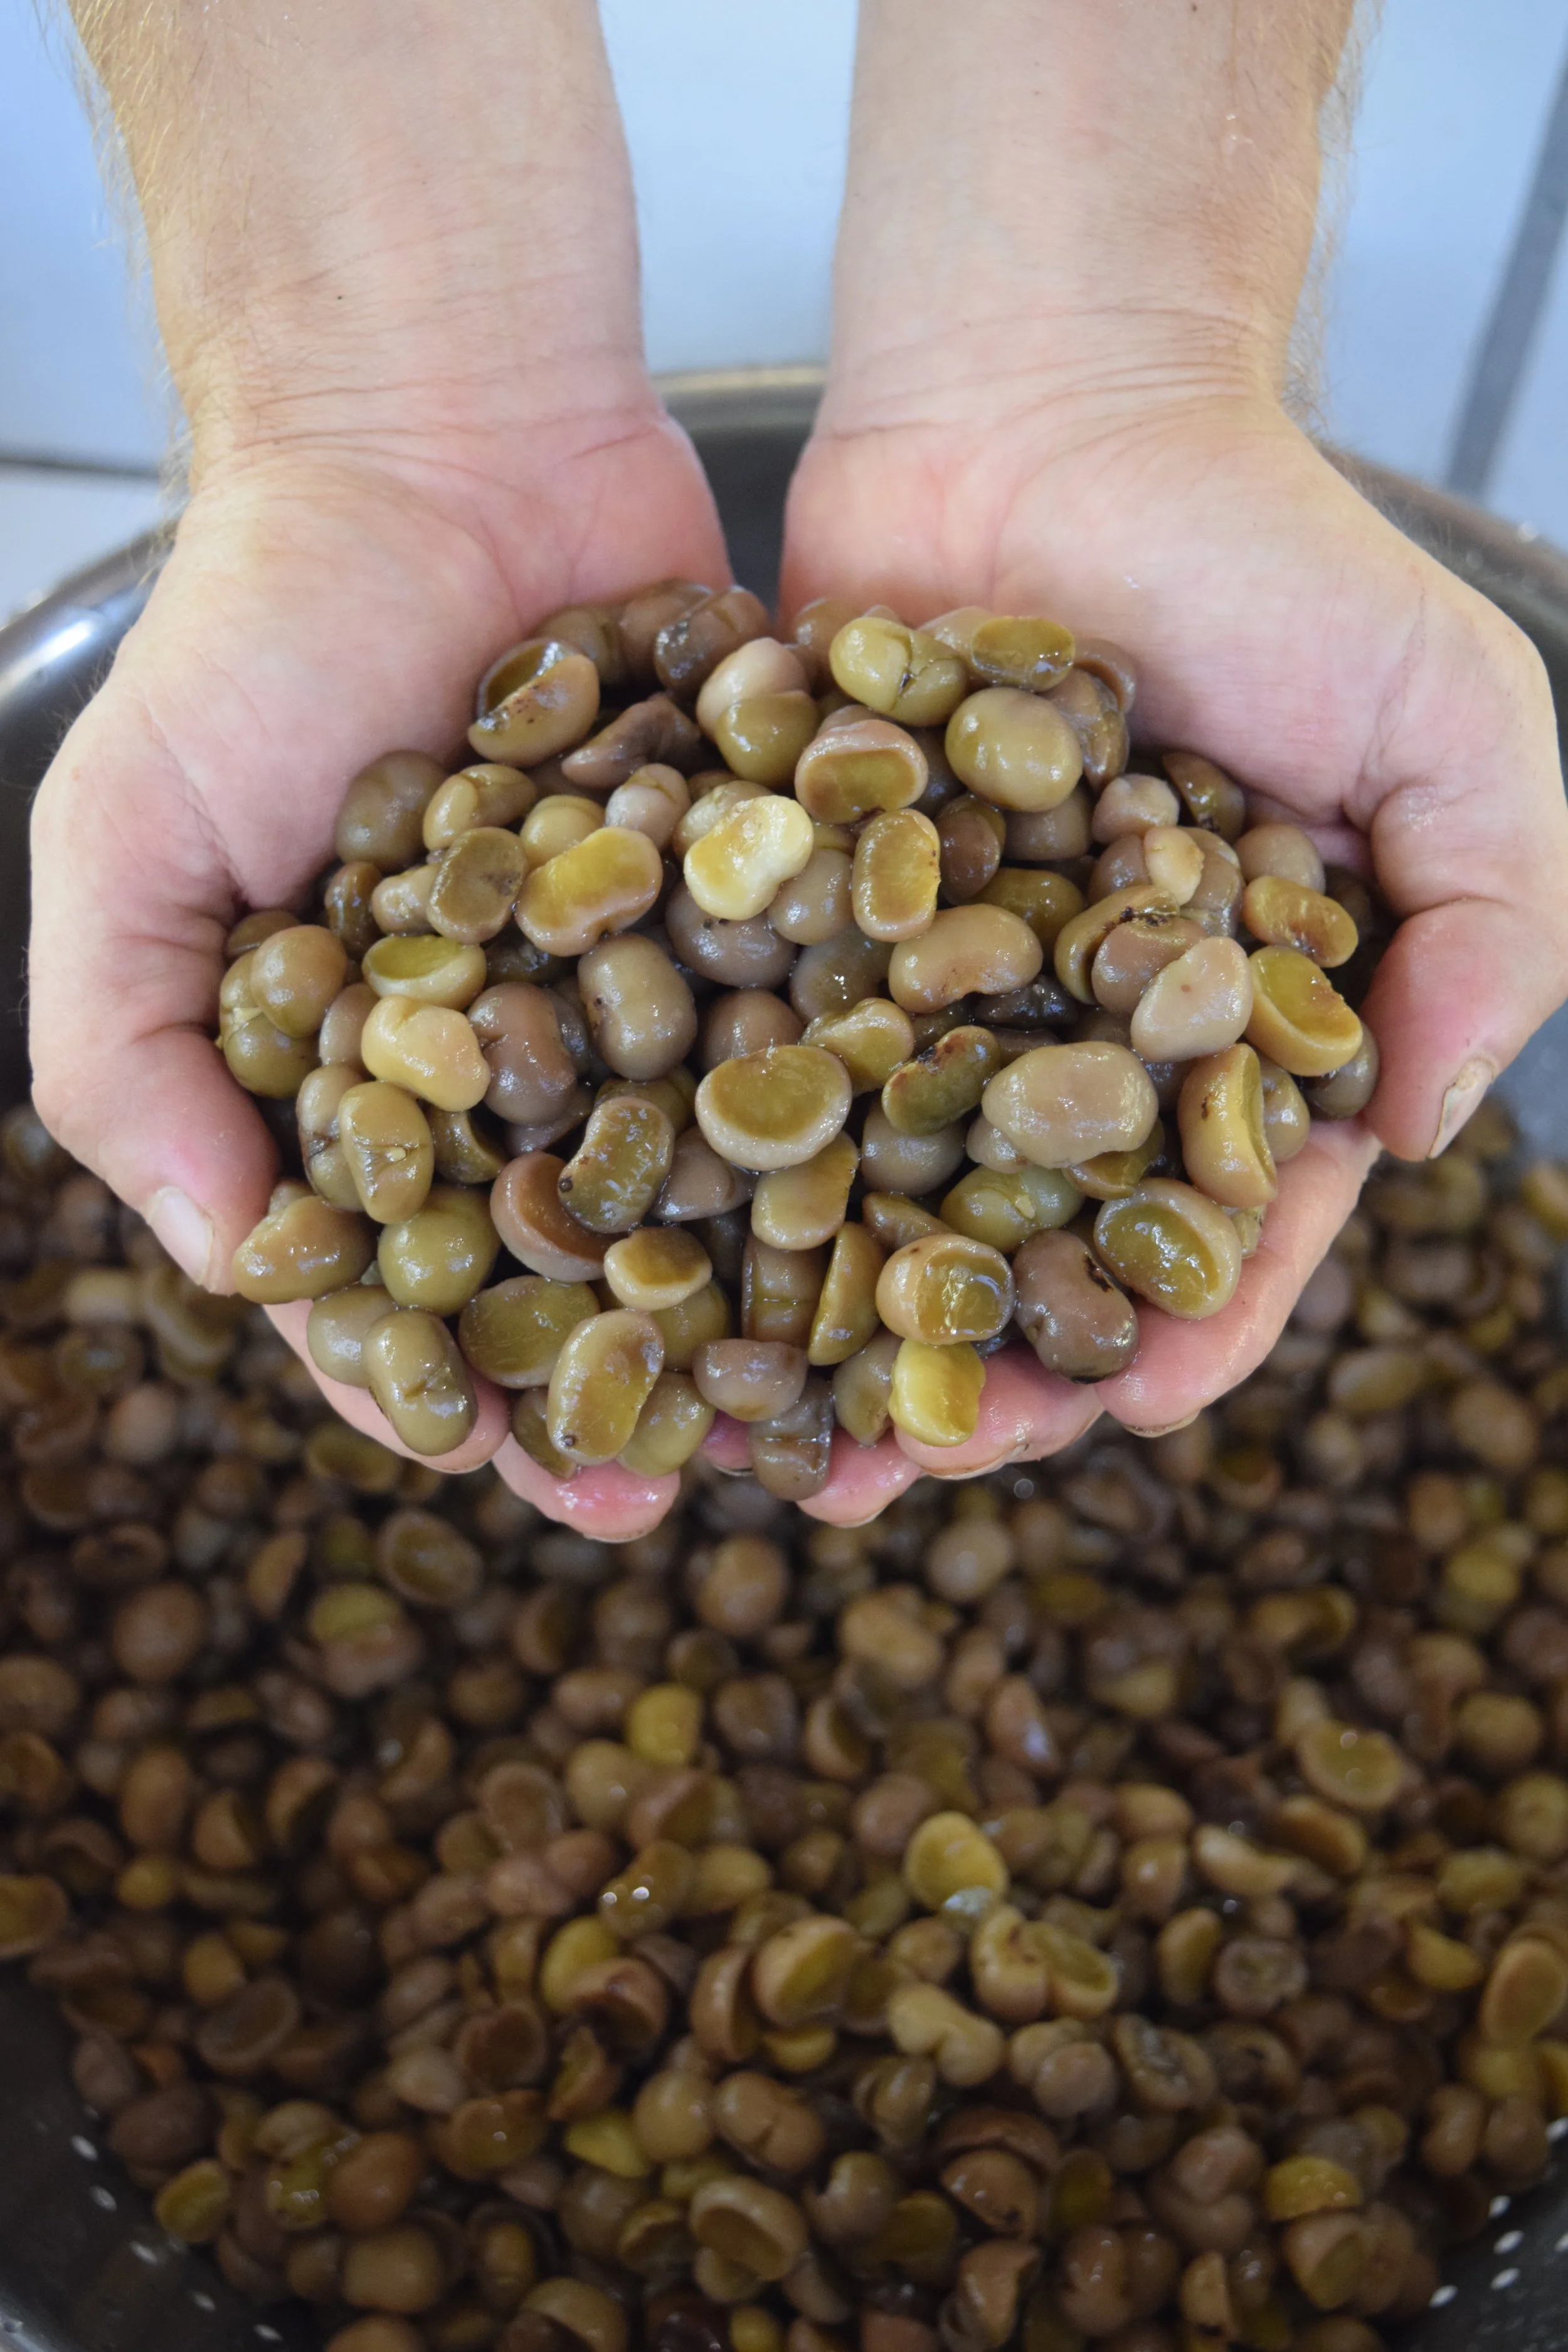
Food, Familiar Stranger
When I was a teenager thumbing rides around Mexico, I quickly realized my vegetarianism would not survive. If my friend Valente and I got in some dusty car with a family that brought us back to a tin-roofed house and gave us chicken soup, we ate that soup. The kindness of strangers humbled my big picture ideas of right and wrong.

When I was a teenager thumbing rides around Mexico, I quickly realized my vegetarianism would not survive. If my friend Valente and I got in some dusty car with a family that brought us back to a tin-roofed house and gave us chicken soup, we ate that soup. The kindness of strangers humbled my big picture ideas of right and wrong.
Wherever food comes from, as soon as it touches human hands, human mouths, it transforms into an intimate thing, a thing we all need, a thing we all want. As soon as it's prepared, or shared, or savored, it carries with it something beyond itself, a new richness. A new complexity.
***
For thousands of years, people and the food they ate grew together in the same place. Bodies—plant, animal, microbe, earth—co-evolved together in direct relationship. Communities of people created food traditions that reminded themselves how to eat, and how to live, in the place they were a part of.

But now, generations of individuals, and entire societies, are born into places dissociated from themselves. The objects of our lives that surround us—shelter, food, clothing, stuff—come from someplace else. Industrialized, machine-scale food systems and globalized food markets (food from everywhere, transported anywhere, warehoused in grocery stores) form the foundation of our new food traditions. They remind us not of a place we are connected with, but of a world we know little about.
Increasingly, the objects of our lives we know the least about are the things we recognize as most familiar. Food, and most other objects we surround ourselves with, are familiar strangers.
Recently I began researching different types of vinegars to incorporate into my fermentation classes. The vinegars I make (pear, apple, and watermelon in Massachusetts, jackfruit, banana and pineapple in Costa Rica) are easy to ferment with whole fruits and indigenous microorganisms, and the history of this type of fermentation goes back thousands of years. But I wanted to know more about the vinegars someone might buy in a grocery store.

Culinary fermentation is a radical transformation and engagement between living things—microbes, people, plants, animals. Industrial scale production cannot really make vinegar in the way an artisan would understand vinegar—it makes a replication. Large, factory scale production simply can't manage the inherent variability of wild life, so it homogenizes, standardizes, and in doing so changes the intrinsic nature of the product.
Most of these products are replications of something that was once made by human hands, from something in nature those hands could access, an original source. But what happens when we forget what the original source was to begin with? White vinegar, for example, is not made of “white”. Sometimes its made of grains, like genetically modified corn, but often its made of petroleum. Most people who buy rice vinegar or apple cider vinegar could probably wager a guess that apple cider vinegar has something to do with apples; rice vinegar something to do with rice. But white vinegar? Would anyone guess it was made from oil? Its a familiar food that has no natural precedent.

And yet, the richness and complexity of eating still exists, and we still identify, very personally, with our strange-familiar foods. As food and objects scatter around the globe, so do people. Many of us will live in or between several places over our lives. This sudden mobility exposes us to more of the world, but in less depth, and breaks the chain of linear trans-generational traditions that once held people, food, and place together. Many food traditions now dissipate and replicate laterally, around and across the world. They travel to us wherever we are, and travel with us wherever we go.
Once, on a bike trip across Colombia, my partner Scott and I stopped in a tiny town in the Andes. We went into a little country store to get some food. The man at the counter answered our Spanish with English, and started pulling things off the shelves to show us. “Look, tuna fish!” He said, waving the can, gleeful. “Peanut butter!”
“Actually, we’re looking for Colombian foods,” we replied, smiling. We had hopes of some fresh-made cheese, vegetables, corn cakes sculpted by little old lady hands. Things from the place we were in, the people we were with.
But the man wanted us to have tuna, desperately. Later he told us why. Though technically born in Colombia, he had lived his entire life in Idaho, until that past year when he was deported back to his little Andean “home town.” But it was no longer his home, or never had been. He missed the foods of the place where he grew up—not foods from the place where he grew up, as tuna fish does not hail from Idaho—but the foods he ate when he grew up in that place. The foods that surely did not come from Idaho, or even necessarily the United States, were now the foods he identified with, the ones that made him feel the nostalgia of home.

People sometimes talk about food traditions as if they were all lost, like socks that didn’t make it back from the laundromat. And its true, countless recipes and food traditions are disappearing, never to return--and it is a loss. Yet we don’t live in an absence of food traditions. People in both industrialized and developing countries increasingly now identify with the flavors, smells, textures of global market and laboratory created foods more than the real thing from the place they live. Global market food may be a stranger, but it's a stranger that we recognize, and feel comfortable around. We relate to something we can’t relate to.
Its important to recognize our personal attachment to globalized food markets, because its real, and I think its a piece of the puzzle that sometimes goes missing in the argument for local food. Only a few generations ago people felt attached to foods embedded in social lineages of cultural heritage and co-evolution. We identified with foods that only the people of the place we lived in could produce and make. But in a globalized food system, we now get attached to pop tarts, nacho flavored frito lays, diet mountain dew—foods that no one, no single person, anywhere, could really produce or make. Most of the foods on the grocery store shelf are conglomerates of ingredients from many places, products of laboratories and mechanization. No one person could make, from start to finish, a pop tart, or chips, or industrial soda, or white vinegar, in its current form, from scratch—there are too many additives, components and processes that can only be done in a factory or laboratory.
Beyond the oft quoted statistics about the vast benefits of local food systems—that local food is more nutritious, more flavorful, better for the environment, better for people, can mitigate climate change, can regenerate local economies, and much more—eating food from the place where we live, cultivated and crafted by the people of that place; be it a home, a community, or a region--connects us deeply to something meaningful, powerful, and comforting. It connects us to a world we can relate to, that we truly are a part of, and reflects something real, and unique about us.
***
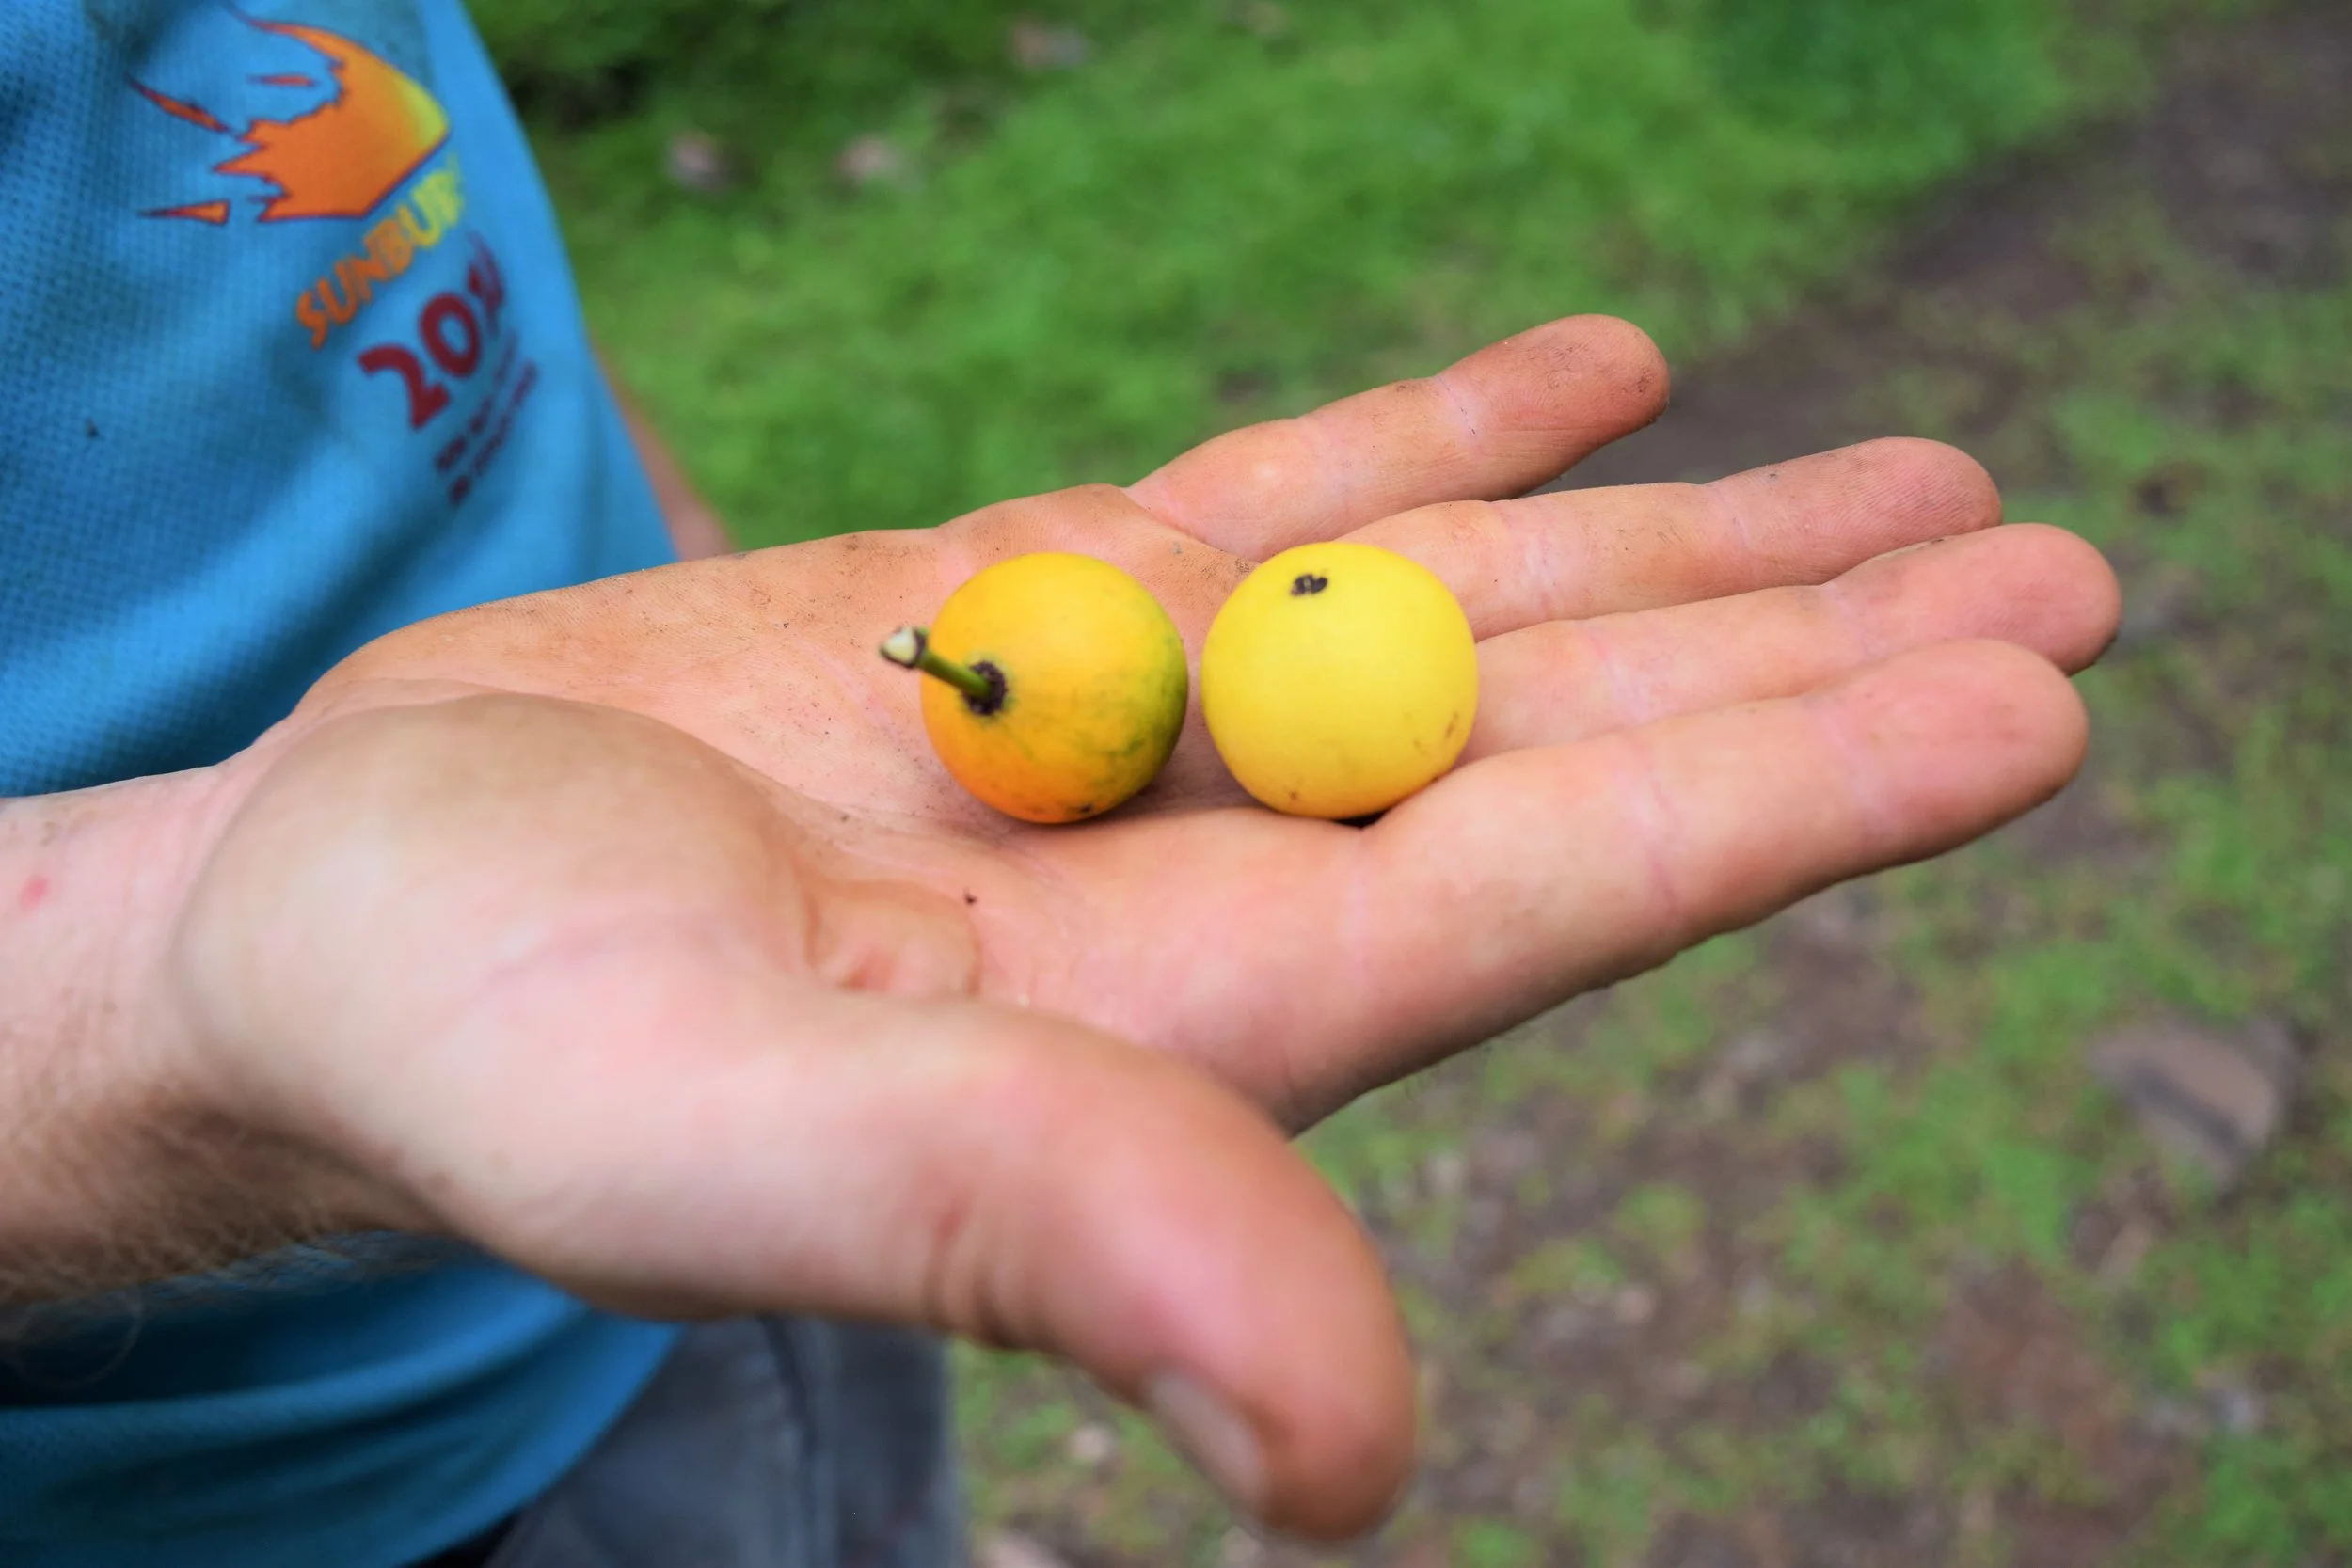
Since my teenage years I’ve changed my perspective on eating animals. My vegetarianism did in fact die, replaced by a combination of opportunitarianism and locavorism. (I’ll still gladly eat any soup you give me, but if I’m giving you the soup, I’ll make it with foods from the place where I live.) But the original ethical dilemmas I chewed on in those years remain. How do we match our values with our reality, in a world so vividly layered in tangled truths? How do we live sustainably in a world that is clearly no longer structured for sustainability? How do we reconcile a felt attachment to the objects of globalization that we grew up with, but don’t represent us?
Of all the complicated steps and solutions we can take, I think the first and most immediate one is simple: we need to engage with actual food from the place where we live. Somehow, some way. We need to “get to know” living things with our senses. To smell tomatoes ripe on the vine; watch living beans swell in water and sprout; listen to farmers talk about the plants and soil they care about; taste the salty crunch of fresh cucumber dills; touch soil, plants, animals—anything, anything real. We need to go to the source of food—the thing itself—and get to know it, remember it. On a farm, in the wild, in the kitchen—we need to engage with real foods, in real life. We need to forge identities and food cultures accessible on a human scale.

Food and our relationship with it is complicated, and to create sustainable food systems I think we need to do lots of complicated things. We need to re-skill ourselves and our communities; re-purpose tools and technologies to work for us in different and better ways; build new networks of tangible and intangible food infrastructures that make local economies easier than they are hard. But this one starting point—engaging with the real thing—is the place we can all begin.
Engage with Your Food: Upcoming Workshops with Laura
In Massachusetts or nearby? Take a class with Laura this Fall at Round the Bend Farm in Dartmouth: Fermentation Fervor: A Vegetable Fermentation Series.
Or travel to the Ranch this May 2017 for Laura's annual The Art and Practice of Live Culture Fermentation workshop.
Categories
Topics
- Agriculture 6
- Agroforestry 21
- Animals 2
- Apprenticeship 19
- Appropriate Technology 6
- Backpacking 1
- Bananas 1
- Basic Pantry 4
- Biochar 1
- Books 3
- Build Your Own Home 1
- Central America 5
- Chiles 1
- Cinnamon 1
- Clay Carving 1
- Climate 2
- Climate Change 1
- Cob oven 1
- Communication 5
- Community 24
- Compost 2
- Composting Toilets 2
- Condiments 1
- Conservation 2
- Cooking 4
- Costa Rica 18
- Design 10
- Earthen Construction 10
- Eat Local 2
- Ecohome 1
- Education 9
- Environment 3
- Ethics 4
- Farm to Table 12
- Fasting 1
- Fermentation 14
- Food 22
- Food Choices 8
- Food Forest 8
- Food Processing 15
- Food Systems 12
- Gap Year 1
- Gardening 5
- Ginger Beer 1
- Harvest 2
- Health 12
- Healthy living 5
- Homemade 2
- Homestead 8
- Internet 2
The Ranch’s new cookbook is here!
This cookbook might not be quite like the others you have sitting on your shelf. We’ve made it look like a cookbook— and it might smell like a cookbook if it’s spent enough time in your kitchen— but it’s also a memoir, a history of a place, of 20 years of experimentation and learning and growing on the piece of paradise known as Rancho Mastatal.