

BLOG
Stories, articles, and updates from the Ranch community.

Bamboo Treatment
Bamboo is a wonderful fast growing grass, it comes in all shapes and sizes and has an incredibly diverse list of uses from many cultures all around the world. Bamboo is incredibly fast growing and can grow up-to a meter a day and achieves 80% of its height in the first 2months of its life! This ability to grow quickly and produce a huge variety of usable products has got many a permaculturists and green living enthusiasts excited by its potential.
By Nic, Core Team member

What is Bamboo
Bamboo is a wonderful fast growing grass, it comes in all shapes and sizes and has an incredibly diverse list of uses from many cultures around the world. Bamboo is incredibly fast growing and can grow up-to a meter a day and achieves 80% of its height in the first 2months of its life! This ability to grow quickly and produce a huge variety of usable products has got many a permaculturists and green living enthusiasts excited by its potential. Generally speaking bamboo falls into two categories, running or clumping (although there are some that are in between). Running bamboo has the capacity to become very weedy and hard to manage if allowed to get out of control, we spent many years pulling out random culms that appeared throughout the Ranch’s front garden from the “living fence” that had been inherited upon the purchase of the property. This battle against the running bamboo Phyllostachys sp. was not an uncommon story as many people around the world can probably attest to, but was a great reminder of the will to live that bamboo species have!
In the early years of purchasing the Ranch property, Tim and Robin sought advice from well-known bamboo builder and furniture maker Brian Erikson. They purchased several varieties of giant clumping bamboos, which we are now learning about how to manage. 20 years later these bamboo have grown to full maturity and tower above some of our orchard spaces and buildings! As the clump matures the culms get successively larger in diameter until they reach their maturation diameter. This varies from species to species, but one bamboo known as Dendrocalymus asper is massive! Each culm measuring 8” in diameter with a wall about 2” thick and approximately 30m tall, this is quite the impressive bamboo. Not only is it incredibly impressive it is incredibly intimidating to harvest!
Problems With Bamboo
Since the very beginning we have used bamboo as a building material. We had always purchased this bamboo and over time have become quite disillusioned by the varying quality of the purchased product, despite paying premium prices for the bamboo (each 6m culm at 4” diameter costs around $30 plus transportation). Not long after buildings were completed we were finding that a significant proportion of the culms were suffering from insect damage (a sign of improper curing and drying) and replacing these pieces, which were now inside of a building, was incredibly challenging and a lot of work.
The other major problem that we were facing was that typically when bamboo is treated correctly it is using an acid or a salt of Boron. Boron is a natural mineral that at approximately 10% solution is toxic to fungus and insects. Boron is an essential element for plant development and by diluting the solution down it is actually used as an organic fertilizer. Boron therefore gained a reputation of being an excellent, organic and safe treatment solution for bamboo and is the most widely used treatment for bamboo around the world. Unfortunately one of the problems of using an acid or a salt (boric acid or borax, disodium octoborate etc….) is that it is corrosive to steel and in order to attach roofing and even to combine pieces of bamboo, steel is often one of the fastening materials used (yes there are others but steel is the most practical and commonly used). We were finding that over time even galvanized steel was corroding and becoming dangerously damaged.
These two major problems had us move to using timber more and more and limiting our use of bamboo to non structural/permanent uses such as harvesting poles, temporary structures, propping posts, trellis etc… We got deep into Timber Framing and structural bamboo became a thing of the past.
Bamboo at Rancho Mastatal

Henry setting up a scaffolding system in our bamboo
We continued to treat our own bamboo for wattle and daub walls through this period and the potential of bamboo continued to intrigue us but just seemed beyond our reach. As our stands of bamboo grew older and more daunting to manage we decided to hire in an expert to help us manage our bamboo. We found Henry Glen, a bamboo expert living in Costa Rica at Finca Bamboo in the south of the country and he was willing to come and help train us in the proper management and treatment of bamboo. With Henry’s help we have been able to (mostly!) get our bamboo under control after years of neglect and we have begun to treat our own bamboo using his very simple modified boucherie technique that I will outline below. He also sells a bamboo treatment solution called “Bam Blue” that is based on boron and copper sulphate (another organic chemical used to treat mold and insects) and also has a penetrant and anticorrosive properties. In one go Henry has solved our bamboo problems and we are now well on our way to building with bamboo again.
Please contact Henry directly through Finca Bamboo to purchase his treatment solution or enquire about his consultation services. He comes highly recommended by Rancho Mastatal.
Modified Boucherie System
Things you will need:
2” high pressure water PVC tube (schedule 40)
2” ball valve
2” Elbow
Fernco couplings
¼” NPT Tap and drill bit
¼” NPT Threaded Male compressor part
Roll of Teflon



Process:
Cut one piece of 60cm 2” PVC and one piece of 15cm.
Glue your elbow to one end of the 60cm piece and the 2” ball valve on the other end. The valve handle should face opposite the direction of the elbow.
Glue the 15cm piece on the other side of the elbow.
Drill your 2” ball valve through the section that is glued to the 60cm piece of PVC and use the tap to create the threads in the hole.
Wrap your threaded male compressor piece with Teflon and screw into the PVC until tight.
One the end of the short section after the elbow attach the Fernco coupling.
Replace the Fernco pipe clamp with the stainless steel pipe clamp by constant Breeze. You can tighten these to 92 in/lb.


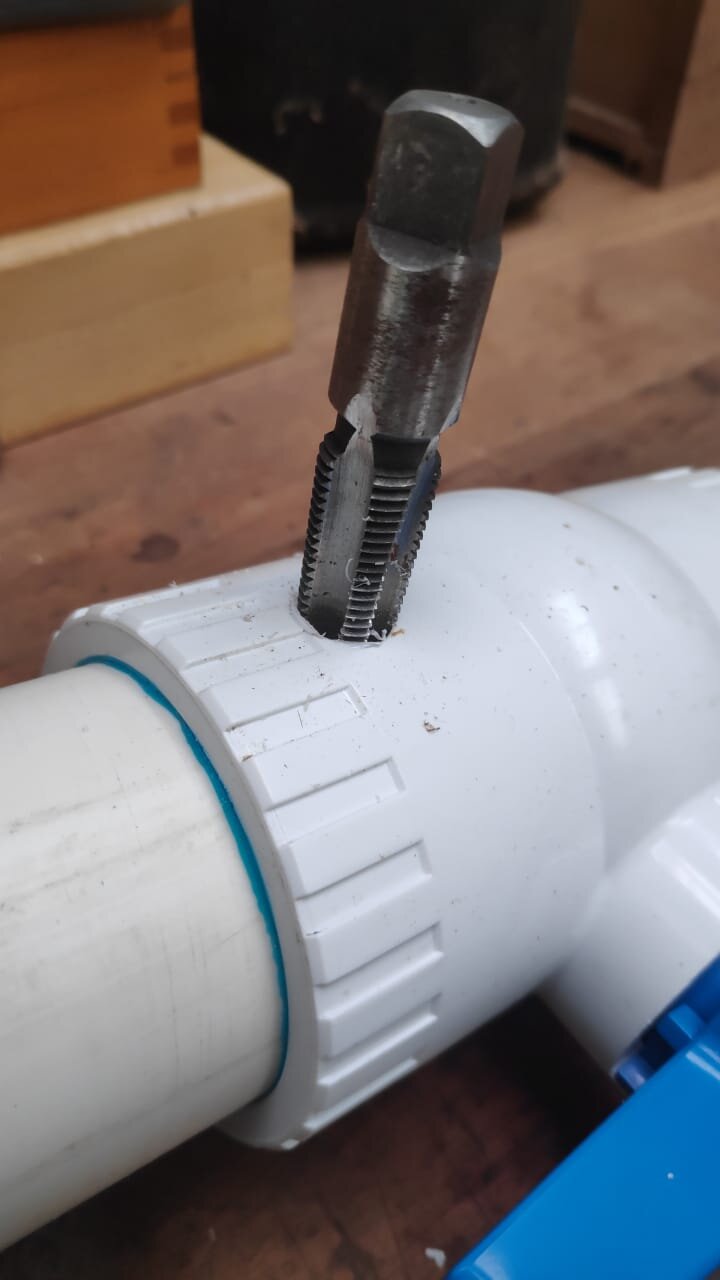

This is your basic modified boucherie set up, from here you will attach the bamboo to the Fernco coupling, fill the solution into the PVC pipe by opening the valve, close the valve and connect the compressor. Its important to keep the pressure low, around 12 PSI otherwise you will blowout the coupling. As you force the solution through the bamboo you will see the water from the bamboo coming out the other end. Soon you will begin to the see the Bam Blue begin to come out and when the full concentration is coming out the other end you can stop it running. Now you have a treated piece of Bamboo, this needs to dry vertically and can then be stored horizontally.

A piece of bamboo hooked up to the boucherie

A treated piece of bamboo
WANT TO LEARN MORE ABOUT BAMBOO?
Read our other blog about Bamboo Shoots
Stay tuned for our annual workshops that cover topics in natural building, permaculture, fermentation, and more!

Lime Plasters Are In
Lime plastering as a craft form has endured the test of time due to its versatility and the accessibility of limestone as a building material. When produced and applied with care and experience, lime plasters yield an elegant finished product.
By Anthony, Apprentice 2020
Plastering is an ancient tradition in the building trades that continues to hold cultural importance in modern times. Amongst the typical plasters that can be found in the building world include clay, gypsum, portland cement, and the focus of today’s blog, lime. The rich history of the use of lime in the plastering trades can be traced back to all continents. Of particular note are the styles that have emerged from Italy and Morocco, as well as the beautiful examples that are found in Japan and the ancient Mayan temples of Mexico. This craft is experiencing a resurgence through the increased global interest in natural building.

A clay carving with a lime fresco background

Tadelakt (water resistant lime plaster) shower- Read our blog about how to make an earthen/tadelakt shower
Why people love Lime Plasters
Lime plastering as a craft form has endured the test of time due to its versatility and the accessibility of limestone as a building material. When produced and applied with care and experience, lime plasters yield an elegant finished product. Some of the many benefits of using lime include high vapor permeability (‘breathability’), flexibility, autogenous healing, stickiness, and durability. Perhaps of greatest interest is the ‘breathability’ factor, which contributes to drying interior spaces and the general avoidance of condensation inside buildings. Additionally, where other stiffer plasters, such as cement, might fail due to the formation of large cracks, flexible lime plasters have the unique characteristic of self-healing (‘autogenous healing’) with which micro-cracks are naturally filled with ‘free lime’. This contributes greatly to the durability of ancient structures, particularly in seismic zones.
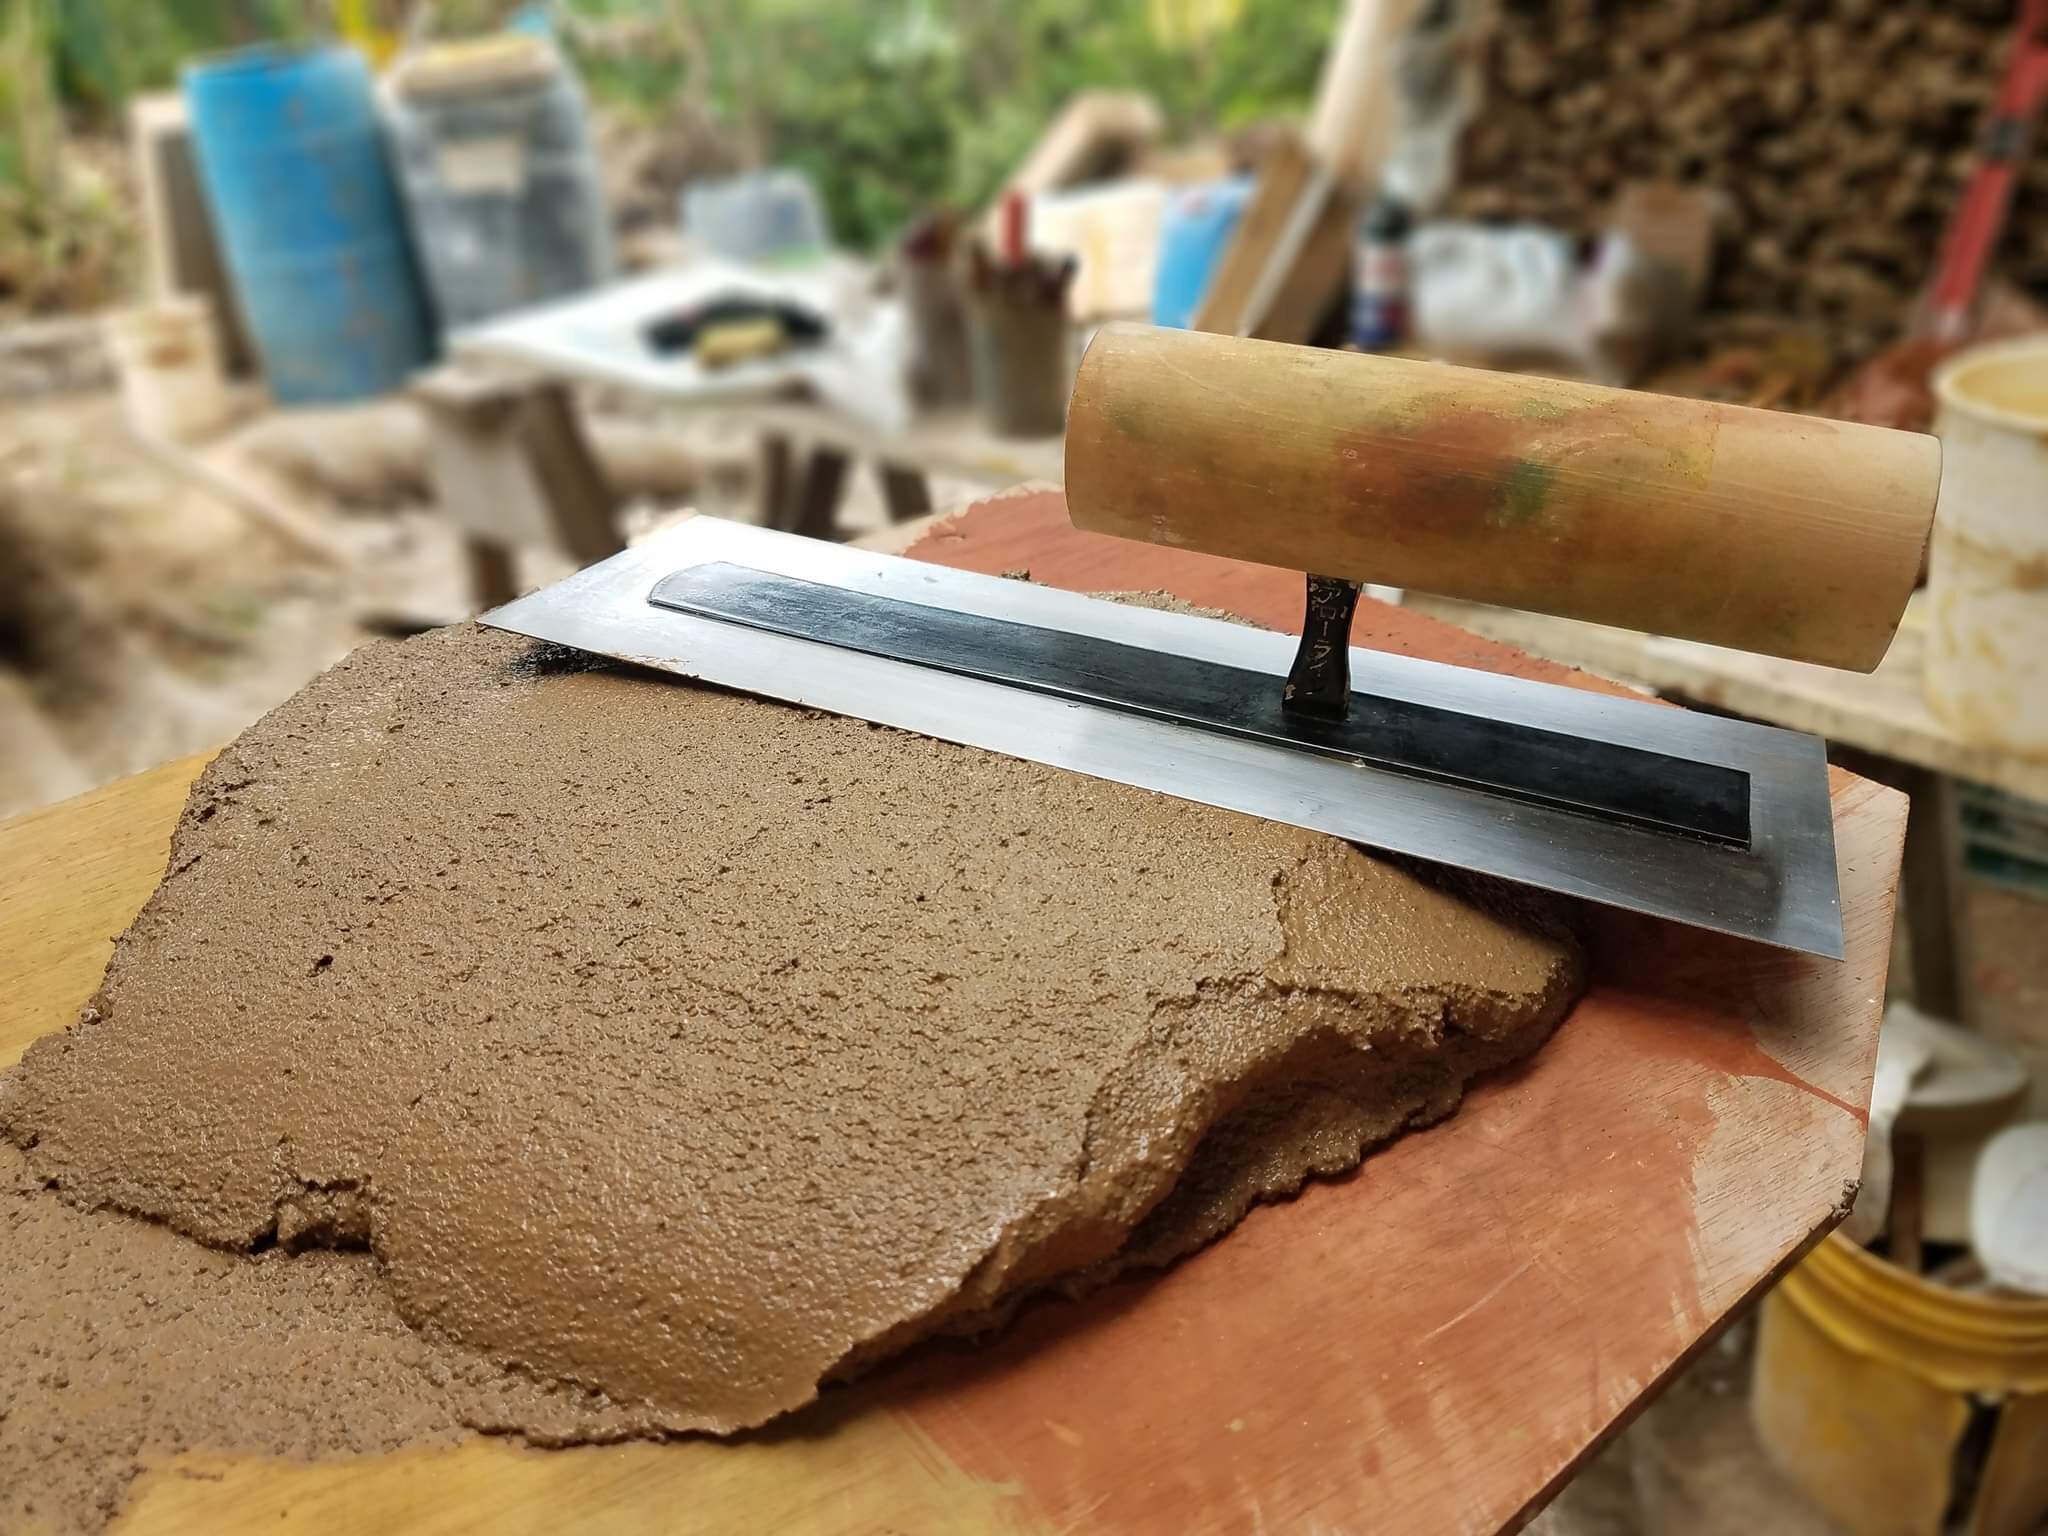
Hawk and trowel
Overview of the Lime Cycle
Understanding the benefits of using lime in our buildings, let’s review the source of these plasters by exploring the lime cycle. Our desired binder begins as calcium carbonate in the form of limestone, coral rocks, or sea shells. This base material is heated to around 900°C (a ‘cherry-red heat’) where it undergoes a chemical change by giving off carbon dioxide gas and forming calcium oxide (quick lime), a highly reactive, dangerous compound. Don’t mess with it. From here, quick lime is hydrated by combining it with water and calcium hydroxide is formed. At this point, our hydrated lime is being prepared for final application by slaking it, that is, to be stored in water. Once we are ready to use this hydrated lime, it is prepared in a mix with aggregate and fiber, according to our desired use of the plaster. Generally, multiple coats are applied with each successive layer receiving a thinner application. The final layer, or our finish coat, can be applied as thin as 1/16th of an inch, or even less.

Lime Plaster Finishes
There are many ways that lime plasters can be applied to create different visual and textural effects. This is where the magic happens. Some of the well-known finishes include frescos, venetian plasters, lime wash paints, and tadelakt. All require a detailed attention to the timing and moisture levels during their application.

Benito Steen stoning our tadelakt shower

Fresco design
Learn Lime Plastering in Natural Building Workshops in Costa Rica
The annual Natural Building Workshop at Rancho Mastatal in Costa Rica is focused on developing simple and elegant wall systems for sustainable homes using readily available natural materials. The course focuses on Natural Building techniques, such as wattle and daub, adobe bricks, cob, earthen floors, and the mixing and application of multiple kinds of plasters, including clay and lime. Workshop attendees have the opportunity to learn from some of the most experienced natural builders in Costa Rica, and to develop their skills in creating elegant lime plaster finishes such as tadelakt, fresco, and venetian plaster. This year’s course was attended by people from more than 10 countries, and was just as diverse in its variety of natural building techniques demonstrated.
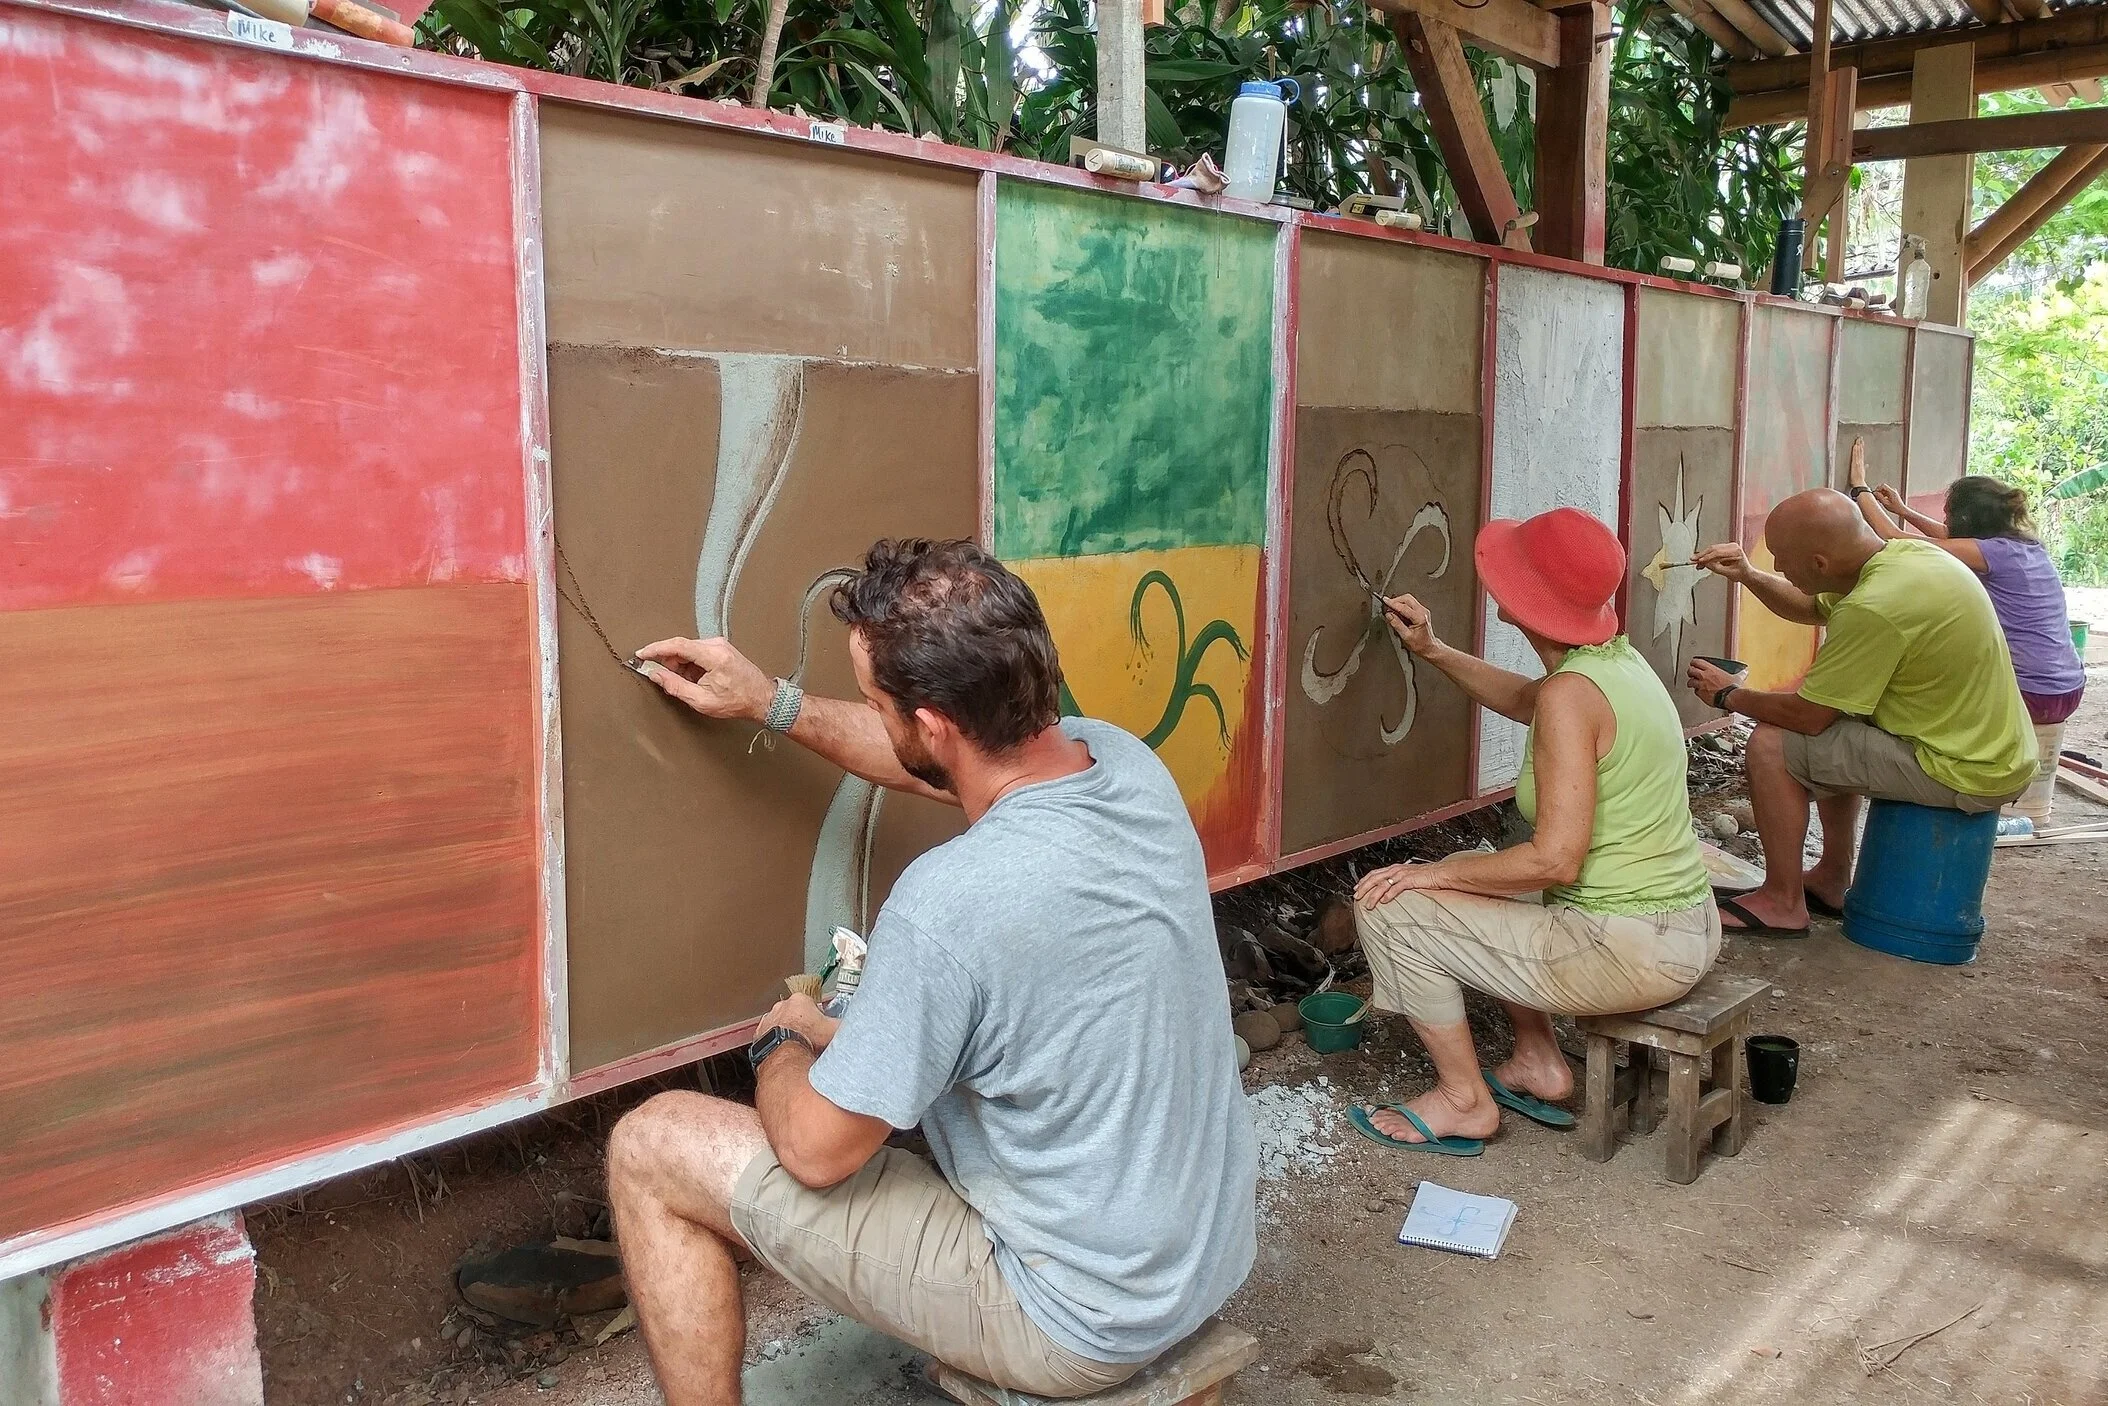
Students practicing different plasters and techniques during our annual workshop

Pigments, fibers, sands, and more
Want to learn more?
Hope you feel inspired to begin learning the ancient art of lime plastering. You can really beautify and add special touches to your home and spaces with a variety of different lime plastering techniques.
If you want some hands on practice and instruction, sign up for our annual Natural Building Workshop.
Also check out Benito Steen’s YouTube channel all about natural building techniques.
Stay tuned for the wide array of upcoming courses conducted at Rancho Mastatal in Costa Rica.
Check out these past blog articles about natural building techniques we practice and teach:
How to Make an Earthen Floor for Your Sustainable Home
Natural Building & Clay Carving: Add Artistic Expression to Your Home

Timber Framing: 10 Things You Didn't Know You Needed to Know (Part 2)
With proper instruction, patience, and focus, it is entirely possible for a beginner to accomplish amazing things with this building technique.
By Kara, Apprentice 2020
(This article continues from Part 1, read that one first to learn some basic tips for Timber Framing!)
Timber framing is an important natural building technique here at Rancho Mastatal, and much of it is done by workshop participants and apprentices-- not people with years of experience! With proper instruction, patience, and focus, it is entirely possible for a beginner to accomplish amazing things with this building technique. If you’ve taken a timber framing workshop with us here at the Ranch, you may find these tips a helpful reminder of the little techniques that often escape our memory. And if you’re planning on building your own sustainable home, these small things might be the difference between a day of frustration and a successful frame-raising.


If you’re interested in building your own home and timber framing check out our latest workshop offerings.

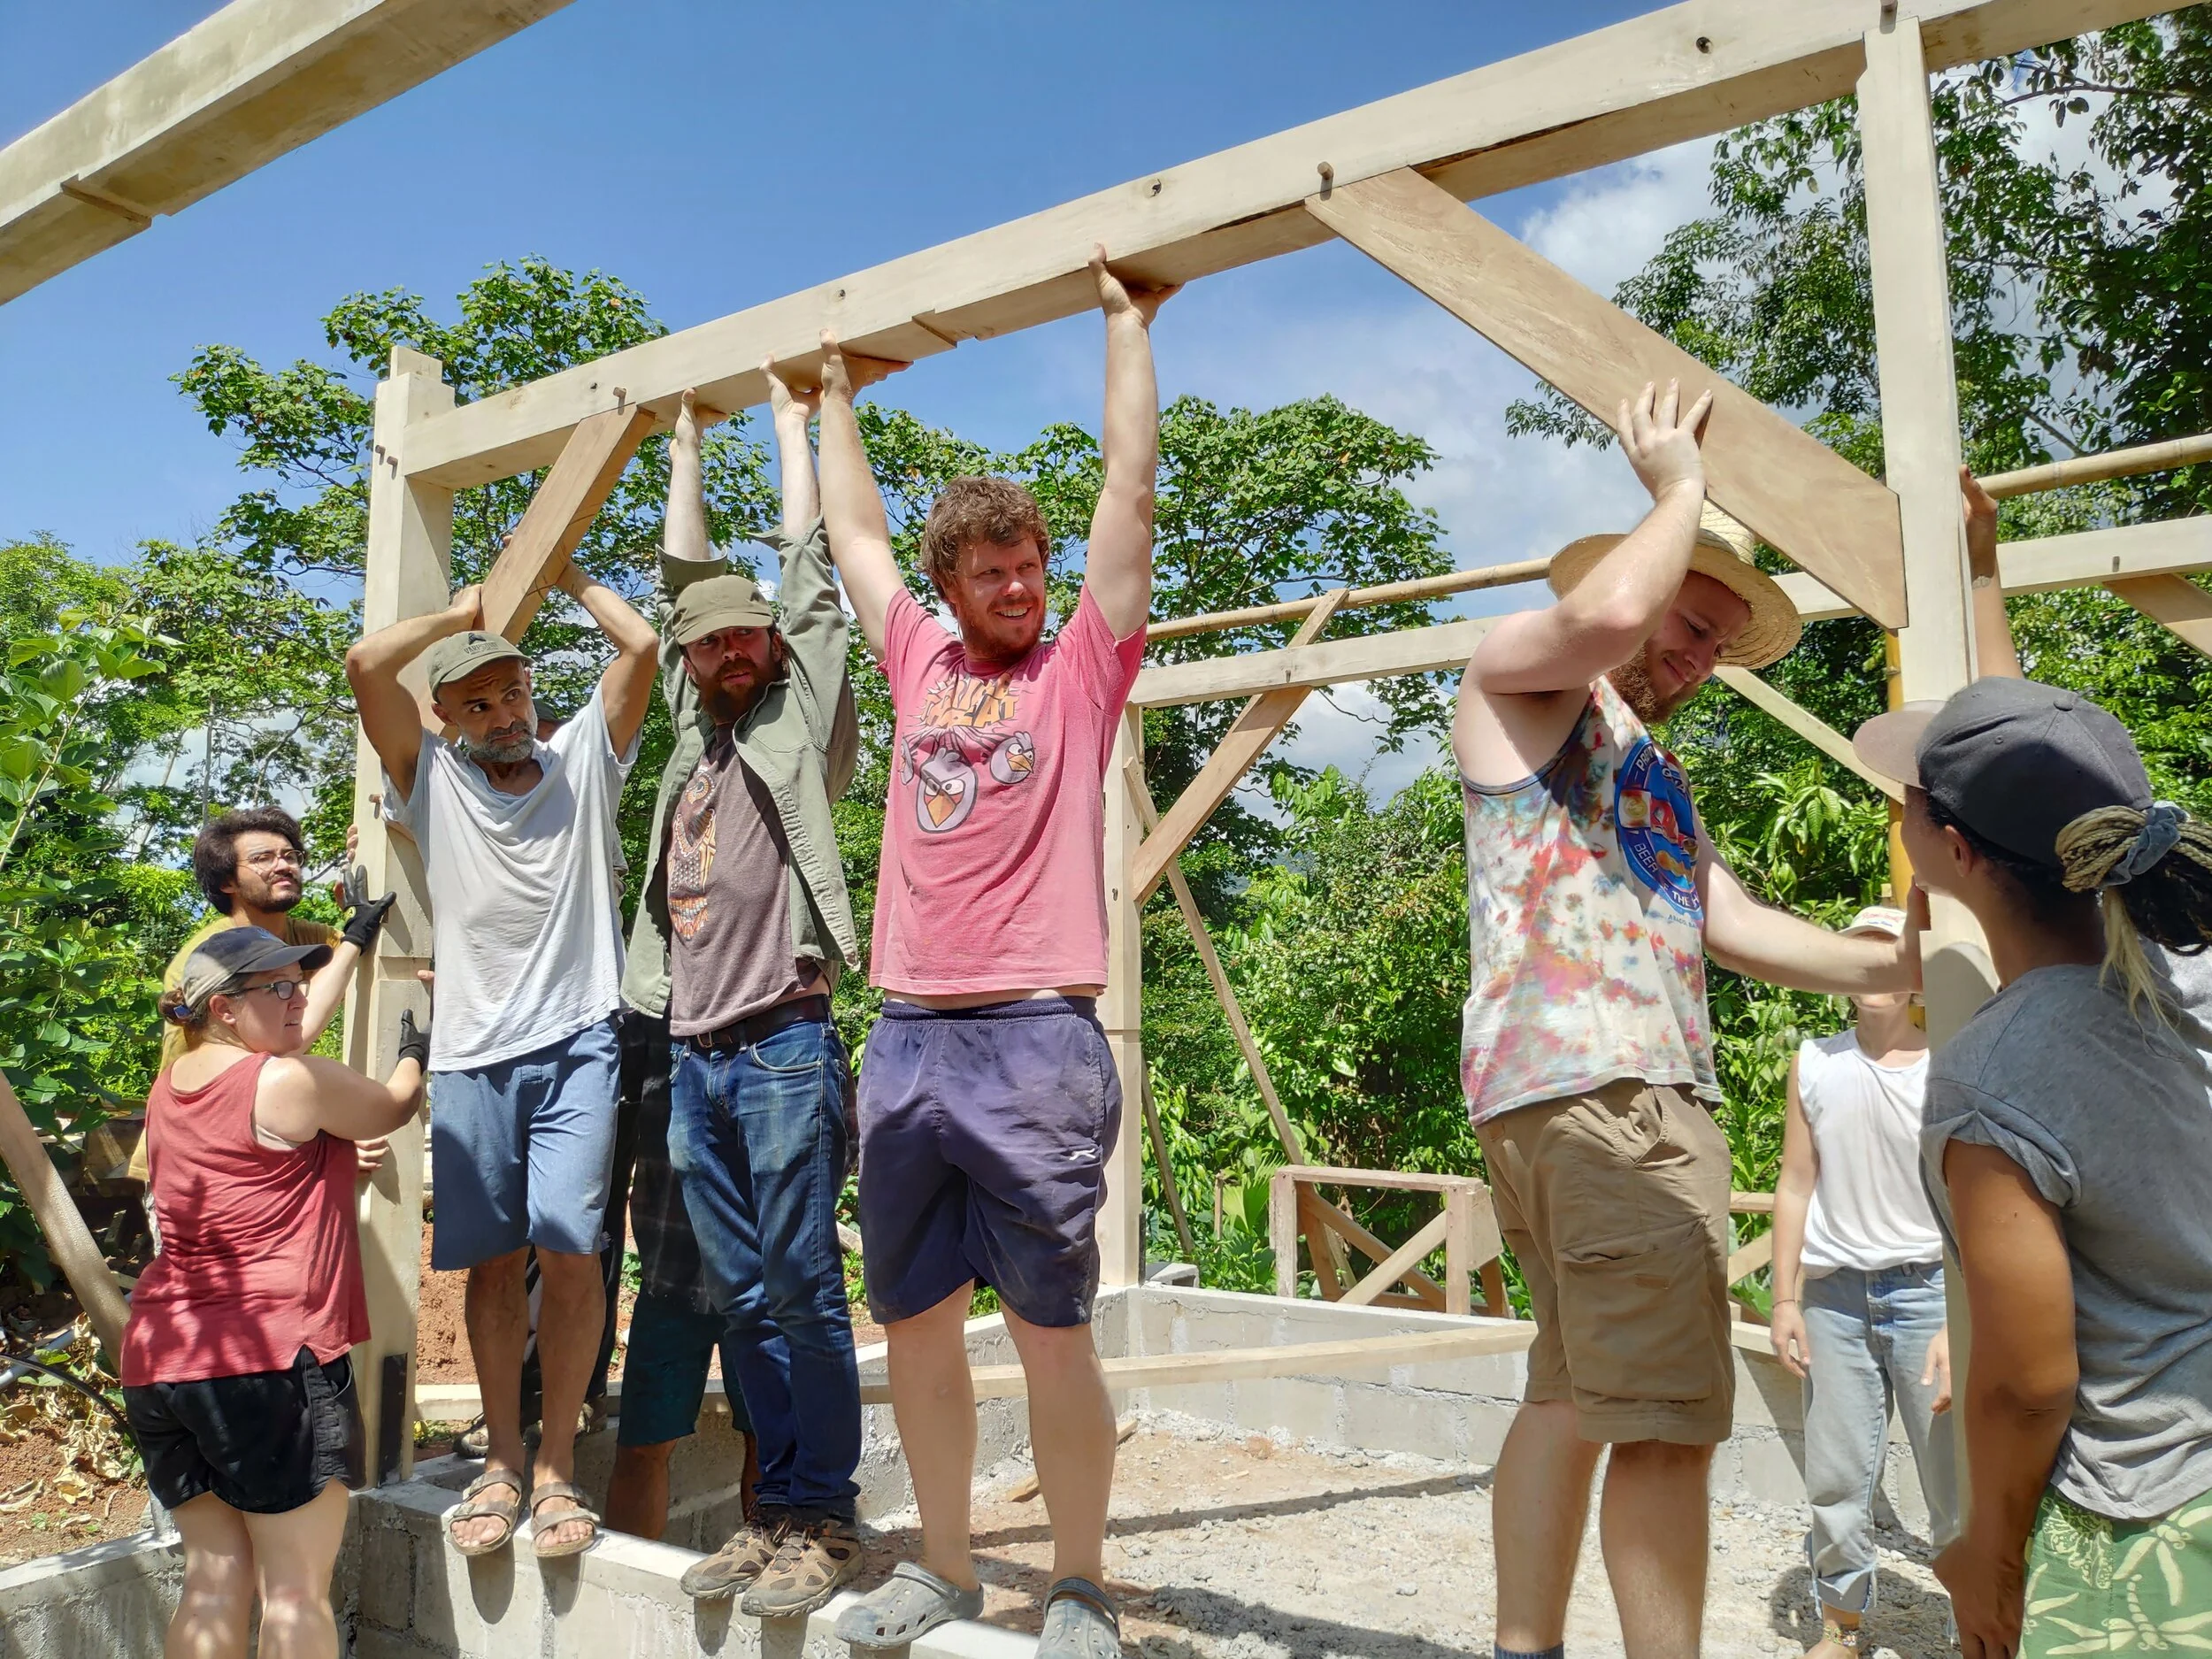
It takes a team to raise a frame
Doing your Lay-up
5. Pulling Horizontal Lines
After you’ve laid your tape and marked your measurements with a crow’s foot mark (remembering to subtract the 10” you’ve burned! See Part 1 of Timber Framing Tips to learn more), you’re ready to pull your horizontal lines around your timber. This means drawing straight, accurate lines around your timber at a right angle to the edge of your reference face, to indicate the cuts needed for each joint. With the crow’s foot ‘V’, pointing towards one long edge of the timber, it’s easy to see where on your mark your line needs to cross, but you still need to make sure that you’re drawing it perpendicular to the edge between the two reference faces. Both a framing square and a combination square can help you do this.
To use the framing square, orient your timber so that one reference face is up, and the other is on the side closest to your body. Hold the framing square with the ‘L’ parallel to the ground, one side resting flat across your timber where it intersects the measurement mark, and hold the edge of the other side flush against the close face of the timber. You’ll have to hold the square at a slight downward angle, but keep it as shallow as you can. Hold the framing square tight to the timber with your hip, and draw your line with a sharp pencil when you have it positioned accurately.
You can do the same thing with your combination square, and it’s not as important to be standing with a reference face facing you, as long as you’re aware each time you’re drawing a line to hold the flat edge of the square against a reference face. Never draw a line while the edge of the square is
resting against a non-reference face, it’s an easy mistake to make, but it can skew your lines and eventually cause misalignment in your joints if you don’t catch the mistake.
To pull a horizontal line around to a non-reference face, where you don’t have the crow’s foot mark, keep your square against a reference face, and draw the line around the timber, being careful to align your pencil lines at the corners. You’ll end up flipping your timber around as you work, so it’s important to mark your reference faces clearly. A thick chalk mark is ideal, so that you can see quickly if you’re using the right face to draw your lines from.
6. Drawing Vertical Lines
To draw the vertical lines for your layup, the ones parallel to the long edge of the timber, using a combination square is quick and accurate. Set the known distance between the edge of the reference face and your cut line, and place the flat edge of the square against the reference face, holding it parallel to the ground to that the ruler is resting fully on the timber. Using square rule, you only actually know the distance between the line and the edge of the reference face, since the corner
between reference faces is where your ‘perfect’ timber within the timber lives, and there could be extra wood on the other sides.
When setting the distance on your combination square, reveal the needed amount beyond the handle, leaving the tick mark on the ruler just slightly covered by the handle. Draw the line by holding your pencil against the end of the ruler, and drag both square and pencil along the length of the line, moving in tandem to draw a smooth line.
By almost covering the tick mark that you’re measuring to on the ruler, you account for the small
distance between the pencil line and the end of the ruler-- a sharp pencil helps, too!

Using the combination square to make your lines, making sure to set it just under the measurement you want, to account for the width of the pencil line
Cutting Joints
7. Don’t Remove Your Line!
Whenever you are cutting any joint remember to not cut away your line! The perfect cut would be cutting your line in half, but this isn’t always easy to achieve, especially for beginners. So instead cut just to the waste side of your line. This is important because as you’re cutting the rest of the joint you need reference of where to cut to! Seems obvious, but many people’s lines seem to disappear.
8. Practice Your Square Cuts
Seriously, you may think using a hand saw to make a square cut is easy… Well it’s not if you’ve never done it! Especially on large timbers. Usually you have a bit of extra timber to spare on either end, do as many practice cuts as you need to get a square cut.
To make a square cut, remember to cut on the waste side of the line. Align your saw blade at the far side of the line, you will move the blade down the line slowly, creating a small cut along the line (a kerf cut). Once you have your kerf cut you will begin moving the saw blade diagonally down the side line that is facing you, keeping the blade in the original kerf cut, and trying to not drop the blade down the other side that you can’t see. Stop cutting once you’ve reached the bottom. Now repeat on the other side of the timber, keeping your blade in the original kerf and moving the blade down the line. If at any point your blade begins to move off the line, stop and correct it immediately. The farther you move from the line the harder it will be to correct it.
The diagonal cuts should line up and create a square cut. You can check it with a framing square to see how far off or on you are.
9. Bevel up or bevel down
First, always make sure you have a sharp chisel! A dull chisel will make everything slower and probably not give you as clean of a cut.
There are two sides to the chisel. The bevel refers to the angled slant at the end of the chisel.
When you are cutting your joints it’s important to orientate the bevel the right way for which way the wood grain is going. When you are going with the grain of the wood, the bevel should be faced down. This will help insure that you don’t dive into the wood. Then when you are going against the grain, the bevel should be up.
10. Get a Team
Yep, timber framing kind of requires at least a few people. You always want someone to check your layouts before you cut anything. It is very helpful to have a partner to help spot you when you’re drilling the holes for mortises. And then when it comes to raising the frame, the extra hands will definitely be helpful and appreciated.

A student cutting this long tenon
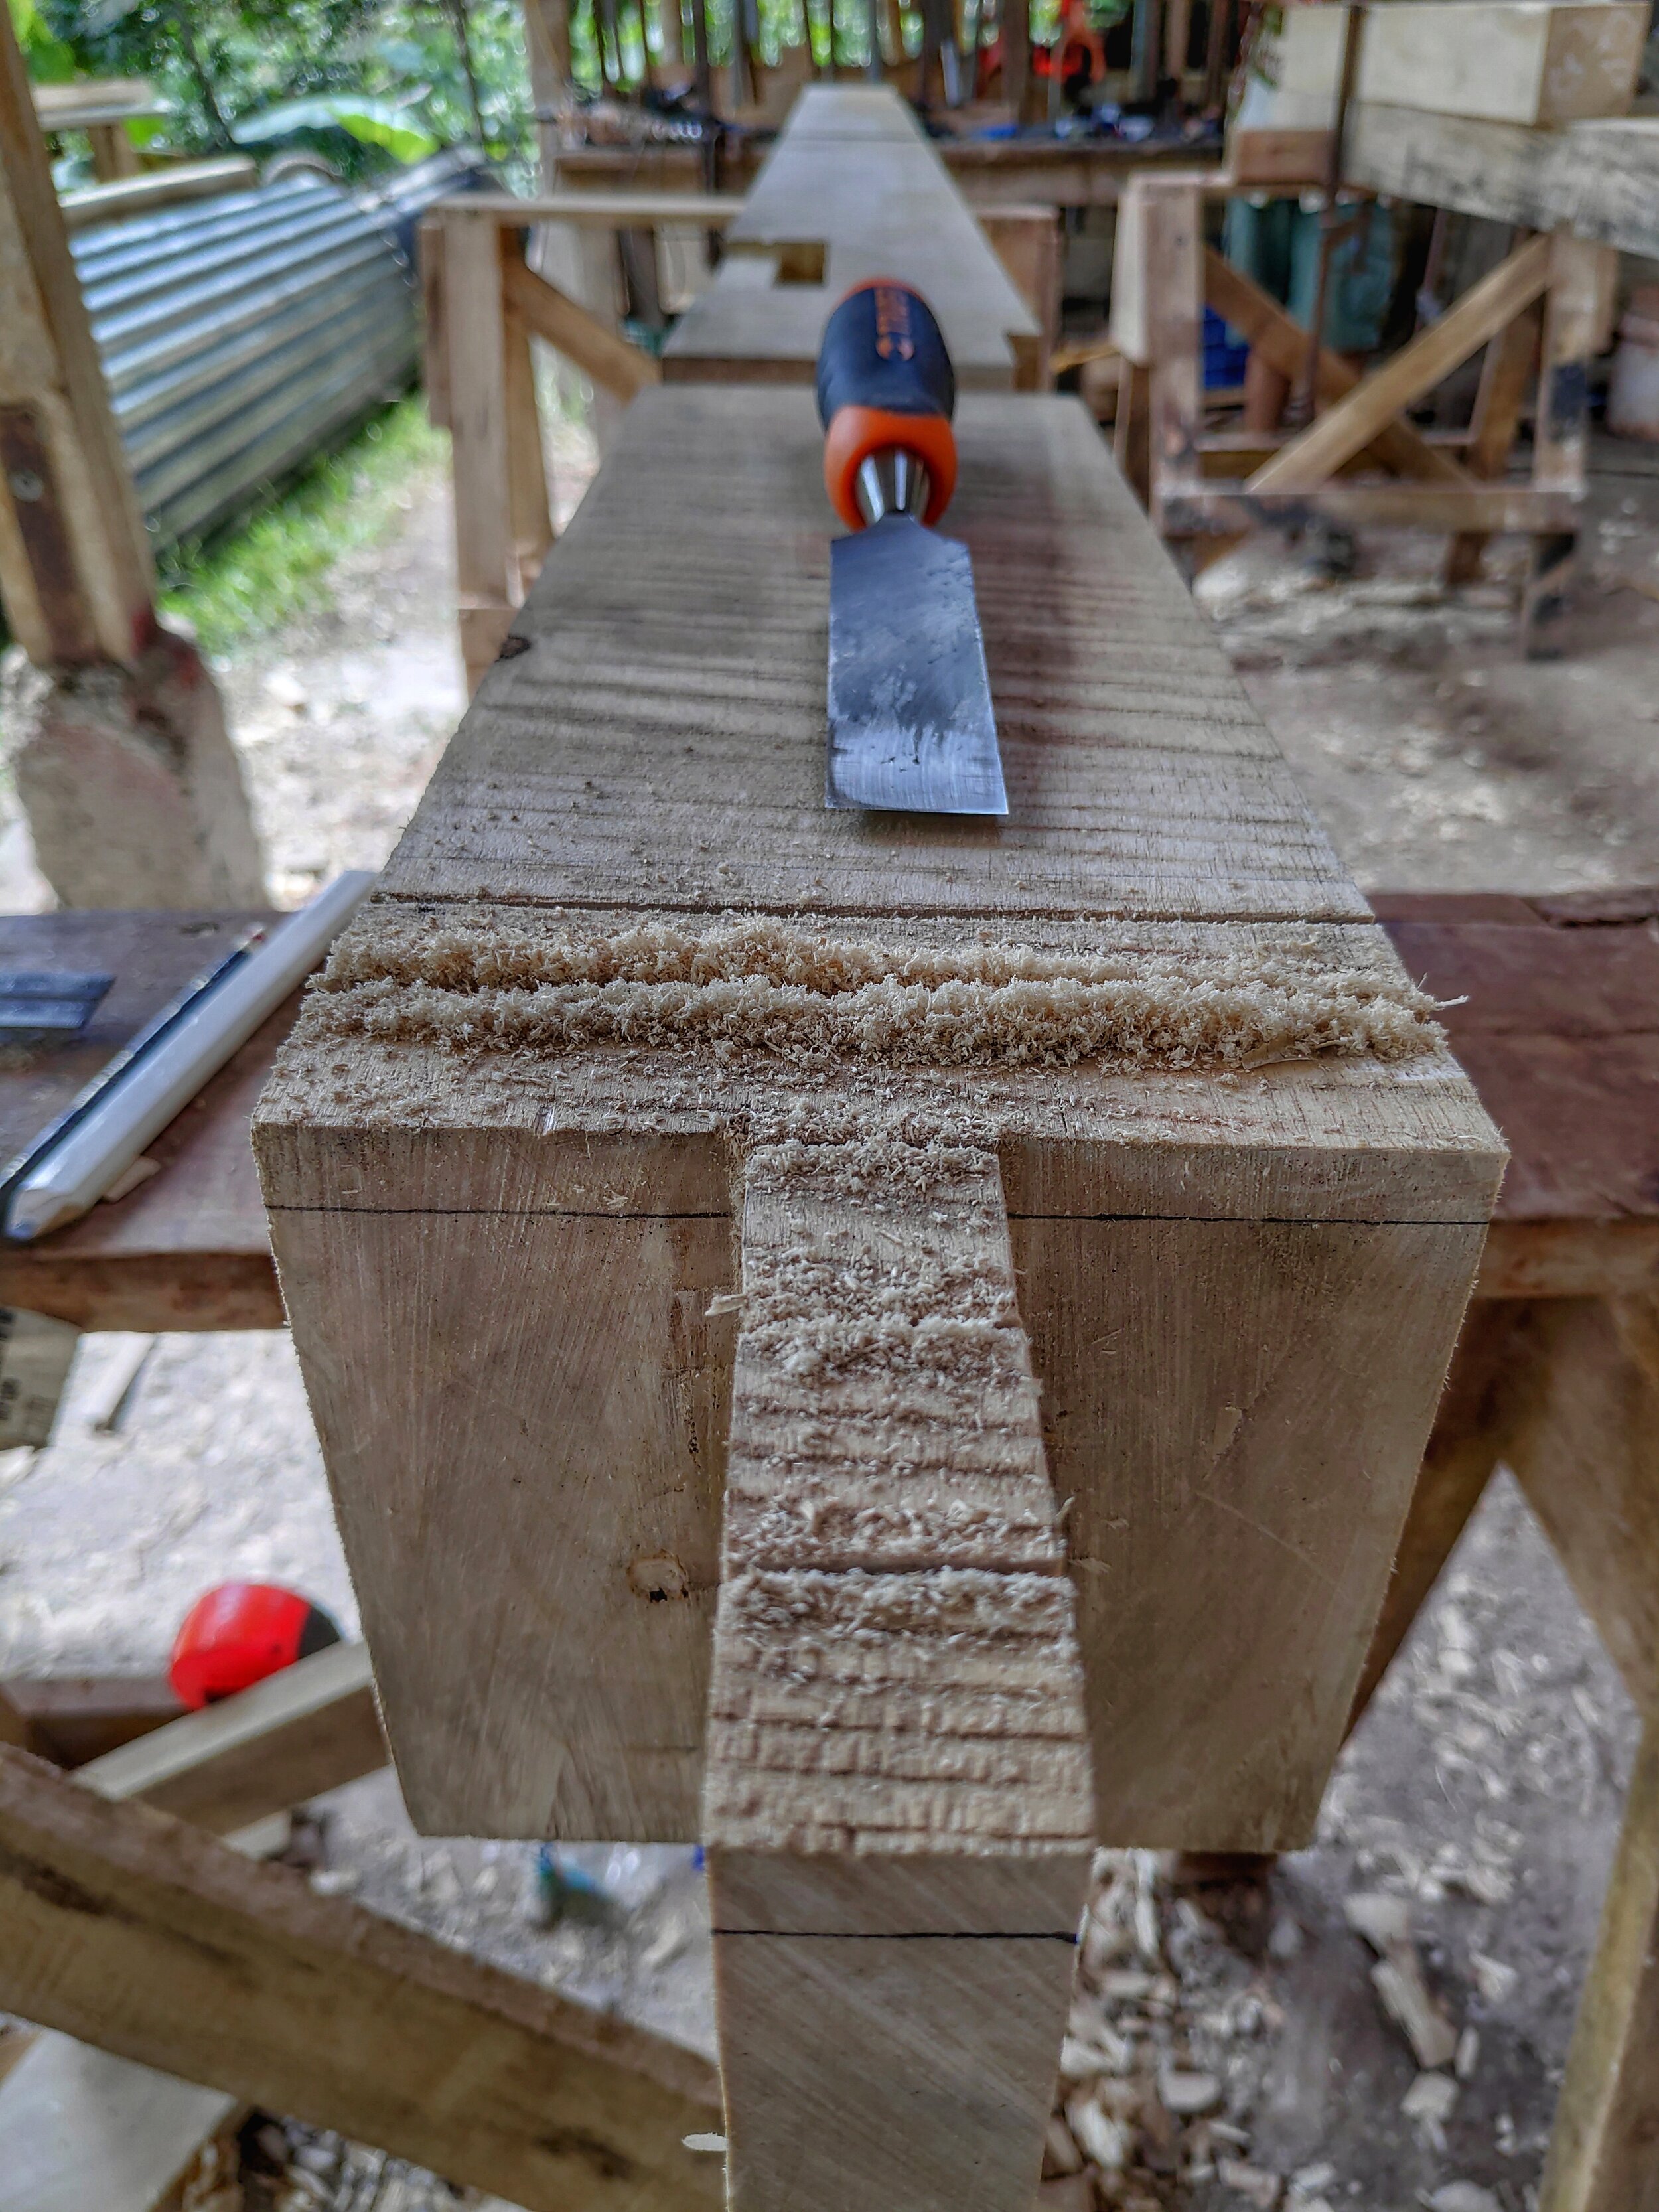
The kerf cuts to remove the housing on this joint
Want to Build Your Own Home?

Timber frame joinery
With over 15 years of experience in natural building including earth building, bamboo construction, and timber framing, Rancho Mastatal is a great learning environment to get inspired and hands on experience in these fields.
Make sure to check out our natural building courses:
Natural Building and Plasters Intensive
We host most of these courses annually, so make sure to stay tuned by visiting our workshop page here.
Past articles on timber framing and natural building at the Ranch:
Timber Framing: A Real Application of Sustainable Forestry Management

Timber Framing: 10 Things You Didn't Know You Needed to Know
Either way it’s important to know that timber framing takes patience and practice if you’re a beginner. The tips in this article are intended to introduce some important concepts in timber framing and to solve some common problems before they even arise, in order to set you up for success in your sustainable home build.
By Kara, Apprentice 2020
Timber framing is an integral part of the natural building techniques we use at Rancho Mastatal. The building style provides a strong framework to combine with other techniques. Adobe, cob, wattle and daub-- can all be used in conjunction with a timber frame. Maybe you’re already planning on building a timber frame house, or weighing options of building types. Either way it’s important to know that timber framing takes patience and practice if you’re a beginner. The tips in this article are intended to introduce some important concepts in timber framing and to solve some common problems before they even arise, in order to set you up for success in your sustainable home build.
If you’re interested in learning the basics of timber framing you can check out our upcoming workshop.

A happy crew after finishing the raising of this timber frame
1. Square Rule
When building your sustainable home it may be possible to work with locally sourced, large-dimension timber, but the pieces provided by your local sawyer may vary in size and squareness. For timber framing, a construction style that relies on accurate measurements, this reality presents an interesting problem. A common solution, and one we use for our natural buildings at Rancho
Mastatal, is called square rule. The basis of square rule is the assumption that a perfect, slightly smaller, timber exists within your uneven timber. By making measurements and joints align to this
imagined perfect timber, the inconsistencies between the actual timber sizes won't affect the integrity of your joinery.
In practice, there are likely to be two adjacent faces on your timber that are at 90 degrees (or close enough to plane one side until they are). These two sides become your reference faces, and thinking in terms of your ‘perfect’ timber, it’s nestled into that 90 degree corner. You’ll measure everything from these two sides, marking them distinctly in pencil or chalk so that you can quickly see where they are.
In planning where your joinery is going to be laid out, you have to keep in mind that the exterior faces must be flush to allow the cladding to be attached as well. This means that one of your reference faces will always be on the exterior facing side of your timber. Along with this consideration, you’ll want most cuts to be on a reference face. Even if they aren’t, joints will be measured to the inner surfaces of the reference faces, so that the inconsistencies in the timber won’t affect their placement.
When cutting, this may mean that you have to cut out ‘housing’ for the joints on non-reference faces. This is a reduction that exposes the ‘perfect’ smaller timber, and allows mated pairs of joints to sit flush against each other. By exposing the ‘perfect’ timber, identical pieces like knee braces
become interchangeable throughout the building-- so you don’t have to plan for the inconsistencies and variations in each piece.
Square rule is a concept that may seem daunting at first, but it can becoming intuitive with practice. By measuring to the ‘perfect’ timber, and cutting housing to expose it, means that each piece can be cut without knowing the unique shape of the corresponding timbers it will fit into. I recommend doing more research into the topic. The book “Learn to Timber Frame” by Will Beemer is a good resource.

Using a framing square to find your best 90 degree sides

And a hand planer to make those sides perfectly 90

A perfectly sharp pencil
2. Sharpening your Pencil
To mark measurements on a rough piece of timber, it’s best to use a carpenter’s pencil. It should be sharpened to a wedge (you can use a chisel or a knife), so that you can make a thin line or a thick one. You can even shave down one wide side flat to the lead, so that it sits flush with your ruler as you draw a line. It’s important to consider the sharpness and the angle you’re holding your pencil as you draw, since it’s easy to skew a line as you draw it along your timber if you’re not paying attention.

Exact measurements are key to your frame fitting together
3. Burning 10”
When running a tape measure over your timber, don’t start measuring right from zero. Sometimes the metal edge is loose, and it is hard to get an accurate read on where 0” actually is. Instead, place your tape measure so that 10” is on your beginning mark. Measure from there, adding the 10” to your measurement. It’s better to use 10” than 1”, because it’s easier to see if you’ve forgotten to account for the burn when you’re checking your layout. Don’t get burned by the burn!
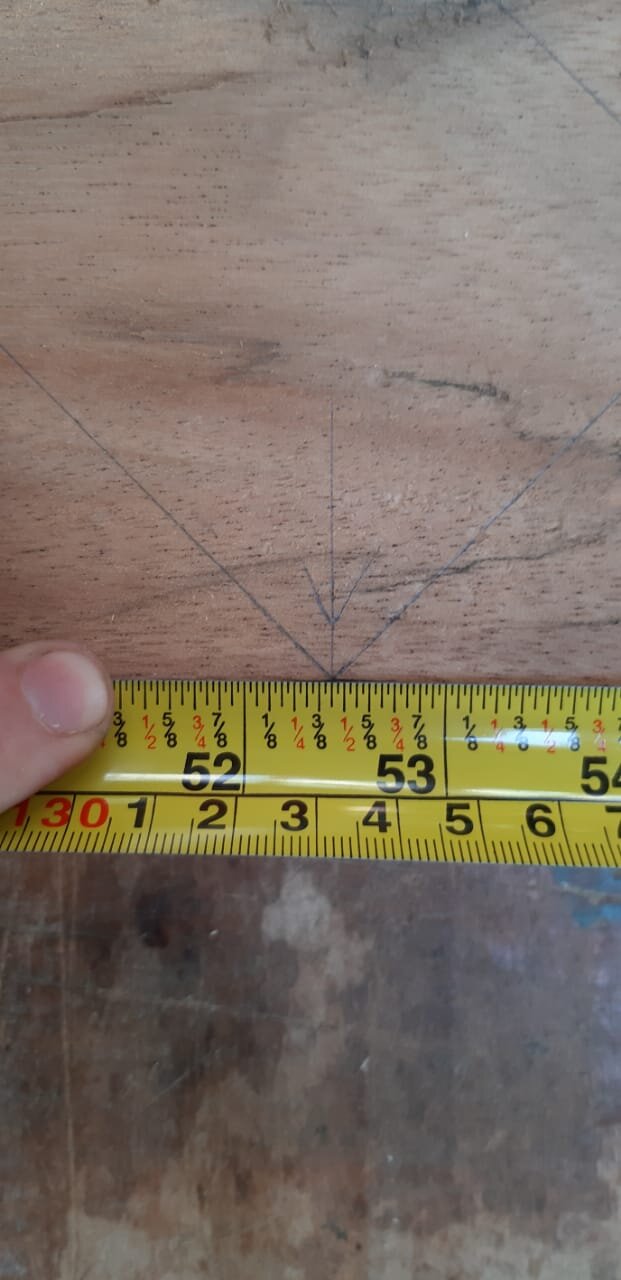
A crow’s foot helps you identify the right measurement
4. Crow’s Foot Marking
When marking measurements taken from your tape measure, use a ‘V’ shape ‘crow’s foot’ mark on
your timber instead of a single line. While carefully holding your tape flat against the timber (being sure not to move it!), draw the crux of the ‘V’ at the mark you’re measuring to, drawing both lines from the point out. A sharp pencil lead is crucial here for accuracy. A single, quickly drawn line can curve, and later it can be hard to tell exactly where on that line the accurate measurement is.

A timber frame joint called a “scarf joint” that allows you to join two long timbers together
Part 2 to Come!
Building your sustainable home using timber framing techniques is an exacting, but rewarding pursuit. Part 2 will continue with more tips to help you measure, layout, cut, and assemble your building.
Want to Build Your Own Home?
With over 15 years of experience in natural building including earth building, bamboo construction, and timber framing, Rancho Mastatal is a great learning environment to get inspired and hands on experience in these fields.
Make sure to check out our 2021 natural building courses:
Natural Building and Plasters Intensive: February 2021
Bamboo Construction: April 2021
Timber Frame Construction: June 2021
We host most of these courses annually, so stay tuned yearly by visiting our workshop page here.
Check out these past articles about natural building and timber framing here at the Ranch:
Design Ideas for a Sustainable Home in the Tropics
Timber Framing: A Real Application of Sustainable Forestry Management

Students in the Timber Frame course raising the frame they cut in class

Natural Building & Clay Carving - Add Artistic Expression to Your Home
Now you have an expanse of clay before you, a blank canvas to express yourself upon. Have fun! Feel the warmth and beauty of the clay, and tap into your inner artist. Get dirty, and share the experience with someone else! With some practice, you might be surprised what kind of beautiful things you can make with just a bit of Earth!
Natural Building & Clay Carving - Add Artistic Expression to Your Home
By Mateo, Apprentice 2020
Clay. Oh noble clay. O beautiful, hardy, earthy clay. Whence forth did you come, and how did we ever come to deserve such a wondrous material? Art thou merely a dream... oh

A Dorodango, using a handful of clay from our soil
Oh sorry... didn't see you there. I was just entranced by this ball of clay I have here in my hand. Why do I have clay in my hand you ask? Well, why DON'T you is what I say!
I'm here today to preach the wonders of clay, and more specifically to try and convince you to go out in your backyard this afternoon and dig a hole and play in the mud. You'll be so busy having fun, you might not even realize that you're making art at the same time! So buckle up, and let's dive into the world of Clay Carving!
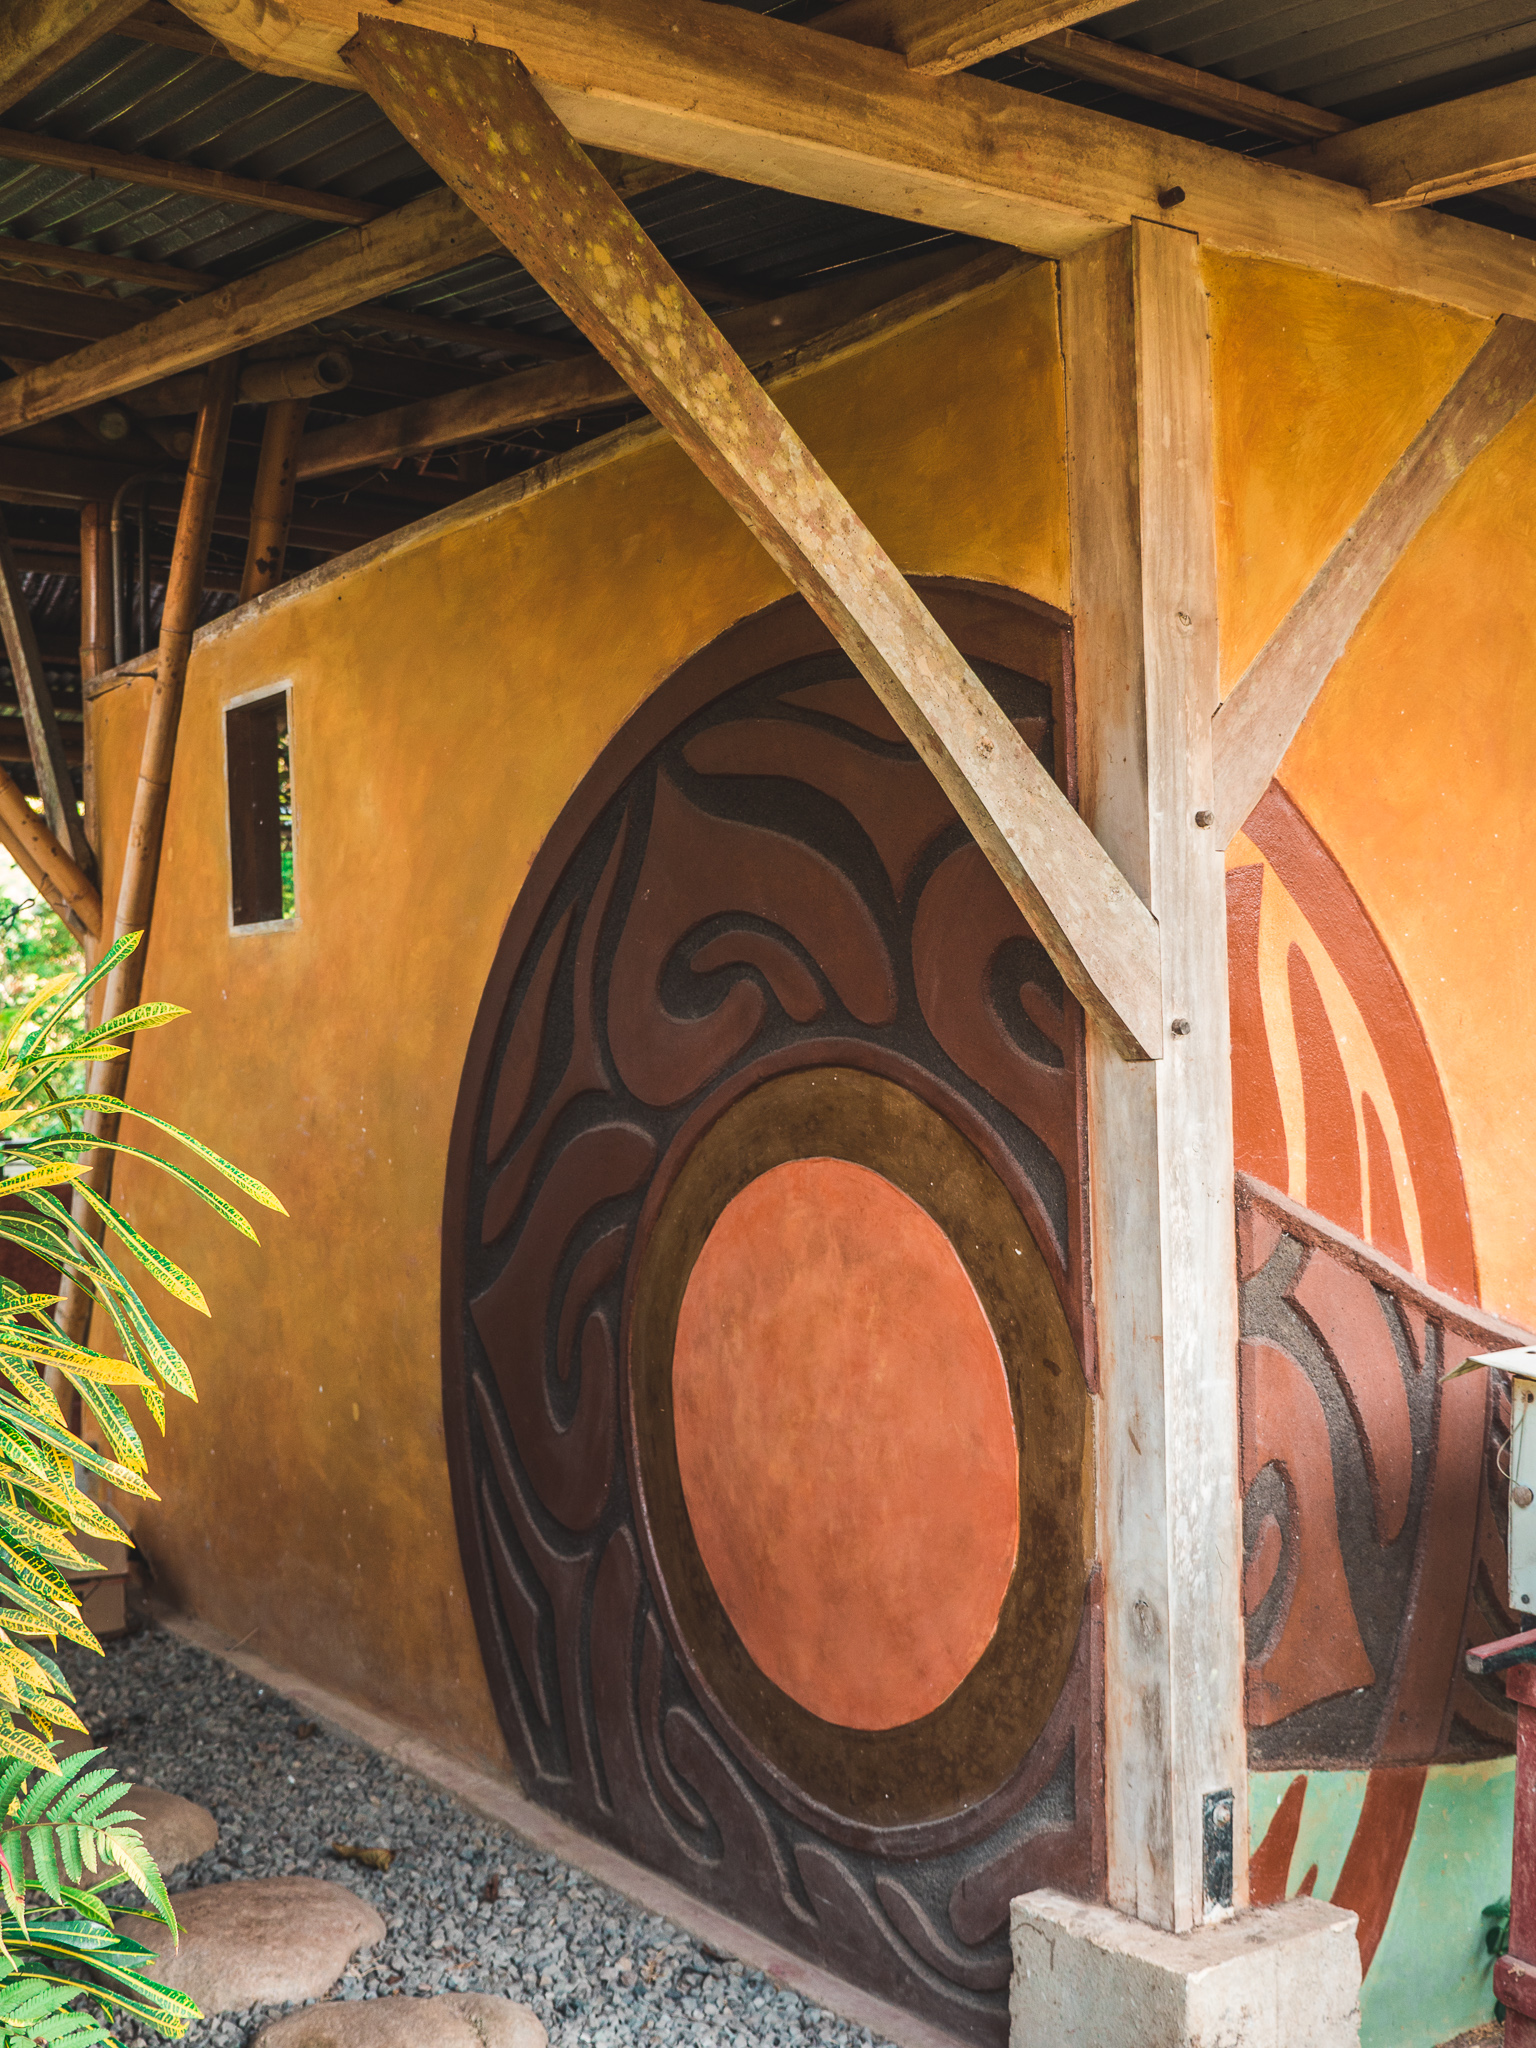
Clay carving with polished lime plaster on the center and a timber frame structure
What is Clay Carving?
Now first off let's get one thing straight. I'm not talking about your classic clay pottery, or your other classic clay sculpture. I'm talking about Clay CARVING. What's the difference you say? Go ahead and take a look at those pictures all around these here words. These are all examples of clay carvings we have adorning different natural buildings here at Rancho Mastatal.
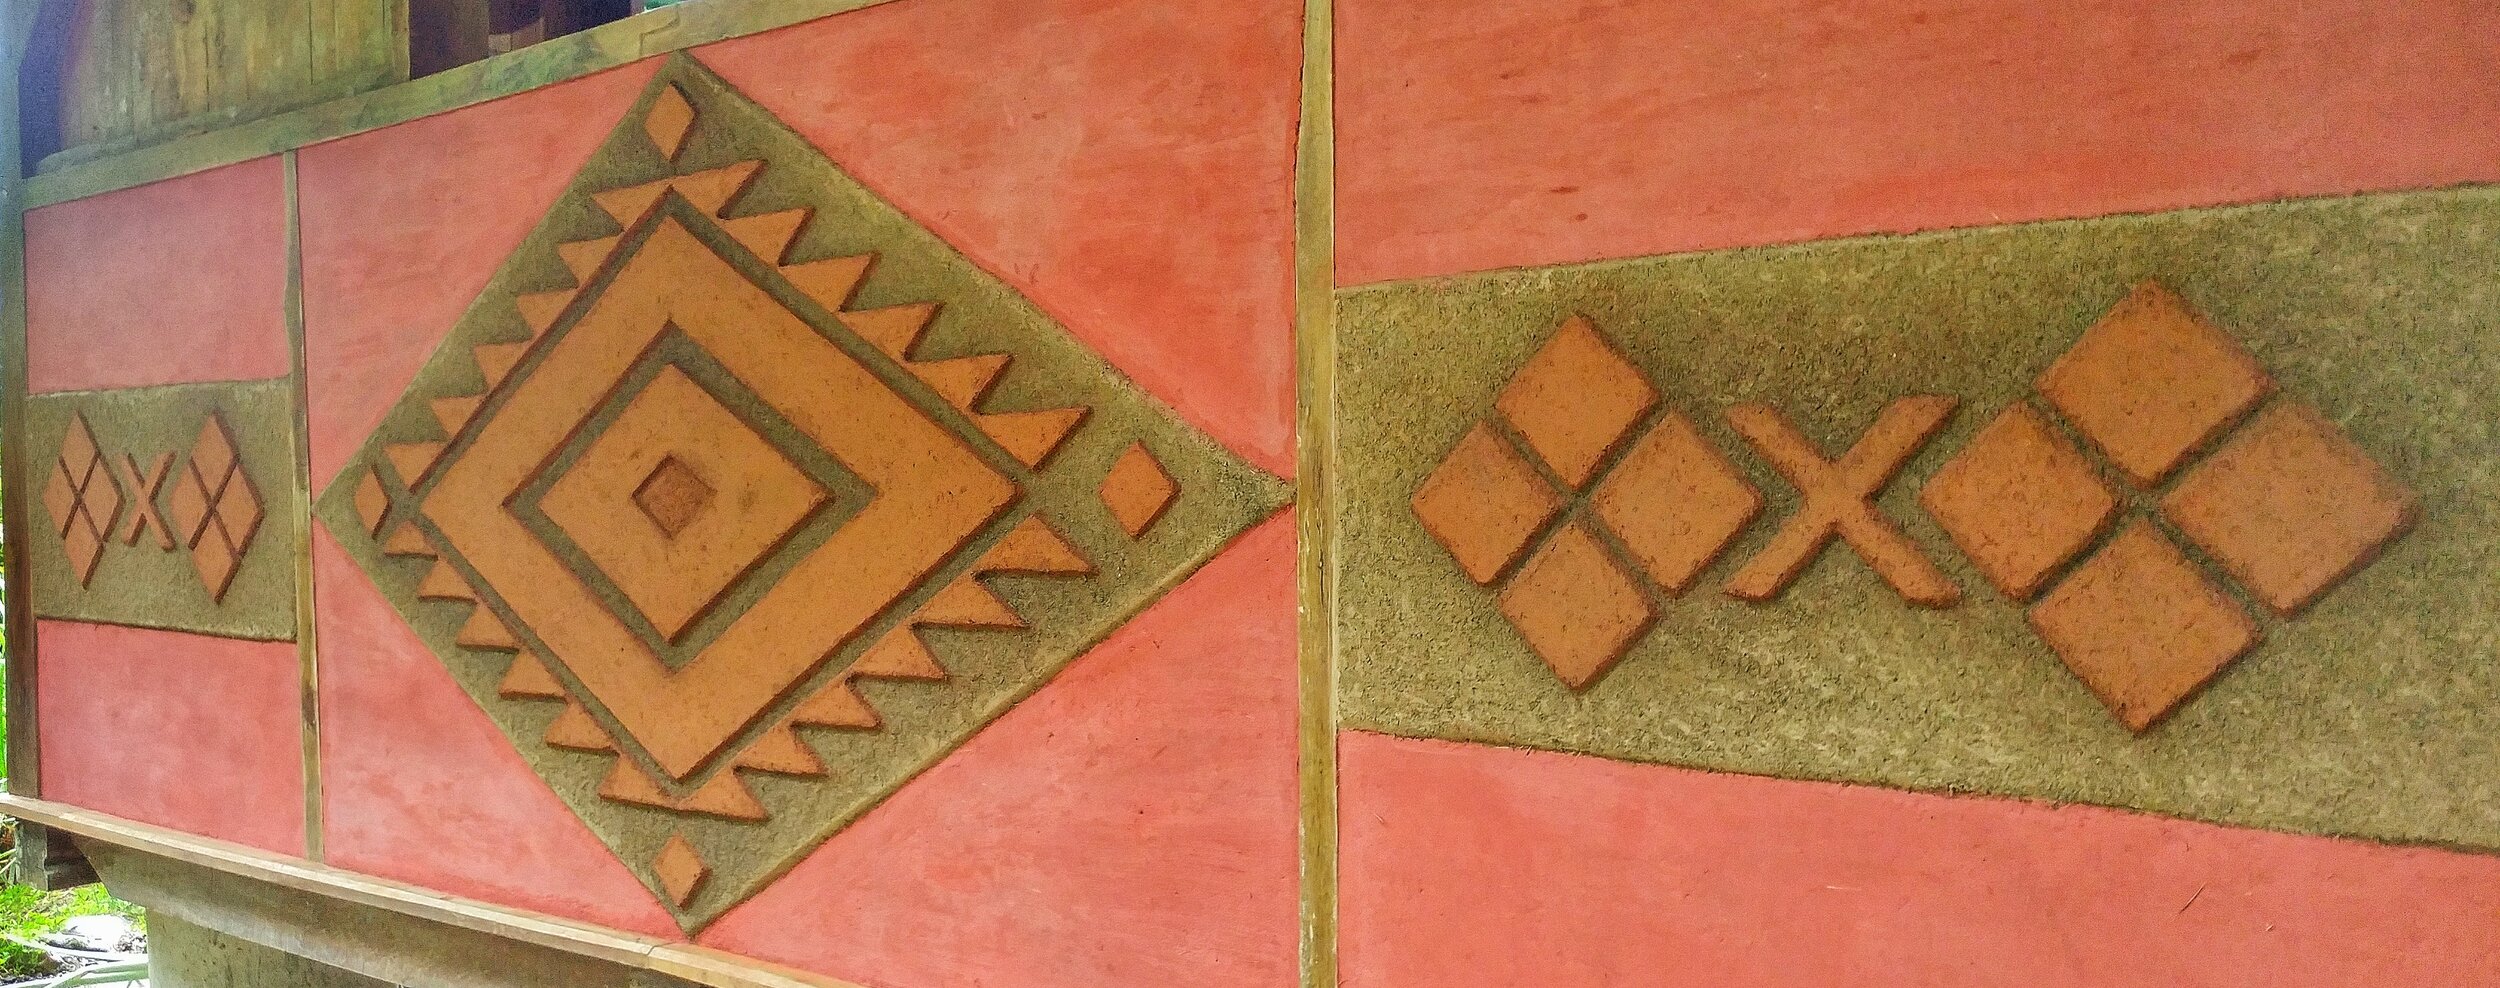
Clay carving is the process of building up layers of clay in differing colors or textures, and then carving away those layers in forms and shapes to create a 3 dimensional "relief" carving. This technique transforms ordinary, flat walls into amazing works of art, and can drastically transform and elevate a space. It also goes hand and hand with natural building techniques like earthen walls and clay plasters.
Building your Clay Carving Canvas
Now that you know what it is, you might be wondering, where would I even do this? The answer to that my friend, is wherever you want.
Well, maybe not wherever. But you could do it in a lot of places! In your home, in your garden, your backyard, your school, your workplace (if your boss is cool), etc. etc. If that 's too much choice, here, take these tips for building yourself a canvas to work on.
Build a rectangular panel out of plywood. You can line the edges with 1x1 in pieces of wood to contain the plaster and clay plaster mix as you apply it. You will probably need to apply a base coat of cement based plaster with some acrylic glue in it to bond to the plywood and create a rough surface for the clay to stick to. A 2' x 3' panel would make for a nice size to practice on, and if you like how it turns out, you can clean the edges up and place it in the garden, on your porch or hang it from a wall somewhere! (If you're thinking about, or already are, building a house, then consider adorning whole walls with an artistic carved clay finish. The beauty of your natural building will astound!)

Practice panels in our annual natural building course
OR make a cob bench, and add a clay carving to the back. Cob is one of the simplest and most versatile natural building materials. By just mixing clay, sand, and straw in the correct ratio (more on ratios in a bit), you can then stack and mold the cob into flowing, beautiful shapes, and the surface will be nice and rough for further Clay coats to stick to. Stack it up into a bench shape in the backyard, and then leave yourself a nice flat area on the back for your carving to live.
Getting Natural Building Materials
At this point, there are two directions you can take, or maybe you can walk right in the middle. You can either buy good quality, pre sifted sand and clay from hardware and/or ceramic supply stores, or you can go into your backyard and dig up some Earth and see what you find.
Soil is different everywhere, and amounts of clay and sand vary widely between locations. Regardless, you'd want to dig down at least 6" (though this varies by location) to get past the topsoil, and then do some tests to figure out how much clay and sand you have at hand. This could mean doing the jar test, filling a jar with a handful of soil and water and letting the parts separate out, sand falling to the bottom and clay settling on top. Or you could send out a sample for precise testing if you want to be scientific about it. Once you have a better idea of what ratios of material are in your soil, you can make a mix.
This process is essential in most natural building endeavors, and is a skill that takes practice. Trust me on this though, getting to know the Earth around you will bring benefits beyond just what you can build with it.
Making a Clay Carving Mix
Clay is naturally flexible, while sand is naturally rigid. Sand provides structure, while clay binds a mix together. The right balance of the two will give you a material that you can carve into shape, and have it stay.
Finding that balance is part of the fun. Try mixing in different ratios, starting with 1:1, and taking some notes along the way. What feels good to work with? What drys well without cracking? What lets you carve without crumbling? Some tips to start: too much clay will cause cracking, and too much sand will cause crumbling. Too wet of a mix won't hold its shape or stay on a wall, and too dry will be hard to apply.

Sample sizes of sand, clay, and straw ratios
Remember, that as you carve you will reveal lower layers of clay. Try finding or buying different colors of clay, or mix in pigment or colorful materials to create contrast and interplay between layers. And don't be in too much of a rush to apply the next layer; if it's not dried enough, your layers may blend together.
Finally, a note on tools
You can do all of this with your hands and a razor blade, laying material down, smoothing it out, and cutting it into shapes once dry. You can also use different tools like floats and trowels to smooth and flatten layers, and other tools like chisels and awls to aid your carving. Start small and easy before you spend money on new tools, and look for used tools or tool rentals before a big purchase.
Summary Step by Step
To wrap up, let's go through a step by step and some final tips:
1. Gather all your tools and materials. It is better to do all your preparation before you start. Think through what you will need from start to finish, including clean up!
2. Prepare your canvas. Whether you're building a new surface or applying to an old one, make sure that the surface is rough or "keyed" so that the clay mix has more surface area to bind and hold on to.
3. Create your mix. Do small batches for tests and samples before going big, so you have an idea what it will turn out like before spending a lot of time and energy. Also keep in mind that you can get finer (as in smaller sand) and creamier (as in more clay) as you add more and more layers, but you'll have to apply in thinner and thinner layers to prevent cracking as these ratios change.
4. Apply your first layer. Smooth and flatten as much as you desire. Let dry enough so that you can add a new layer without the under layer blending with your new layer. You may need to wait several days between layers in a humid climate.
5. Apply second layer. You can now add as many layers as you want to carve away, altering color and texture between layers as desired.
6. Carve away clay to reveal the art within! A razor blade is effective due to its sharp edge, though any knife could work. The basic process is to cut with the knife the outline of the shape, then carve out the interior (with an awl, screwdriver, or even stick). Cut at an angle, widening outwards from the surface, to create cleaner lines and forms. You can smooth the revealed surface beneath with fingers or smooth stones. Dig and carve deeper to reveal more layers beneath!
7. Clean up when you're done, especially your tools to prevent rust. Finally, if you want your clay carving to last longer or be water resistant (though not water proof) you can apply a hardening oil like linseed oil.
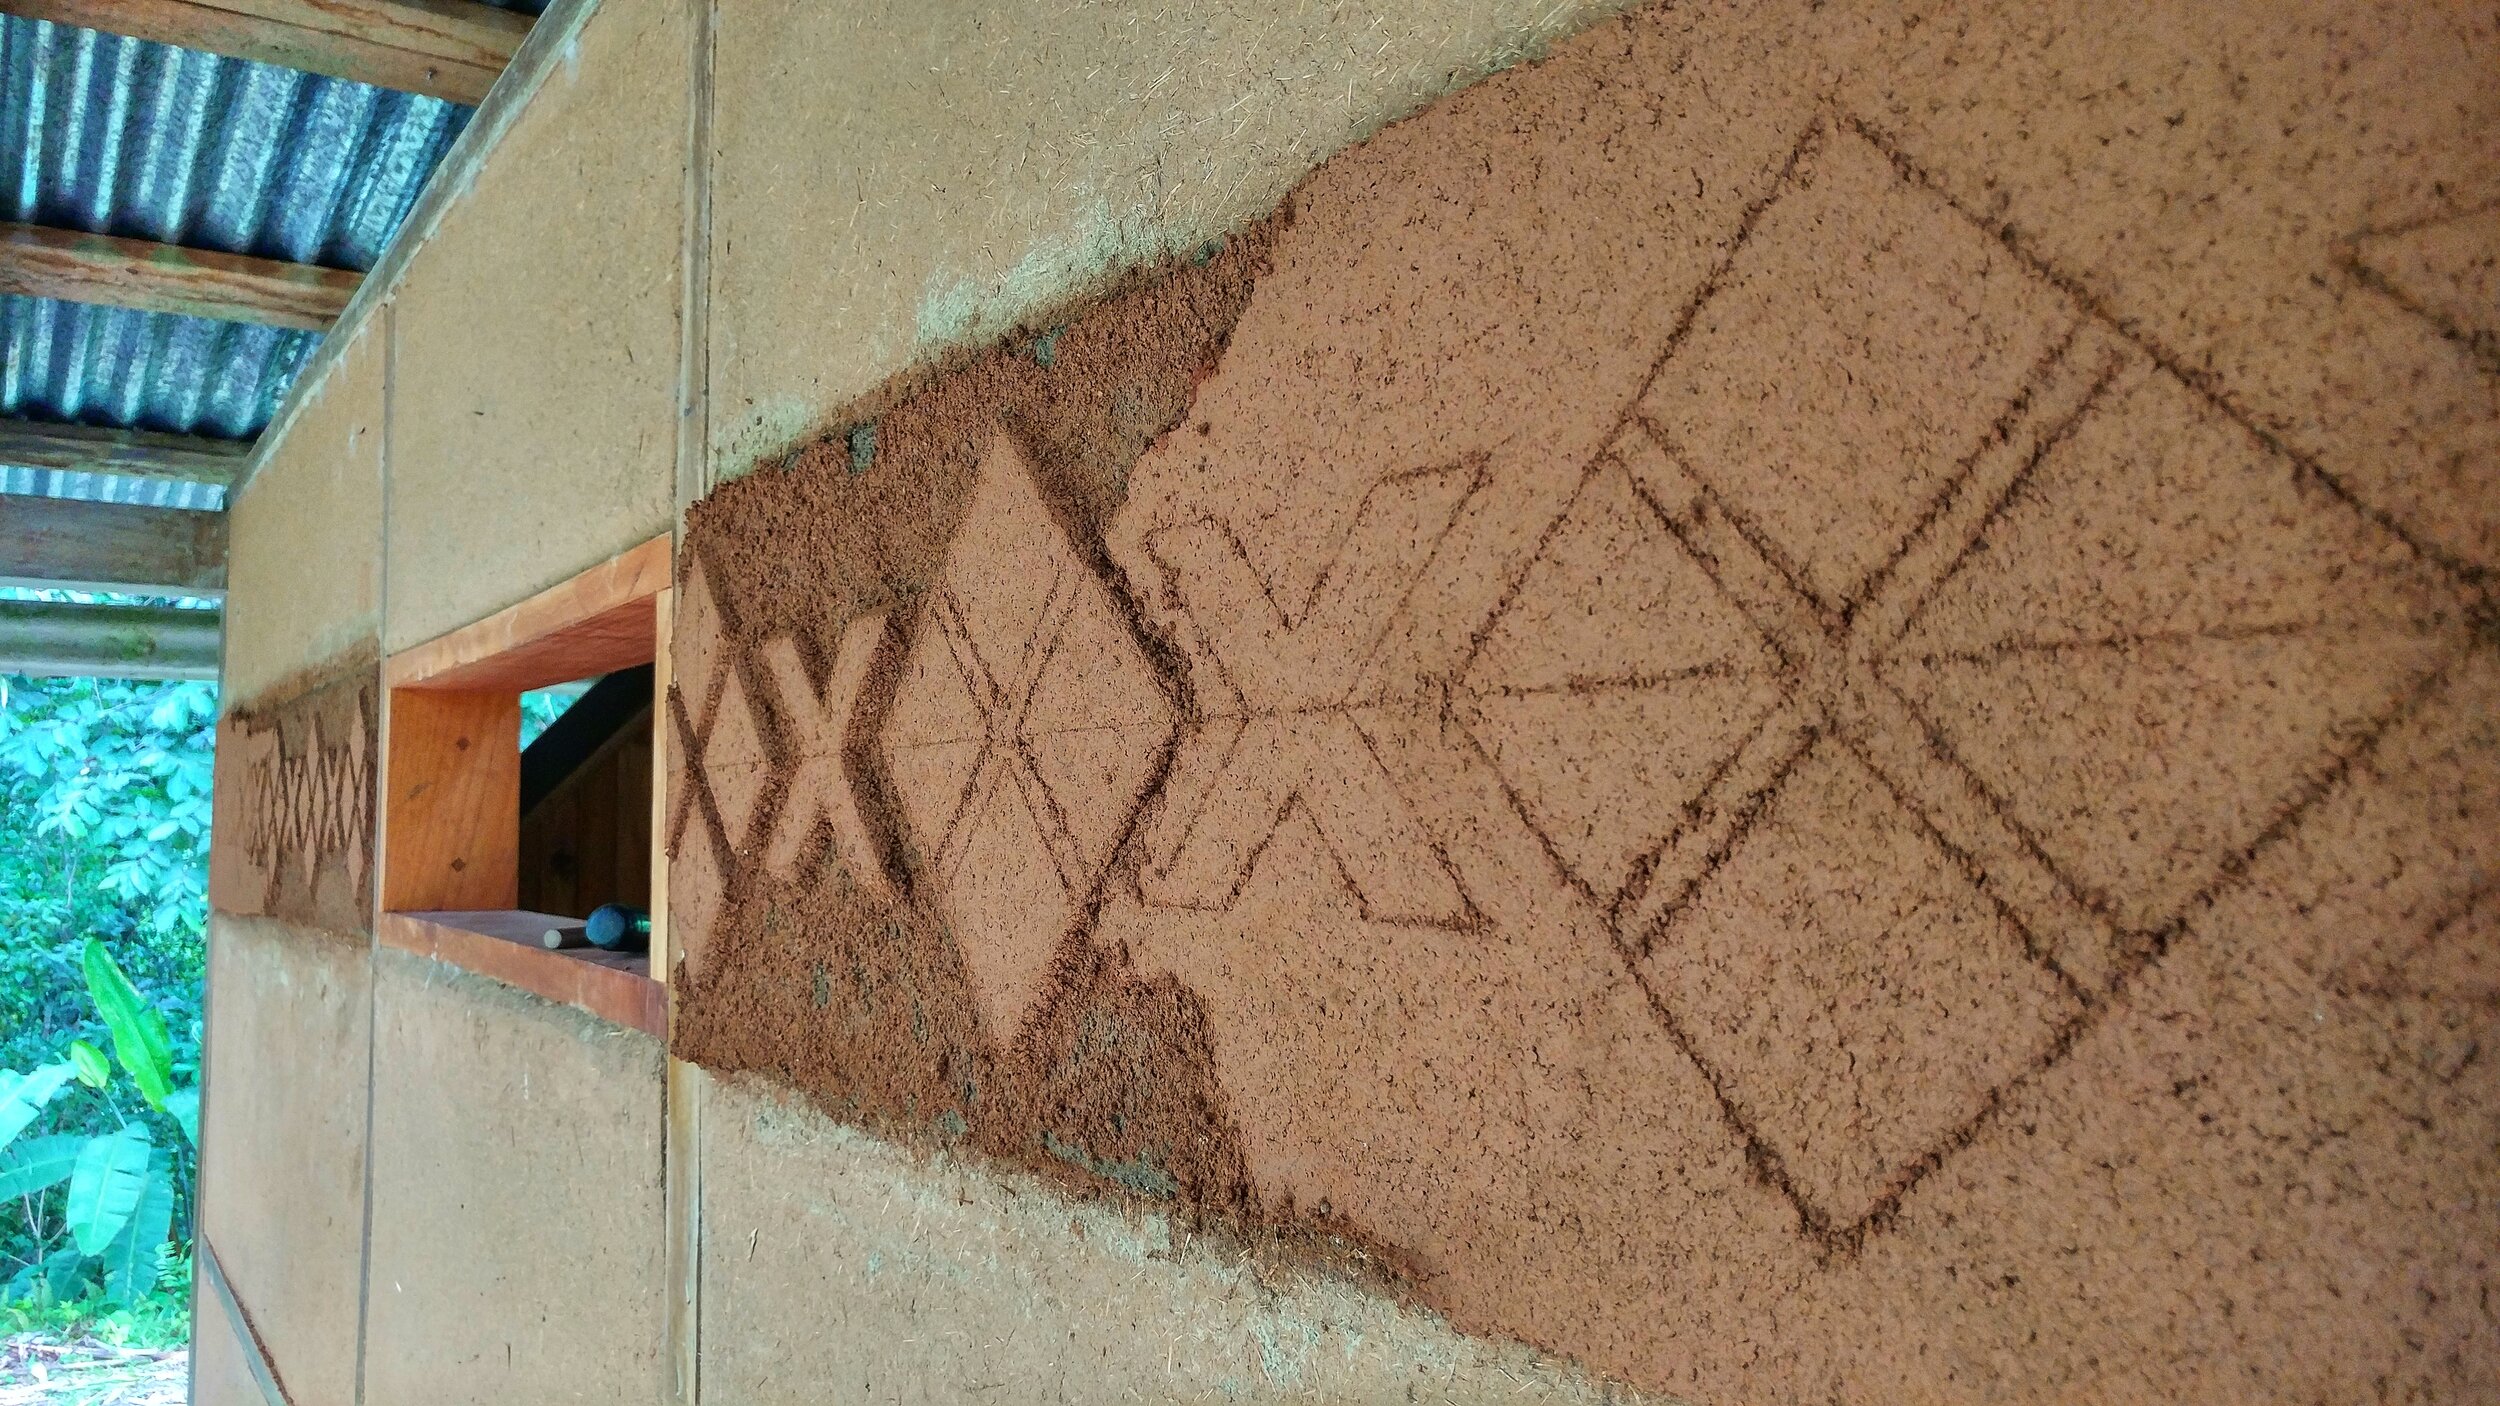
Exposing the different layers of plaster. You can see here the design sketched in, and the first coat of red clay plaster being carved away to expose the underneath grey plaster.
Let the Artist in You Soar!
Now you have an expanse of clay before you, a blank canvas to express yourself upon. Have fun! Feel the warmth and beauty of the clay, and tap into your inner artist. Get dirty and share the experience with someone else! With some practice, you might be surprised what kind of beautiful things you can make with just a bit of Earth!

Working on the Rancho Mastatal mandala on the outside of our food processing kitchen. The yellow is a frescoed lime plaster.
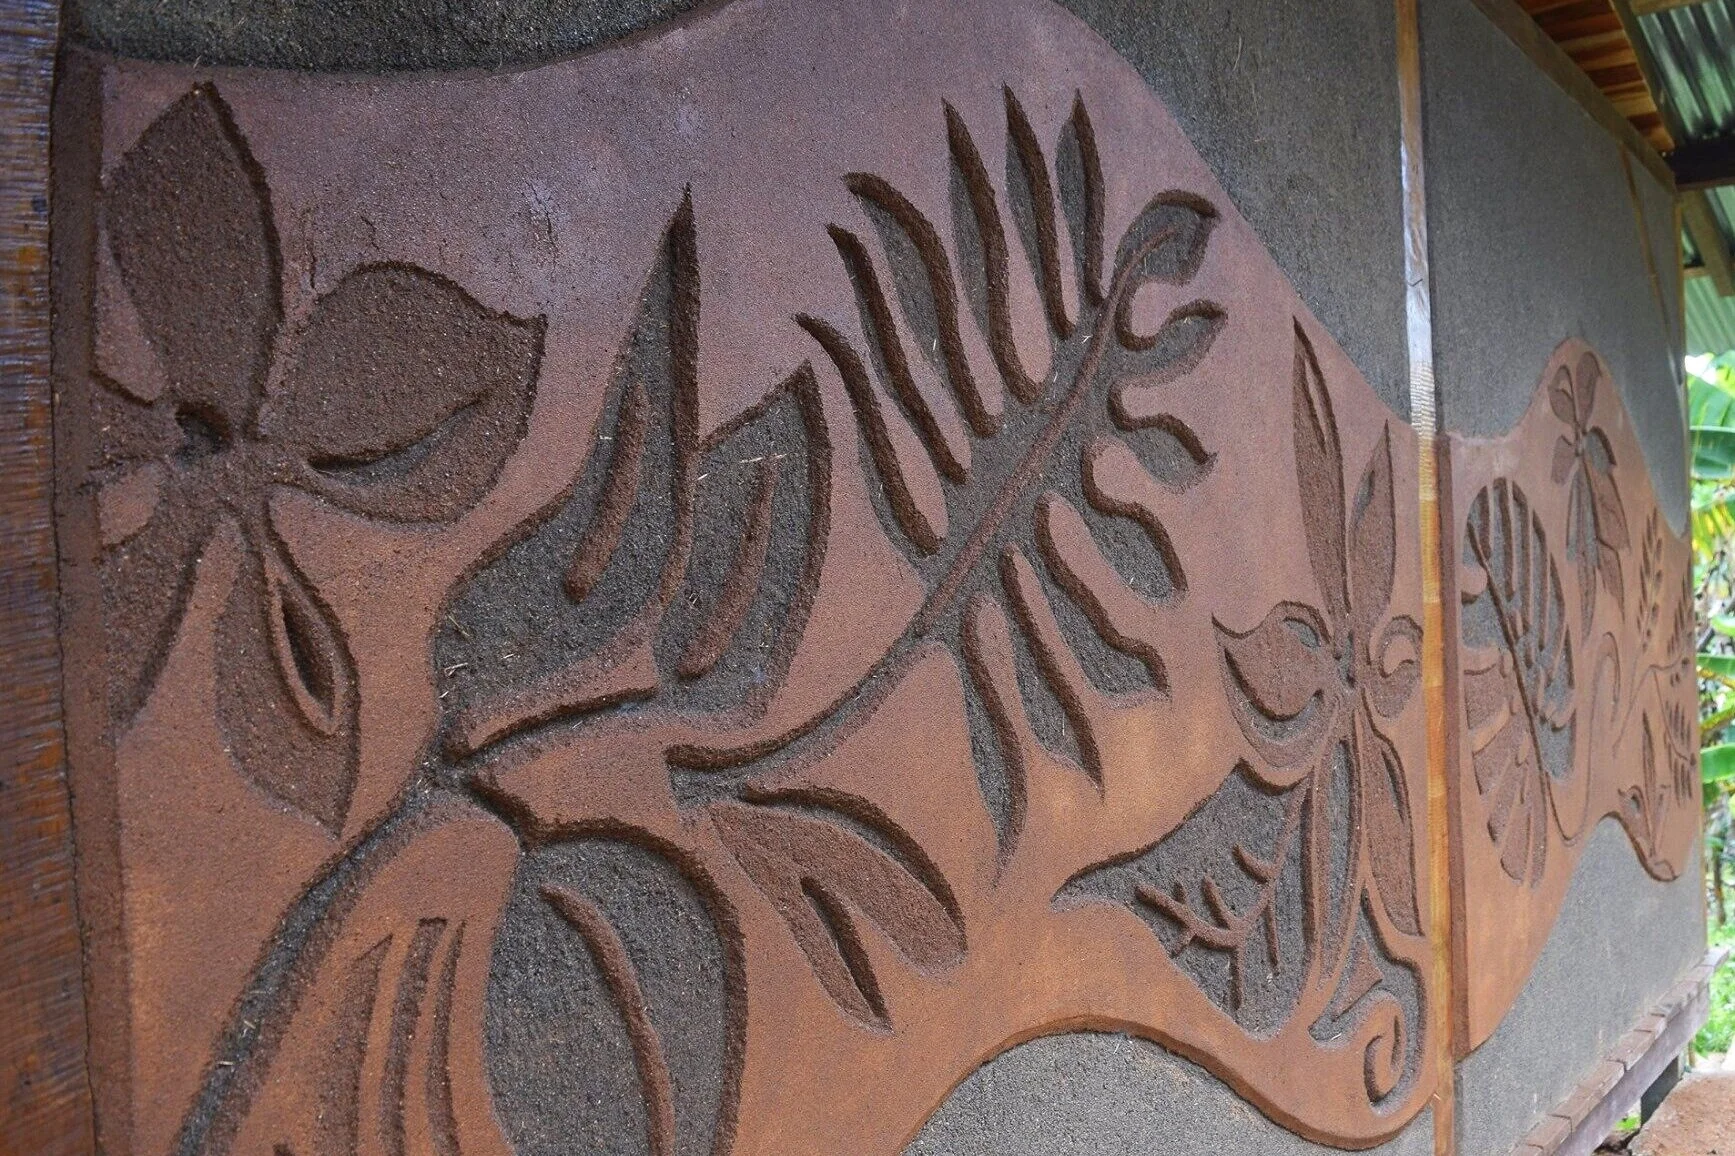
The clay carving done on the outside of a small cabin. The entire project was completed by our 2017 apprentices!
Want to Learn More?
For a great video of a beautiful clay carving in action watch this video by The Nito Project.
To get hands on instruction and learning in clay carving and other natural building and plaster techniques come join us for our annual Natural Building and Plasters Intensive.
Stay tuned about our annual workshops!
Timber Framing: A Real Application of Sustainable Forestry Management
The deforestation problem that constantly threatens our global forest resources is one that we can overcome. To accomplish this, though, we must again learn to give our forests real value. The main idea here is that our forests must be more economically valuable in their current state than they would be under competing land uses. If not, they will be deforested.
By Anthony, 2020 apprentice
The deforestation problem that constantly threatens our global forest resources is one that we can overcome. To accomplish this, though, we must again learn to give our forests real value. The main idea here is that our forests must be more economically valuable in their current state than they would be under competing land uses. If not, they will be deforested.

Cattle Pasture and Forest,
Latin America’s diverse and astoundingly beautiful forests are constantly under threat. Here, deforestation occurs when forest owners decide that they can earn more money doing something else with their land. Forests are routinely slashed and burned to make room for agricultural systems, cattle ranches, infrastructure, urbanizations, and mining, to name a few alternative land uses.
One real strategy to conserve our precious forests is sustainable forestry management, a practice that selectively and sustainably chooses trees to be harvested within a forest in order to use their timber for construction, furniture, tools, and artisanal products. When well planned and carried out respectfully, sustainable forest management gives way to increased biodiversity within a given forest, offers employment opportunities in rural communities, and, perhaps above all, makes a forest’s continued existence economically possible.
Timber Framing
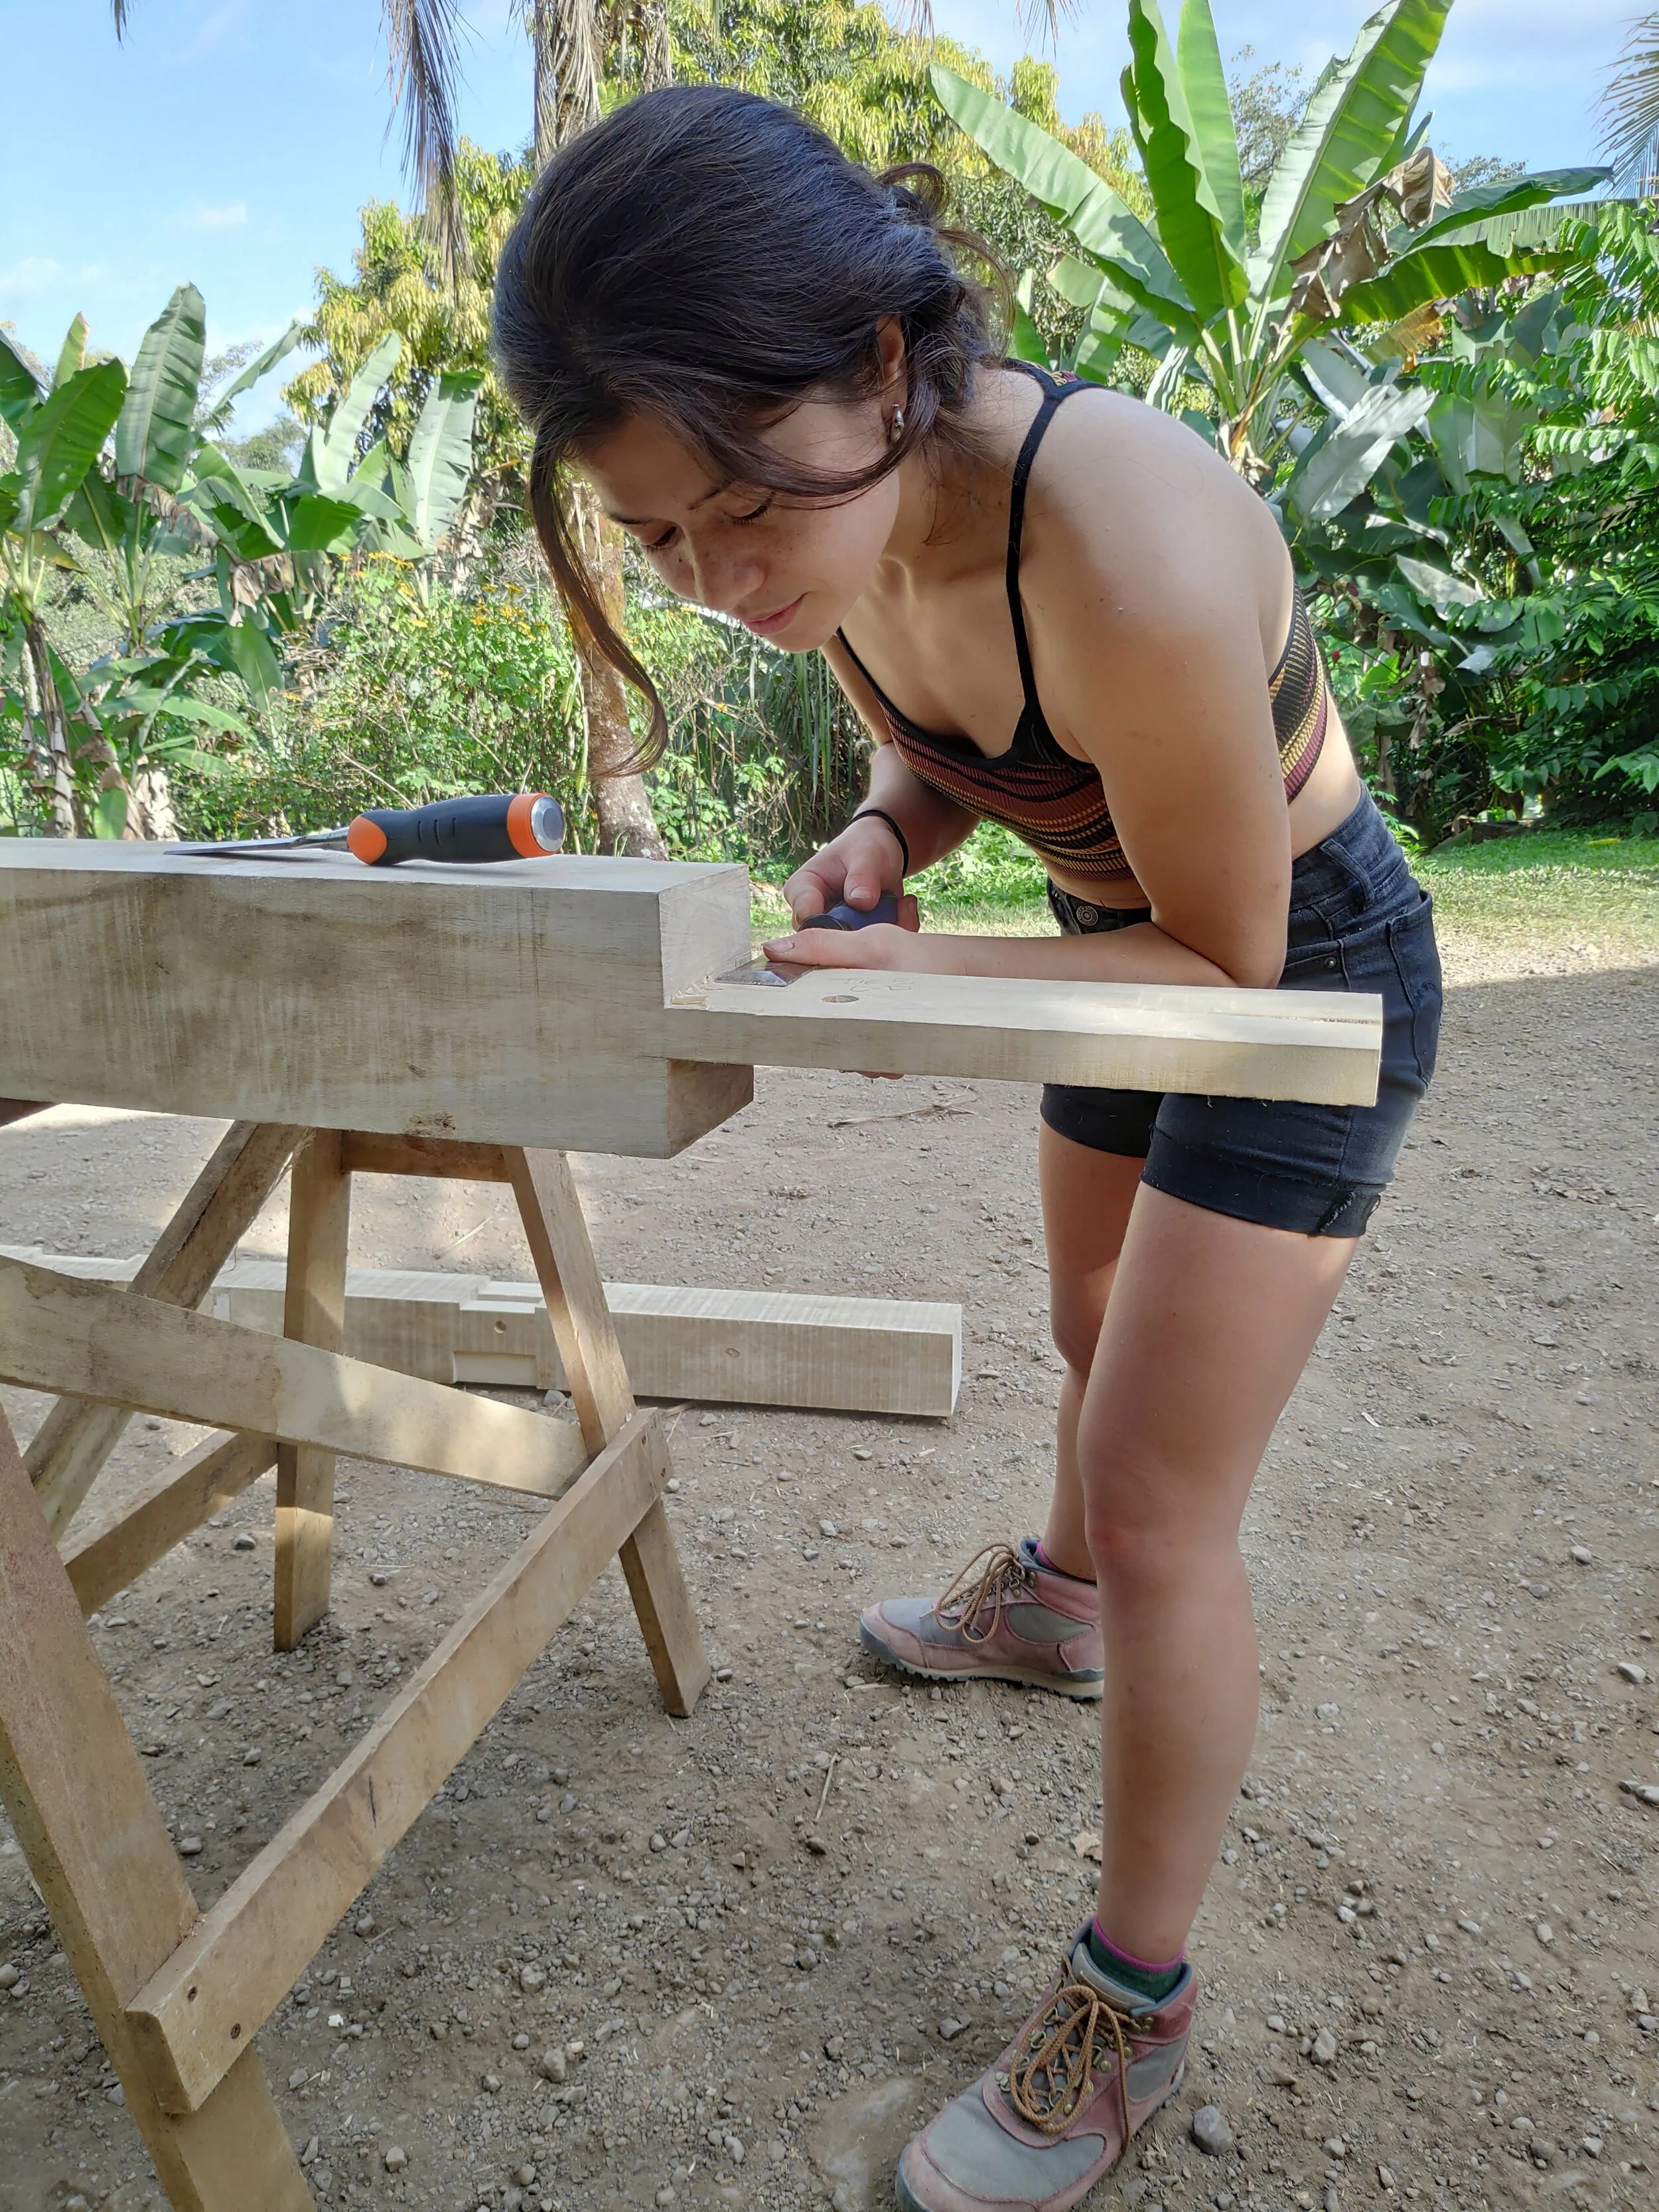
Rancho Mastatal is putting this plan into action. This Costa Rican-based educational farm offers workshops in diverse areas with an emphasis on sustainable community living in the tropics. One of their flagship courses, ‘Introduction to Timber Framing’ leads workshop attendees through the process of building a simple and elegant timber frame home. Starting with the basics, such as tool sharpening and laying out a timber using the square-rule method, the workshop ends in climactic style on raising day when the students see their work come to fruition. After many days of focused, methodical work chiseling and sawing, the timber frame home is assembled in a swift group effort in a single morning. The workshop is an ideal combination of focused individual development and group camaraderie.
Sourcing sustainable wood
The timber used for the construction of Rancho Mastatal’s timber frames originates from two main sources, both of which are sustainably and carefully chosen: selectively-felled trees from managed secondary forests, and trees planted specifically to be harvested for their wood. Additionally, the national context of the timber frame workshops is significant. Rancho Mastatal exists in a nation aiming to be carbon neutral by the year 2021. So far, large-scale national strategies have been based on a renewable energy sector, yet little has been done for real improvement in the construction sector. Here Rancho Mastatal leads the way toward carbon neutrality while conserving tradition.
To be original, one returns to the origins. Sustainable forestry management and timber frame buildings are ancient traditions that must be practiced in order to be culturally conserved. By integrating these traditions into a business plan through its educational workshops, Rancho Mastatal and its core team aim to realize an originality apt for modern times.
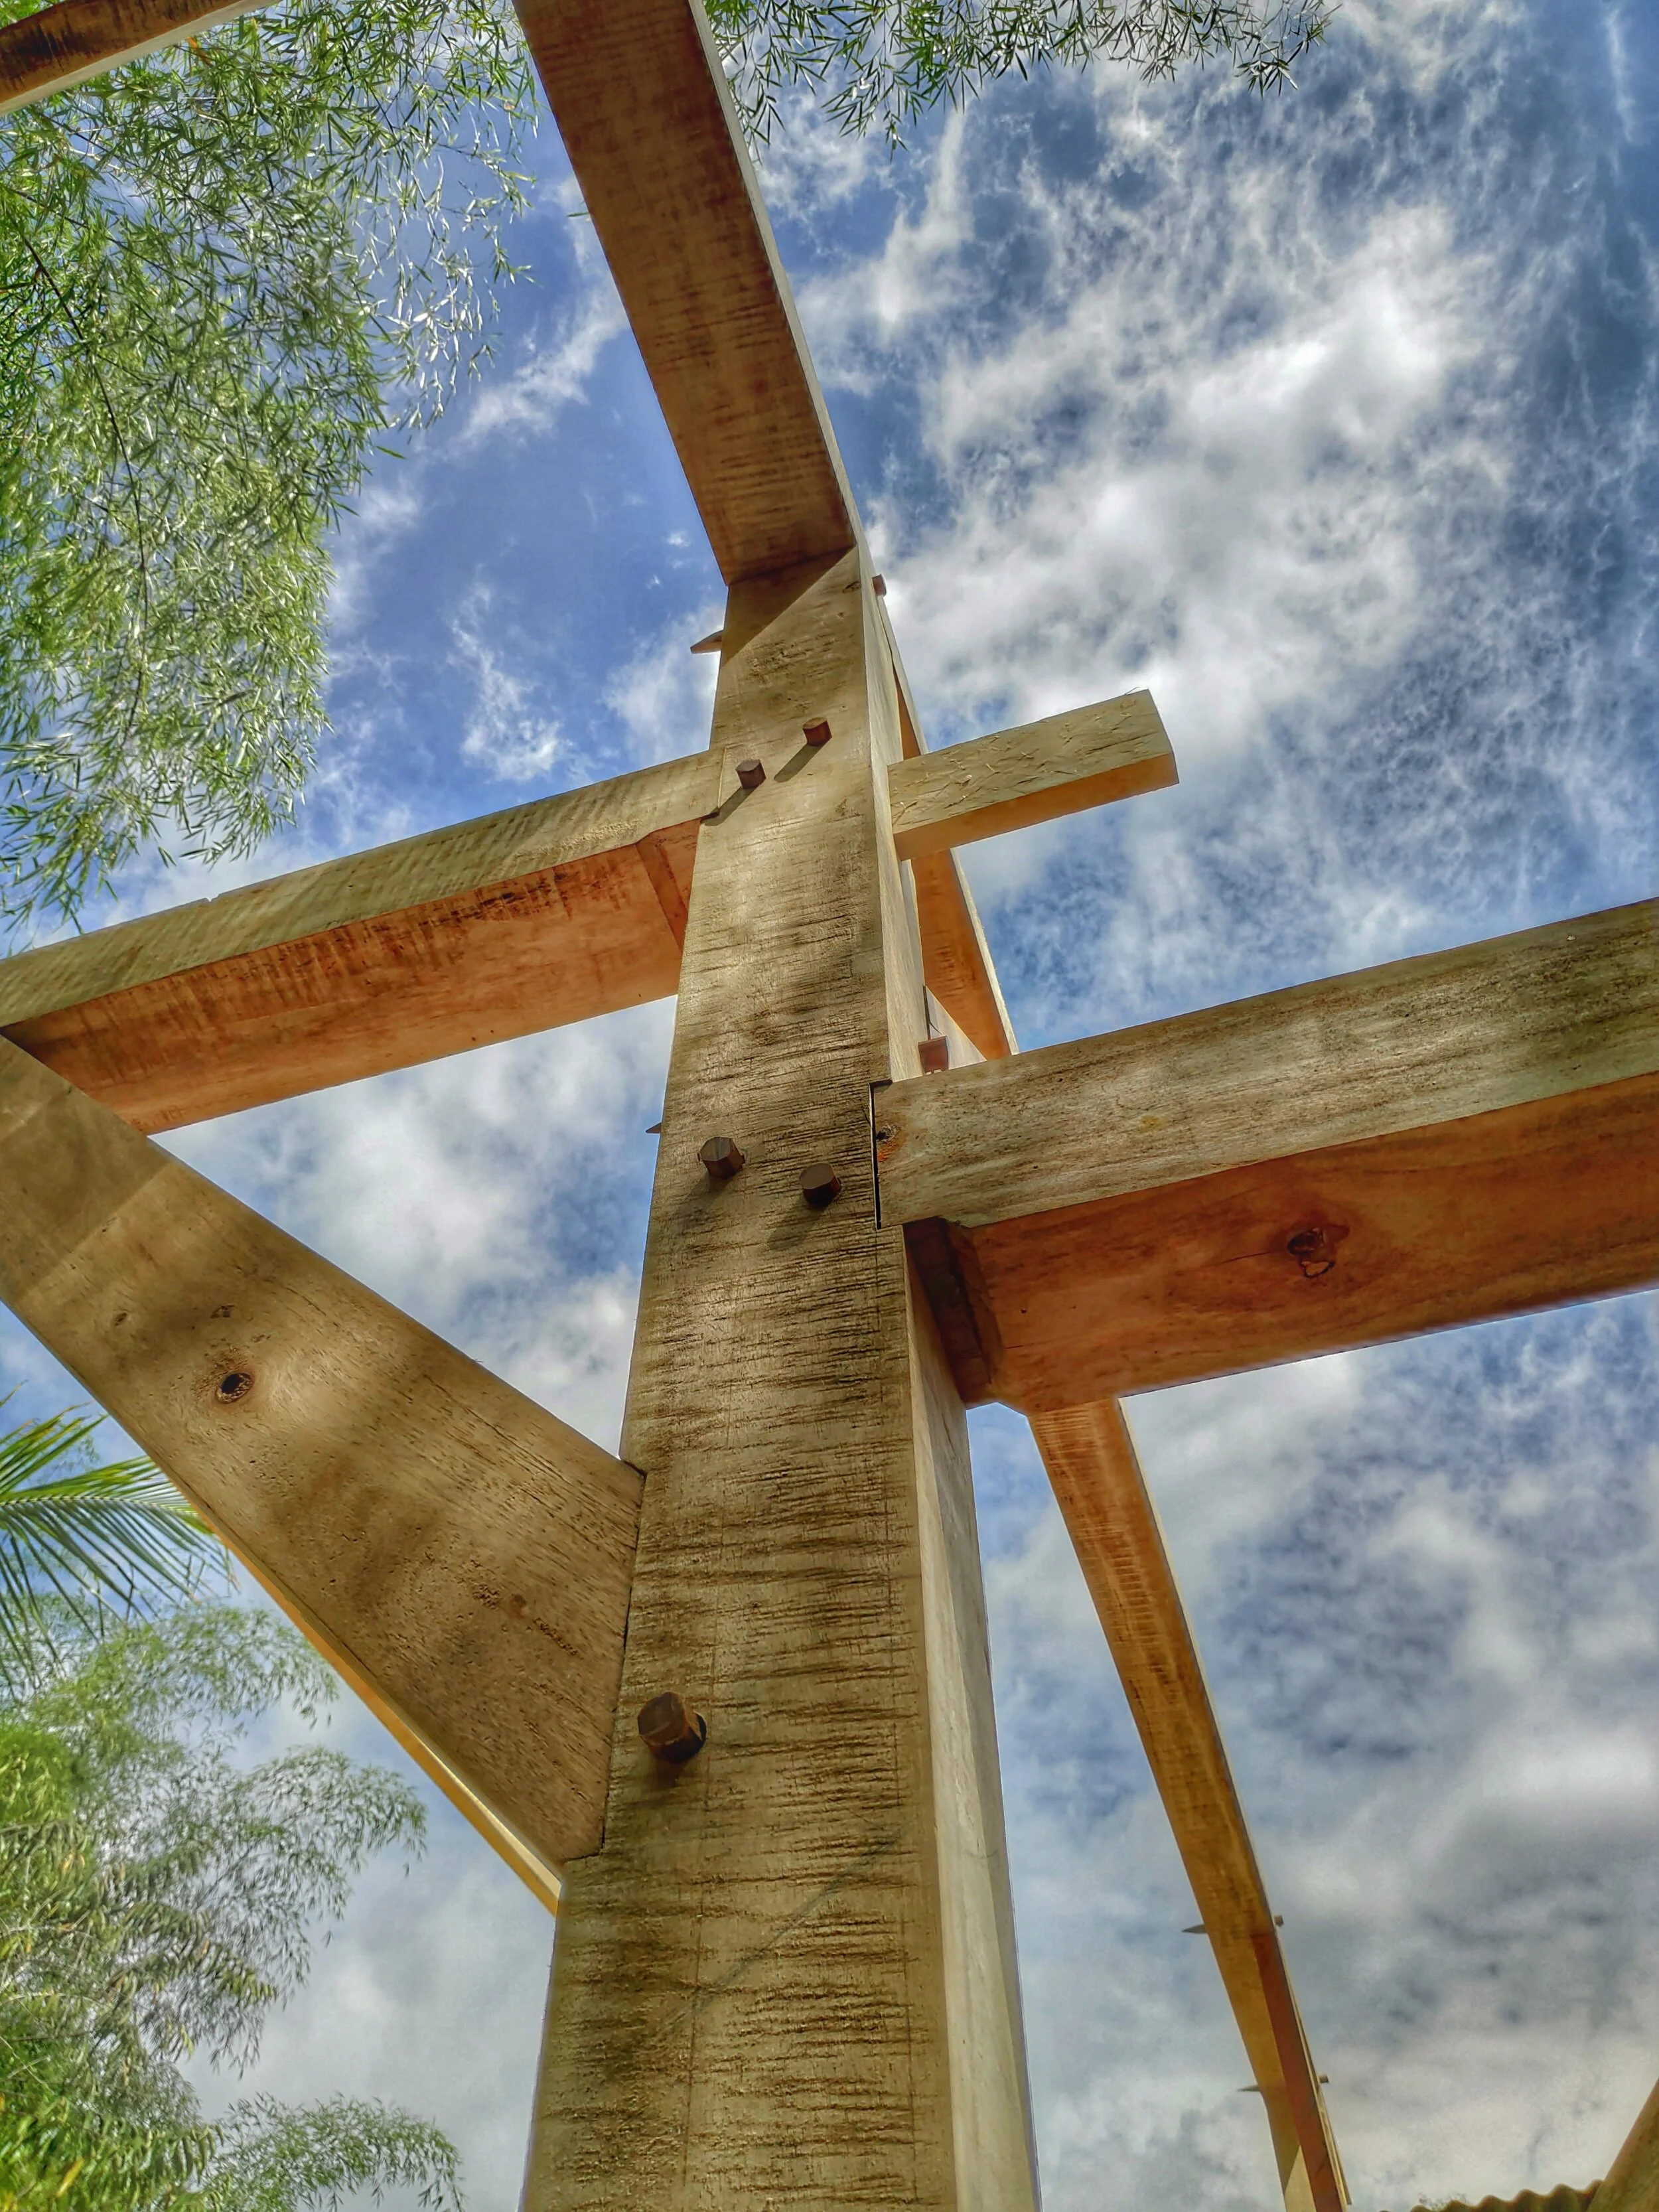
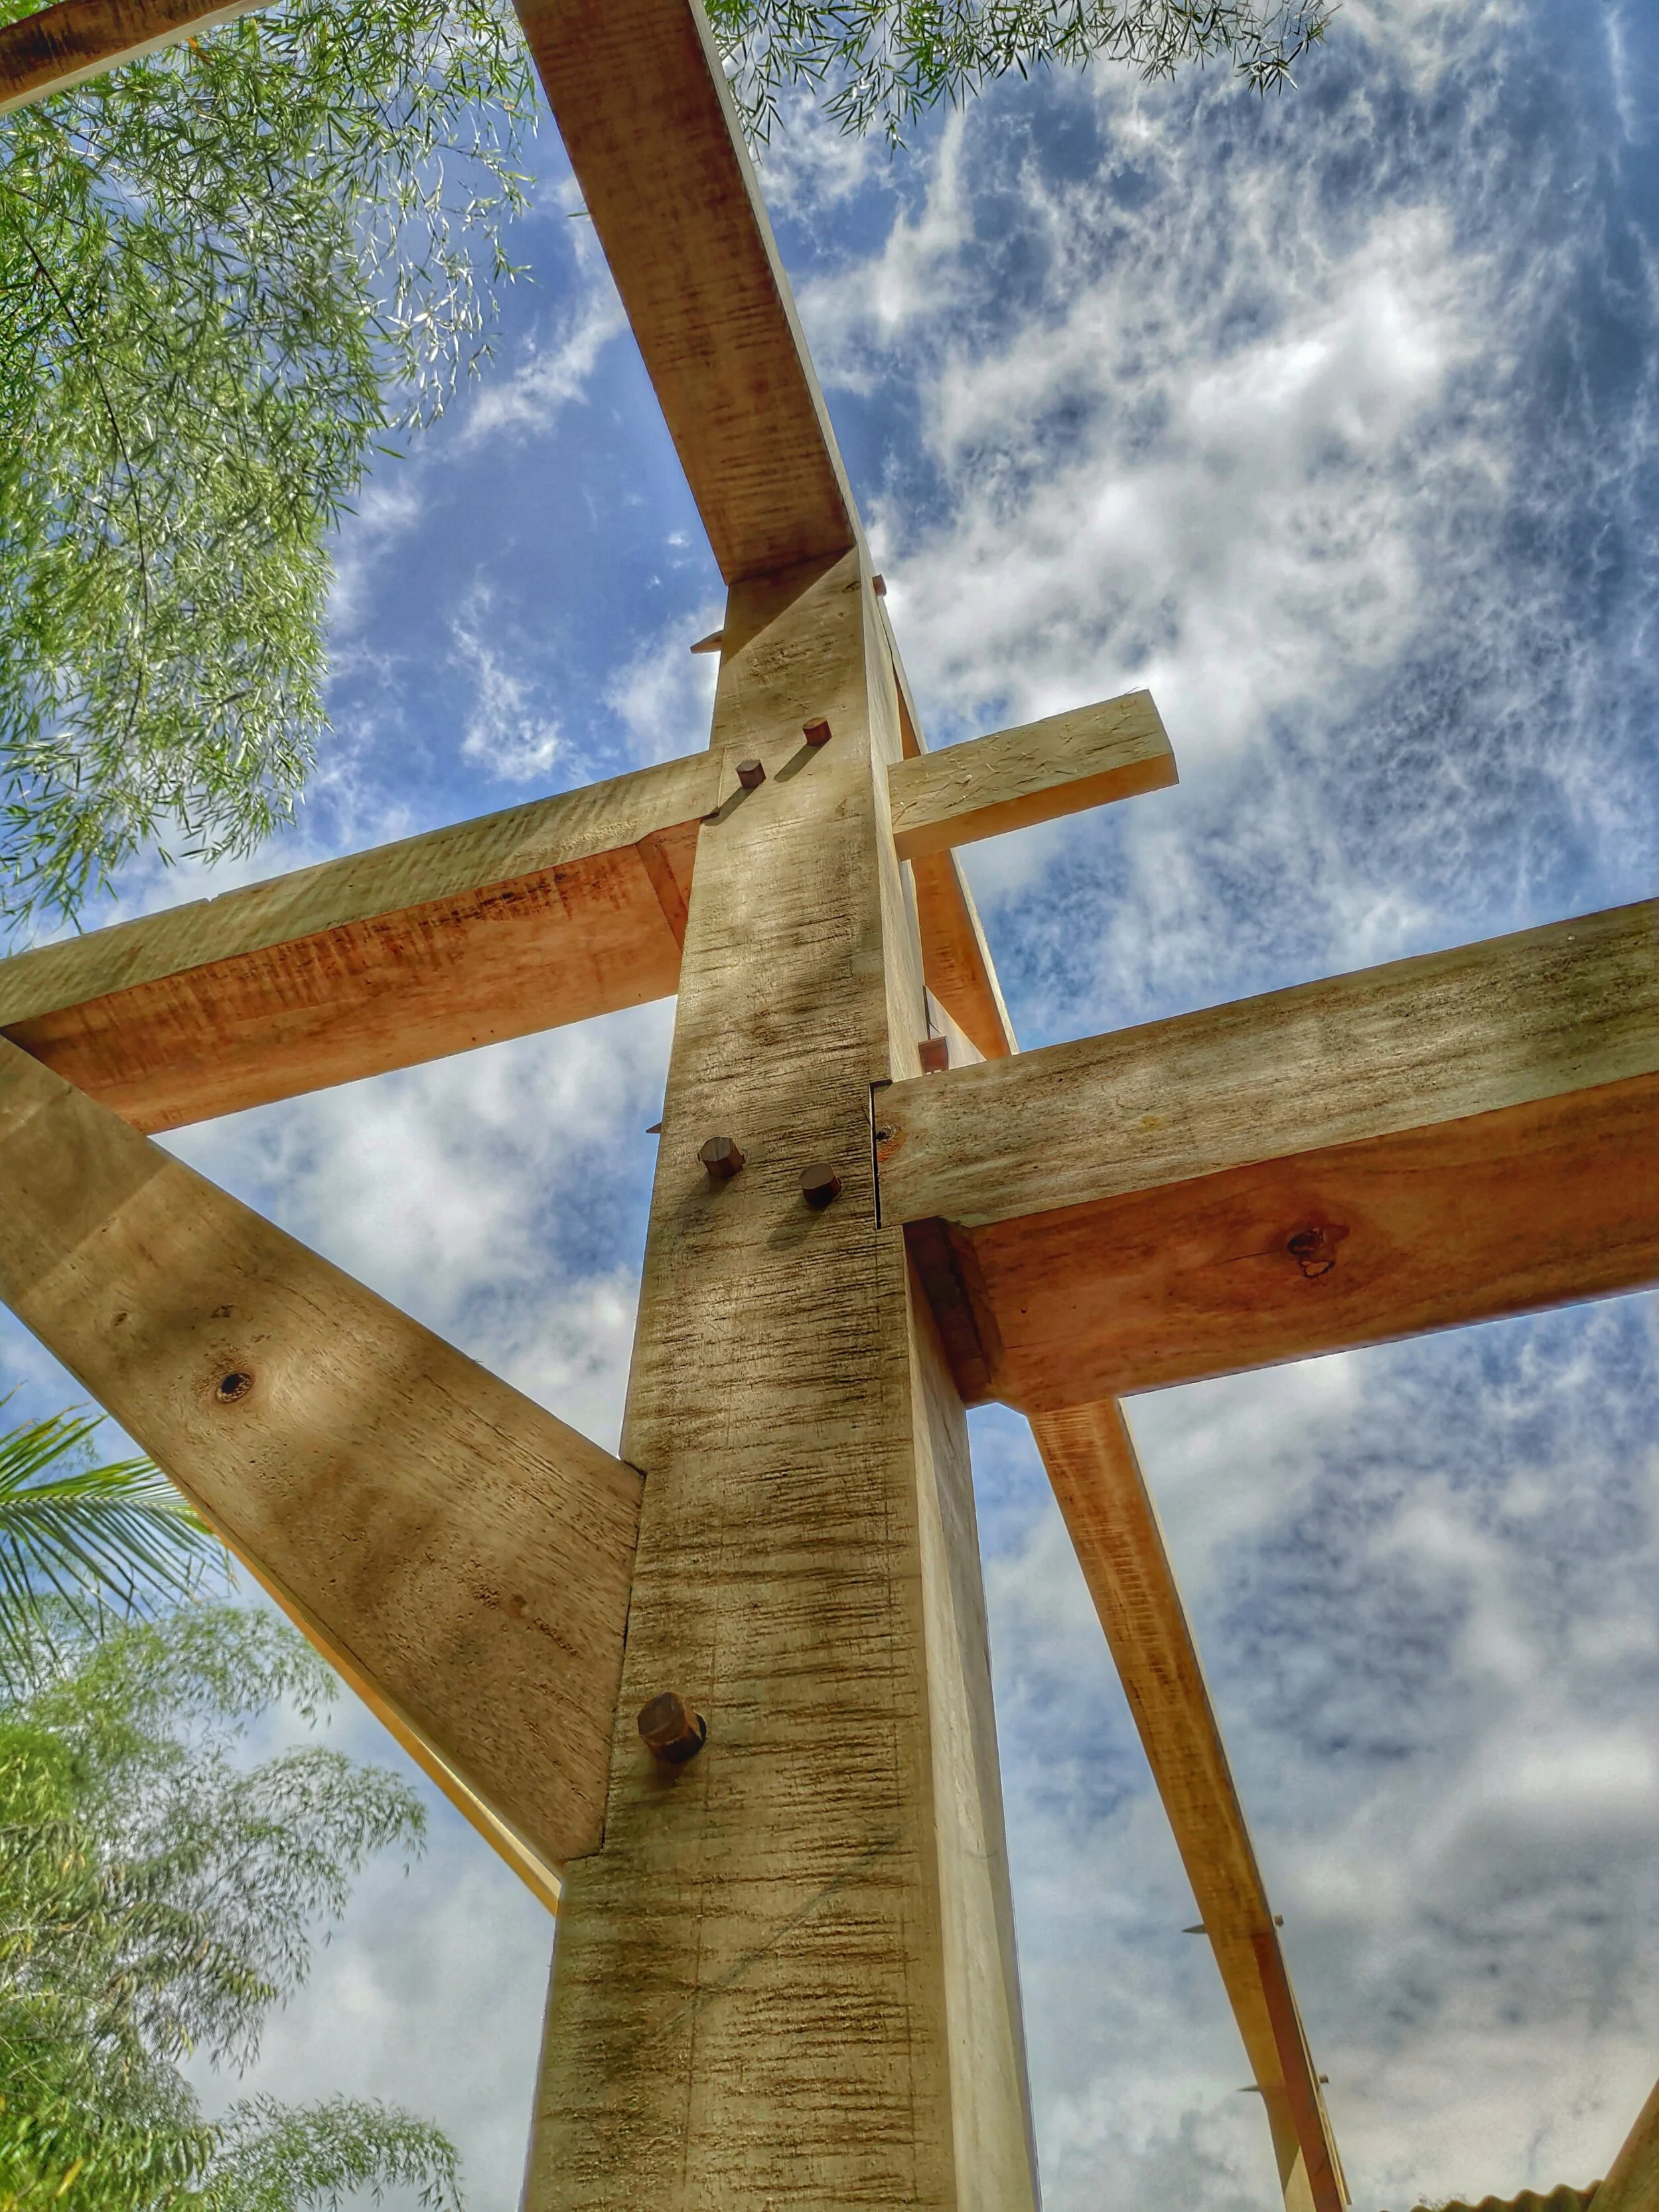
A nice display of the different joinery in one post
Stay tuned for the next blog Timber Framing Tips: The Things You Didn’t Know You Needed to Know.
Join us in 2021 for our Timber Framing Workshop to get hands on practice and instruction on this beautiful and traditional form of building.
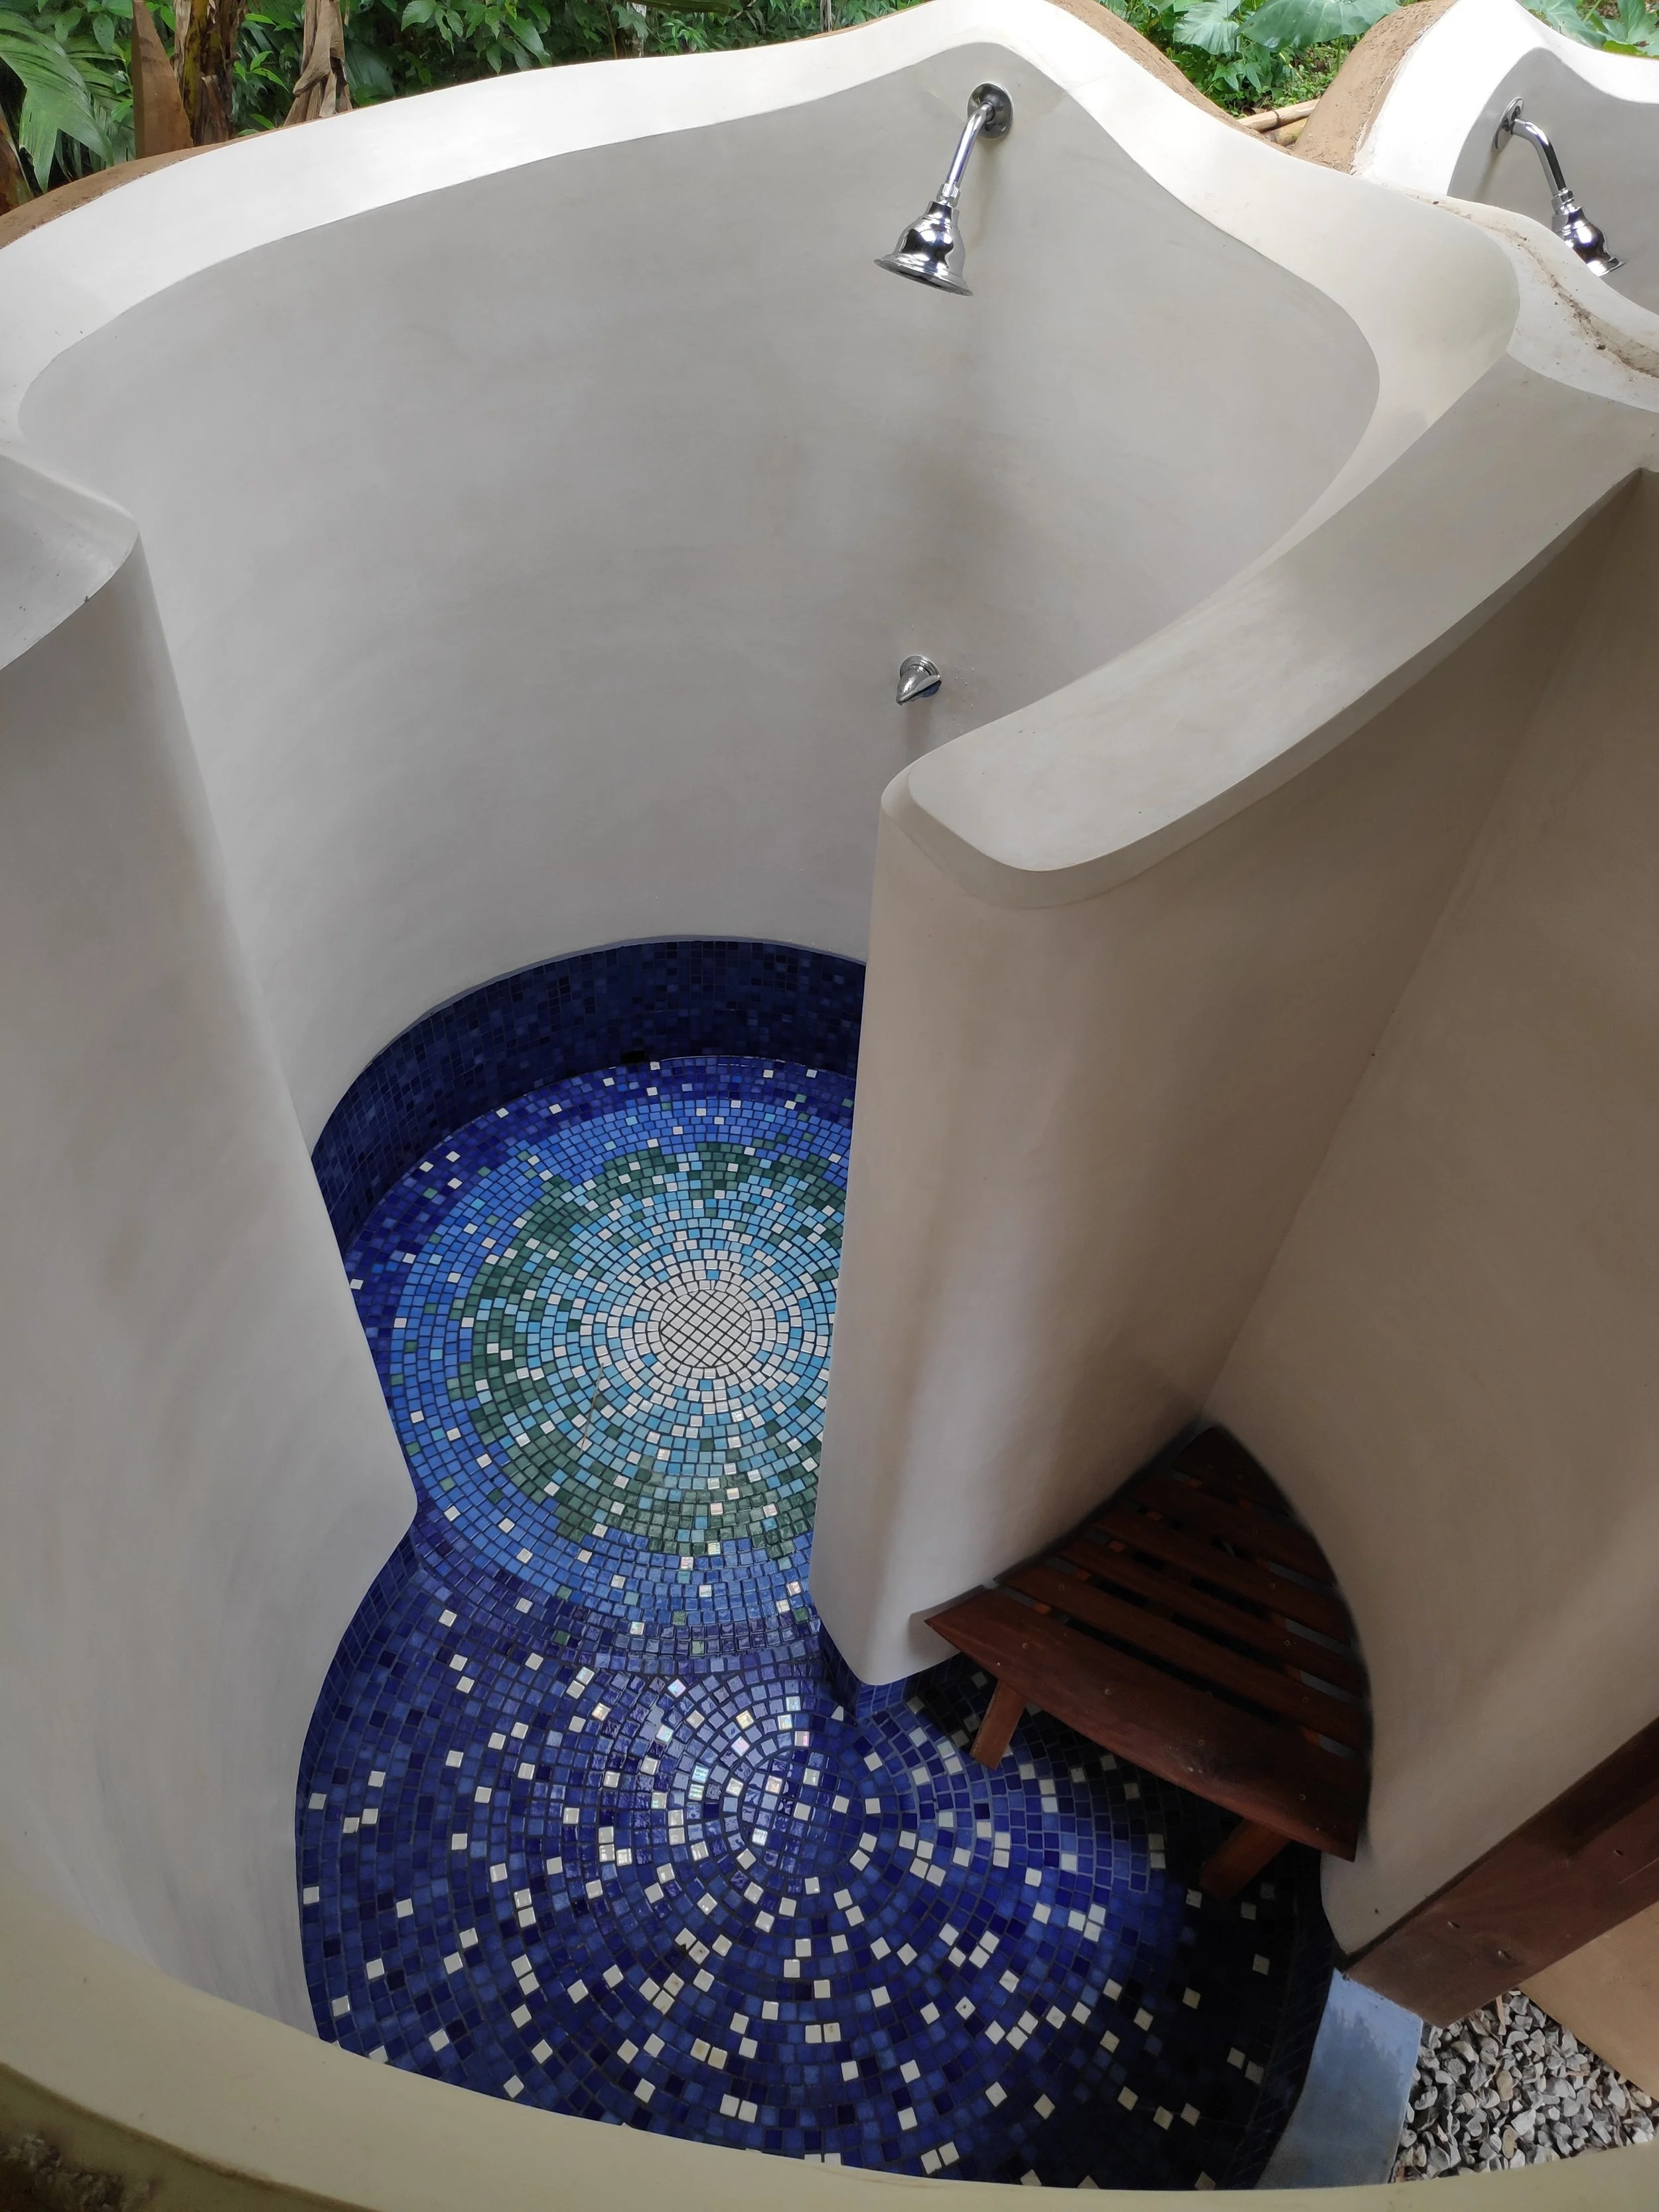
Building an Adobe Shower with Tadelakt Plaster
We recently completed our adobe shower and thought we would share with everybody how and in what order it was executed. The building blocks of the design were Adobes that we made with our 2018 apprentices and student groups that visited us through the year
By core team members Nic & Ali
We recently completed another adobe shower and thought we would share with everybody how and in what order it was executed. The building blocks of the design were adobes that we made with our 2018 apprentices and student groups that visited us through the year. In total we used around 500 adobe bricks at 5” x 5” x 10”.
What is an Adobe brick?
An adobe brick is mixture of sand, straw and clay, formed in a mold and sun dried.
How to make an Adobe brick
Start by making tests with your soil, if you are not sure what that means, read this article. Where we live we have an abundance of red clay soil. Using our soil, which is almost pure clay, we can use 1 part soil to 3 parts sand as a good starting point, depending on variations in the soil we may need to mix at 1:4 too. We add about ½ a part of long straw too, this gives the adobes some additional tensile strength. We then put all our ingredients on a tarp and begin to mix it together. Once the adobe mix is ready (one uniform color of mixed sand and clay) the mixture is put into an adobe form. When packing the forms make sure to fill all the corners! The form is then removed and the brick is left in the sun to dry until it dry enough to be moved and stacked. In our climate during the dry season this takes 3 to 5 days.
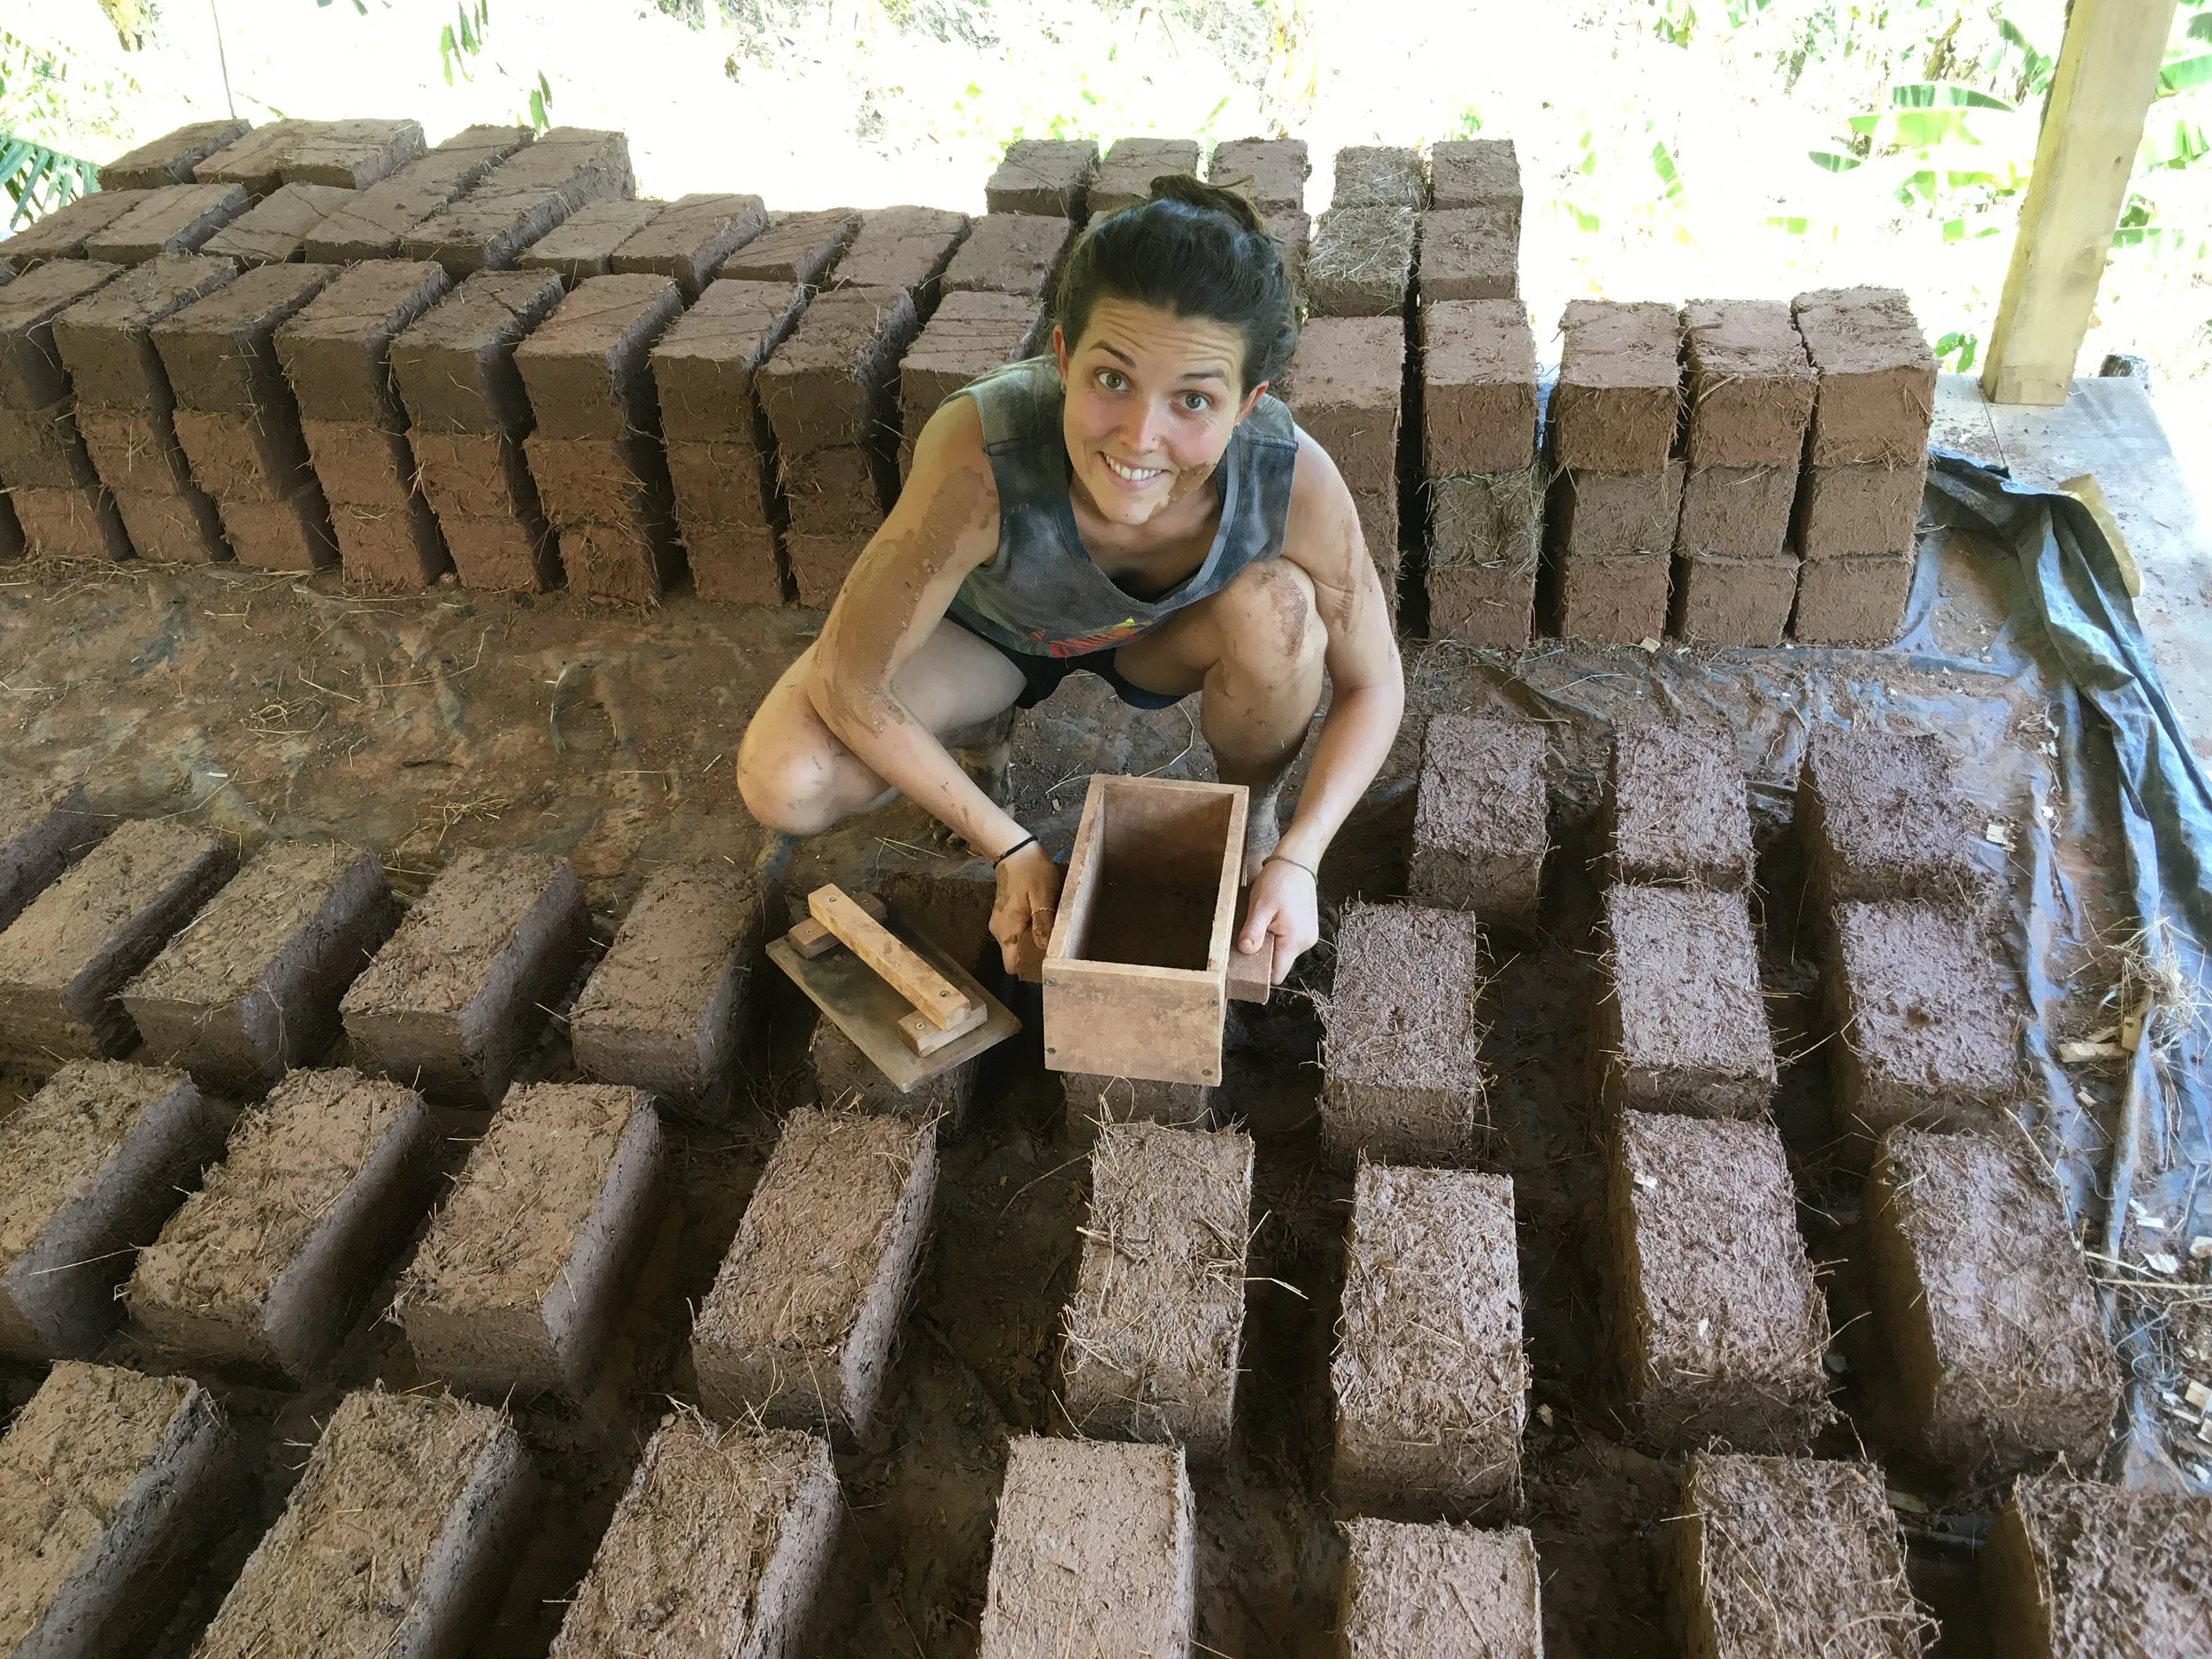
Steps to making a shower
1. Planning
As with all successful projects the key is good planning. We like to use a program called SketchUp to mock up all of our designs, lay out foundations, the frame and even plumbing. Every detail must be planned in advance this makes sure that the correct provisions can be designed in and made in advance.

2. Foundations
For our shower we used concrete blocks cut in half so that they could form the curves that we wanted. A shower is going to be a wet area so it is important that you think about this during the planning stage, where will the water drain to? Are my pipes embedded in my foundation? How is my roof going to be attached. In our design we decided to have a separate Timber Frame to support the roof structure.

Step 3 - Adobe
The first course of adobes were attached to the foundation using a cement based mortar this helped them bond strongly to the concrete foundation.
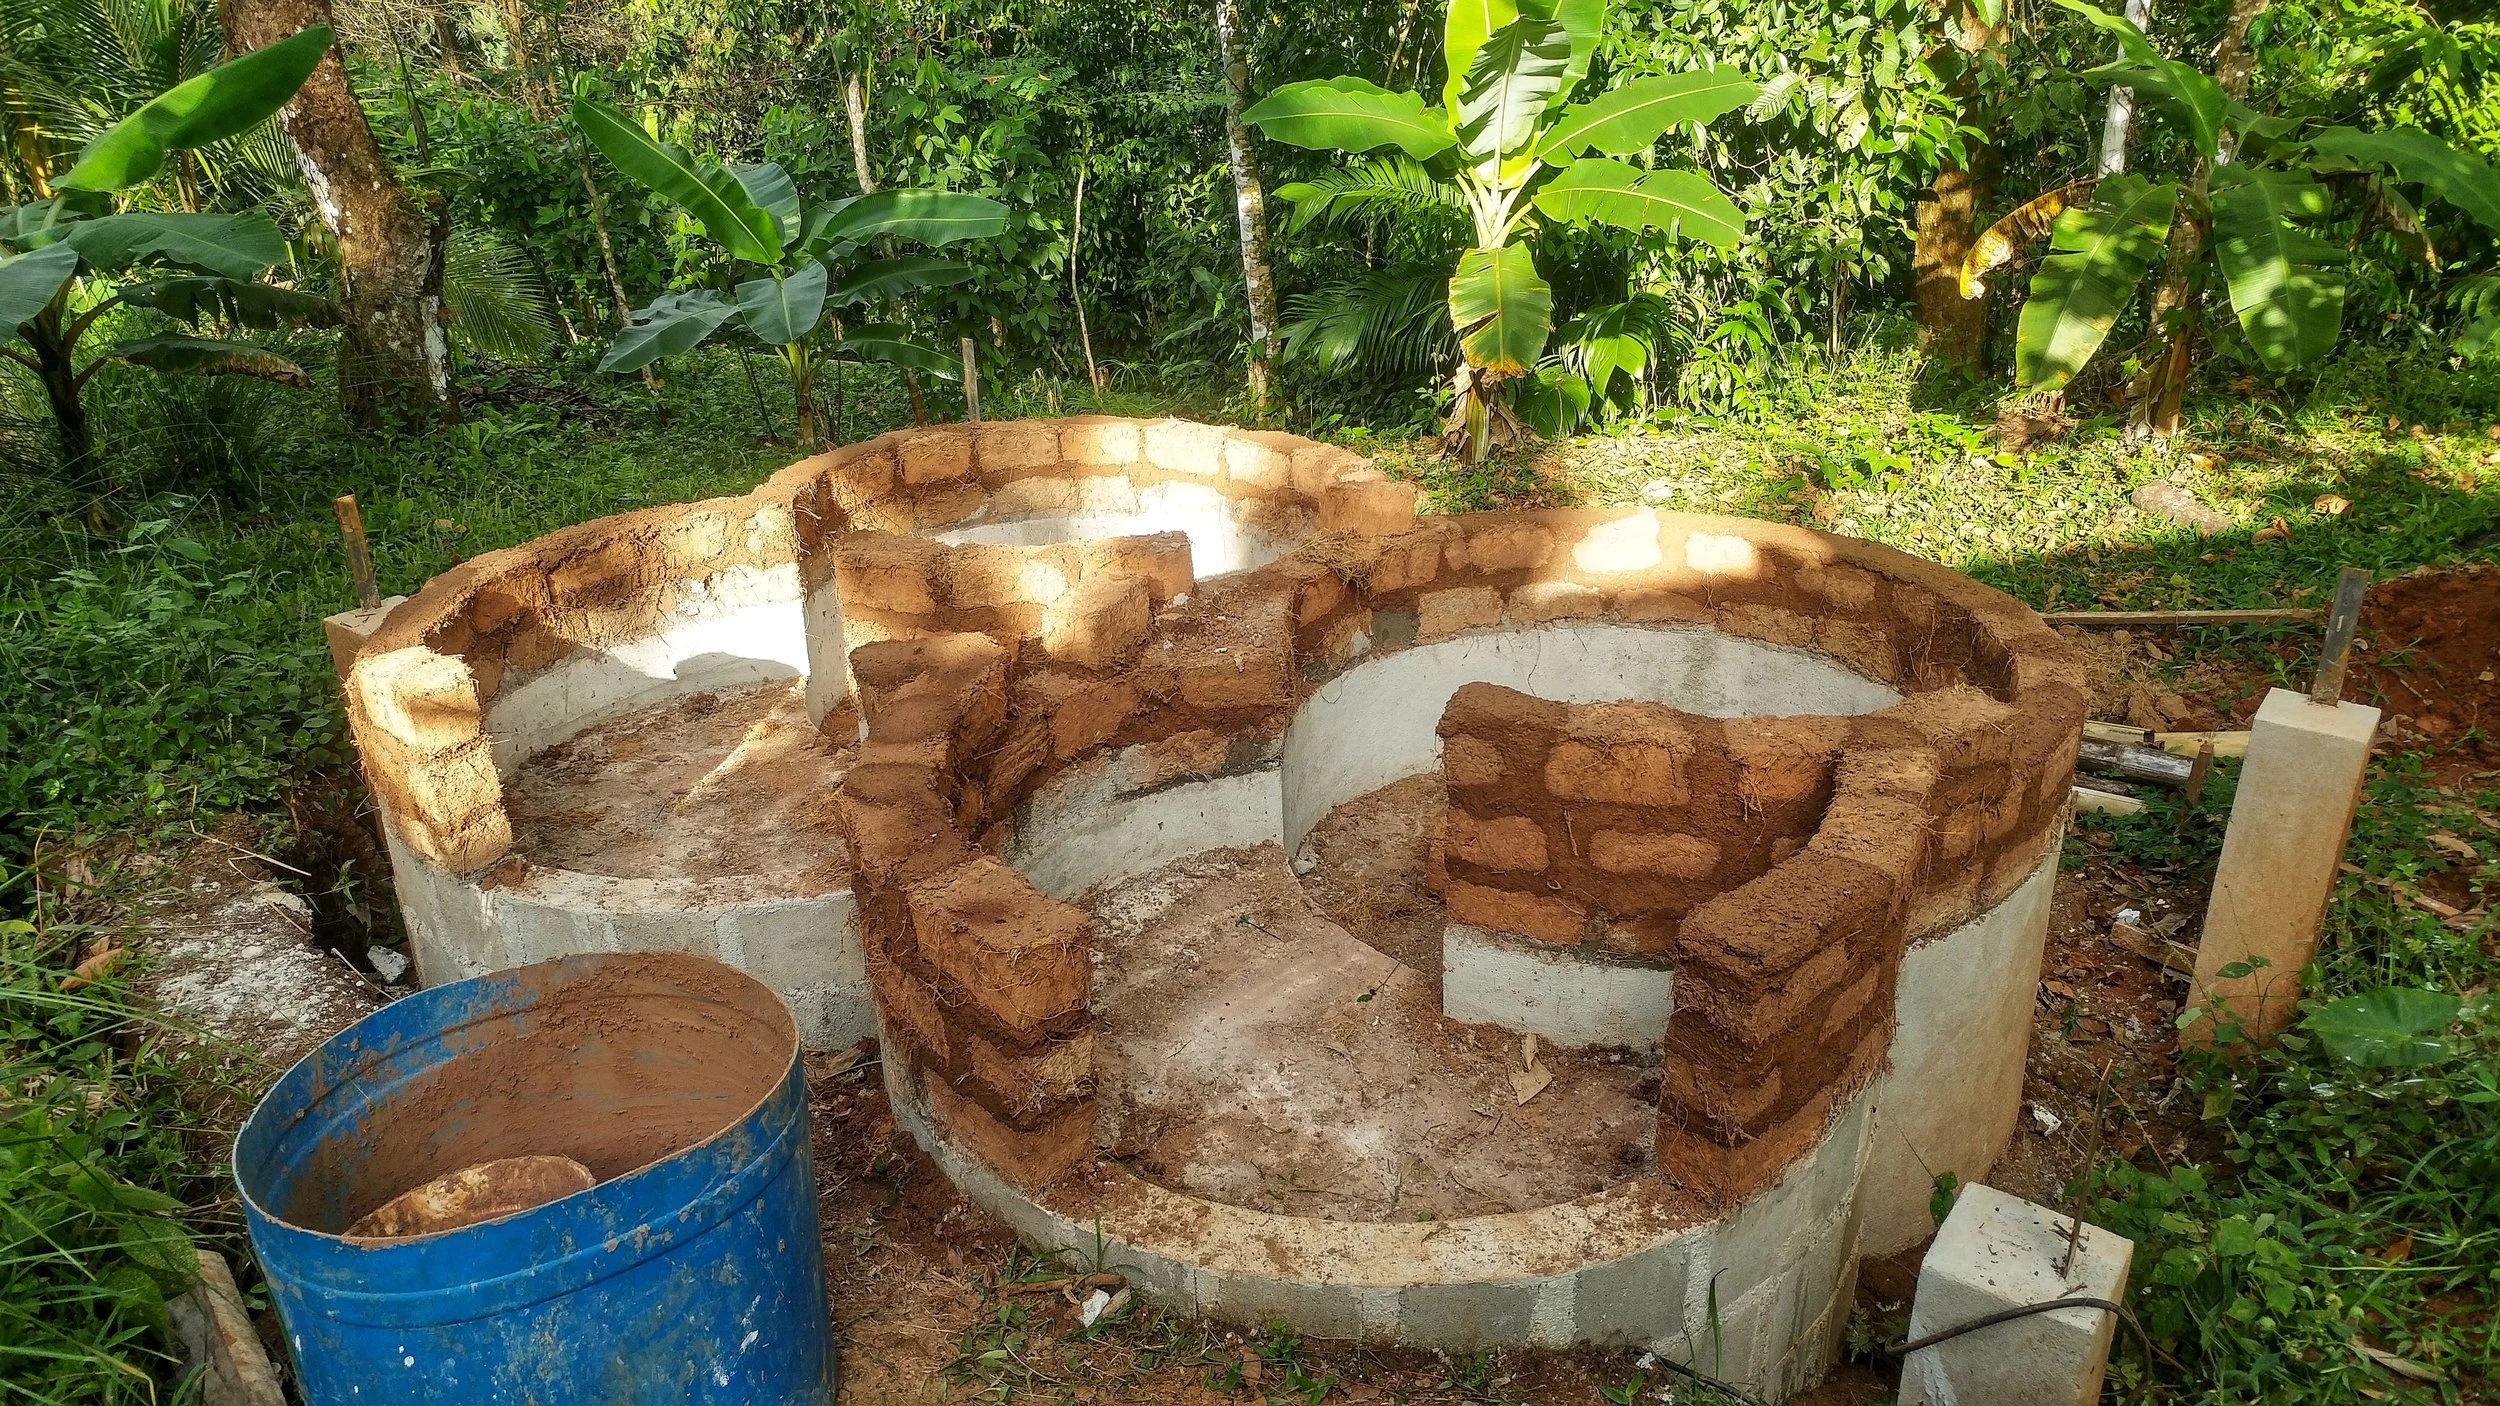
Step 4 - Bond Beam
From the second course upwards we used a sandy clay mortar for the adobes. Every 4 courses of adobes we made a cob bond beam for extra strength.

Step 5 - Gringo Blocks
Wooden hollow blocks (known as gringo blocks) were put at the end of each wall to attach in the wooden frame for the doors and a hollow plumbing box was installed where all the plumbing would be inserted for the shower handle. In Costa Rica the plumbing parts easily purchased in the local hardware store are terrible and always leak so we made most of the plumbing accessible from the outside. It is generally a good idea when making your initial design to plan for replacing parts in the future.
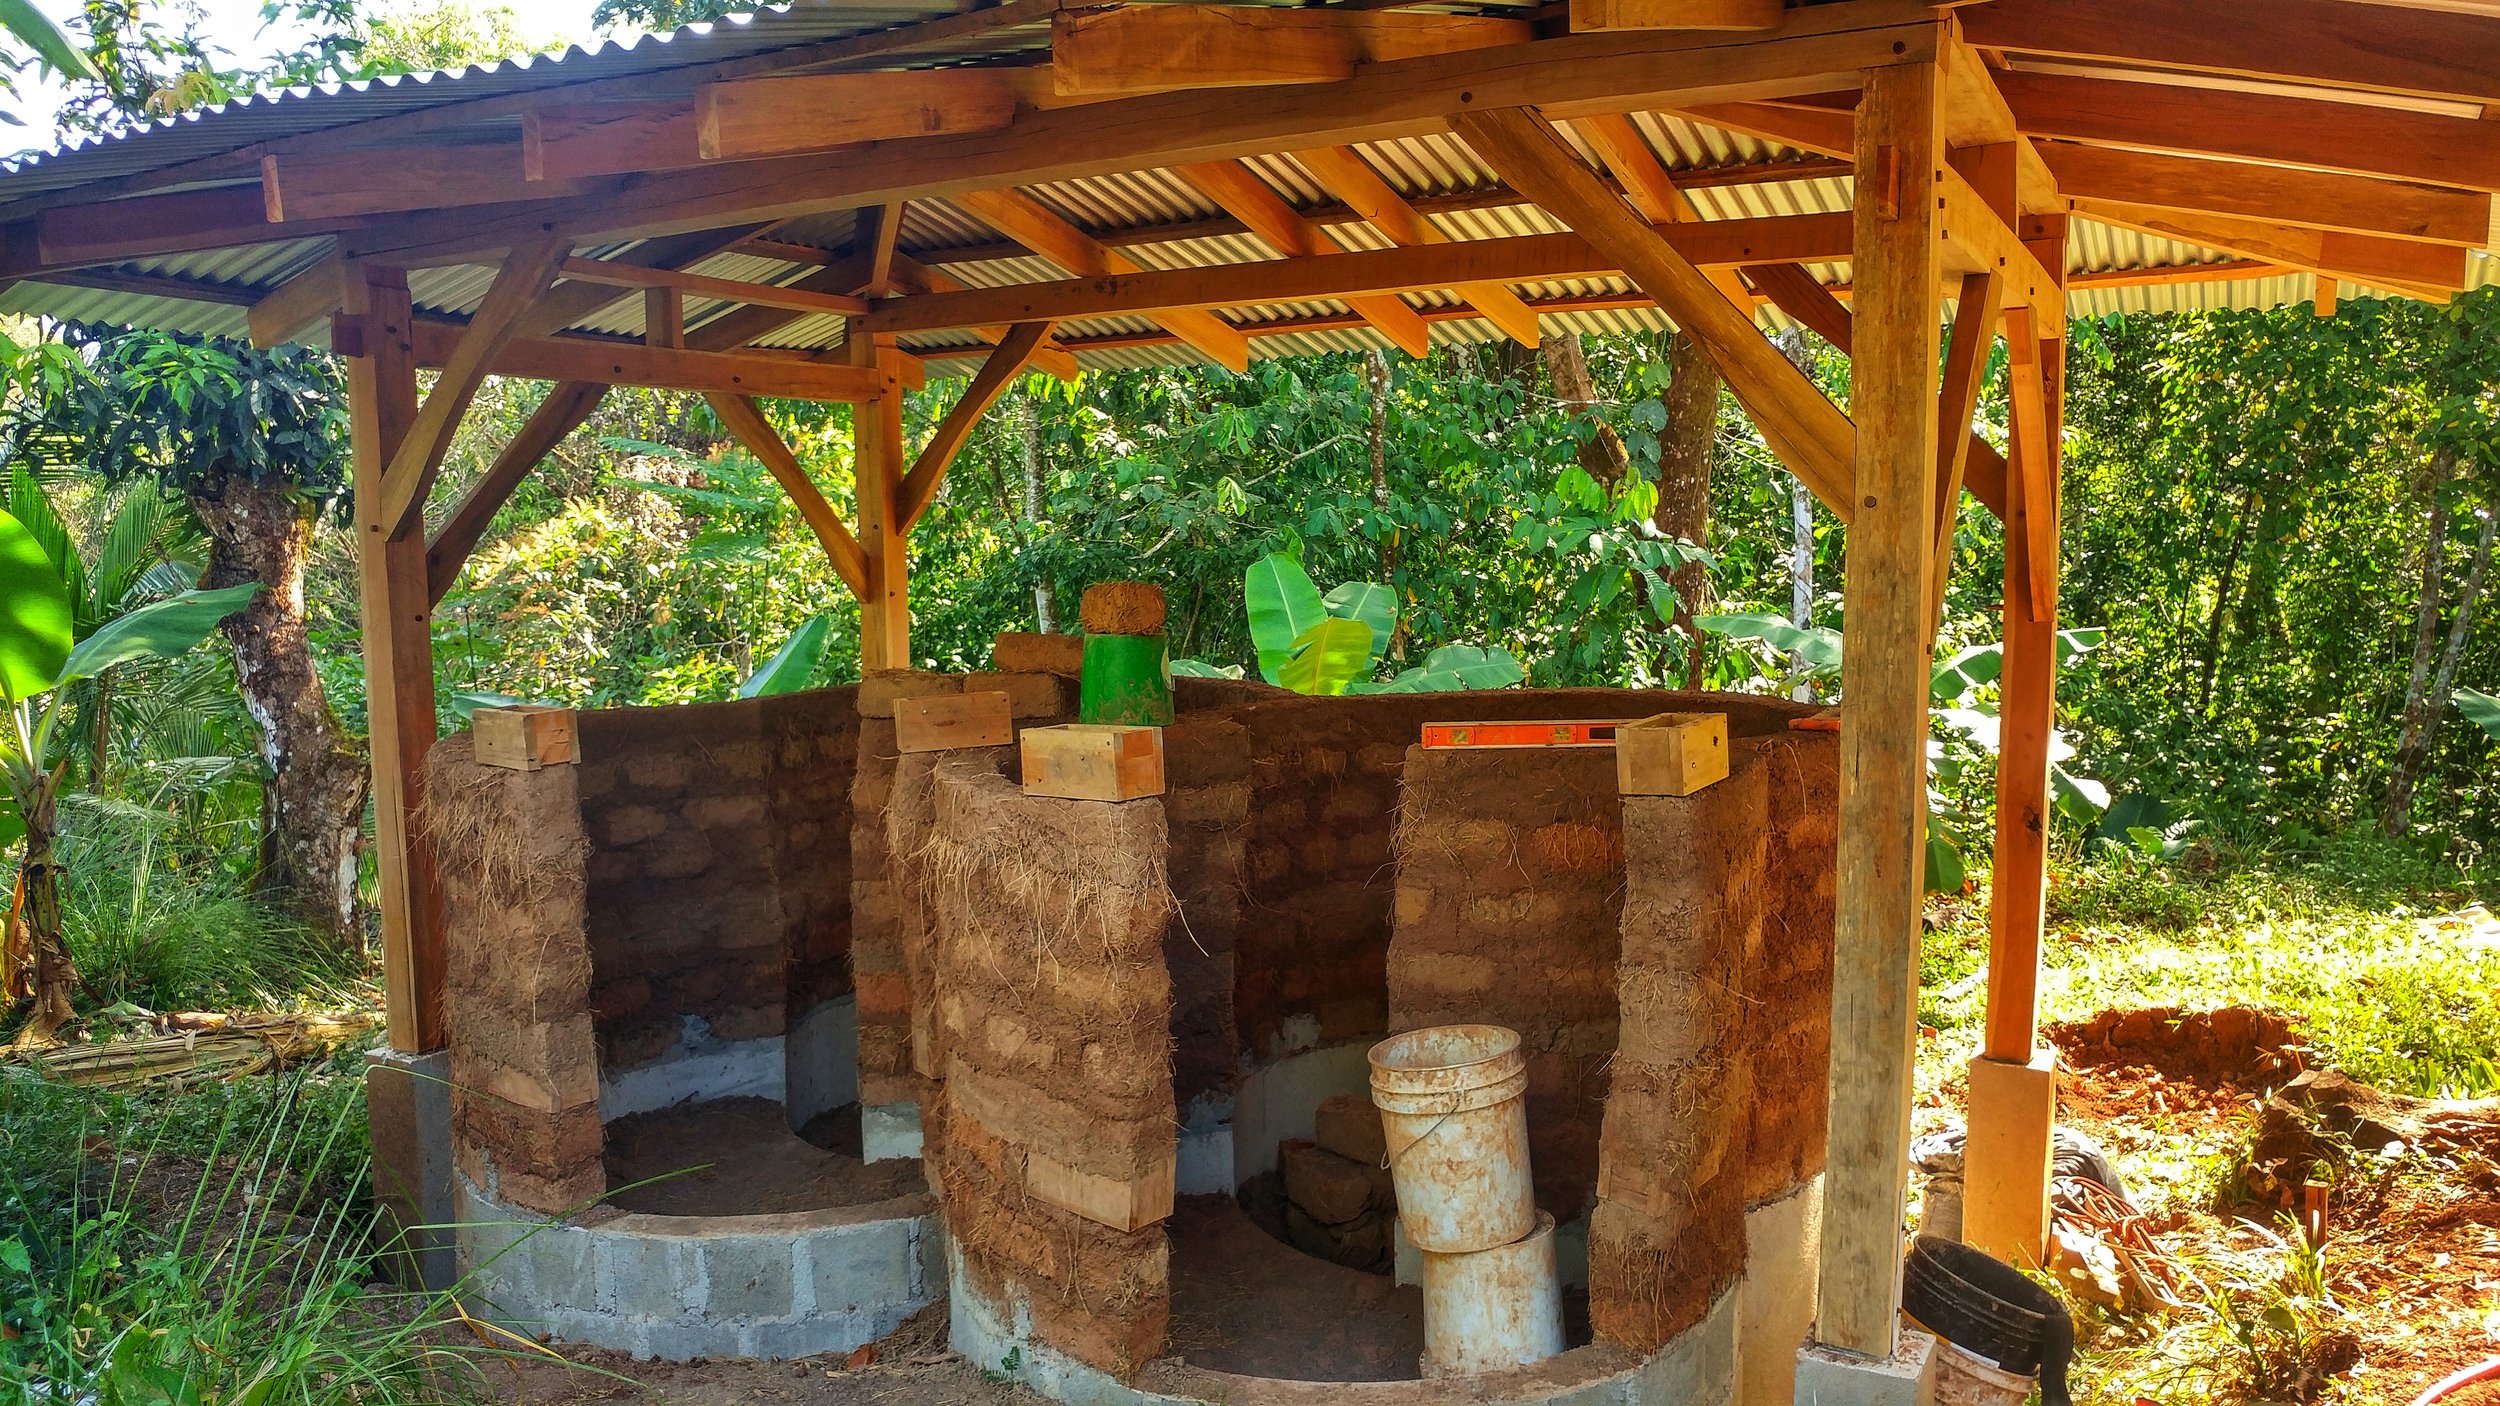
Step 6 - Frames
The door frames were installed at this point and they were screwed into the Gringo blocks. The door frames were also tied into the adobe structure using some mesh, we used what we could locally find which is what they sell for chicken fencing. You could also use a variety of natural alternatives, attaching them to the wood and plastering them in to the wall to give them extra stability.

Step 7 - Leveling
A leveling coat was then applied to sculpt and level the walls, this was tied into the door frame to give extra support too.
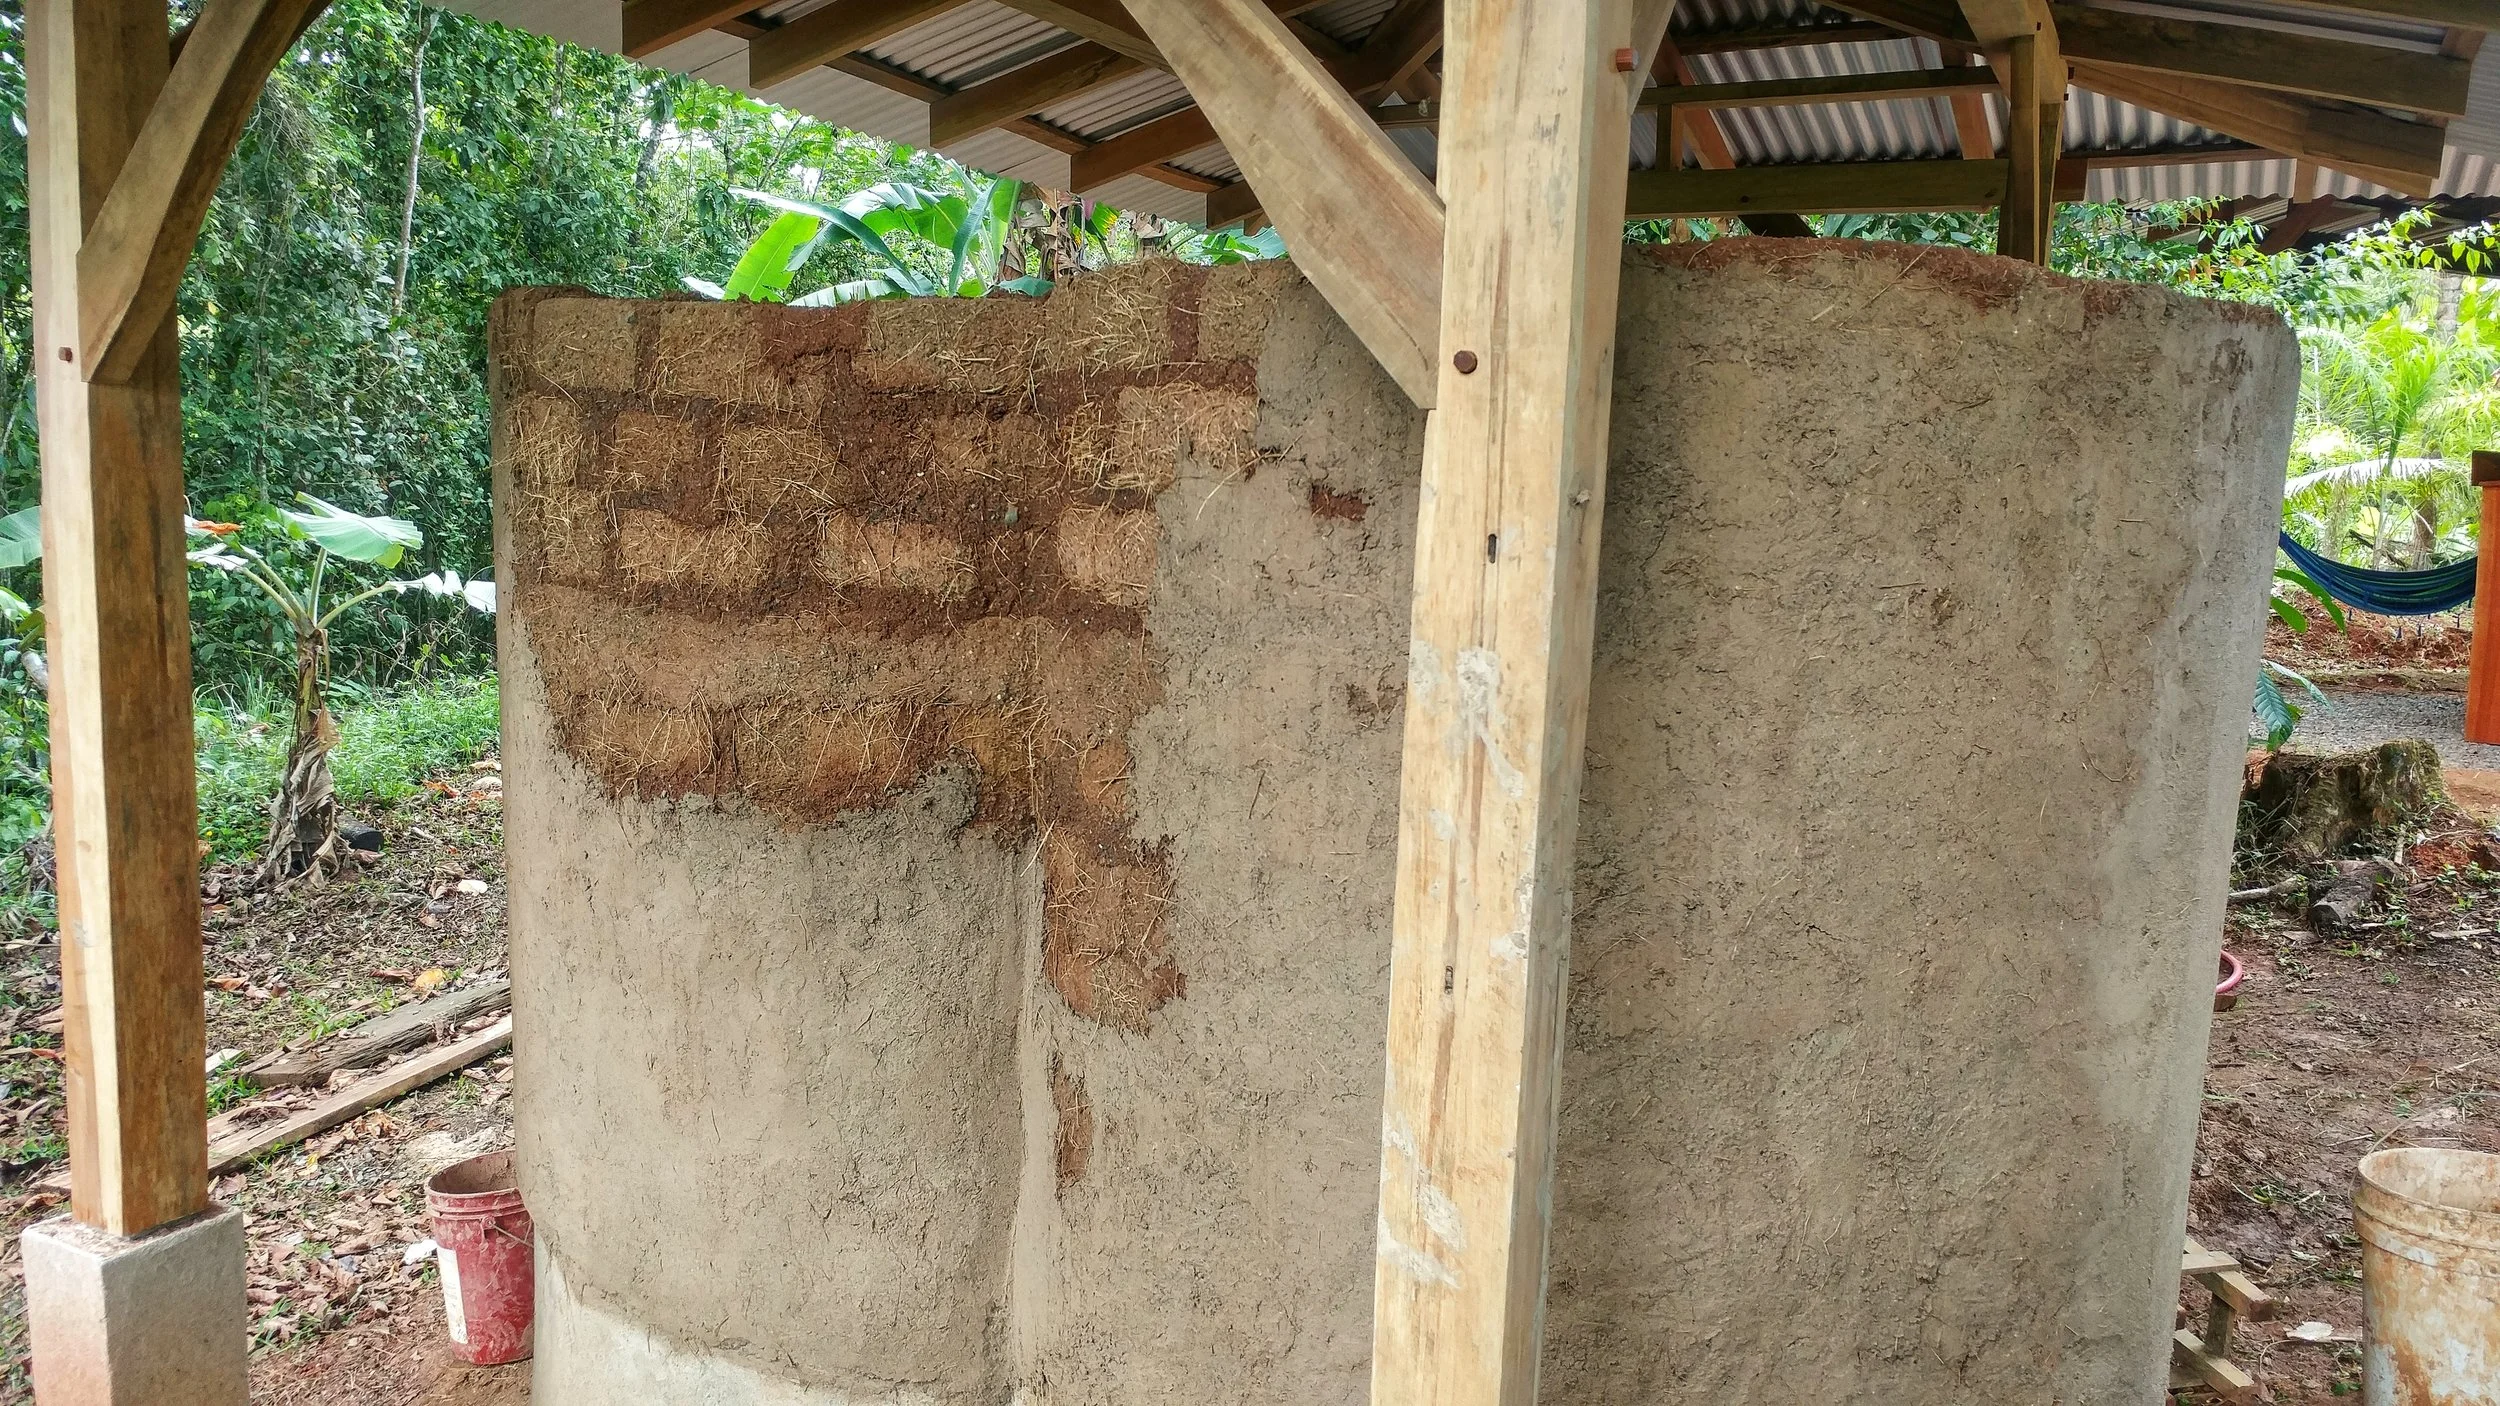
Step 8 - Tiling
The vertical surfaces of the concrete block were tiled to provide a plaster stop on the bottom edge were the plaster would meet the tile.
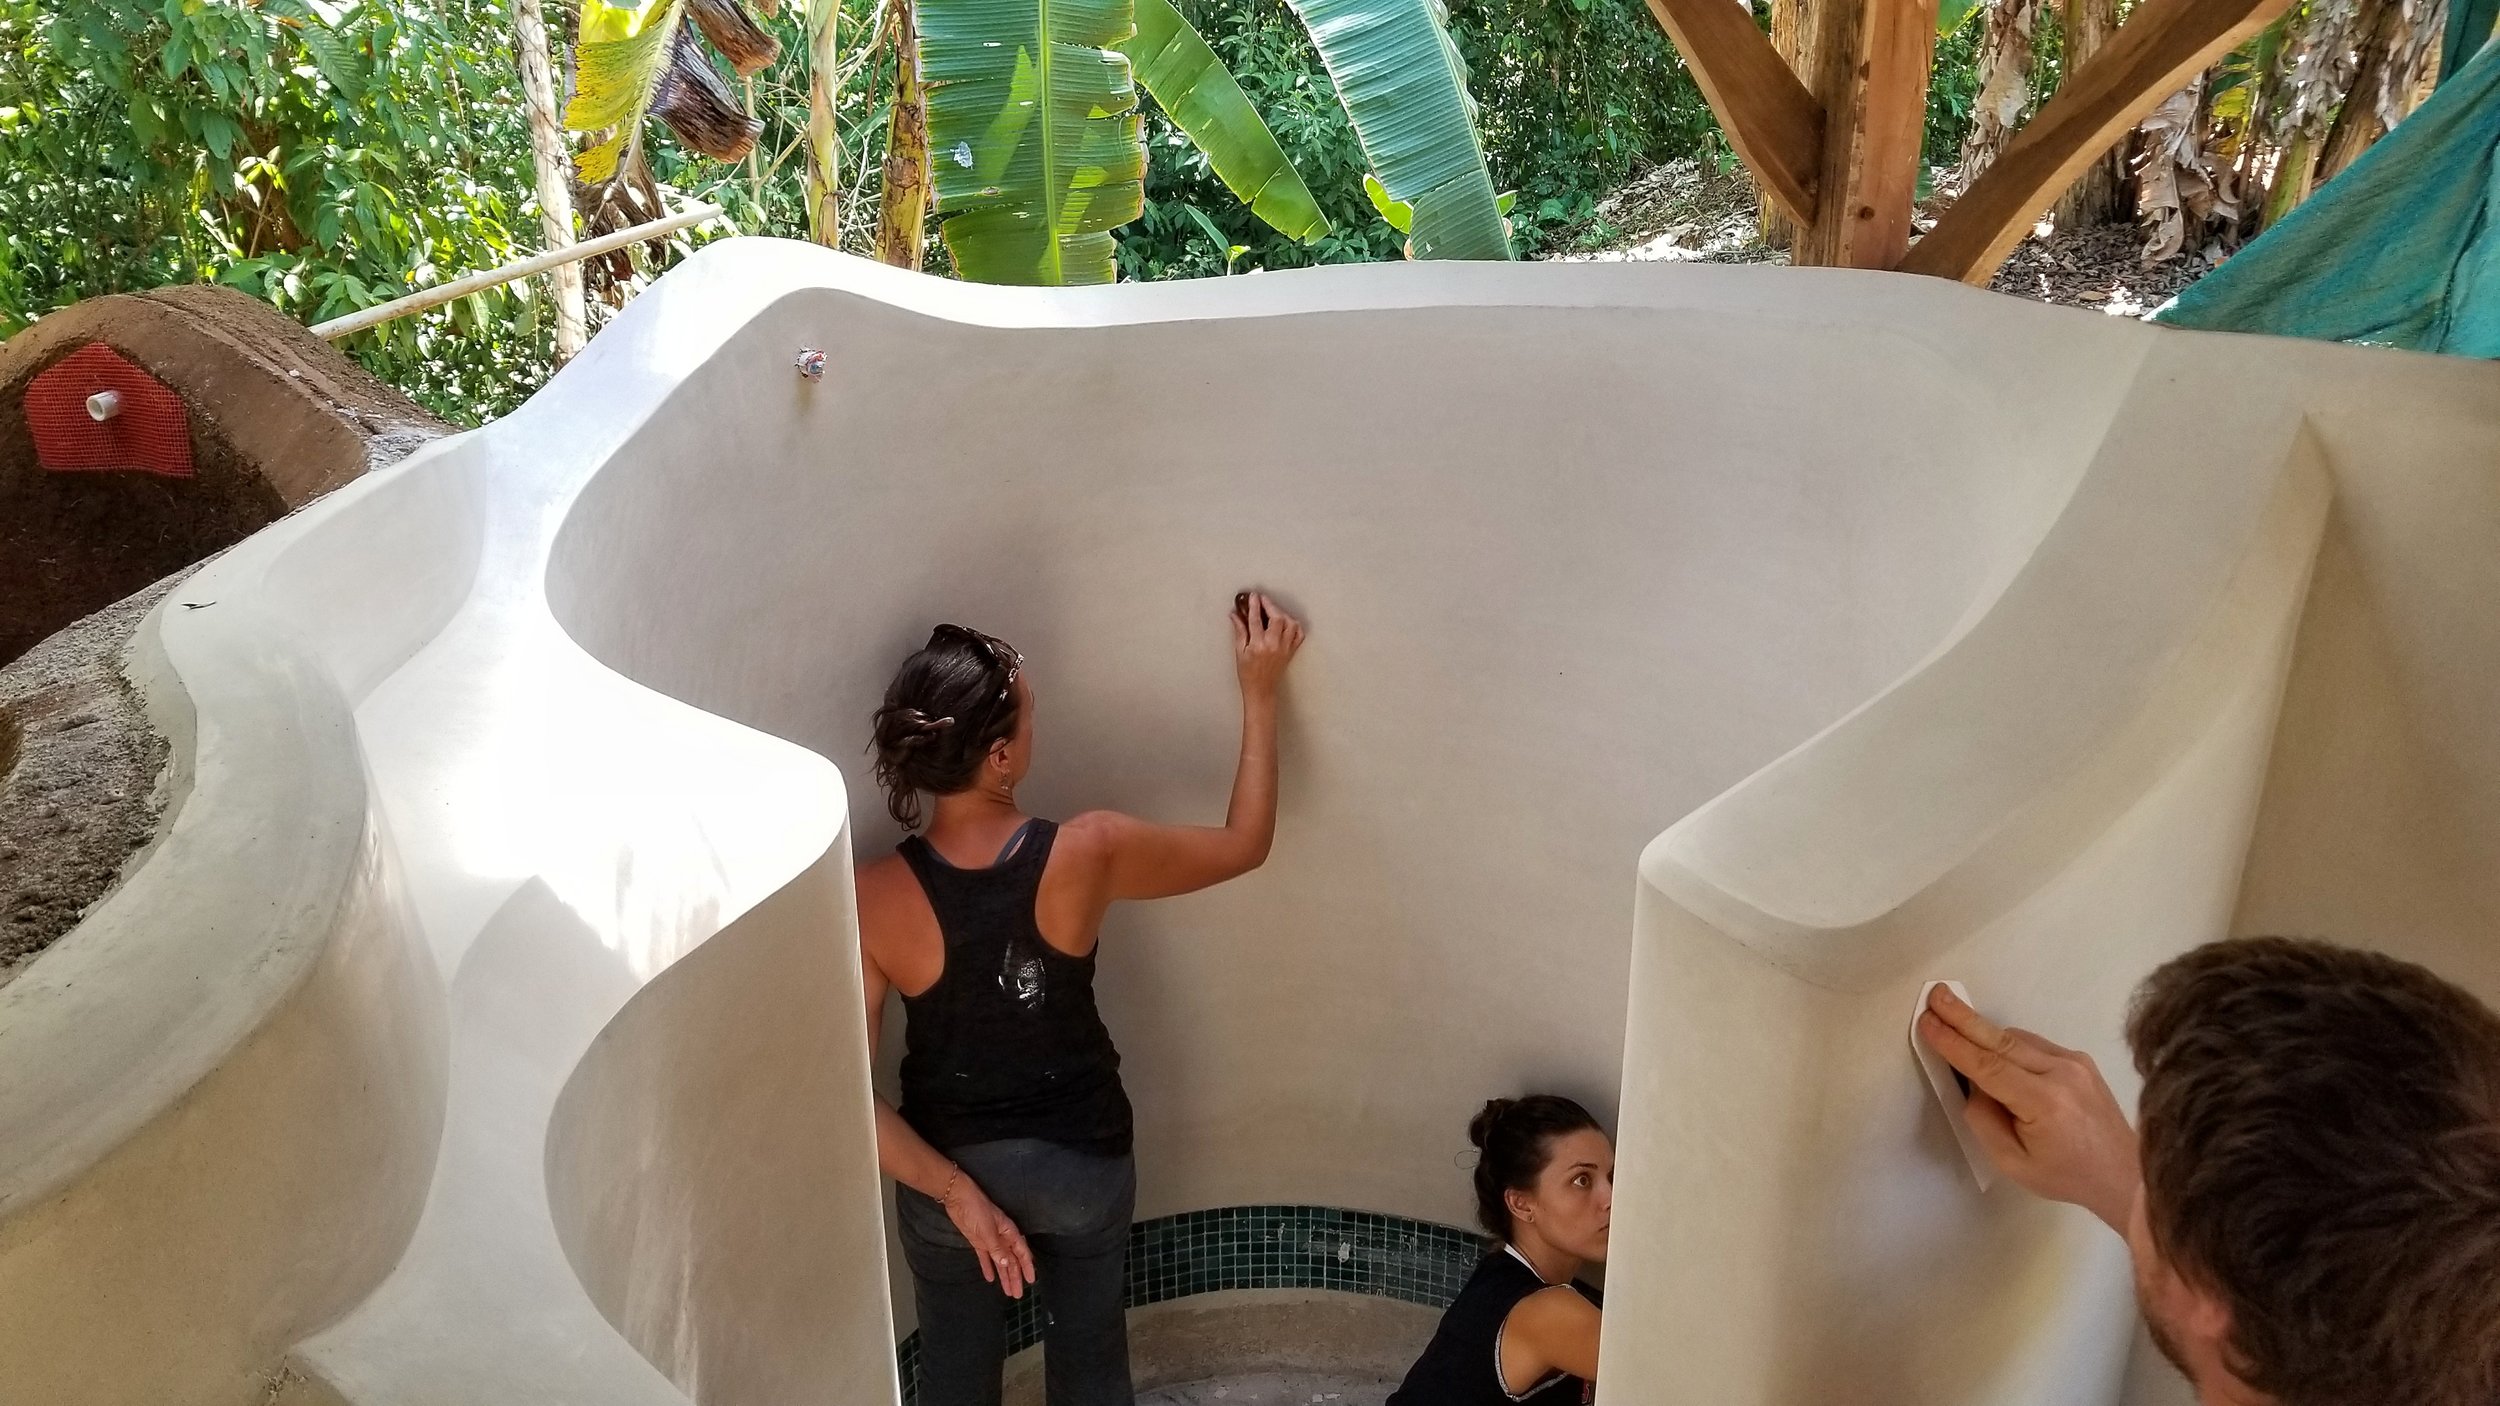
Step 9 - Plastering
A lime base coat was then applied over the earthen leveling coat. Whilst this basecoat was still damp (before it started wicking moisture again) we applied the tadelakt mix (1 part fine lime sand and 1 part lime). We did the Tadelakt like this as we had such a large continuous surface area to plaster and needed the time to work it all.

Step 10 - Tadelakt
Once the plaster had dried enough we stoned and soaped the wall using our homemade soap. The Stearic Acid in soap reacts with the Calcium Hydroxide (hydrated lime) to make Calcium Stearate which is highly hydrophobic and one of the reason Tadelakt is considered water resistant. Read more about Tadelakt here.
Step 11 - Mosaic
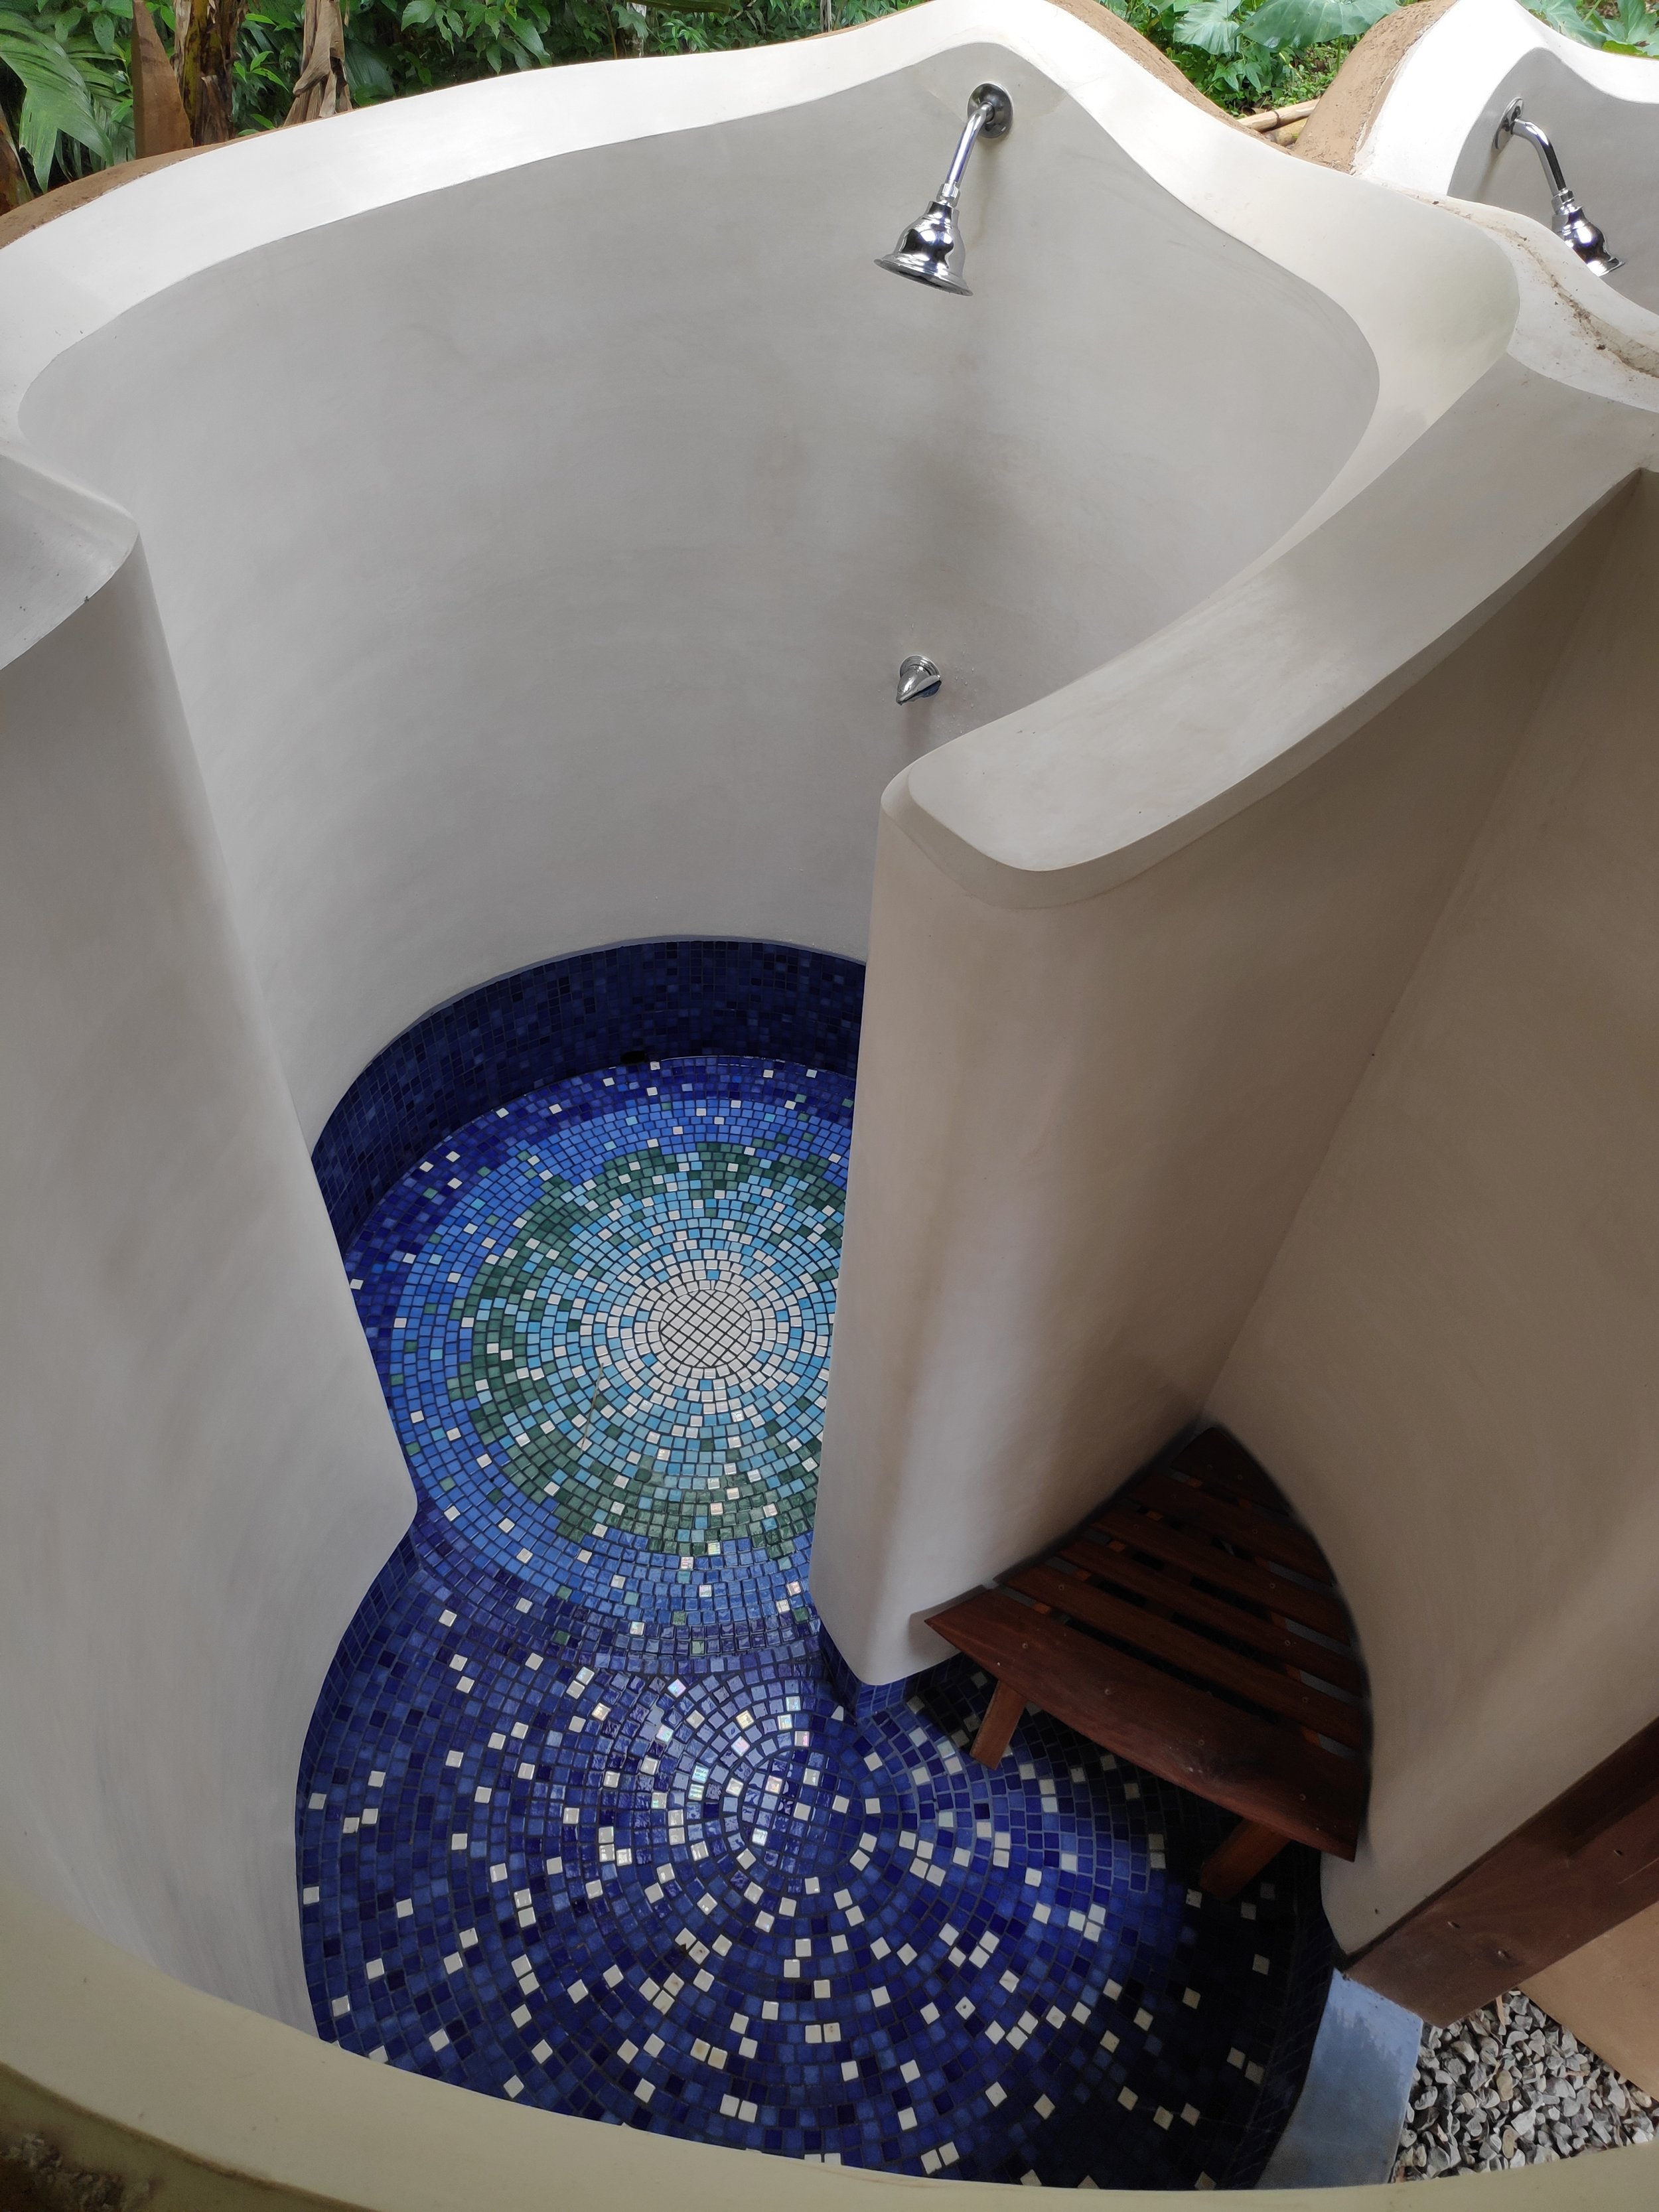
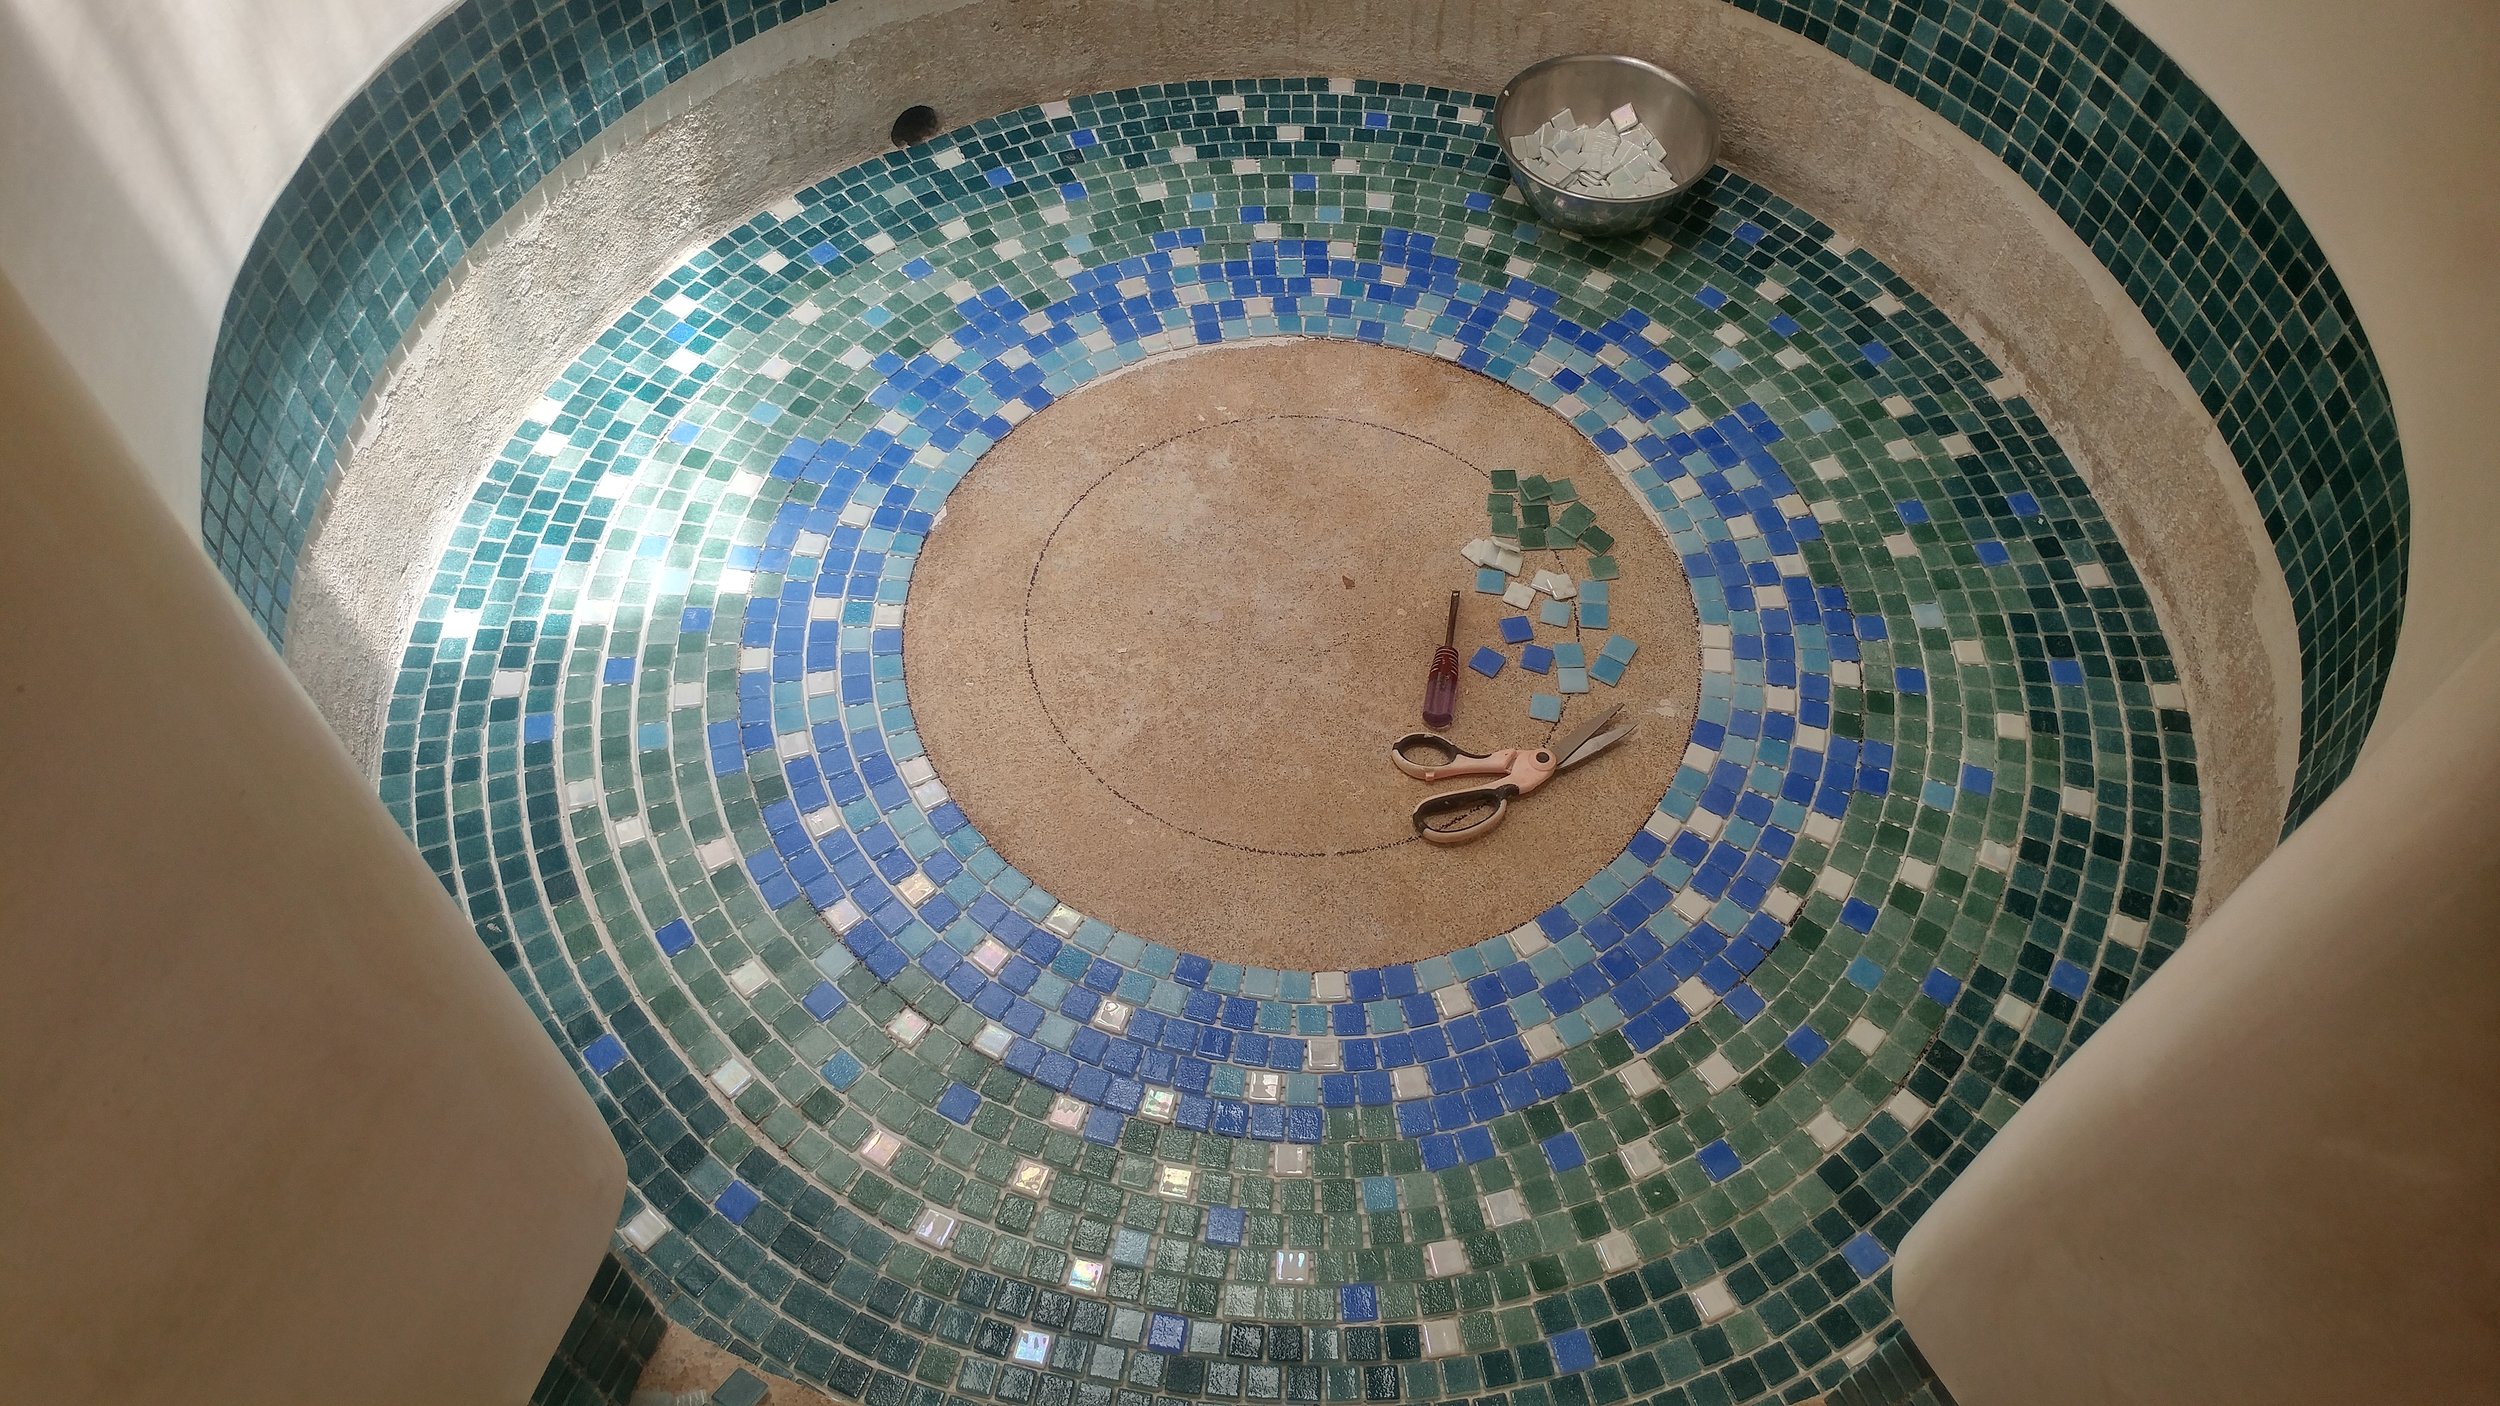
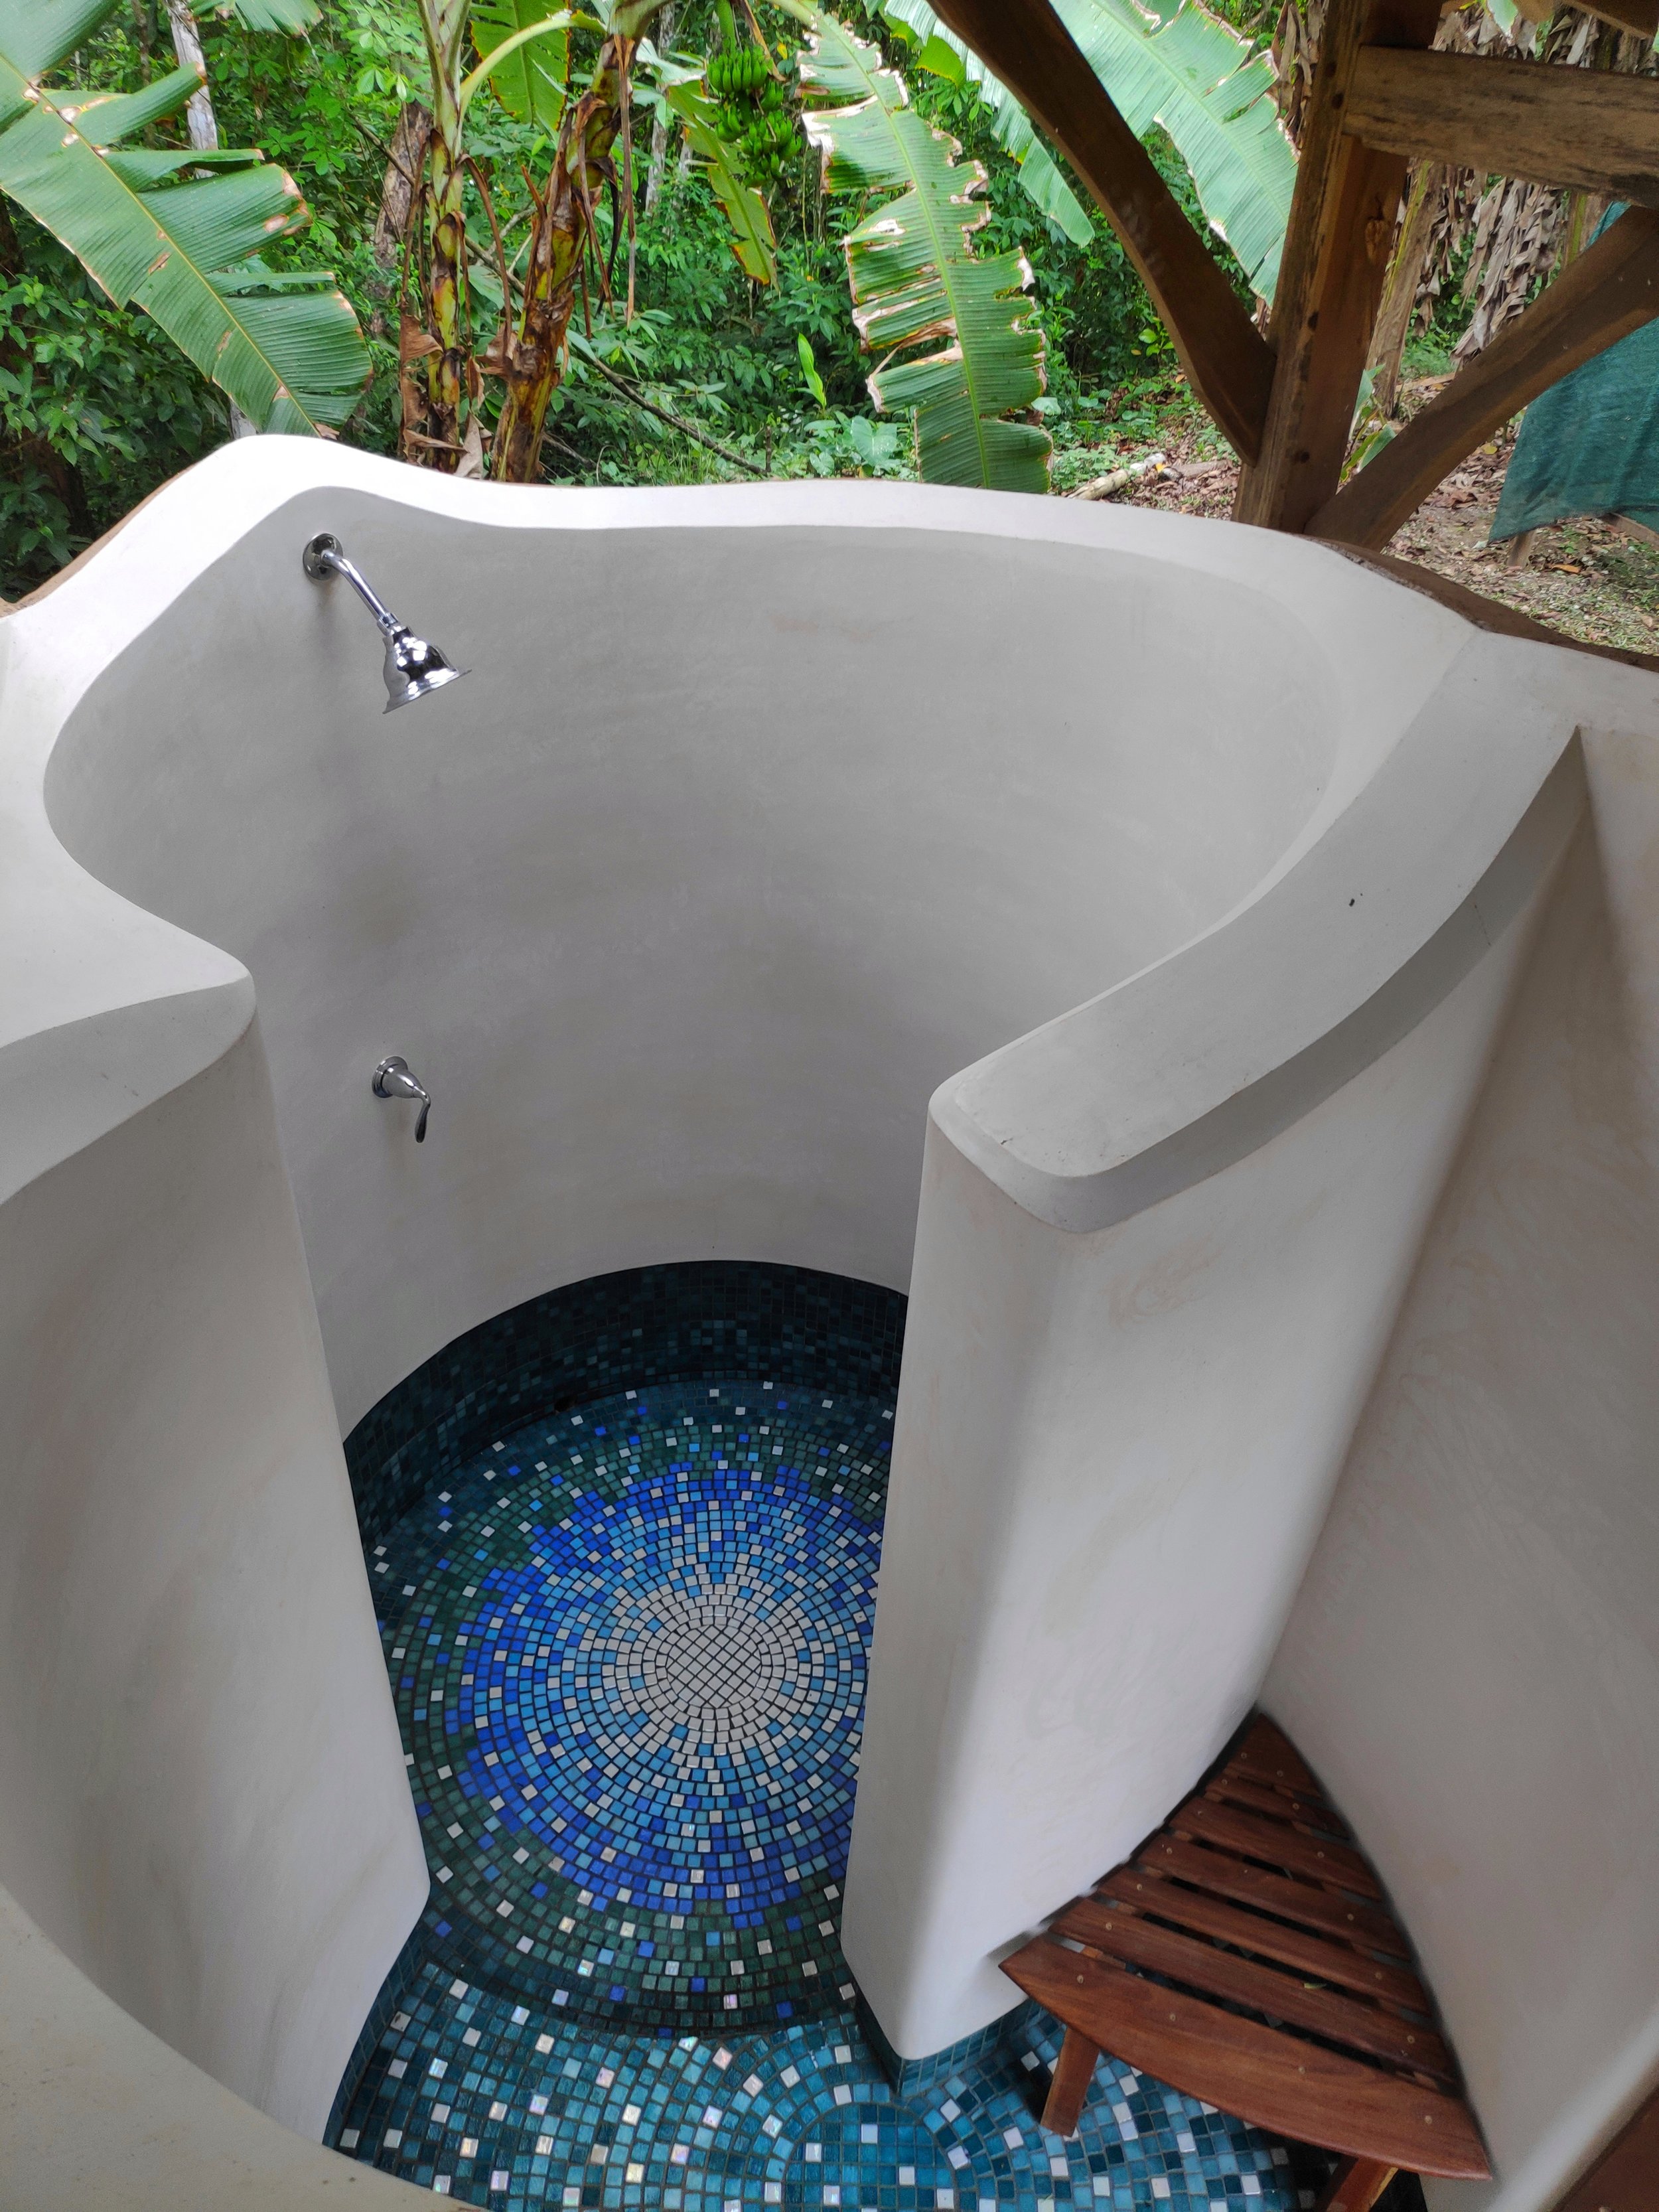
The remaining horizontal surfaces were tiled using different colored swimming pool tiles.


Step 12- Exterior Plaster
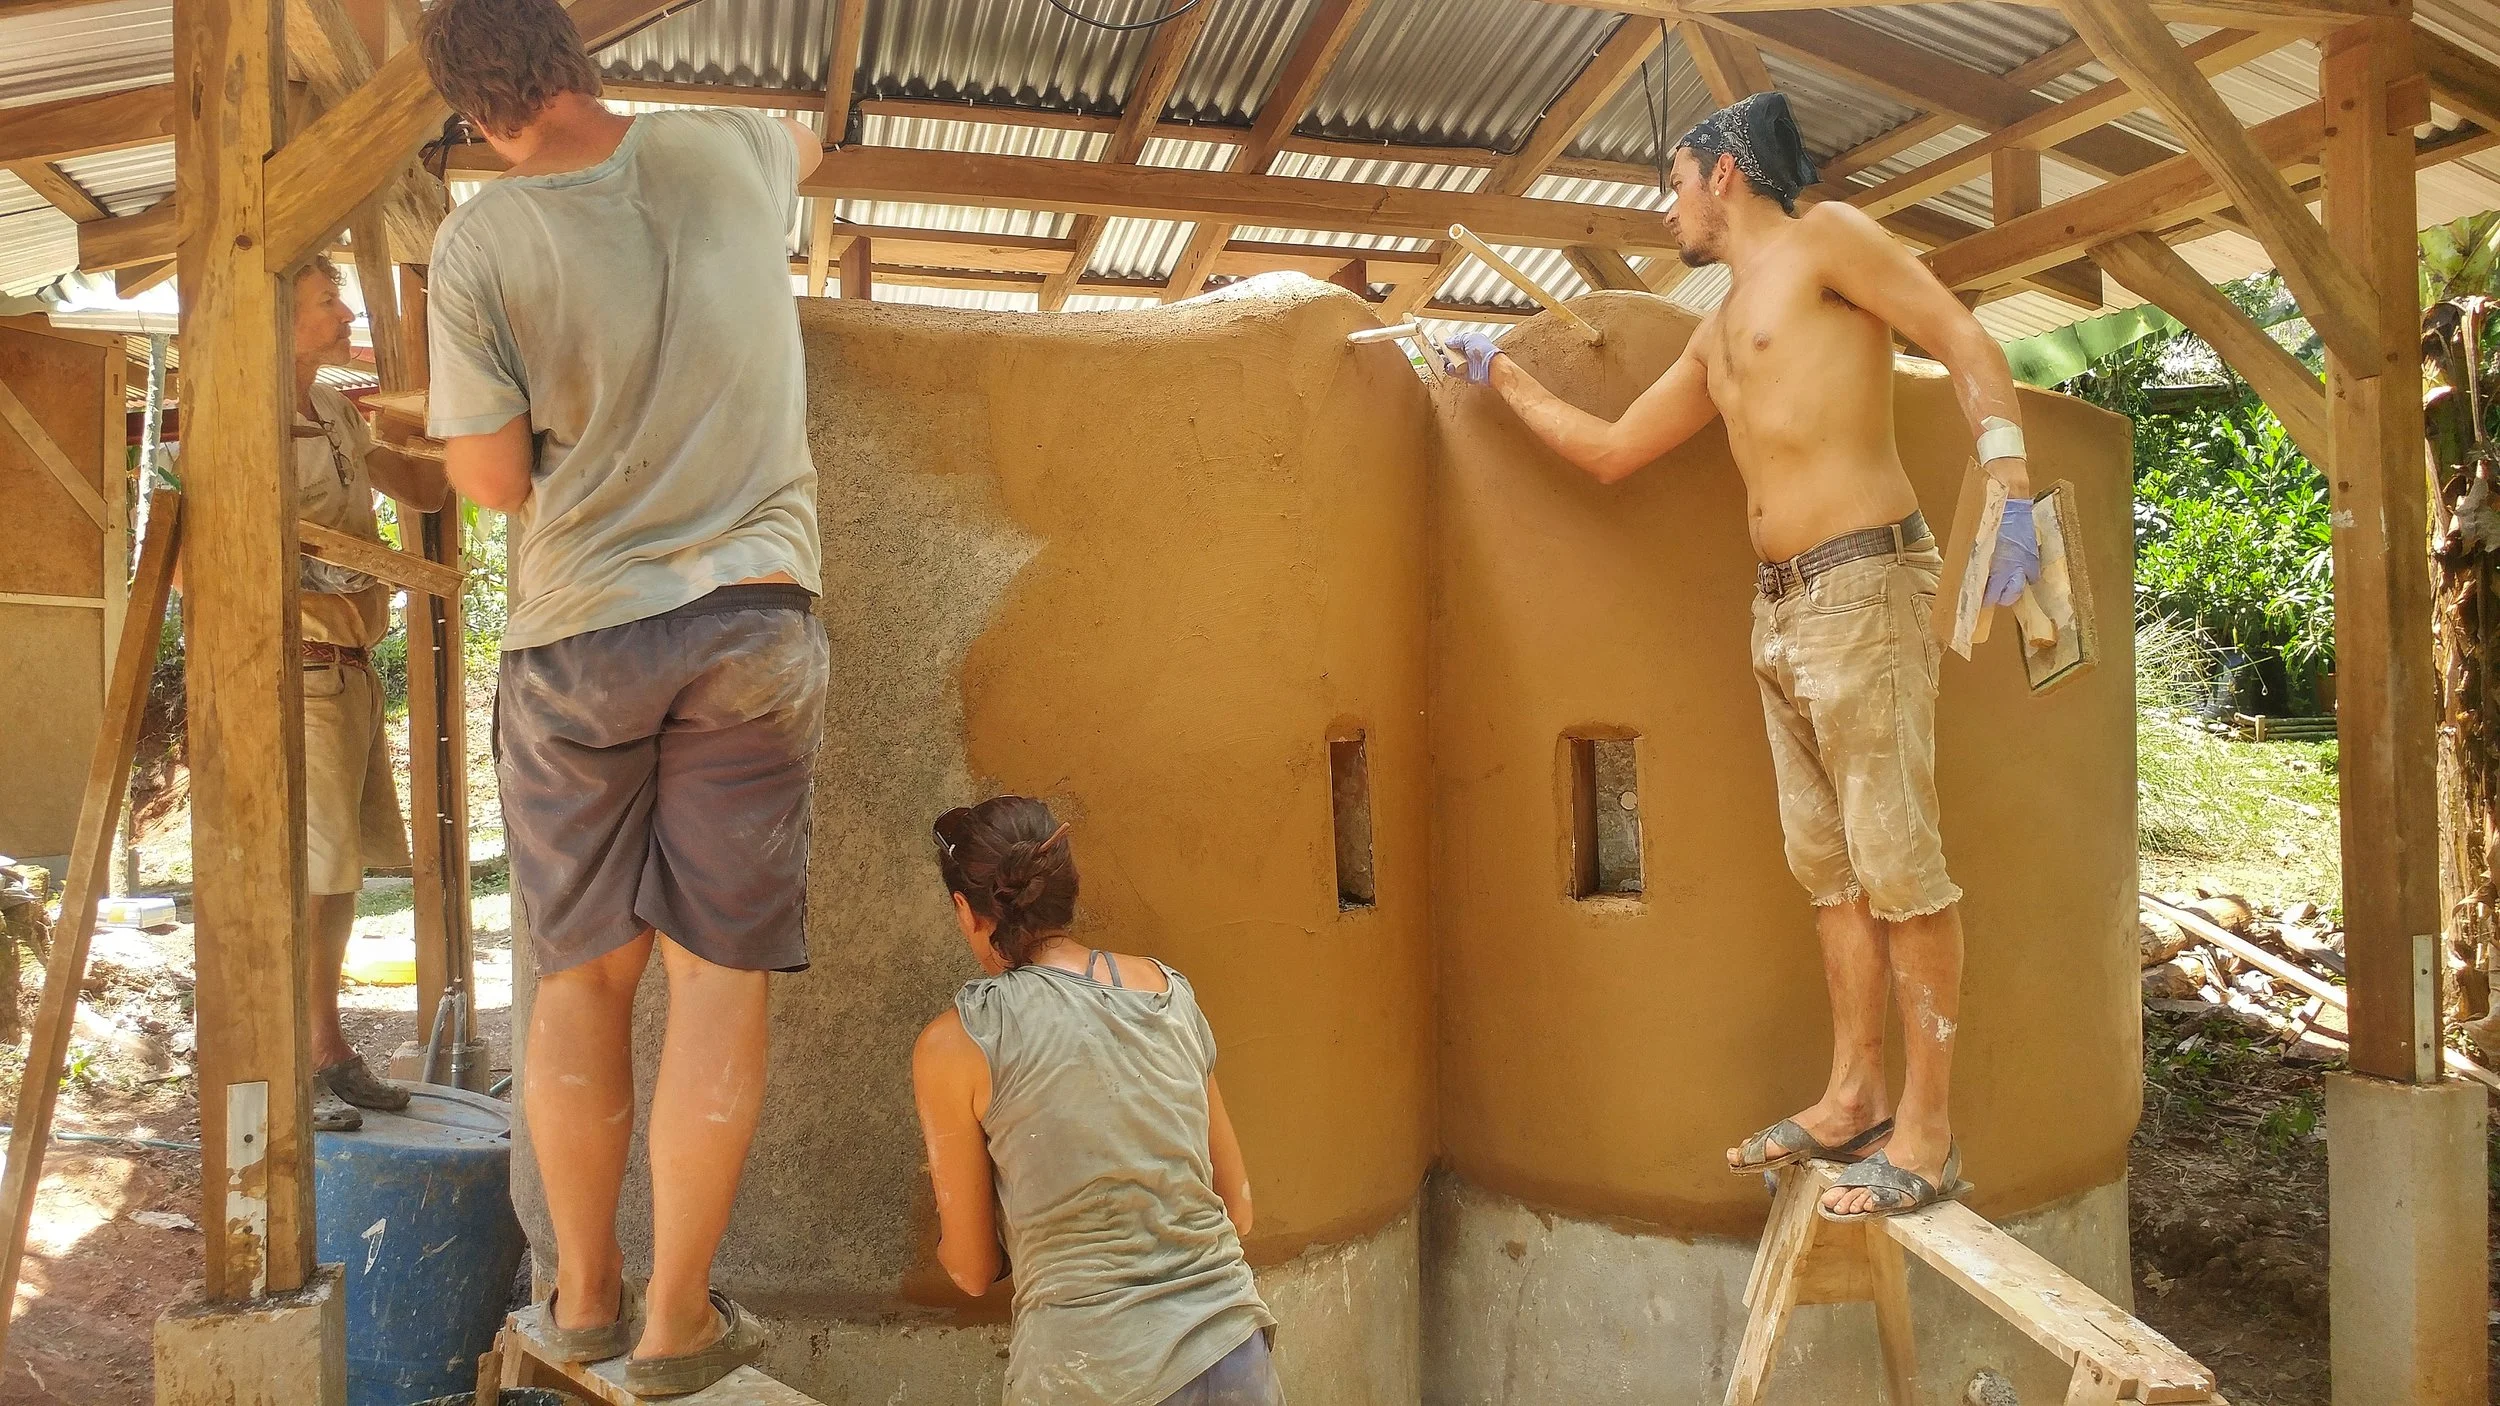
We used some of our left over mixes to do a base coat and finish in one pass, adding some pigments to alter the color. We used floats and darbies for the base coat and a sponge float and flexible Japanese trowel for the finish
The shower was ready, once the plumbing was connected all that was left to do was enjoy the cool water in these wonderful showers. The two sides of the shower are pretty similar, the main difference being the color combination on the tile mosaic floor. Do you want to bathe in this epic outdoor shower? Come stay with us at Bernies Bungalow!
want to learn more?
Dream of building your own home, outdoor space, or maybe just a simple earthen garden bench?
With over 15 years of experience building and teaching natural building techniques, the Ranch is a perfect setting to get inspired and hands on learning.
Join us for one of our upcoming natural building focused workshops. We generally host a workshop in natural building, timber framing, and/or bamboo construction annually.

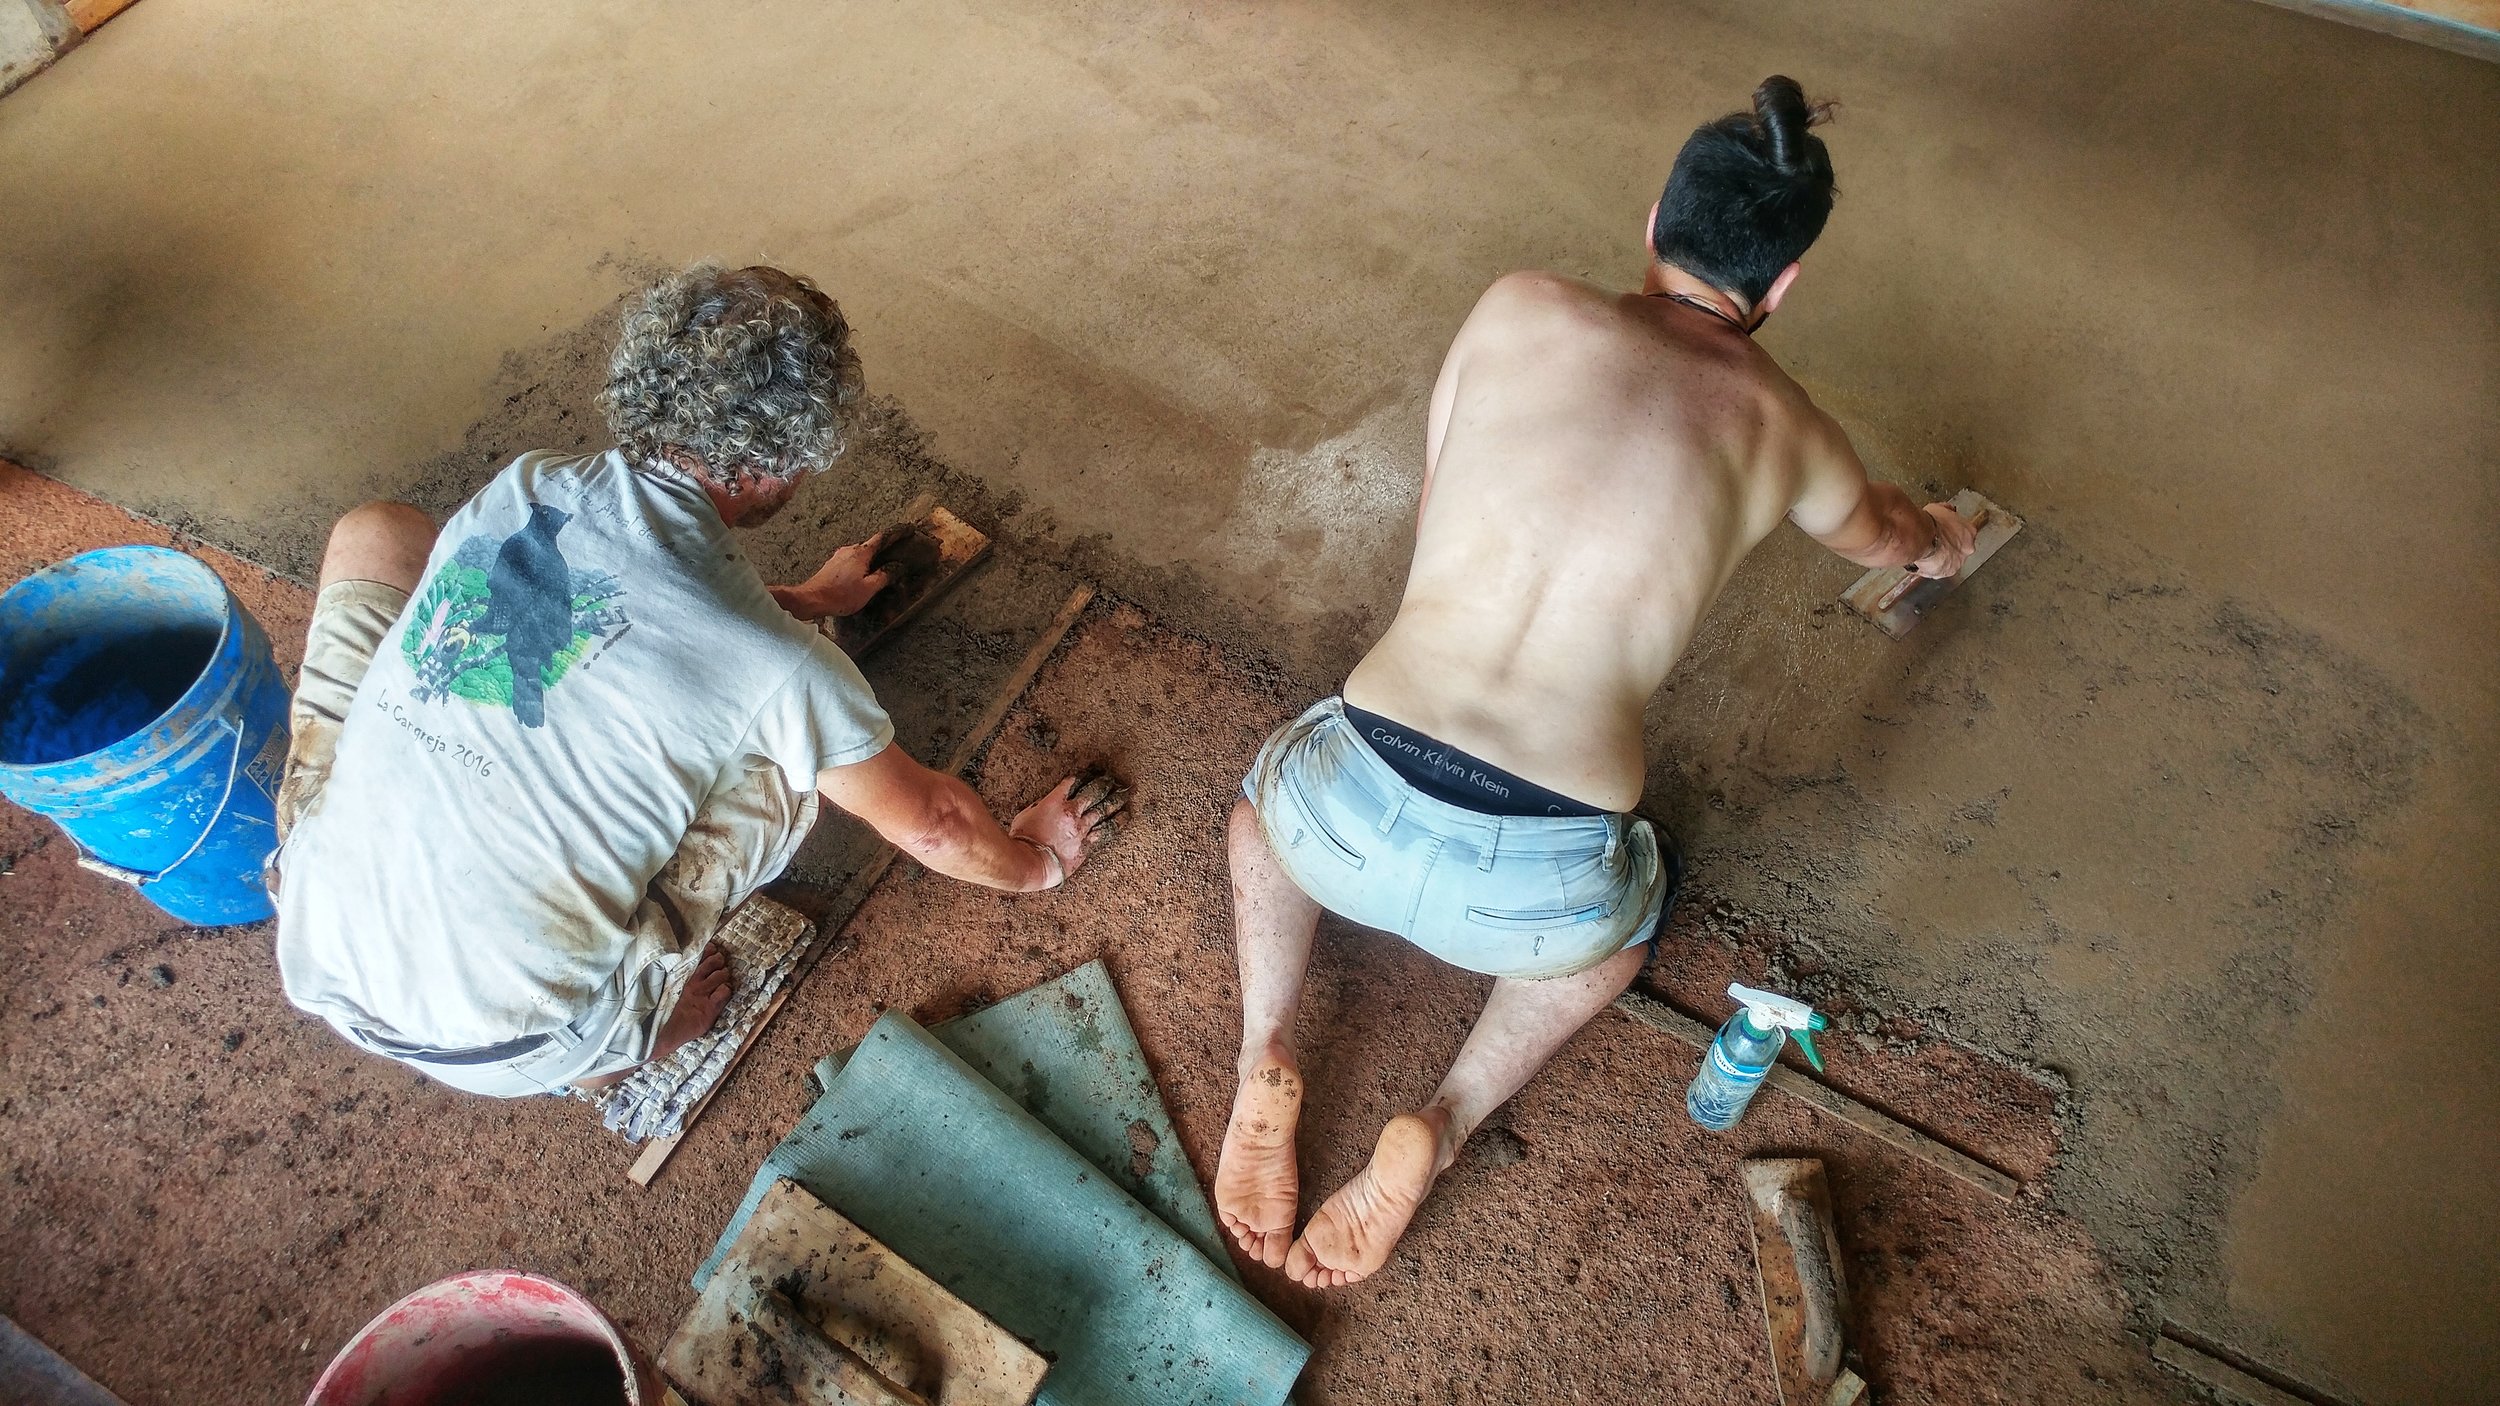
How to Make an Earthen Floor for Your Sustainable Home
Earthen floors add a great earthy touch to your sustainable home; whether that’s in your cob house or conventional stick frame home. They have more give than concrete or tile, meaning they are more comfortable and easy on your feet.
Why Build an Earthen Floor?
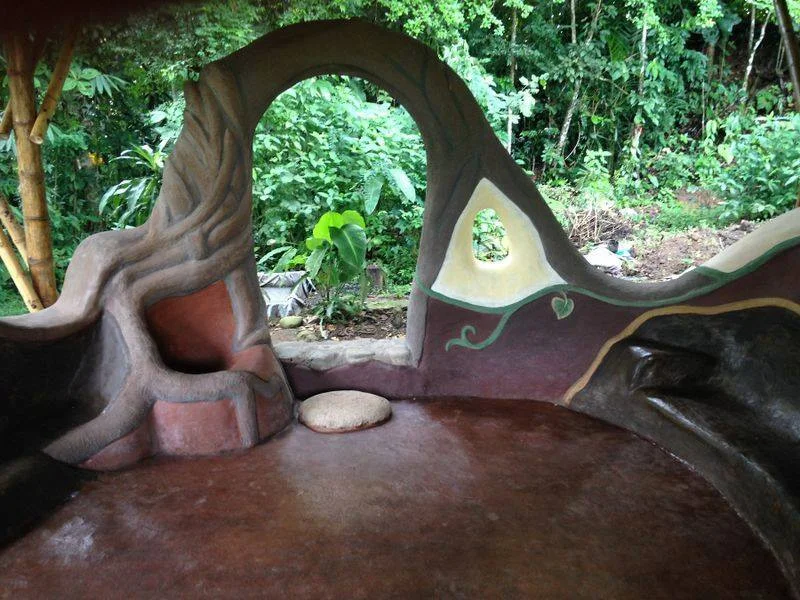
This Earthen Floor adds a wonderful warmth to the Ceiba Lounge
Earthen floors add a great earthy touch to your sustainable home; whether that’s in your cob house or conventional stick frame home. They have more give than concrete or tile, meaning they are more comfortable and easy on your feet. Earthen floors can be durable and last a long time, but are not the best material for all spaces in your home. They will break down faster when there is a lot of moisture on them or heavy items dropped on them. So places like your kitchen and bathroom are not ideal locations for an earthen floor. Earthen floors work great for bedrooms and living rooms.

Mixing by hand gives you a great feel for the mixture
Here at the Ranch we have been practicing and perfecting our earthen floors for more than 15 years. We strive to create sustainable homes from natural, local materials. Natural building is one of the ways we practice green living. We have seen what works and what doesn’t in many different structures and spaces throughout our community. After having an earthen floor in our kitchen, a space that produces three meals a day for an average of 30 people, and after repairing patches again and again, we realized this space is too heavily used for an earthen floor. Spaces like our guest cabins are perfect for earthen floors. Of course with hundreds of people going through these spaces they wear down over time. If you correctly lay an earthen floor in your home, and take care of it, they should last you for a long time.
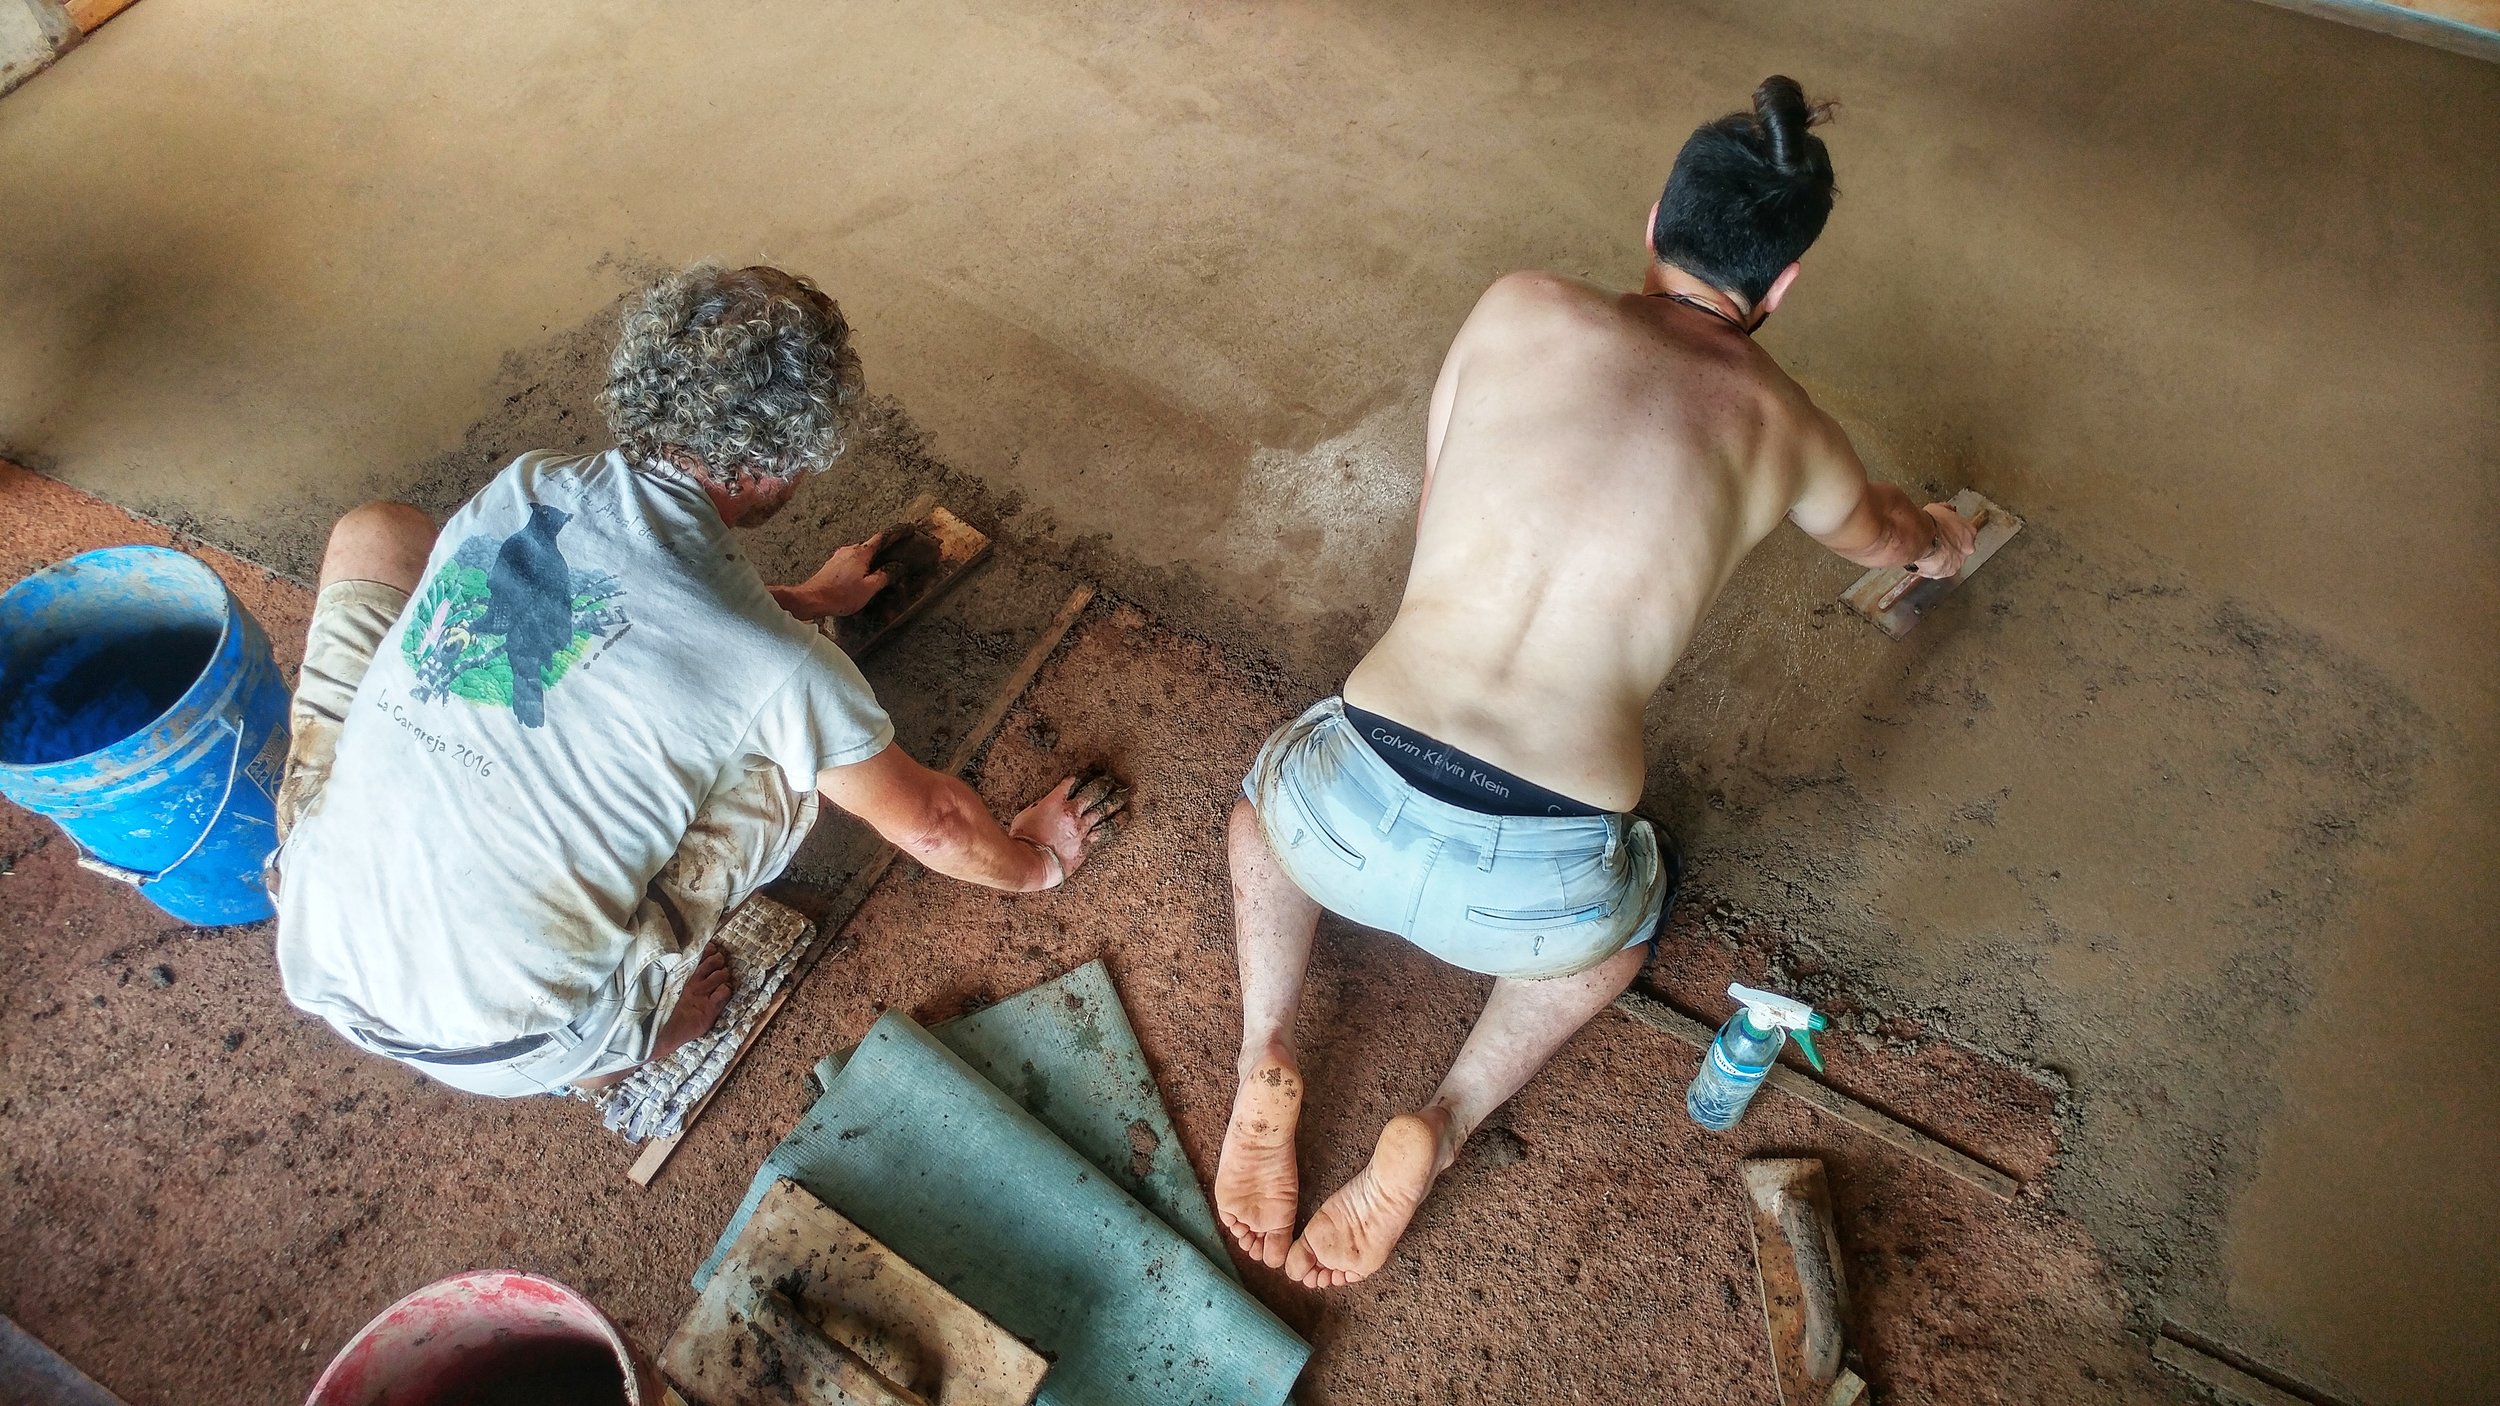
Wooden guides can be used to help keep the correct thickness
How We Build Our Earthen Floors
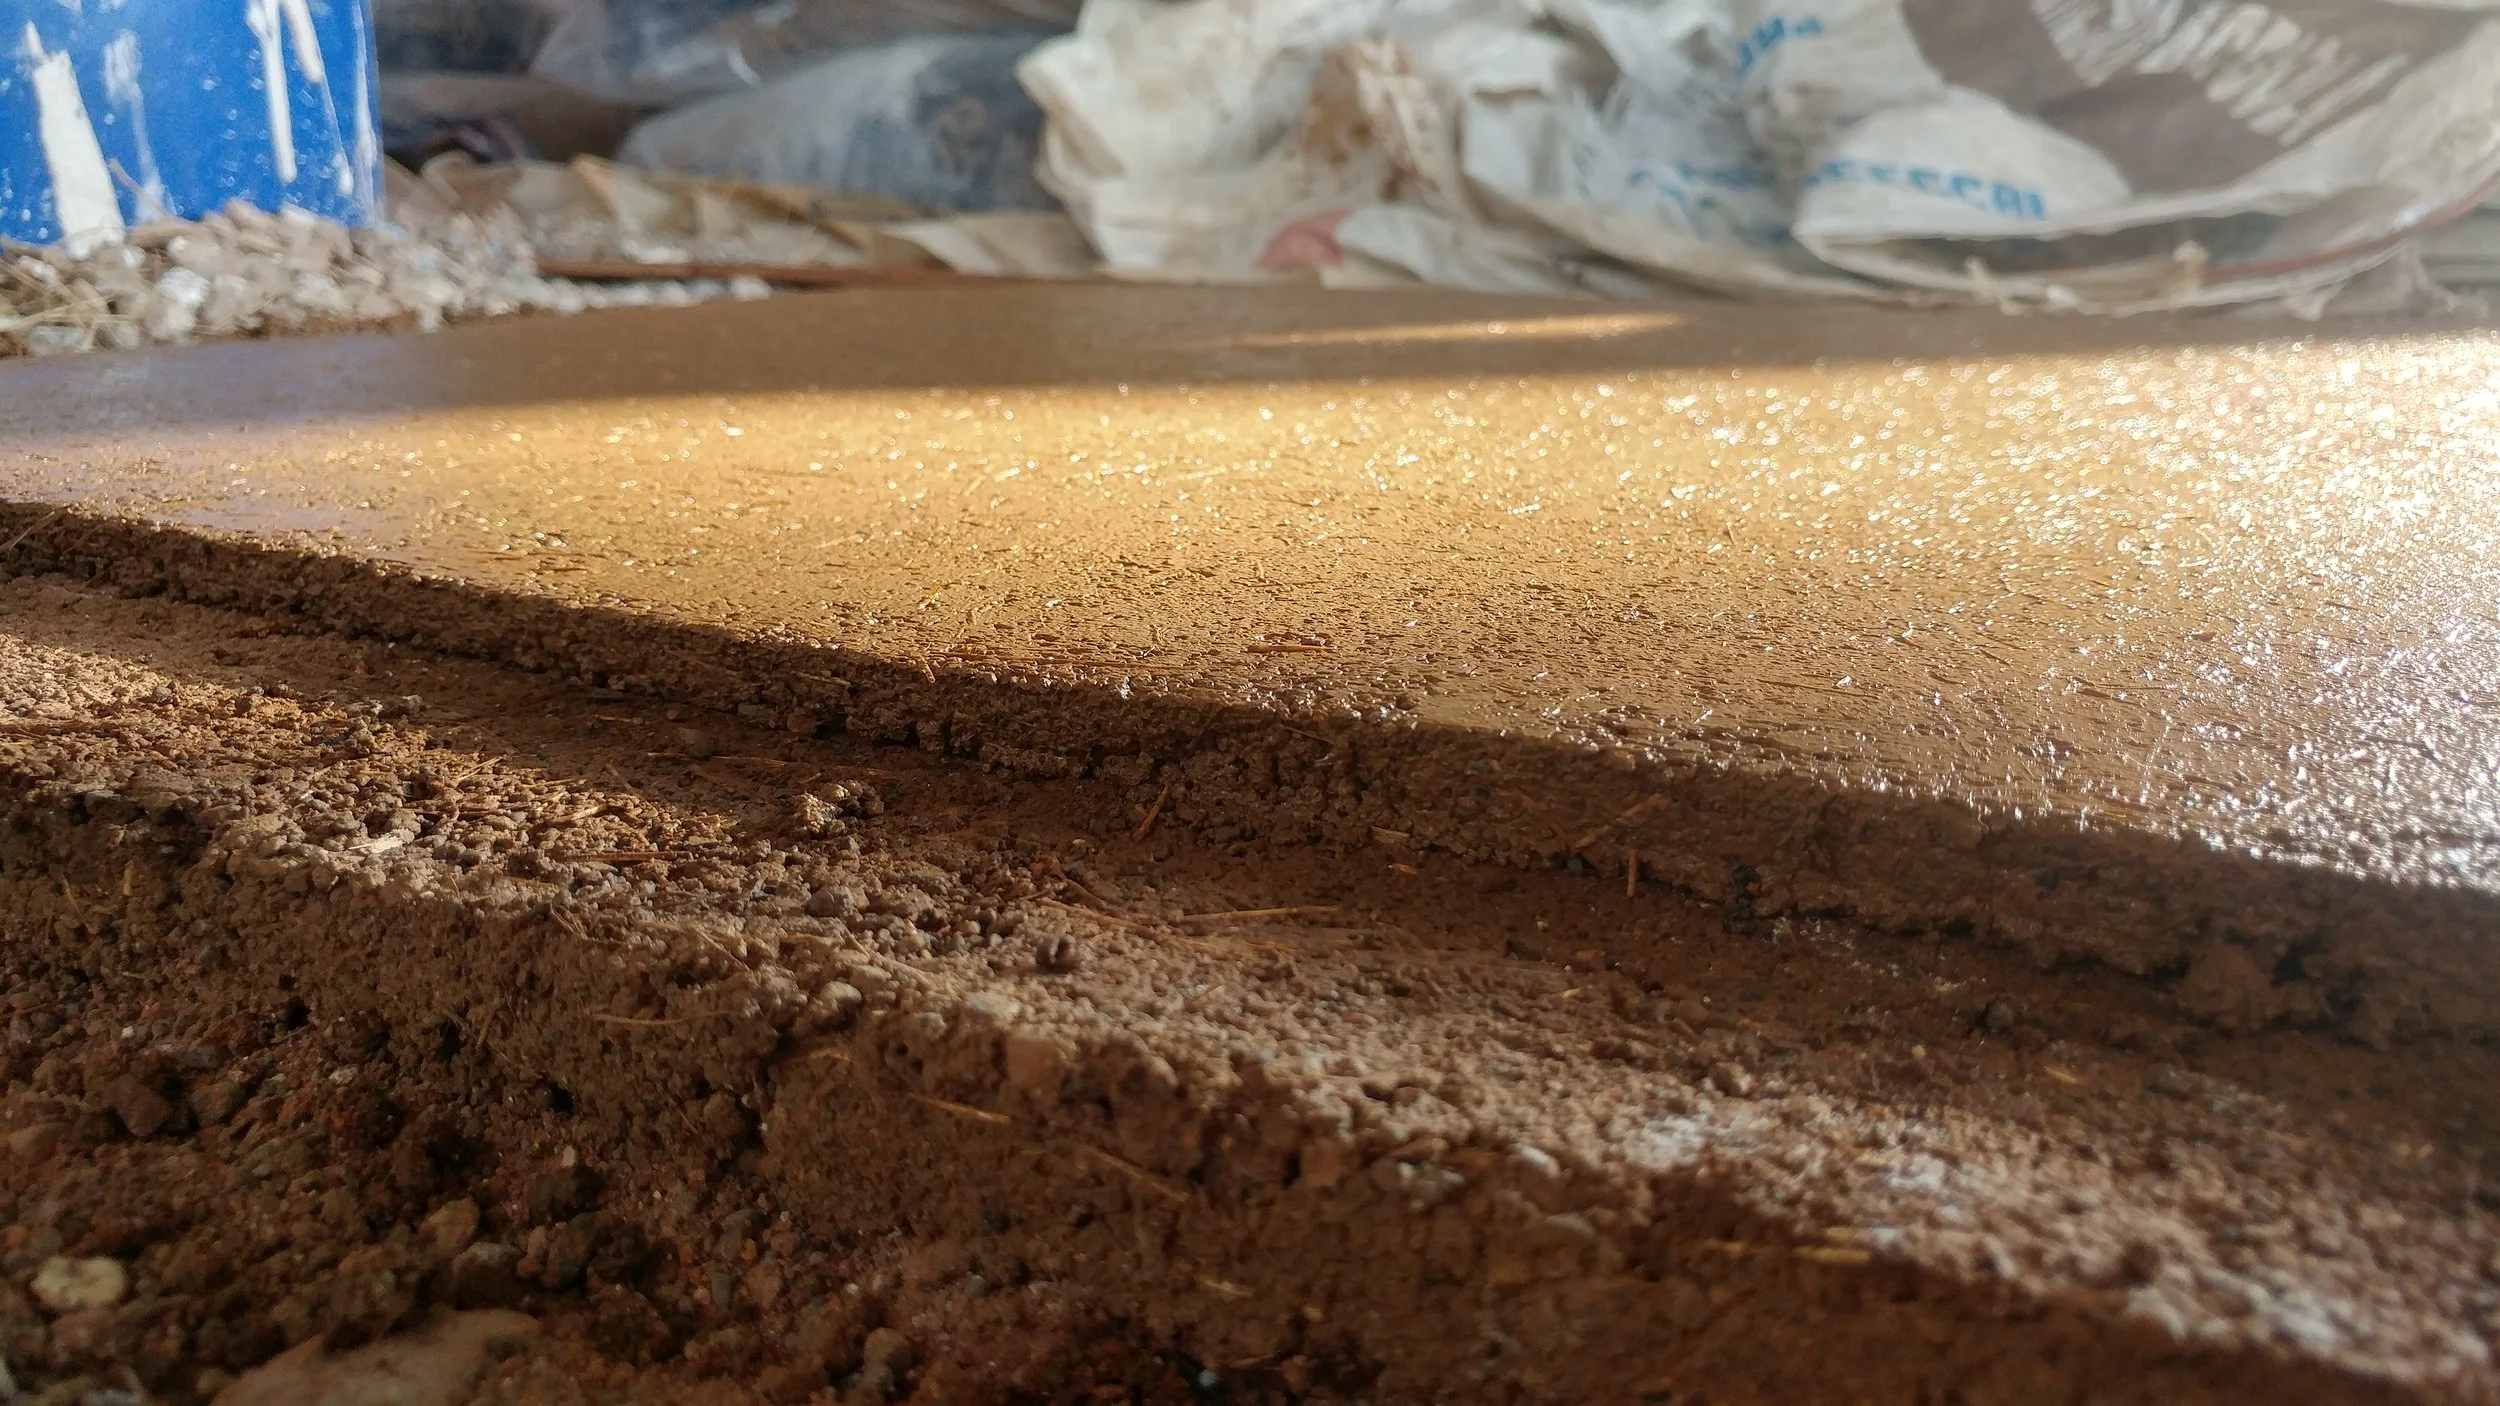
Base and final coat in a sample, always make tests!
Here in our tropical environment, with the materials locally available to us, we have finally figured out a bomber earthen floor. Here is a simple step by step guide on how we lay an earthen floor.
An earthen floor is comprised of 4 different layers
· Water proof membrane
· Tamped gravel (optional to increase total depth)
· Compacted road base (mixture of sand, clay and gravel)
· Two layers of final floor (mixture of sand, clay and chopped straw)
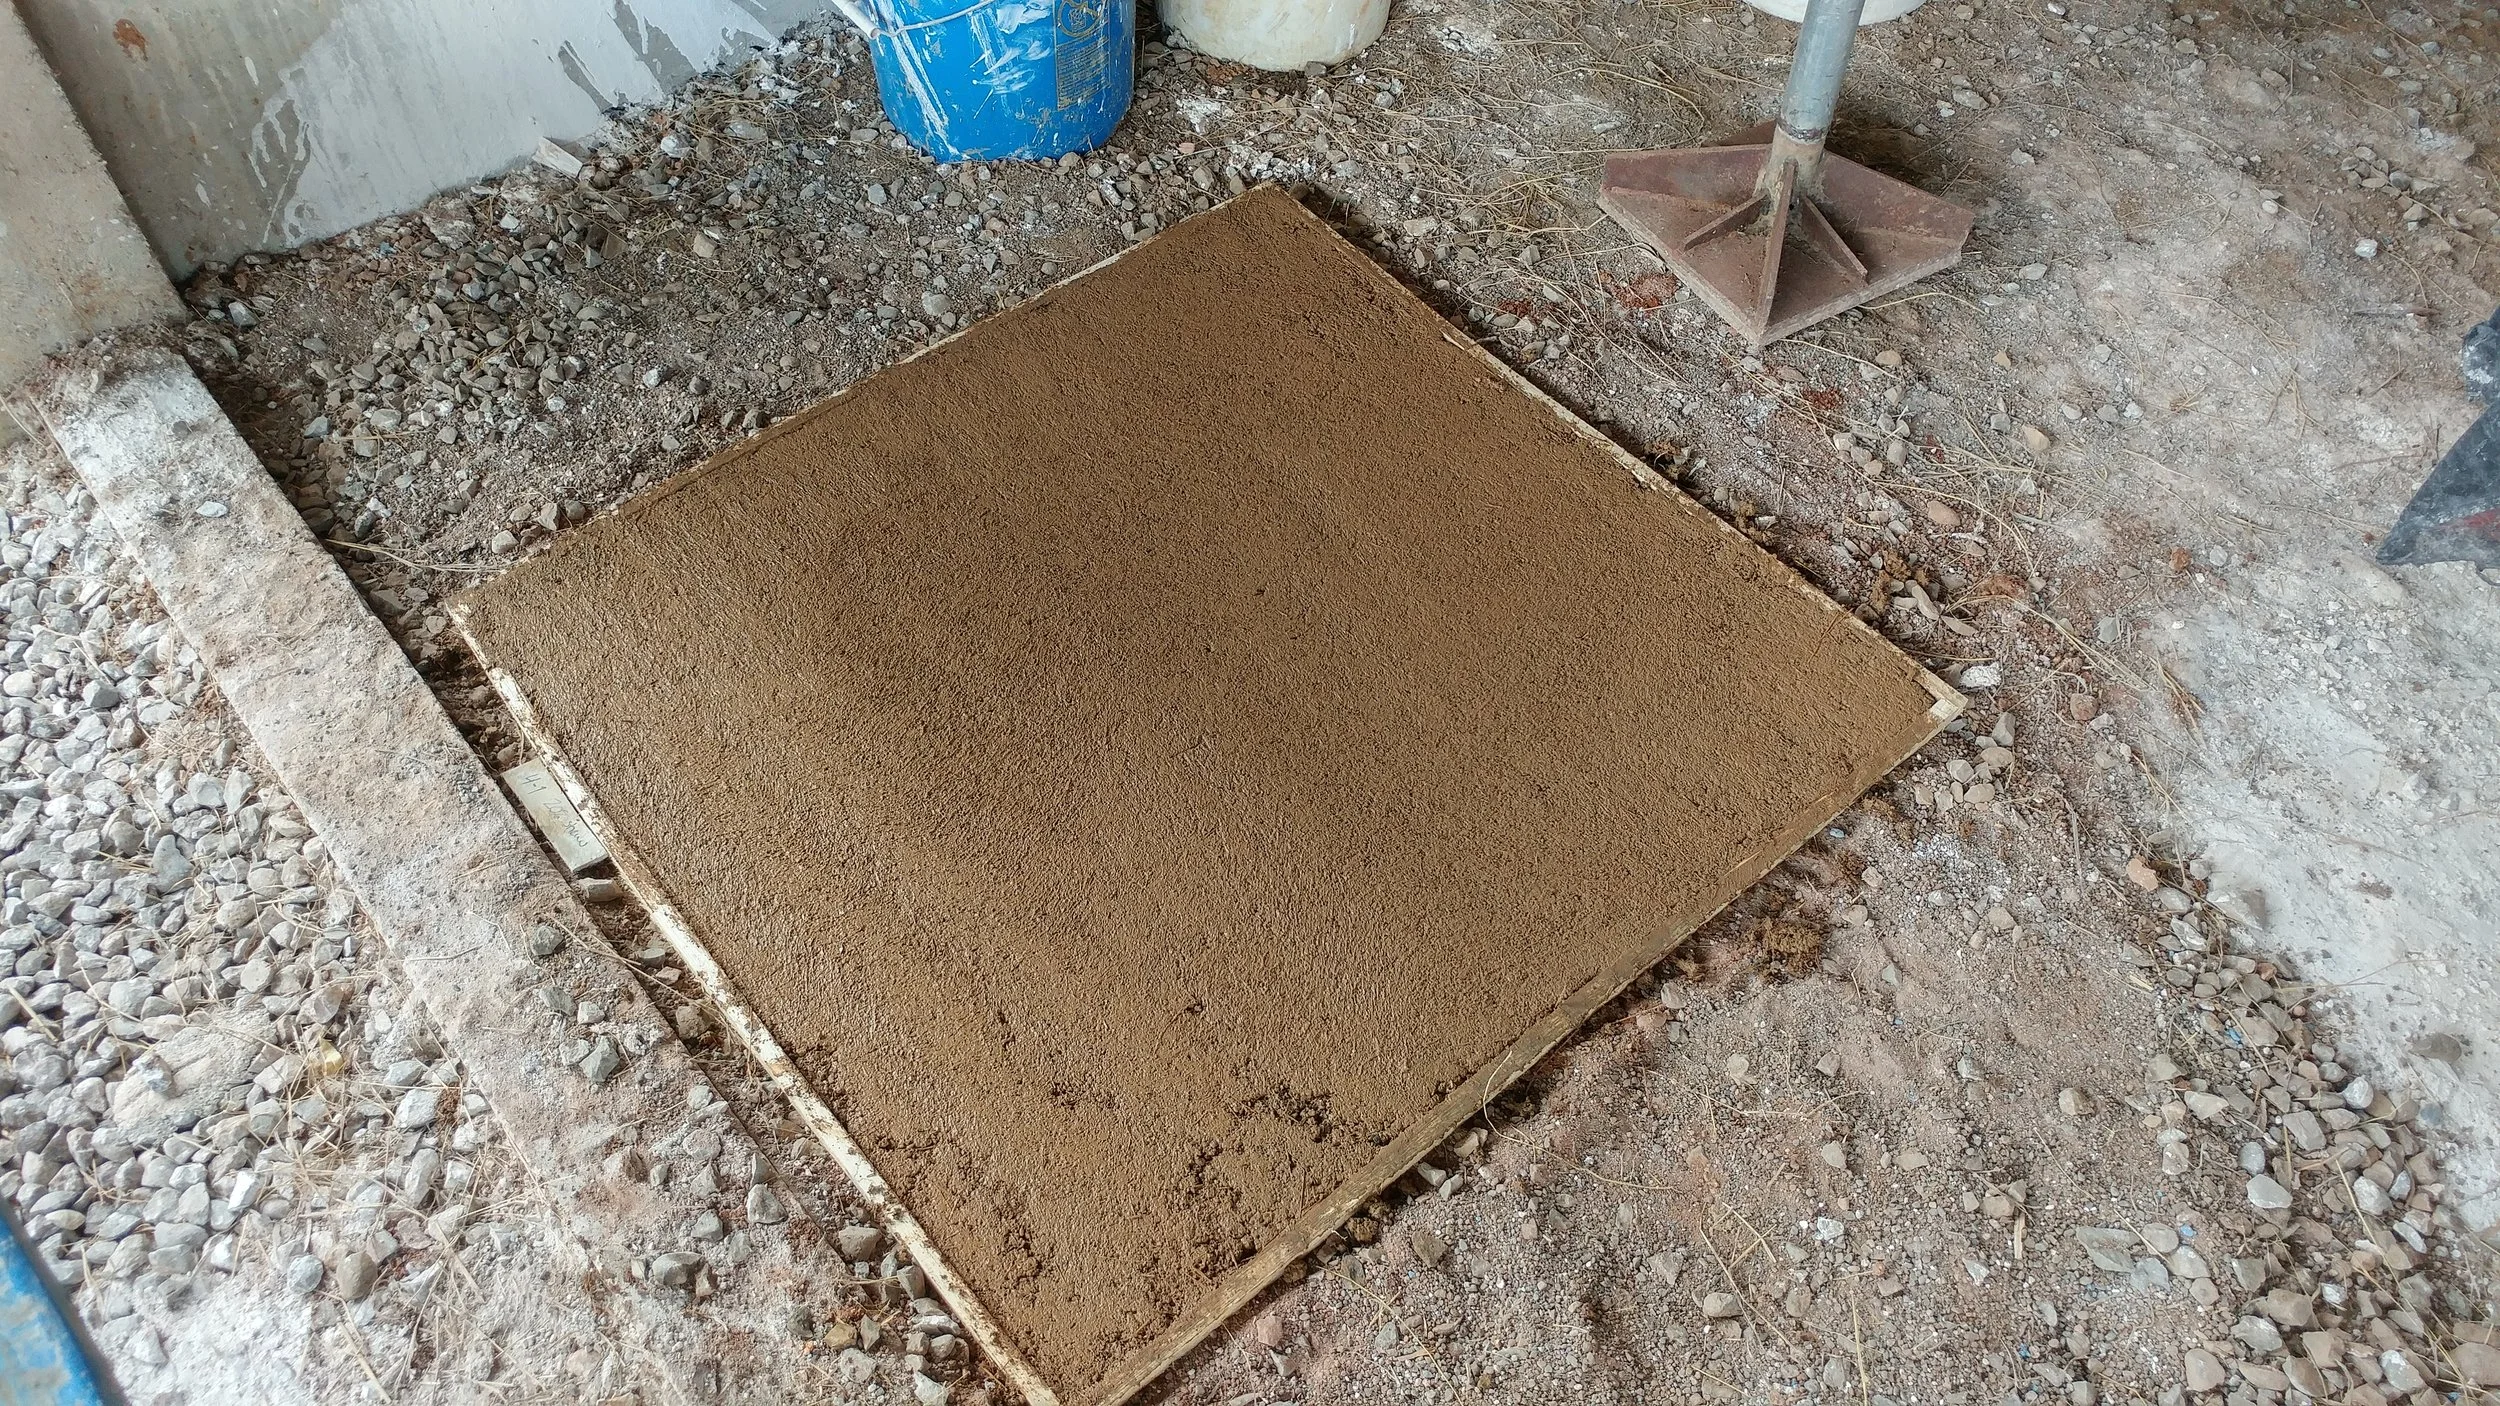
Make sure your samples are large enough to be representative!
Before you begin make samples! Always make samples for anything you plan on building; whether that is for your cob house, outdoor pizza oven, or natural plasters. We recommend making at least 3 samples with different ratios of clay, sand, and straw. These should be at least 1 meter by 1 meter to get an accurate example of the final product.
Steps once you find the correct ratios
1) Lay down a waterproof membrane, wrapping it up the inside of the stem wall.
2) If you need to increase the depth of your floor height you can add tamped gravel.
3) Compact your road base. Minimum depth is 4 inches.
4) Lay down your first layer of final floor. We do ¾ inch thick. Let completely dry.
5) Lay down your final layer of floor. We do ¼ inch thick. This can be troweled smooth to close any holes. Let completely dry.
6) Paint multiple layers of linseed oil/thinners combo at 3:1 ratio. This provides a protective coat that will increase the longevity of your floor.

Want to Learn More?
Perfecting an earthen floor takes time and practice. If you are trying to create a sustainable home consider using earth for your floor and throughout your home.
If you would like to get some hands on experience in natural building join us for one of our upcoming courses check out our workshops page for our latest offerings.
References:
Earthen Floors - A modern Approach to An Ancient Practice By Sukita Reay Crimmel & James Thomson
Categories
Topics
- Agriculture 6
- Agroforestry 21
- Animals 2
- Apprenticeship 19
- Appropriate Technology 6
- Backpacking 1
- Bananas 1
- Basic Pantry 4
- Biochar 1
- Books 3
- Build Your Own Home 1
- Central America 5
- Chiles 1
- Cinnamon 1
- Clay Carving 1
- Climate 2
- Climate Change 1
- Cob oven 1
- Communication 5
- Community 24
- Compost 2
- Composting Toilets 2
- Condiments 1
- Conservation 2
- Cooking 4
- Costa Rica 18
- Design 10
- Earthen Construction 10
- Eat Local 2
- Ecohome 1
- Education 9
- Environment 3
- Ethics 4
- Farm to Table 12
- Fasting 1
- Fermentation 14
- Food 22
- Food Choices 8
- Food Forest 8
- Food Processing 15
- Food Systems 12
- Gap Year 1
- Gardening 5
- Ginger Beer 1
- Harvest 2
- Health 12
- Healthy living 5
- Homemade 2
- Homestead 8
- Internet 2
Due to popular demand we have put together a document that outlines how our composting toilets are designed and made. The documents include
-dimensions for different size chambers based on number of people using it
-door design
-chamber design
We have spent years fine tuning our design and details based on what is easiest and what works. This is the culmination of building 11 different composting toilets and each time improving the design.
It is important that you understand that this design is only for the composting toilet element, it does not include any of the timber frame or bamboo framing that form the structure for the roof that covers these all over the ranch.