

BLOG
Stories, articles, and updates from the Ranch community.

Bamboo Treatment
Bamboo is a wonderful fast growing grass, it comes in all shapes and sizes and has an incredibly diverse list of uses from many cultures all around the world. Bamboo is incredibly fast growing and can grow up-to a meter a day and achieves 80% of its height in the first 2months of its life! This ability to grow quickly and produce a huge variety of usable products has got many a permaculturists and green living enthusiasts excited by its potential.
By Nic, Core Team member

What is Bamboo
Bamboo is a wonderful fast growing grass, it comes in all shapes and sizes and has an incredibly diverse list of uses from many cultures around the world. Bamboo is incredibly fast growing and can grow up-to a meter a day and achieves 80% of its height in the first 2months of its life! This ability to grow quickly and produce a huge variety of usable products has got many a permaculturists and green living enthusiasts excited by its potential. Generally speaking bamboo falls into two categories, running or clumping (although there are some that are in between). Running bamboo has the capacity to become very weedy and hard to manage if allowed to get out of control, we spent many years pulling out random culms that appeared throughout the Ranch’s front garden from the “living fence” that had been inherited upon the purchase of the property. This battle against the running bamboo Phyllostachys sp. was not an uncommon story as many people around the world can probably attest to, but was a great reminder of the will to live that bamboo species have!
In the early years of purchasing the Ranch property, Tim and Robin sought advice from well-known bamboo builder and furniture maker Brian Erikson. They purchased several varieties of giant clumping bamboos, which we are now learning about how to manage. 20 years later these bamboo have grown to full maturity and tower above some of our orchard spaces and buildings! As the clump matures the culms get successively larger in diameter until they reach their maturation diameter. This varies from species to species, but one bamboo known as Dendrocalymus asper is massive! Each culm measuring 8” in diameter with a wall about 2” thick and approximately 30m tall, this is quite the impressive bamboo. Not only is it incredibly impressive it is incredibly intimidating to harvest!
Problems With Bamboo
Since the very beginning we have used bamboo as a building material. We had always purchased this bamboo and over time have become quite disillusioned by the varying quality of the purchased product, despite paying premium prices for the bamboo (each 6m culm at 4” diameter costs around $30 plus transportation). Not long after buildings were completed we were finding that a significant proportion of the culms were suffering from insect damage (a sign of improper curing and drying) and replacing these pieces, which were now inside of a building, was incredibly challenging and a lot of work.
The other major problem that we were facing was that typically when bamboo is treated correctly it is using an acid or a salt of Boron. Boron is a natural mineral that at approximately 10% solution is toxic to fungus and insects. Boron is an essential element for plant development and by diluting the solution down it is actually used as an organic fertilizer. Boron therefore gained a reputation of being an excellent, organic and safe treatment solution for bamboo and is the most widely used treatment for bamboo around the world. Unfortunately one of the problems of using an acid or a salt (boric acid or borax, disodium octoborate etc….) is that it is corrosive to steel and in order to attach roofing and even to combine pieces of bamboo, steel is often one of the fastening materials used (yes there are others but steel is the most practical and commonly used). We were finding that over time even galvanized steel was corroding and becoming dangerously damaged.
These two major problems had us move to using timber more and more and limiting our use of bamboo to non structural/permanent uses such as harvesting poles, temporary structures, propping posts, trellis etc… We got deep into Timber Framing and structural bamboo became a thing of the past.
Bamboo at Rancho Mastatal

Henry setting up a scaffolding system in our bamboo
We continued to treat our own bamboo for wattle and daub walls through this period and the potential of bamboo continued to intrigue us but just seemed beyond our reach. As our stands of bamboo grew older and more daunting to manage we decided to hire in an expert to help us manage our bamboo. We found Henry Glen, a bamboo expert living in Costa Rica at Finca Bamboo in the south of the country and he was willing to come and help train us in the proper management and treatment of bamboo. With Henry’s help we have been able to (mostly!) get our bamboo under control after years of neglect and we have begun to treat our own bamboo using his very simple modified boucherie technique that I will outline below. He also sells a bamboo treatment solution called “Bam Blue” that is based on boron and copper sulphate (another organic chemical used to treat mold and insects) and also has a penetrant and anticorrosive properties. In one go Henry has solved our bamboo problems and we are now well on our way to building with bamboo again.
Please contact Henry directly through Finca Bamboo to purchase his treatment solution or enquire about his consultation services. He comes highly recommended by Rancho Mastatal.
Modified Boucherie System
Things you will need:
2” high pressure water PVC tube (schedule 40)
2” ball valve
2” Elbow
Fernco couplings
¼” NPT Tap and drill bit
¼” NPT Threaded Male compressor part
Roll of Teflon



Process:
Cut one piece of 60cm 2” PVC and one piece of 15cm.
Glue your elbow to one end of the 60cm piece and the 2” ball valve on the other end. The valve handle should face opposite the direction of the elbow.
Glue the 15cm piece on the other side of the elbow.
Drill your 2” ball valve through the section that is glued to the 60cm piece of PVC and use the tap to create the threads in the hole.
Wrap your threaded male compressor piece with Teflon and screw into the PVC until tight.
One the end of the short section after the elbow attach the Fernco coupling.
Replace the Fernco pipe clamp with the stainless steel pipe clamp by constant Breeze. You can tighten these to 92 in/lb.


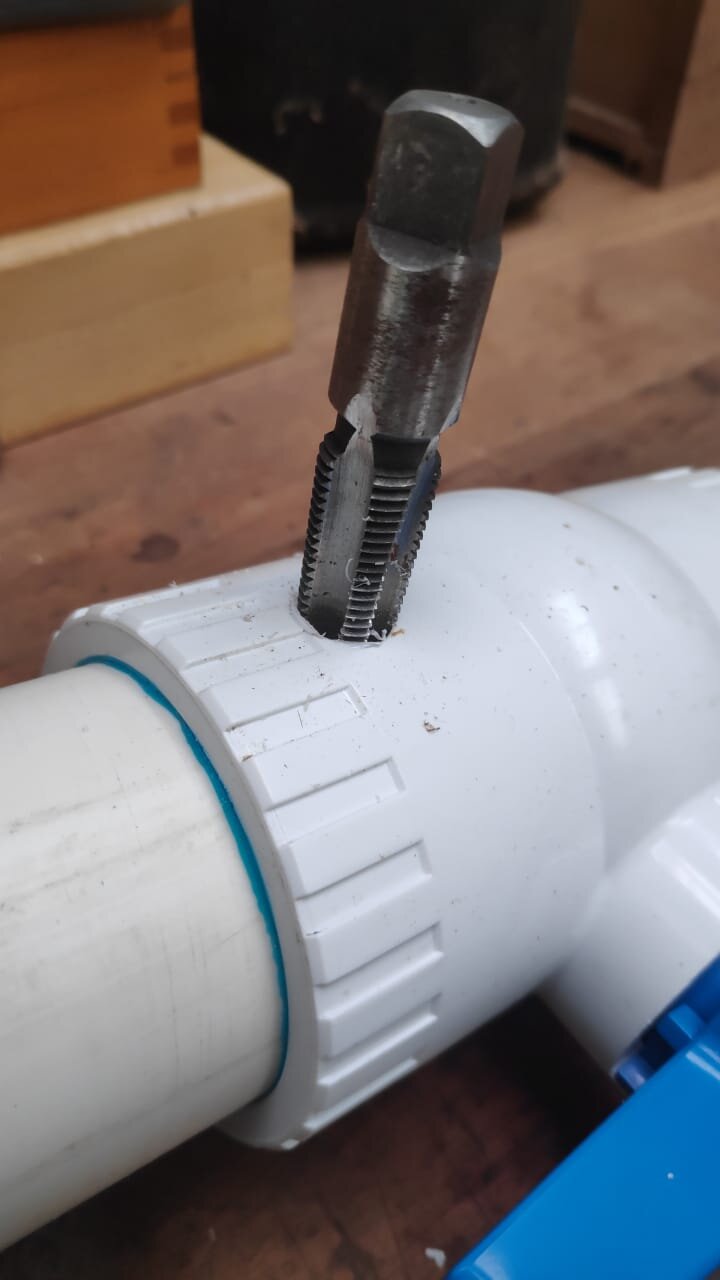

This is your basic modified boucherie set up, from here you will attach the bamboo to the Fernco coupling, fill the solution into the PVC pipe by opening the valve, close the valve and connect the compressor. Its important to keep the pressure low, around 12 PSI otherwise you will blowout the coupling. As you force the solution through the bamboo you will see the water from the bamboo coming out the other end. Soon you will begin to the see the Bam Blue begin to come out and when the full concentration is coming out the other end you can stop it running. Now you have a treated piece of Bamboo, this needs to dry vertically and can then be stored horizontally.

A piece of bamboo hooked up to the boucherie

A treated piece of bamboo
WANT TO LEARN MORE ABOUT BAMBOO?
Read our other blog about Bamboo Shoots
Stay tuned for our annual workshops that cover topics in natural building, permaculture, fermentation, and more!
Life after the Ranch (Part 1: Day to Day Life)
The Ranch experience for me was completely life changing. This is the common feedback that is given from anyone that has stayed there, whether it was for a day, or a year. This place gets under your skin and awakens something inside you that makes you think differently.
By Marrissa Taylor
2018 Apprentice
The Ranch experience for me was completely life changing. This is the common feedback that is given from anyone that has stayed there, whether it was for a day, or a year. This place gets under your skin and awakens something inside you that makes you think differently. There is something very special about being given the space to learn, to question and to experiment with new information and skills. For the first 6-8 months we received a lot of training and workshops and in the second part of the apprenticeship we were all encouraged to take on our own projects in areas of interest, as well as continue the regular tasks and projects that we needed to do to contribute to the functioning of the Ranch. This was a great life balance – as you can never get away from the things you need to do to survive – but you can look at the ‘doing’ in a different way. So yes, you need to haul and lift the heavy bags of wet cow dung, then make a daily poop soup out of them to feed the Bio-digester. Most of us at the beginning did not look forward to our rotation on the Bio-D, but once you do it, and it becomes a part of your daily life. Something shifts.. You start to understand the extremely amazing system you are working on. That this task you are doing kicks off a very cool, yet simple, process of fermentation. The results of this both provide fuel you can feed 50 people on, and manure that you can feed your veggie seedlings with. It is at this point you also start to notice the tiny little delicate mushrooms that seem to magically come from nowhere, and how the birds congregate around the piles of manure for the worms underneath. Then finally in yourself, the smells that use to repel you suddenly become the smell of the earth at work, and the peace that surrounds this space is teaming with curious life. You learn to observe and experience the world differently. Something inside of you shifts… this is the Ranch.

One of the signs at the Biodigestor
Life after the Ranch, after this shift in perspective can be jarring for sure depending on where you are going. For me it was heading home to the cold winter of Canada. My newly strong body, my heart full of peace and nostalgia of leaving the Ranch and all my wonderful friends that are as close to family as you can get, now to enter the ‘real world’. This world is fast, full of social media, tv series bingeing conversations, food whose ingredients are barely recognizable and a taste that can only be described as chemical. Although it is balanced off because it is lovely to be reunited with family and friends and the familiar. It is as this point that others start to notice… you also start to notice, you are different now. Something inside you has shifted… You have an understanding of the effort that it takes to bring that food to your plate. How harmful the gobs of packaging is on the environment. You know what real un-chemically treated food tastes like – and even how that taste is further enhanced when you plant it, nurture it and wait expectantly for it to be ready to harvest. You have also spent the time on the ranch relatively disconnected from the web so the incessant surfing does not appeal like it used to. You crave real conversations, face to face, and even miss the gratitude dinner circle as you come to realize it is not common place to say thank you to people (even strangers) genuinely in the day to day. Something inside you has shifted…

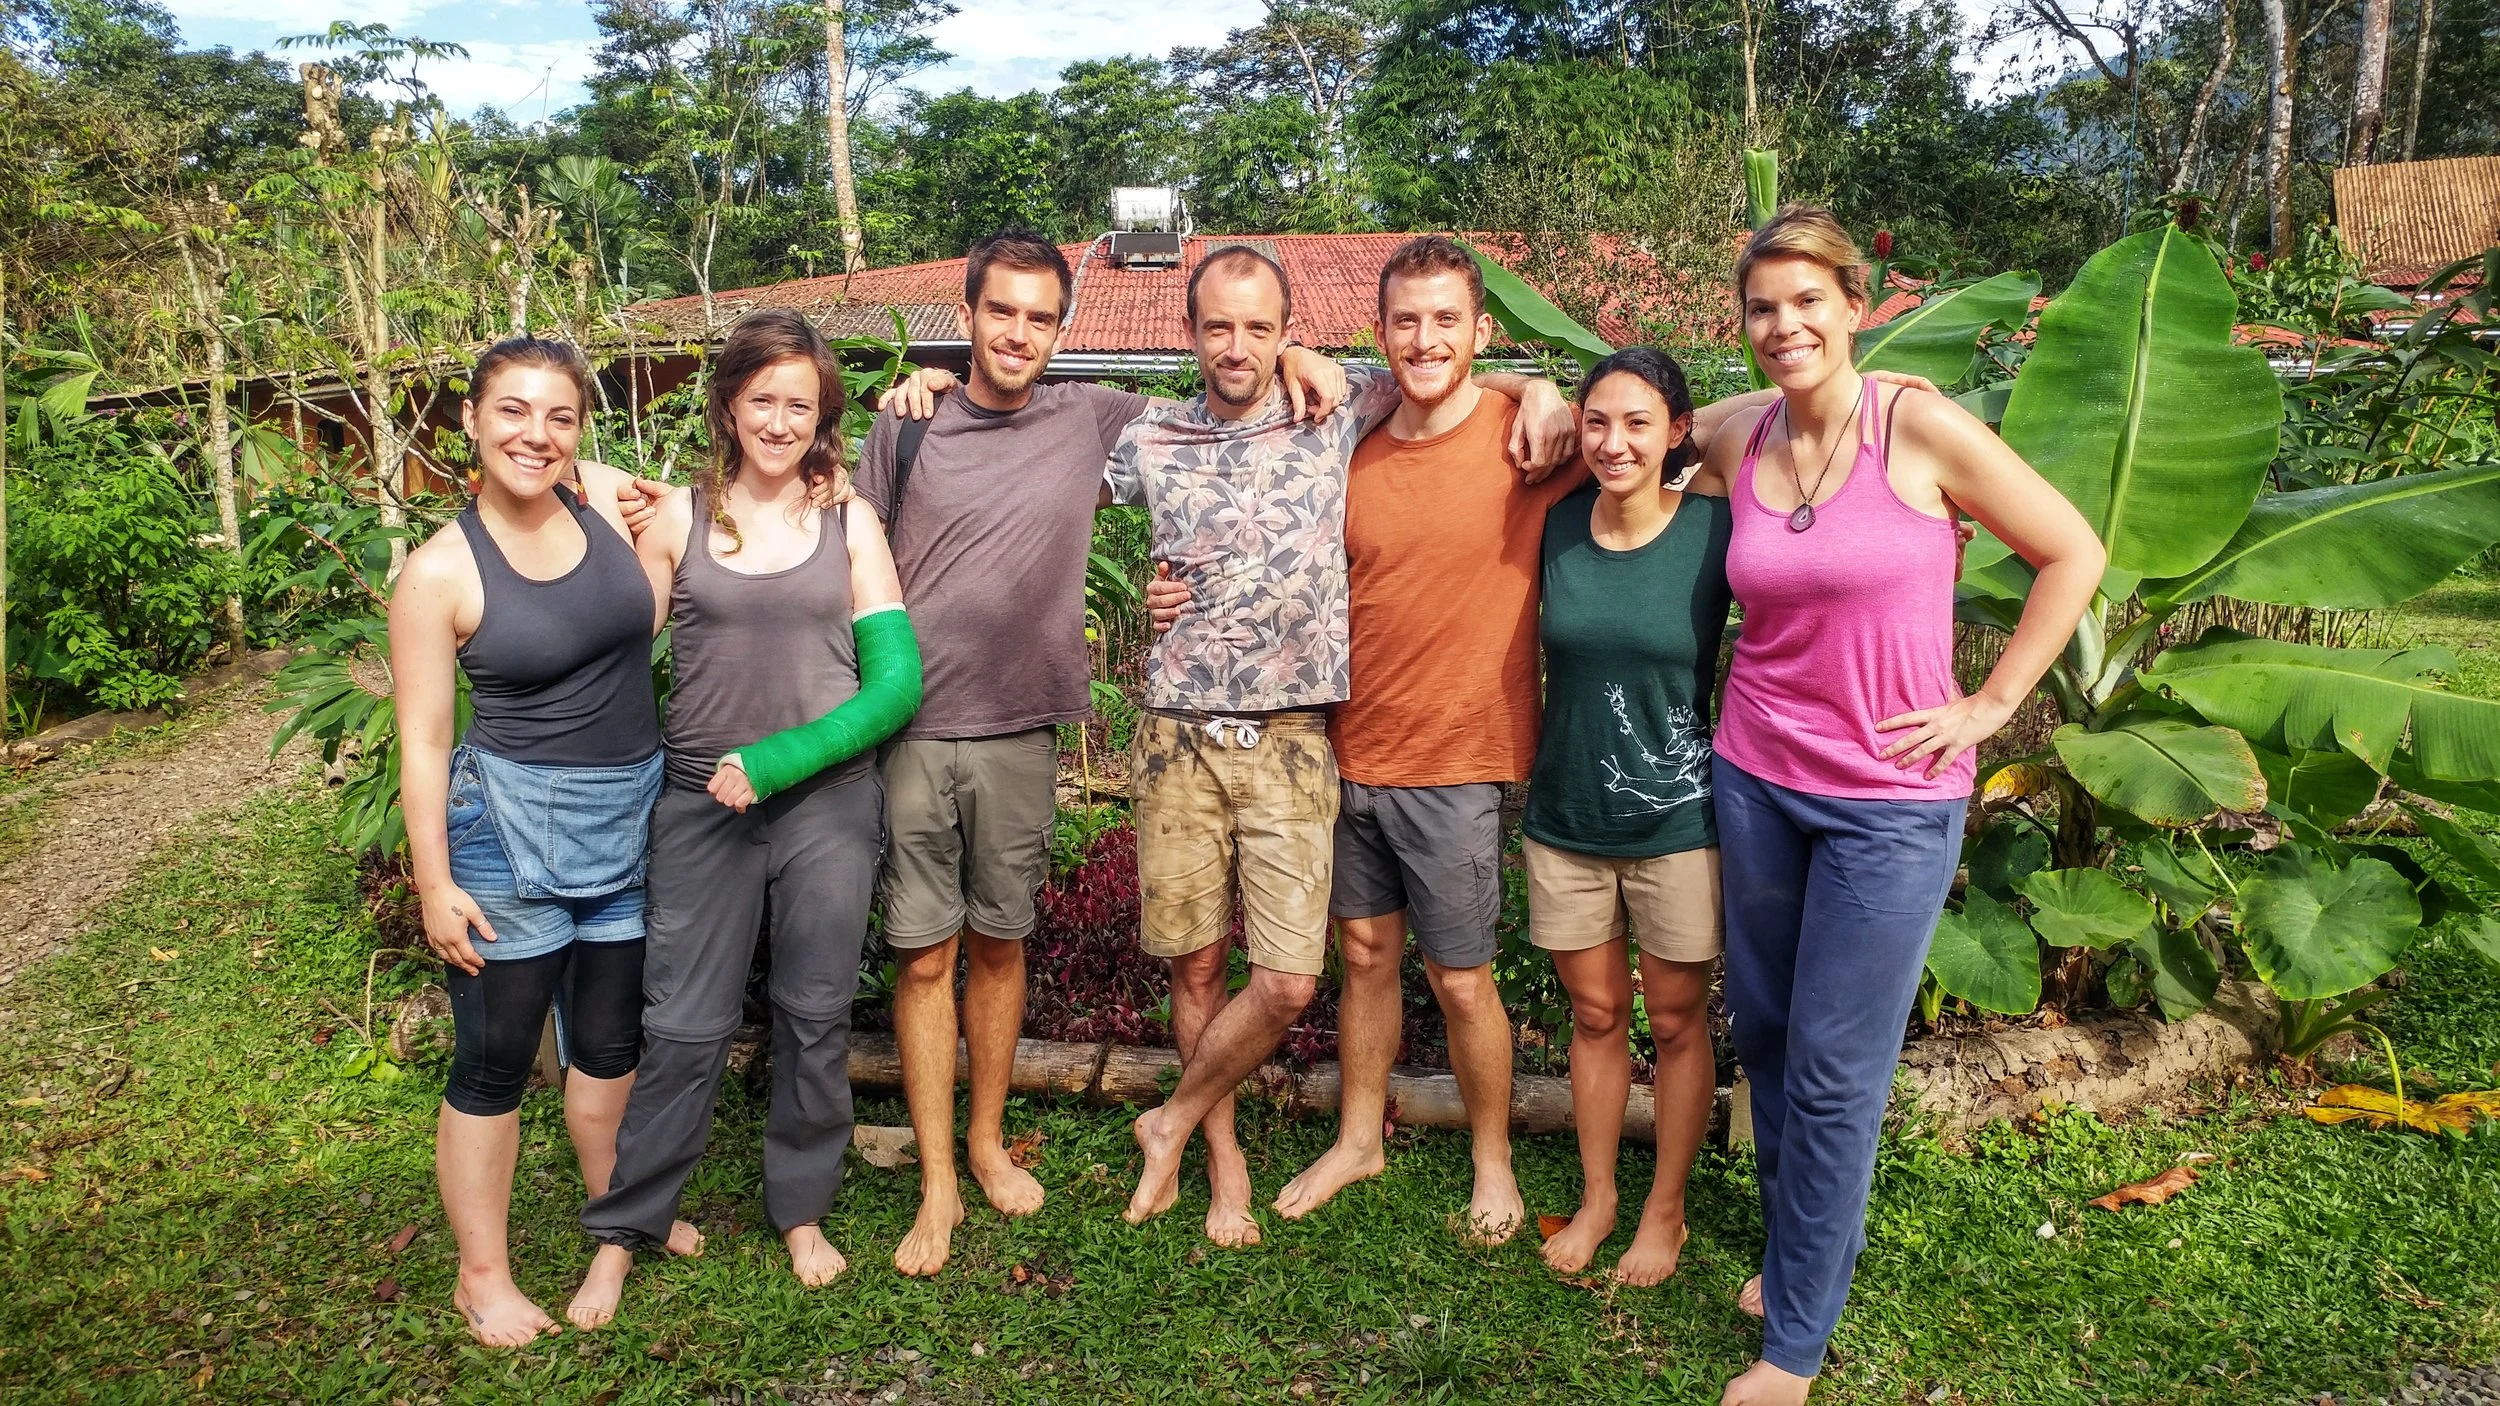
The 2018 apprentice team
After the farm, I needed to find a job. It was the dead of winter and going to a farm was not an option. So I looked for casual work in my old career in international development. I ended up getting a 3 month contract in South Africa, so I left the cold. A part of me felt really guilty. I was ‘selling out’ on my farm life just to go back to my old career. Some of my other apprentice group were able to continue working on a farm – they could do it and they were happy for the most part. What was I doing?? So when I was offered a longer contract that also came with a feeling of major guilt. I needed to look at this opportunity differently. What I came to realize as I now sit in my new home in the mountains of Eswatini (Swaziland).. something in me had shifted and this cannot be defined by what I do on my daily, but rather how I do it – whether it be making poop soup or working with vulnerable communities – I have changed. I see and approach my life is differently. It is more whole hearted and with a sense of curiosity I did not have before.
On a practical note, there are permaculture groups EVERYWHERE in the world! So I am building linkages with some of these groups so that I can still continue to learn and connect in this way. I will have my own land one day, but until then I will continue to practice what I have learned when I can, teach what I know when I can.. and be forever grateful for how my experience at the ranch has shifted something in me.
Marissa

Dairy Dairies: How to Make Cream Cheese with Dairy Kefir
Dairy Kefir is so interesting to me because it embodies stacking functions - like alchemy, it's possible for 1+1 to equal 4. Milk, grains (scoby) and a days time and voila, you have a delicious base product better than the milk you started with. It's now lightly carbonated, stable in the fridge, resistant to microbial incursion, lower in lactose, tangy, creamy, probiotic and great for your gut.
By Ryan Roberts
2019 Apprentice
That's right folks, we're making cheese with the champagne of yogurts.
Dairy Kefir is so interesting to me because it embodies stacking functions - like alchemy, it's possible for 1+1 to equal 4. Milk, grains (scoby) and a days time and voila, you have a delicious base product better than the milk you started with. It's now lightly carbonated, stable in the fridge, resistant to microbial incursion, lower in lactose, tangy, creamy, probiotic and great for your gut.
Furthermore, that stable base product, can be used to create a wide variety of different specialty products that carry with it those unique value-added characteristics that we impart with our time, energy and expertise. During our last diary entry, we discovered Dairy Kefir Creme Fraiche, which you can read about here . This time we'll be making luscious, spreadable and customizable cream cheese out of dairy kefir.
In our first diary entry we discussed dairy kefir's characteristics and how it's made. You may recall that the dairy kefir scoby acidifies the milk as a defensive (or offensive) measure against other microbial life, which have difficulty surviving with such a low pH.
I've discovered for myself, though I don't claim to be first, that we can utilize that acidity to accomplish what is usually done with rennet, vinegar or citric acid: separating the curds (fats) from the whey (protein). Though the exact function of this process is unknown to me, the result appears to be the same. Left for a few days at room temperature, reveals to me that the dairy kefir will separate on its own. But there's a trick!
While leaving the scoby in the milk will speed the process of acidification, we want to be able to easily separate the scoby from the curds and from the whey. We do this with a sieve that catches only the grains, allowing the kefir to flow thru to your ready container. When the kefir is left to ferment longer and it separates, it makes it difficult to capture the curds and grains separately.
Instead, I remove the grains from the dairy kefir prior to separation. The dairy kefir will continue to acidify, though slower, but you'll be left without the headache of hunting thru the curds for your grains.
So starting with the previous step, here are the steps. Now that you have your dairy kefir and scoby separate we can begin:
1. Make your dairy kefir. Follow the instructions laid out in my first blog entry here (link 1st blog).
2. Remove scoby and place in a container with fresh milk.
3. Secure cheese cloth around the rim of a tall container. Make sure there is room for whey to drip to the bottom and accumulate.
4. Pour dairy kefir into fine cheese cloth hanging over the container.

5. Wait 24 hours, allowing time for the remaining whey to drain from the curds. I repeat this process a few times till it quits draining from gravity. The remaining cream is our cream cheese. The live-culture whey can be used in a variety of ways, including starting new ferments by inoculation, using as a probiotic protein supplement, and for cooking with in soups.

Dairy Kefir Cream Cheese

Whey - delicious for soup stock
6. Spread the cream cheese out on a pan with a rubber spatula. Sprinkle in salt and your choice of herbs or dried vegetables. Imagine sun-dried tomatoes, garlic, onions… yes please!

7. Now fold the cheese onto itself, repeatedly, which helps to mix the ingredients in evenly.

8. Place in a container and serve. Buen Provecho!

Building an Adobe Shower with Tadelakt Plaster
We recently completed our adobe shower and thought we would share with everybody how and in what order it was executed. The building blocks of the design were Adobes that we made with our 2018 apprentices and student groups that visited us through the year
By core team members Nic & Ali
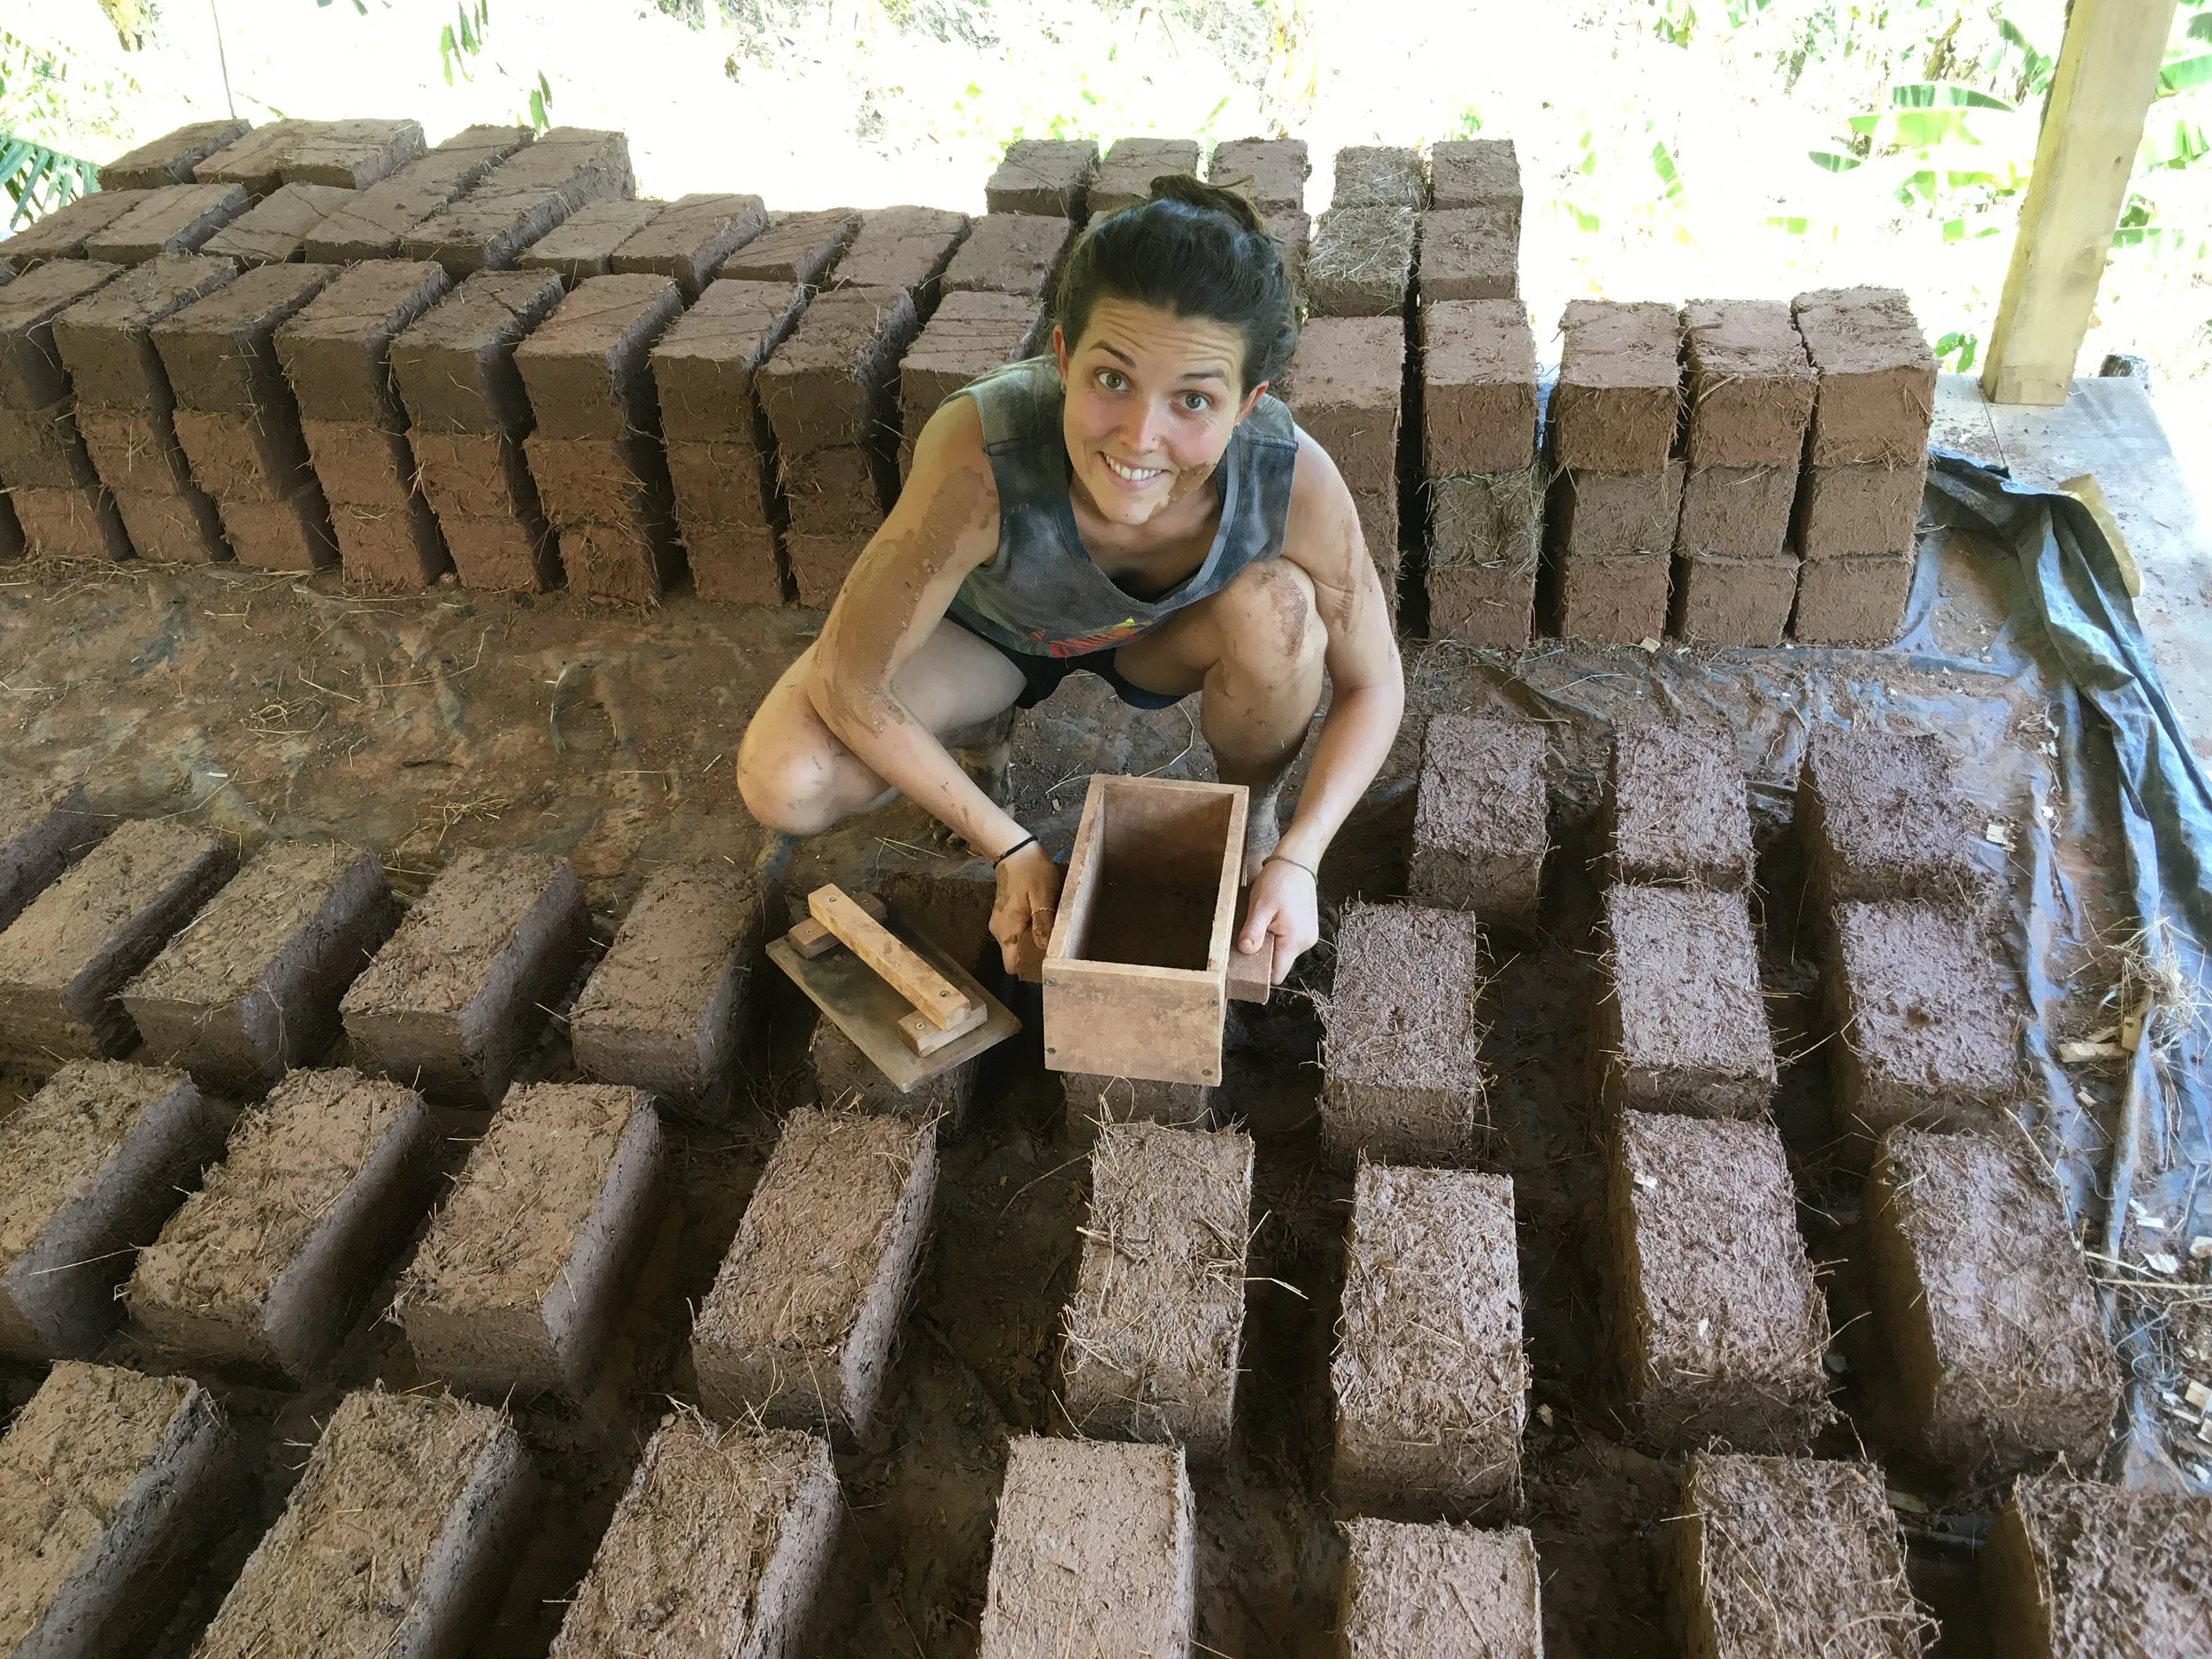
We recently completed another adobe shower and thought we would share with everybody how and in what order it was executed. The building blocks of the design were adobes that we made with our 2018 apprentices and student groups that visited us through the year. In total we used around 500 adobe bricks at 5” x 5” x 10”.

What is an Adobe brick?
An adobe brick is mixture of sand, straw and clay, formed in a mold and sun dried.
How to make an Adobe brick
Start by making tests with your soil, if you are not sure what that means, read this article. Where we live we have an abundance of red clay soil. Using our soil, which is almost pure clay, we can use 1 part soil to 3 parts sand as a good starting point, depending on variations in the soil we may need to mix at 1:4 too. We add about ½ a part of long straw too, this gives the adobes some additional tensile strength. We then put all our ingredients on a tarp and begin to mix it together. Once the adobe mix is ready (one uniform color of mixed sand and clay) the mixture is put into an adobe form. When packing the forms make sure to fill all the corners! The form is then removed and the brick is left in the sun to dry until it dry enough to be moved and stacked. In our climate during the dry season this takes 3 to 5 days.
Steps to making a shower
1. Planning
As with all successful projects the key is good planning. We like to use a program called SketchUp to mock up all of our designs, lay out foundations, the frame and even plumbing. Every detail must be planned in advance this makes sure that the correct provisions can be designed in and made in advance.

2. Foundations
For our shower we used concrete blocks cut in half so that they could form the curves that we wanted. A shower is going to be a wet area so it is important that you think about this during the planning stage, where will the water drain to? Are my pipes embedded in my foundation? How is my roof going to be attached. In our design we decided to have a separate Timber Frame to support the roof structure.

Step 3 - Adobe
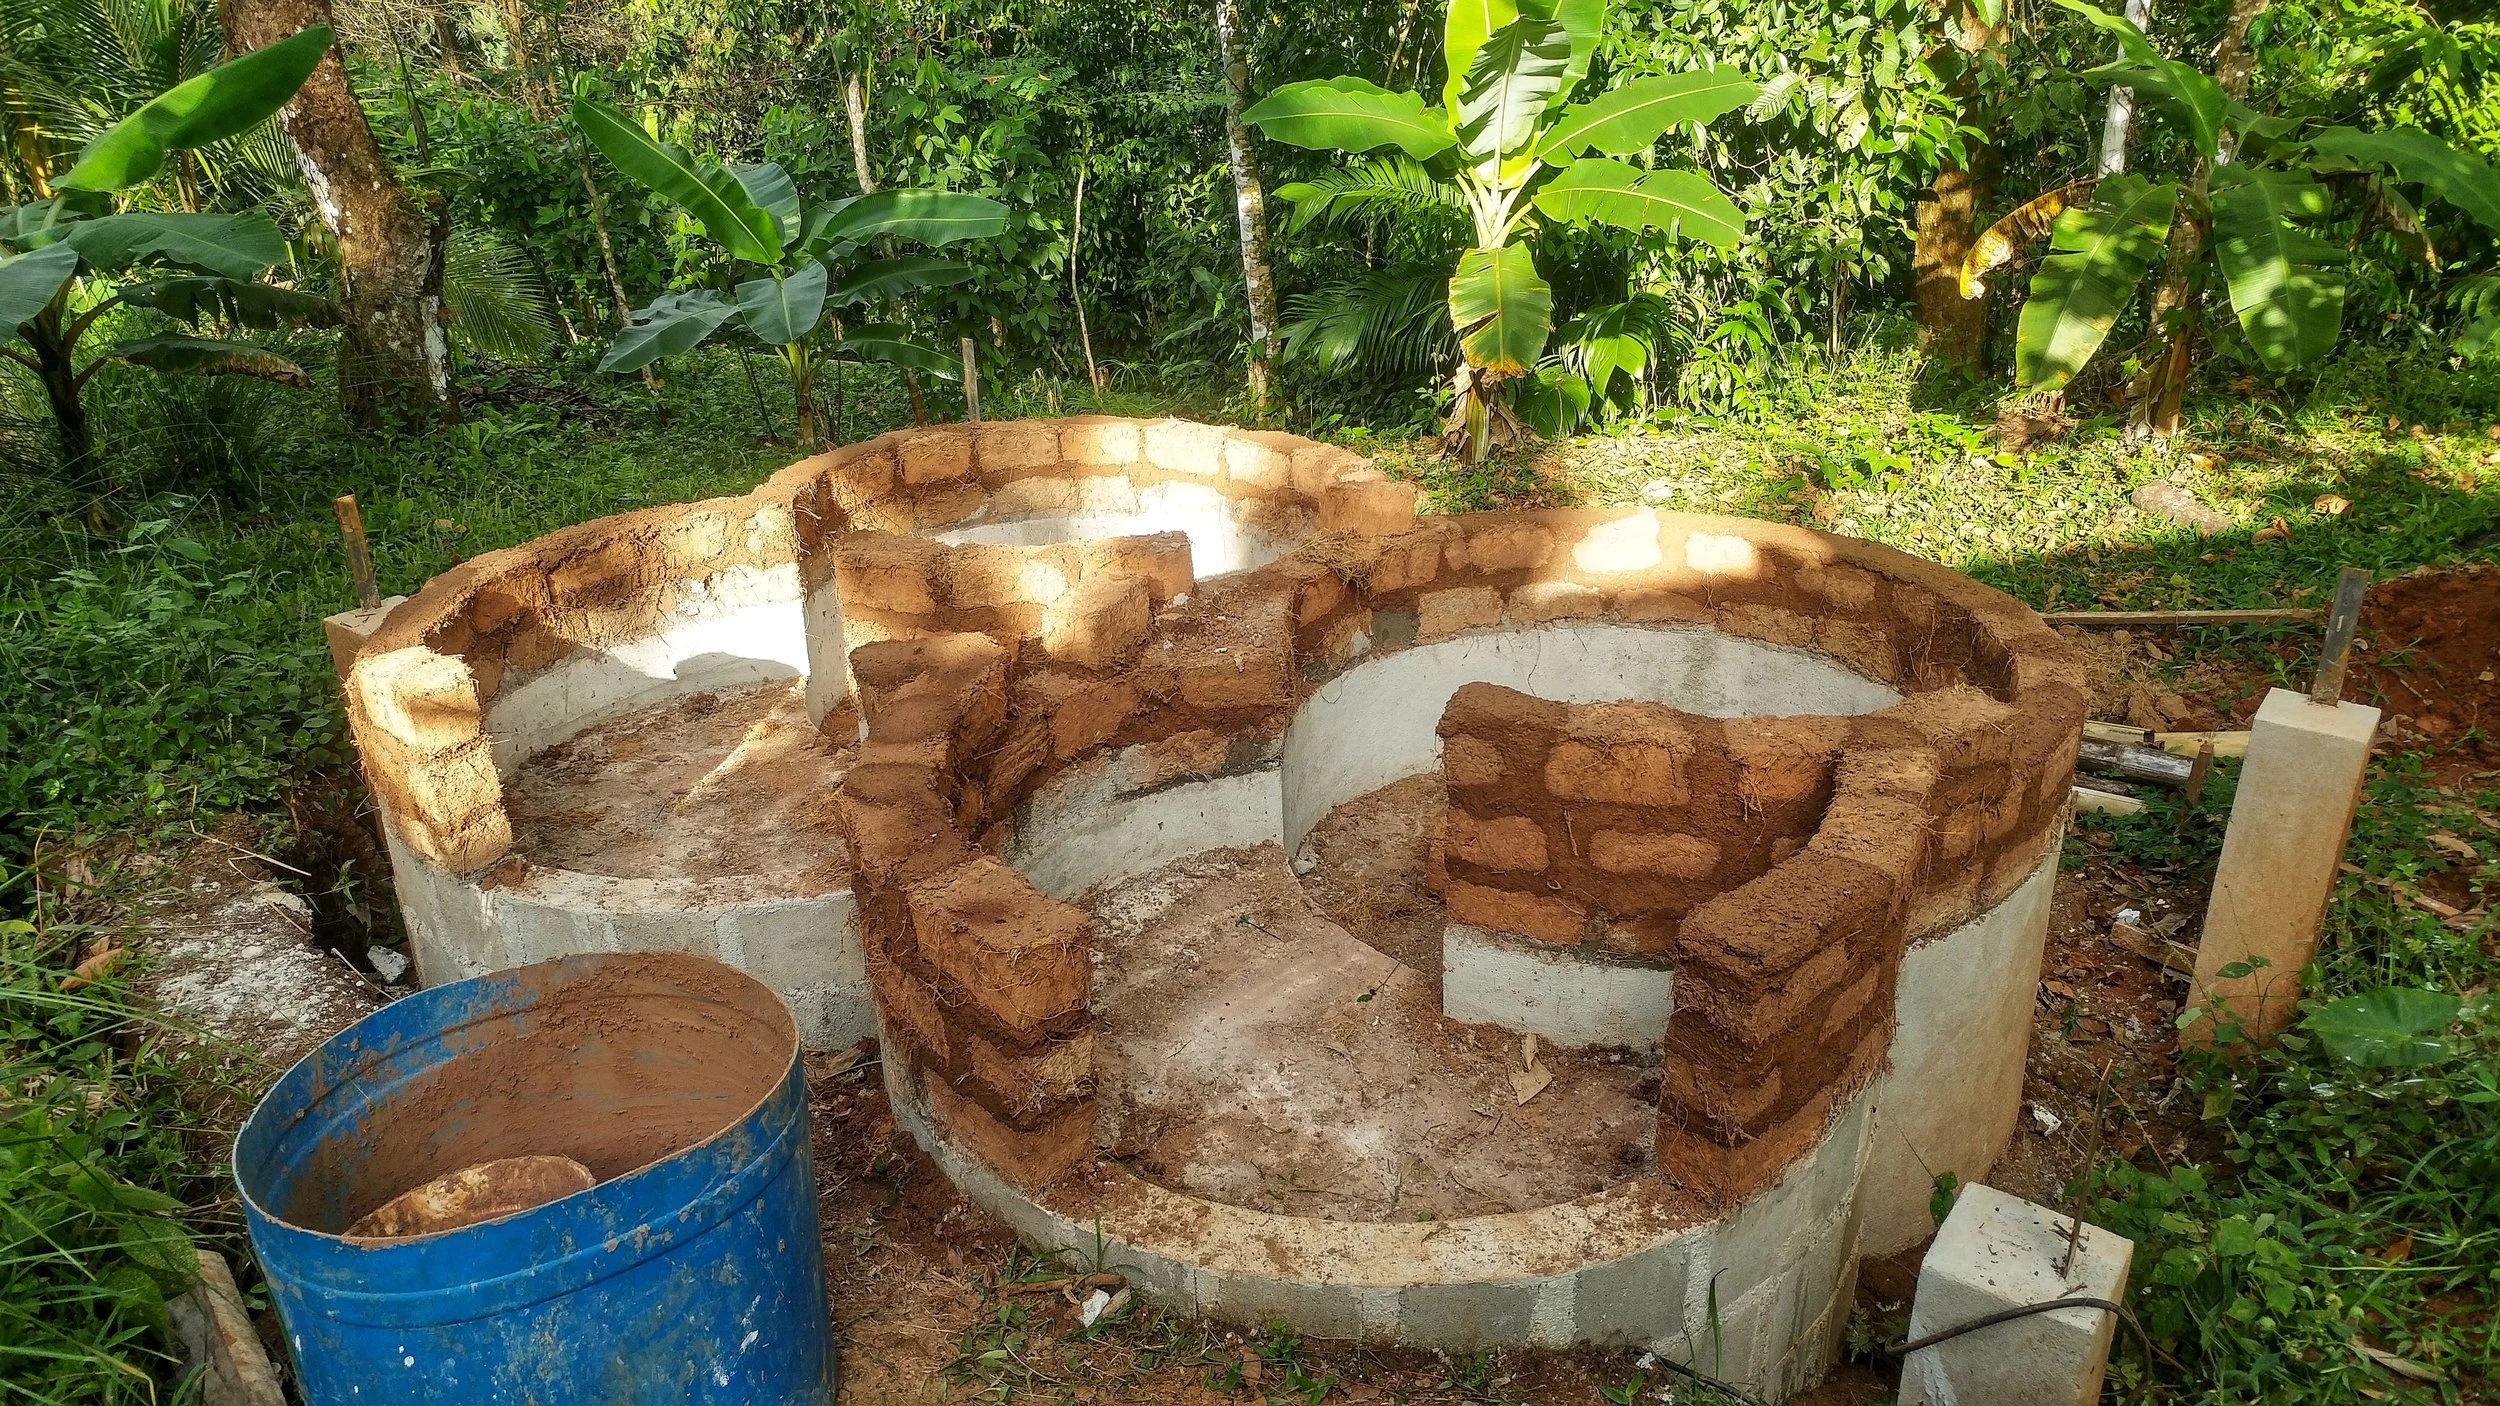
The first course of adobes were attached to the foundation using a cement based mortar this helped them bond strongly to the concrete foundation.
Step 4 - Bond Beam
From the second course upwards we used a sandy clay mortar for the adobes. Every 4 courses of adobes we made a cob bond beam for extra strength.

Step 5 - Gringo Blocks
Wooden hollow blocks (known as gringo blocks) were put at the end of each wall to attach in the wooden frame for the doors and a hollow plumbing box was installed where all the plumbing would be inserted for the shower handle. In Costa Rica the plumbing parts easily purchased in the local hardware store are terrible and always leak so we made most of the plumbing accessible from the outside. It is generally a good idea when making your initial design to plan for replacing parts in the future.
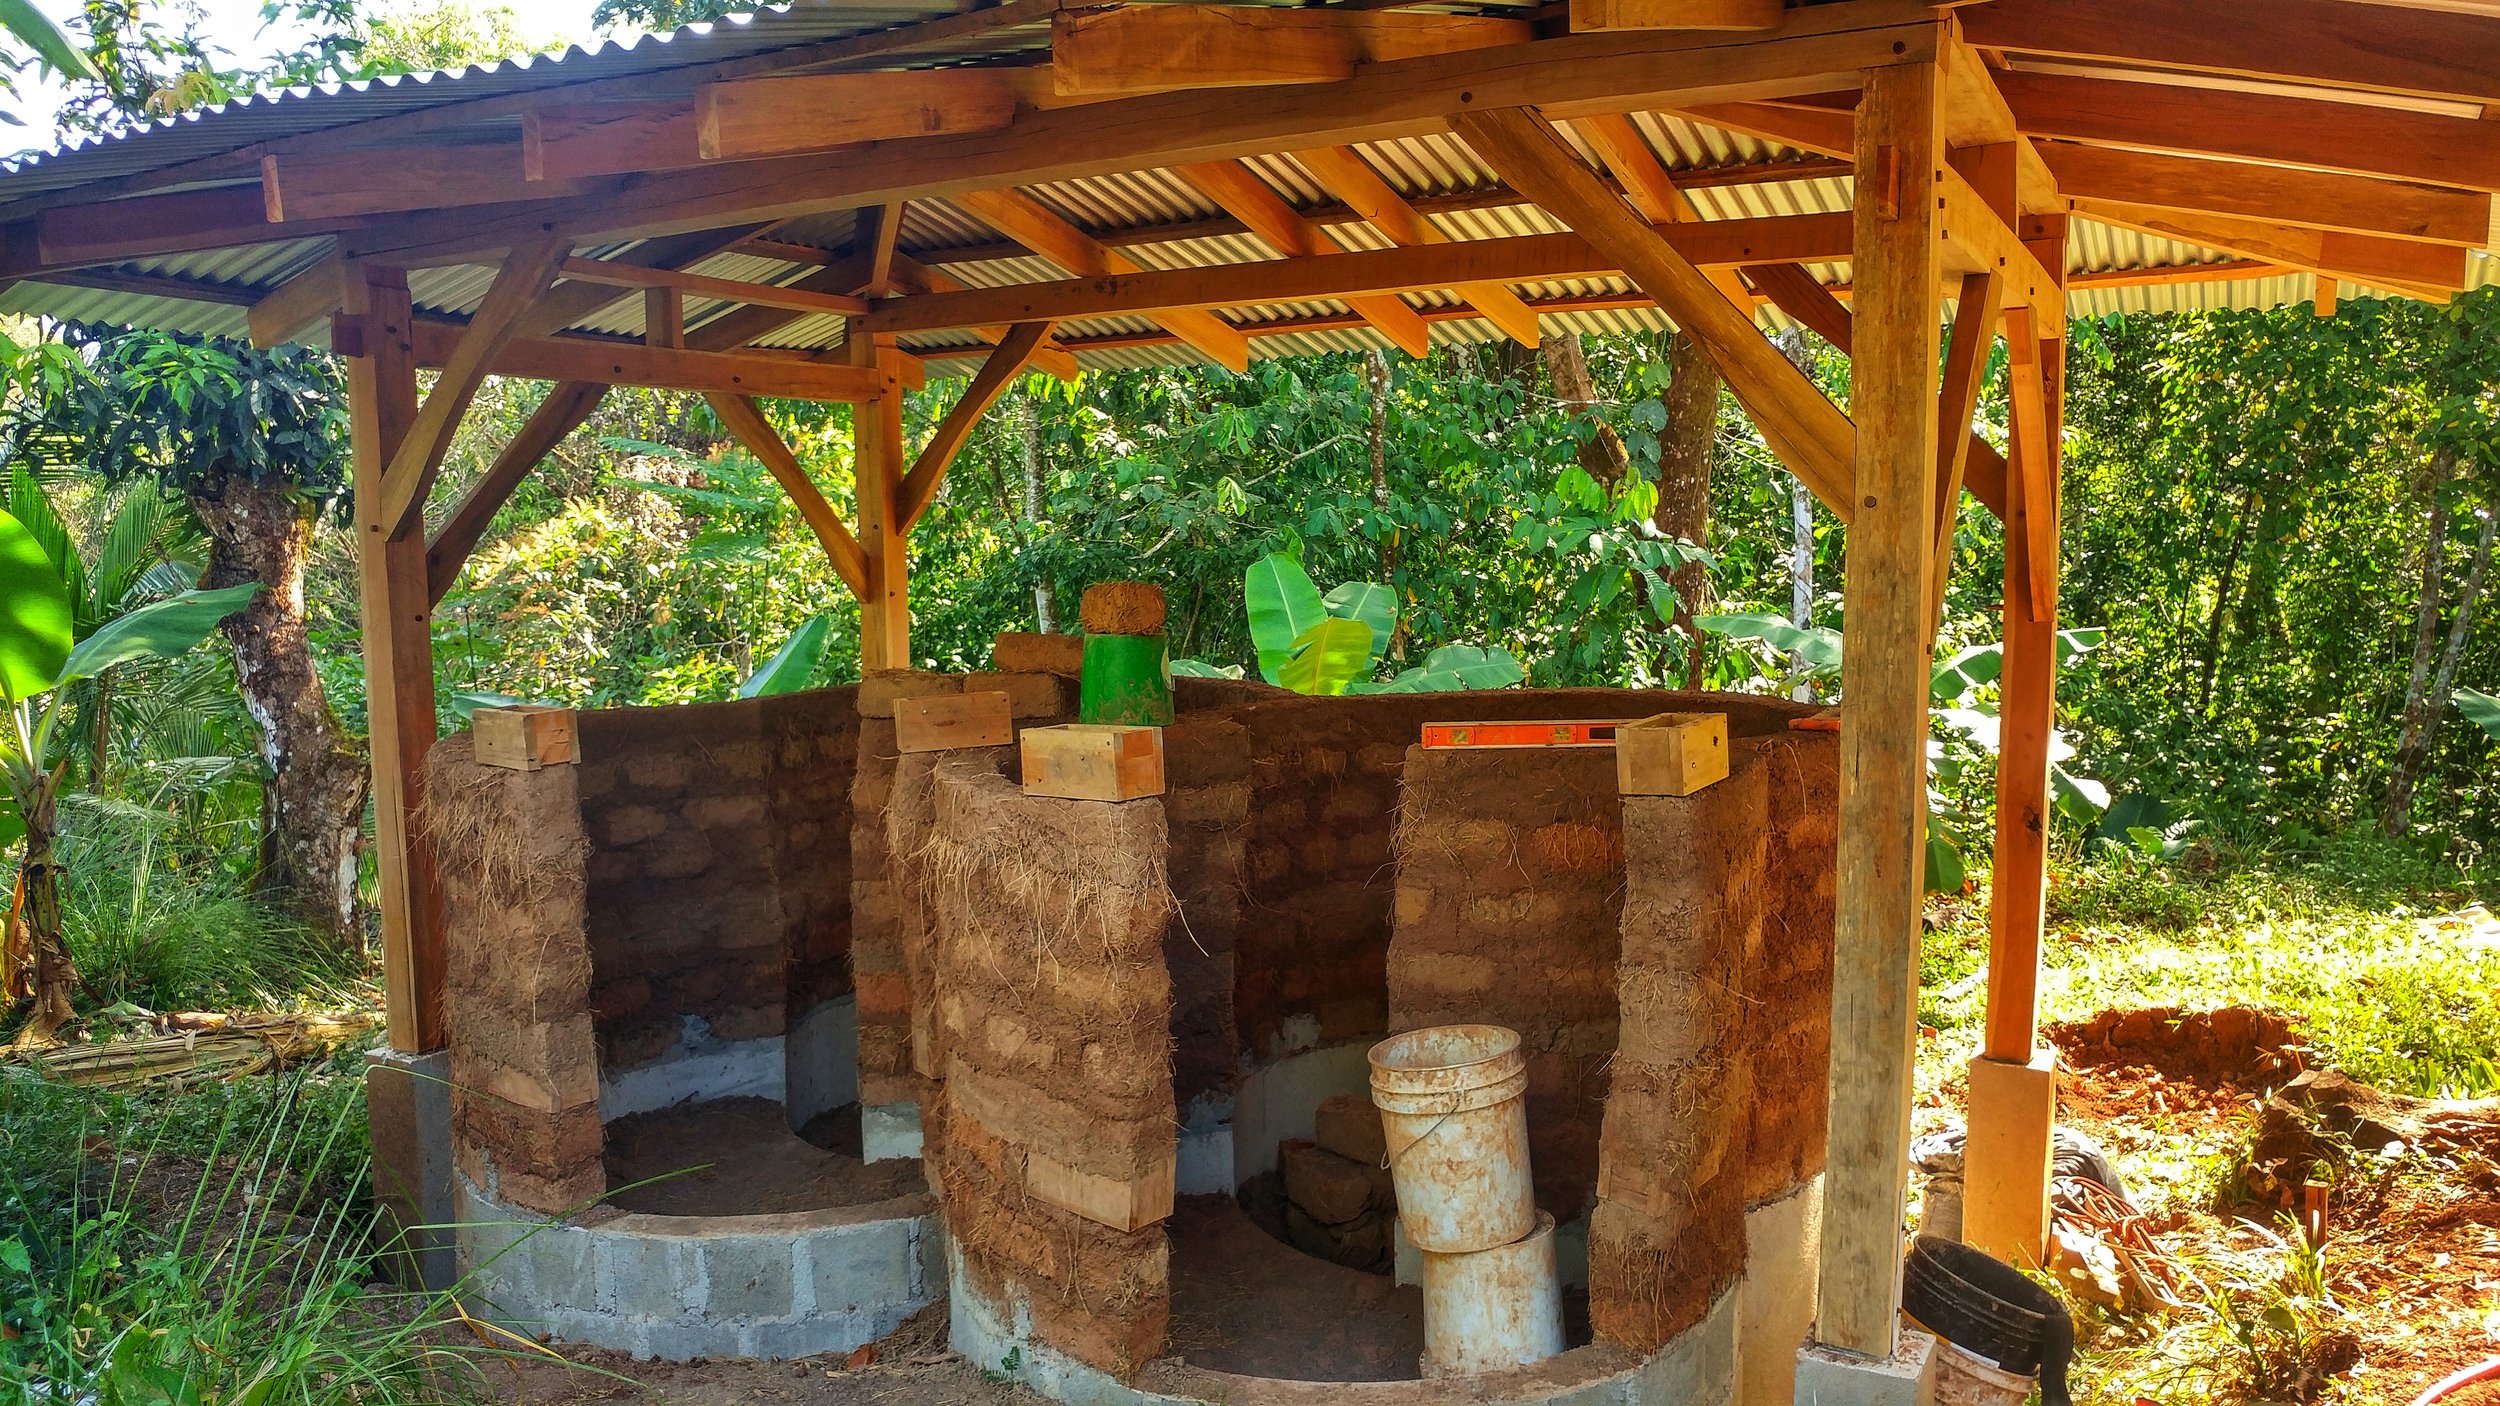
Step 6 - Frames
The door frames were installed at this point and they were screwed into the Gringo blocks. The door frames were also tied into the adobe structure using some mesh, we used what we could locally find which is what they sell for chicken fencing. You could also use a variety of natural alternatives, attaching them to the wood and plastering them in to the wall to give them extra stability.

Step 7 - Leveling
A leveling coat was then applied to sculpt and level the walls, this was tied into the door frame to give extra support too.
Step 8 - Tiling
The vertical surfaces of the concrete block were tiled to provide a plaster stop on the bottom edge were the plaster would meet the tile.
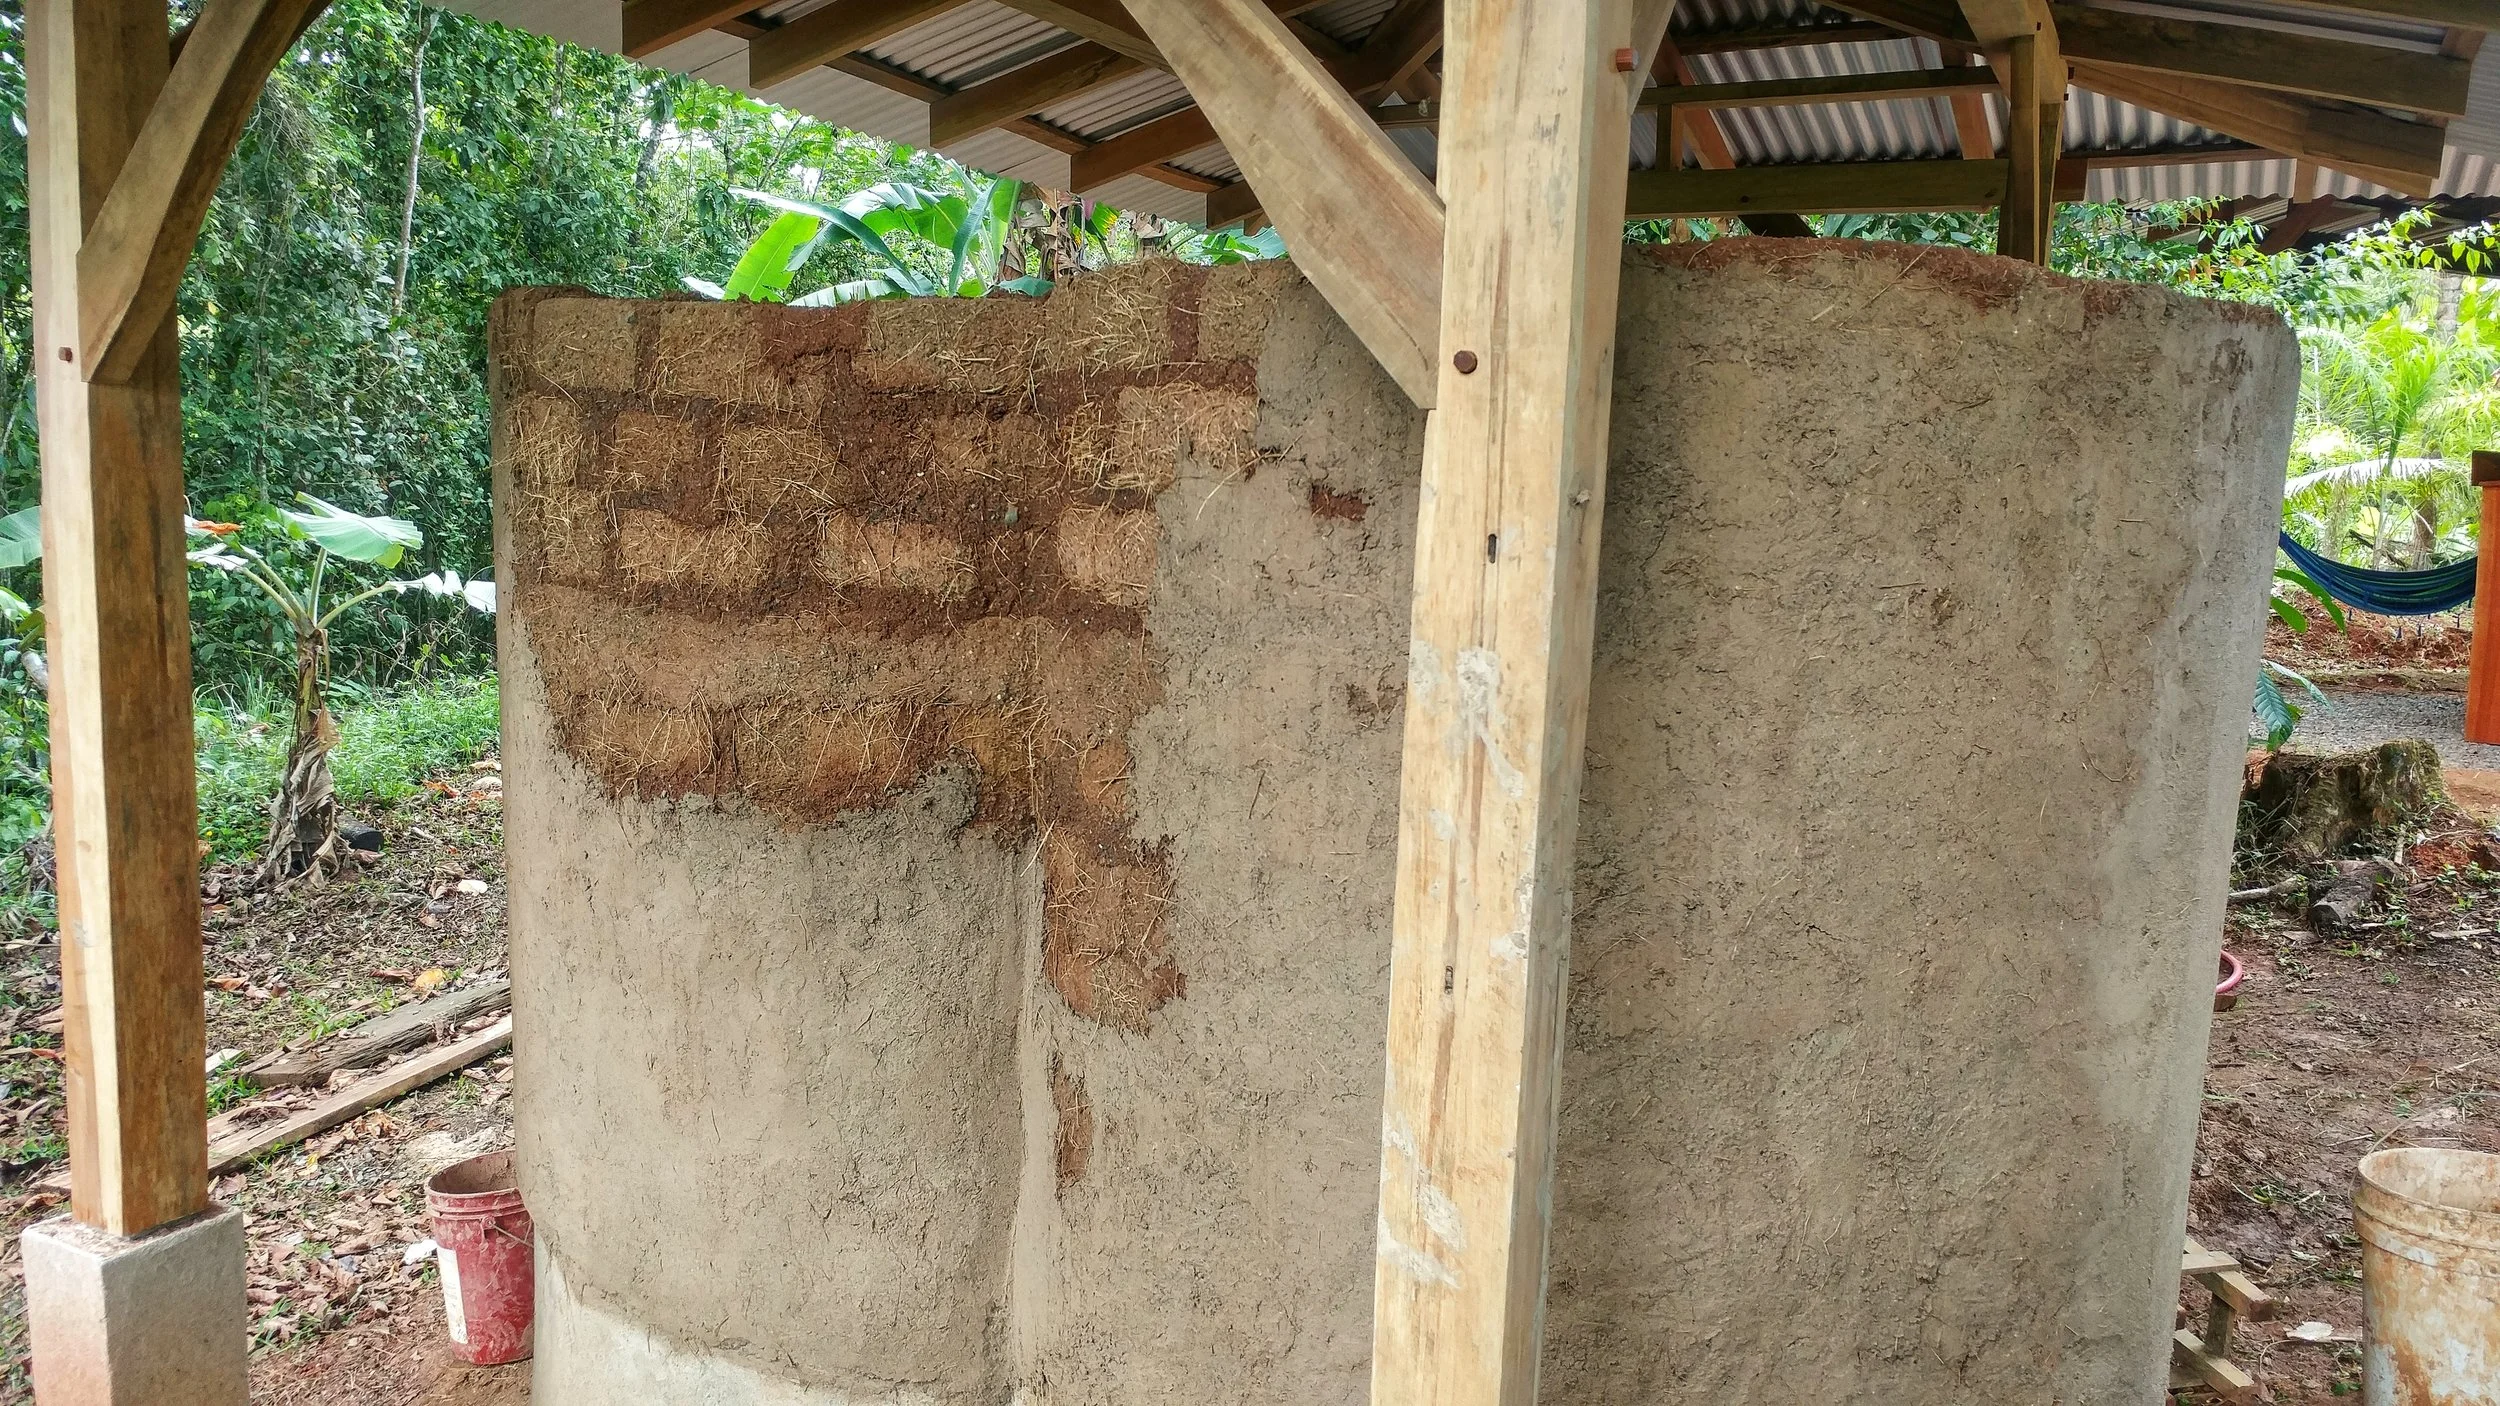
Step 9 - Plastering
A lime base coat was then applied over the earthen leveling coat. Whilst this basecoat was still damp (before it started wicking moisture again) we applied the tadelakt mix (1 part fine lime sand and 1 part lime). We did the Tadelakt like this as we had such a large continuous surface area to plaster and needed the time to work it all.

Step 10 - Tadelakt
Once the plaster had dried enough we stoned and soaped the wall using our homemade soap. The Stearic Acid in soap reacts with the Calcium Hydroxide (hydrated lime) to make Calcium Stearate which is highly hydrophobic and one of the reason Tadelakt is considered water resistant. Read more about Tadelakt here.
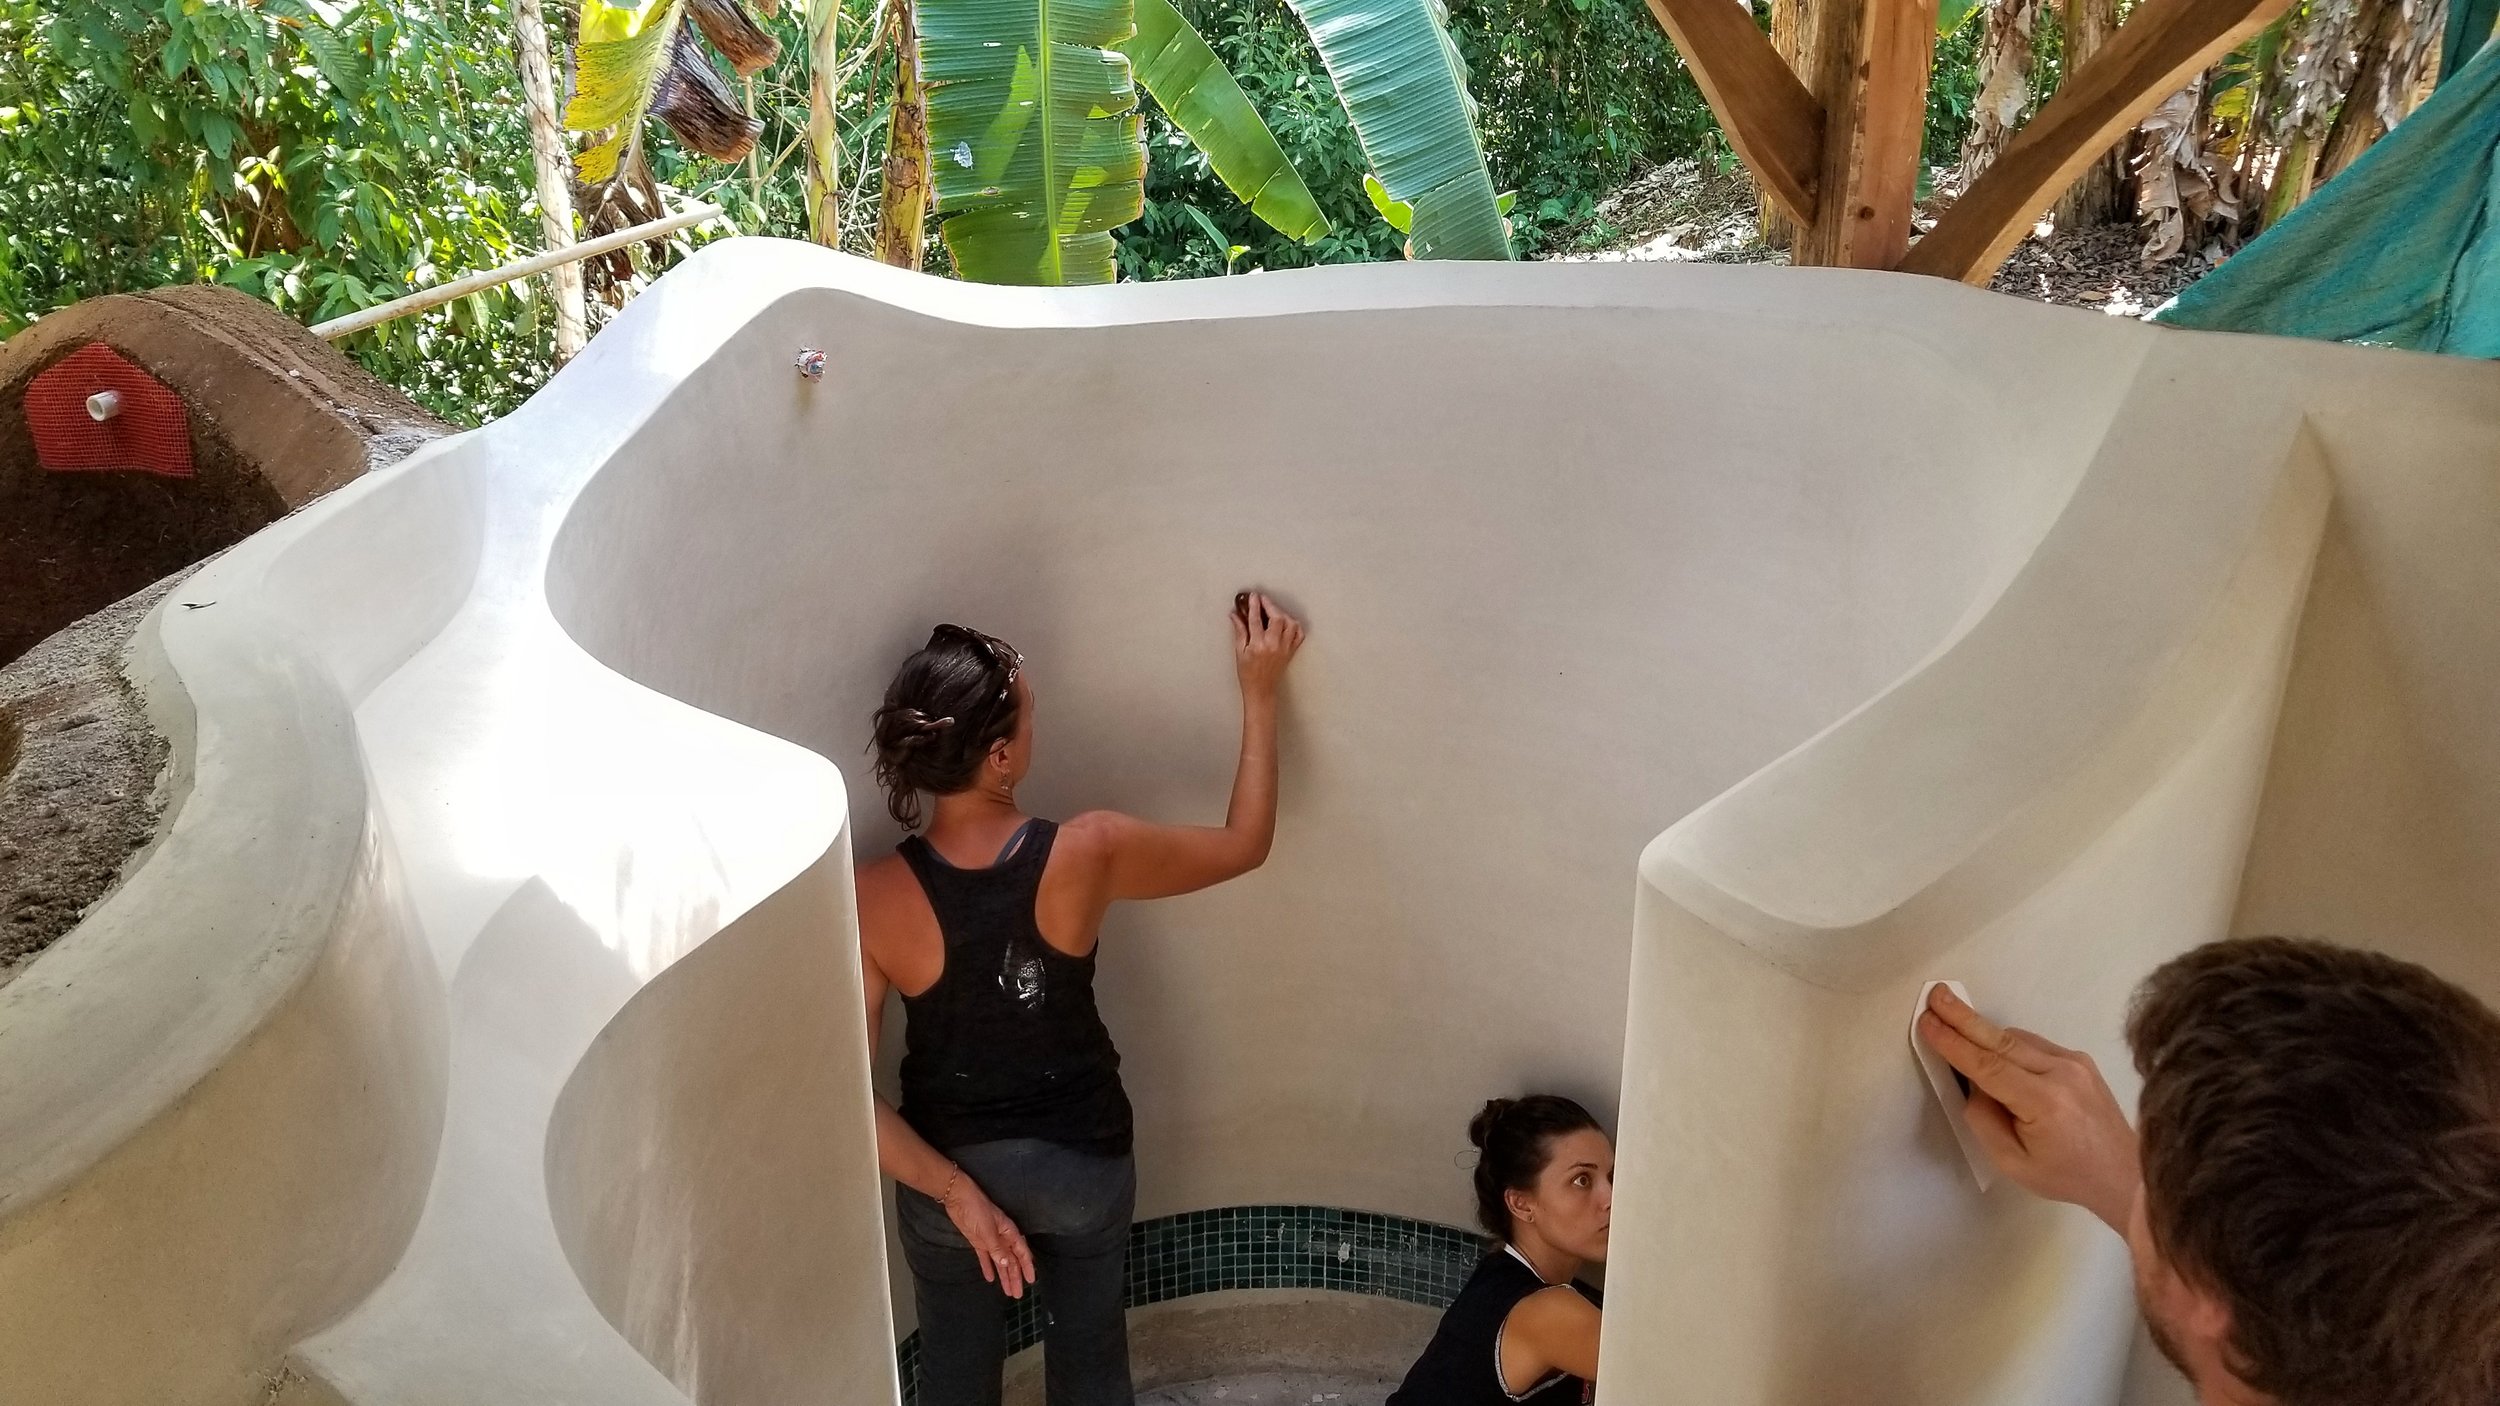
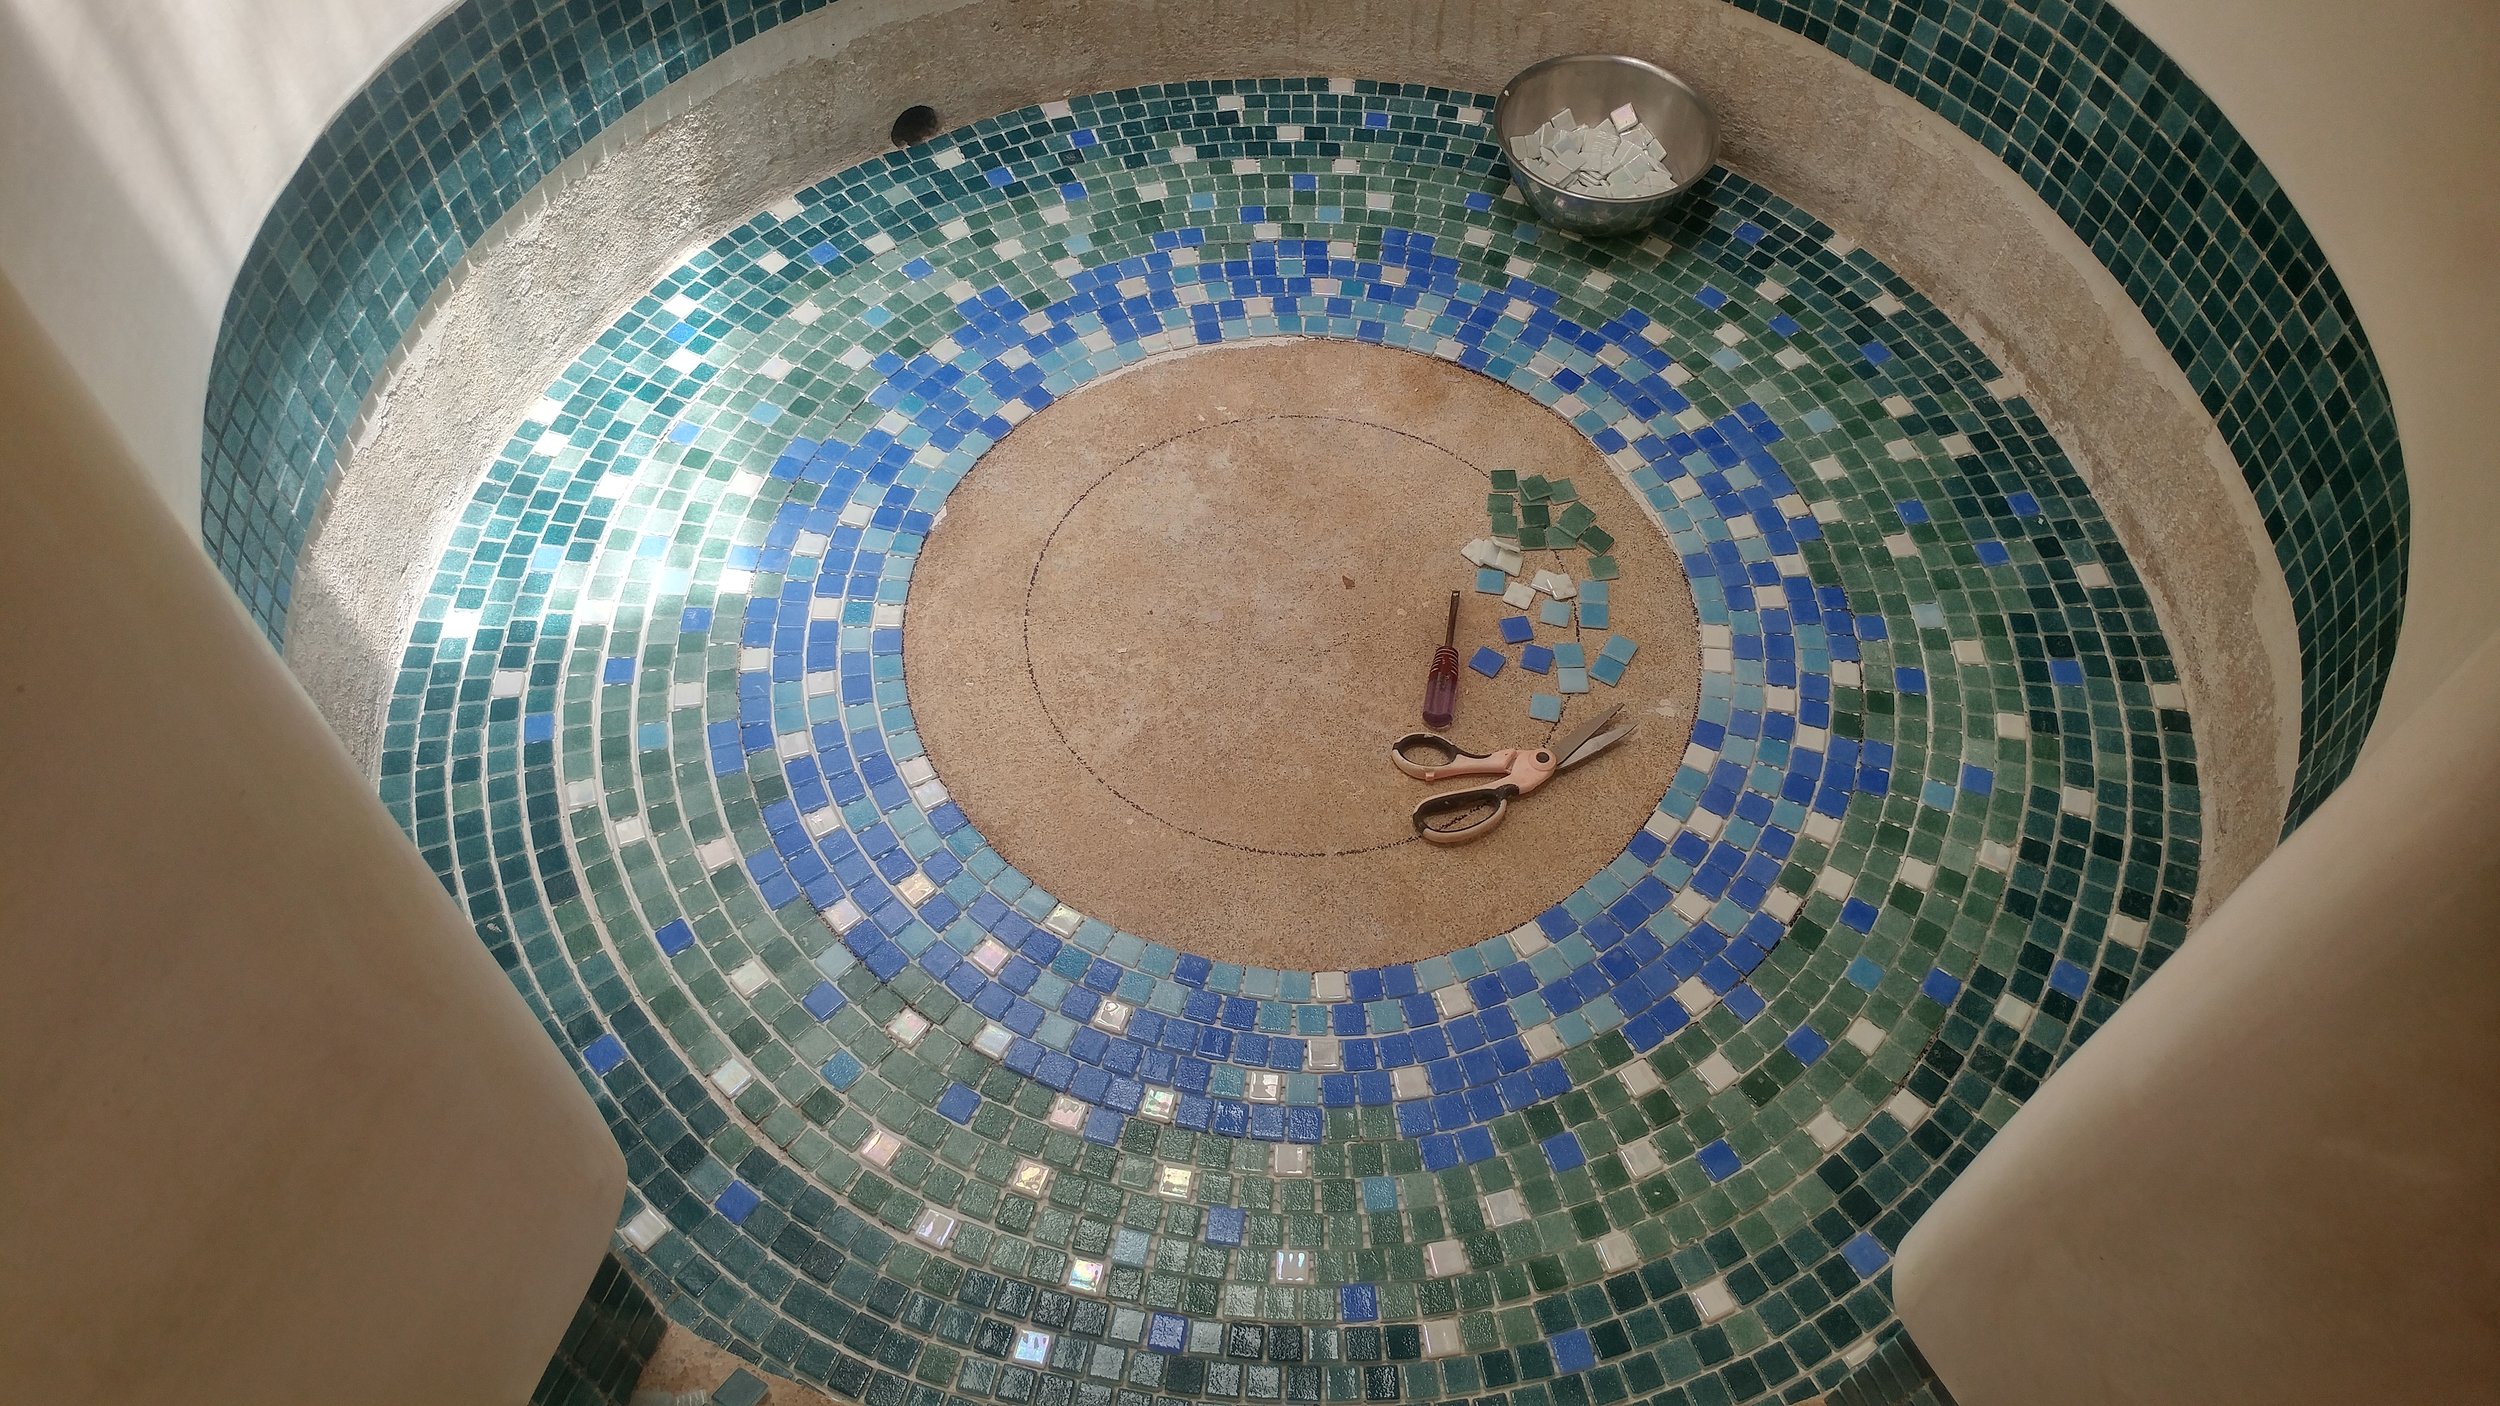
Step 11 - Mosaic
The remaining horizontal surfaces were tiled using different colored swimming pool tiles.


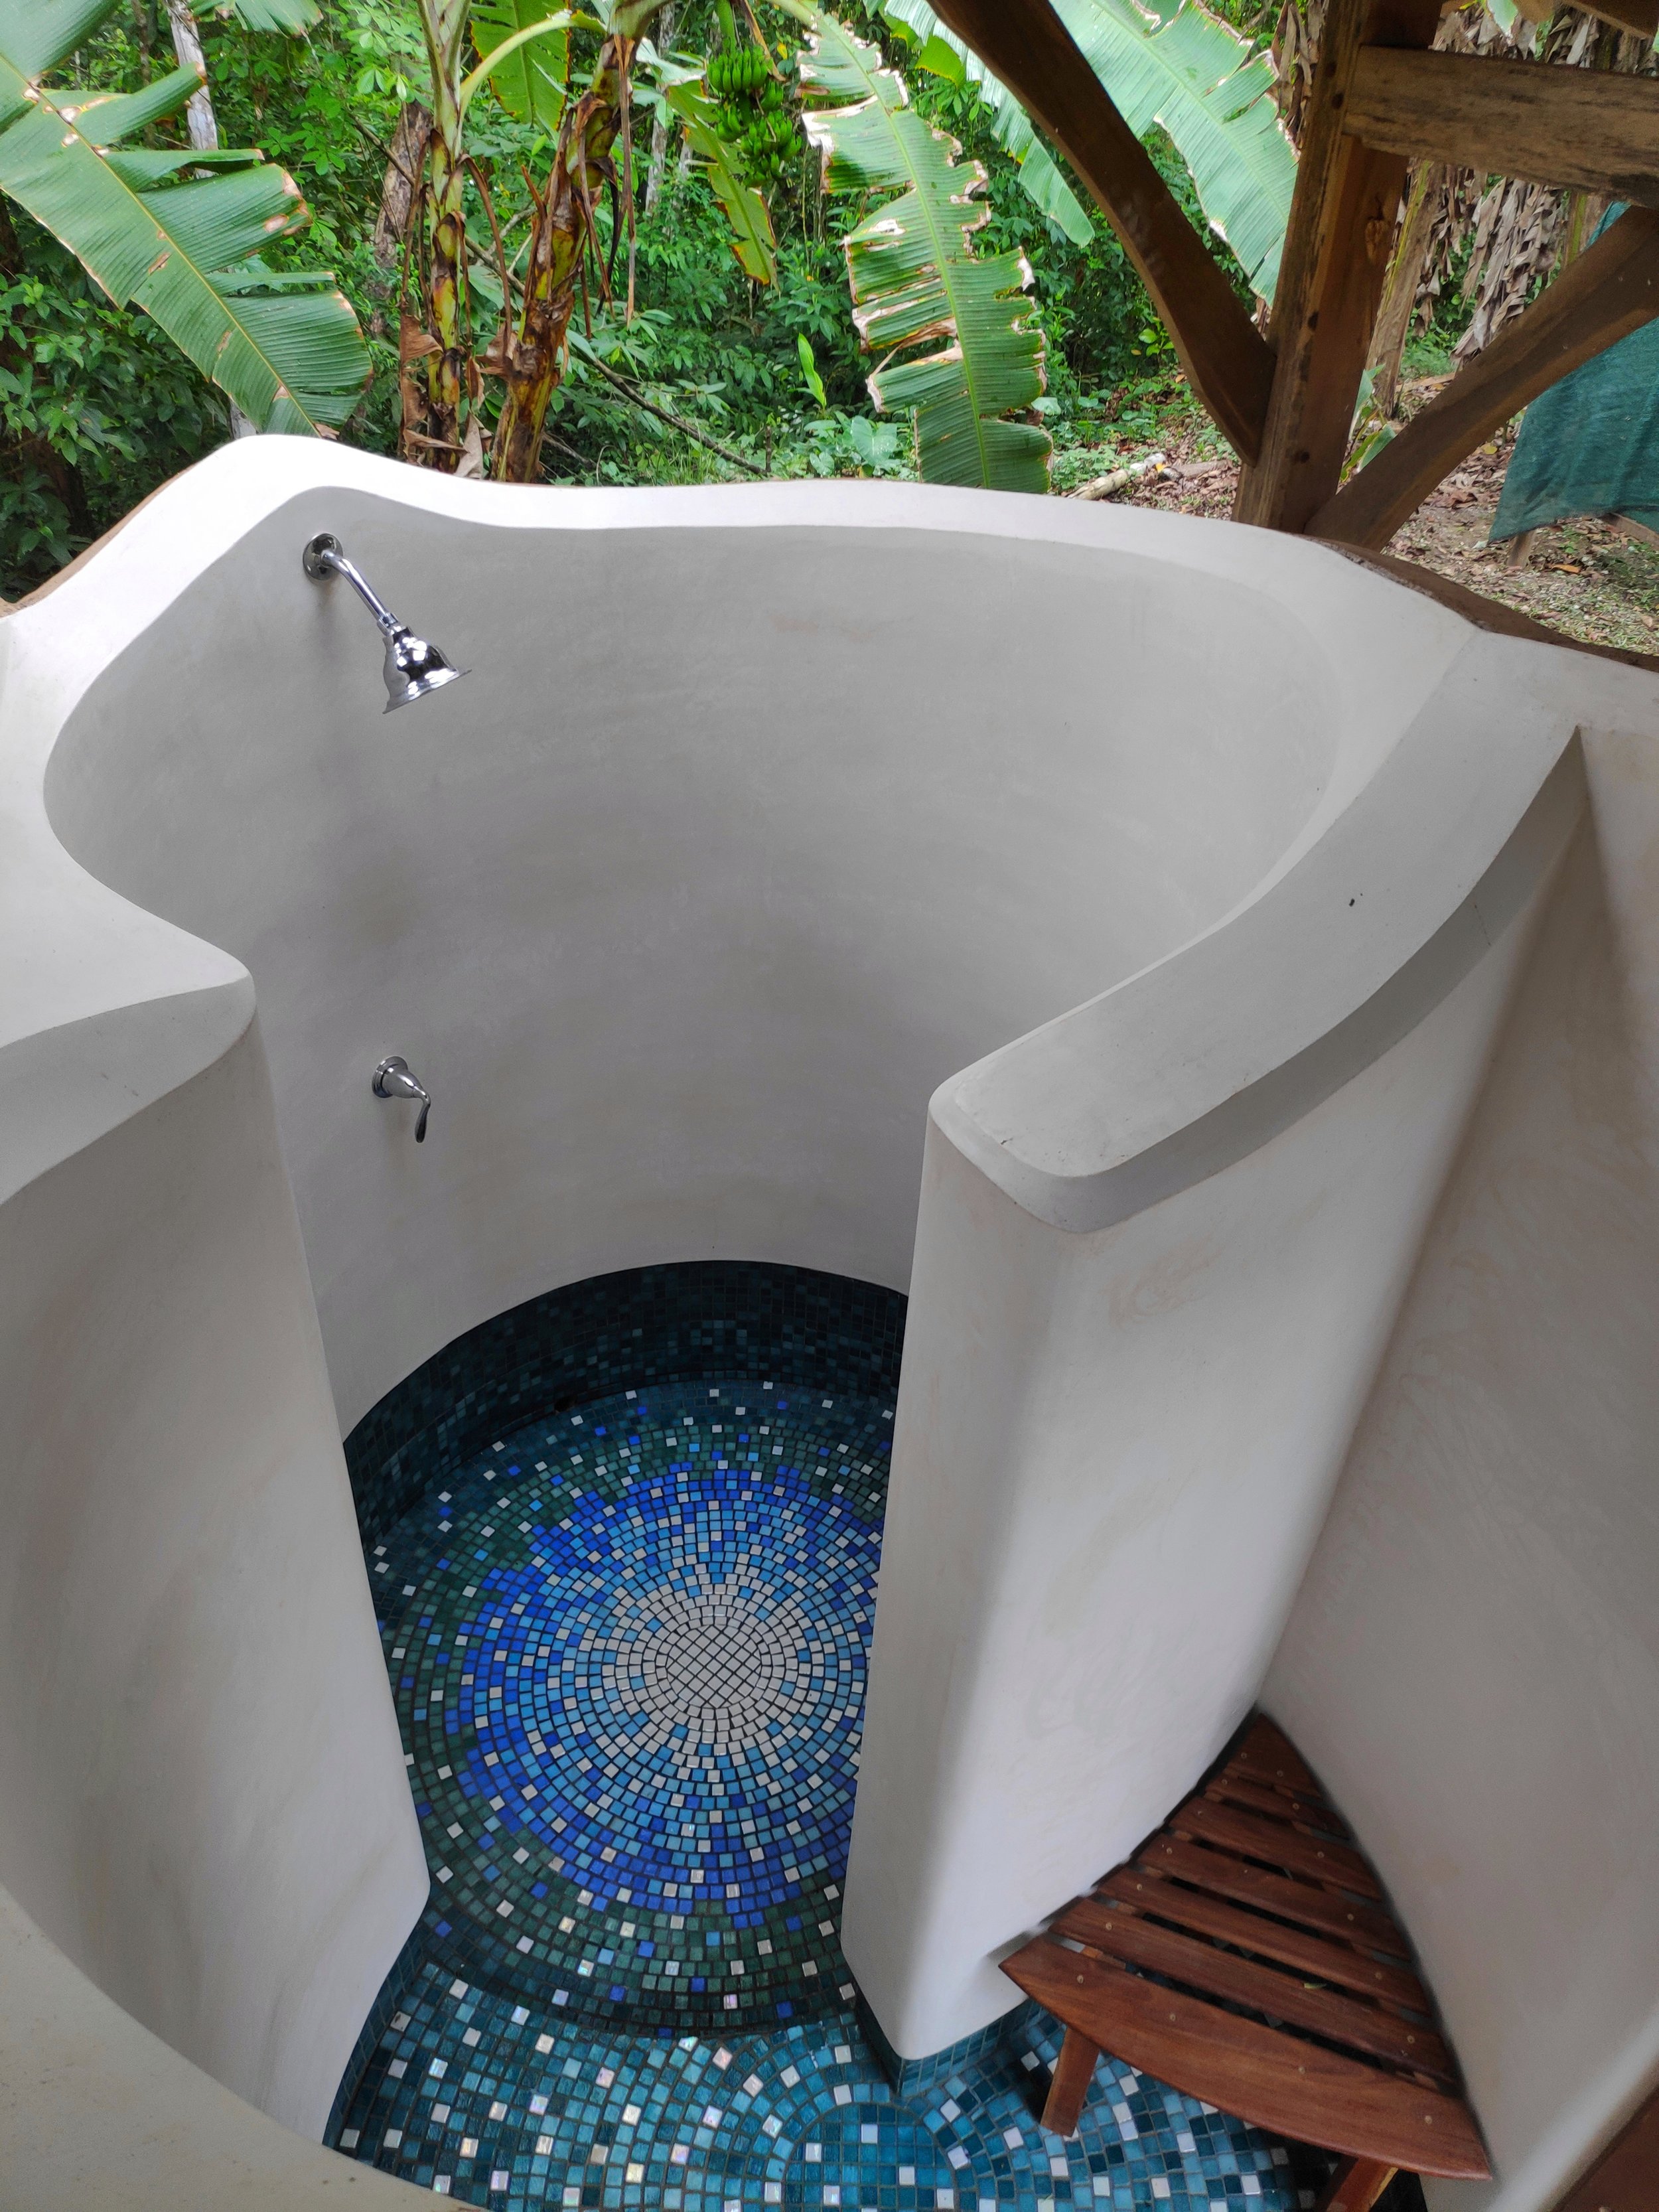
Step 12- Exterior Plaster
We used some of our left over mixes to do a base coat and finish in one pass, adding some pigments to alter the color. We used floats and darbies for the base coat and a sponge float and flexible Japanese trowel for the finish
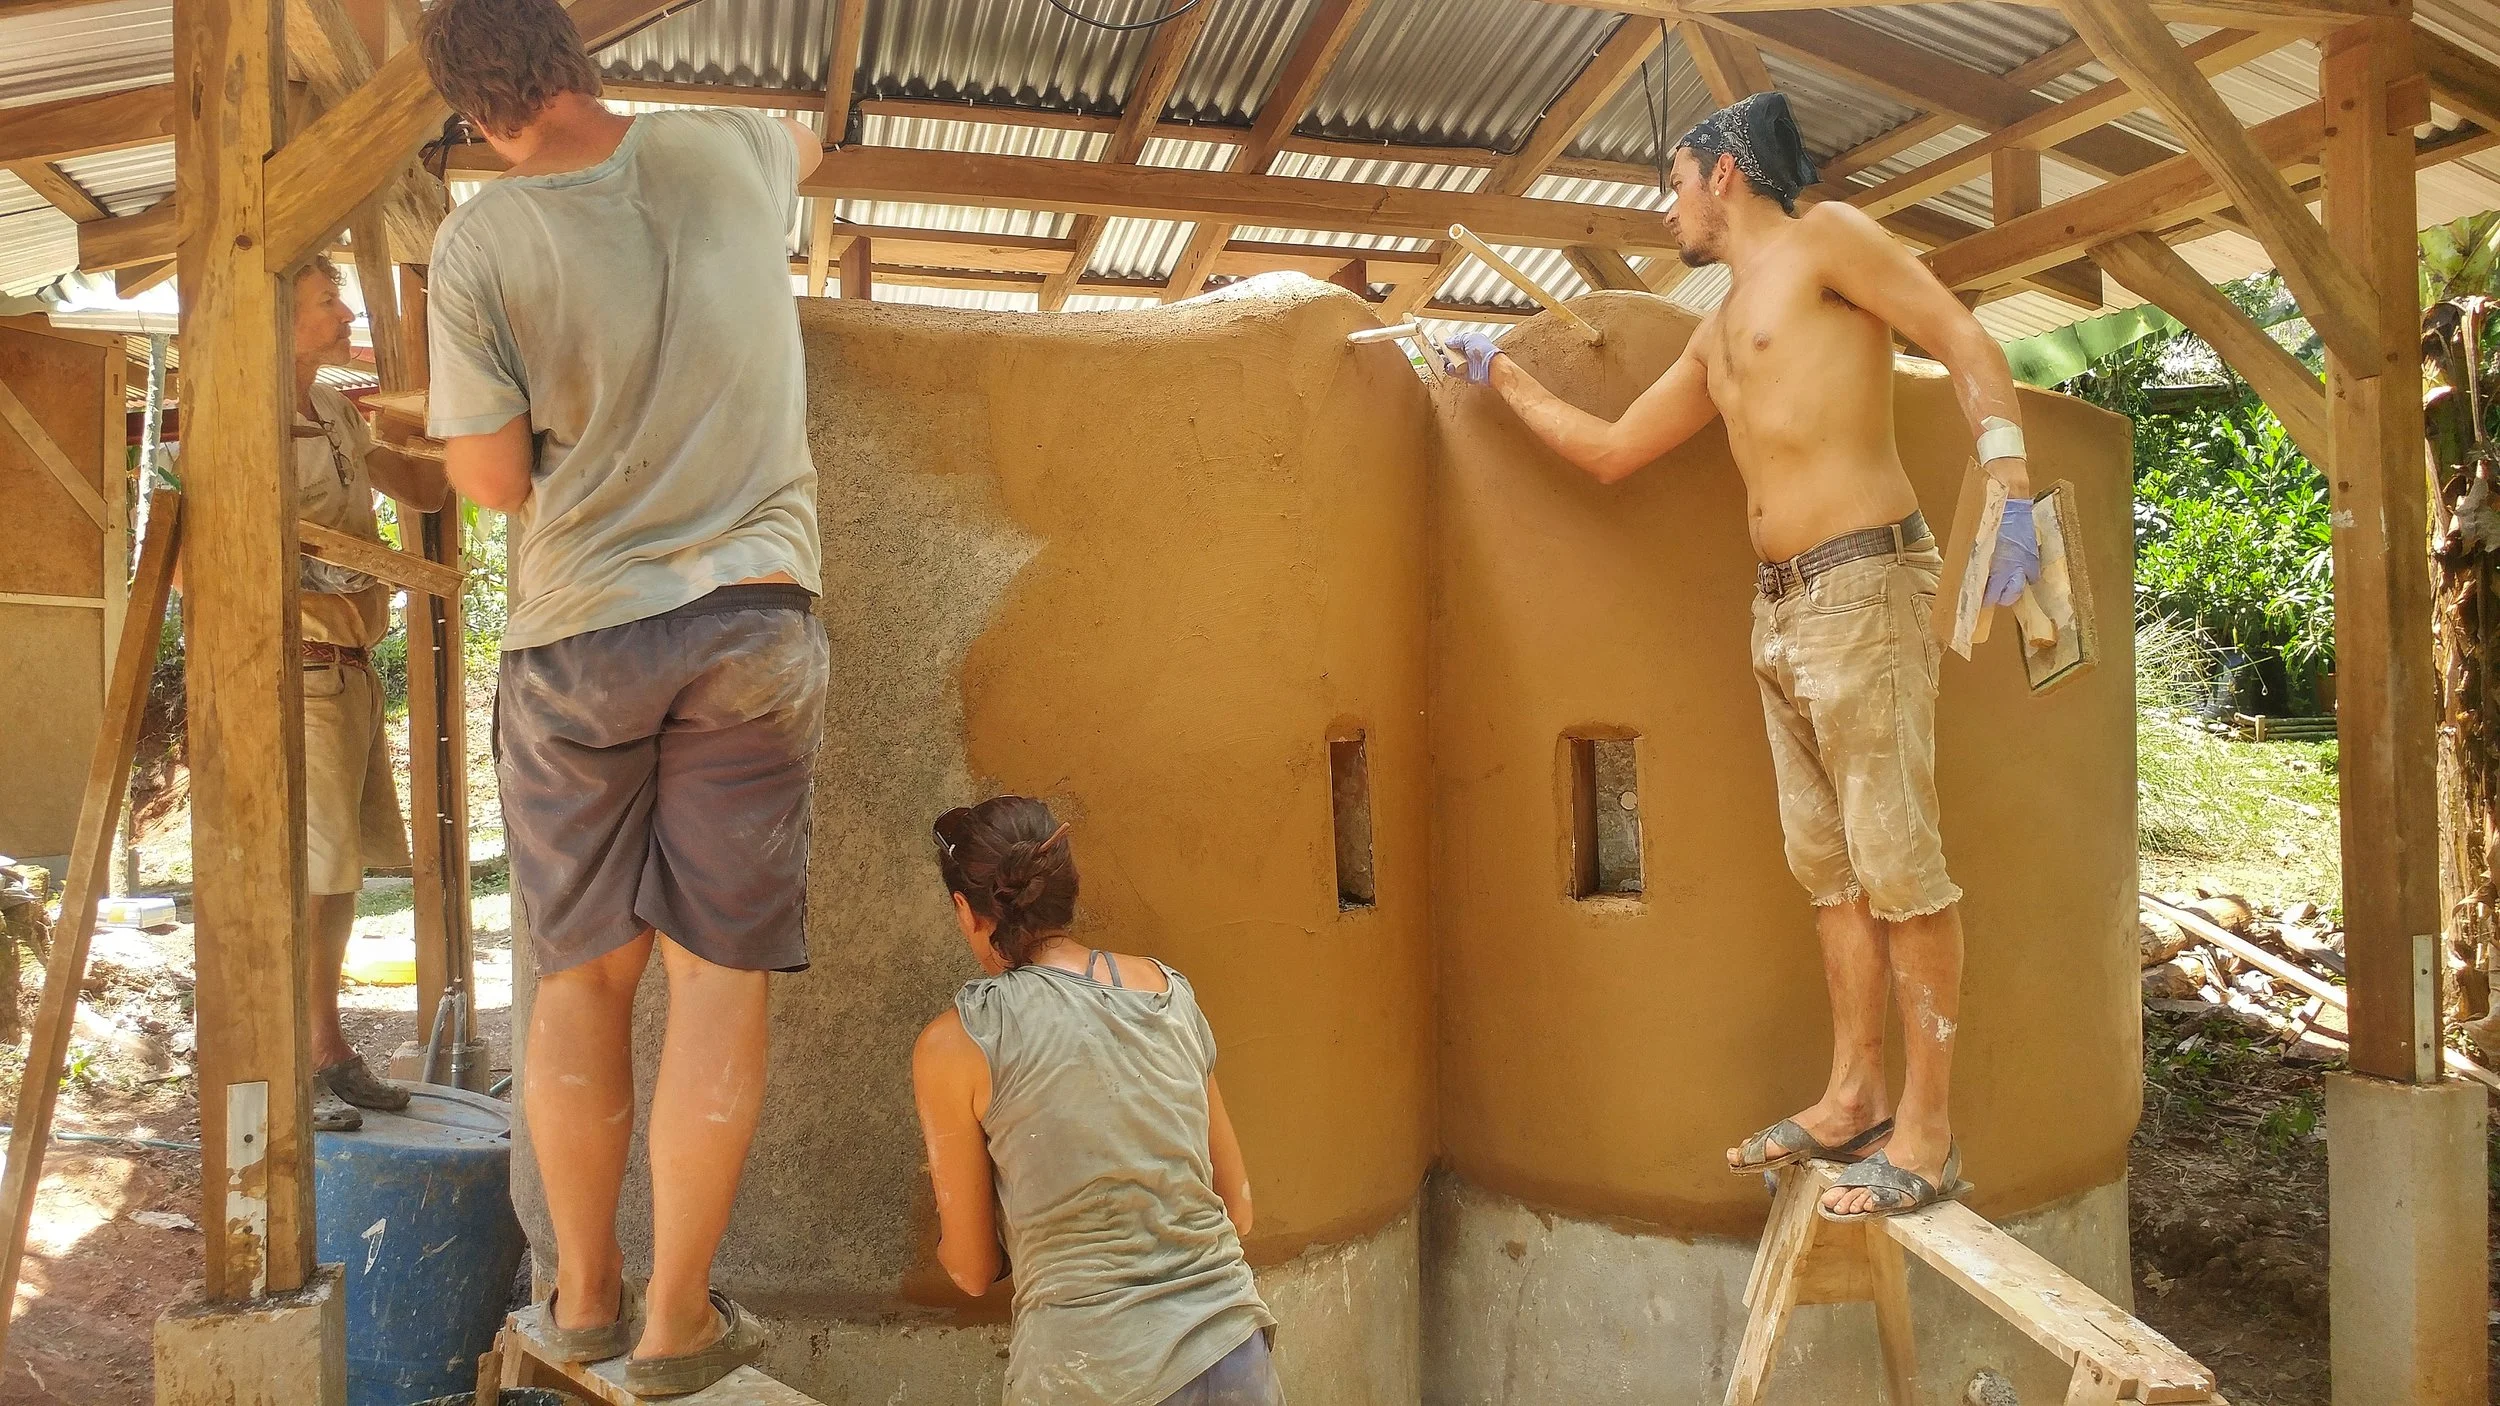
The shower was ready, once the plumbing was connected all that was left to do was enjoy the cool water in these wonderful showers. The two sides of the shower are pretty similar, the main difference being the color combination on the tile mosaic floor. Do you want to bathe in this epic outdoor shower? Come stay with us at Bernies Bungalow!
want to learn more?
Dream of building your own home, outdoor space, or maybe just a simple earthen garden bench?
With over 15 years of experience building and teaching natural building techniques, the Ranch is a perfect setting to get inspired and hands on learning.
Join us for one of our upcoming natural building focused workshops. We generally host a workshop in natural building, timber framing, and/or bamboo construction annually.


Gardening and Permaculture practices at the Ranch
Here at the Ranch the year long apprentices have various roles and functions that support the Ranch community. By taking on responsibilities and managing certain areas we the chance to learn and experience those areas on a deeper level . Part of the educational model created by the ranch team is a monthly rotation of these so called life skills. Each apprentice transitions their life skill to the next apprentice, passing on all of the relevant information to their colleague in order to complete the various tasks associated with each life skill.
by Diana Dagash
2019 Apprentice

our front gardens
Here at the Ranch the year long apprentices have various roles and functions that support the Ranch community. By taking on responsibilities and managing certain areas we the chance to learn and experience those areas on a deeper level . Part of the educational model created by the ranch team is a monthly rotation of these so called life skills. Each apprentice transitions their life skill to the next apprentice, passing on all of the relevant information to their colleague in order to complete the various tasks associated with each life skill.
One of the life skills is currently called the Garden Gnome. I would like to share some of my experience and reflections from doing this task every morning for a month. The garden gnome is in charge of maintaining the front gardens. This is referred to as our zone 1 garden using permaculture lingo. It is the area that is in closest in proximity to the most frequently used space- the main house. In the Zone 1 gardens we grow herbs, annual and perennial crops such as mustard greens, katuk, Haitian basket vine, hibiscus, cucumbers, squash, yard long beans,wing beans, radishes, sweet potato, moringa, basil, oregano, mint, parsley and curry leaf and other amazing tropical goodies which we use in our kitchen everyday. Having these crops growing in close proximity to where we spend most of our time allows us to easily provide the daily maintenance of this space such as watering, harvesting and weeding.
In Rancho Mastatal we approach gardening through a permaculture lens. By mimicking the patterns in nature we are able to create micro climates in which our crops thrive. We create systems that have many functions and support other systems in their functions, allowing them to thrive in harmony with nature. We apply a range of those practices at the ranch and we continue learning and experimenting with new possibilities.
Given that we live in the tropics we have two opposite seasons, about half the year its is dry and the other half rainy. Although the dry season has its own challenges I can only speak from my own experience taking care of the garden in the rainy season, for instance i believe that in the rainy season there is a lot of weeding whereas in the dry season there is a lot of watering!
As the rains increase in volume and frequency it is a time when everything begins to grow rapidly. The jungle fills up with even more green vegetation, popping out of every space available. It rains consistently every afternoon , sometimes all day and night. The soil is saturated . It is a happy time for ALL living things to thrive, including some of the more challenging species like mold, fungus and insects. Some of our crops were over taken by fungus or eaten by insects, others became over saturated with water as they were lacking sun and/or air flow. As with every challenge, i found an opportunity to research and experiment with natural recipes for pest and fungus control.
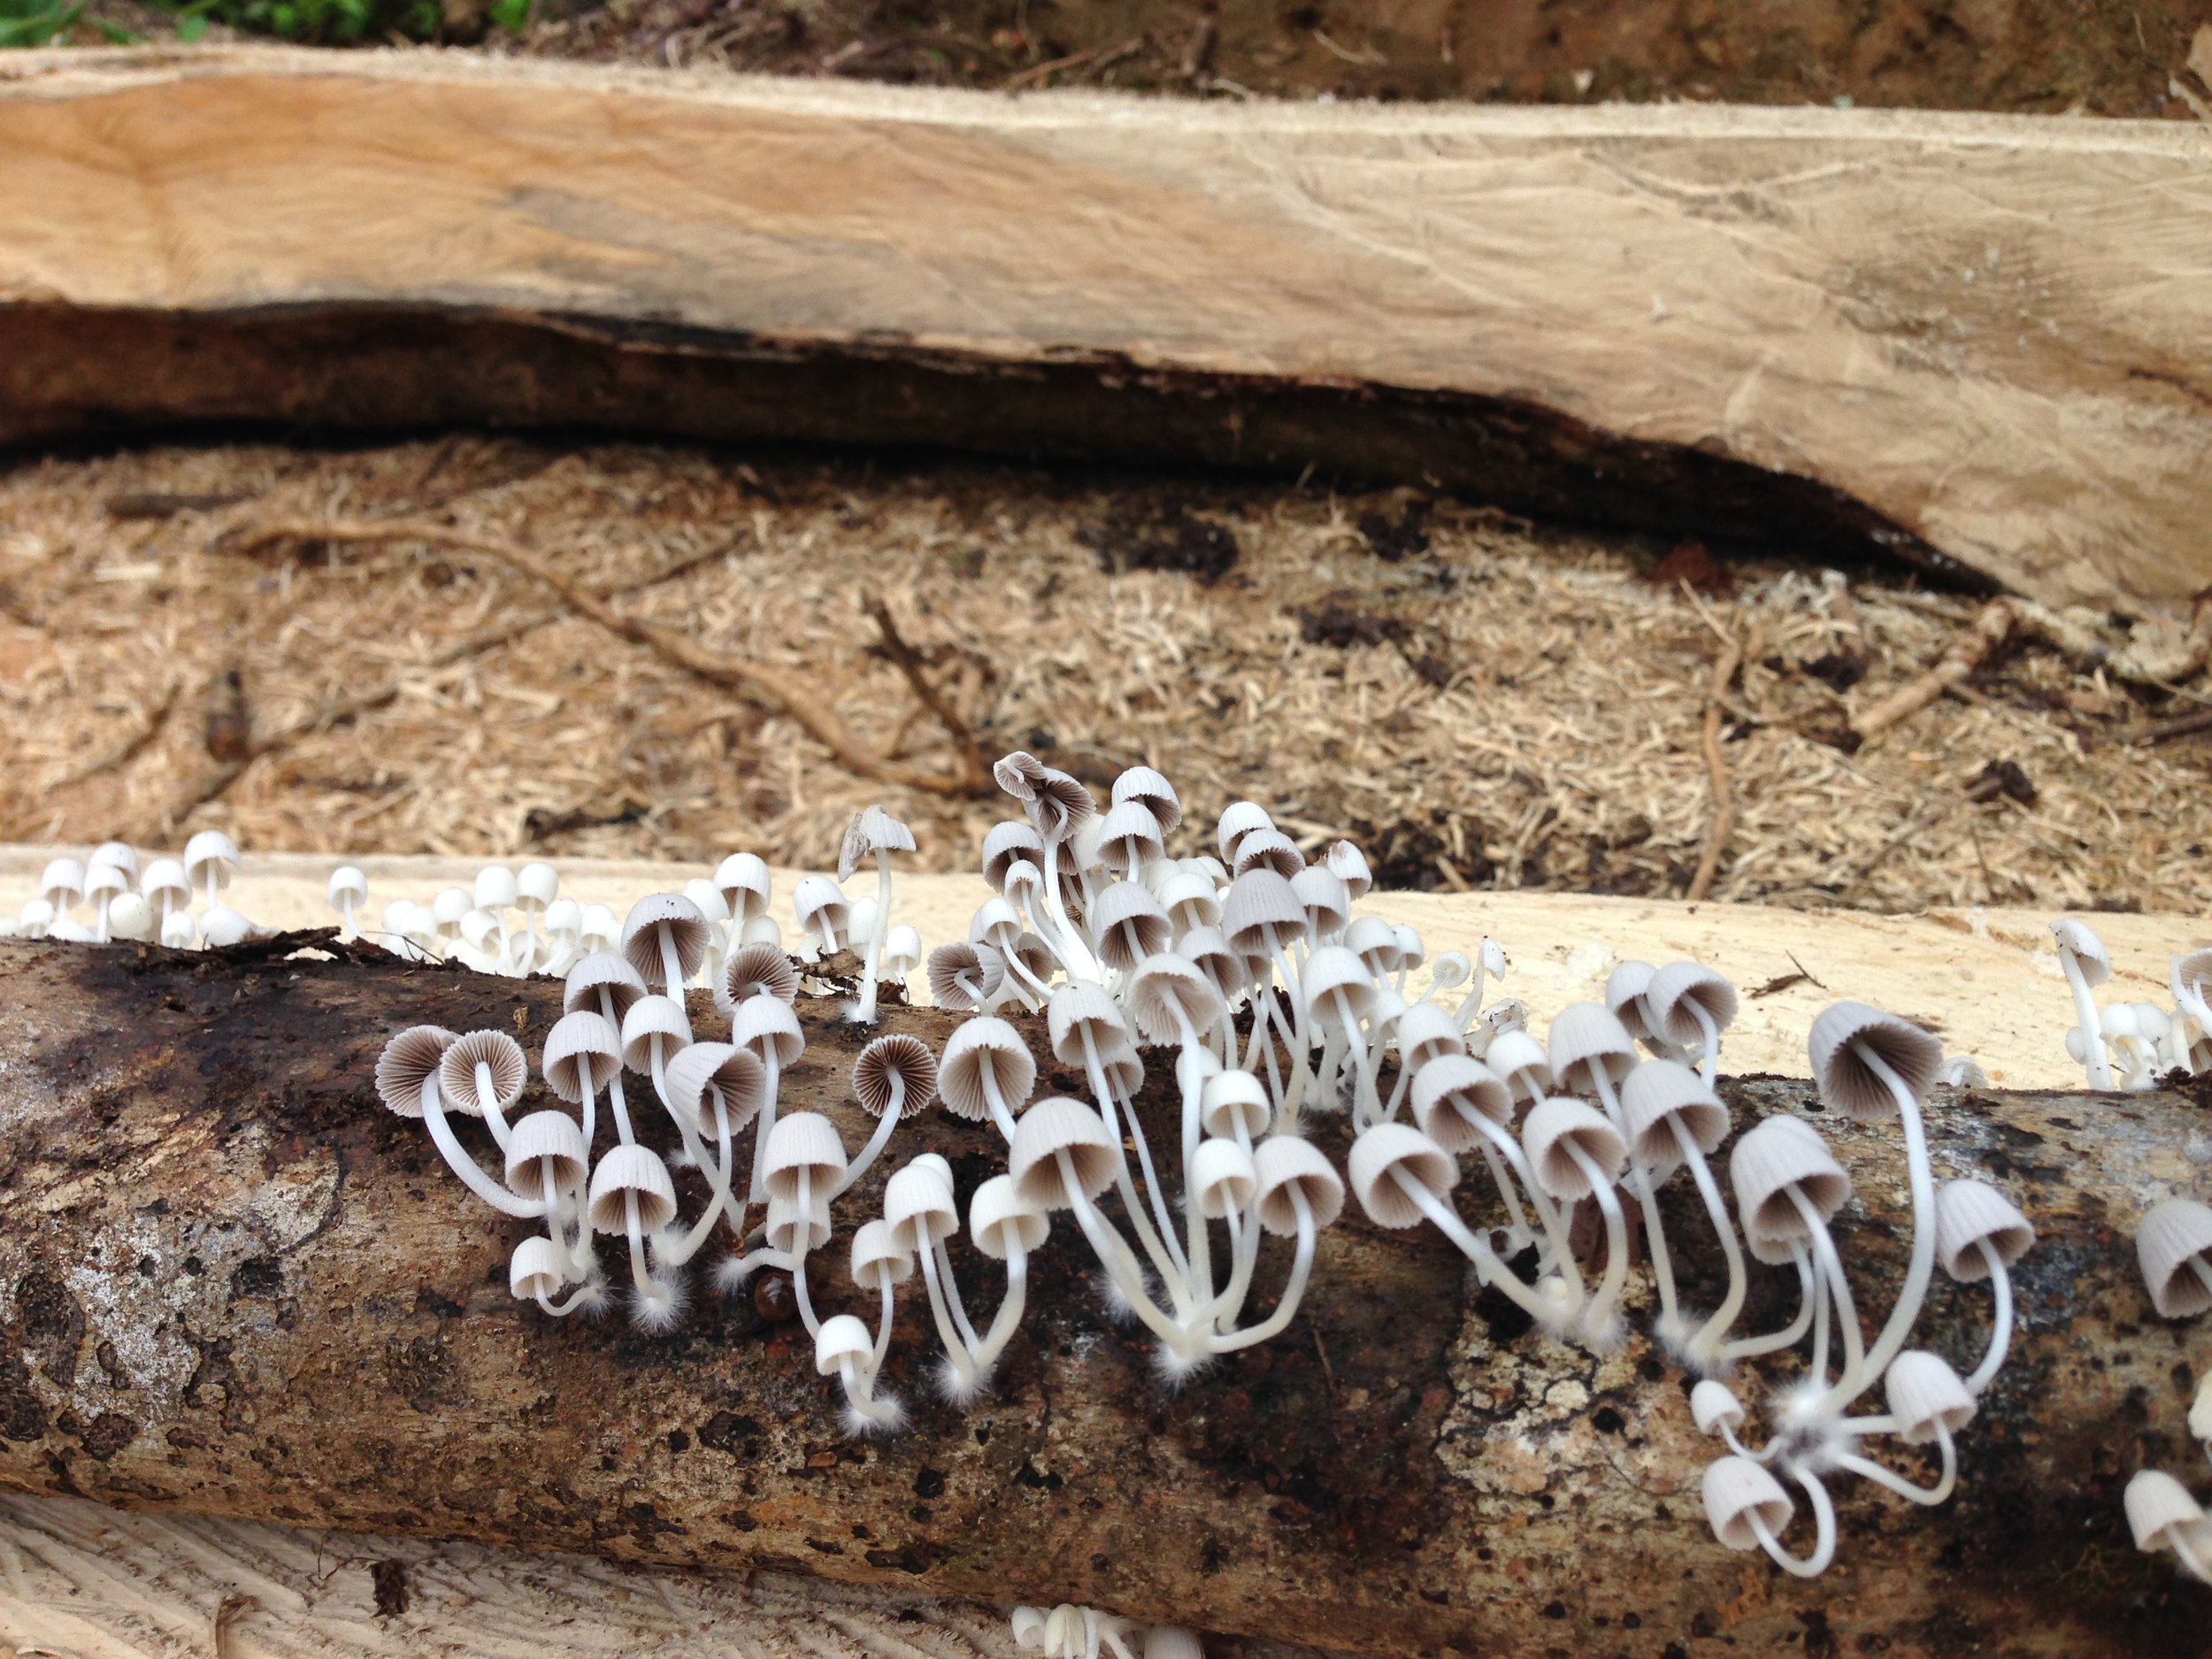
with the onset of the rains, mushrooms started popping up everywhere
My days started early in the mornings with a walk through the garden, observing the plants and checking the soil moisture levels. As I walked I noticed plants that seem to be struggling and tried to identify what might be affecting them. This is then communicated with the garden manager so we could discuss further ideas and solutions. We researched potential natural insecticides and fungicides that could help solve these issues.
Here is some of what we have learned and the practices we apply here at the ranch.
We are surrounded by amazing medicinal plants growing all around us, thriving under the jungle canopy or occupying disturbed pockets. These plants contain medicinal properties that can benefit humans as well as plants.

For example turmeric contains anti-inflammatory and antibacterial properties beneficial to humans and when planted among the roots of a tree, benefits the tree with those same properties This is referred to as companion planting. By planting diverse species next to each other they are able to support, protect and ultimately benefit one another. This can be as simple as providing shade or wind protection. Not only can companion planting by a useful tool in our belt to fight against disease and pest pressure but we can also use the properties of some local herbs. Here are some examples of what we have been doing.
Jackass bitter - the most bitter herb known, contains antifungal and antiparasitic properties. Spraying this tea onto diseased plants can repel insects and prevent fungal issues.
Inter cropping aromatic herbs like oregano, lemon grass and basil with certain food crops can confuse and repel insects with their scent and prevent disease with their antimicrobial and antifungal properties.
Using the shade of the cucumber trellis to help shade and shelter more delicate herbs underneath them.
Using peanut grass as a living mulch to crowd out weeds and provide nitrogen to the soil underneath some of our taller perennial crops such as Katuk and Cranberry hibiscus.
Planting Marigolds everywhere to reduce nematode populations, there is controversy about the effectiveness of this though.
Working in the front gardens has also made me reflect on the ideas of closed loop systems. As i am partially responsible for management of the kitchen compost. I really like the idea that there is no such thing as waste. Everything can be transformed into something useful. All of our food scraps are composted creating a finished compost that can then be added back to the soil to enrich it, closing the loop.

Another big part of the practices we apply when it comes to the food forests is observation of the environment and meeting the land's needs by mimicking patterns in nature. Thanks to all the researches and life long practices in the agro forestry and gardening world, a network of knowledge has been created for us to share our experience and knowledge. We are continuously learning and working towards improvement of our systems.
With each piece of land we carry the responsibility for the history, present and future of it. It is up to us to create a relationship with our land, to observe it's needs and potentials.To be stewards of the land and assist it to become a healthy ecosystem in which we can humbly live and feed ourselves.
This experience, of being an apprentice at Rancho Mastatal, has opened my eyes to a new world of possibilities, inspiring ideas, regenerative solutions, discovering new ways to live lighter on the planet and in harmony with nature .

I am inspired by the movement towards an ecological , sustainable lifestyle and feel grateful to be a part of a project that focuses on sustainability, permanent culture and agriculture.
I invite you to share your experience and discoveries with growing food in the lowland tropics.
What interesting practices have you learn about recently?
Which annual crops did well for you in the tropical rainy season of Costa Rica?
What kind of companion planting worked well for you?
Would love to hear from you!
Blessings,
Diana D.
For more information about Permaculture consider joining us for our Permaculture Design Certification. For info about being an apprentice please go to the apprentice page. Here you will find in depth descriptions of what life is like in Mastatal.

Choosing Consciously for Healthier Families and a Safer Home
Many of us grow up thinking of home as our safest place. As consumers, we have been led to believe that by the time products make it to the market, they have been thoroughly tested and proven safe. We pick up packaging and read labels before buying, just to know what is in the products. But, what does a label really tell us? What are these manufactured products made with? Where and how was it cultivated, processed, packages and shipped?
By Sharleen Marie, Rancho Mastatal Teaching Staff, 2019
Many of us grow up thinking of home as our safest place. As consumers, we have been led to believe that by the time products make it to the market, they have been thoroughly tested and proven safe. We pick up packaging and read labels before buying, just to know what is in the products. But, what does a label really tell us? What are these manufactured products made with? Where and how was it cultivated, processed, packages and shipped? When I first began looking for answers, I encouraged myself to search, detach and reeducate myself about how better make conscious decisions and take actions aligned with my principals and values for my body, my community and my environment. I became passionate about searching what I now choose for nourishment in food, personal care, and lifestyle.

To begin this journey, I intentionally created the habit of choosing all products based on their ingredients rather than their label. I am grateful and fortunate that I had many people around me who inspired me to learn new ways in which I could live a sustainable life, aware of and driven to practice what was best for me, the people and the places I love and care about. After reading this article, I encourage you to continue your journey to discover alternatives solutions and create the changes that produce the results you wish to see in the world.
Don’t just Trust Labels Read the Ingredients
Labels can be misleading. What we think we know about a product may not be true. How safe are your cleaning supplies and skin care products, really? What does ‘Eco-friendly’, ‘Biodegradable’, ‘Natural’ and ‘Nontoxic’ really mean? For example, when we talk about biodegradability of a material or substance, we’re talking about its ability to be broken down into its smallest components parts. This decomposition can be caused by various natural forces like: hungry microorganisms with a digestive system that can break compounds apart into simpler substances, and by contact with light or water, processes called photolysis and hydrolysis consequently. Biodegradability lies at the heart of nature’s sustainable recycling system. Once created, everything from plants to animals is eventually broken down into its most basic parts, which then become the building blocks for new life that itself will some day similarly decay.
When it comes to household, skin care, beauty, and cosmetic chemicals, biodegradability is generally a good thing. In order for a product to be labeled as biodegradable, Federal Trade Commission (FTC) guidelines state that it must degrade when exposed to air, moisture, bacteria, or other organism, and it must return to the natural environment in a reasonably short time when properly disposed of. There is no standard or oversight for the label; manufacturers may label products “biodegradable” at their discretion.
Understanding What You Read

The business of manufacturing cleaning and cosmetic products relies on chemistry. Chemistry itself is not a bad thing. It’s the kinds of chemicals we make and use that matter. Like most anything else, there is a good side and a bad side to all the molecular manipulation chemists practice. There are safe chemicals, and there are unsafe chemicals. Our problem today is that we don’t know which are which. Chemical companies are not obligated to list the ingredients in their products, better known as Voluntary Disclosure Program. This program leaves of decision of wether or not to list ingredients at the sole discretion of the manufacturers. Manufacturers can also legally omit hazardous chemicals if they are part of a mixture the company claims to be a trade secret. (1)
How much do we know about the effects of daily contact with toxic household materials that retailers sell on faith, while we ourselves are serving as the test tubes while we live, breath, and raise our families among these components every day? Toxic chemicals found in detergents, perfumes, solvents, pesticides, pharmaceuticals, personal care products and household cleaners vary in their severity – from acute (immediate) hazards such as skin or respiratory issues, chemical burns or watery eyes to chronic (long term) hazards.
According to an Environmental Protection Agency (EPA) study of human fatty tissue samples, every American man, woman, and child carries at least 700 pollutants in his or her body. (2) Today, there are an estimated 80,000 different chemical compounds being made and used. (3) In 2016, the EPA named the first 10 chemicals it will evaluate under the new Frank R. Lautenberg Chemical Safety for the 21st Century Act, the first update since 1976 of the nation’s primary toxic substances law. (4)

In the last several years, a growing body of scientific evidence has indicated that the air within homes and indoor environment can be more seriously polluted than the outdoor air in even the largest and most industrialized cities. Other research indicates that people spend approximately 90% of their time indoors. Thus, for many people, the risks to health may be greater due to exposure to air pollution indoors than outdoors. In addition, people who may be exposed to indoor air pollutants for the longest periods of time are often those most susceptible to the effects of indoor air pollution. Such groups include the young, the elderly and the chronically ill, especially those suffering from respiratory or cardiovascular disease.
The evidence that does exist strongly suggests that exposure to many of the common products we take for granted can cause chronic diseases, cancer, fertility issues, ADHD, compromised immune system, hormone disruption, nerve and organ damage, allergies, asthma, sinusitis, anxiety, depression, and other health problems. Do any of these health problems sound familiar?

The 2017 American Association of Poison Control Centers' National Poison Data System (NPDS) reported, consistent with the previous year, that the top 5 substance classes most frequently involved in all human exposures were analgesics (11.08%), household cleaning substances (7.43%), cosmetics/personal care products (6.76%), sedatives/hypnotics/antipsychotics (5.74%), and antidepressants (5.02%). Including the top 5 most common exposures in children age 5 years or less were cosmetics/personal care products (12.59%), household cleaning substances (10.96%), analgesics (9.18%), foreign bodies/toys/miscellaneous (6.39%), and topical preparations (4.84%). (5)
Healthy homes must extend into the larger world beyond our windows. By definition it means not only making sure that the activities that take place inside our houses are as nontoxic as possible, but also doing whatever we can to make sure that these activities don’t negatively impact the environment outside. As ever increasing amounts and types of different industrial chemicals are being manufactured and used, our environment is becoming increasingly contaminated by the pollution these chemicals create. This is because many of the synthetic chemicals made today do not easily break down into harmless bits and pieces as natural materials do. Instead, they resist decomposition, and once they are introduced into our air, water, and soil, they tend to remain there for long periods of time. This persistence means that as more of these chemicals enter our environment and bodies, they accumulate in ever larger amounts.
What Can I Do? Small Changes = Huge Benefits
Manufacturers and the organizations that works to protect their interests aren’t going to make the changes we need. If, as consumers you want the right to know exactly what is in the products you purchase and to change the toxicity of products used all around you and your family, you need to ask for and demand change.
Research the products you buy. Purchase only from companies that list all the ingredients on their products’ packaging. When you do have a concern about a commercial product, contact the company and express your concerns about their ingredients and/or marketing practices.
Ask the places you frequent —schools, daycares, workplaces, in community centers— to change the products they use to safer, less toxic supplies for the well being of our children, friends, parents, and community.
Speak about this issue and your concerns with your family, neighbors, coworkers and friends.

Make your own cleaning products for your home, using less toxic ingredients. There are many resources available including immersive trainings like Sustainable Practice: Homesteading to Skin Care, which I will co teach this May 2019. During the course students will learn how to create their own line of nontoxic natural products and free themselves from a dependency on wasteful commercialized goods. This course and others like it can provide an introduction to topics such as fermentation, distillation and herbalism in order to help build the foundation skills and confidence students often need in order to safely create their own personal care products and promote holistic wellbeing in their home and environment.
Article written by Sharleen Marie, co-founder of Atabey Botanicals, a social enterprise dedicated to supporting you develop practical applications of sustainability into your lifestyle that will improve your health and well being and protect the environment.
The workshop will be held at Rancho Mastatal, Costa Rica. Learn, Stay and Explore the education center, working permaculture farm, lodge and community rooted in environmental sustainability, meaningful, place-based livelihoods, and caring relationships.
To know more, access https://ranchomastatal.com/sustainablepractice or contact me through atabeybotanicals@gmail.com
Sources:
(1) Welsh, M. S., Lamesse, M., Karpinski, E. (2000) “Te verification of hazardous ingredients disclosure in selected material safety data sheets.” Appl Occup Environ Hyg. 15(5):409-420.
(2) US Environmental Protection Agency Office of Toxic Substances, “Analysis of Human Adipose Tissue, Volume 1: Technical Approach.” (1987) Accessed online on April 4th 2019, https://nepis.epa.gov/Exe/ZyNET.exe/10003C6I.txt?ZyActionD=ZyDocument&Client=EPA&Index=1986%20Thru%201990&Docs=&Query=human%20adipose%20tissue%20technical%20approach&Time=&EndTime=&SearchMethod=2&TocRestrict=n&Toc=&TocEntry=&QField=&QFieldYear=&QFieldMonth=&QFieldDay=&UseQField=&IntQFieldOp=0&ExtQFieldOp=0&XmlQuery=&File=D%3A%5CZYFILES%5CINDEX%20DATA%5C86THRU90%5CTXT%5C00000000%5C10003C6I.txt&User=anonymous&Password=anonymous&SortMethod=-f%3Apubyear&MaximumDocuments=15&FuzzyDegree=-1&ImageQuality=r85g16/r85g16/x150y150g16/i500&Display=hpfr&DefSeekPage=x&SearchBack=ZyActionE&Back=ZyActionS&BackDesc=Results%20page&MaximumPages=1&ZyEntry=1&SeekPage=x
(3) Steve Waygood, “Uncertainty Persists on Chemical Equation.” Environmental Finance, September 2004
(4) https://www.ewg.org/research/under-new-safety-law-epa-picks-first-10-chemicals-review
(5) Gummin DD, Mowry JB, Spyker DA, Brooks DE, Osterthaler KM, et al. 2017 Annual Report of the American Association of Poison Control Centers' National Poison Data System (NPDS): 35th Annual Report. Clin Toxicol (Phila). 2018 Dec 21;:1-203. PubMed PMID: 30576252.
How to Make an Earthen Floor for Your Sustainable Home
Earthen floors add a great earthy touch to your sustainable home; whether that’s in your cob house or conventional stick frame home. They have more give than concrete or tile, meaning they are more comfortable and easy on your feet.
Why Build an Earthen Floor?
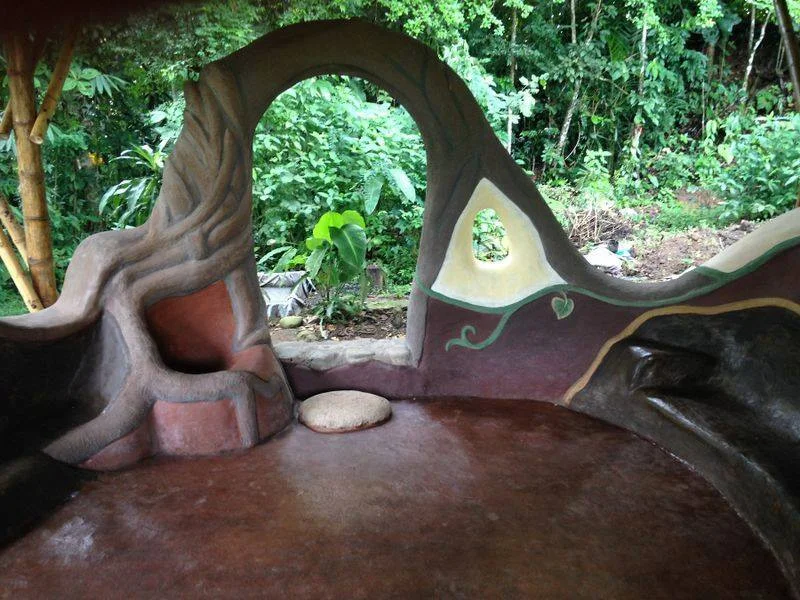
This Earthen Floor adds a wonderful warmth to the Ceiba Lounge
Earthen floors add a great earthy touch to your sustainable home; whether that’s in your cob house or conventional stick frame home. They have more give than concrete or tile, meaning they are more comfortable and easy on your feet. Earthen floors can be durable and last a long time, but are not the best material for all spaces in your home. They will break down faster when there is a lot of moisture on them or heavy items dropped on them. So places like your kitchen and bathroom are not ideal locations for an earthen floor. Earthen floors work great for bedrooms and living rooms.

Mixing by hand gives you a great feel for the mixture
Here at the Ranch we have been practicing and perfecting our earthen floors for more than 15 years. We strive to create sustainable homes from natural, local materials. Natural building is one of the ways we practice green living. We have seen what works and what doesn’t in many different structures and spaces throughout our community. After having an earthen floor in our kitchen, a space that produces three meals a day for an average of 30 people, and after repairing patches again and again, we realized this space is too heavily used for an earthen floor. Spaces like our guest cabins are perfect for earthen floors. Of course with hundreds of people going through these spaces they wear down over time. If you correctly lay an earthen floor in your home, and take care of it, they should last you for a long time.
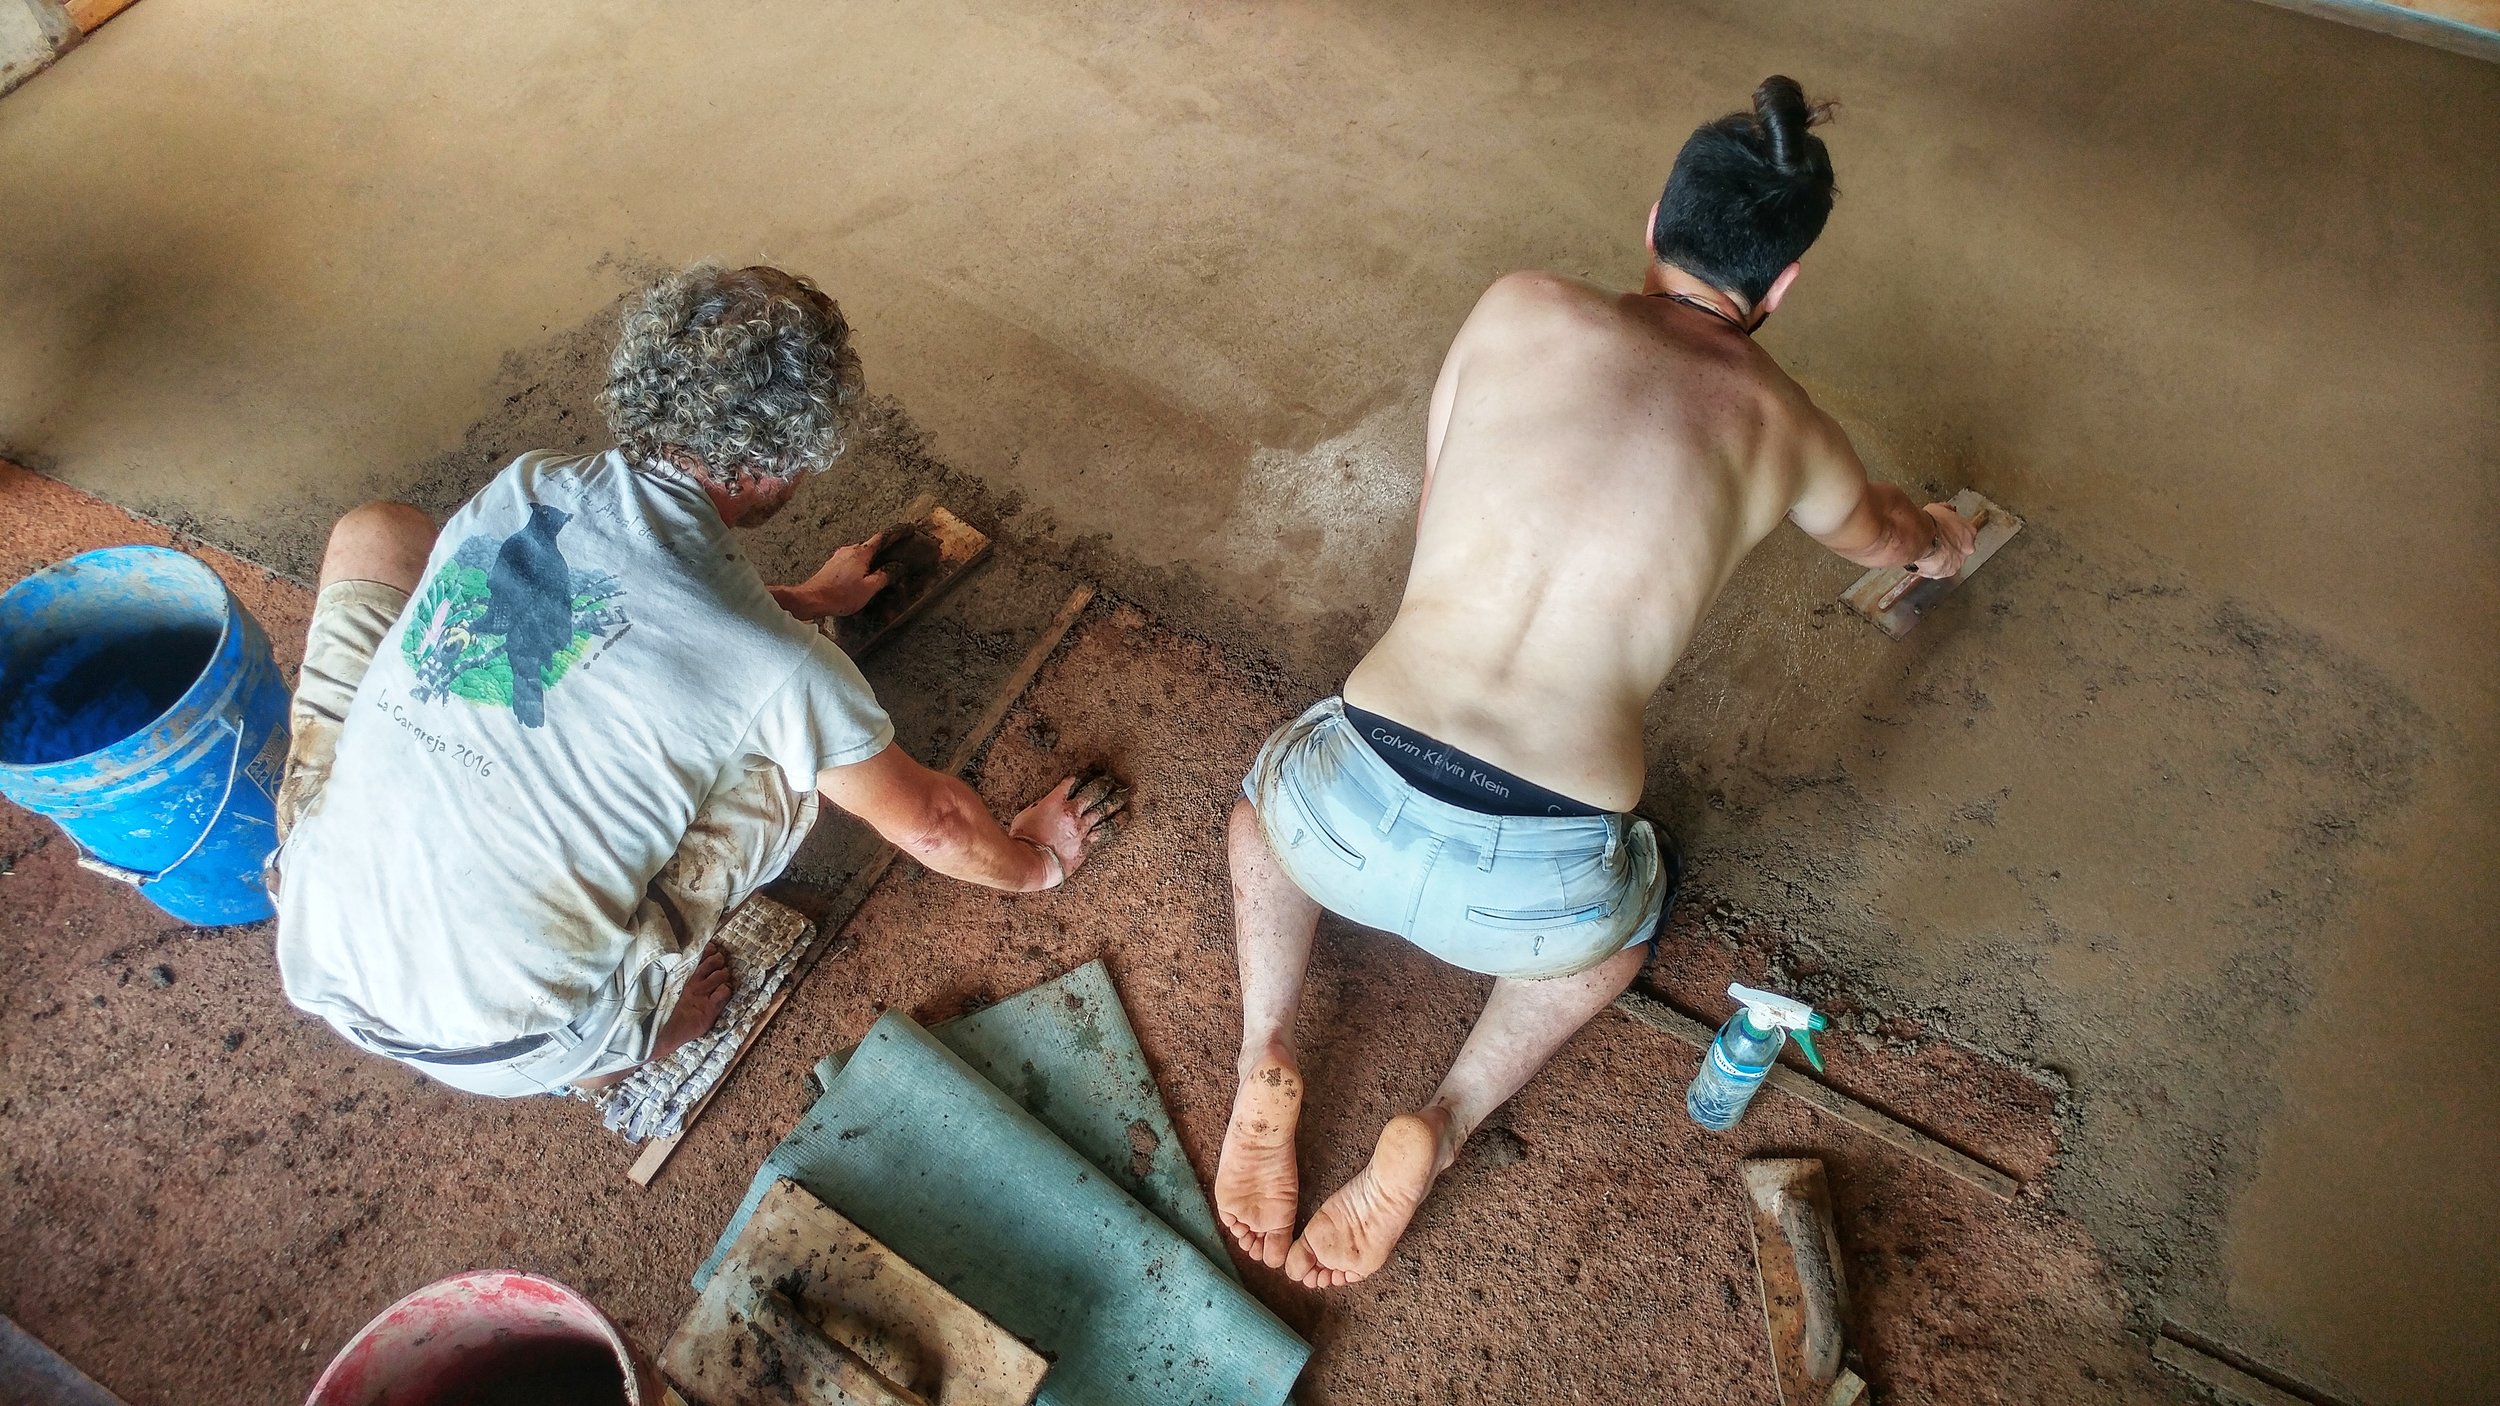
Wooden guides can be used to help keep the correct thickness
How We Build Our Earthen Floors
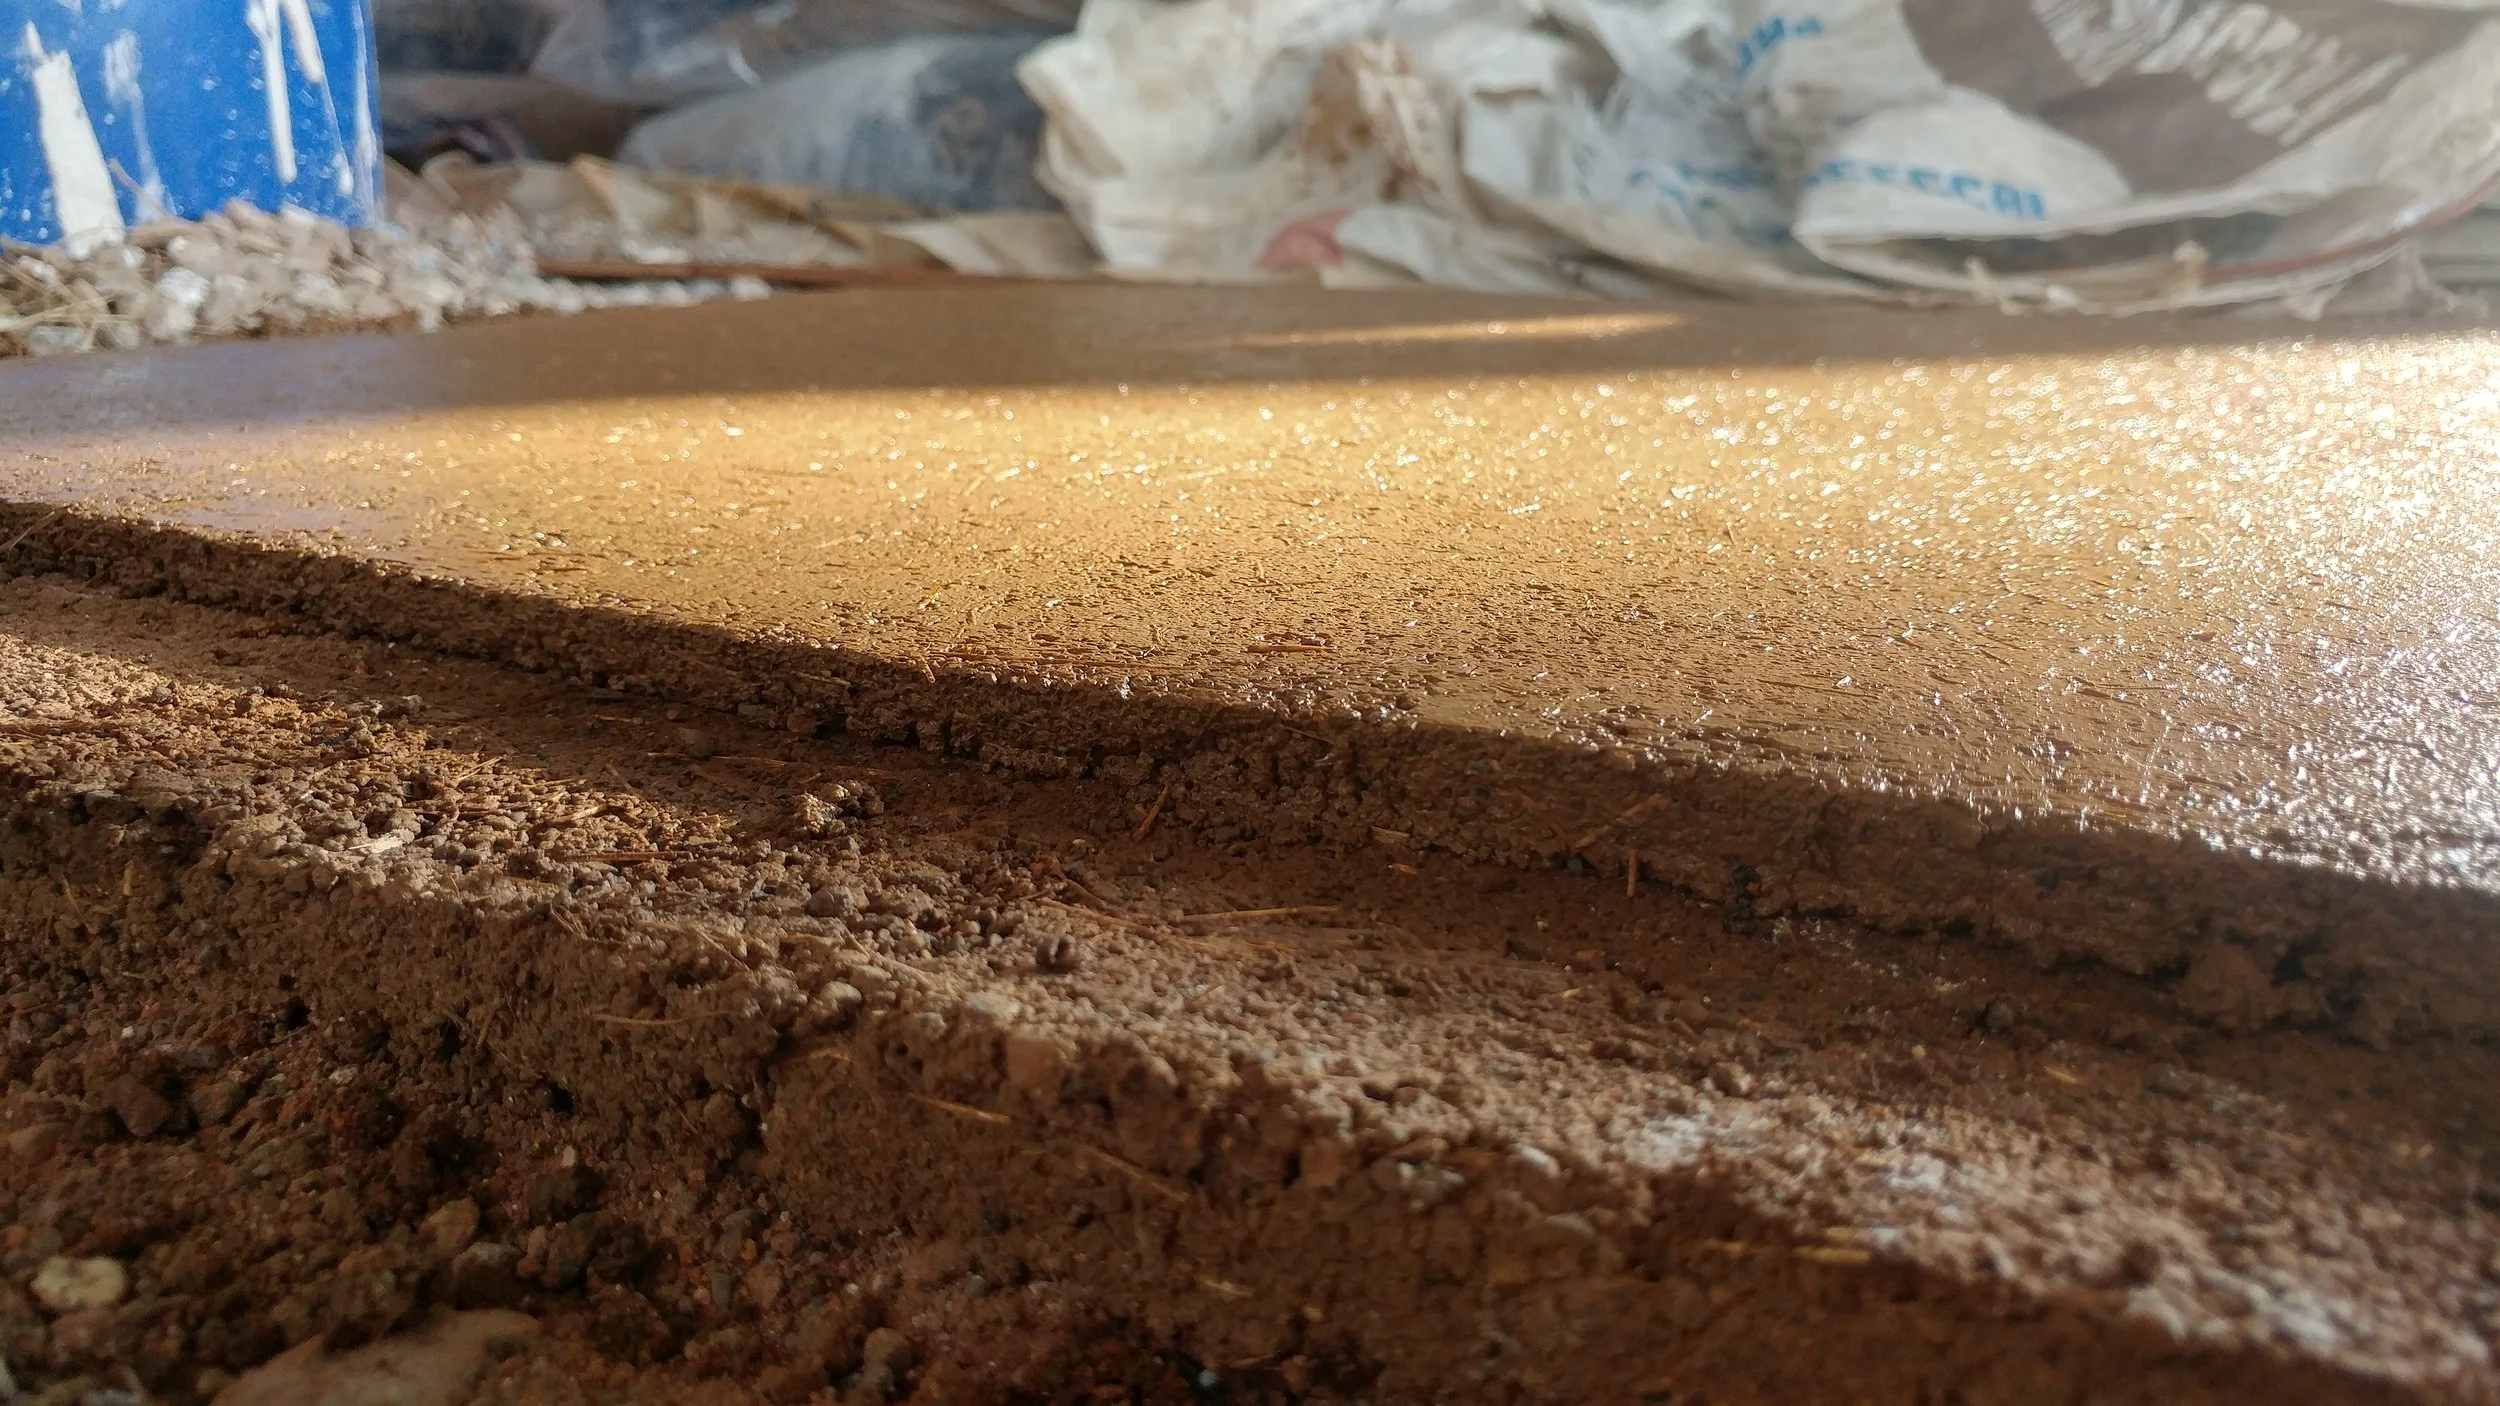
Base and final coat in a sample, always make tests!
Here in our tropical environment, with the materials locally available to us, we have finally figured out a bomber earthen floor. Here is a simple step by step guide on how we lay an earthen floor.
An earthen floor is comprised of 4 different layers
· Water proof membrane
· Tamped gravel (optional to increase total depth)
· Compacted road base (mixture of sand, clay and gravel)
· Two layers of final floor (mixture of sand, clay and chopped straw)
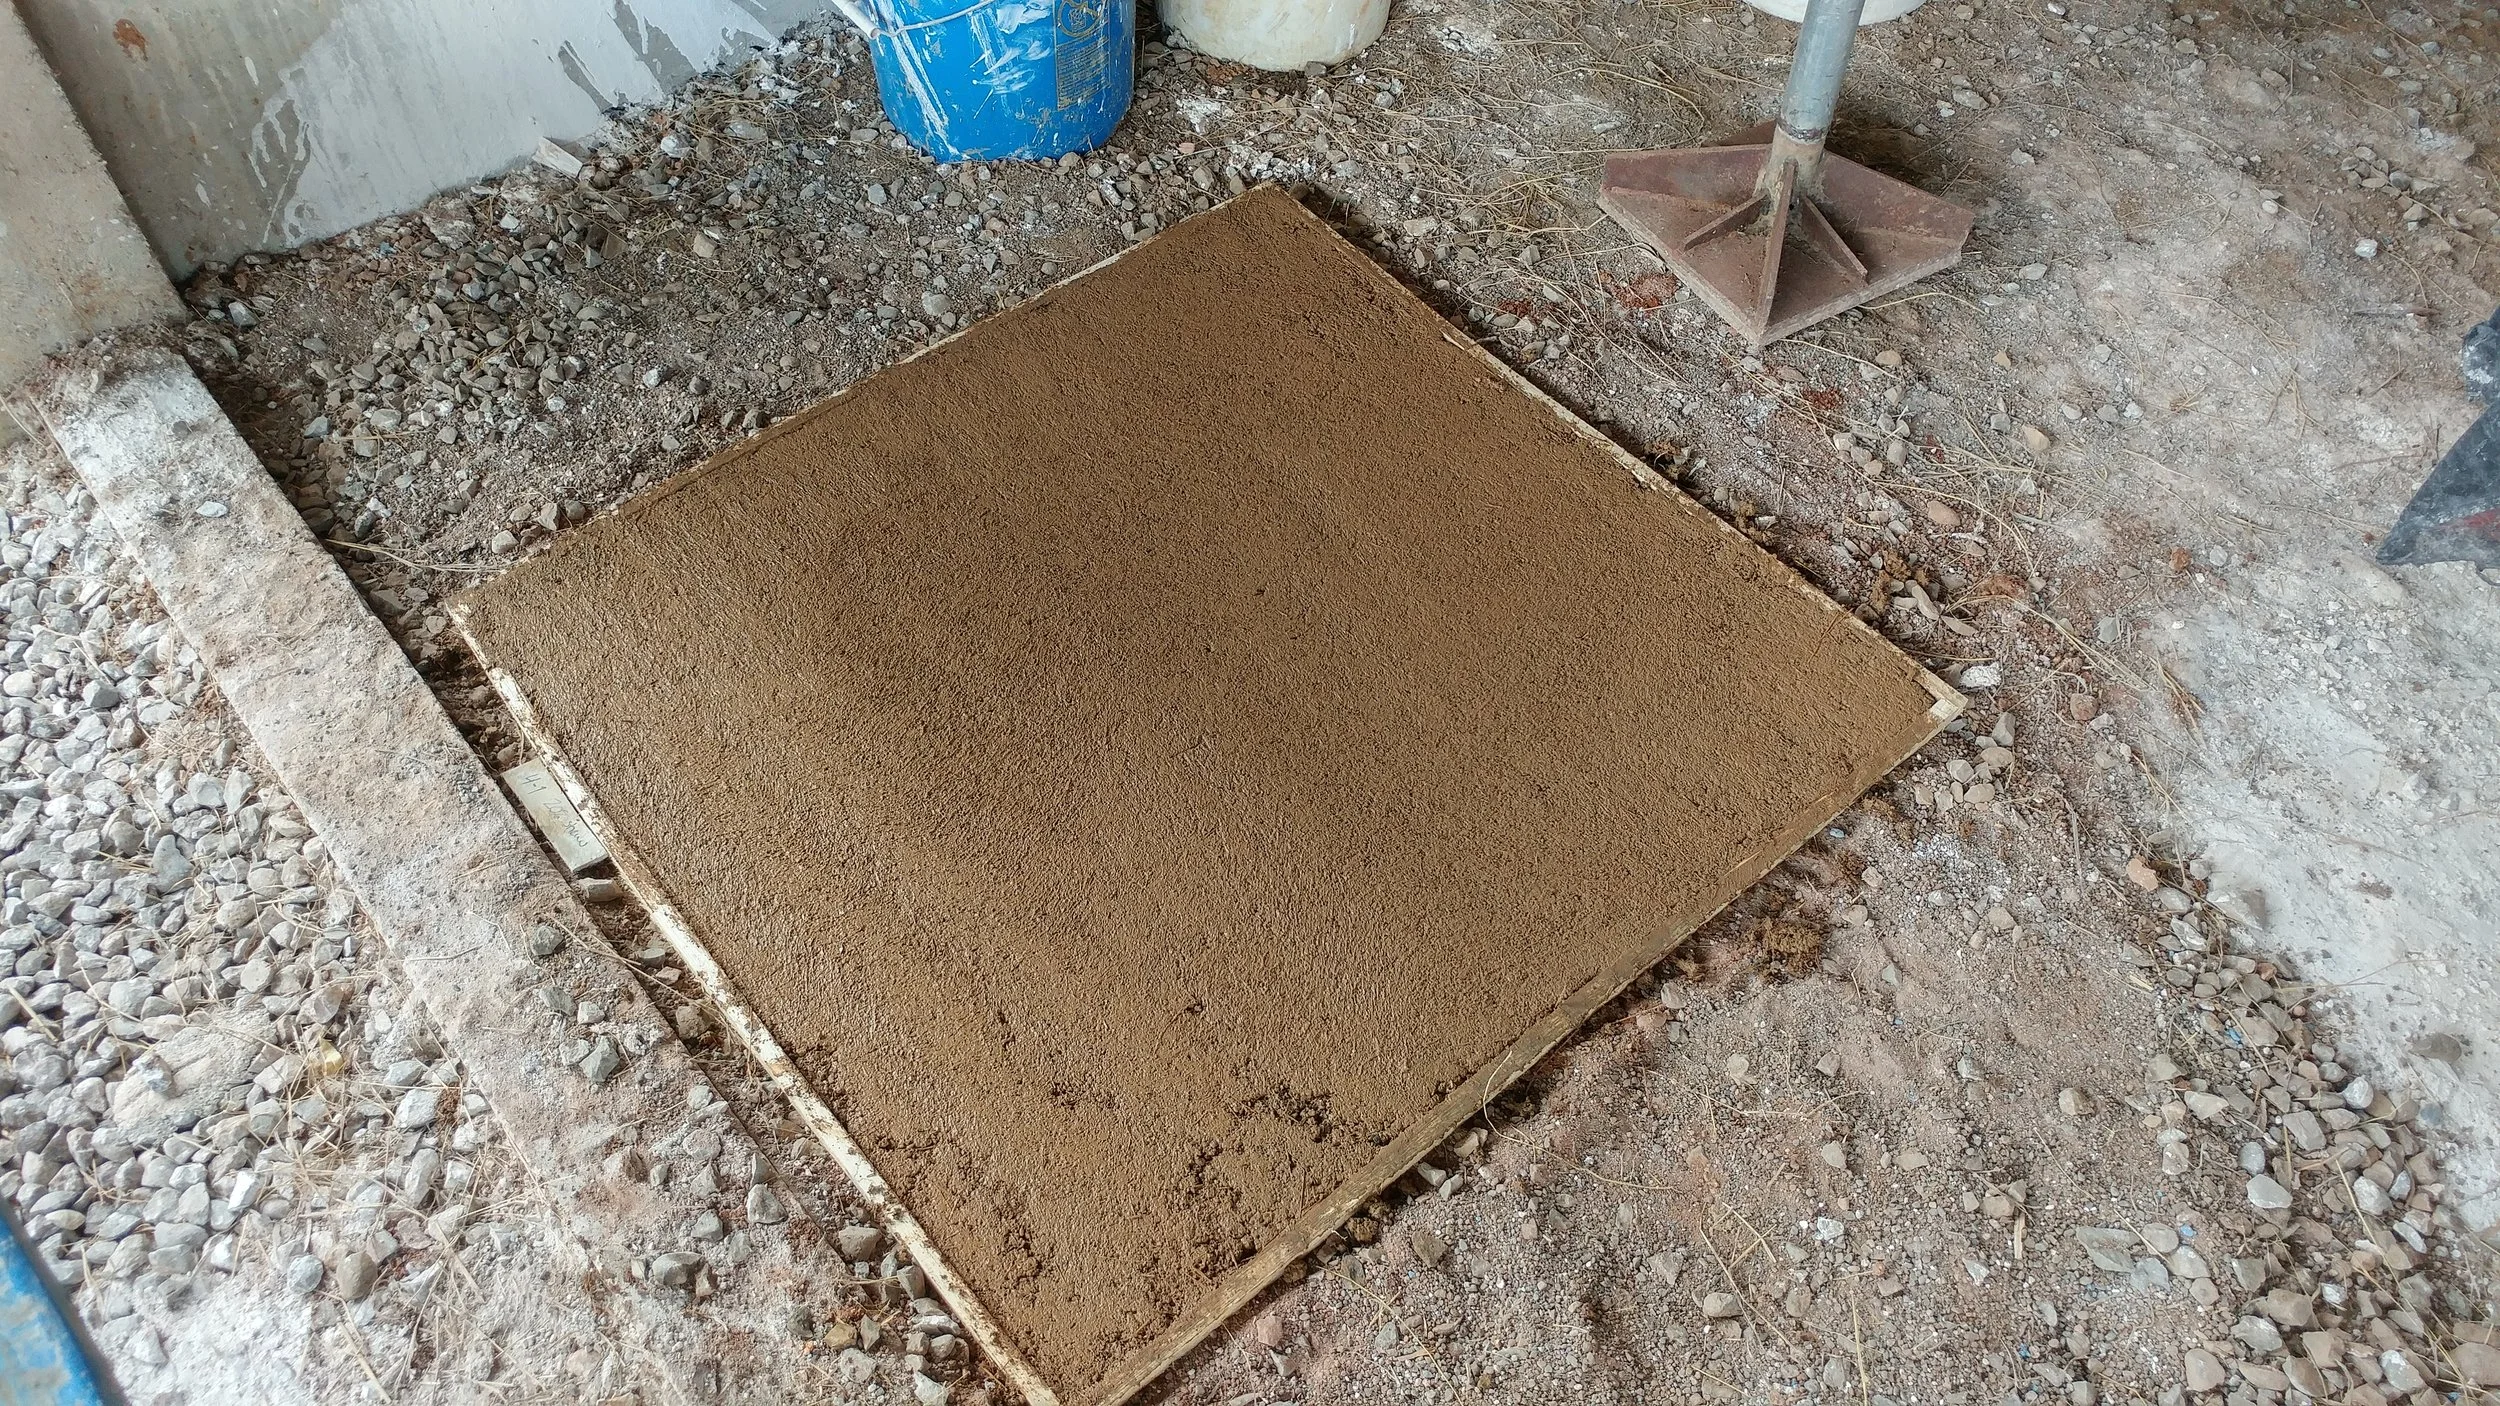
Make sure your samples are large enough to be representative!
Before you begin make samples! Always make samples for anything you plan on building; whether that is for your cob house, outdoor pizza oven, or natural plasters. We recommend making at least 3 samples with different ratios of clay, sand, and straw. These should be at least 1 meter by 1 meter to get an accurate example of the final product.
Steps once you find the correct ratios
1) Lay down a waterproof membrane, wrapping it up the inside of the stem wall.
2) If you need to increase the depth of your floor height you can add tamped gravel.
3) Compact your road base. Minimum depth is 4 inches.
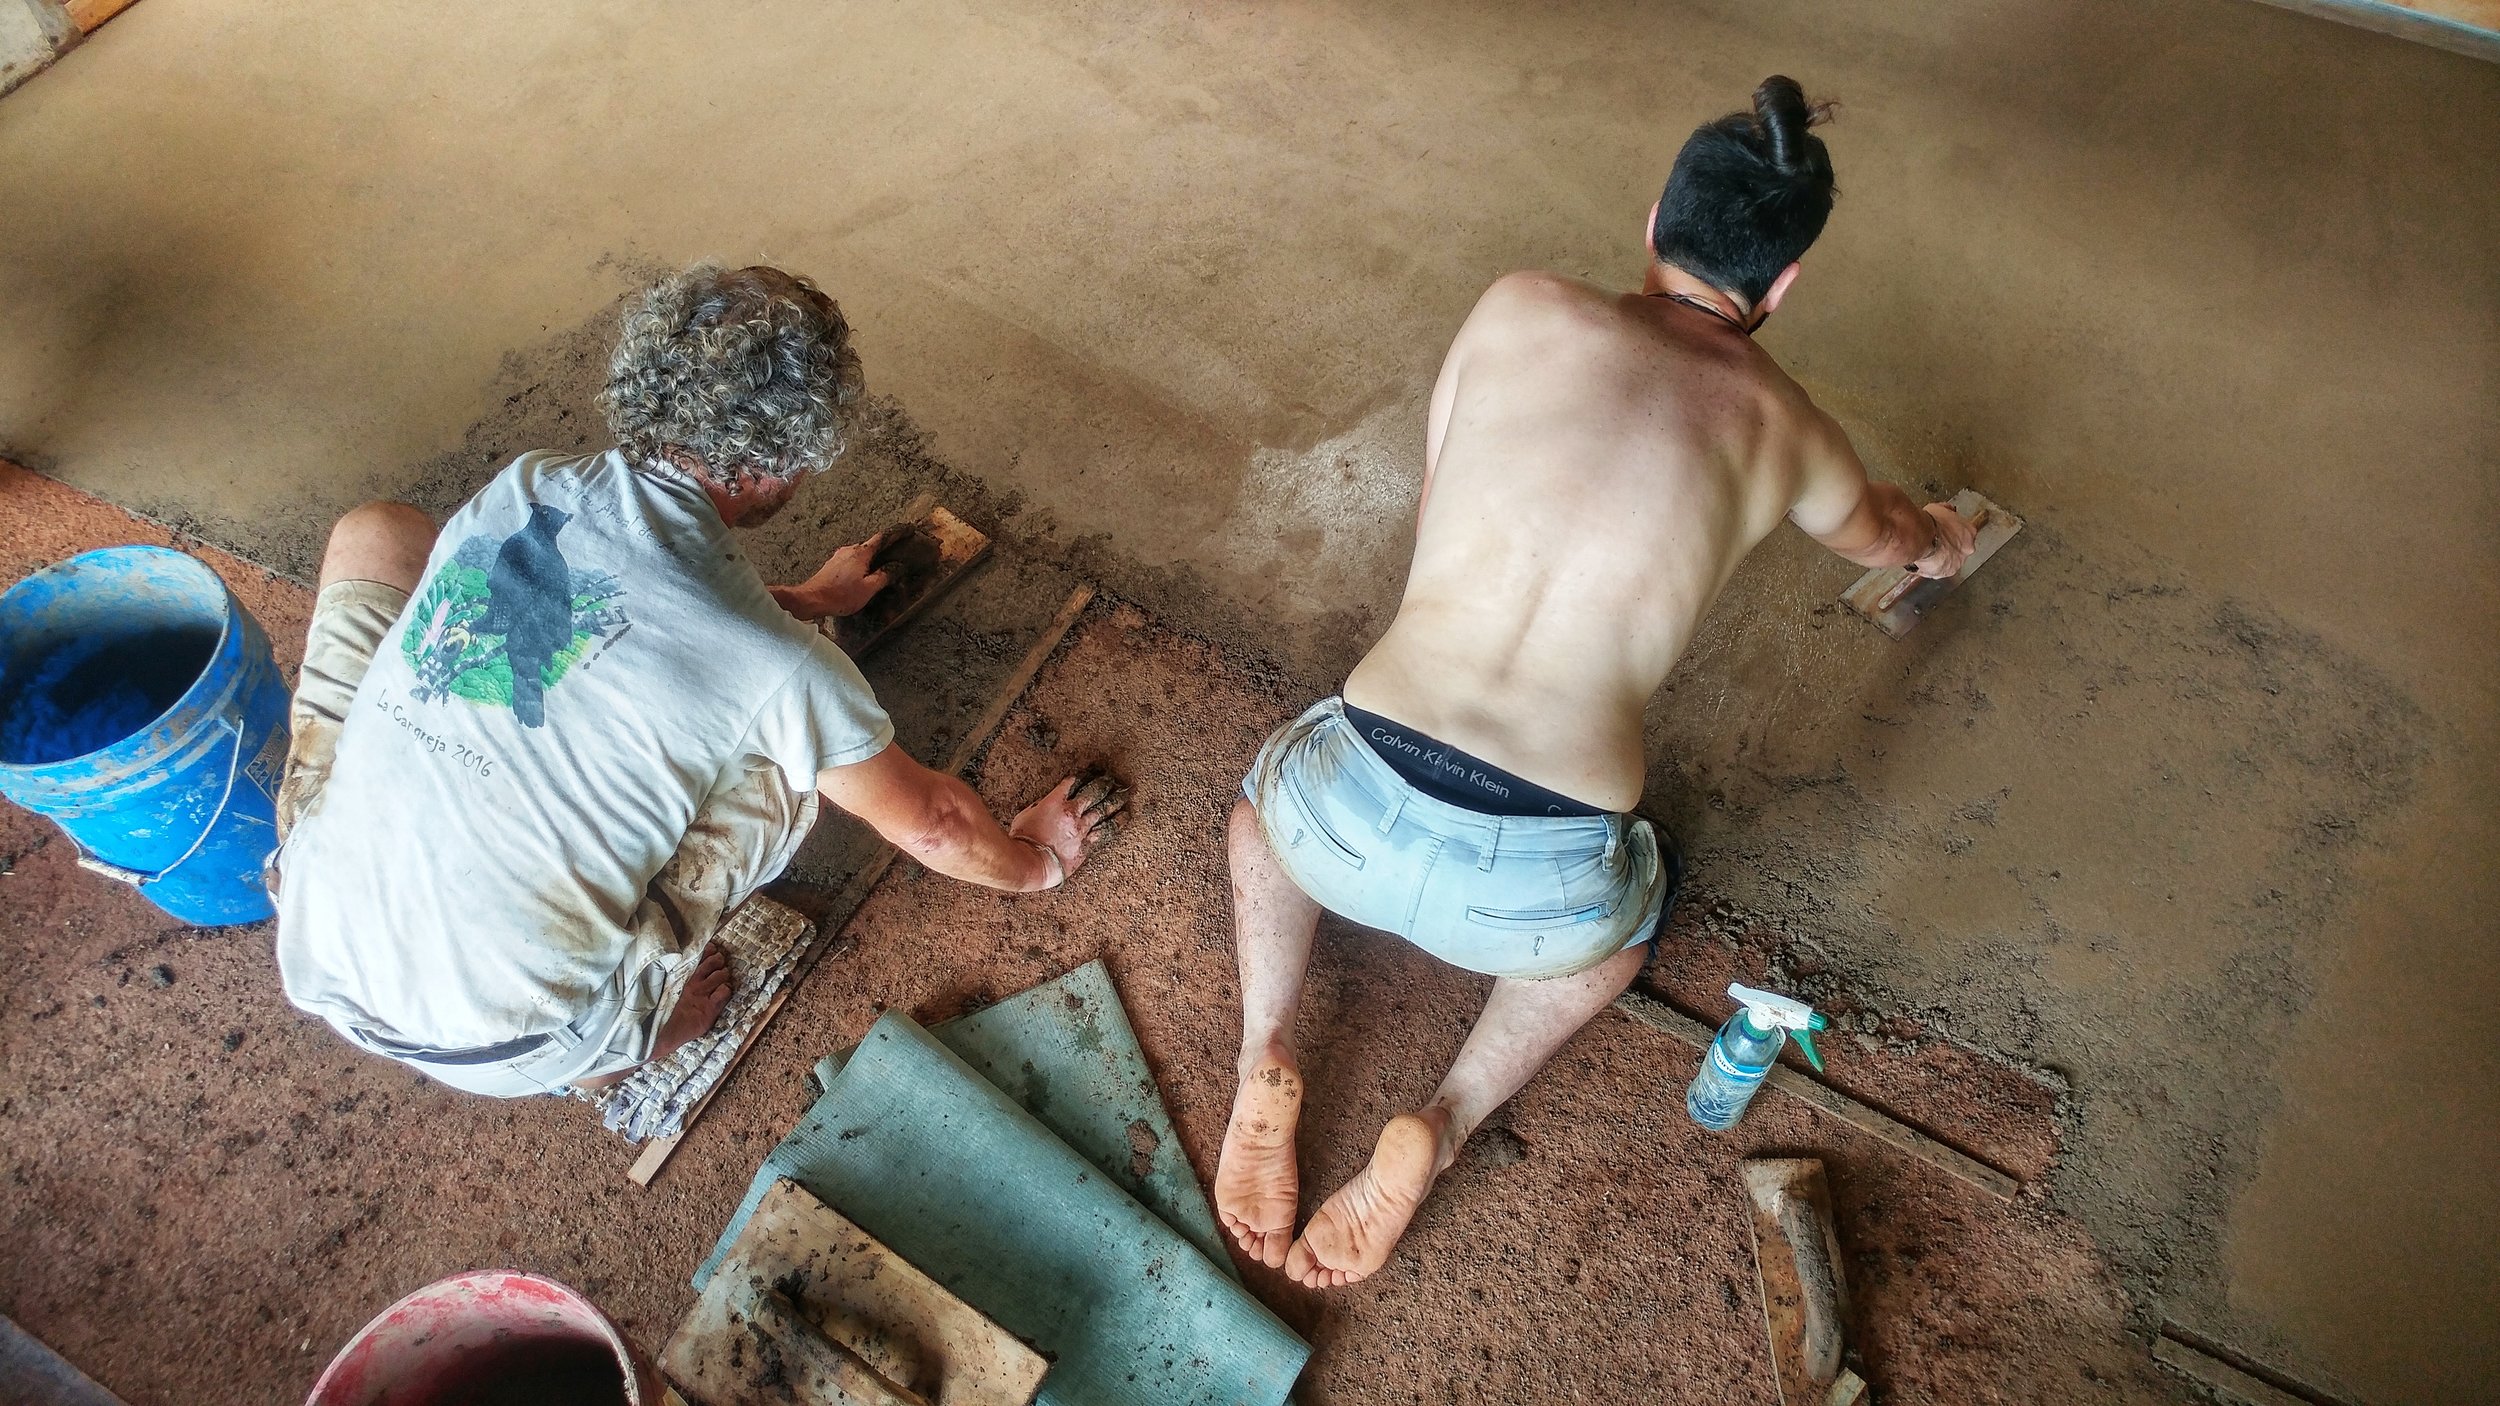
4) Lay down your first layer of final floor. We do ¾ inch thick. Let completely dry.
5) Lay down your final layer of floor. We do ¼ inch thick. This can be troweled smooth to close any holes. Let completely dry.
6) Paint multiple layers of linseed oil/thinners combo at 3:1 ratio. This provides a protective coat that will increase the longevity of your floor.

Want to Learn More?
Perfecting an earthen floor takes time and practice. If you are trying to create a sustainable home consider using earth for your floor and throughout your home.
If you would like to get some hands on experience in natural building join us for one of our upcoming courses check out our workshops page for our latest offerings.
References:
Earthen Floors - A modern Approach to An Ancient Practice By Sukita Reay Crimmel & James Thomson
Categories
Topics
- Agriculture 6
- Agroforestry 21
- Animals 2
- Apprenticeship 19
- Appropriate Technology 6
- Backpacking 1
- Bananas 1
- Basic Pantry 4
- Biochar 1
- Books 3
- Build Your Own Home 1
- Central America 5
- Chiles 1
- Cinnamon 1
- Clay Carving 1
- Climate 2
- Climate Change 1
- Cob oven 1
- Communication 5
- Community 24
- Compost 2
- Composting Toilets 2
- Condiments 1
- Conservation 2
- Cooking 4
- Costa Rica 18
- Design 10
- Earthen Construction 10
- Eat Local 2
- Ecohome 1
- Education 9
- Environment 3
- Ethics 4
- Farm to Table 12
- Fasting 1
- Fermentation 14
- Food 22
- Food Choices 8
- Food Forest 8
- Food Processing 15
- Food Systems 12
- Gap Year 1
- Gardening 5
- Ginger Beer 1
- Harvest 2
- Health 12
- Healthy living 5
- Homemade 2
- Homestead 8
- Internet 2