

BLOG
Stories, articles, and updates from the Ranch community.

Salak: A Productive Understory Crop
The risks of cultivating this species are beautifully contrasted by the enjoyment and health benefits of the fruit it produces.
By 2022 apprentice AJ Nolan
Salak palm is a great option for an understory species for a permaculture tropical agroforestry system. The risks of cultivating this species are beautifully contrasted by the enjoyment and health benefits of the fruit it produces. You truly get what you pay for. The fruit can be eaten right off the palm and makes for a great snack after working in the orchards.
Salak palm is native to Indonesia and is often cultivated in analogous climates. Here at the Ranch, we have around 40 palms both male and female.

A bowl of freshly picked salak
How to Start Growing Salak
Propagation
In order to establish salak in your agroforestry spaces you’ll need to start with propagation. Salak can be started from seed and should be placed sideways and half buried in a well-drained potting mix.
Both males and females are needed for successful fruit production. There is no way to determine the gender of the palm until 3 years after planting, when they begin to flower. Having 3 female plants for every male plant has proved to be optimal for our orchard space of roughly 4000m2. Once the plants reach maturity and begin to flower you can then identify any excess males you may have. Replace them as needed to reach your ideal ratio (3 female : 1 male)
Planting
The best time to plant is at the start of the rainy season.
The soil around the palm should be heavily top-dressed with compost.
Each plant should be planted 2-3 meters apart and are best planted in the same area for safety reasons and pollination needs (more on pollination below).
Keeping in mind the spiked nature of salak, it is good practice to avoid planting where any fruit or nuts may fall from overstory species. The palm is best planted under a low-maintenance canopy of fruit and nut trees. The individuals that have done the best in our orchard spaces have been ones that receive about 50% shade.
Maintenance

Using the macana to help remove dead material
Maintenance of the salak palm is where your patience and physical fitness will be put to the test.
Once the plant reaches maturity, it is time to start pruning. Remove any dead material and any leaves that are blocking easy access and visibility to the flowers. It is recommended to remove any hijos that are growing on the mother plant. Hijos are competing with the mother plant for sunlight and nutrients so it is best to use them as mulch seeing as they inhibit fruit production. The mother plant can be identified by following the roots. The roots lead into the mother plant which is curved and looked to be in an upward dog position. Any other segment not attached to the roots, but are instead attached to the mother plant are known as hijos.
After pruning, we make donuts around the palm, using mulch from around the orchard space. Read this blog “5 Grow-Your-Own Mulch Plants for the Tropics”. We have moved away from using the salak prunings to mulch the trees with, as it makes for further maintenance and pollinating challenging. We pile the cuttings and let them decompose in a pile or burn them and add to the trees.

Helpful pruning tools
When it comes to pruning, always have both of your hands occupied so you don’t accidentally reach out and grab the spiky palm. For optimum pruning our tools are: a macana, machete, garrabato, loppers, and a pruning saw with a long blade or handle. Using a macana and a pruning saw is an effective way to pry the hijos off of the mother plant. This takes practice and it is best to have at least two people to pry the hijos away. Then, using a garrabato to move the fronds around, I use my machete to move the cuttings to the pile.
Unlike most tree species, salak’s growth pattern is not one of vertical extension. As salak continues to grow, it will shuffle along the ground (much like a snake) and will begin to hover, the roots acting as it’s foundation on the forest floor.
Pollinate
In addition to the efforts of pruning, you should also pollinate the female flowers with the male flower. The native pollinator can only be found in Indonesia so whilst native pollinators will give very low levels of production, if high yields are desired it is necessary to hand-pollinate (learn more about pollination here).
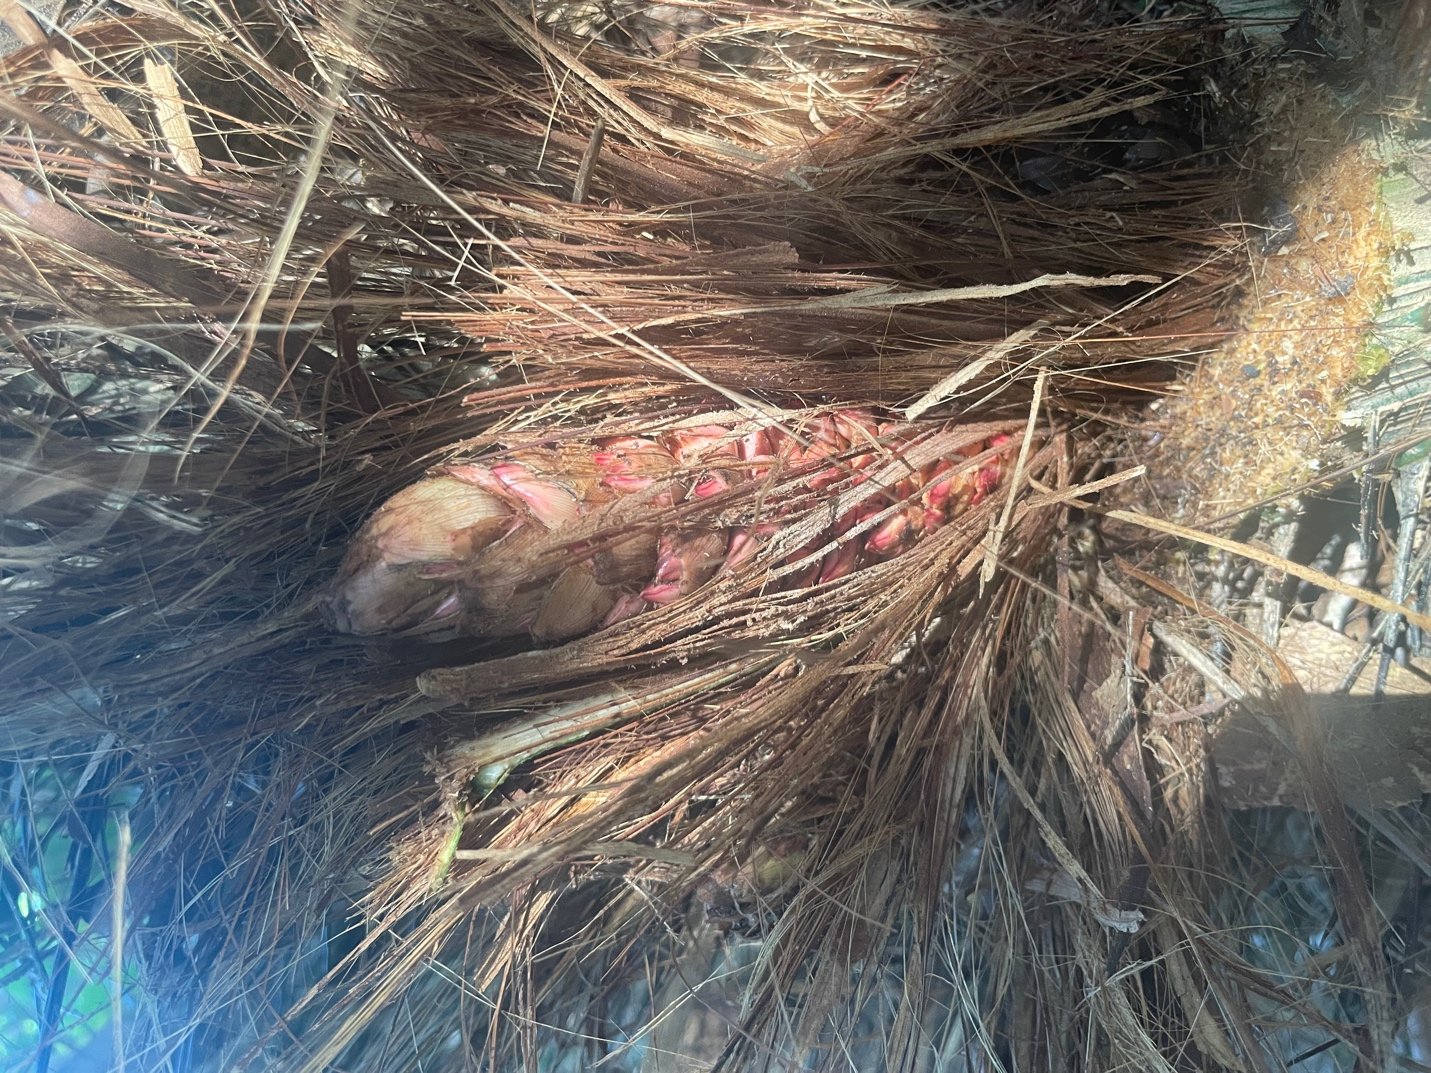
Female flower
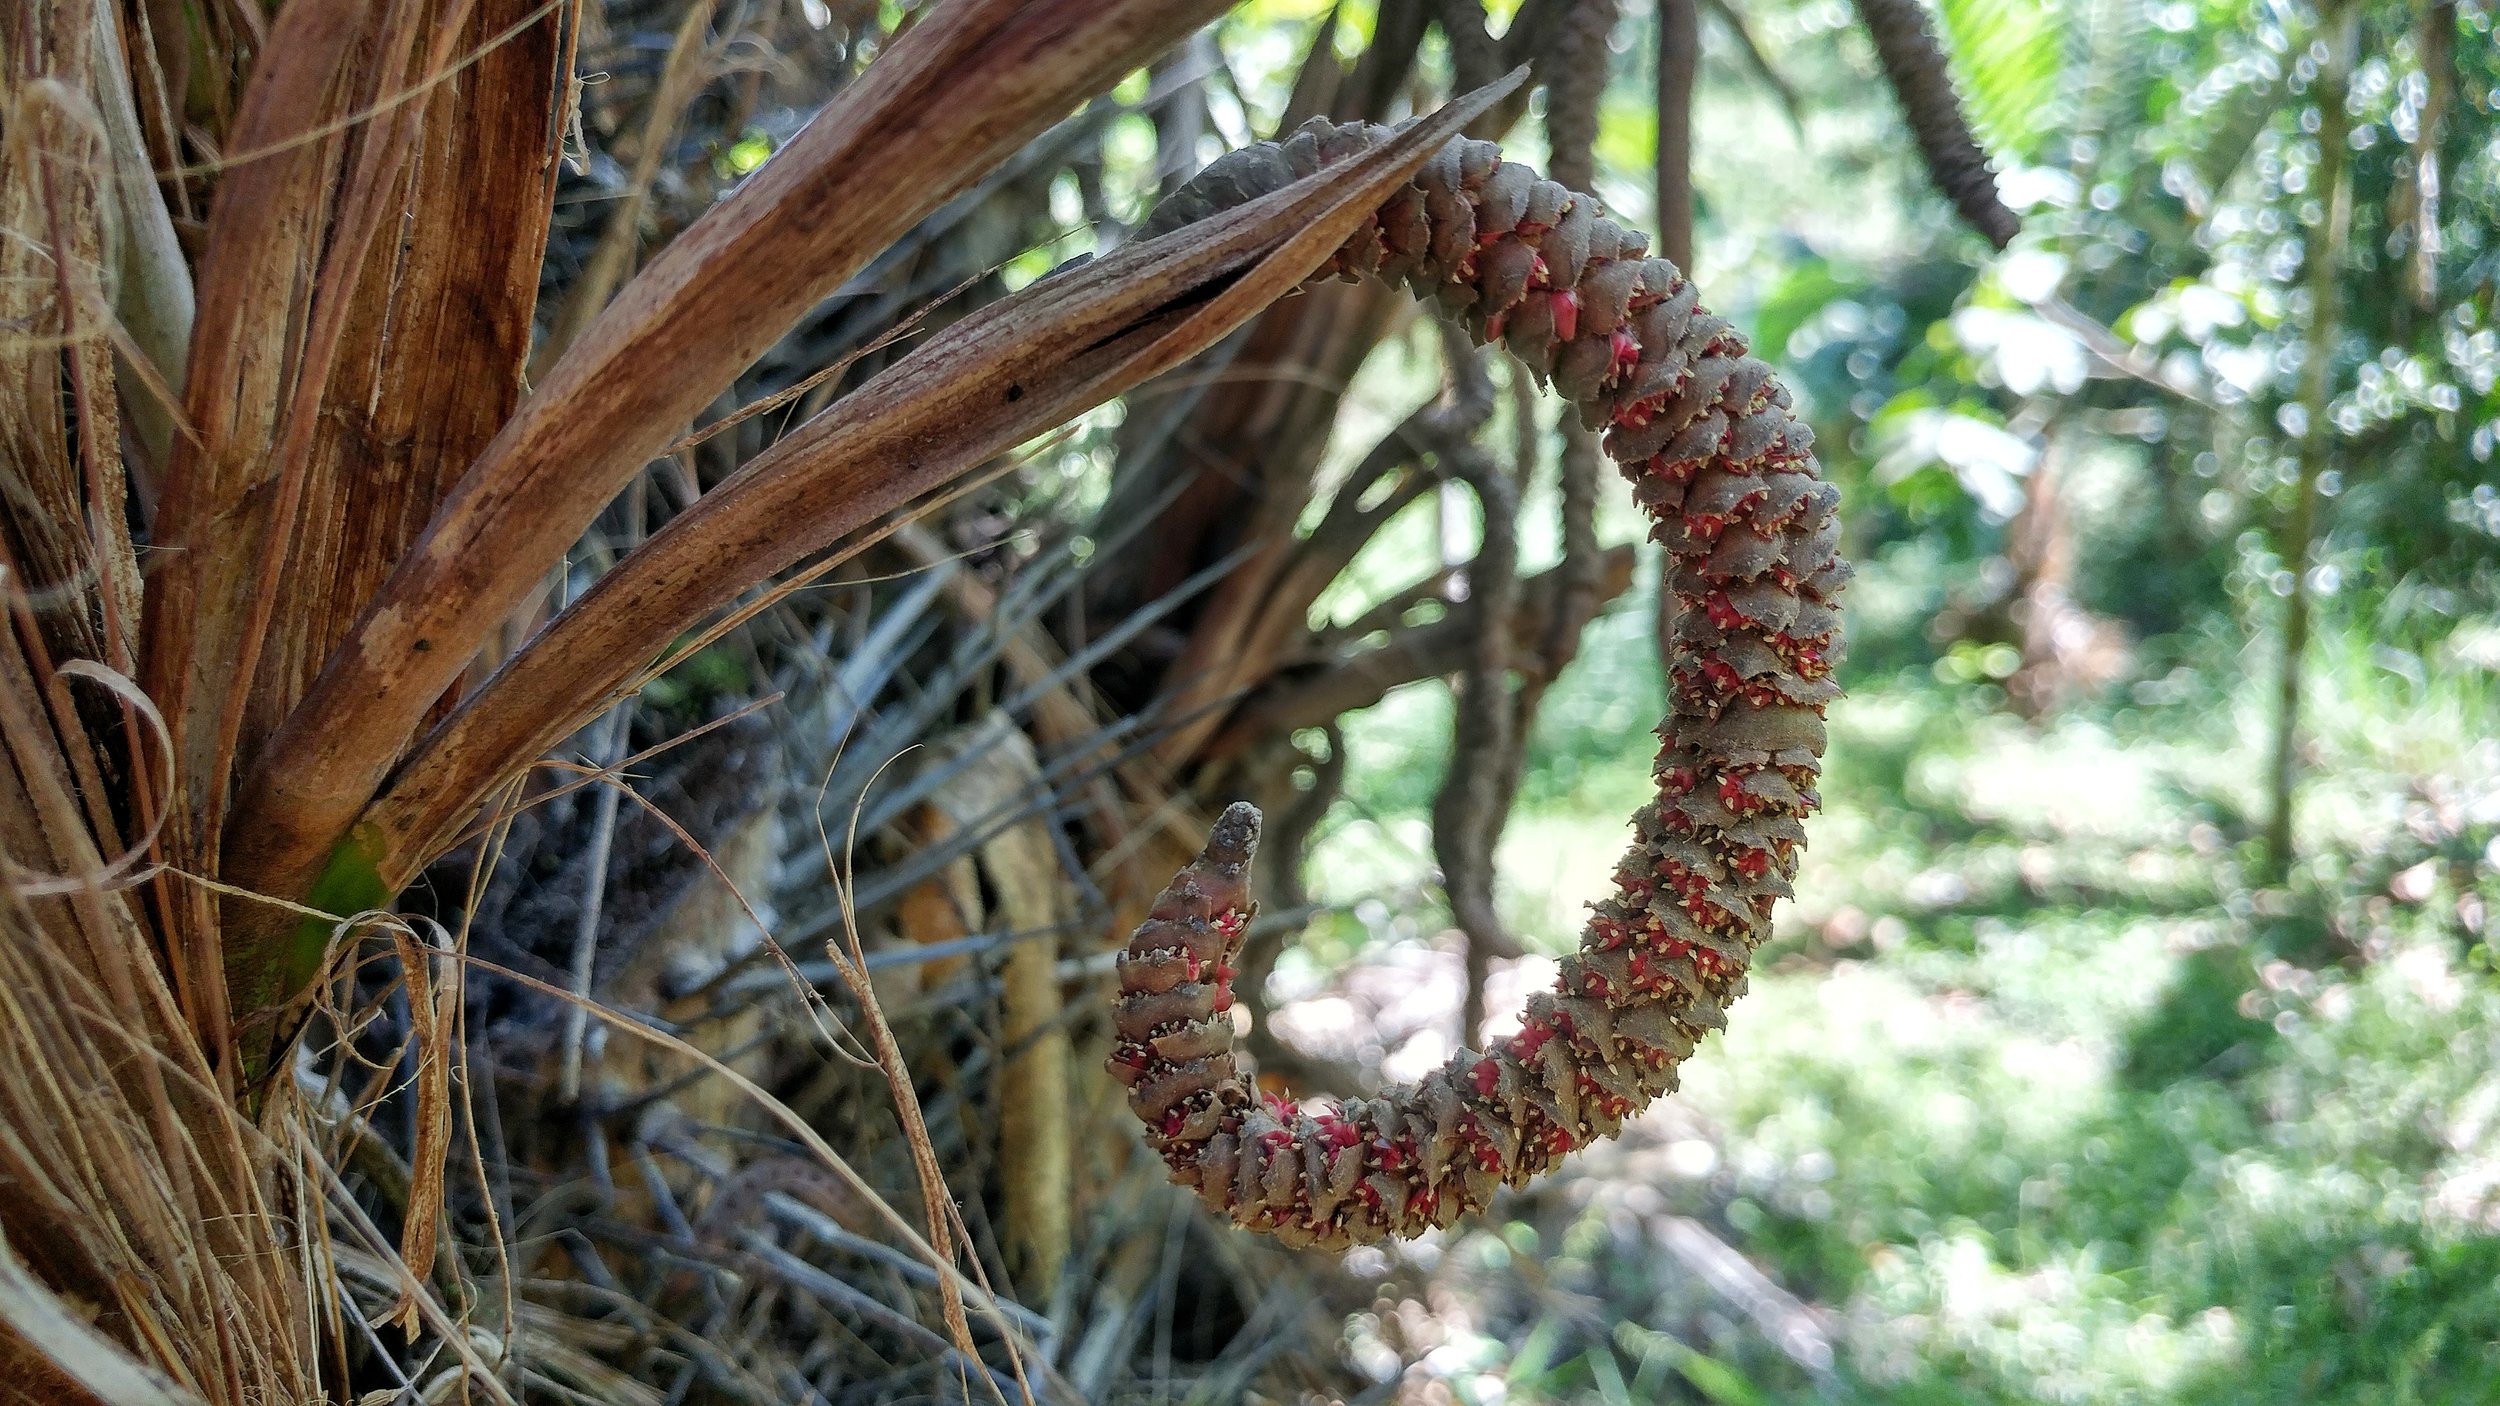
Male flower
Salak flowers all year round, so we have found it very useful to mark the females with red flags for easier management. This is because you only need to check to see if the female plants have any receptive flowers and then go and find a male flower if needed. The female flowers are cone-shaped and covered with a dense outer layer. The outer layer is shed over the course of a couple of months and the pink flower is revealed. The male flowers should be removed and brought to the female plant to dust the open flower. Within a few days the flower should harden up, which indicates a successful pollination.
Harvesting
Now comes the best part....harvesting! To determine if the fruit is ripe, take one off towards the base of the clump of fruits, after eating the flesh, see if the seed inside has changed from white to a brown color. If the seed is brownish and the taste is sweet and satisfying, you’ll know the time is right! If the seed is light brown or white and the fruit is astringent then you will know to leave the clump of fruits on the palm to mature further. Harvest when you can to avoid competition from pests but don’t be too indulgent because the fruit does not ripen off of the plant. After repeated successful harvests you will begin to be able to identify when the clumps are ready for harvest without needing to taste one first.
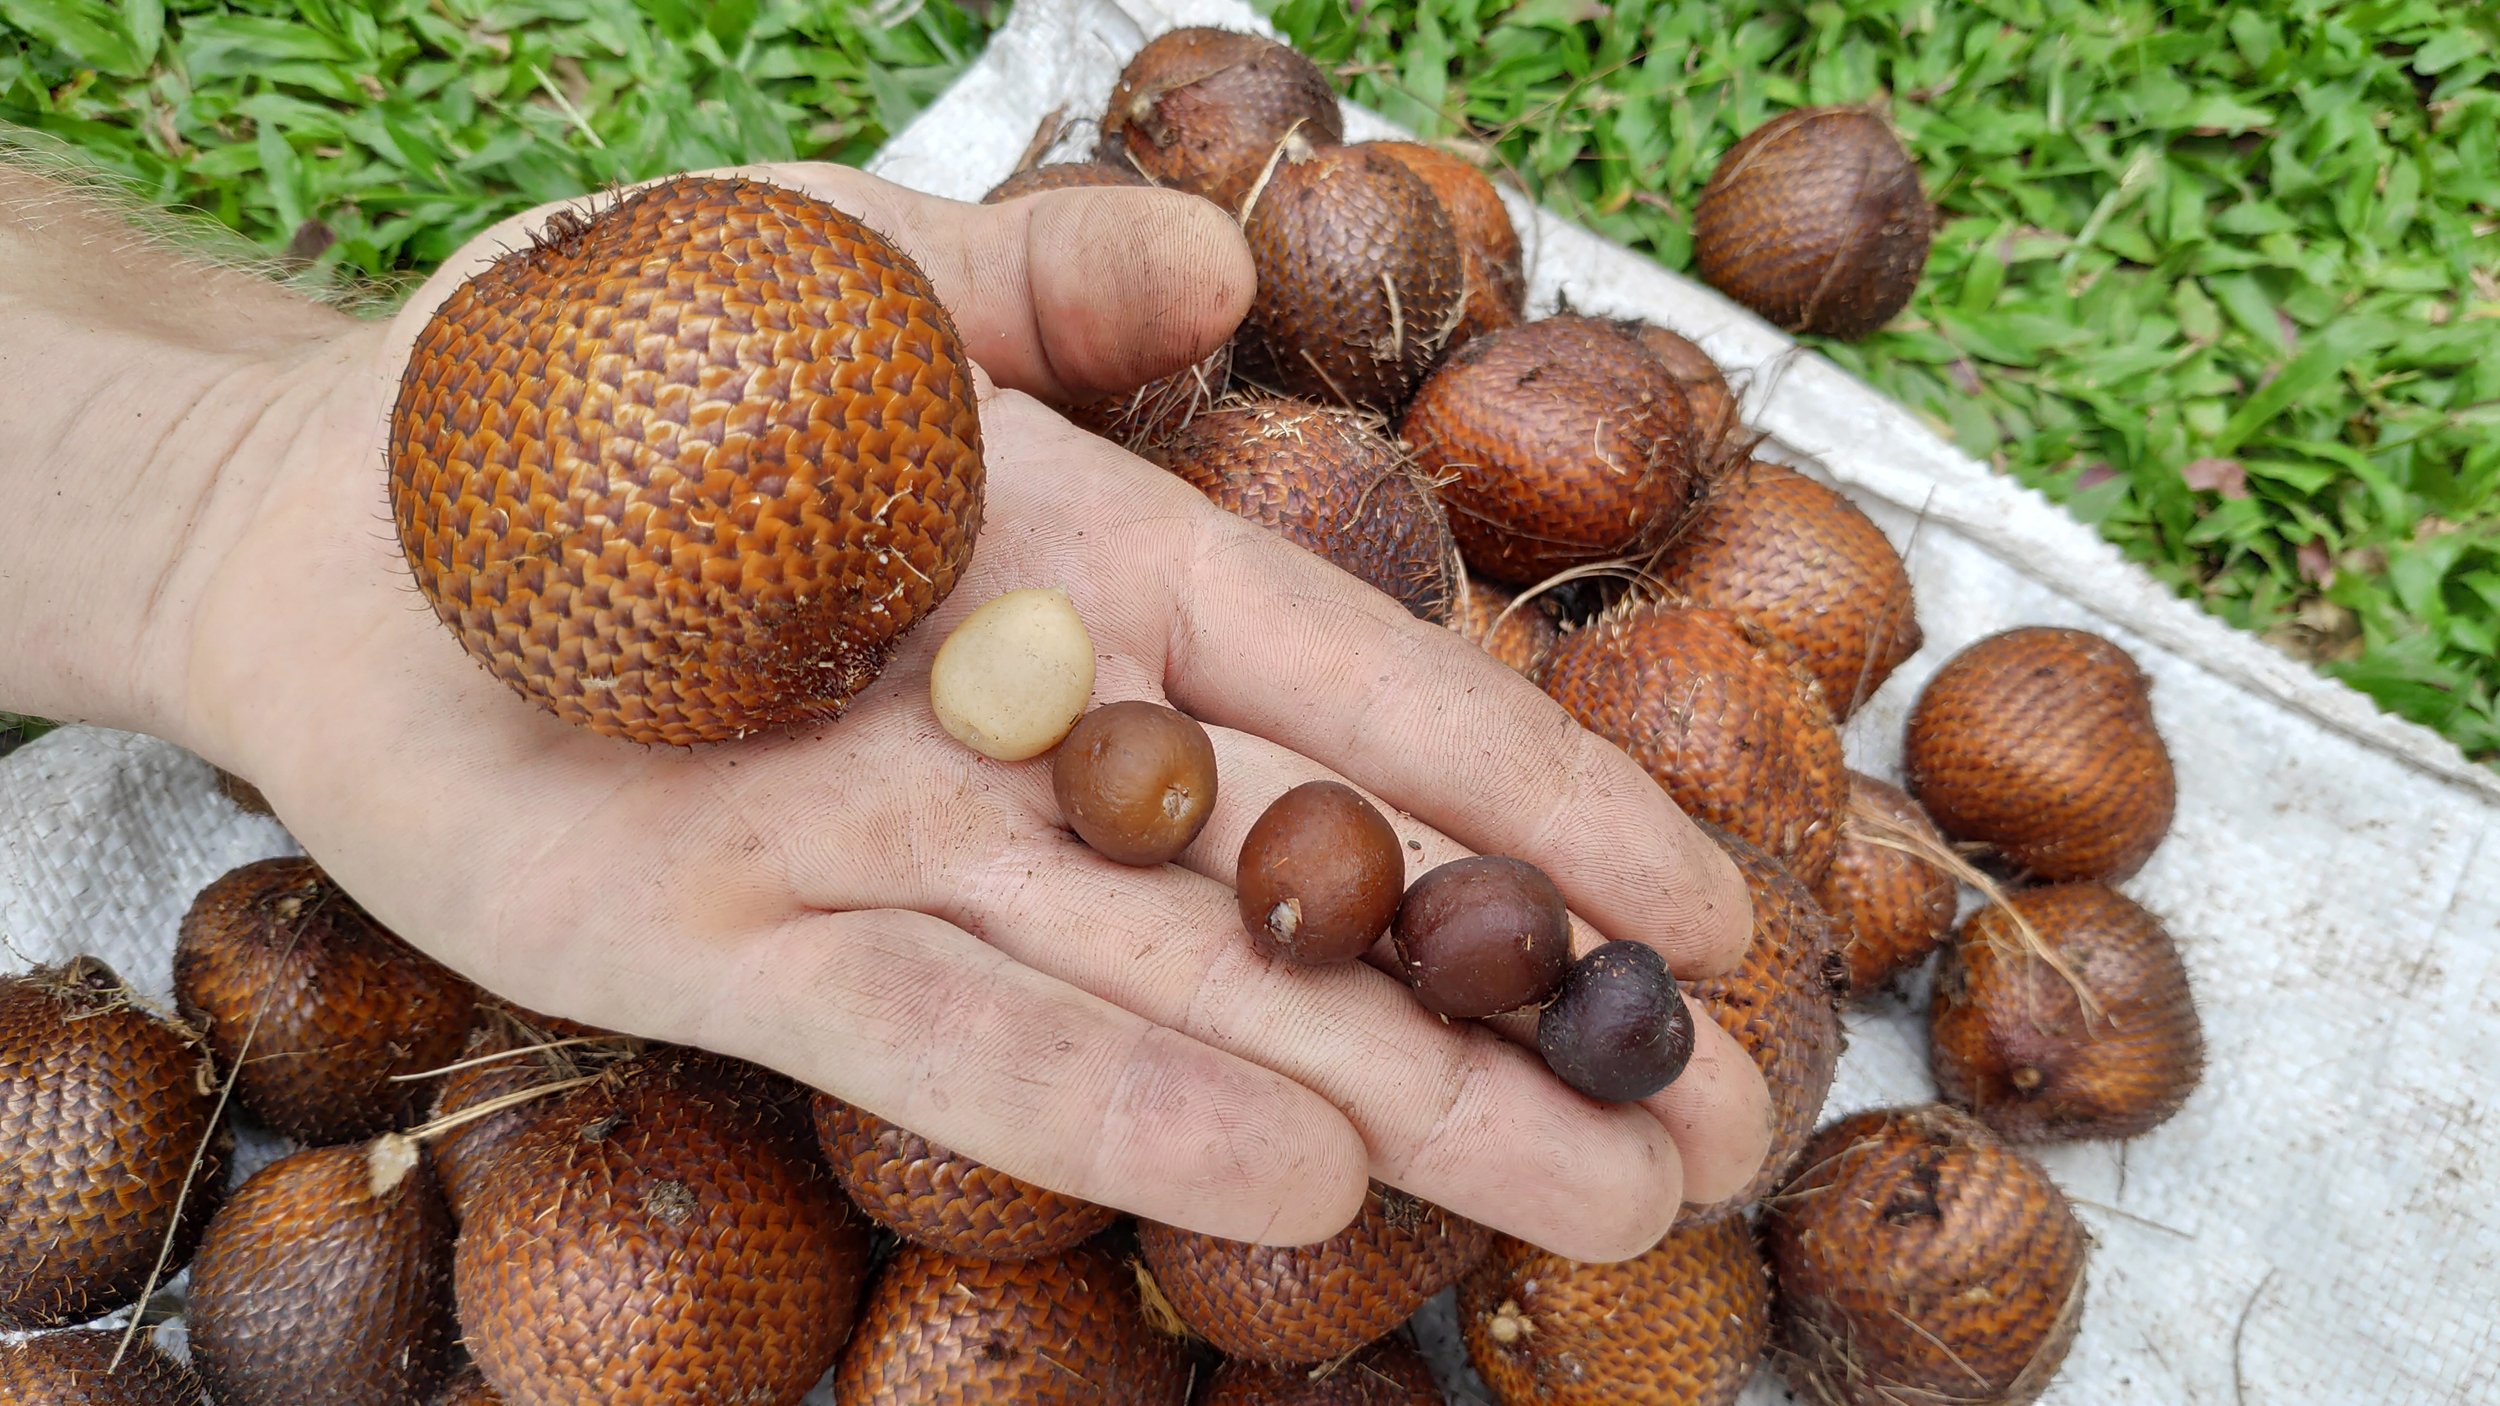
The different colors of the seeds to determine ripeness
Overview
Salak is a valuable companion in your agroforestry spaces, able to be planted underneath mature fruit trees. Like anything worth doing it involves work and dedication, but the rewards are well worth the effort and the work will not be in vain. The fruit is delicious and nutritious and maintenance is a great way to truly earn the fruits of your labor.
References :
El Arbol “Al servicio de Agricultor” Vol 2. Guia de Especies
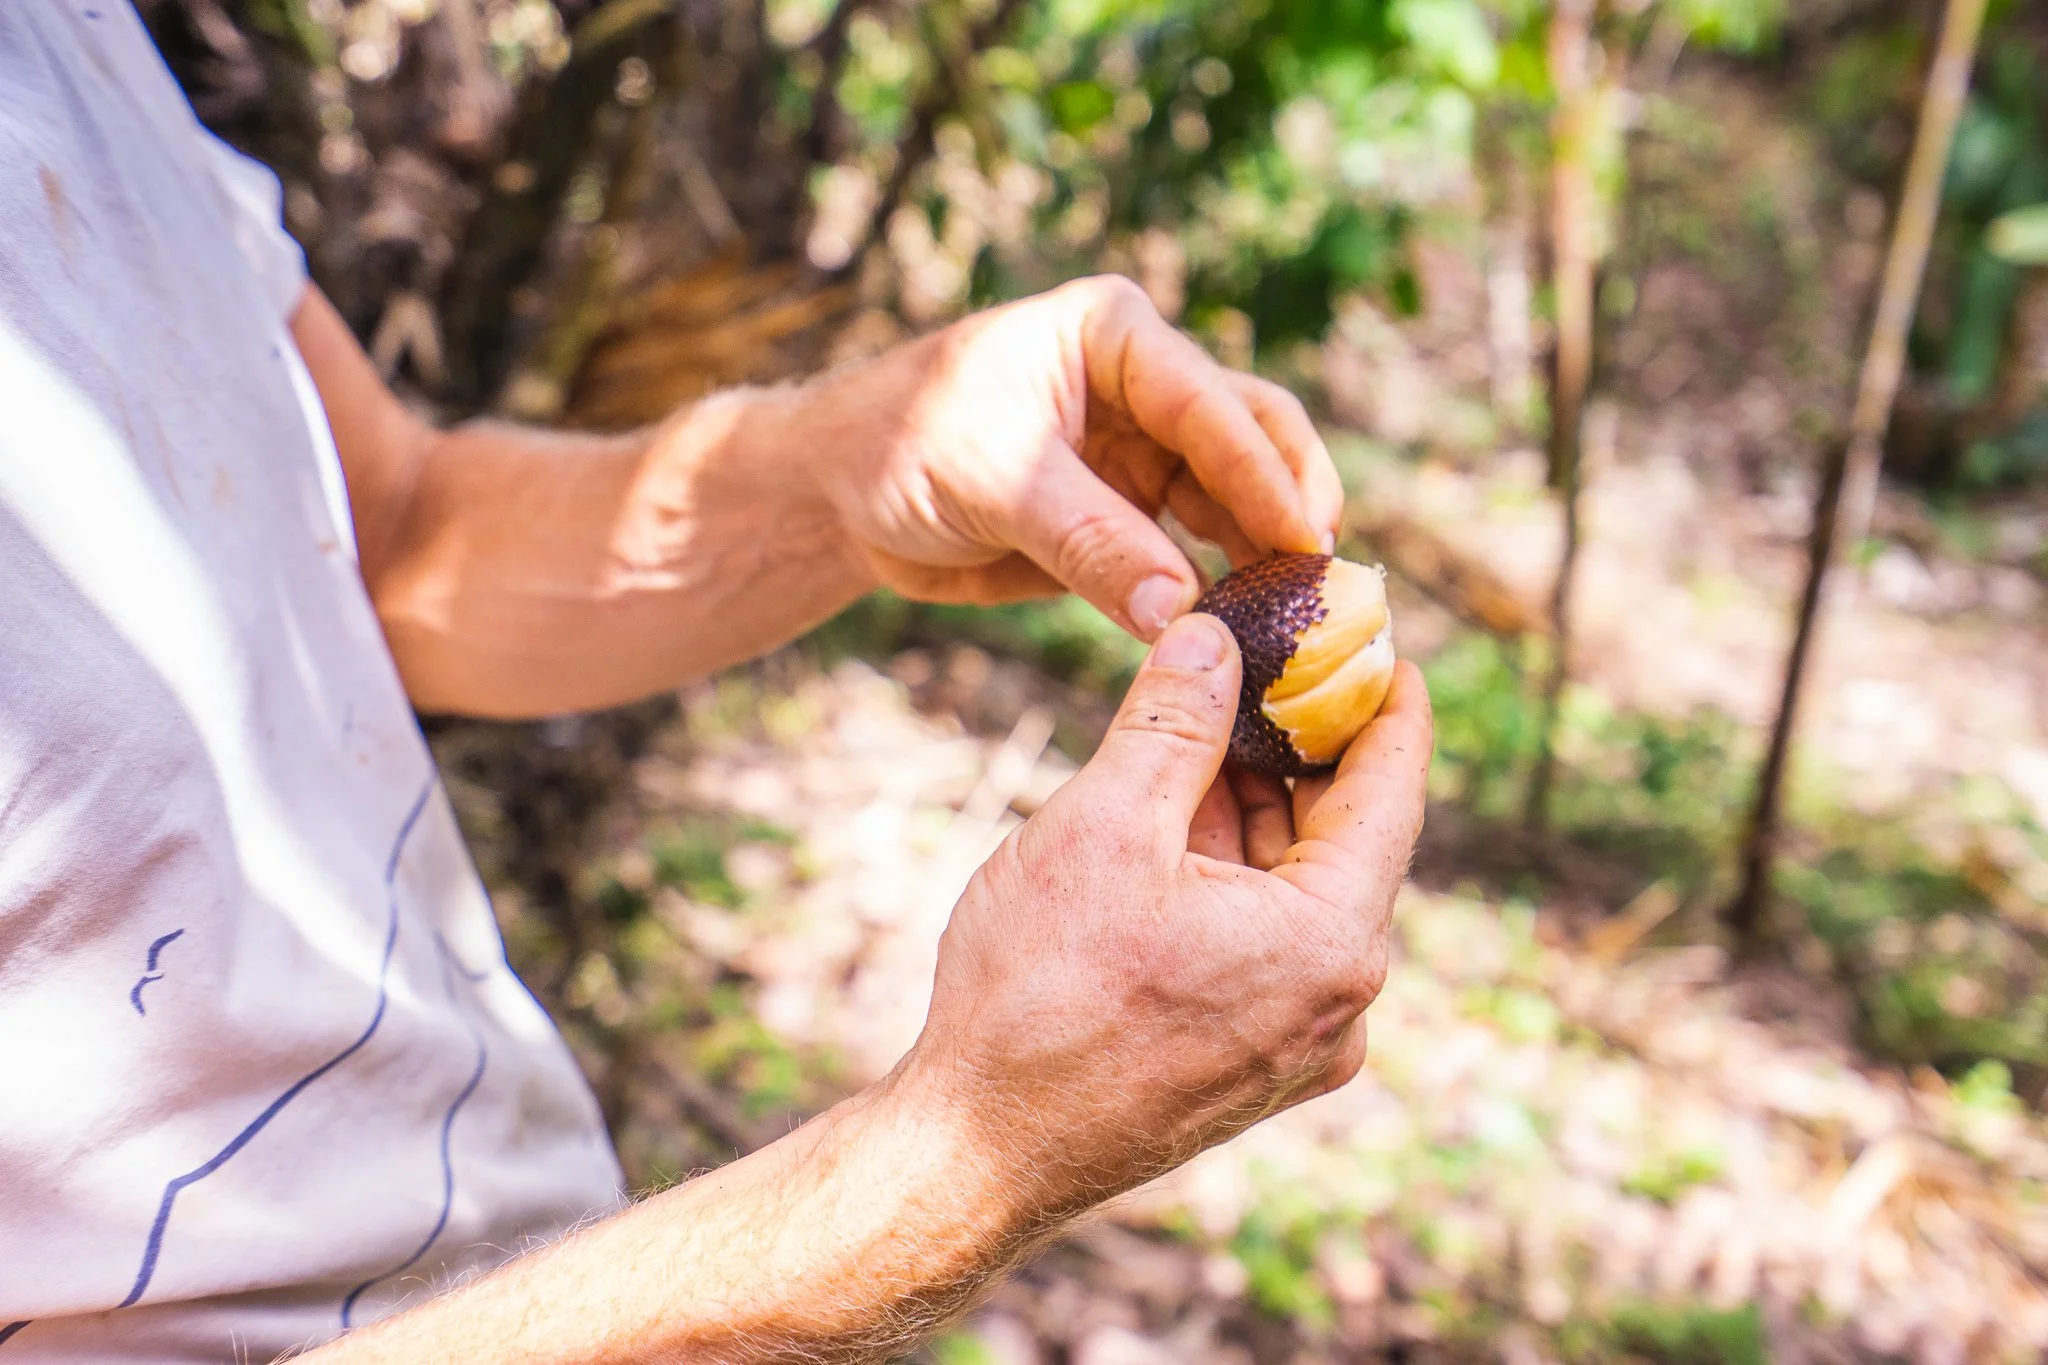
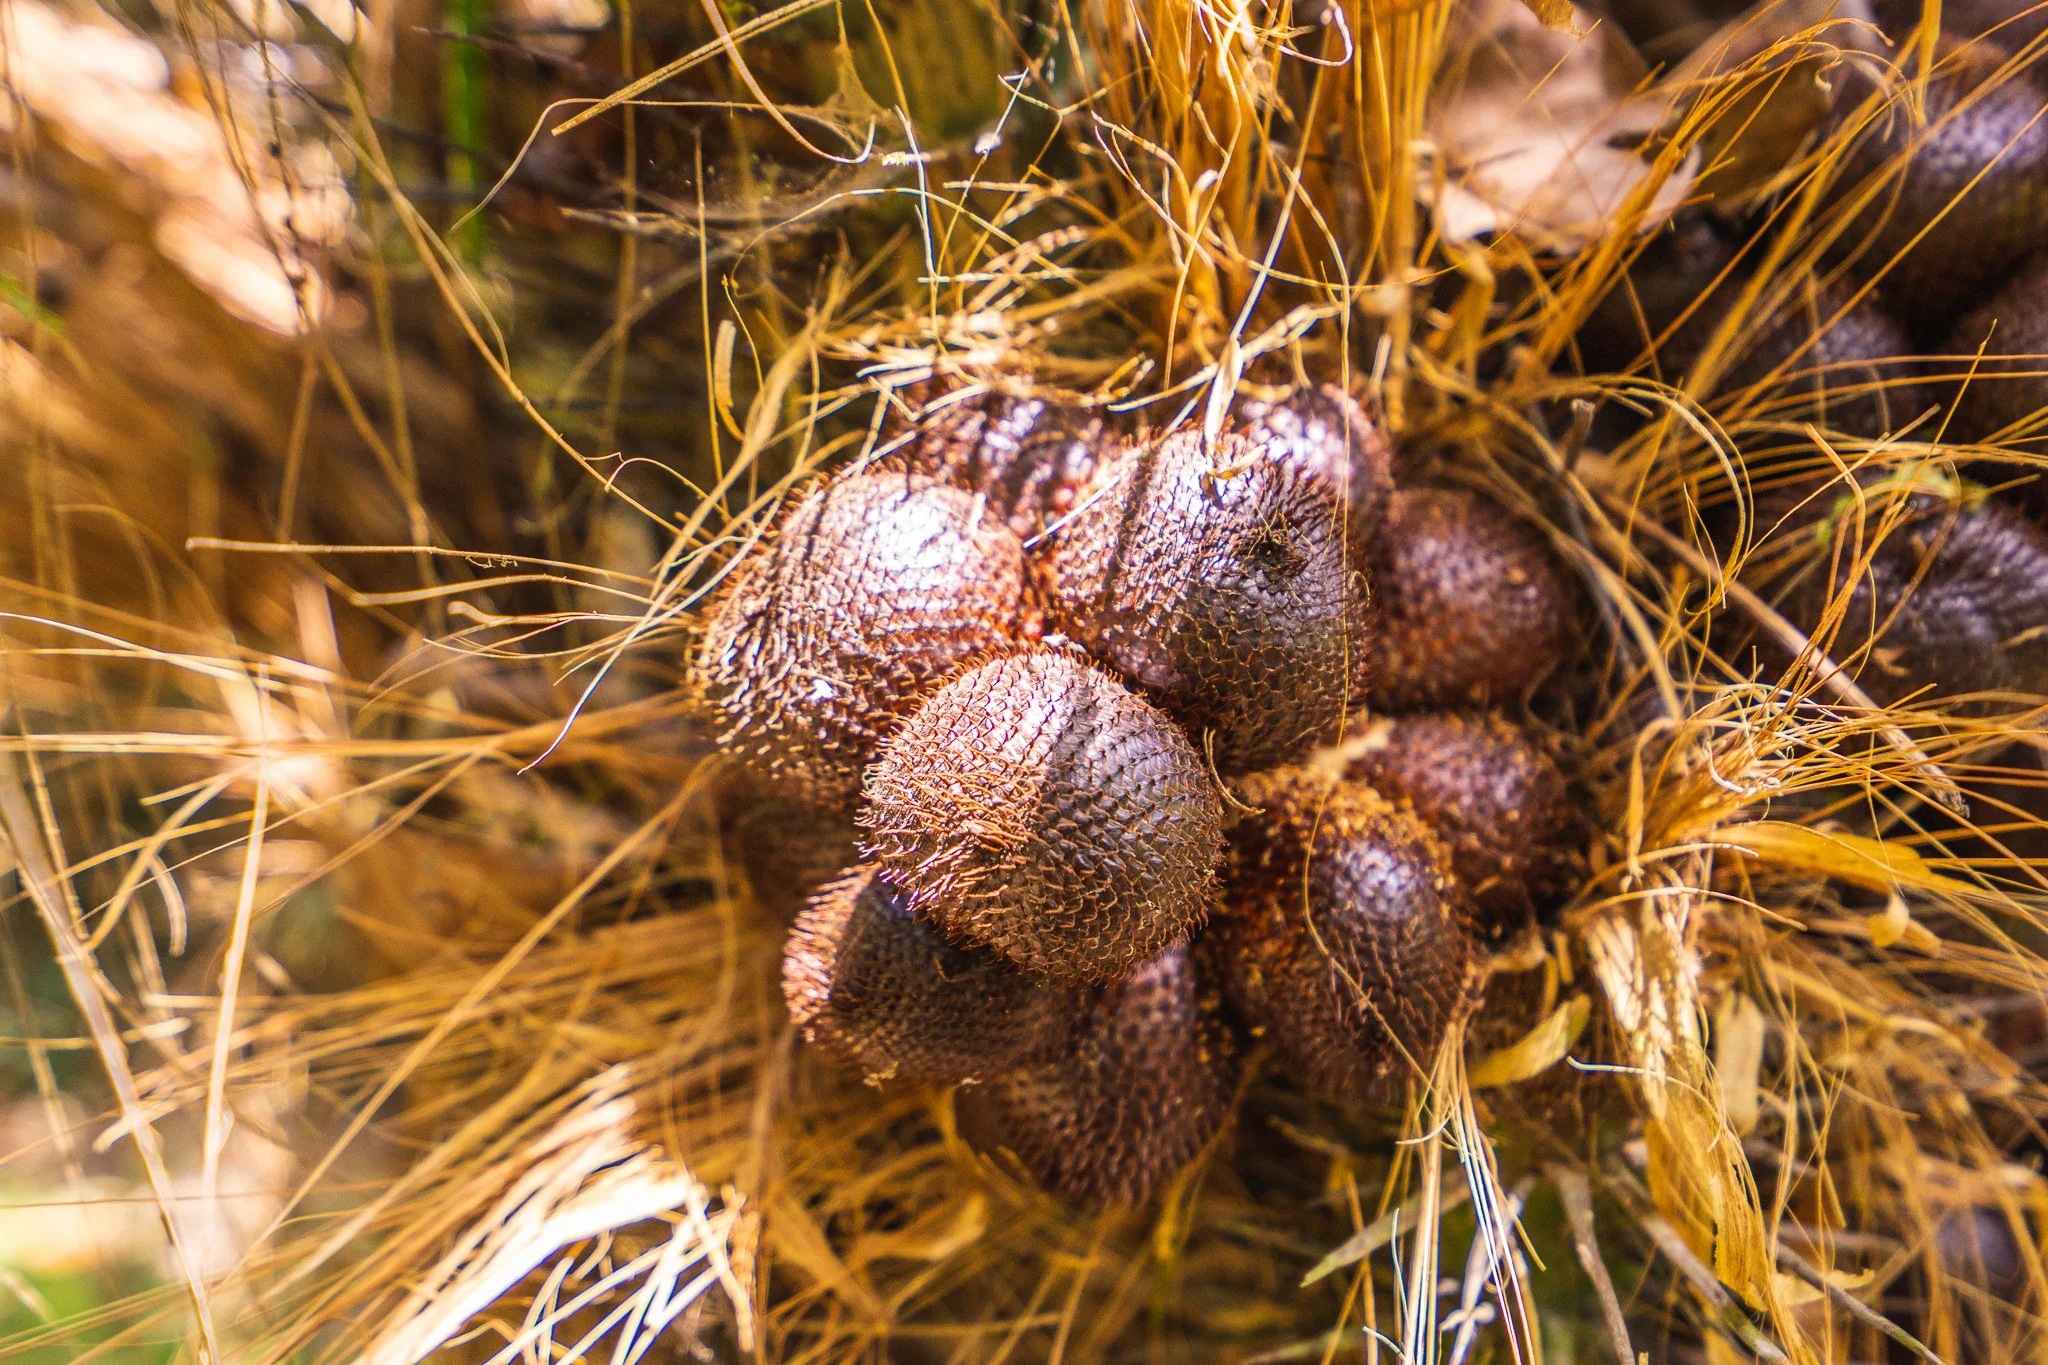
Check Out These Other Blogs About Salak & Permaculture
Salak Palm: A Guide for Tropical Permaculture
Ameding Calium-Deficient Soils - A Tropical Permaculturists Approach
LEARN MORE
Join us for one of our educational workshops about permaculture design, natural bulding, fermentation, and more. Check out our yearly workshops here.

Beyond Cacao: The Fruit(s) of the Gods
Like cacao, these trees produce a fruit filled with delicious pulp and seeds and have proven to be amazing additions to our culinary experiments. These pre-Colombian species are still grown on a relatively small scale and have retained significant genetic diversity. They provide hope for a more diverse tropical forest system and chocolate industry.
By 2021 Apprentice Cameron Conklin

Various forms of theobroma processing
You may have heard the term Theobroma (“theo” meaning “God” and “broma” meaning “fruit”) in reference to the genus of the cacao tree (Theobroma cacao) the incredible fruit that creates what we call chocolate. Here at the Ranch we love our cacao, but we also grow two other members of the Theobroma genus - cupuacu (Theobroma grandiflorum) and pataxte (Theobroma bicolor) who have stolen our hearts this year. Like cacao, these trees produce a fruit filled with delicious pulp and seeds and have proven to be amazing additions to our culinary experiments. These pre-Colombian species are still grown on a relatively small scale and have retained significant genetic diversity. They provide hope for a more diverse tropical forest system and chocolate industry.
A Short Description and History
The Cupuacu (Theobroma grandiflorum)

A cupuacu fruit
The cupuacu tree grows to an average height of 6-10 meters, maturing in 4 years. It has a large, brown, smooth oblong fruit (15-35 cm long), that falls to the ground when it is ready to be harvested. There are about 25 seeds per fruit protected by sweet, tangy pulp. Cupuacu is native to the Brazilian Amazon. Today it is still cultivated primarily in Brazil, but can be grown anywhere from southern Mexico to Peru. Right now, the cupuacu pulp is the most commonly used product from the fruit. The pulp is used for drinks, ice creams, pastries and other sweet treats common across Brazil. There is significantly more pulp in the cupuacu than cacao. To my surprise, the seeds are not as commonly commercialized, but there is a growing market. The seed is high in fat, about 48% (similar to 45% in cacao), which has created a budding market for industrialized cupuacu butter being used in cosmetics for skin care. Cupuacu butter has higher yields per fruit than cacao and its price is attractive for farmers. Processing accessibility seems to be the current limitation in production increase.
Yet the seed also makes for a creamy and delicious cupuacu chocolate or “cupulate” that creates light mocha-colored bars or drinks. From what I can see, there is an untapped market for an alternative chocolate product made from the cupuacu bean. The taste is tantalizing - fruity, earthy, and bright. It also has lower levels of alkaloids, theobromine, and caffeine than cacao but still retains high levels of vitamin C and anti-oxidants. The fat content makes for an extra creamy consistency. However it’s high oleic fat content is also one of its logistical downsides. It has a low melting point of 30 degrees Celsius (compared to 35 degrees for cacao) which can make transport difficult. Yet combining cacao and cupuacu together makes for a winning combination!
Here at the Ranch, we have used cupuacu for everything from making vinegars and wines, to bonbons and coconut cupuacu hot chocolate! It is truly a magical tropical fruit that I could see becoming much more popular across Central America soon.
The Pataxte
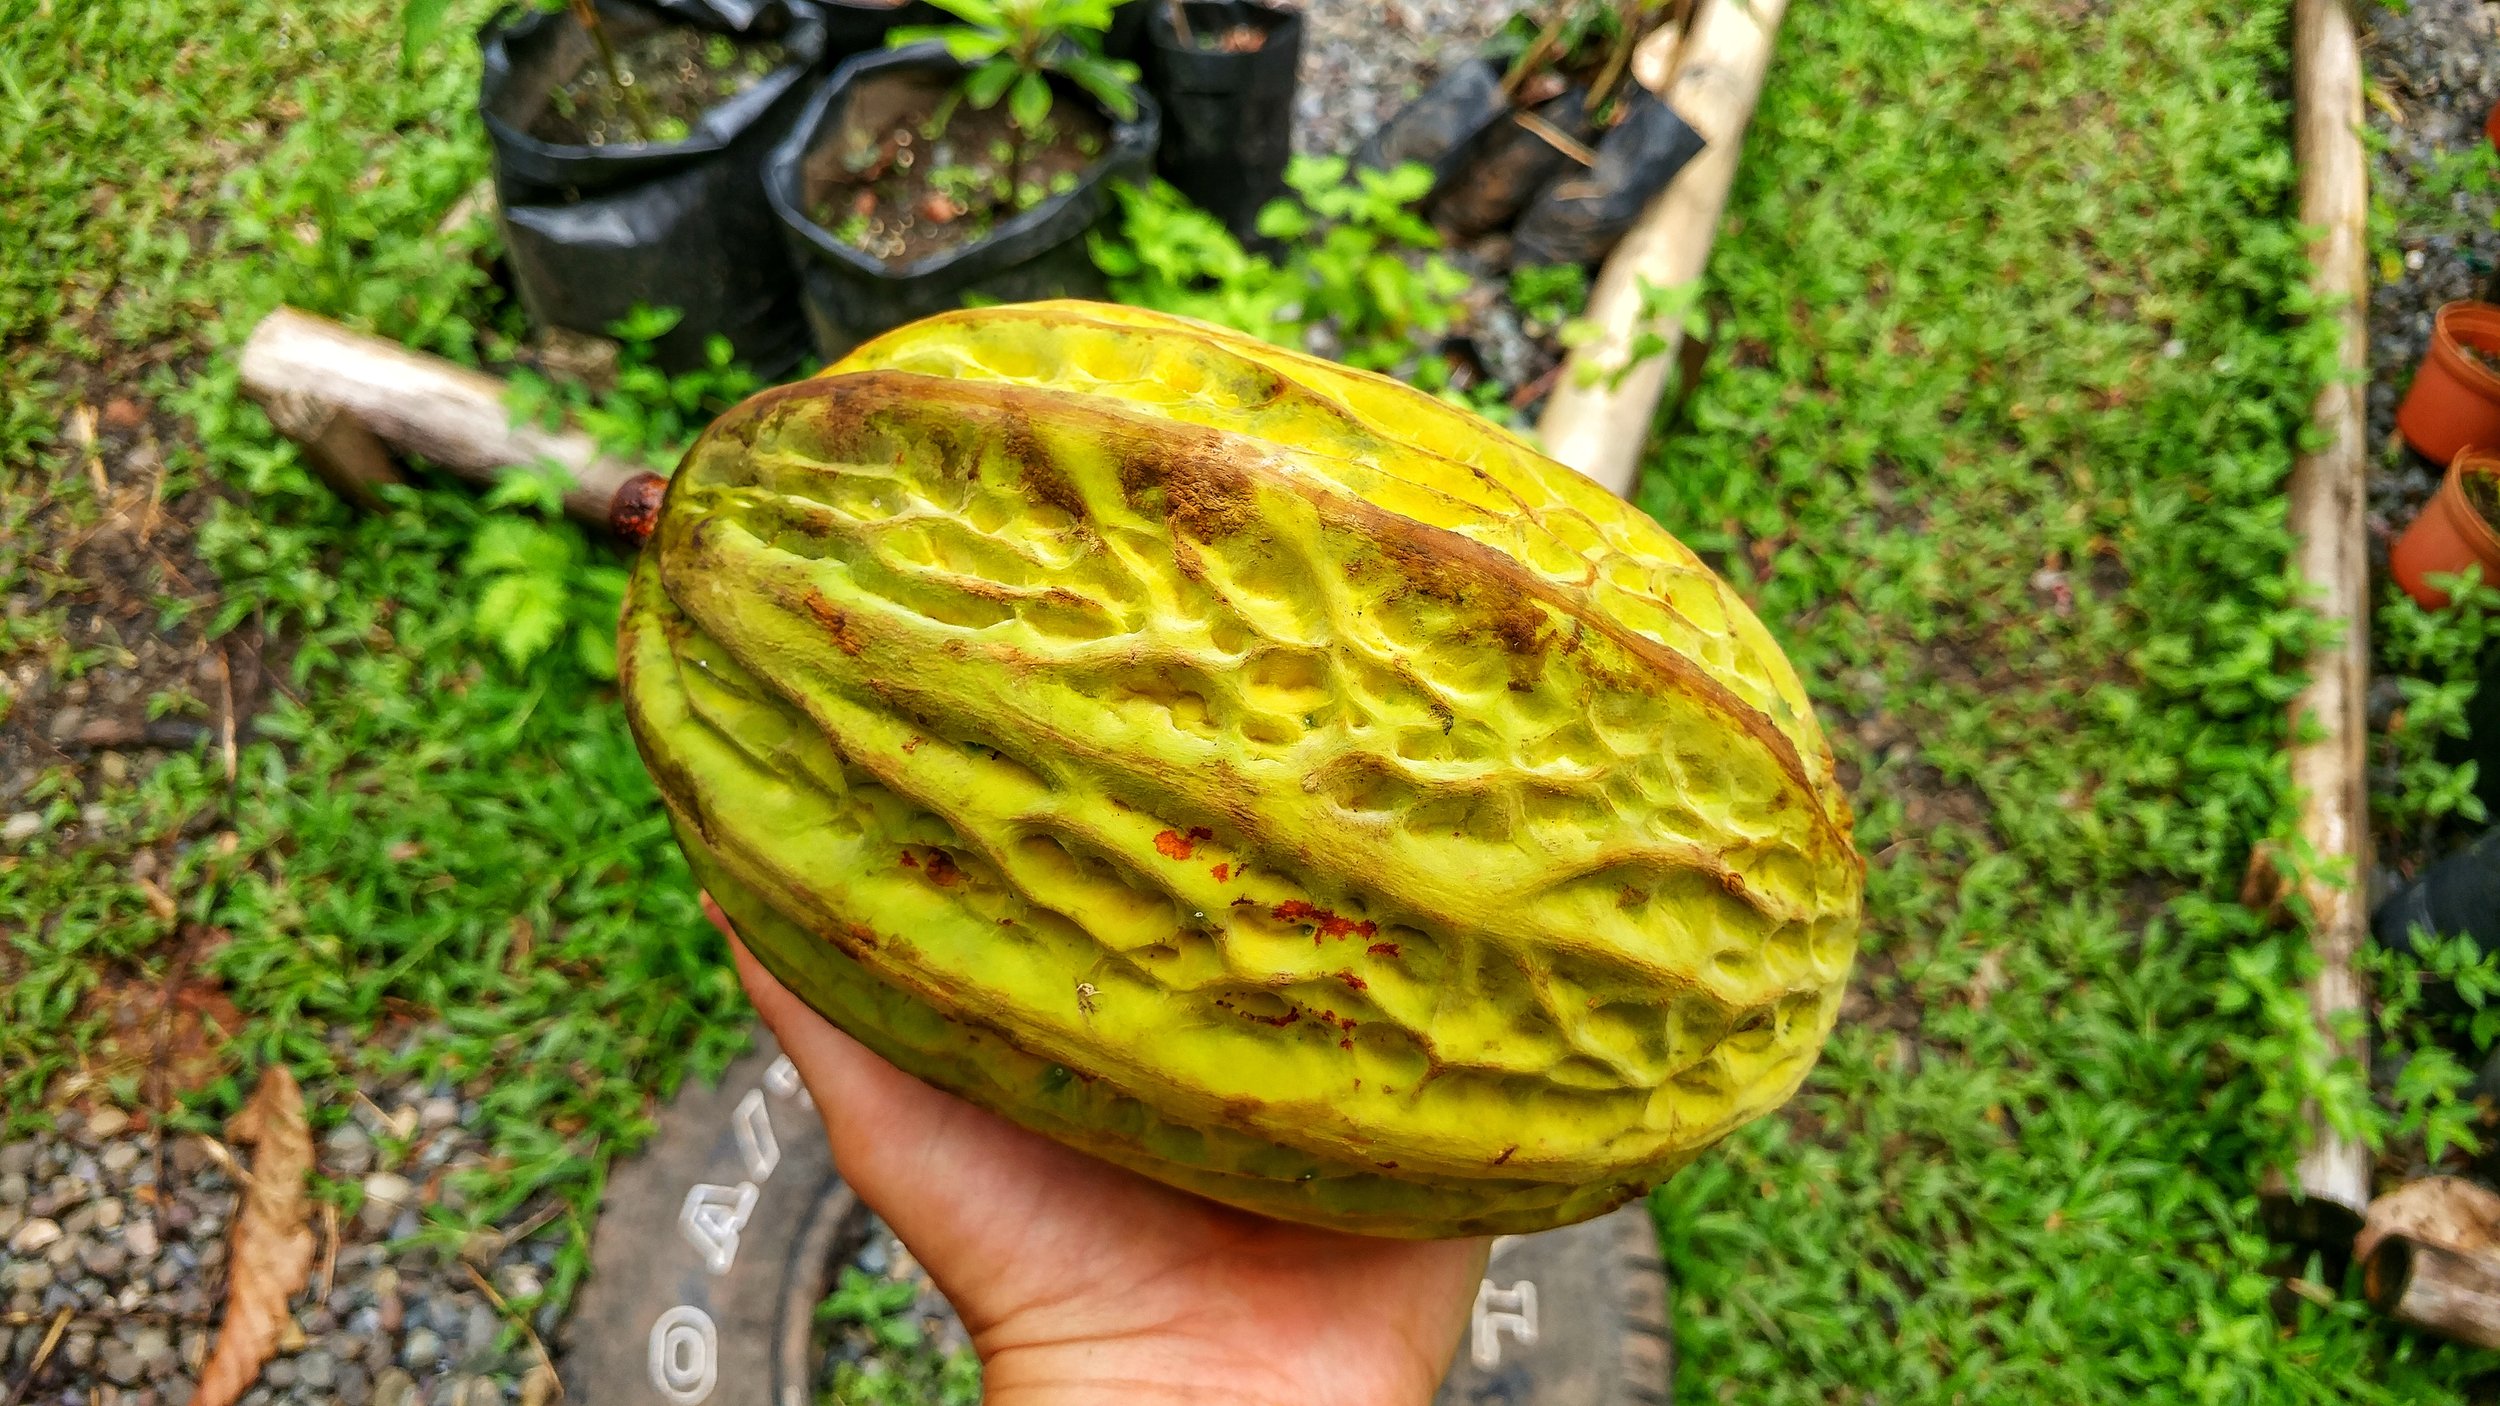
A pataxte fruit
The pataxte tree grows to an average height of 8-12 meters, maturing in 5 years. It has a large, yellow, round to oblong fruit with distinct ribs (12-30 cm long). Its pulp is tangy, and can sometimes give off the aroma of gasoline, but generally has a sweet taste. Here at the Ranch, the pataxte pulp flavor is defnintely more polarizing than cacao or cupuacu. There are about 40 seeds per fruit and the pods fall to the ground when ready to be harvested.
Similar to the history of cacao, the pataxte was developed into chocolate during the Aztec period and likely originates from the Amazon. Mesoamerican civilizations used pataxte in beverages similar to cacao. Pataxte is grown from Peru to Mexico, but today it is most commercially available in Mexico. Its seeds are used in combination with cacao to make chocolate bars or fried/roasted for savory dishes. In Oaxaca, there is a traditional beverage called the “popo” made of pataxte. Pataxte is also often used to create buttery foams on the top of traditional cacao and maize beverages in Maya culture.
Pataxte already has a history of being combined with cacao to make chocolate, but this relationship is still underutilized and certainly not pervasive in Costa Rica. Pataxte provides an incredible nutty, buttery, and sweet flavor to cacao. However, its fat content is much lower coming in at around 20%. This gives us the opposite problem of the cupuacu, making it difficult to create a creamy bar with just pataxte.
Sounds like a combination situation just might be the ticket! Here at the Ranch, we have combined pataxte with cacao and cupuacu to make bon bons, chocolate drinks and delicious chocolate sauce!
Seeing Chocolate in a New Light
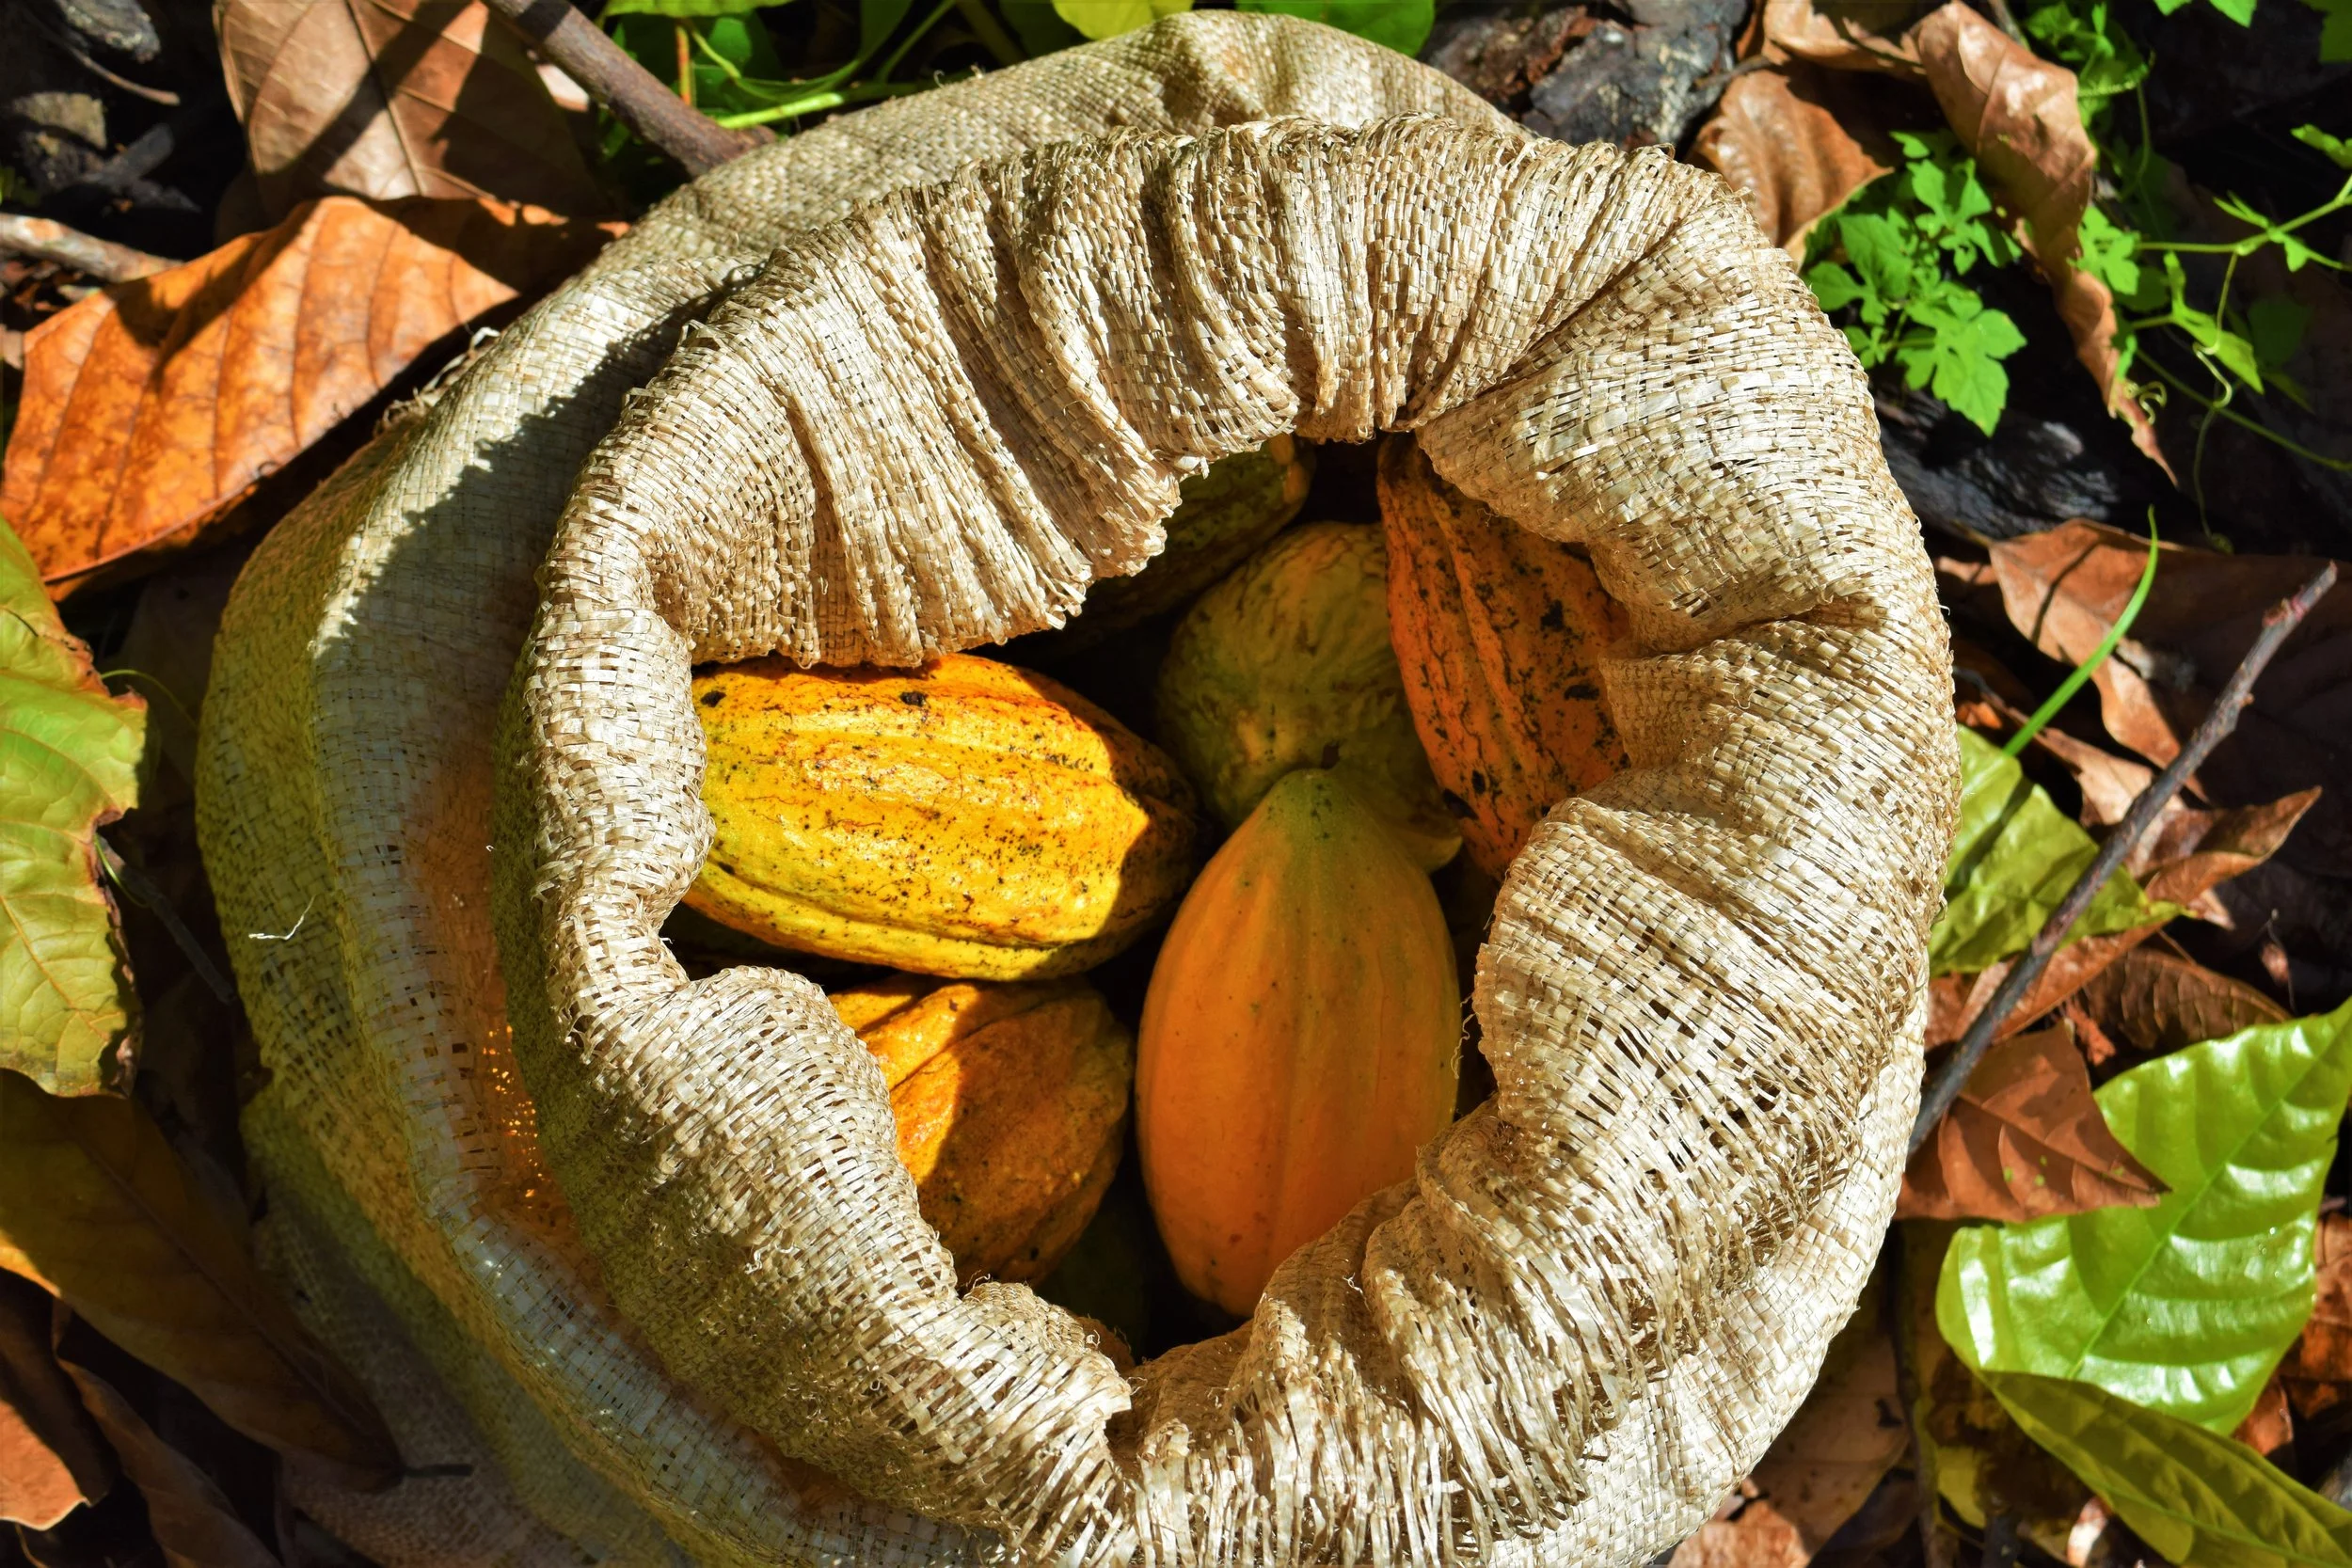
A small harvest of cacao fruits
A beautiful and important lesson I’ve learned this year is that chocolate is more than just dark, hard and bitter. Experimenting with cupuasu and pataxte has showed me that chocolate can be soft, creamy, nutty, floral, and taste like red wine. Expanding my interpretation of chocolate to encompass these other Theobroma varieties has inspired me to learn more about how to grow cacao, cupuacu, and pataxte in combination. This could create a more ecologically and economically diverse and stable chocolate farm for growers across Central America. It could also create more complex and unique chocolate products for everyone to enjoy!
The Fermentation Process
These Theobromas taste best when the seeds have been fermented, letting the sugars in the pulp seep into the seeds and enhance the flavor of the beans. A typical ferment needs a fairly large number of fruits (30+) to reach the desired temperature to initiate fermentation. Due to the somewhat sporadic and limited harvest of cacao, cupuacu, and pataxte we get from our agroforestry systems, we often find ourselves needing to ferment a small number of fruits at a time (under 10). To tackle this problem, we have done everything from warming jars of seeds in hot water baths to heating them in our compost piles!
The recipe below has wound up being one of our favorite ways to “ferment” the beans. It is a two for one process creating both tasty vinegar and beans with a rich flavor profile. As sometimes happens, we actually never intended to use this recipe to ferment beans, we just decided to give the beans a try after making the vinegar. Lucky for us (and for you!) we loved the way the beans tasted after going through this process.
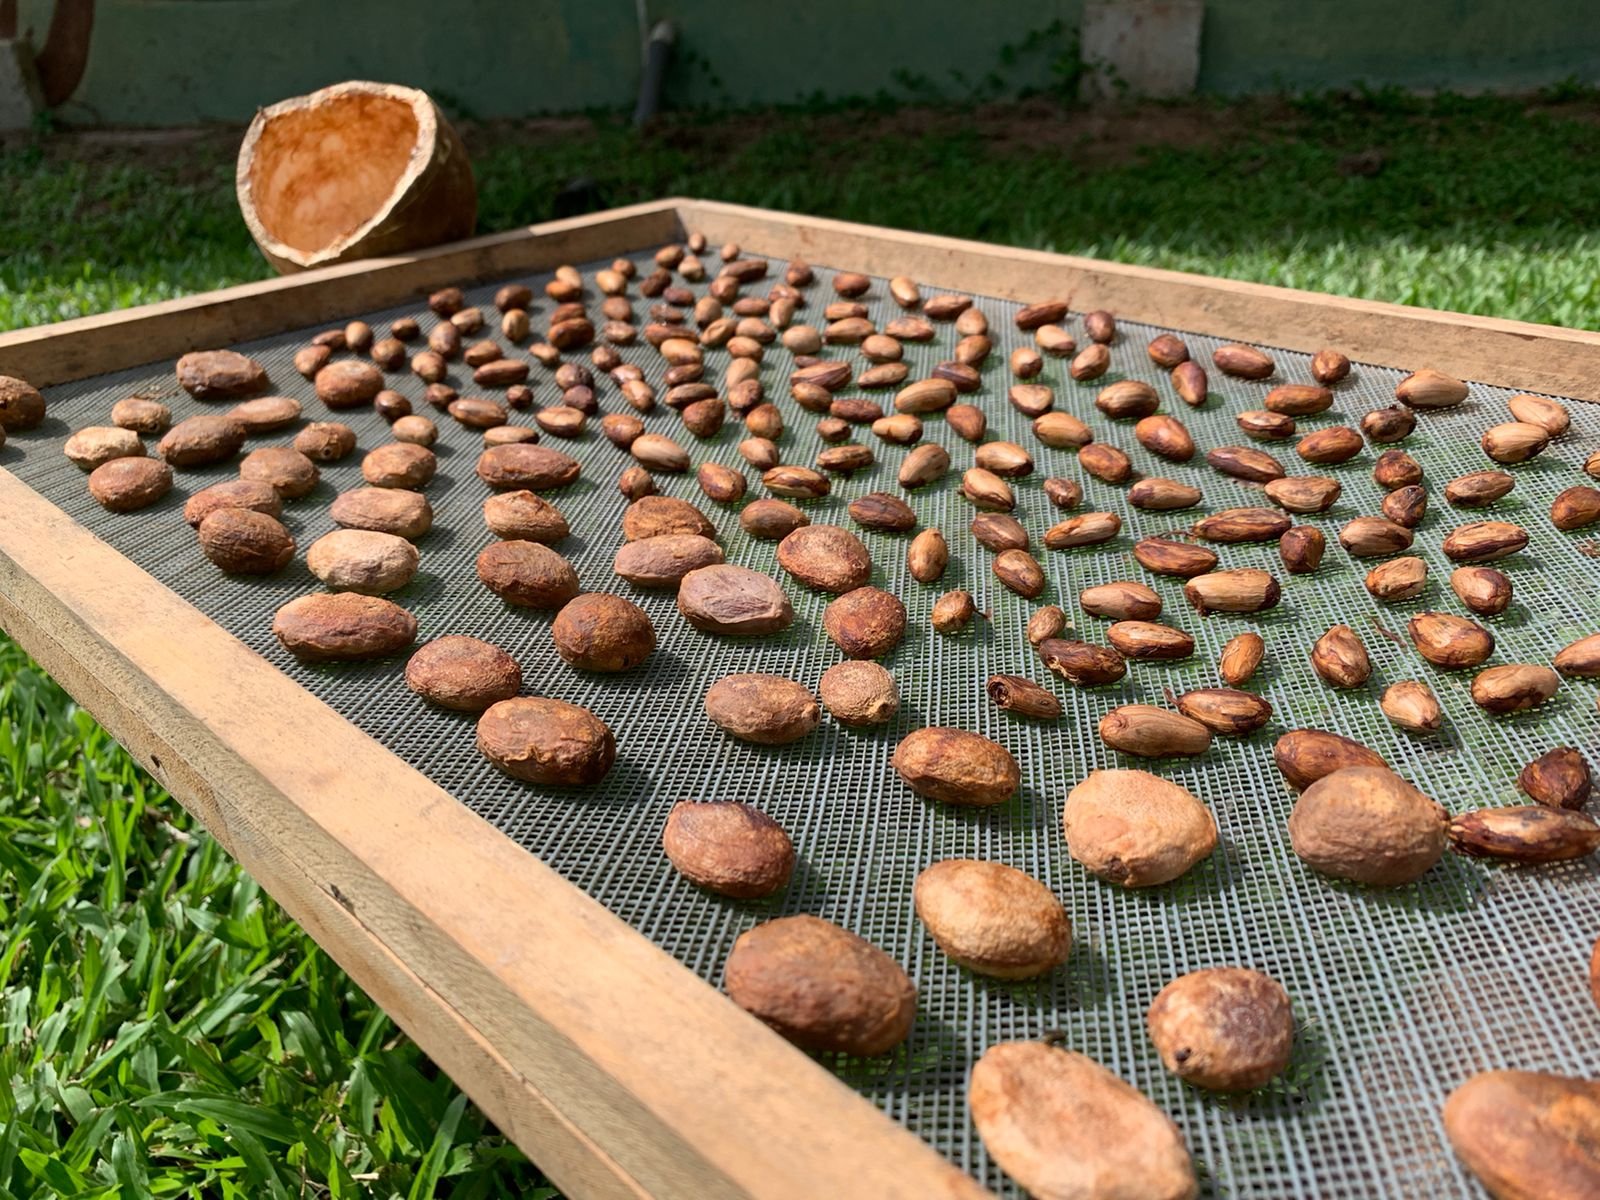
A mixture of Theobroma seeds that have been fermented and are drying in the sun
Recipe: Theobroma Vinegar Fermentation
Every so often, magic is created from a forgotten experiment. This recipe is just that, an experiment that was left on the back of the shelf only to be found again and turned into something delicious! This process actually produces two unique products, vinegar with notes of chocolate, red wine and nuts along with beans ready to be dried, roasted, and turned into chocolate!
When beginning with fresh pods:
Place seeds and pulp of cacao, cupuacu, and pataxte into a bucket. We have used as little as 4 fruits to as many as about 10 fruits for this process.
Fill with water, enough to cover all of the seeds and pulp sufficiently. Add more water if you would like to yield more vinegar. This is up to you!
Add 1/3 cup tapa dulce (our source of raw sugar) for every fruit in the ferment.
Leave open to oxygen but covered for bugs (we use a cheesecloth and string).
Stir once a day for 3 days.
On the third day, check the flavor of the ferment, adding more sugar if the solution has already lost significant sweetness.
Check the vinegar once a week for 3 more weeks, testing the solution to see how well the pulp has soaked off of the beans. Add more sugar if the vinegar flavor is weakening.
After about a month, check to taste - If the vinegar is tangy and the beans are relatively free of pulp (the cupuacu and pataxte will have more pulp than the cacao) then the vinegar ferment is ready.
Strain the vinegar and bottle, storing in an anaerobic environment for 6 months to age.
Wash the beans, removing any extra pulp you can, and lay out to dry in the sun.
These beans can then be used to make homemade chocolate bonbons, ground up and put in smoothies, or in the chocolate sauce recipe below.
recipe: Theobroma Chocolate Sauce
This creation is a delicacy here at the Ranch, made with three different members of the Theobroma family we grow: cacao, cupuacu, and pataxte. This sauce is a great accompaniment to almost anything sweet, but we particularly like it for drizzling over coconut macaroons (stay tuned for our upcoming recipe book). If you only have access to 1 or 2 of these beans, you can follow this same recipe and it will no doubt be delicious. The flavor profile will change as you change the ratios of the beans, so experiment as you have access to different quantities of each!
1/4 cup cacao beans
3/4 cup cupuacu beans
3/4 cup pataxte beans
1/4 cup tapa dulce
1 teaspoon vanilla extract
1/2 teaspoon sea salt
Water to taste
If beginning with fresh pods:
Ferment the beans following the “theobroma vinegar fermentation” recipe above.
Sun-dry or dry beans in a dehydrator (the skins should feel dry and no longer sticky).
Roast beans in a cast iron skillet on low for 15-20 minutes until flavors are released and shells look easy to peel.
Peel shells, separating beans out.
Grind beans all together using a heavy duty hand crank in order to release the fats, creating a paste.
On low heat, melt 1/4 cup tapa dulce (our local sugarcane), stirring in the paste. Slowly add water to create the consistency you are looking for. You can make this sauce as thick or thin as you’d like!
If you already have roasted nibs, you can skip steps 1-4 and continue with the recipe!
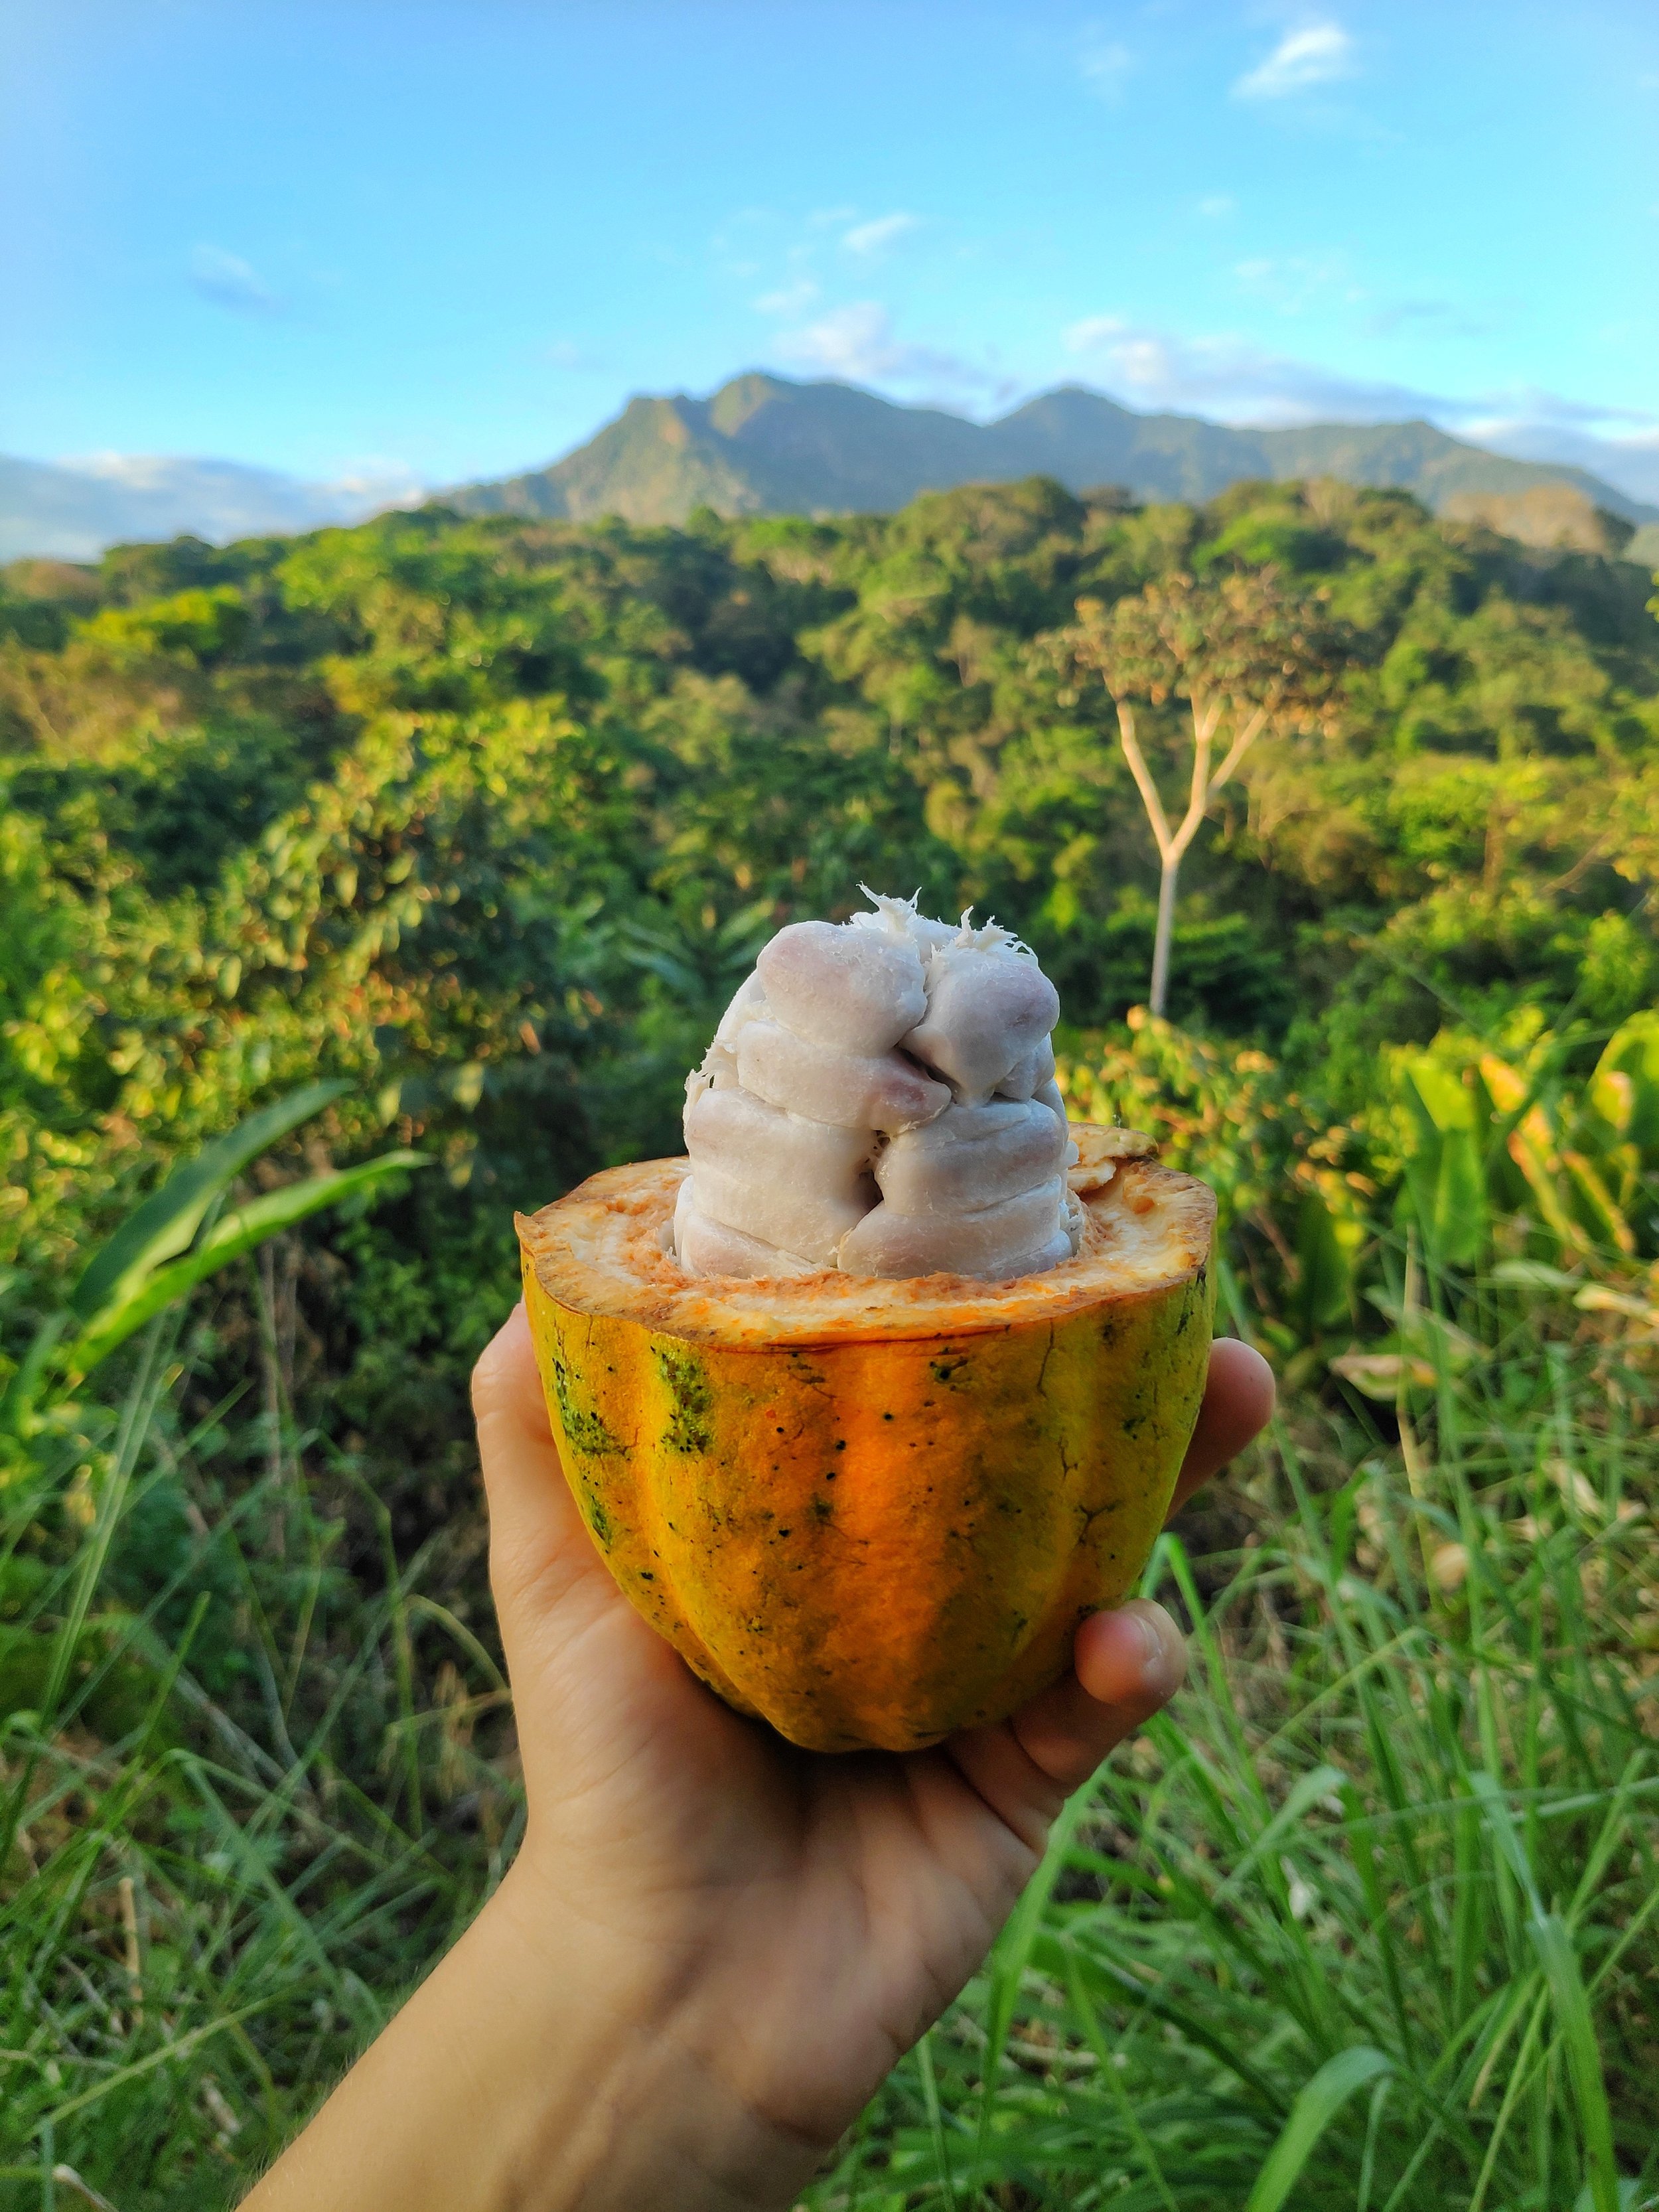
A cacao overlooking La Cangreja National Park
These magical and delicious fruits have some serious potential in the chocolate making market. We look forward to getting larger harvests and experimenting more with these incredible fruits.
Check out these past blogs
Farm to Table Chocolate Bonbons
Life of Spice: Farm to Table Cinnamon
How to Design, Plant, Maintain, and Feast from your Food Forest

Tropical Brewing
The craft brewing movement has migrated to Central America and the Caribbean. A growing number of small scale artisanal producers are building on the American Craft Brewing tradition by incorporating local spices and fruits into traditionally brewed ales. To distinguish themselves, from their temperate counterparts, they are adding a tropical flare and creating innovative flavor combinations
by Connor Harron
The craft brewing movement has migrated to Central America and the Caribbean. A growing number of small scale artisanal producers are building on the American Craft Brewing tradition by incorporating local spices and fruits into traditionally brewed ales. To distinguish themselves, from their temperate counterparts, they are adding a tropical flare and creating innovative flavor combinations. For example Domingo7’s Maracuyá Pale Ale (that’s Spanish for Passionfruit) in Costa Rica, Ocean Lab’s B.O.B. - Blood Orange Blonde in Puerto Rico and Lu Bru’s Maiz Azul (Blue Corn) Ale in Mexico all demonstrate how local producers are beginning to incorporate regional ingredients into local craft beer movements. This is surely a positive development and one that leads us to consider other ways we might be able to further highlight local and seasonal ingredients into craft beers.

These efforts will help to make brewing both more sustainable and position craft brewing as a vehicle for more thoroughly exploring terroir, which describes the potential for fermentation to be used as a method of expressing the unique environmental conditions of the places in which our ferments are produced. By using exclusively local ingredients as well as wild captured yeasts, we have the power to capture the unique flavors of seasons and regional differences that allow for near infinite variation and creativity to explore new combinations of flavors that are rooted in cultural tradition while simultaneously pushing the frontier of artesian brewing. As much as I love finding good craft beer in places like Mexico and Costa Rica, I constantly find myself asking if it really makes sense to be brewing beer with imported German Barley and Hops from the Pacific Northwest United States when there are such a plethora of sugar sources and bittering herbs available locally in nearly every corner of the globe. Could we instead develop beers using a hybridized process and create products that are truly local while still maintaining the key characteristics that make beer, beer?
Speaking of, have you ever asked yourself what it is that really makes a beer? It turns out, the answer really depends on who you ask and where you live. In the most general terms, beers are fermented from carbohydrate rich starches (typically grains such as barley) that first need to be enzymatically converted into simple sugars and extracted into a liquid malt before the substrate can be fermented to produce appreciable levels of alcohol. Wines and Ciders on the other hand, are fermented from fruits and simple sugars that can be fermented into alcohol with limited or no processing. In the case of beers, bittering herbs such as hops are commonly added to provide antimicrobial properties, improve shelf stability and add complex flavors to ferments. In the United States, it turns out that hops are not required in the production of beer and that there are many malt substitutes that are allowed in the production of beer, including “rice, grain of any kind, bran, glucose, sugar, and molasses (TTB Ruling, 2008).” This definition is actually quite liberating, and creates the opportunity to experiment with non-traditional malts and bittering herbs in ways that will promote creativity and improve the sustainability of the craft brewing market globally. This flexibility in malt production will be especially important given that recent climate models suggest that the regional distribution of barley production will become increasing restricted over the next 20 years (Nature, 2018).

In Costa Rica, we have been experimenting and finding repeated success using a wide range of local ingredients including banana, corn, rice, cacao beans, coffee and local cane sugar for producing malts. Corn and bananas, for example, both have long cultural traditions of being used in the creation of local beers. In Eastern Africa, Bananas have long been used to create malt for the production of banana beer (Urwaga or Mubisi as it is locally known). Bananas make for an interesting malt base because they fall into a relatively unique category of fruits that when ripe are rich in both simple sugars and complex carbohydrates that can be easily fermented into a strongly alcoholic brew while maintaining a mouthfeel that is remarkably similar to beer brewed from barley. When the ripe bananas are boiled for several hours, the sugars begin to caramelize, transforming the flavor of the malt into a sweet, neutral flavored base that remarkably, tastes very little of banana, making it an ideal substrate for mixing with bitter herbs or other local products such as coffee and chocolate that can be fermented into either an Ale or Stout like brew.

Conversely, in many parts of South America, but perhaps most notably in Peru, Maize has been used for centuries to produce a corn beer called Chicha. Unlike barley, which when sprouted produces a large concentration of Amylase Enzymes (the key types of enzymes needed to convert complex carbohydrates into fermentable sugars), to make a corn beer, these enzymes need to come from another source. The indigenous peoples of South America developed an ingenious solution to this challenge when they discovered that chewing the cooked corn would transform the starchy, carbohydrate rich grain into a sweet masa that could then be re-boiled in water and strained to create a fermentable Wort made purely from Maize. Although many foreigners cringe when they first learn about the process, for the Inca’s, it was a powerful community building practice that would bring people together to sit around the fire, alternating between sharing stories and laughter while chewing the cooked corn and then depositing all of the masa into a large pot. Although they almost assuredly could not have fully comprehended the transformations that were taking place, their solution was so ingenious because human saliva is packed full of the enzymes needed to break down the carbohydrates in corn into fermentable sugars. I experimented with the traditional process a couple years ago, and I have to admit it was a powerful community building process that for me, took the idea of collective fermentation to a whole other level. Talk about terroir!
The problem with the traditional process is that it is incredibly labor intensive. If you are lucky, like me, you might be able to convince your friends to help you chew a few pounds of corn once or twice for the novelty of the experience, but you are likely to be hard pressed to find a consistent source of labor to chew through the many pounds of corn you will need to produce even a few gallons of Peruvian style Chicha. Fortunately, today we have access to many sources of amylase besides our saliva. As it turns out, ripe bananas (and in particular, ripe banana peels), contain a very high concentration of the same amylase enzymes needed to convert the starches in Maize into fermentable sugars. If you think about it, this actually makes a lot of sense. Unripened green bananas and plantains are a very starchy staple food crop that is used culinarily in a similar fashion to potatoes. As the skin yellows and the banana ripens however, the banana naturally transforms those carbohydrates into simple sugars that make dessert bananas so pleasant to eat directly out of hand.
Due to the high concentration of amylase enzymes present in ripe banana peels, they can be dehydrated and pulverized into an enzyme rich powder that can be mixed with ground maize and water and then mashed similarly to a barley based beer between 140-160 F for 2-24 hours (depending on the ratio of corn to powdered banana peels used) before being strained and boiled to make a fermentable wort. You’ll need to taste the Mash or use iodine strips to determine when the conversion has been completed. There are actually lots of fruits and vegetables that are rich in amylase enzymes. Sweet potato, for example, has such a high concentration of these enzymes that its peel is often used in the commercial production of Amylase.
Alternatively, instead of using the enzymes present in another product, it is also possible to ferment grains with certain types of molds that consume starches and in turn naturally produce the enzymes needed to convert the grains of carbohydrates into fermentable sugars. In Japan for example, Aspergillus Oryzae (or Koji as it is better known), is a humble yet miraculous mold that has been grown on rice for millennia in order to sweeten the rice and make Sake. It is also the key ingredient for making naturally brewed Soy Sauce or fermenting Miso due to the rich diversity of enzymes Koji produces that not only sweeten carbohydrate rich foods, but also break down proteins into amino acids that are the basis for savory foods and the flavor of umami. Due to these impressive properties, koji has now made it’s way out of Japan is slowly become increasingly familiar around the globe. This is assuredly a wonderful thing, because it has now been well established that Koji can be grown on a variety of substrates and virtually any grain, including rice, barley and corn, making it an ideal candidate for assisting in the brewing process anywhere on Earth.

To further explore local flavors and novel combinations, while boiling our worts we have been experimenting with using a variety of local bittering herbs and teas to add complex flavors to our beers, including ginger, turmeric, lemongrass, vanilla and many others. During either primary or secondary fermentations, we use nylon mesh bags weighed down with boiled volcanic rocks to infuse fresh fruit from the farm such as Pineapple, Soursop, Starfruit, or freshly roasted Cacao Nibs, just to name a few examples. Finally, by fermenting our beers with mixed cultures, wild captured yeasts and/or locally adapted strains, we have been able to produce ales with several layers of harmonious flavors, which provide depth and complexity that is only possible to achieve with mixed culture fermentation.
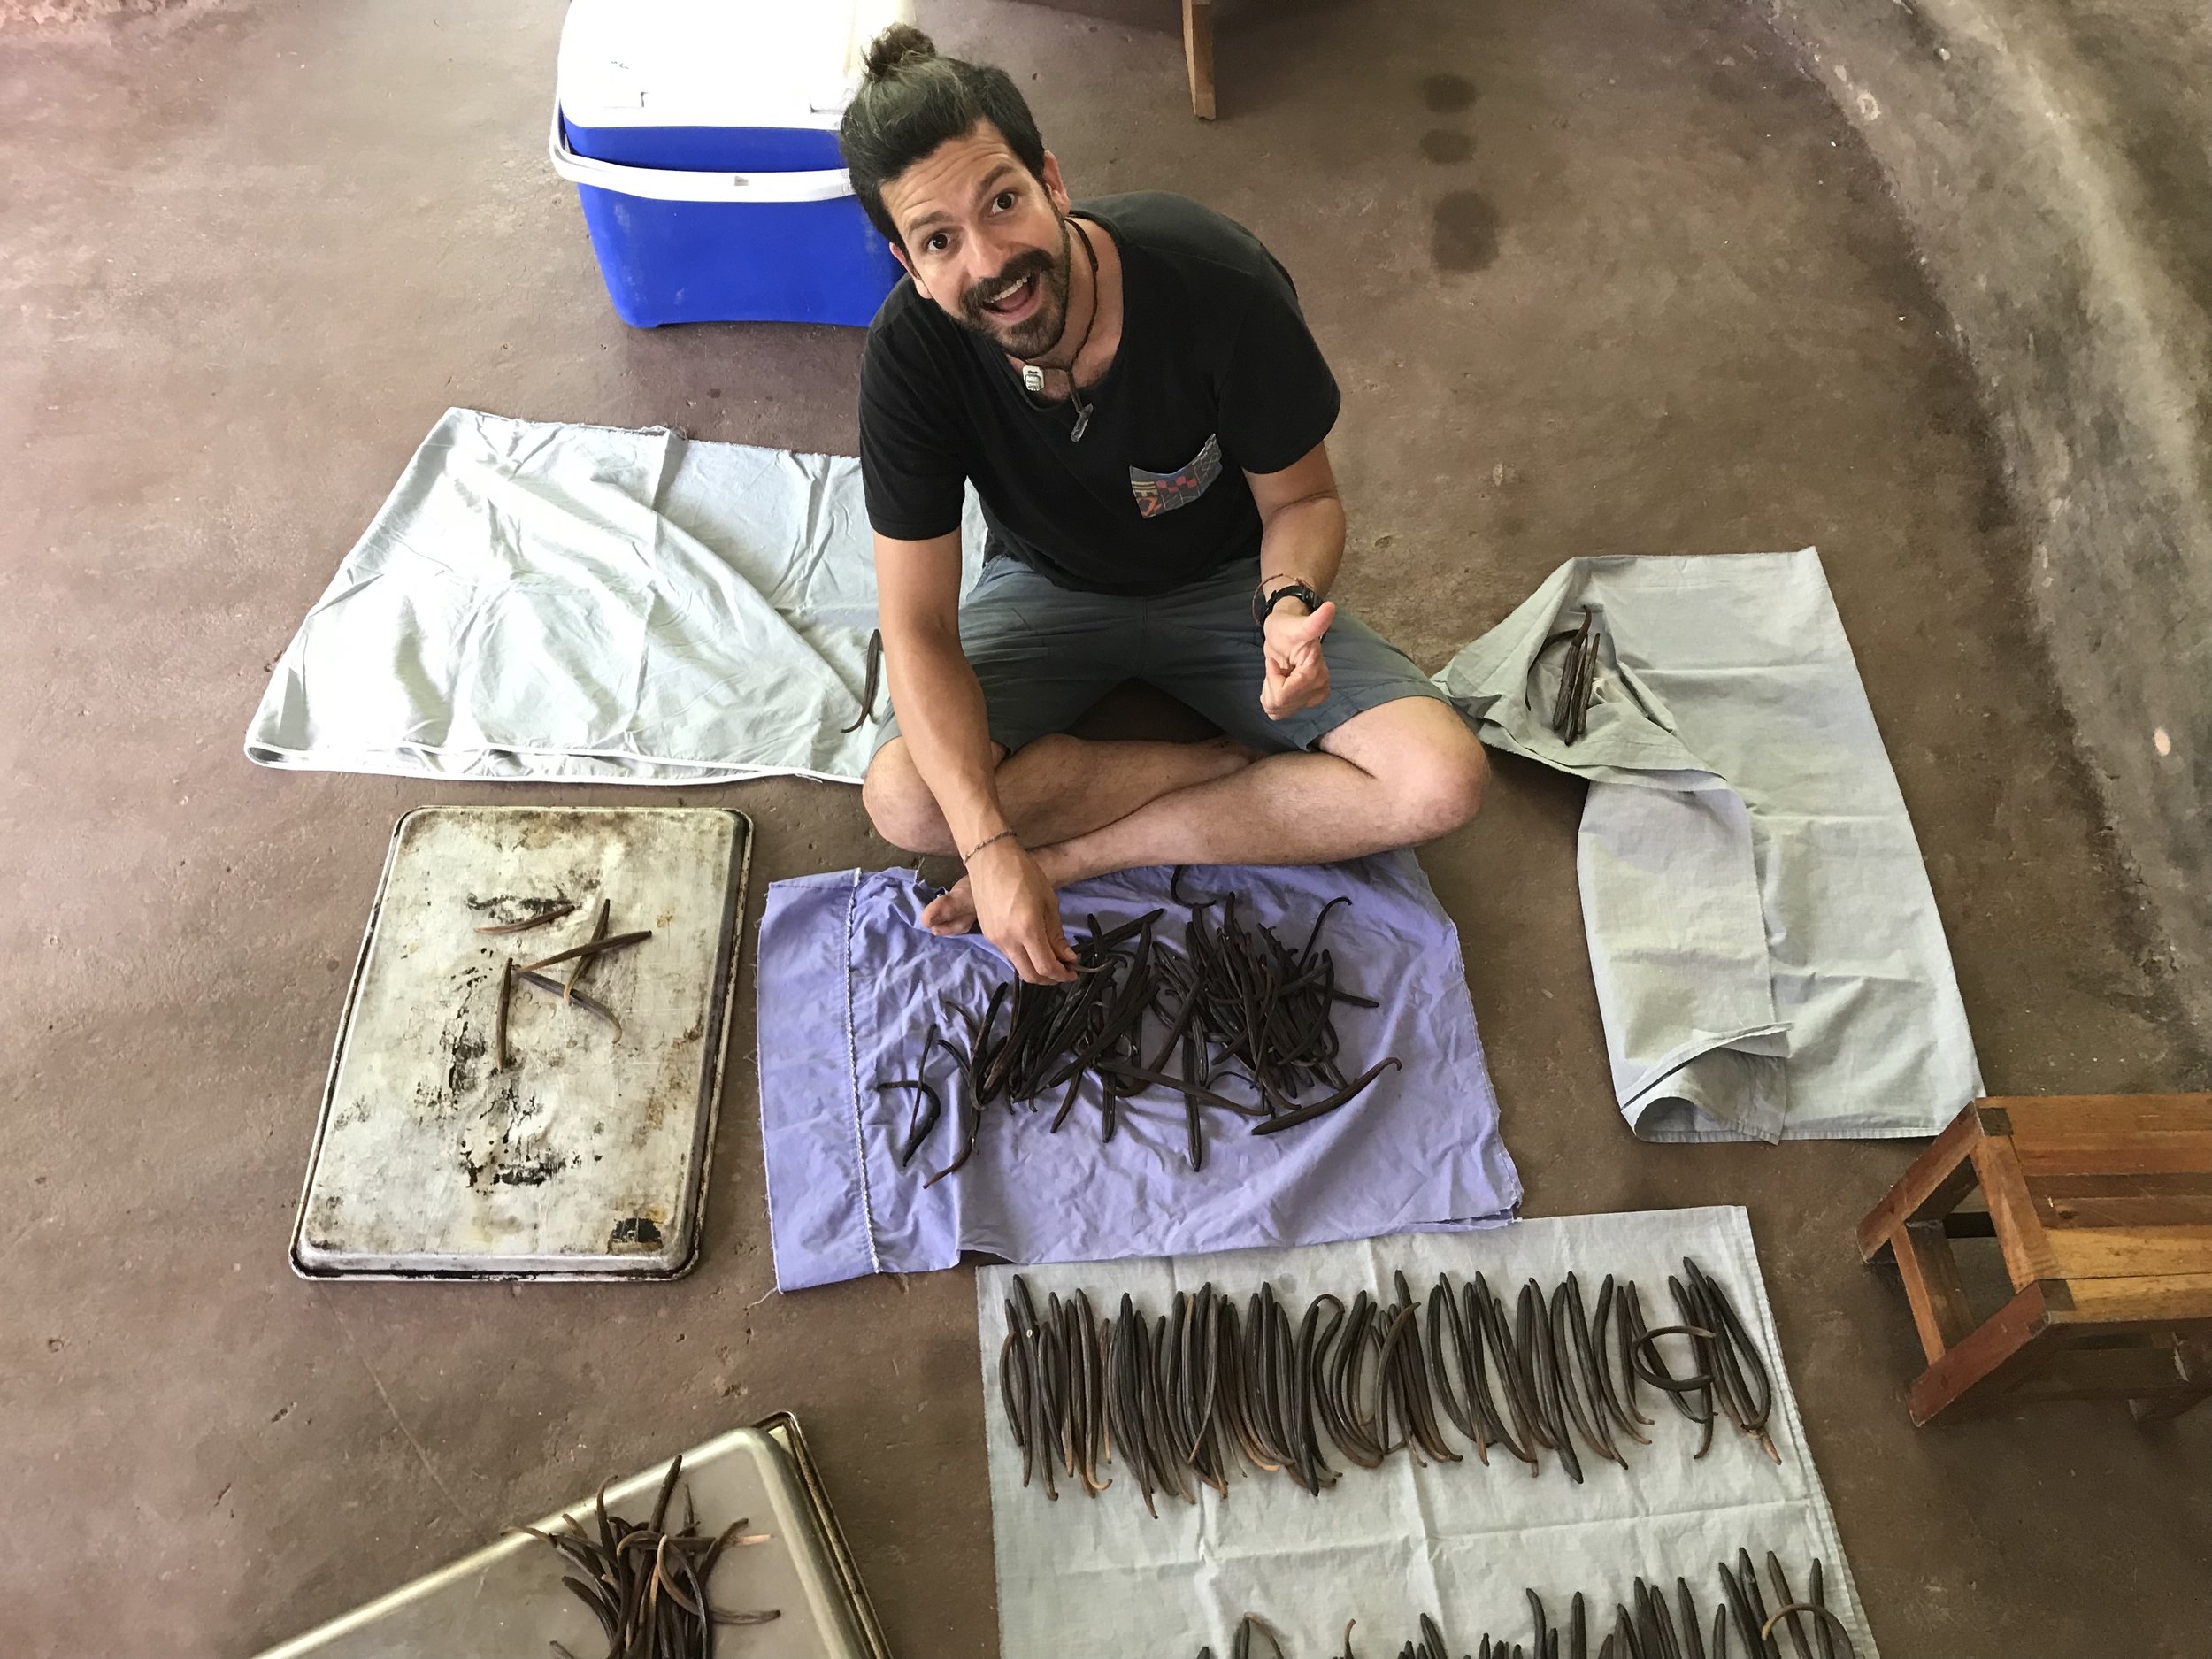
I would not have believed what a powerful role yeast and bacteria play in the creation of complex beers and wines when I first started brewing over a decade ago. Now however, I have learned first hand just what a difference the cultures we use can make. The experience of trialing yeast captured off of different fruits and flowers has led me to encounter flavors I never would have dreamed possible. Some have certainly been on the far side of the funky extreme, including cultures that produce the dreaded odor of sweaty feet or burnt rubber. This however, is exactly the reason for small scale trials rather than placing our faith in large scale spontaneous fermentation. Once you discover the joy of fermenting a simple malt of dissolved sugar or Dry Malt Extract with wild yeast and tasting apples, pears, or other citrus fruits magically appear in the finished product, I believe that like me, you will never want to use a commercialized yeast strain on it’s own again.
I believe that by drawing from the richness of our cultural traditions around the world, we have the potential to greatly expand the breadth of our palates and to more intimately link our brews to the time and place in which they were crafted. The craft brewing revolution is still in its infancy and if I am to have a part of to play in it’s development, then Ginger Hibiscus Sake Hybrids, Banana Coffee Stouts, and Mayan Chocolate Ales will be just the tip of the iceberg.

If you would like our simple Hooch recipe, read our blog article with step by step instructions. If you want to learn more about the wild world of fermentation consider joining us for our year long apprenticeship where apprentices go deep into advanced fermentation techniques.

Where to Buy Your Trees and Seeds in Costa Rica?
Ever have a challenging time finding your favorite plant in Costa Rica? Or wonder where to get supplies for a new greenhouse? What about organic pesticides? After nearly a decade working in country, our team has compiled a comprehensive list of nurseries, seed banks, botanical gardens, and farm/garden suppliers.
By Nic, Core Team
Costa Rica has always been a challenging place to source your materials, as more places are getting online though, it is getting easier and easier to find things that were once impossible.

We are delighted to be able to share with you some of our favorite places to buy grafted fruit trees, seeds and so much more
Gary Zill is one of the leading produces of tropical grafted trees in Costa Rica and the tropics. A must visit in Orotina area. Check his website out for more info
Peter Kring runs a fantastic botanical gardens in Puerto Viejo and has many rare and difficult to find grafted fruit trees. Check out his Facebook, he also sells fruits at the puerto viejo farmers market every week.
The La Garita area in Alajuela just off the pan american highway near the airport is a place with many many nurseries, it is probably one of the best areas to purchase your more commonly available fruit trees like mango and citrus, but they are unlikely to have any more niche trees like Durian or Salak. El Punto is one we have used in the past.
CATIE in Turrialba area has a large seedbank of cover crops, native trees, timber species and some fruit trees. you can contact them through their website for upto date info about what they currently have.
ICE, Costa Rica’s electricity company usually has stock of native trees and nitrogen fixers available for free for reforestation projects. They can be phoned for free on 800-VIVEROS (800-8483-767) for more info.
For local annual vegetable seeds, our friends at Semillas Plantae have a fantastic selection of organic seeds available in country that can even be delivered to your house!
At the Ranch we also have a small nursery with a variety of Nitrogen Fixing Species, grafted fruit trees etc.. Please contact us if you would like to know what we currently have in stock.
The Earth University also maintains an extensive nursery, David Guido can be contacted on +506- 8639-9928
Join us for our annual Permaculture Design Course to learn more about designing, implementing, and maintaining your own farm and project.

8 Tips for Starting your Tropical Homestead
You’ve just purchased your dream property in tropical Costa Rica. You want to grow your own food. You are anxious to get to work now, have bought some plants from a nursery you randomly drove by, and have a shovel in hand, but...where to start?
Most of our clients fall on either side of a spectrum of project implementation. Either they experience paralysis by analysis, overthinking every step, their confidence slowly eroding, or they dive in head first without any planning. Either way they hire our team at Porvenir Design to bring them to the middle. How can we take our time and plan while simultaneously moving forward with the energy and confidence that is required to see a project to completion?

8 Tips for Starting your Tropical Homestead
Originally published at the Porvenir Design blog.
You’ve just purchased your dream property in tropical Costa Rica. You want to grow your own food. You are anxious to get to work now, have bought some plants from a nursery you randomly drove by, and have a shovel in hand, but...where to start?
Most of our clients fall on either side of a spectrum of project implementation. Either they experience paralysis by analysis, overthinking every step, their confidence slowly eroding, or they dive in head first without any planning. Either way they hire our team at Porvenir Design to bring them to the middle. How can we take our time and plan while simultaneously moving forward with the energy and confidence that is required to see a project to completion? The answer revolves around good goal setting and thoughtful design. So as you look to set your goals and follow the permaculture design process, here are a few tips we’ve picked up over the years for starting your tropical homestead.
Consider Access First

Before you do anything: planting a garden, siting a fruit tree, digging earthworks; make sure you know how you will access that space afterwards. The most common reason for systems to fail is that they are difficult to access. It may be easy to plant those nut trees at the bottom of the steep gully, but walking and slipping and falling down that slope in the middle of the rainy season, year after year, will quickly erode your enthusiasm for those plants’ care.
Paths should be wide, 1.5 meters at least, allow wheelbarrow access if possible, and should only be lined with plants that will not interfere with your movement. Anything that makes walking on a path less desirable means that whatever is at the end of the route will get less care and be less productive.
Consider lining paths with mundo grass for erosion control and delineation. Plant species around the path that you can trim in the rainy season for more sunlight and let grow in the dry season for more shade.

No Bare Soil
Do not underestimate the power of the tropical sun and rain to erode exposed soil. Anytime that you find bare soil on your property, you should instantly be thinking about how you can cover that soil with dead or living mulch. This will lower the soil temperature, increase nutrient cycling, improve water retention and so much more.
A dead mulch is effective and can be anything from grass clippings to pea gravel to chopped banana trunks. A living mulch is even more effective. This is a cover of living plants, also called a ground cover, that perform specific functions. Good tropical ground covers include peanut grass, sweet potato, wandering Jew, Okinawan spinach, and many beautiful ornamentals.
Don’t Overestimate Your Soil Fertility
It is easy to think that with a little compost from the Ag store and some mulch that your garden will be rocking for years to come. Clearly plants thrive in the soil all around your site; the tropics are a prolific place. But that doesn’t mean your soil is high in nutrients, has a balanced pH, or has a healthy microbial population. Most of us buying land in the tropics are working with degraded hill sides that were formerly cattle pasture. This is not prime farm land. Many of the plants we want to grow will struggle in this soil. Don’t be surprised if your first tomatoes and cucumbers struggle.
Fortunately soil is the component of our ecosystem that we can change the fastest. By actively promoting microbial health, planting leguminous trees and shrubs, providing fungal biomass, and reducing erosion we can quickly turn a site’s soil productive. Soil fertility requires consistent maintenance.

Tropical Tubers and Perennial Greens
Speaking of tomatoes and cucumbers, don’t bother growing these outside in your first year. Instead focus on very easy to grow, nutritious local foods adapted to the common soil conditions and heavy rain fall. Our typical western style vegetables can be grown in the tropics but the pest pressure is high here and these crops haven’t been bred with the same defense mechanisms.
Focus on tropical tubers such as yuca, sweet potato, taro, and yam. Plant greens like chaya, Haitian basket vine, and zorillo. Learn how to prepare them for your kitchen and enjoy!

Never Stop Planting and Observing
Don’t be afraid to put plants in the ground. You will plant stuff in poor locations, but that's okay on a home scale. Its better to move forward than not at all. If a year later you don’t like a plant’s location, you can transplant it! Most plants in the tropics transplant well with little shock.
It is only through the act of observing your plants over time that you can learn from them. Through good observation and feedback you knowledge level will zoom ahead. You will begin to see the pollinators in action, understand the rivulets of water moving your mulch around, and become familiar with the seasonality of your tropical climate. If you consistently put time toward putting new plants in the ground, and observing them, you will quickly develop a lush and tropical feel to your site.
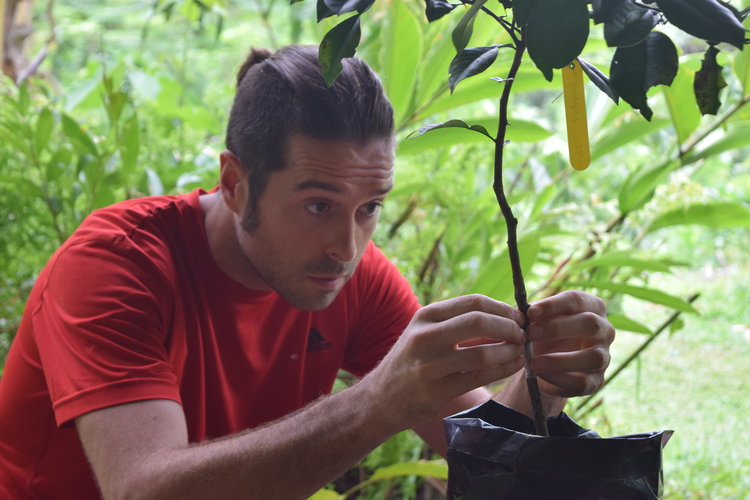
Learn to Propagate your Own Plants
Related to the previous tip, learning to propagate your own plants will save you time and money. It will accelerate the biological succession of your homestead. A lot of tropical plants propagate vegetatively from cuttings or root divisions. As you travel around the country carry a pair of garden clippers and a sharp trowel, and when you see a new plant you love, ask if you can take a cutting or division.
Set up a nursery right away on your property to accommodate all of these new plants. It should let about 50% of light through, have easy access to water for irrigation, and be protected from the wind. You can start plants in pots, bags, or simply till a bit of soil and mix in good potting mix materials, such as rice hulls, manure, and biochar, and plant directly into this new bed. This is your transplant bed. Once the rains arrive and the plants are large enough move them to their final location. This allows you to gather new plants before you have had the opportunity to site them.
Buy Grafted Fruit Trees
Don’t plant that seedling avocado or mango! Rather, invest the 10 to 20 USD and purchase a grafted tree. Almost all fruit you buy in the store, temperate or tropical origin, is born on a grafted tree and for very good reasons. A seedling avocado can take well over 10 years to produce fruit, while a grafted avocado will produce in year 4 or 5. A grafted tree is a guarantee of a high quality and consistent fruit.
Try to source these trees from nurseries doing the grafting themselves from root stock that is adapted to your soil and climate. Check the graft well before purchasing. Does it look healthy and secure? Don’t purchase trees with fruit on them in the nursery. This can be a sign of stress. But an investment in grafted trees will pay off.

Hire a Consultant
Consider this an investment. Any land use planner, landscape designer, or permaculture designer should be able to articulate to you how an investment in their services will save you time and money in the long run. What is the expected return on investment?
A simple day consultation should help you gain confidence to implement systems. It should allow you to set your priorities and put unnecessary projects on the back-burner. A larger master planning program should save you money by connecting you with the best experts or local resources, such as tree planting programs, and catching costly mistakes on paper before any shovel hits the ground.
A good designer will help you identify your goals and apply those to the landscape, resulting in a beautiful and productive homestead.
Porvenir Design
Looking for more than tips? Consider bringing in the Porvenir Design team for their expert advice!

The Peace in Knowing Yeast: How to Brew Your Own Ginger Beer
I knew there was something wrong when the fraternity brothers put codeine in the keg, when my friends got so sick that they went splat, when thirteen year old me took a sip of every wine bottle in the house when mom and dad weren't looking and I felt like I had done something naughty. European culture is renown for serving alcoholic beverages to children, yet in the USA where I grew up, something about alcohol is taboo. The cultural history reflects just that. Alcohol in Native American early history is absent, contraband could put you behind bars or blind you, prohibition made speakeasies a mischievous and alluring excursion, and even today a cultural lag in how we enjoy alcohol still exists.
By Doro

I knew there was something wrong when the fraternity brothers put codeine in the keg, when my friends got so sick that they went splat, when thirteen year old me took a sip of every wine bottle in the house when mom and dad weren't looking and I felt like I had done something naughty. European culture is renown for serving alcoholic beverages to children, yet in the USA where I grew up, something about alcohol is taboo. The cultural history reflects just that. Alcohol in Native American early history is absent, contraband could put you behind bars or blind you, prohibition made speakeasies a mischievous and alluring excursion, and even today a cultural lag in how we enjoy alcohol still exists.
It became very apparent to me in college that with alcohol, etiquette falls flat on its face. Why? Japanese tea ceremonies, to draw a stark comparison, dedicate hours to enjoying a tablespoon of liquid in the most refined fashion, yet the common bar pumps out wasted resources, wasted fools, and wasted dreams. People may drink so much as to make themselves sick, both physically and mentally.
The Origins of Homemade Hooch
Alcohol is actually an ancient substance that has been intentionally brewed since the beginning of mankind itself. Some people even go as far to claim that alcohol IS the reason for civilization. One theory suggests that contaminated drinking water in Europe warranted humans to grow grains and ferment them to cleanse the water. In this process, humans needed to orient themselves to the earth's growing cycles, work together to organize and specialize in different tasks, then celebrate communally with a drink because clever Homo sapiens managed to retrofit their pollution problem.
Health is a major benefit to why people drink. Medicinal plants have traditionally been brewed into alcoholic beverages and can prevent or cure illnesses. In the "blue zones"- regions of the world where people have measurably longer lifespans--one of the factors is that residents enjoy moderate alcohol intake. Blue zone residents also benefit from strong social relationships, so community is a major piece of healthy alcohol enjoyment. Sharing drinks with other people also lubricates and warms a gathering. So-- yes! You can have your brew AND drink it too. Alcohol gets the psychological, physiological, and sociological stamp of approval. Where did clever man go astray?
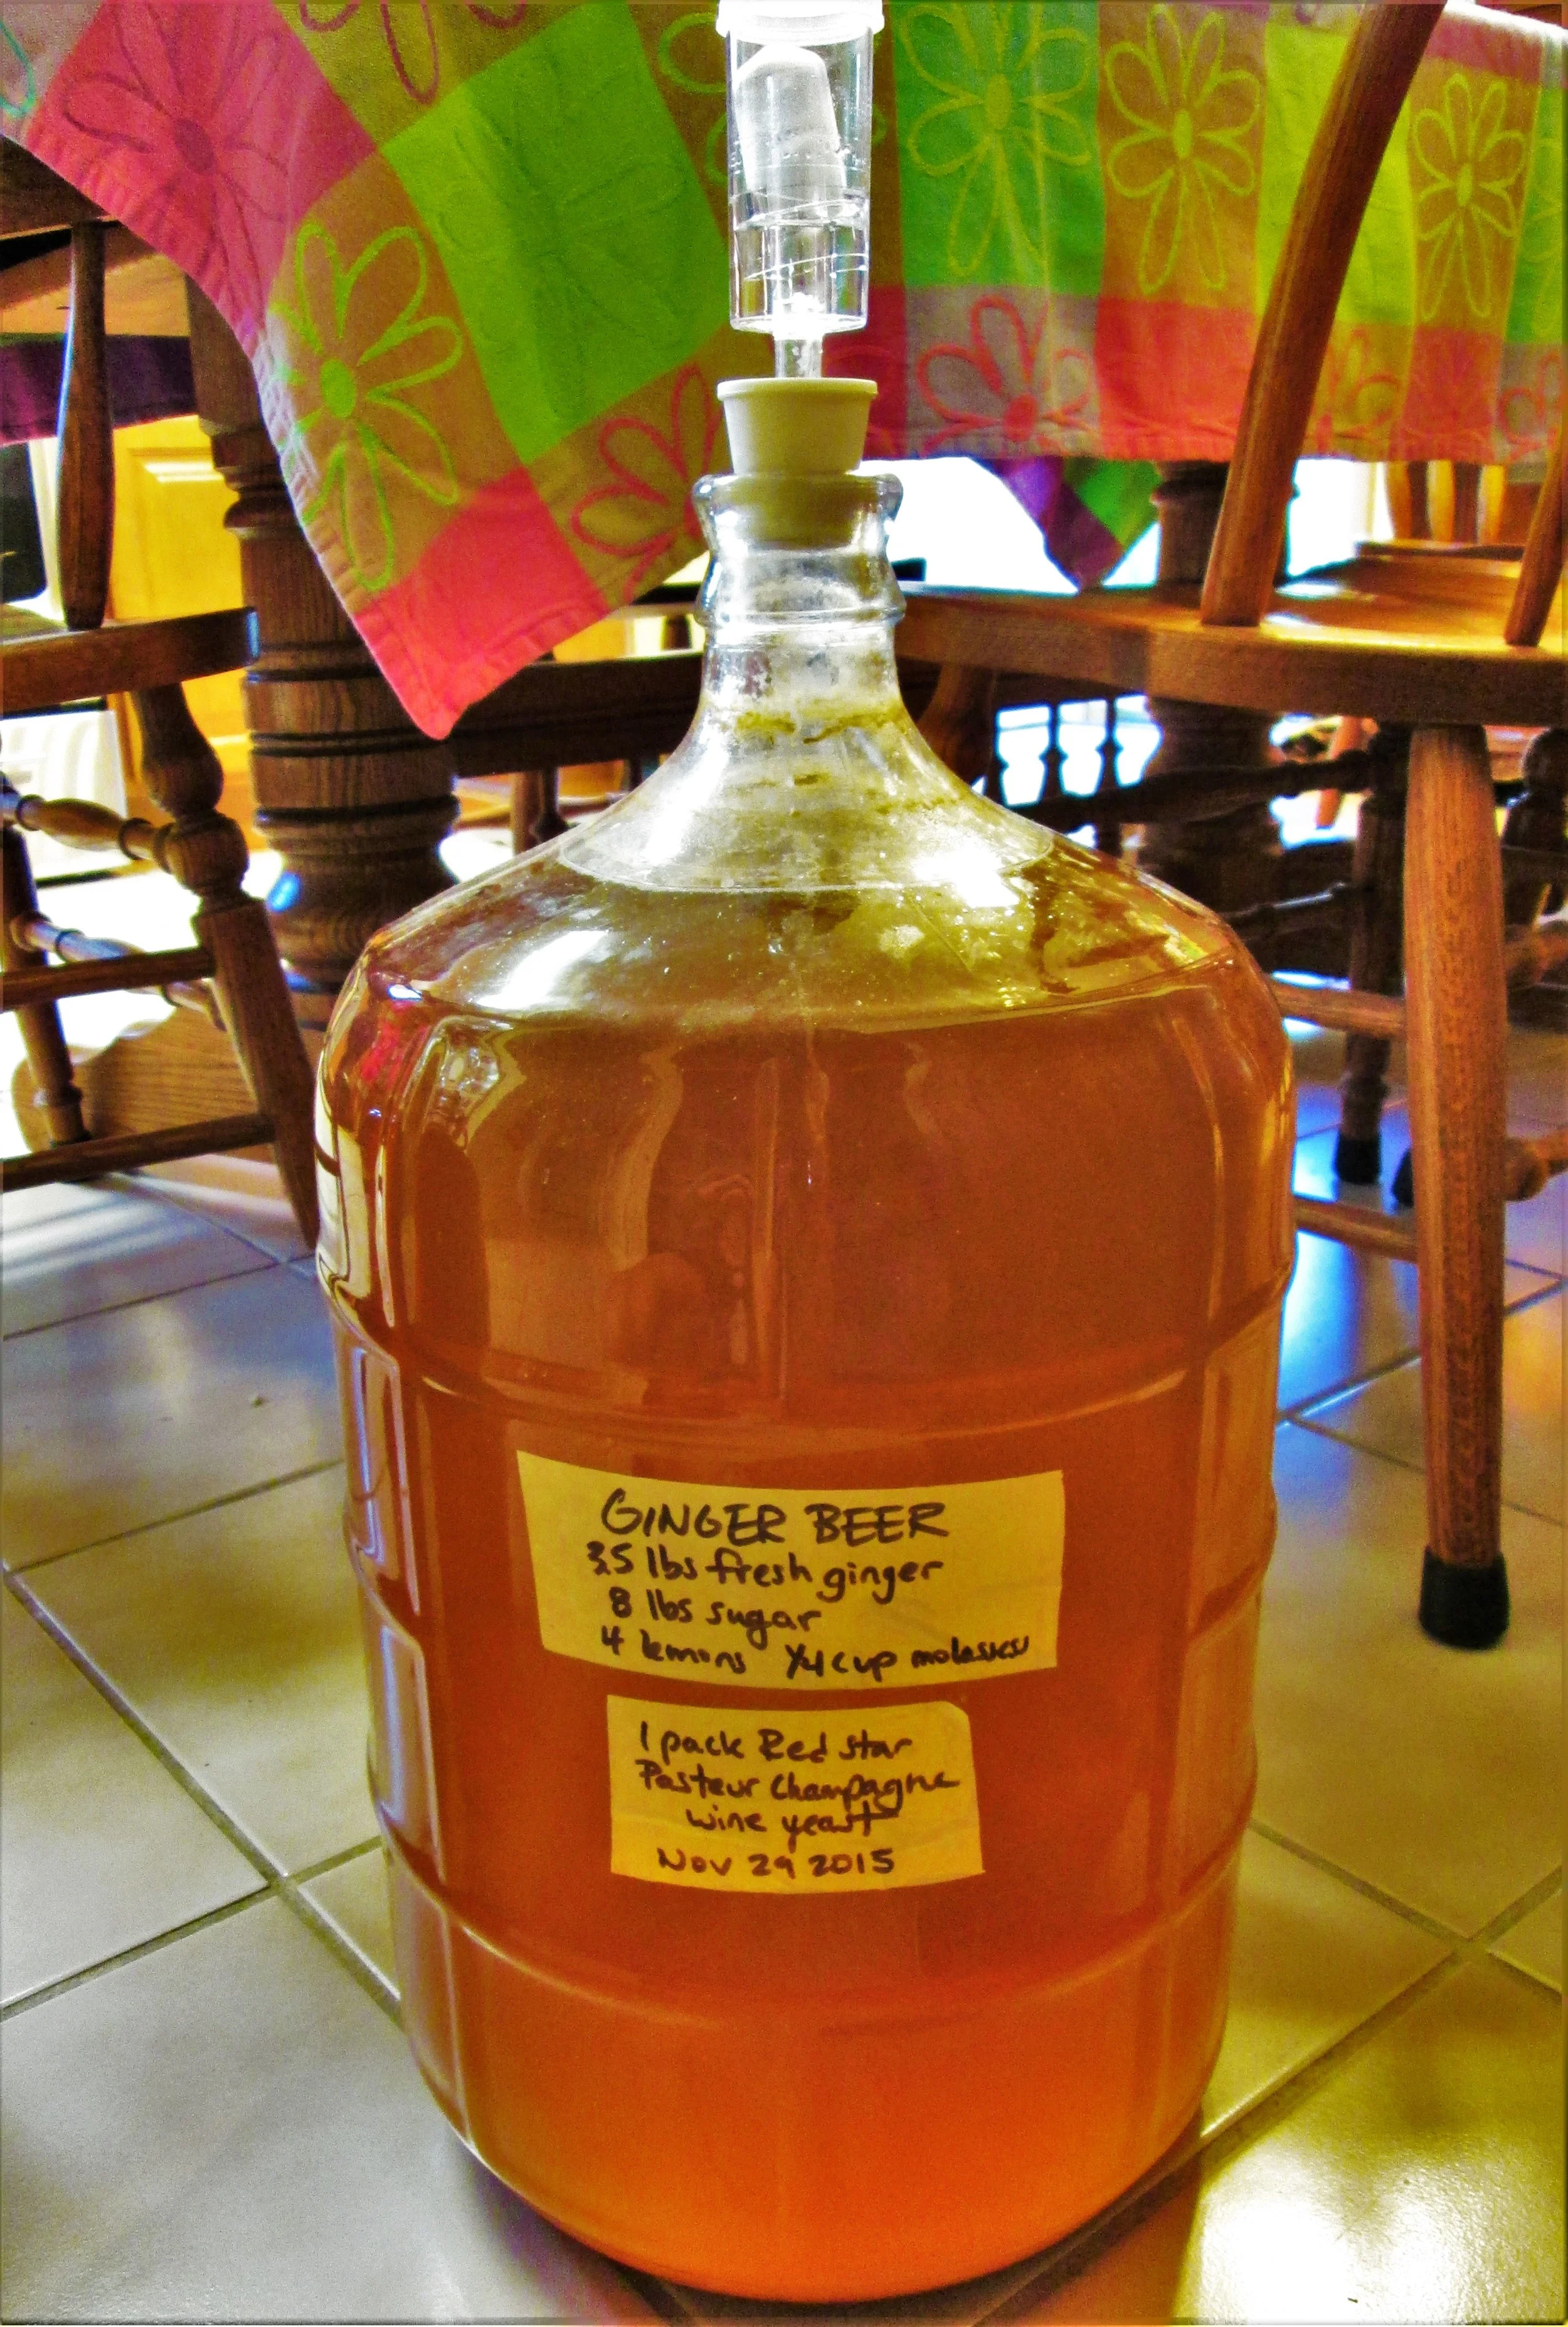
Time is the essential difference in how we relate to a drink we make ourselves and share compared to a drink we buy commercially. Like many good things in life, it takes a lot of time to see a good brew from start to finish-- or in the grand scheme, from seed to chalice. Modern "conveniences" allow people to buy Budlight from the cornerstore, then smash a can to the forehead before thinking twice about going for more. Woah, Nelly! Lack of restrictions on consumption could cost an eye, a tooth, and a frontal lobe if you're not careful, and then what kind of Homo sapiens would that be? Anthropologists suggest that it's our frontal lobes that allows our brains to use foresight and therefore be more aligned with the process of time. My suggestion goes beyond sipping more consciously, more graciously; start from the beginning and make the whole brew yourself.
Meet your Microorganisms
Did you know that one in ten cells of your body share the same human DNA. As for the rest, they are trillions of bacteria and yeasts that live symbiotically with your body. Microorganisms are a great tool for living in your body, or they can be a great tool for brewing the brews that will satisfy your body. There are numerous strands of yeasts that eat sugar and through their metabolic processes, they create alcohol as a waste. What a life! Some of these yeasts are more effective at creating alcohols than others. For example, the yeasts that you can buy in the grocery store were grown in sanitized laboratories to ensure that a very specific strain is repeatedly created. This is an effective means for getting a brew consistency. If you live in the middle of the Costa Rican jungle and cannot access such luxuries, or if you have pride in your local yeasts as San Fransciscans have in their sour dough bread, then you can easily grow your own brewing yeast.
The Ginger Bug

A ginger bug is the first step in brewing your own alcohol. Think of it as a little pet, like a fish in a bowl that you feed everyday. You nurture your ginger bug, and your ginger bug will nurture you. This is how you can deepen your awareness for the beverage that gave rise to humanity, and could propel it forward, or send it tumbling back down to dust.
Step 1: Locate fresh ginger. We happened to dig this rhizome up in our Zone 2 garden. The fresher the better, as it means more active enzymes that ultimately will nourish your bug, and in turn your body.
Step 2: Grate the ginger to increase the surface area. You're going to want about 2 tsp of ginger for 8 oz of water, which will yield a decent size ginger bug.

Step 3: Add 2 tsp of sweetener to your bug. If you can avoid heavily processed and pasteurized sugars, then do so. Honey, maple syrup, and fruit syrups are excellent choices. For this recipe, I used our locally preferred option, tapa dulce, or sugarcane. Bleached white sugars can impose genocide on your microbial populations and are best to be avoided.
Step 4: Stir your water, sugar, and ginger "bug" gently, then cover with a cloth and rubber band. This will allow yeasts in the air to get in, but keep larger creatures out.
Step 5: Carefully observe the nature of your bug. If it starts bubbling, this is a great sign that "it's working". Carbon dioxide, like alcohol, is a process of the yeasts' respiration, and it creates a fizzy bug.
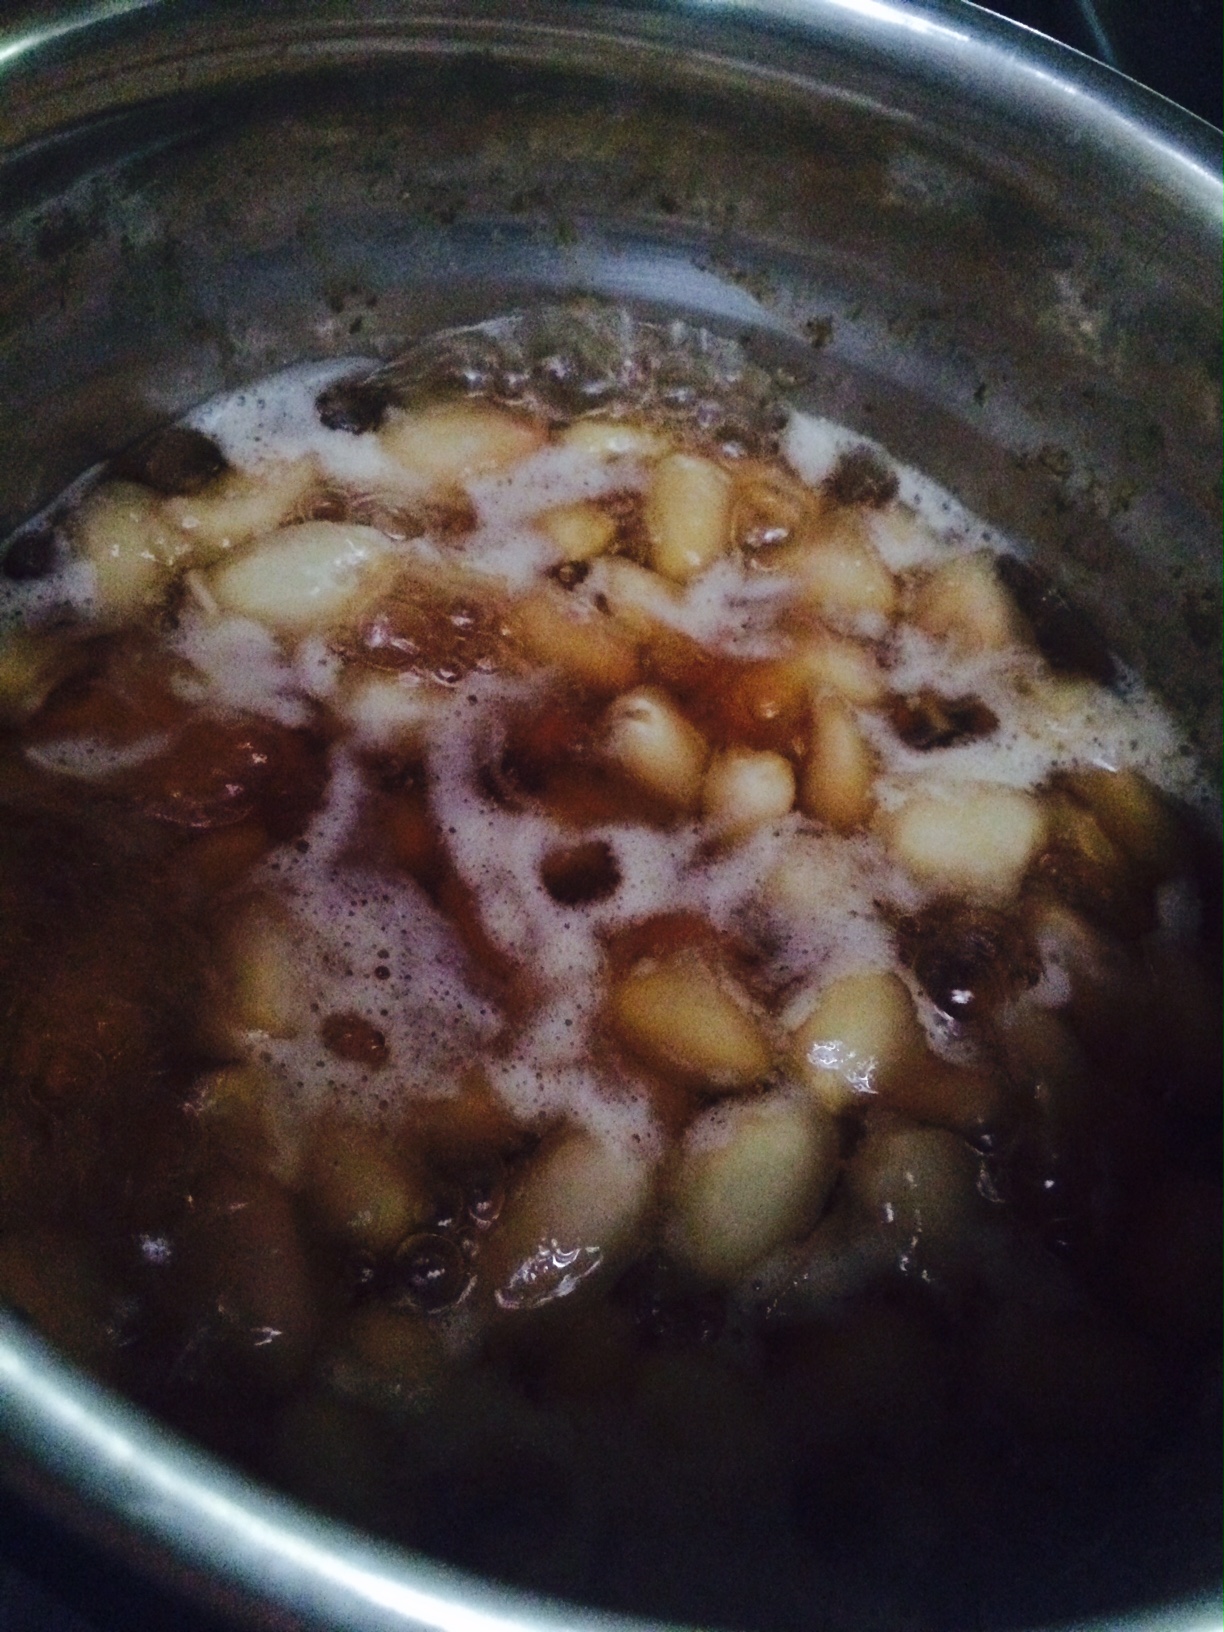
What's happening is that you are creating a mini ecosystem that allows local yeasts from the air a free place to get some lunch (sugar), hang out in a safe environment, maybe meet some cool other microbes; and if all goes well, fall in love, divide, and start a yeasty family. That's right, you are creating a yeast breeding ground, and because ginger tea is the base of the medium, the antibacterial properties of the ginger are keeping the population of "bad" microbes at bay. You can feed your ginger bug once every two days with the same ratios of sugar and ginger as before, but only if necessary. Avoid over feeding your bug and creating a viscous solution. Your bug is your pet. Know it, feed it, and it will reward you with love and affection. If your bug has some fizzy action-- congratulations!-- your pet is ready to use.
Fermentation Experimentation
Ginger bugs are good for inoculating teas with yeasts that will allow them to ferment into alcoholic beverages. The next step in creating a brew is to find a tea recipe or make one up using locally available resources. Fruits and herbs make great tea flavors. I brewed two separate teas for this occasion. The first is a ginger sour guava tea, in which the ingredients were chopped, boiled, and strained. The second is a cacao tea that used the same process except using the fruit that bears the infamous chocolate seed.

Once the tea is prepared, add a sweetener, just as in the ginger bug process. Sugars will continue to feed the microbial populations you are brewing. Like mentioned before, the less processed the sugar the better. Sometimes sugars even carry wild yeast colonies. This will encourage your brew to ferment.
Once you have your ginger bug and sweet tea, you can use the bug's yeast to inoculate the tea. Like a small fish released from bowl to small pond, your ginger bug yeast is off to fend for itself. Ensure that it is going into a safe, clean environment, and that your tea is not too hot. Room temperature to 105 degrees F is a safe range. Since you know that the health of your yeast will ultimately intertwine with the health of your own being, you continue to monitor the brew.
Thus, you have entered the experimental phase. The ultimate flavor and quality of your brew is at fate's discretion. Proceed valiantly! Check your brew at least once a day to ensure nothing is growing inside of it except for good microbes, that the texture is liquid and not thick, and that there is enough sugar.

It may take one day, it may take ten, but you will try your home brewed alcohol and realize that all that time you spent caring for your ginger bug and your brew was very well worth it. "This is delicious!" you'll say one day, "And my gift to humanity." A successful brewer is an artist-- one who reorders the chaos of water, sugar, plants, and airborne yeasts, and transforms them into a product that brings humans together. It turns out that it was never about the buzz, or the story the morning after-- it was always about the process. As humans face the coming challenges of the environment that our culture has shaped, it is important that we remember that each of our actions continues to evolve our relationship with the natural world. Even something as simple as brewing gives proof that the things we provide care for will in turn care for us. Sit back, sip back, and celebrate the pleasure of good brew and good company. Cheers!
News and Notes from around the Permaculture World
We are scheming and dreaming about expanding our chicken program in 2017. More eggs, meat, better breeding strategies, and figuring out how to get the birds to weed our orchards has got us motivated. If any of you are trying to do the same, you should check out the Permaculture Chicken Film from the guys and gals at Permies.com.
One of Scott's past PDC students, Levi Gardner, from a course taught in Nicaragua, is doing some excellent urban farming work in Grand Rapids, Michigan. Check out this article about Urban Roots. Levi states that for him, "a big turning point was going to Nicaragua for a month last year to study permaculture. I left there going, ‘I’m not just a guy that wants to be an urban farmer anymore. I want to build something.'" We are inspired!
As you know we practice agroforestry at the Ranch and love sharing our experiences with others. The USDA Inside Agroforestry publication is full of similar experiences from the states and around the globe which we are hope to contribute to in the future. Considering signing up for their quarterly publication to up your agroforestry skills!
Abrazos
The Ranch Crew

Extreme Food Processing: Flaming Nuts and Poison Ivy Spray
I was harvesting fruits down by the classroom this week when Jenny walked by with a line of high school students, en route for the river trail. She paused for a moment as she passed.
“We're roasting cashews at five tomorrow. Why don't you gather some from the ground here and bring them?”

I was harvesting fruits down by the classroom this week when Jenny walked by with a line of high school students, en route for the river trail. She paused for a moment as she passed.
“We're roasting cashews at five tomorrow. Why don't you gather some from the ground here and bring them?”
As I nodded in reply, she kept walking, the line of students slowly disappearing into the trees.
I looked down at my harvest—a small sack of red lovi-lovis, pink water apples, and green peppercorns. Friendly faces of the fruit world, each one unique in form and function. The lovi-lovis bright and tart, the water apples soft and quenching, the peppers prized for their addictive pungency. Understanding each one's harvest, preparation, and usage is one of the true joys of farming and cooking; each new discovery a revelation in the subtle and powerful nuances of the life around us.

The cashews, though. The cashews were dangerous temptations.
I looked up from my harvest. The Ranch cashew trees were close enough that I could smell the fruits, softly sweet, with a piercing astringency. Cashews are mythical beasts of the fruit world, strangely formed in an unlikely combination of parts. The fruits themselves are soft and oval, and vary in size and color like apples do, most red or yellow. They have a soft, waxy skin and extreme juiciness—which ironically leaves your mouth completely dry when you bite into one, courtesy of the high quantity of astringent tannins. But the strangest part is the seed. Instead of hiding buried inside the fruit's flesh, the cashew seed dangles in a curved shell on the bottom of the fruit itself, like a tiny curled finger, beckoning and warning.
Each February and March at the Ranch, as soon as the first mythical cashew beasts begin to form and dangle from the trees at eye level, an urgent announcement is made to all apprentices, guests, and passersby: do not touch the cashew nuts or they will get you!! Like all mythical beasts, cashews come with a set of strange powers. In addition to the fruits sucking all the saliva out of your mouth when you eat them, the nuts are covered in urushiol, the same chemical substance that gives poison ivy its poison and people a terrifying rash when they touch it. Nuts nuts nuts!
I happen to be extremely allergic to lots of plants, including plain grass. My legs from the knees down still bear hundreds of poison oak scars. Urushiol is my nemesis, and I always lose our battles. So when Robin warned us about the cashew nuts' latent danger—don't touch them the wrong way, don't look at them the wrong way and above all else, don't try to roast them—I took the message to heart as fair warning and good advice. After all, this sound advice was preceded by experience: on the two occasions when people attempted to roast the nuts at the Ranch, both events ended in trips to the hospital for steroid injections. Swelling of the entire body after consuming urushiol is apparently even worse than itchy legs. “Robin had a cashew trauma,” Jenny later described it. Some fruits are better left untouched.
And yet. My friend Amanda who, bless her lovely heart, is afraid of nearly everything in the jungle, including insects, sounds, and rainstorms, happened to tell me just that morning that she was enjoying cashew processing with her four-year-old daughter Lily. “We just cooked them in the fire and then Lily broke open the nuts with a rock and they were really good,” she said. And then there was the time last year that we filled a whole sack full of cashew nuts from the driveway, and Junior was thrilled to lug the things back to his place to roast and eat. And of course the fact that there are cashew trees everywhere in Mastatal and everyone seems to eat them. Maybe it was time to try again.
The next morning at meeting I announced my plan to collect the nuts and bring them to Jenny and Marcos's to roast. A small sea of terrified faces looked back at me. “Its okay!” I said, “It's okay!” Having no idea if it would be okay or not, but hoping.
“For anyone that chooses to participate, we will help you in any way we can, but you will be responsible for the cost of your own transportation and hospital visit,” added Robin.
That afternoon I took a bag to the cashew tree patch, scavenged for fallen nuts, and thought about my future. Would it be bright? Painful? Delicious? It was easy to gather a good quantity of nuts in a half hour or so. I stuck them in a backpack along with a take-out container of salted Maya nut seeds to share. Just before leaving I asked Robin what part of the roasting process she had been allergic to. “The nuts, the utensils that handled the nuts, everything that touched the nuts, the smoke, and everything the smoke touched,” she said. I added a bottle of benadryl and an emergency inhaler to my backpack, and Rachel Jackson, Jess, and I set out walking to Marcos's.
When we arrived Arabela was sitting in a rocking chair on the front porch, and Chilo wandered up with a shovel in his hand. I could see smoke coming from behind the house, and Chilo pointed us around the corner.
There was Marcos, shirtless and stirring cashews over the fire with a very long stick. In front of him sat a small crowd of young tourists and volunteers, watching, chatting. Someone strummed a guitar. No one looked terrified or swollen. Jenny greeted us. Smoke wafted from the fire onto the crowd, and Rachel, Jess and I stepped back out of its reach. We explained our trepidation to Jenny, and she shook her head. “It's fine!” she said. “As long as the toxins spray out and burn up its no problem, its good.”


We handed Marcos our sack of cashews and he tossed them on a roofing sheet over the fire and poked them around with the stick. “You have to stir them until they pop,” he explained, “then they open and spray out all the toxins, and it runs into the fire and burns.” After a few minutes the cashews looked black and charred, and I heard the hiss and pop of shells breaking. Marcos pointed out the rivlet of liquid running off the roofing sheet onto the ground. Once he deemed that all the shells had opened, he dipped the end of the stick into the fire, and brought the burning tip up to the cashews. They ignited immediately, and burned like an enormous flambe. After a minute or so Marcos told us to step back, and he flipped the roofing sheet with the flaming nuts onto the ground, where they burned out in the dirt. Jenny used a stick to gather them into a pile and brought them over to us. They were completely charred, the husks burned through. She put one on a rock and tapped it with a piece of wood. The husk fell off, and she picked up the nut. A cashew! Golden brown, with one end toasted slightly black. “If its wet, and bends, don't eat it, its got the toxins,” she said, pressing the nut between her fingers. “This is good.” She handed it to me to eat. It was warm, and tasted sweet and tender-crisp.


We spent the rest of the evening by the fire, cracking open cashews and passing around May nuts. The Maya nut, also called ojoche or ramon, is a native rainforest tree that produces an edible, high-protein nut. The week before, Jenny accompanied us deep into the forest in Zapaton to track down one of the last known mature trees in the area. We hope that by valuing the Maya nuts as a food source and the trees that produce them, we will help drive sustainable food economies that are financially viable and promote conservation of forest ecosystems.
One of Marcos's volunteers took a Maya nut and popped it in his mouth. He looked at Marcos poking another roaring ball of fire on the roofing sheet. “If cashews were in the states people would go crazy, there'd be like cashew parties every year or something. Its so cool!” He took another Maya nut. “What are these, these are good?”
Around dusk it began to rain, and we crowded under the awning of Marcos's house, snacked on Maya nuts, and talked about the cashews. Marcos explained the differences in varieties and processing techniques. We concluded that the Ranch Cashew Trauma was probably a consequence of ingestion of un-combusted urushiol and a serious allergy to it. Even though Marcos made it all look easy, the complete combustion of the toxins in cashew nuts is an extreme food processing technique honed by many seasons of experience. I certainly won't be roasting them by myself any time soon. But hopefully Marcos and Jenny will let us continue to celebrate the season with them in years to come.
A Ranch guest recently asked me why local food traditions are important in Mastatal. Why trek into the jungle to gather rainforest seeds? Why feel the adrenaline spike of watching someone combust toxic nuts in a ball of fire? Why prepare three meals a day from local foods--no boxes, bags, or can openers involved? Why do we do this, and why is it important?
Food is constant. It builds us, it forms us, it unites us. Sustainable food systems are the heart of resilient communities and regenerative ecosystems. If you can do this one thing—food--on a sustainable community scale, everything else will follow. Community cohesion, local economies, conservation of diverse ecosystems, health and wellness, celebration—all fall into place as we create successful, vibrant local food systems. Its not just about the flaming nuts, its about the whole picture, and that's why it worth it.
NEWS AND NOTES
We have a number of life changing workshops coming up.
We rely on all of the amazing ambassadors to our project to spread the word; if you know of anyone who needs a get-life-into-gear experience, send them to one of our classes!
Abrazos,
The Ranch Crew
Categories
Topics
- Agriculture 6
- Agroforestry 21
- Animals 2
- Apprenticeship 19
- Appropriate Technology 6
- Backpacking 1
- Bananas 1
- Basic Pantry 4
- Biochar 1
- Books 3
- Build Your Own Home 1
- Central America 5
- Chiles 1
- Cinnamon 1
- Clay Carving 1
- Climate 2
- Climate Change 1
- Cob oven 1
- Communication 5
- Community 24
- Compost 2
- Composting Toilets 2
- Condiments 1
- Conservation 2
- Cooking 4
- Costa Rica 18
- Design 10
- Earthen Construction 10
- Eat Local 2
- Ecohome 1
- Education 9
- Environment 3
- Ethics 4
- Farm to Table 12
- Fasting 1
- Fermentation 14
- Food 22
- Food Choices 8
- Food Forest 8
- Food Processing 15
- Food Systems 12
- Gap Year 1
- Gardening 5
- Ginger Beer 1
- Harvest 2
- Health 12
- Healthy living 5
- Homemade 2
- Homestead 8
- Internet 2