

BLOG
Stories, articles, and updates from the Ranch community.
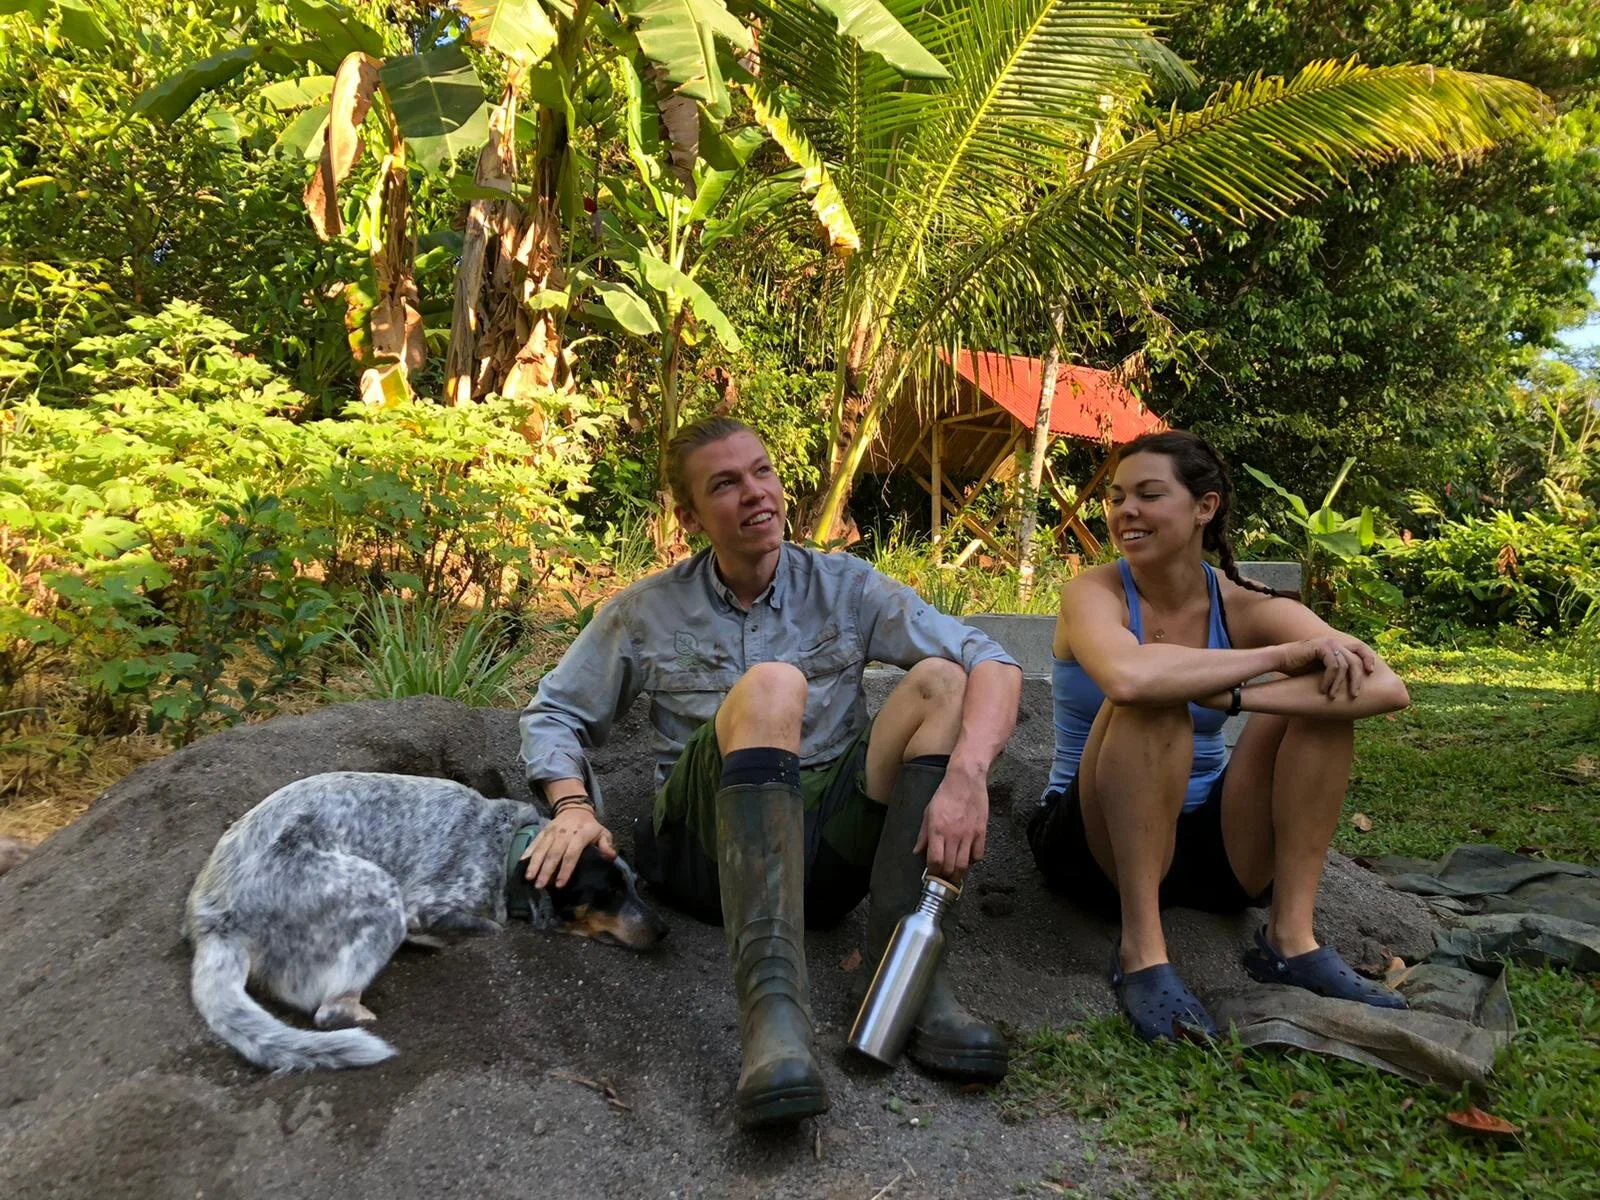
Life Lessons From Moving Piles
There are piles of sand and clay ready to be formed into adobe bricks or wattle and daub mix, piles of starfruit and lemons waiting to be fermented, stacks of bamboo waiting for the next bamboo construction workshop, piles of green papaya anticipating its second life as kimchi, piles and piles of knowledge held in peoples brains, piles of books filling up the library waiting for the next curious mind, piles of manure, compost piles, worm piles, piles and piles of piles.
By Matthew Raybon, apprentice 2021

Treated bamboo drying and ready to move
If you were to visit Rancho Mastatal at any time of year, something you can count on seeing is the ever present pile. At first glance you may overlook them, but as the mystery of the Ranch unfolds in front of you, the seemingly insignificant pile of dirt reveals itself as a central piece of what makes everything at the Ranch happen. There are piles of sand and clay ready to be formed into adobe bricks or wattle and daub mix, piles of starfruit and lemons waiting to be fermented, stacks of bamboo waiting for the next bamboo construction workshop, piles of green papaya anticipating its second life as kimchi, piles and piles of knowledge held in peoples brains, piles of books filling up the library waiting for the next curious mind, piles of manure, compost piles, worm piles, piles and piles of piles.
It’s safe to say that piles and the movement of piles is an integral part of living in community at Rancho Mastatal.
LET ME PAINT YOU A PICTURE OF PILES
It’s one week into the 2021 apprenticeship program. So far we’ve spent our time getting acquainted with one another and our new home and taking a deep dive into the wealth of knowledge and experience Rancho has to offer. Up until now this has mostly involved talking and reading. Brain work rather than body work. Myself along with the other apprentices are ready to jump into the active work of building, fermenting, cooking, and caring for the land.
Monday of the second week rolls around and it’s time for our morning natural building work party. Amazing! For our first task we will be working with adobe bricks to construct the shower and toilet walls at a residential structure on the property called the Casucha. We all gather at the wood shop in the morning for a quick chat before breaking into teams to tackle the day’s tasks. “Alright,” Nic says, “first things first, we need to move some piles of sand from the road to the Casucha for our adobe mix. Let’s split into two groups. . . Two people grab shovels and go with Ali in the truck to haul sand from the road to here. The rest of us will transfer sand from the truck to wheelbarrows and bring it down the ridge to the Casucha.”
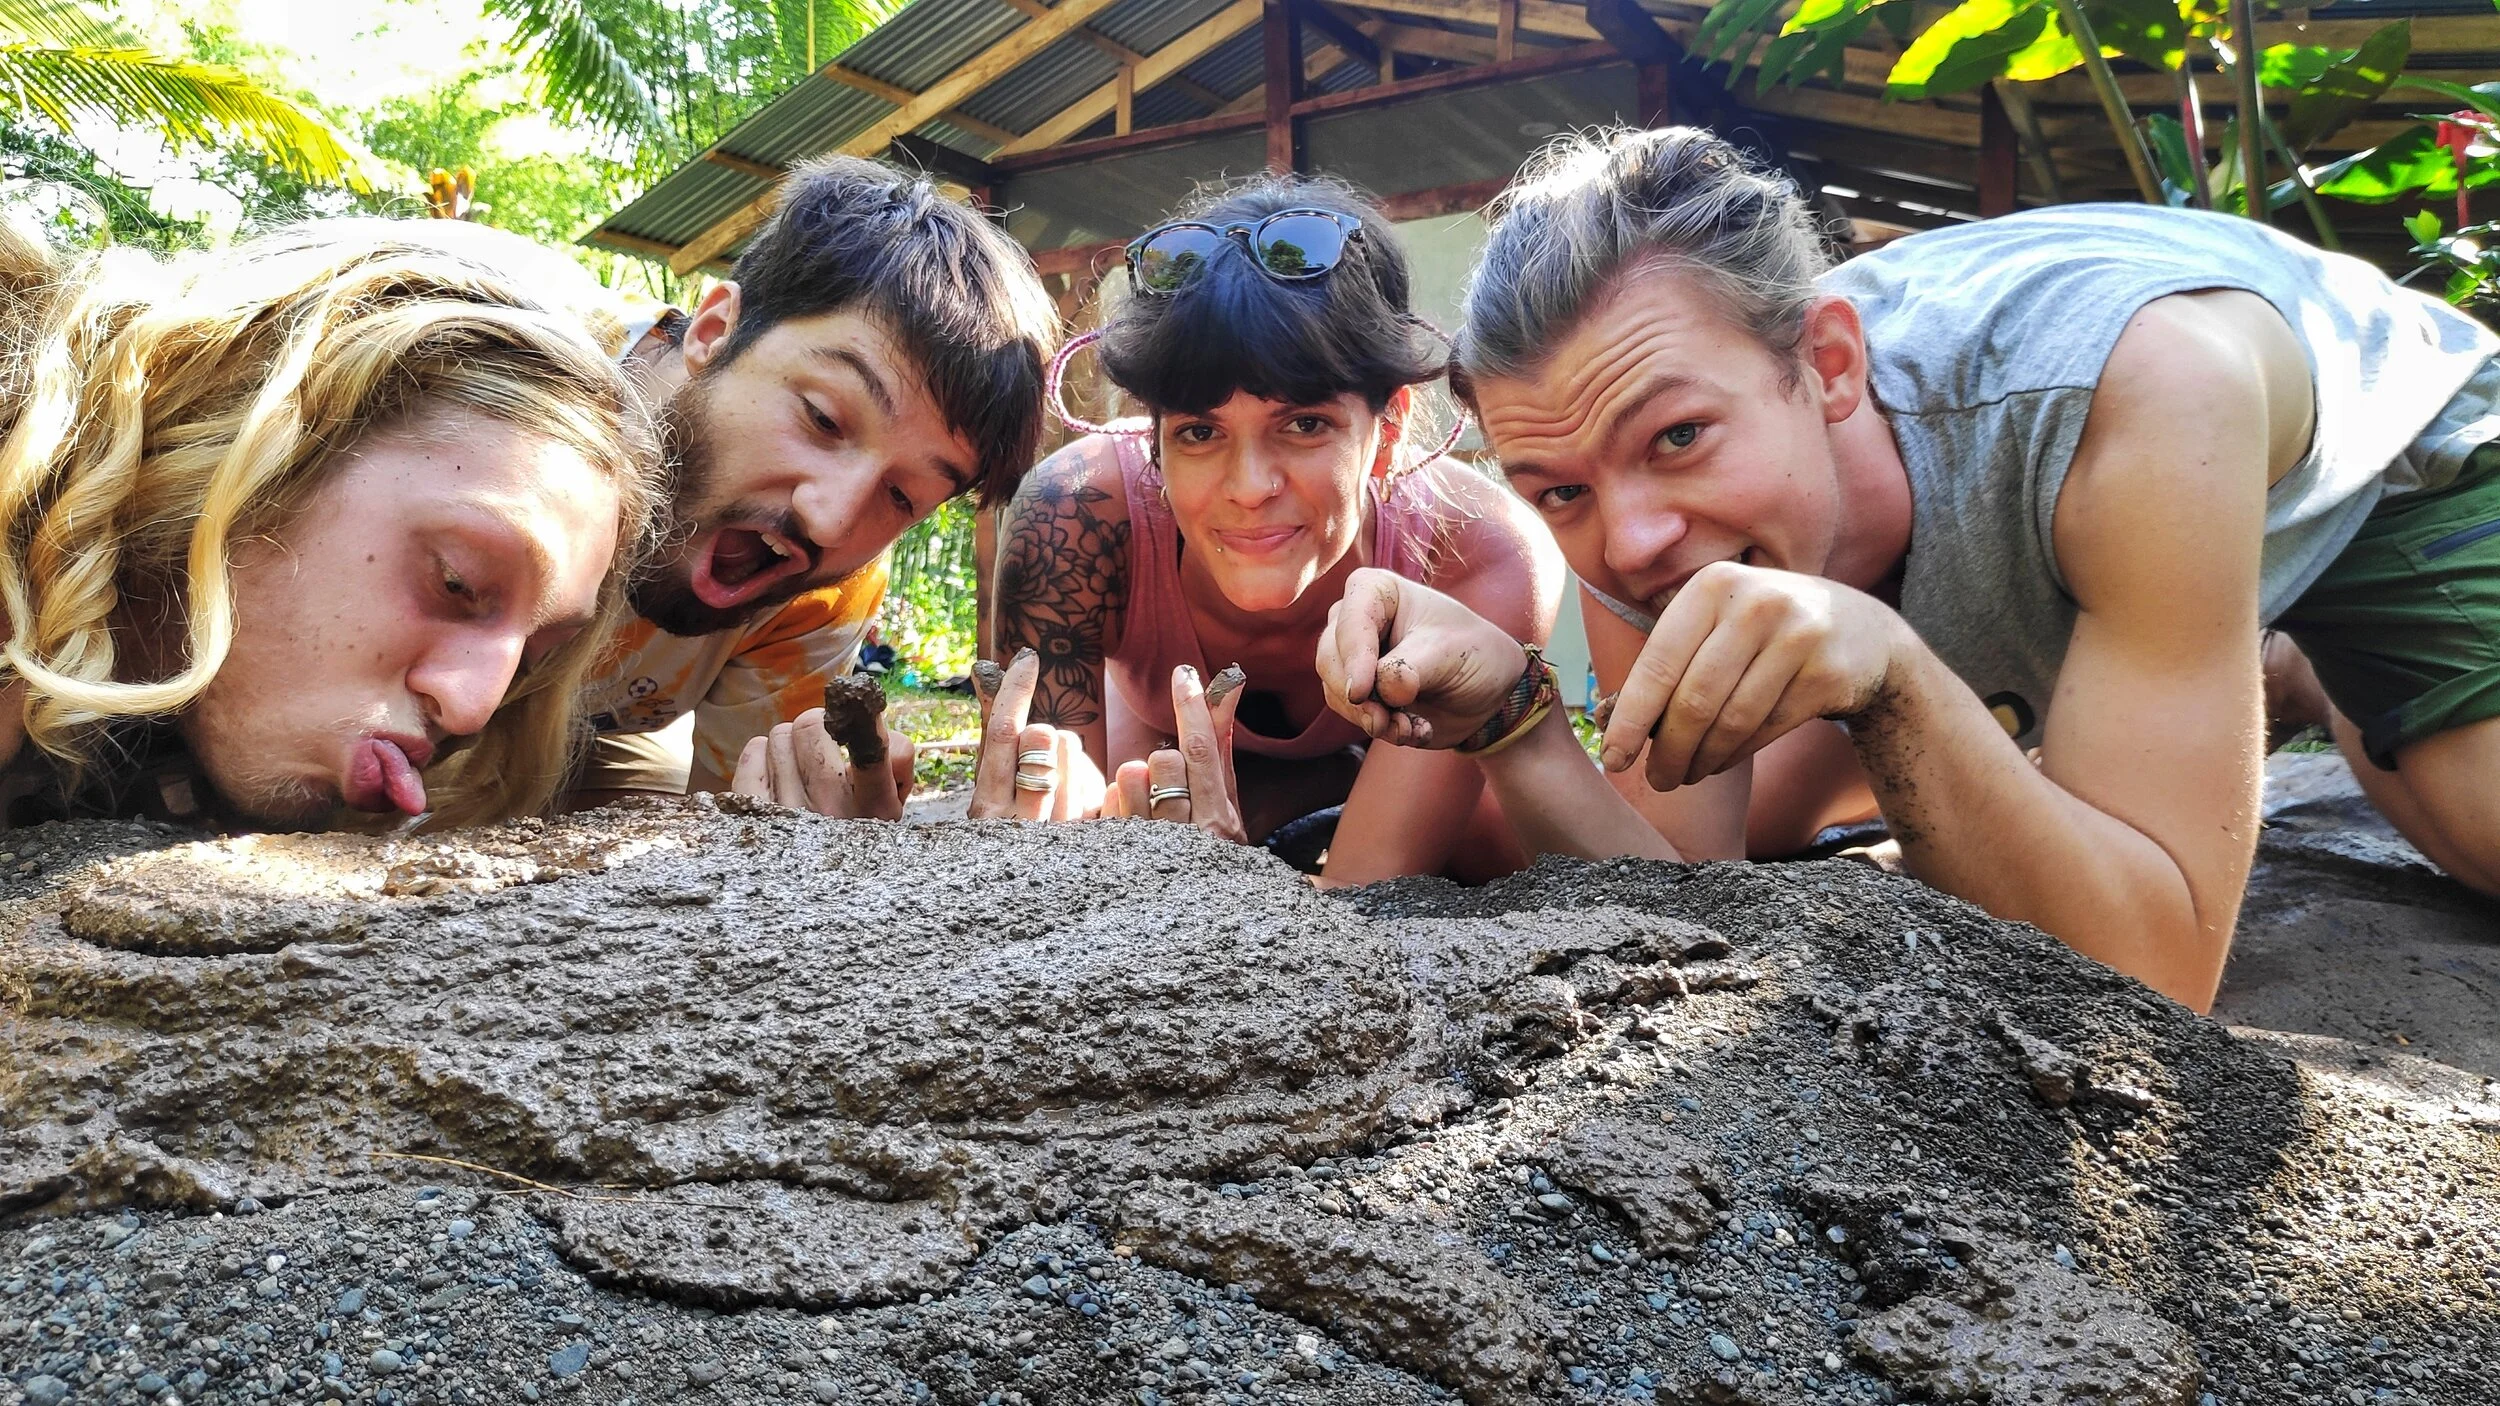
There is always more sand to move somewhere!
Two hours and a handful of blisters later we had successfully moved a few truck loads of sand from the road to the Casucha using primarily our hands, shovels, wheelbarrows and some tunes to keep the camaraderie high. In doing so we had all learned a few valuable lessons in natural building and in communal living as well as in life:
A. Nothing happens until someone moves piles
B. Many friends make light work
In other words, if you find yourself lost along the way and unsure of how to begin, start with a clear and simple task... and don’t be afraid to ask for help! I have returned again and again to these lessons and found steady ground in the simple act of moving piles to guide me through the ups and downs of life at Rancho.
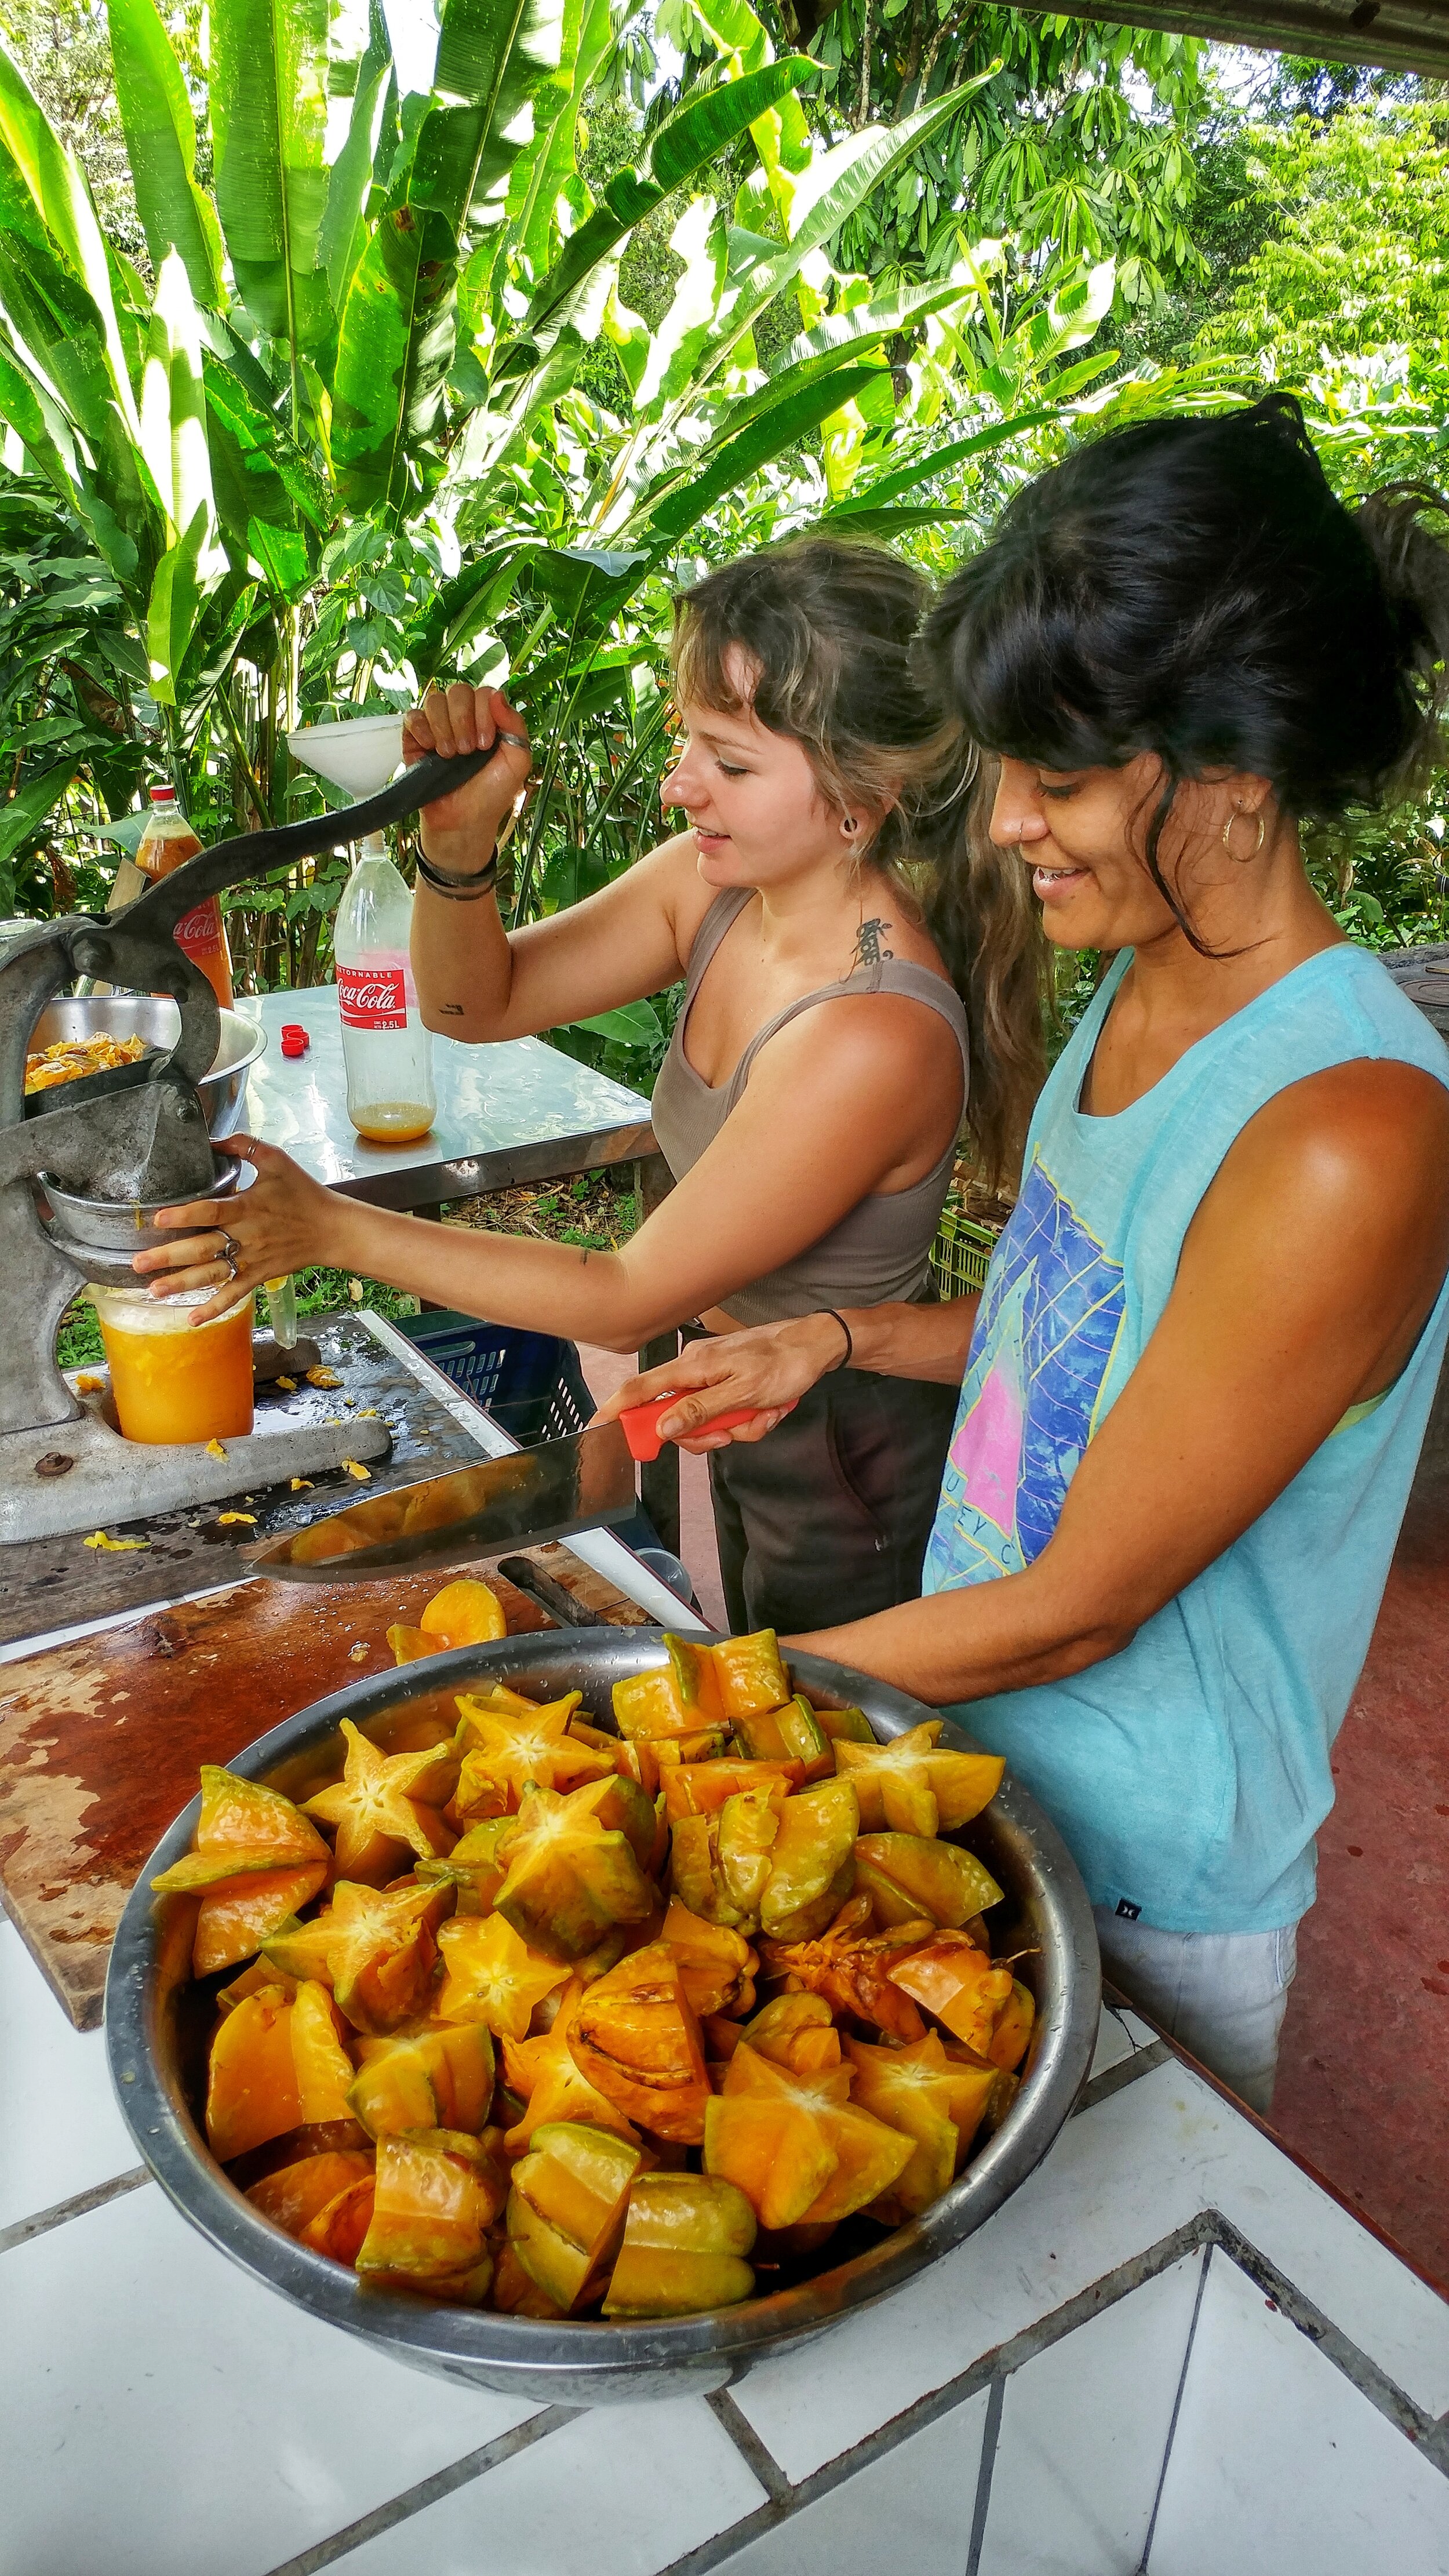
And always more food from the farm to move
When embarking on a new ambitious project it’s easy to be quickly overwhelmed and consumed by details. What flavorings do I want to add to my kimchi? Is it really kimchi if I am not using cabbage? How did I end up here? Not to worry. First, I need to harvest, cut, peel, seed and grate a ton of green papayas. In other words I need to move and transform a whole pile of green papaya (recipe here). I’ll start there with that simple task and come to the details along the way. I look at the looming papaya pile and I think, “Oh man that’s a whole lot of papaya”. But then the next thought follows, “Good thing I’ve got some friends to help me out along the way.”
Before coming to the Ranch I lived in a house, I worked as an Architect and I ate fermented foods purchased from the store. I knew in my mind that the life that I was able to live was made possible by the physical labor of many people around the world. I didn’t know with my body what exactly goes into building that house that I lived in or creating a delicious kimchi, and I didn’t know with my body the waste that those processes can create. In moving sand and mixing adobes I am learning with my body as well as my mind what it takes to build a natural home. As I peel and process baskets of green papaya, I am learning what has gone into that kimchi I bought from the store. In doing these things I am able to understand the true cost and value of the things I was previously benefiting from. Not just the cost of the product on the shelf at the store, but the environmental cost and the physical cost.
The seemingly mundane task of moving piles has transformed into something far more significant for me. It is a means to an end that serves as a guide for me as I search for the next step. It is a way of strengthening a bond between my community and myself. It is providing me with both the mind and body knowledge of what goes into creating a community and living in harmony with the environment.
As the days pass on by, I am reminded constantly that all of those piles don’t just move themselves or fall from the sky. We move them. If I don’t move them someone else does, and when we move them everything happens. Like the leaf cutter ants toiling away at building their home one tiny leafy piece at a time, we set to work making sustainable community happen by moving piles. All kinds of piles.

Grab a friend, because there is always more piles to move!

Fruity Ferments- How to Make Fruit Scrap Vinegar
You can make fruit vinegars from all kinds of different local, seasonal fruits. Using the scraps from the fruits (i.e. the peel and extra bits) is a way to value the marginal (permaculture principle) and turn a “waste” product into something of purpose.
By Hannah Knudson, apprentice 2021
You can make fruit vinegars from all kinds of different local, seasonal fruits. Using the scraps from the fruits (i.e. the peel and extra bits) is a way to value the marginal (permaculture principle) and turn a “waste” product into something of purpose. Here at the Ranch we often make fruit vinegar from bananas (recipe here) and pineapples. But have also done so with a variety of tropical fruits including: patanga, araza and mangosteen. In this article I will explain the process for pineapple vinegar, but this can easily be adapted to meet your local ingredients.
Pineapple Facts

Farm fresh pineapples
Costa Rica is well known for its wide variety of tropical fruits. One of the most loved of these is the pineapple. Many of us around the world are familiar with this tropical treat. The pineapple is one of Costa Rica’s largest exports, trailing close behind coffee and bananas.
Each pineapple plant only produces one fruit and ranges between nine to fourteen months on average for the fruit to be harvested. Here at the Ranch the cultivation of pineapples is an ongoing process. Due to the amount of people we share our space with, we balance between purchasing pineapples locally as well as harvesting what is grown on site.
There are many permaculture values that we try to put into practice in our daily lives here. One being we want to produce as little waste as possible. Even though we have an active composting system, we always try to stack functions - considering if something that normally has one purpose can also find life in other ways. So you can imagine our excitement when a pineapple is finally ready! This magical fruit has been growing for over a year, free of chemical inputs, which is key for this specific recipe. We only use pineapple peels that come from the fruit we grow here on the Ranch because we can ensure they haven’t been sprayed with any pesticides which allows us to give a second life to the peels.
We love our food at the Ranch and do a fair amount of experimentation on a weekly basis, finding new ways to enjoy different aspects of our diet. One way we do this is through fermentation. Each Wednesday we spend our entire day working on creating Kimchi, vinegars, alcohols, chili jams and many other jungle treats. Our pineapple vinegar is a tasty way to connect our love for food and our desire to use our gifts from the earth to their fullest potential.
Fermentation
Experimentations and fermentation go hand in hand in our kitchen here. As apprentices, one of the first things we learn about in our food work parties is the art of fermentation. The beauty of fermented treats is that the possibilities are endless, allowing us to turn our harvests into new recipes.
The word vinegar comes from the French word vinaigre, which translates into “sour wine”. Following the permaculture principle, “produce no waste”, vinegars are also a great way to save some of our alcohol experiments gone awry.
Vinegars are created through alcohol or sugars turning into acetic acid bacteria (AAB). These tiny bacteria are found on almost any surface making them incredibly easy to access. Pineapples are readily available to us so making vinegar from the peel is a quick and easy way to use the whole fruit. We adapted this recipe from one of our favorite books, Wild Fermentation by Sandor Katz. If pineapples aren’t readily available where you are, we hope that this recipe can give you some new ideas on how to preserve some of your own local fruits.

Our homemade fruit vinegars
Recipe
Ingredients:
1/2 cup sugar (we use locally sourced sugar known as tapa dulce, you can use a local sugar source too)
Peel of 1 pineapple (or an equivalent amount of your local fruit)
1 quart water
Instructions:
Mix the sugar and water in an open mouth glass jar.
Submerge the pineapple peels. Ensure all pieces of the peel are completely submerged in your sugar water mix. You can stab the pieces of pineapple peel through a chopstick or secure and wedge them into the jar so all of the peels stay beneath the surface of the water. Add more water and sugar to cover if necessary.
Cover the glass jar with a piece of cloth that is tightly secured (if it is too loose, flies will lay eggs inside which turn into maggots - and for some reason everybody hates maggots). We use a piece of string to tie the cloth around the container.
Stir the sugar water mixture at least once a day. This is in order to prevent mold from growing and to break the surface that is created to allow aeration to occur which is needed for the fermentation process.
When the liquid darkens after about a week, strain out the pineapple peels and compost them.
Ferment the liquid 2-3 weeks more. A gelatinous “mother” may grow on top, which is great. When your vinegar is acidic, strain it into a bottle and cap. The mother can be composted or added to a new vinegar at step number five.
At this stage, you can start to use your vinegar or continue to let it age. We usually let our vinegars age around 6 months.
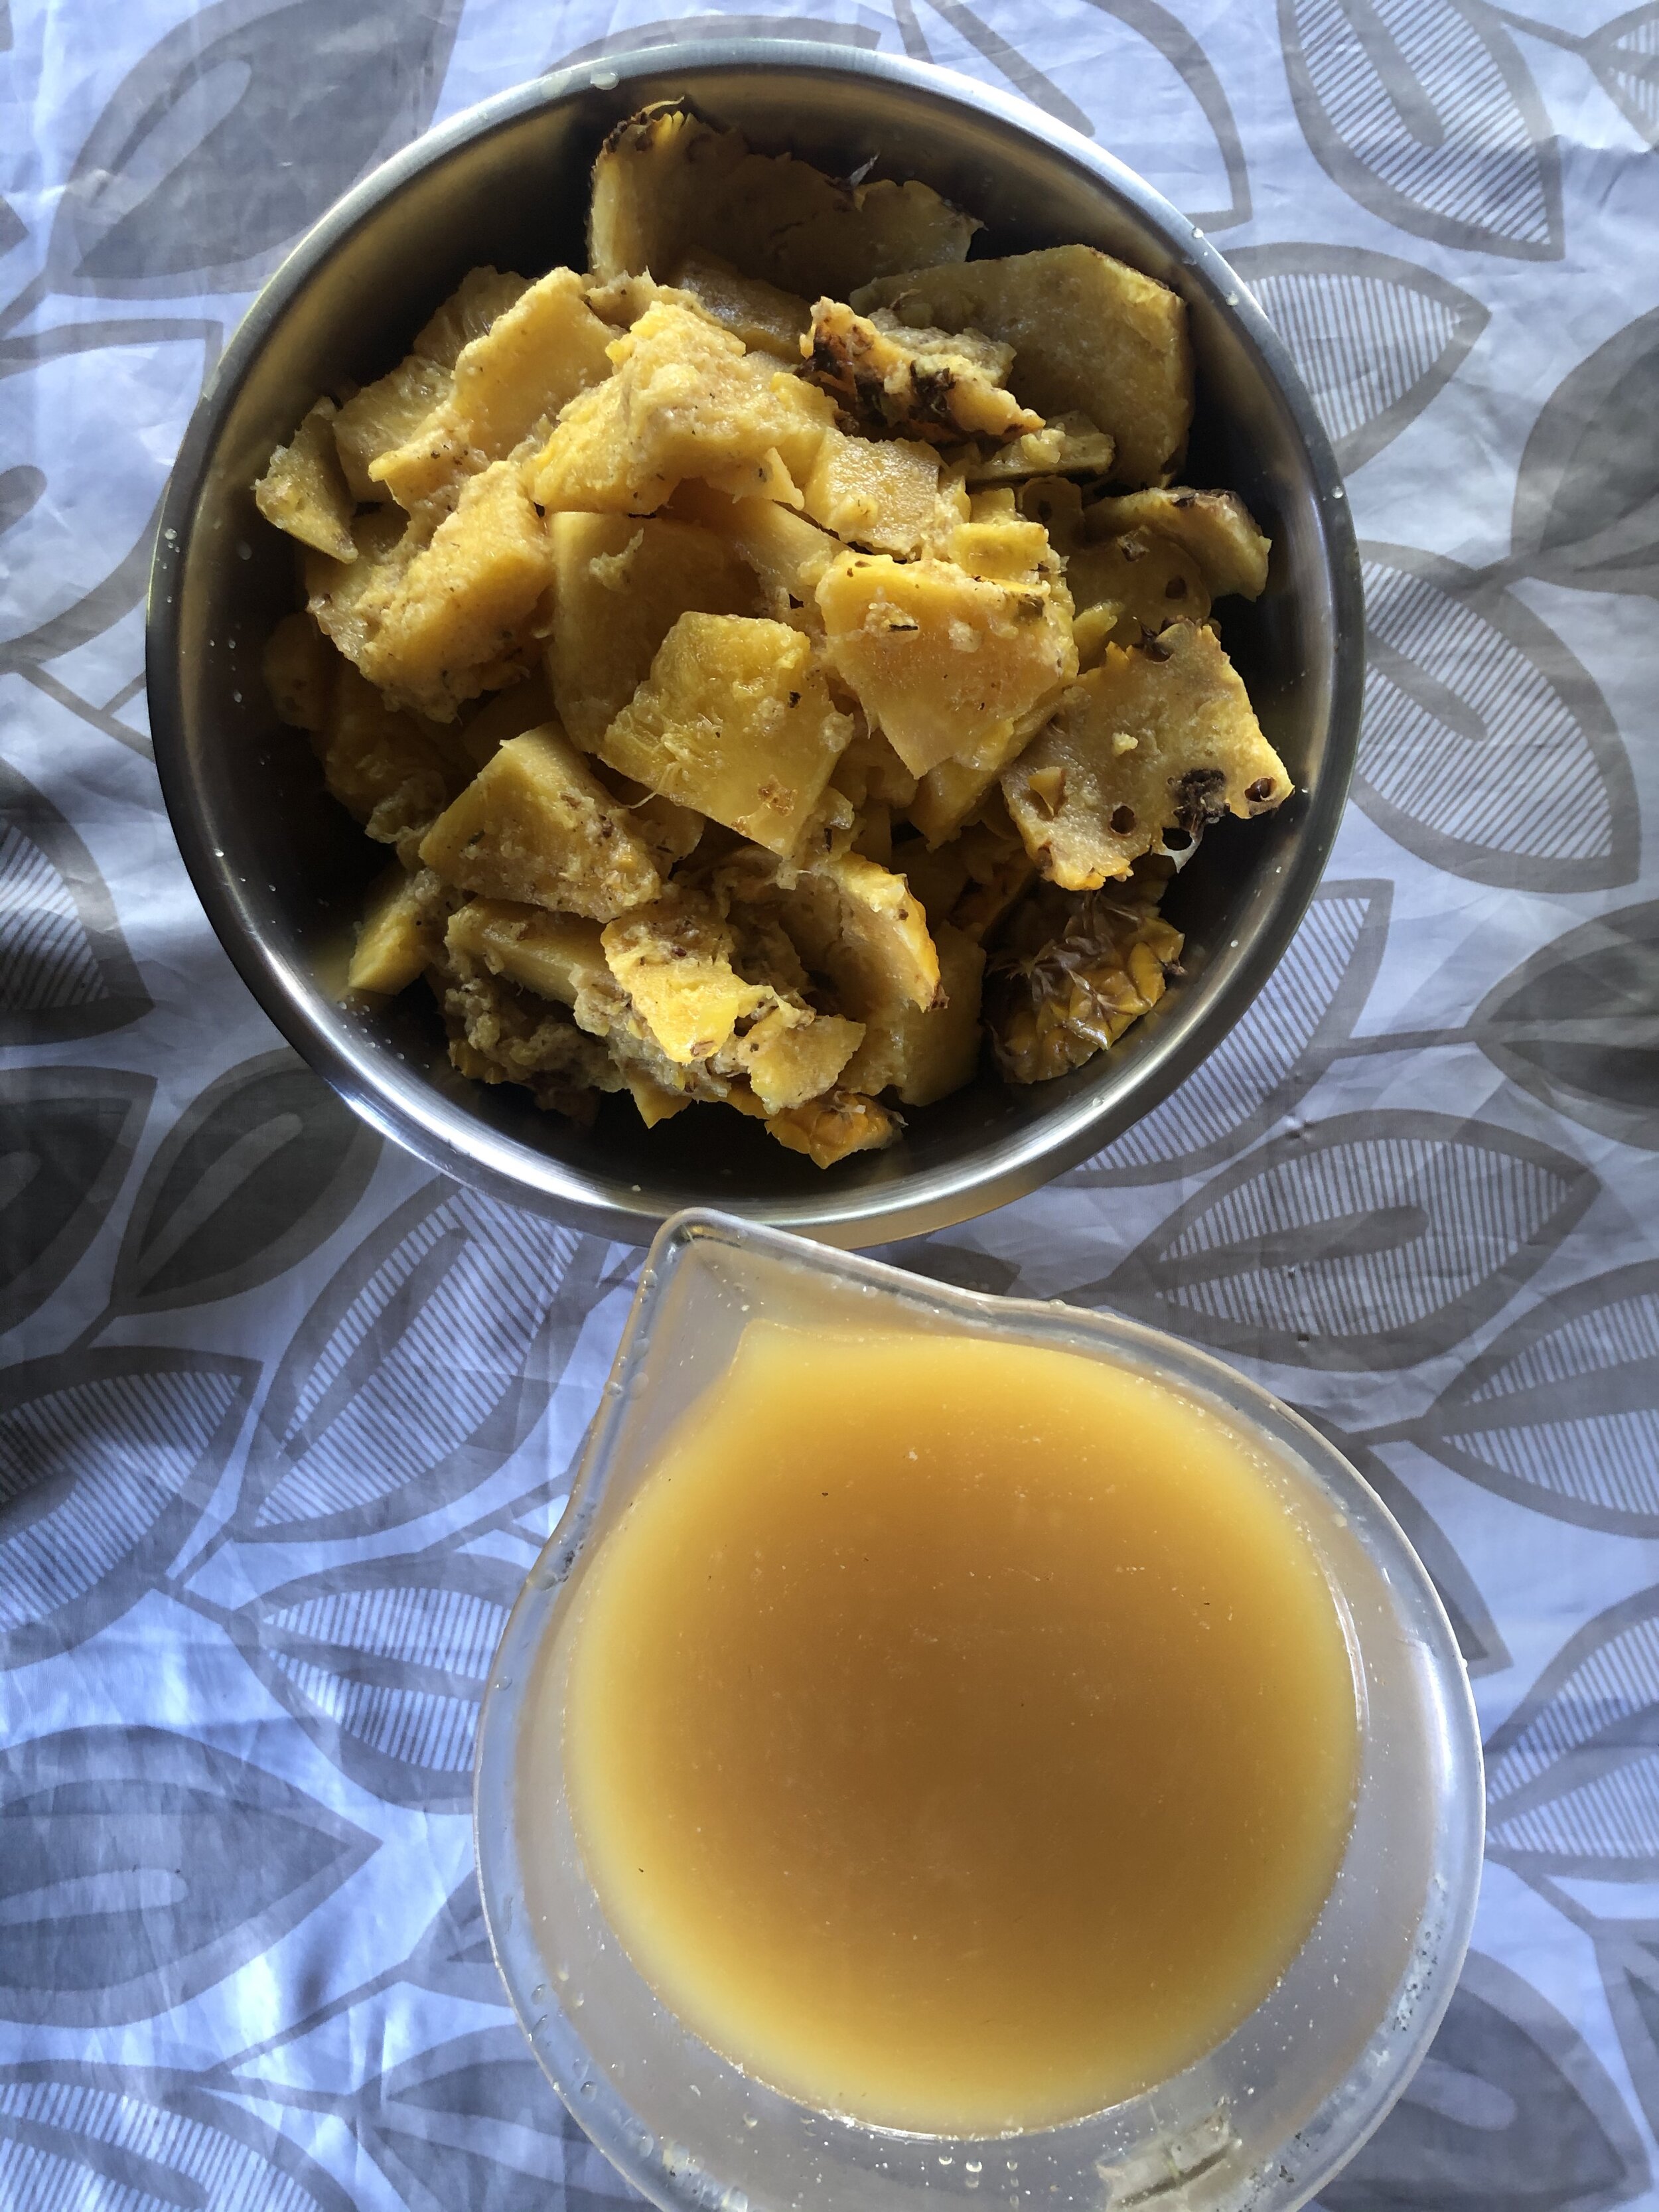
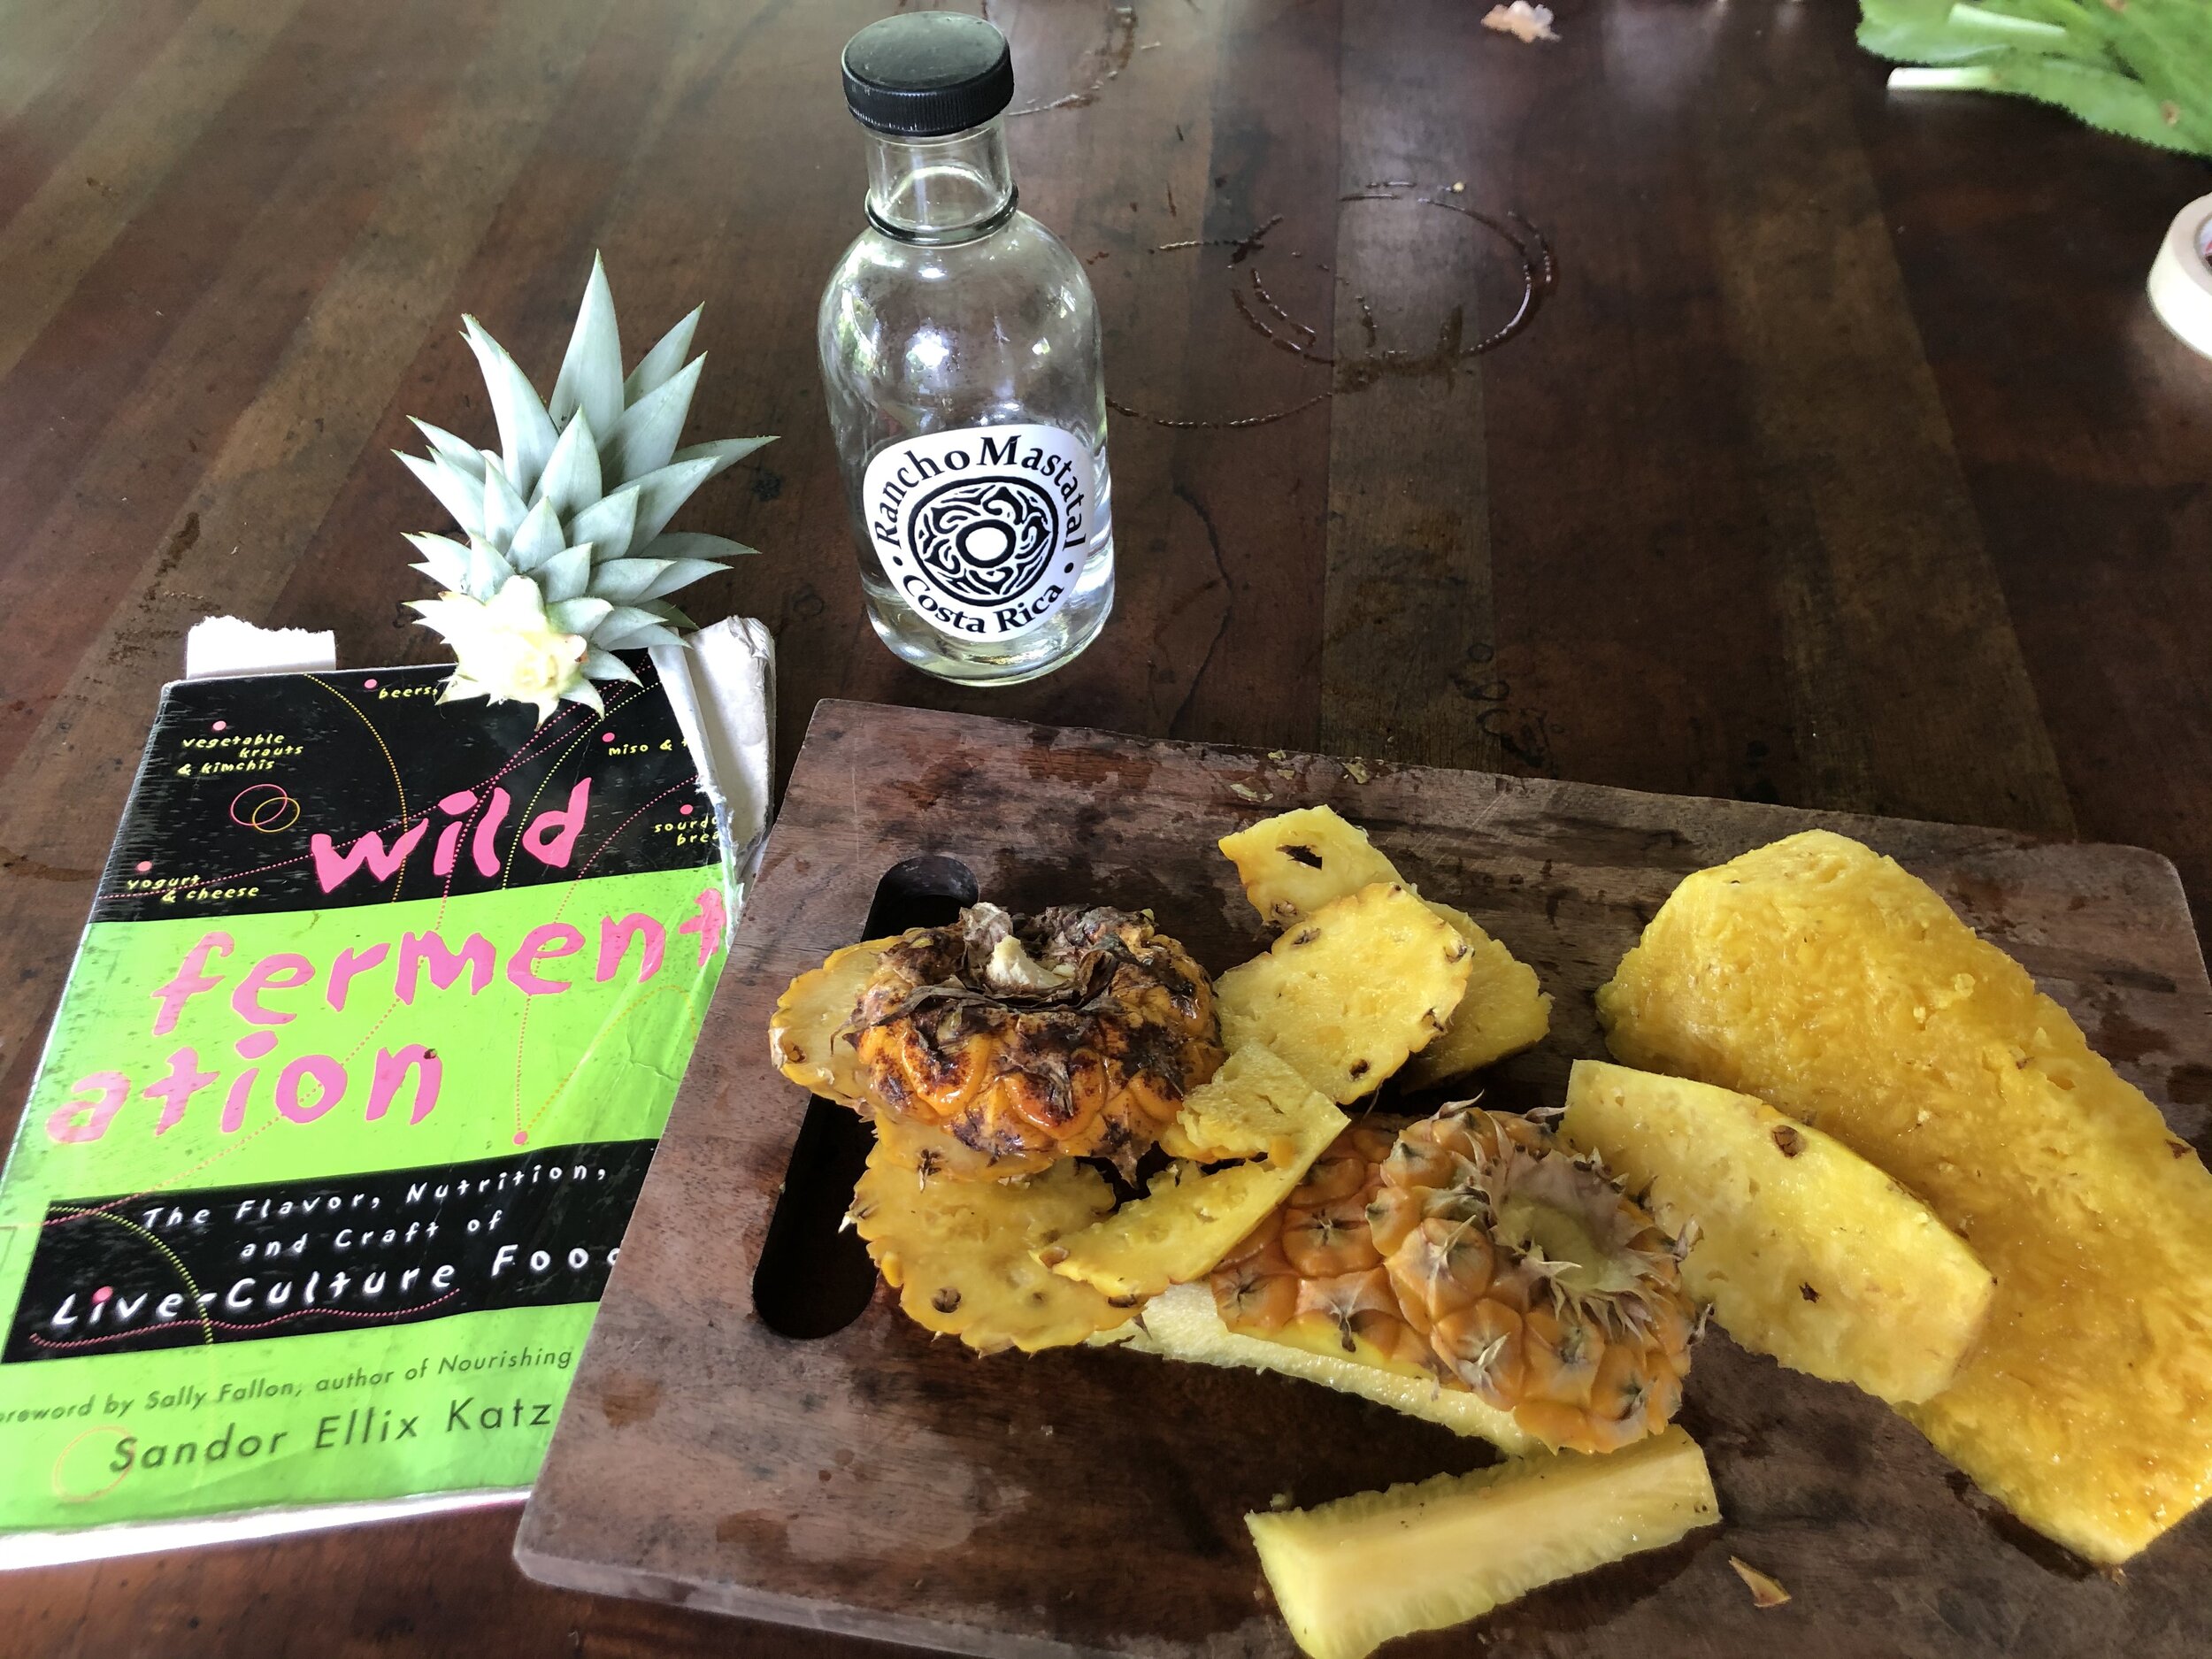
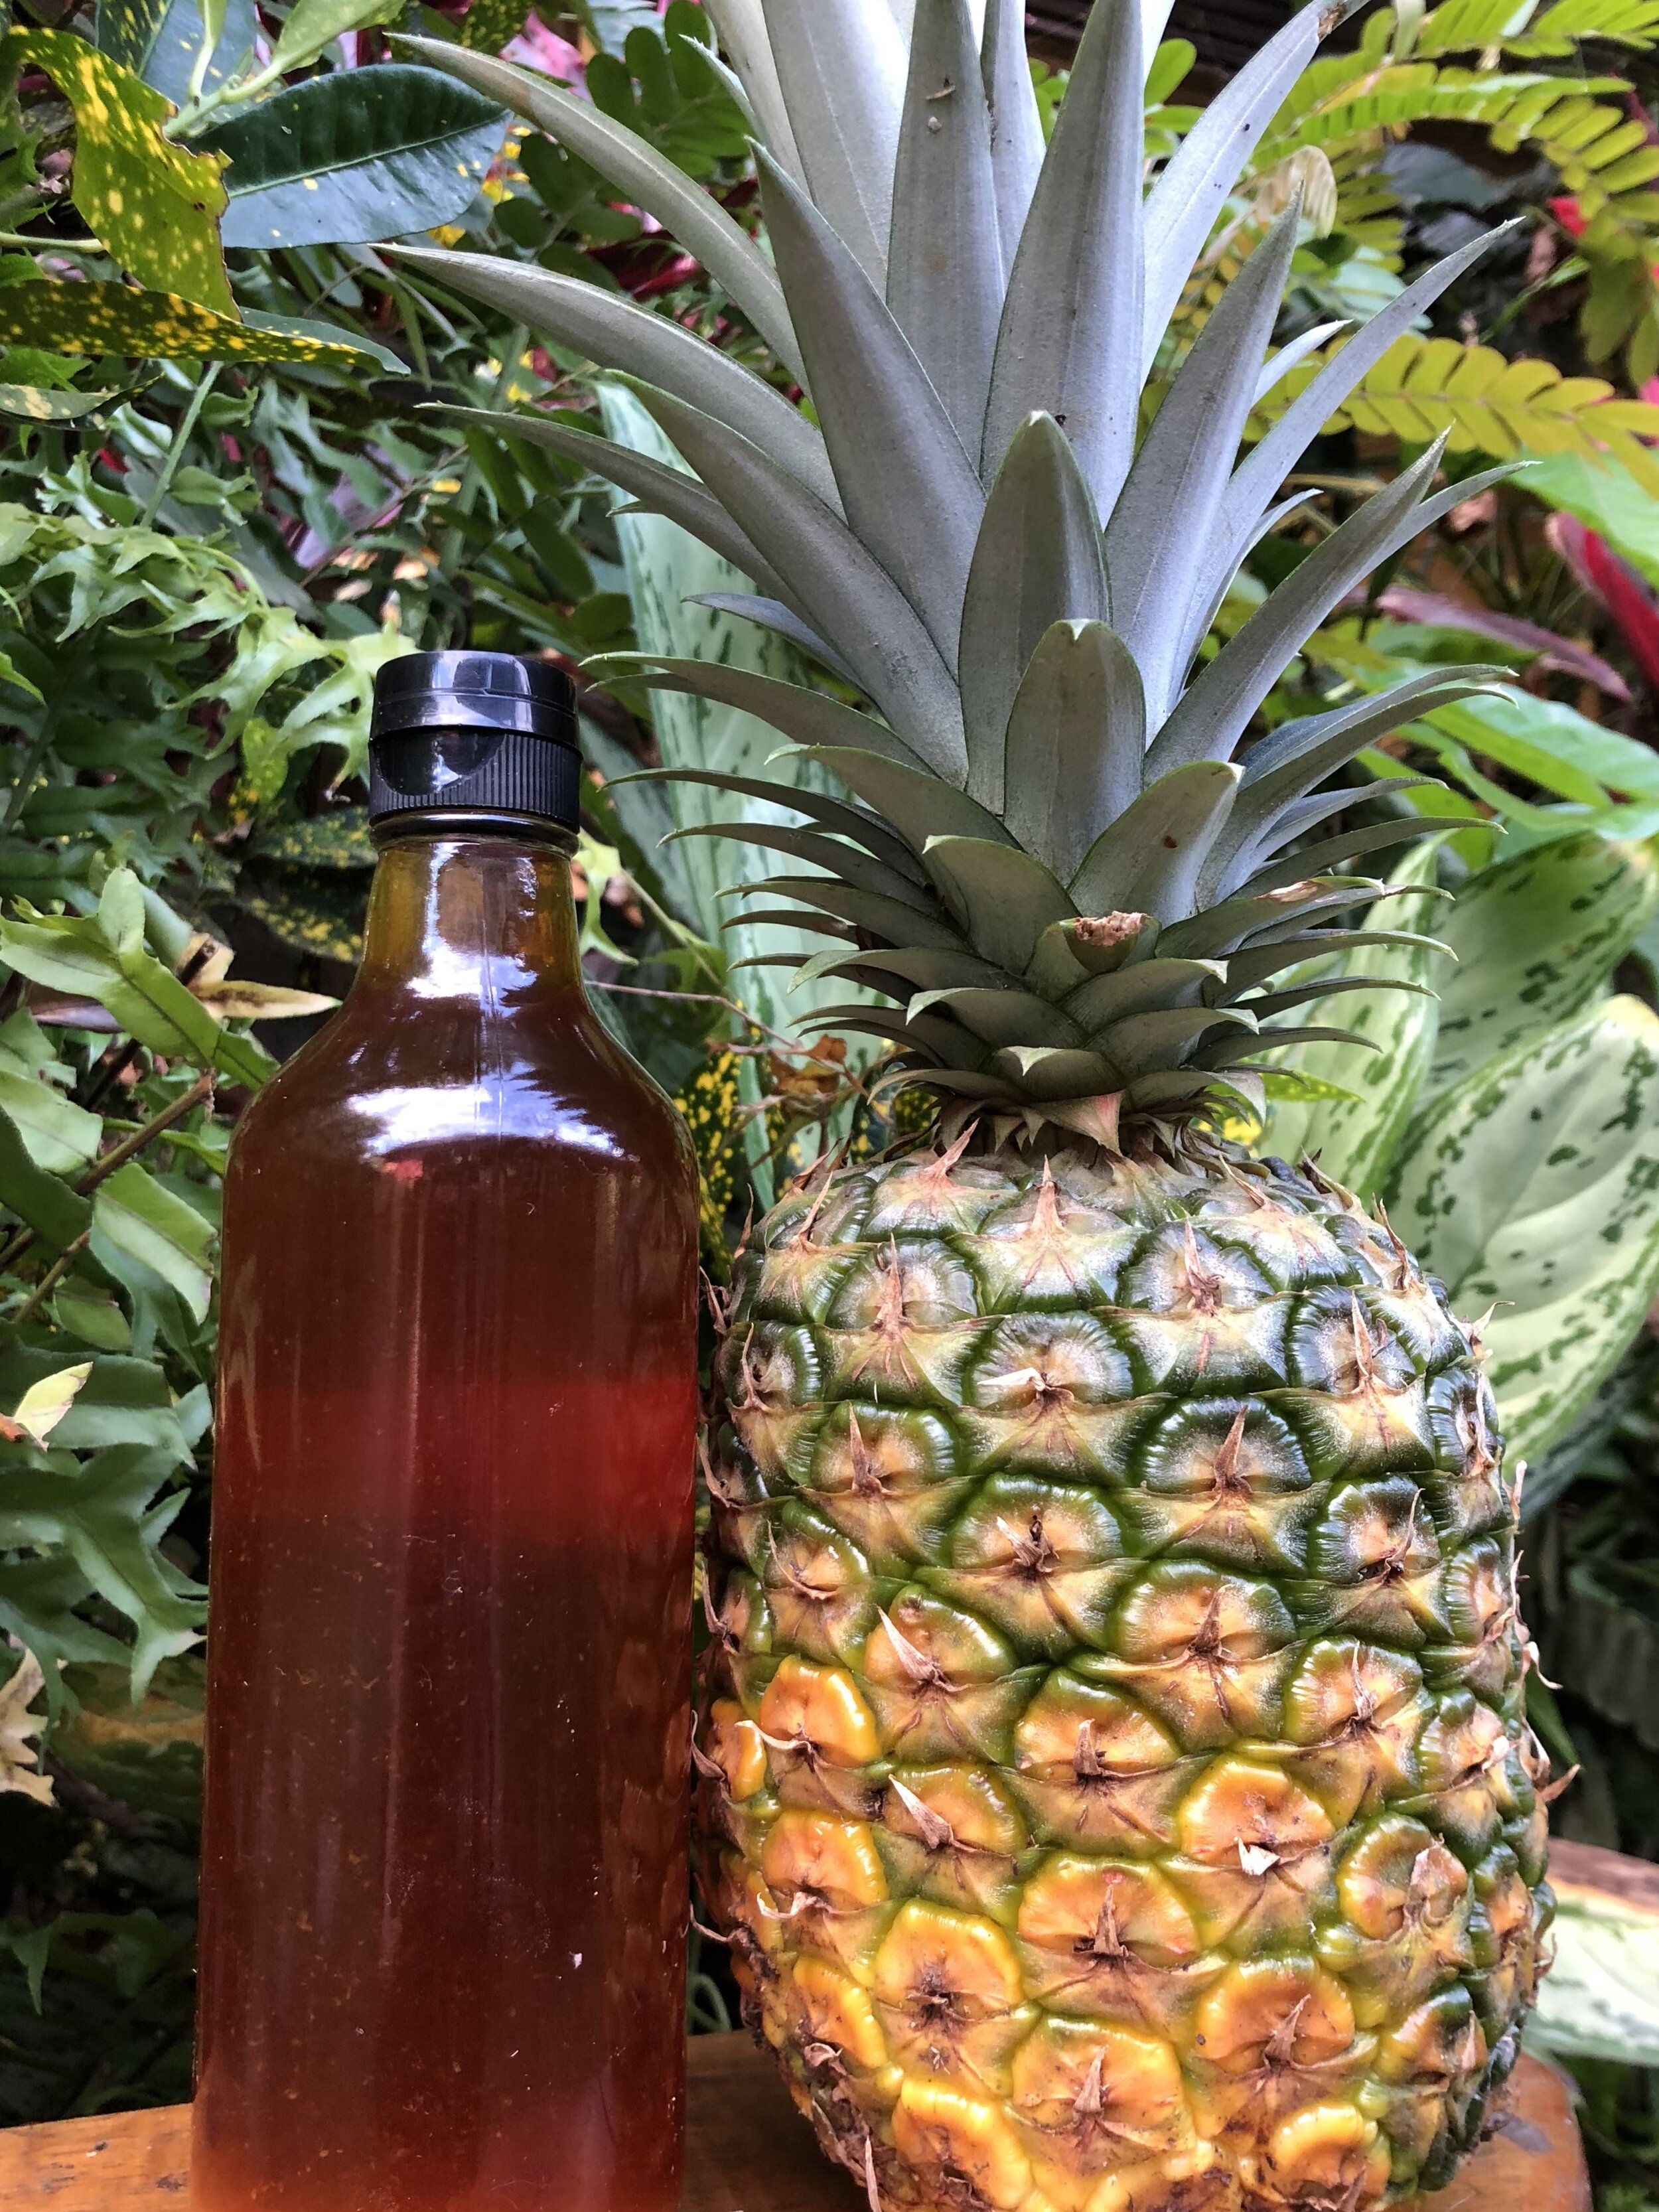
This recipe is adapted from Wild Fermentation by Sandor Katz.
The pineapples we are now harvesting were planted by previous apprentices and our current cooking vinegars were created by them as well. Many times the work we start here is created to be enjoyed by future Ranch dwellers. If this past pandemic year 2020 has shown me anything, it would be the reinforcement of the dangers of full reliance on our large industrial food system. Many of us have the desire to become more self sufficient in producing and conserving our own food. We know that access to healthy, fresh food is a privilege. We are lucky to have both the time and space to grow and experiment with ours. As this same interest and passion is also growing in others, we hope that our jungle experiments can be an inspiration on your journey.
Want to learn More
Join us for one of our workshops that sometimes include farm to table fermentation. Or consider applying to our year long apprenticeship or two month internship, where you will learn all the basics of fermentation, homesteading, growing your own food and lots more!
Happy ferments, happy microbes!

Enriching Community Soil: 5 Simple Strategies That Support Sustainable Relationships
"Sustainable community must be based on sustainable relationships- relationships that give more than they take- that nourish, enliven & inspire us."
By Brittany Bares, Intern 2020
"Sustainable community must be based on sustainable relationships- relationships that give more than they take- that nourish, enliven & inspire us." Larry Kaplowitz, in "Creating a Life Together: Practical Tools to Grow Ecovillages and Intentional Communities".

Taking time to enjoy each others company and make new connections
At the beginning of August, four interns, myself included, arrived at Rancho Mastatal, bubbling with anticipation and wonder. What would we be learning? Who were the people living here? What was the overall "vibe”? With a background in social work, I arrived particularly curious about how this unique group of people related to one another, as well what invisible structures were in place, if any, that supported sustainable relationships.
With a few weeks of experience at the Ranch, I have observed several simple strategies that support sustainable relationships and are both: 1) being taught and 2) being practiced in real time by community members.
The following 5 strategies are a few of the ways Rancho Mastatal supports sustainable relationships and practice social permaculture. Following each simple strategy is a recommendation for how you too can create sustainable relationships within any community you are a part of, be it family, work or any other group.

Community activities to create trust and bonding
1. Share Responsibilities
What The Ranch Does
The community members of the Ranch share daily responsibilities, called “community contribution skills”, ranging from the daily care of the Biodigestor to making the water kefir drinks. Every month, community members rotate from one skill to the next. As well, community members share the responsibility of daily cooking and cleaning by rotating through a weekly schedule.
What You Can Do
In any group you are a part of, begin by creating a list of daily/weekly tasks that, however mundane, contribute to the order, operation & cleanliness of the shared space. Make agreements on how the tasks are to be completed and then, write the expectations, as well as who is responsible for what, in a place that is visible to all members. Assign each person a task and rotate through the tasks on a weekly or monthly basis.
How does this enrich community soil?
Sharing responsibilities saves individual time, while contributing to the community in a way that is beneficial for all. As well, it increases the ownership and value each community member has for the shared space and resources they use.
2. Check-Ins

We hold all our communal meetings in this circular, earthen space called the Ceiba Lounge
What The Ranch Does
Ranch members meet for a brief meeting everyday to review the daily schedule. Once per week, the core-team, apprentices and interns meet in seperate groups to discuss a variety of topics, ranging from personal challenges to project planning. Then, once per week, all community members meet in a "community check-in", where members have the opportunity to share highs and lows, discuss "square items'' and set intentions.
What You Can Do
Similar practices can be implemented at home or in the office. If you choose to implement community check-ins, have specific boundaries that will create a safe and meaningful space for people to share honestly and openly. These boundaries may include: 1) No obligation to share- a member can “pass” 2) No one can interrupt the speaker, respond directly or give any advice 3) Set a time limit for each share (usually 5-10 minutes max). *the intent of each check-in should guide the boundaries of the meeting.
How does this enrich community soil?
Check-ins help to keep everyone organized and up-to-date on information. They also help to reduce conflict among members because when folks have a safe space to share their values and feelings, potential conflict can be mitigated. Check-ins are a space to share openly and vulnerably, as well as a space to practice active listening and empathy. This, in turn, can create authentic connection and compassionate understanding, which are essential ingredients for sustainable relationships.
3. Play Together

Communal yoga sessions
What The Ranch Does
The days at the Ranch can be long and labor intensive. The Ranch does a beautiful job of balancing long work days with several opportunities to play! Whether it is volleyball, frisbee, playing music, salsa dance nights, storytelling, movie nights, yoga classes or card games, community members at the Ranch love to play!
What You Can Do
At home, implement a game night or schedule family hikes or bike rides. At work, organize a volleyball or softball league or something more simple, like trivia night or board-game lunches.
How does this enrich community soil?
Life can become serious quickly. With work, daily responsibilities, and other duties, it is easy to get trapped in the daily grind. When we actively participate in play, we make space for joy and fun. If you get stuck in " I don't know what to play", simply remember how you used to have fun as a child and do that!
4. Offer Daily Gratitude
What The Ranch Does
Every night, before eating dinner, community members take a few moments to offer gratitude for specific people or events that happened during the day. The expressions of gratitude range from thanking someone for teaching a lesson to thanking the Earth for the abundance of food provided.
What You Can Do
Whether at home or at work, you can implement the same practice by simply providing space before a shared meal to express any daily gratitudes. Another way would be to have a gratitude jar, where anyone can write down what they are grateful for, place it in the jar and then, at a specific time during the day or week, read the gratitudes aloud as a community.
How does this enrich community soil?
Actively giving gratitude helps us shift our mind from the things that have gone wrong or the challenges we have had, to the things that went right, while acknowledging the many things we all have to be grateful for. A simple shift in thinking can have a profound effect on our well being, while enlivening our relationships.
5. Frameworks for Communication & Conflict Management
What The Ranch Does
Whenever working or living with other humans, there is bound to be conflict. Here at the Ranch, members are provided basic training in conflict resolution and effective communication frameworks. Specifically, they practice compassionate communication methods as outlined in NonViolent Communication by Marshall Rosenberg.
What You Can Do
READ NONVIOLENT COMMUNICATION! It will change your life and how you have relationships with others. The framework for communicating and resolving conflict are simple, pragmatic and have been found to be effective by millions of people, in various types of organizations and settings.
How does this enrich community soil?
How we communicate, i.e. the words we use and how we say them, greatly impact our relationships. Many of us were never taught how to communicate to connect or how to resolve conflict in a meaningful way. If there is only one thing you can do to create more sustainable relationships, learn how to compassionately communicate, as outlined in the book Nonviolent Communication by Marshall Rosenberg.

The more sustainable our relationships are, the more purpose and meaning each individual will be able to experience. Healthy communities inspire growth and offer a sense of belonging to its members. They are safe places to learn, explore, inquire and connect to our truest selves. If you are looking for ways to enrich the soil of your own community, be it at home or work, keep it simple with these 5 strategies: share responsibilities, check-in, communicate compassionately, say thanks and PLAY!
Learn More
Want to experience communal living and put these social permaculture skills into practice? Consider applying for either our 2 month internship or year long apprenticeship.

Water Kefir - The New Kombucha!
Before coming to the Ranch, I only knew of kefir as a tasty, sour, probiotic milk product - almost like a liquid yogurt. I loved it, and knew of it’s health benefits, but didn’t think kefir could be anything more. Turns out, kefir can refer to both milk kefir, the product I’ve known and seen in grocery stores, and water kefir, a delicious fermented soda and a staple for us here at Rancho.
By Cameron Conklin, apprentice 2021

Delicious, probiotic, fizzy and homemade soda (Water Kefir)
Kefir is more than just milk!
Before coming to the Ranch, I only knew of kefir as a tasty, sour, probiotic milk product - almost like a liquid yogurt. I loved it, and knew of it’s health benefits, but didn’t think kefir could be anything more. Turns out, kefir can refer to both milk kefir, the product I’ve known and seen in grocery stores, and water kefir, a delicious fermented soda and a staple for us here at Rancho.
Kefir “grains” are not actually grains at all, but instead a type of SCOBY (symbiotic colony of bacteria and yeast), a word you might recognize from researching or making kombucha. Kefir grains are shaped like little translucent miniature cauliflower florets - giving them their name. Milk kefir and water kefir grains look similar, but contain a different combination of bacteria and yeast. So if you want to make both, like we do, you’ll need a different source for each. If you are interested in milk kefir, check out Ryan’s blog post for some great milk kefir recipes here!
Some kefir makers have had luck with rinsing their kefir grains and changing the nutritive liquid they are fermenting. For example, using milk kefir grains with coconut milk instead of dairy milk. But as a rule of thumb, your grains will be trained to like a certain combination of ingredients, and in the case of water kefir grains, water and sugar is the magic recipe!
Making water kefir, what we call “balm”, was my first task here at Rancho. After my first week on balm duty, I thought to myself, “Why isn’t everyone making this stuff?!” It’s easy, delicious, refreshing, and serves as a great base for seasonal flavors, medicinal plants, and culinary creativity.
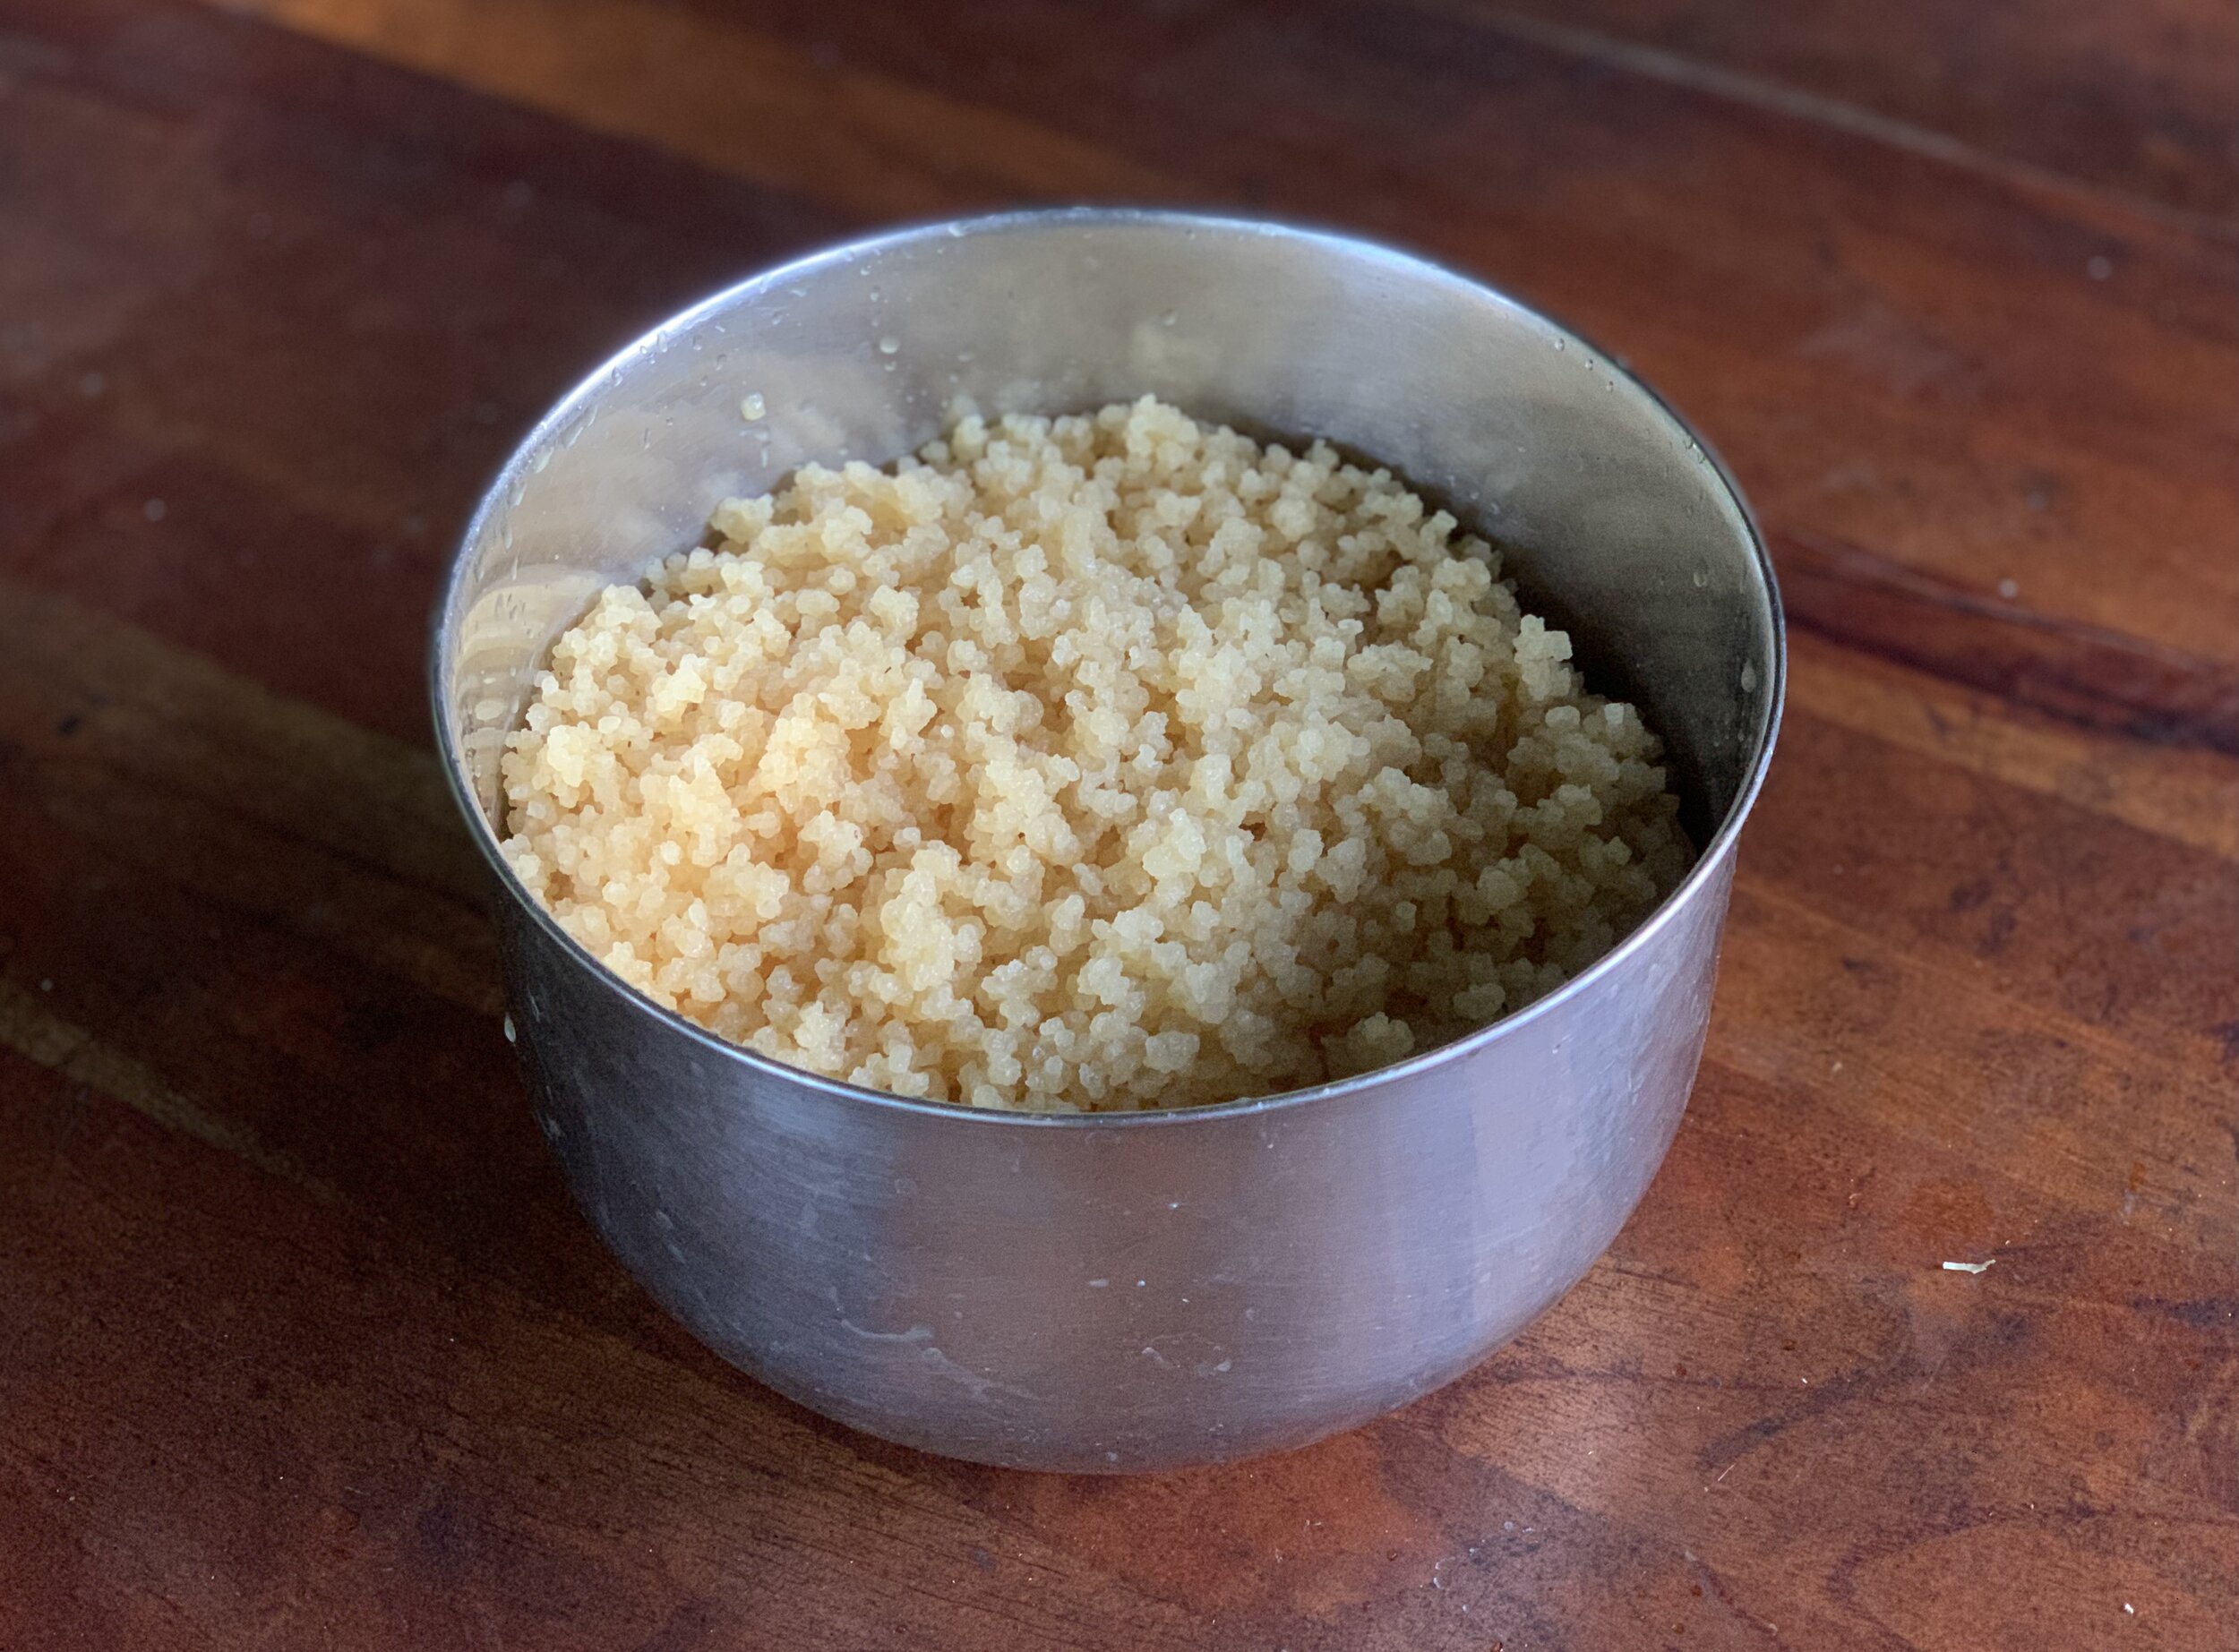
Water Kefir grains
The health benefits of water kefir
The exact origin story of kefir is unknown, but it is believed to have originated in the Caucasus Mountains. Kefir is Turkish for “good feeling” - which I can’t agree more with when I take a cold sip of bubbly kefir soda. Water kefir is high in probiotics, hydrating, and a great replacement for electrolyte sports drinks like gatorade, since it contains enzymes and minerals. It is known to aid in digestion, reduce inflammation, and relieve skin irritation such as eczema and acne. Water kefir is also said to help with detoxification by cleansing the liver (Mueller, 2014). What a magical concoction!
Water kefir serves as a great conduit for fruits and herbs. There are endless combinations of ingredients you can add to boost nutritional and medicinal potency depending on what your body needs!
How to make water kefir
**Note! If you do not have a water kefir making friend or local grain dealer, you can purchase dehydrated grains online. You will need to rehydrate them before following the recipe below.

Water Kefir SCOBY in the water/sugar solution
Primary Fermentation
Combine 1 gallon of water with 2 cups of sugar into a non-metal container (at Rancho we use tapa dulce which is a locally sourced sugar cane that our grains love, but you can use other sugar sources as well)
Pour in 1 cup of kefir grains
Cover with a cheese cloth or lid to keep out dust and bugs but not oxygen
Allow the mixture to sit for 2 days - this may be longer for you (up to 4 days) if you are in a cooler climate. Here in the tropics things move fast!
When your water kefir is ready you will notice a change in color and you may see bubbles rising to the top or foam settling on the surface
Strain your kefir into airtight bottles or jars (no metal) for the second fermentation, being sure to leave room for added fruit juices, herbs, and bubbles from the carbonation process
Set aside your kefir grains to begin your next batch - you can continue using these grains an infinite number of times if you keep them fed and healthy. You will see them start to multiply and this is a great time to give away extra grains to friends!
You are now ready to move on to the second fermentation and carbonation phase!
At this stage your kefir is ready to drink if you do not want to add flavor or carbonation - but in my opinion that is the best part!
Secondary Fermentation
**Note: This is where you can let your creativity shine! Read below to see some of our favorite recipes. You may wish to adjust the amount of fruit juice or sugar you use based on preference so start experimenting.

Passion fruit makes a great and easy flavor for balm!
Add 1/4 cup 100% fruit juice or fruit puree per liter of water kefir
Add 1/8 cup sugar per liter of water kefir
Add any herbs you’d like (I like to muddle them or blend with the fruit juice first)
Cap the airtight containers and let sit at room temperature for 1 to 3 days to let the secondary fermentation take place. In this stage of the process, the added sugar will be consumed by the SCOBY and create the carbonation as carbon dioxide builds up in the airtight container. The longer you wait, the bubblier and less sweet your beverage will be, so do a few trials to find your perfect combination.
Give your bottles a little burp to make sure you release some carbon dioxide to avoid your bottles exploding. Place your bottles in the fridge and enjoy! Don’t wait too long to burp your bottles and put your soda in the fridge, or your bottles might bust. The fridge will slow down the fermentation process significantly, allowing you to enjoy your balm for a longer period.
Watch out when opening your bottles again, the carbonation can be very intense depending on the ingredients so start slow as you unscrew the cap!
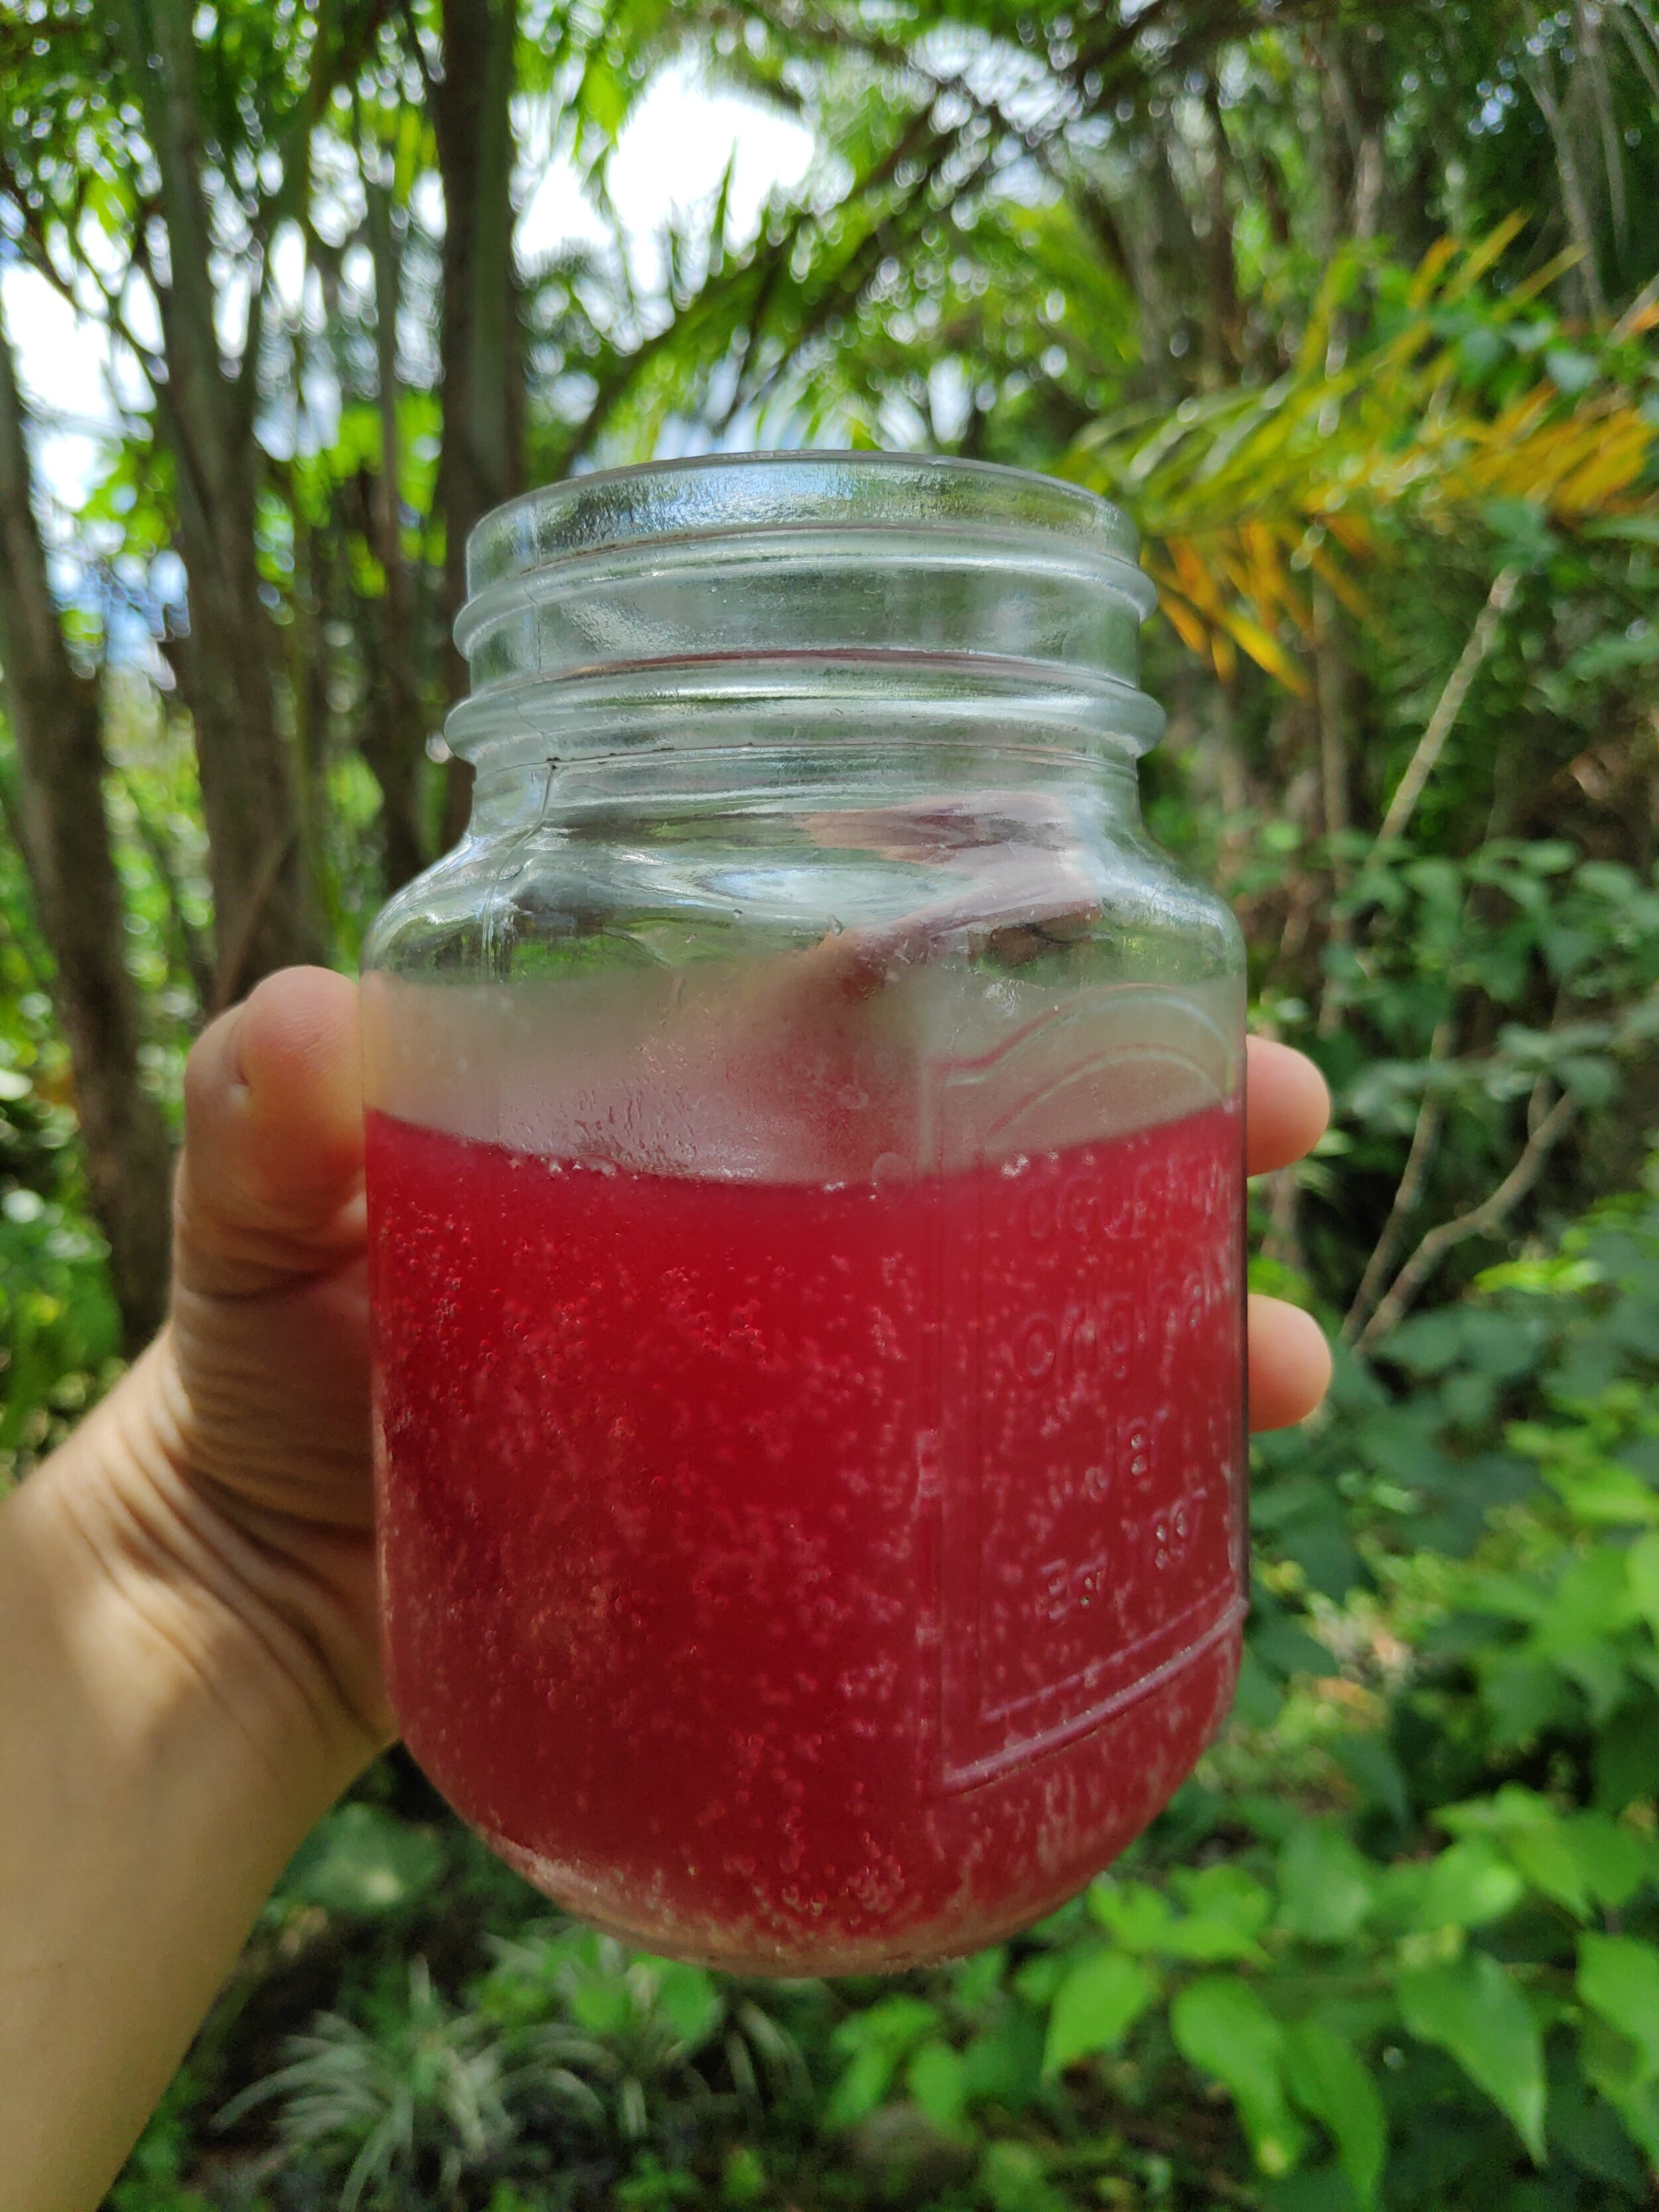
A refreshing, bubbly glass of balm
Our favorite variations
Below are a few flavor combinations that are staples here at Rancho. These flavors are absolutely delicious and come right from our farm. If you aren’t in the tropics and don’t have access to the below, I recommend using local, seasonal, ingredients to flavor your balm - there are so many different options!
Galaxy Bomb:
1/4 cup fresh squeezed starfruit juice
grated fresh ginger to taste
Sunshine Daydream:
1/4 cup fresh squeezed orange juice
1/8 cup fresh squeezed lemon juice
muddled mint to taste
muddled basil to taste
The Queen:
1/4 cup fresh squeezed and strained victoriana
1/8 cup fresh squeezed lemon juice
(be careful with explosions, this one is a firecracker!)
Resources:
Delicious Probiotic Drinks, Julia Mueller, 2014
Wild Fermentation, Sandor Ellix Katz, 2003
More Articles on Fermented Beverages you Can Make!
How to Brew Your Own Ginger Beer
Learn More
Check out our workshops that include farm to table fermentation, medicinal plants, permaculture and more!
Happy brewing and happy microbes!

Nitrogen Fixing Plants at Rancho Mastatal
A nitrogen fixing plant is a common term used to describe plants that have symbiotic relationship with microorganisms on their root nodules that allow them to fix nitrogen. These are the top ones we use here at the Rancho.
By Nic Donati, Core Team Member
What are Nitrogen Fixing Plants?
A nitrogen fixing plant is a common term used to describe plants that have a symbiotic relationship with microorganisms on their root nodules that allow them to fix nitrogen. The vast majority of these plants are in the Fabaceae family (the legume family), but there are other families of plants that have relationships with microorganisms that allow them to fix nitrogen. There are many trees and soft stemmed plants that have symbiotic relationships with microorganisms on their root nodules that allow them to fix nitrogen. We often in permaculture design refer to all of these as NFTs (Nitrogen Fixing Trees) for simplicity although some of the plants we are referring to are not actually trees.

Root nodules on a Poro sapling
What is Nitrogen fixation?
Nitrogen is essential to all life forms as it is used in the biosynthesis of all nitrogen containing organic compounds such as amino acids and proteins. Nitrogen makes up approximately 78% of the earth’s atmosphere, so it is in abundance, however in its gaseous form (N2) it is not readily available to plants as it cannot be easily metabolized by them. Nitrogen fixation is the process of converting N2 into a compound that can be readily metabolized by most organisms such as Ammonia (NH3).
Nitrogen fixation takes place naturally in the soil by microorganisms. Some species of plants are able to form symbiotic relationships with these microorganisms and we are interested in those plants in permaculture because of the role these species can play at increasing the fertility of our soil in a natural way. Permaculture adheres to the philosophy of working with nature rather than against it and capitalizing on these naturally occurring phenomena is a great practical application of this. We use them a lot at Rancho Mastatal in our food forests, alley cropping systems and our annual vegetable garden system.
Getting Nitrogen into the ground
Nitrogen is one of the most important nutrients for the growth and survival of plants and deficiencies in this key element will lead to problems in plant development. In recent decades this has been dealt with in conventional farming by applying chemical fertilizers. The application of these fertilizers, however, has led to huge environmental degradation. Organic growers may use naturally occurring nitrogen rich amendments like manure, blood and bone etc…. Either way it requires the addition of amendments to our soil. At Rancho Mastatal we absolutely use natural soil amendments, typically we apply dried cow manure, compost, vermicompost and other amendments that we have locally available or make ourselves, this requires a huge amount of work, collecting, hauling and applying them. We ideally want to generate all of the nutrition that our trees need right near our trees so that we don’t need a lot of resources to look after them. NFT’s present a wonderful opportunity to use the natural processes that are taking place in the soil to benefit the trees we are interested in being productive.
Agroforestry

An agroforestry system at the Rancho
Our warm, humid, tropical environment lends itself to the development of agroforestry systems. Our natural ecosystem is the rain forest and our goals as a tropical agro-forester is to create a forest environment utilizing tree species that have yields for human consumption. We typically think of these yields as food, but they could also be fodder for feeding animals, timber for building and branches for firewood amongst others, from now on we will refer to these as tree crops. We also need support species for our tree crops, which we may or may not directly use the yields of. NFTs are good examples of these support species as their roots and leaves are richer in nitrogen than other species. It means when we prune our nitrogen fixing tree and arrange its biomass around our tree crops; we are feeding the soil in multiple ways:
1. The leaves and branches around the tree break down over time and add organic material, and nutrients to the soil
2. Whilst they are breaking down, they are also protecting the soil from the harsh sun and rain.
3. The root die back that is created by pruning our NFT releases nutrients and helps aerate the local soil.
4. Even when not pruned the roots stabilize the local soil and the leaves provide protection and shade from sun and rain.
In our environment we use many different species of NFTs and we would like to share the 9 main species we use, what we use them for and why. Not all NFTs are created equal and some provide different functions than others. As I said earlier we also use the term NFT rather liberally as some of these species are actually not trees!
1. Black Wattle (Acacia mangium)
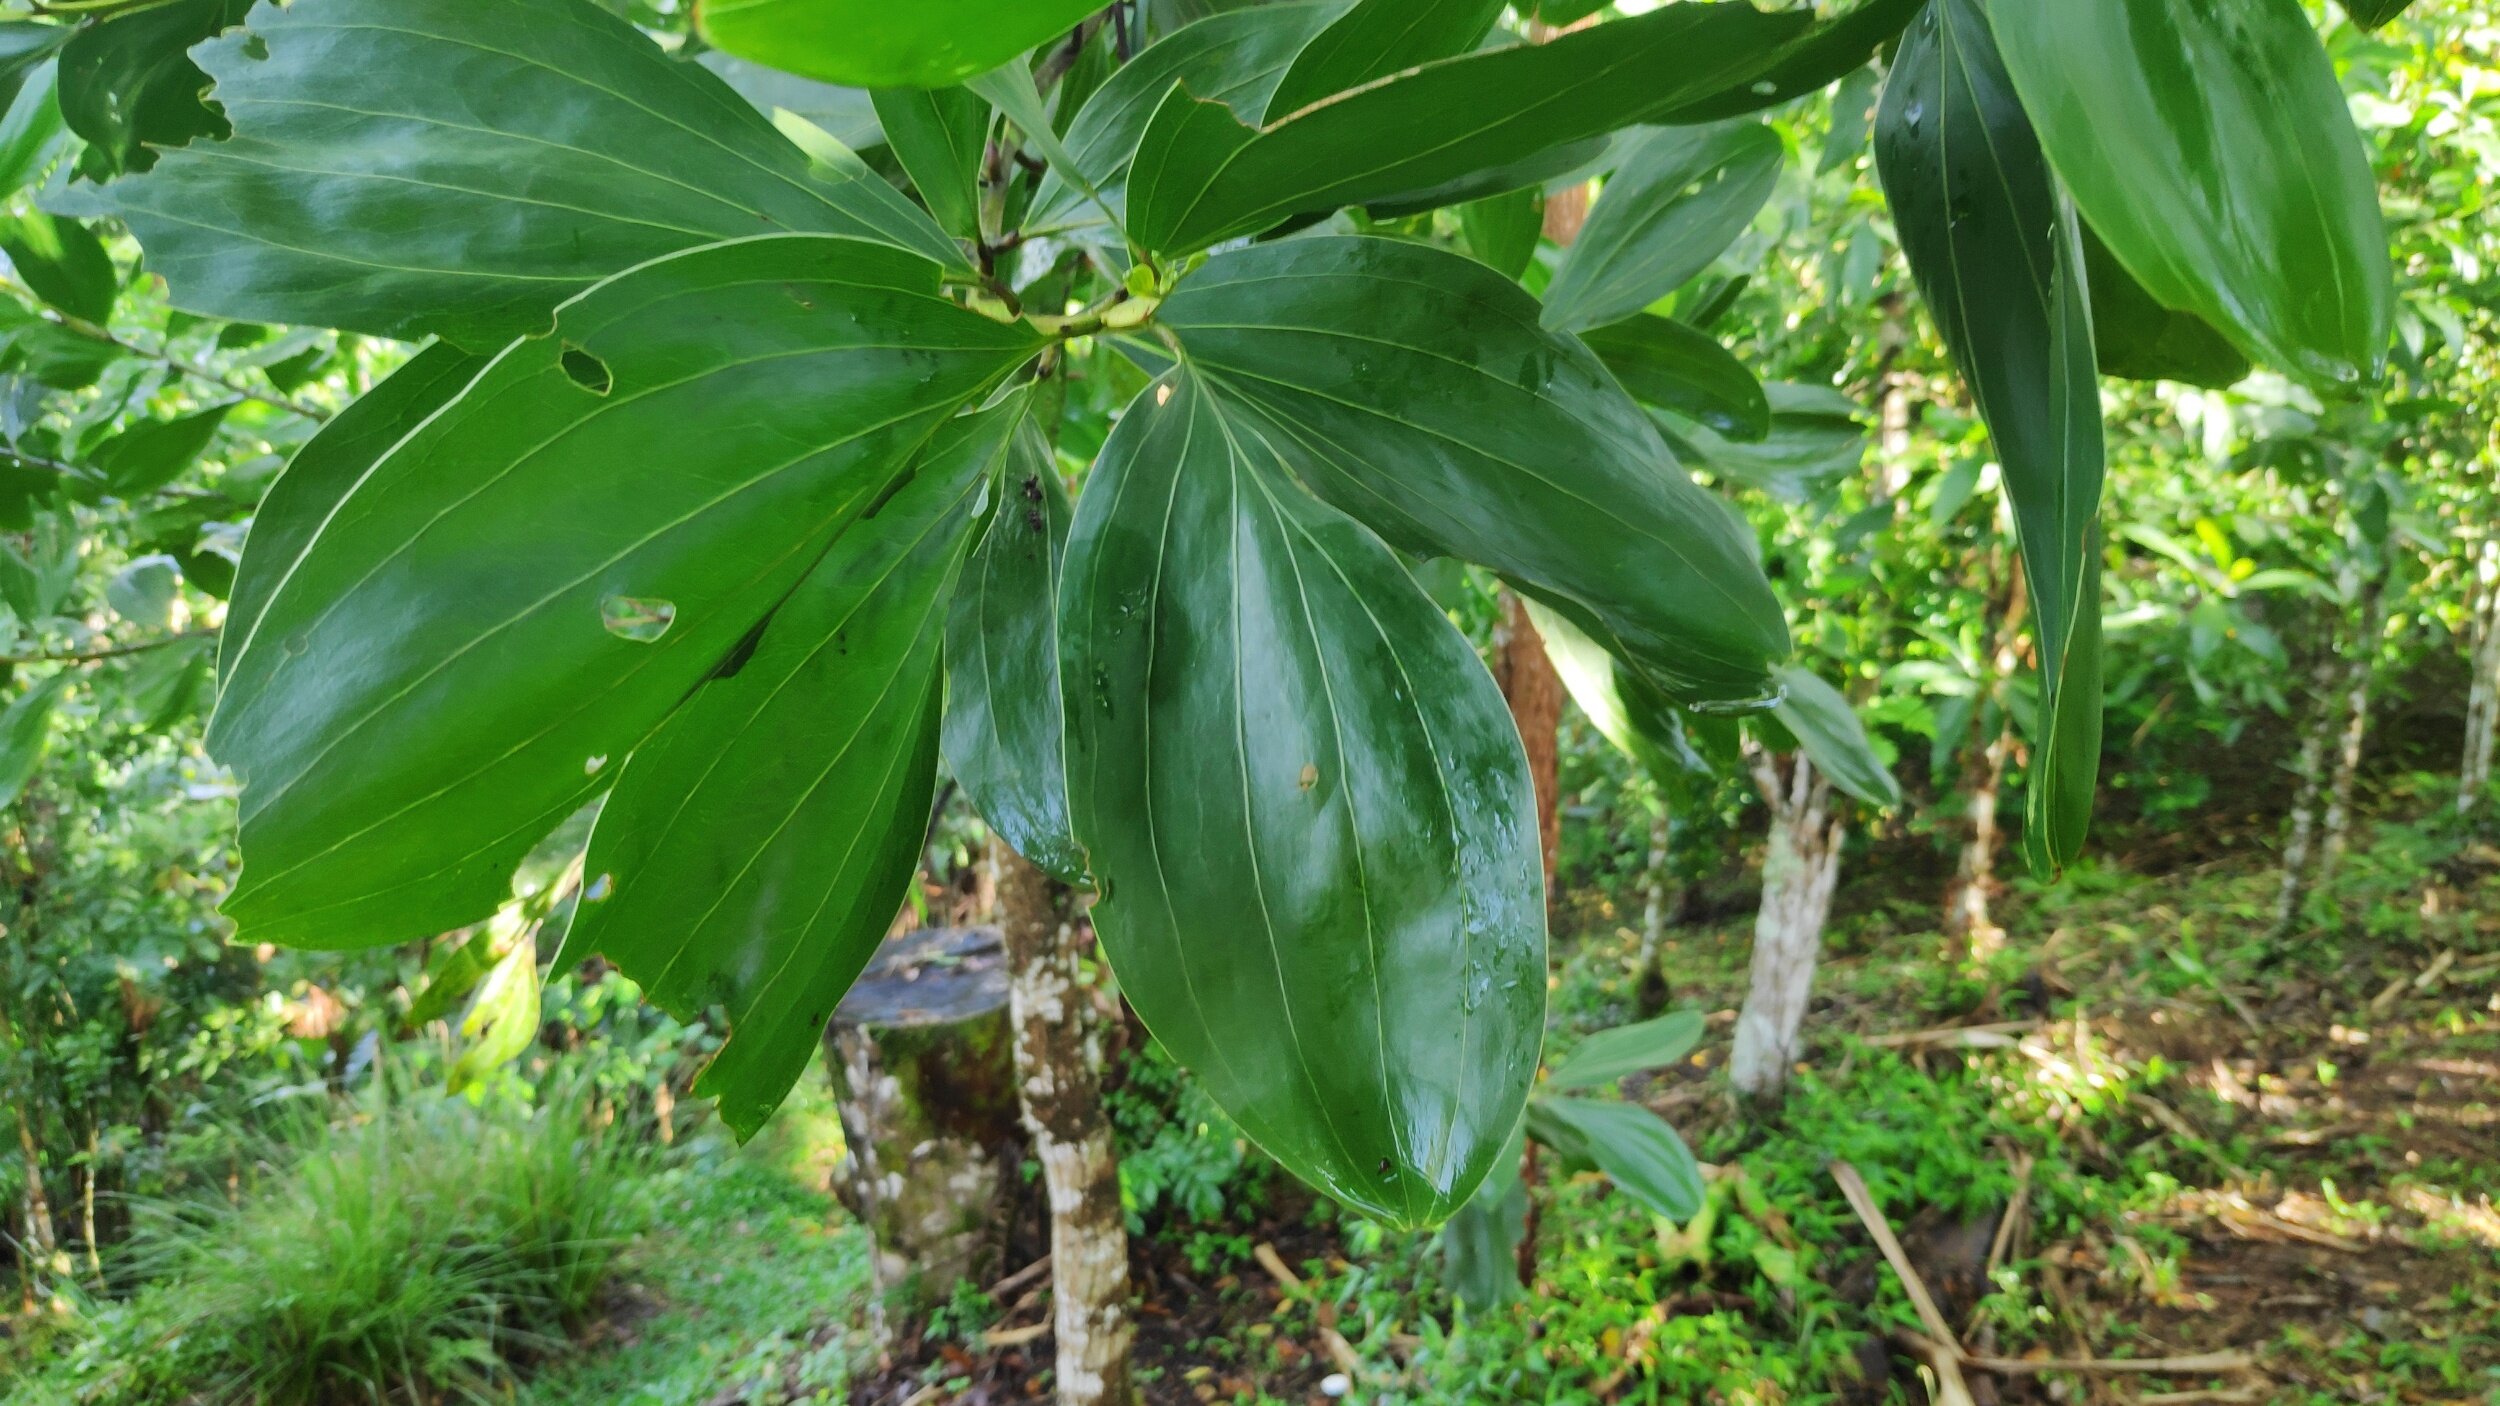
This is number one on the list as it is the most abundantly used NFT on our site. In recent years we have moved away from using it, as it can quickly get large and unwieldy, though there remains a significant number still on our site. It grows fast like most NFTs and handles pruning relatively well, but not great with a fair few dying each pruning season in comparison to some others on this list. It needs full sun and will naturally form a tall straight trunk. It is commonly used in other countries as a valued timber species. The interesting thing about this species is how it really doesn’t look too much like an NFT. Most species in the legume family have a very characteristic leaf pattern. Acacia mangium though does not have this characteristic leaf pattern and you would not think it was an NFT by looking at it. However its first emergent leaves do possess the familiar NFT leaf pattern and give away its family! It is not super easy to propagate from seed like some other NFTs and we have had no success with cuttings. We mainly used this species planted along contour lines when establishing new orchard spaces and since then have moved away from using it so much. We plant it at tight spacing and prune at the end of each dry season to provide biomass for our tree crops.
2. Cratylia argentea

This is the one species on the list that isn’t technically a tree, it is more of a climbing vine, and boy does it climb fast!!! It is an abundant source of nitrogen rich biomass, it handles pruning excellently and pretty much always bounces back. It grows very easily from seed and produces really beautiful, abundant purple flowers (great for pollinators) at the beginning of the dry season, which really facilitates the collection and storage of seeds. You have to be careful with this species as it loves to climb and it will quickly swamp tree crops if left to its own devices and can strangle and kill them. Its greatest characteristic is its speed of growth and abundant biomass, but this is also the feature which gives us a love hate relationship with this species! It loves full sun but will tolerate some shade. We are using this a lot to fill in gaps in our contour plantings of Acacia mangium where a tree has died.
3. Mountain immortelle (Erythrina poeppigiana)

Known locally as Poro, but be careful as there are several species that are known as Poro in Costa Rica. It does really well from cuttings which makes it an excellent choice as a living post for fences or a living post for trellises for climbing crops like passionfruit or dragonfruit. It has an attractive flower which is great for native pollinators and grows easily from seed. The one drawback of this species is it is typically spikey which can make it a little unfriendly to work with and to use as biomass.
4. Brazilian Fire Tree (Schizolobium parahyba)

Is by far the fastest growing NFT on the list along with Cratylia argentea, the main difference being them is it is a tree rather than a vine and it grows straight up…. Very quickly! It can grow up to 30m in 5 years, as you can imagine the wood is very light and spongy. It doesn’t produce a huge amount of foliage and creates a very light shade, it is supposed to keep its leaves during the dry season too as one of its major advantages, however in recent years it has dropped all it leaves so I will leave that one up to you. We typically grow this from seed and use it as a light shade for tree crops.
5. Quickstick (Gliricida sepium)

This species is known locally as Madero Negro, grows well from seed and has about a 50% chance of survival when planted from cutting. The mature tree is a low growing, typically not straight, that produces excellent high quality heartwood timber. The heartwood timber is known for its durability, rot resistance and is used a lot for foundations. It is also used a lot as a living fence post and the leaves can be used to deter fleas and kill rats. At the Ranch we typically use it as a living post for vanilla and black pepper. It tolerates shade, as in it will survive in shade, however don’t expect a lot of growth.
6. Ice Cream Bean (Inga Edulis)
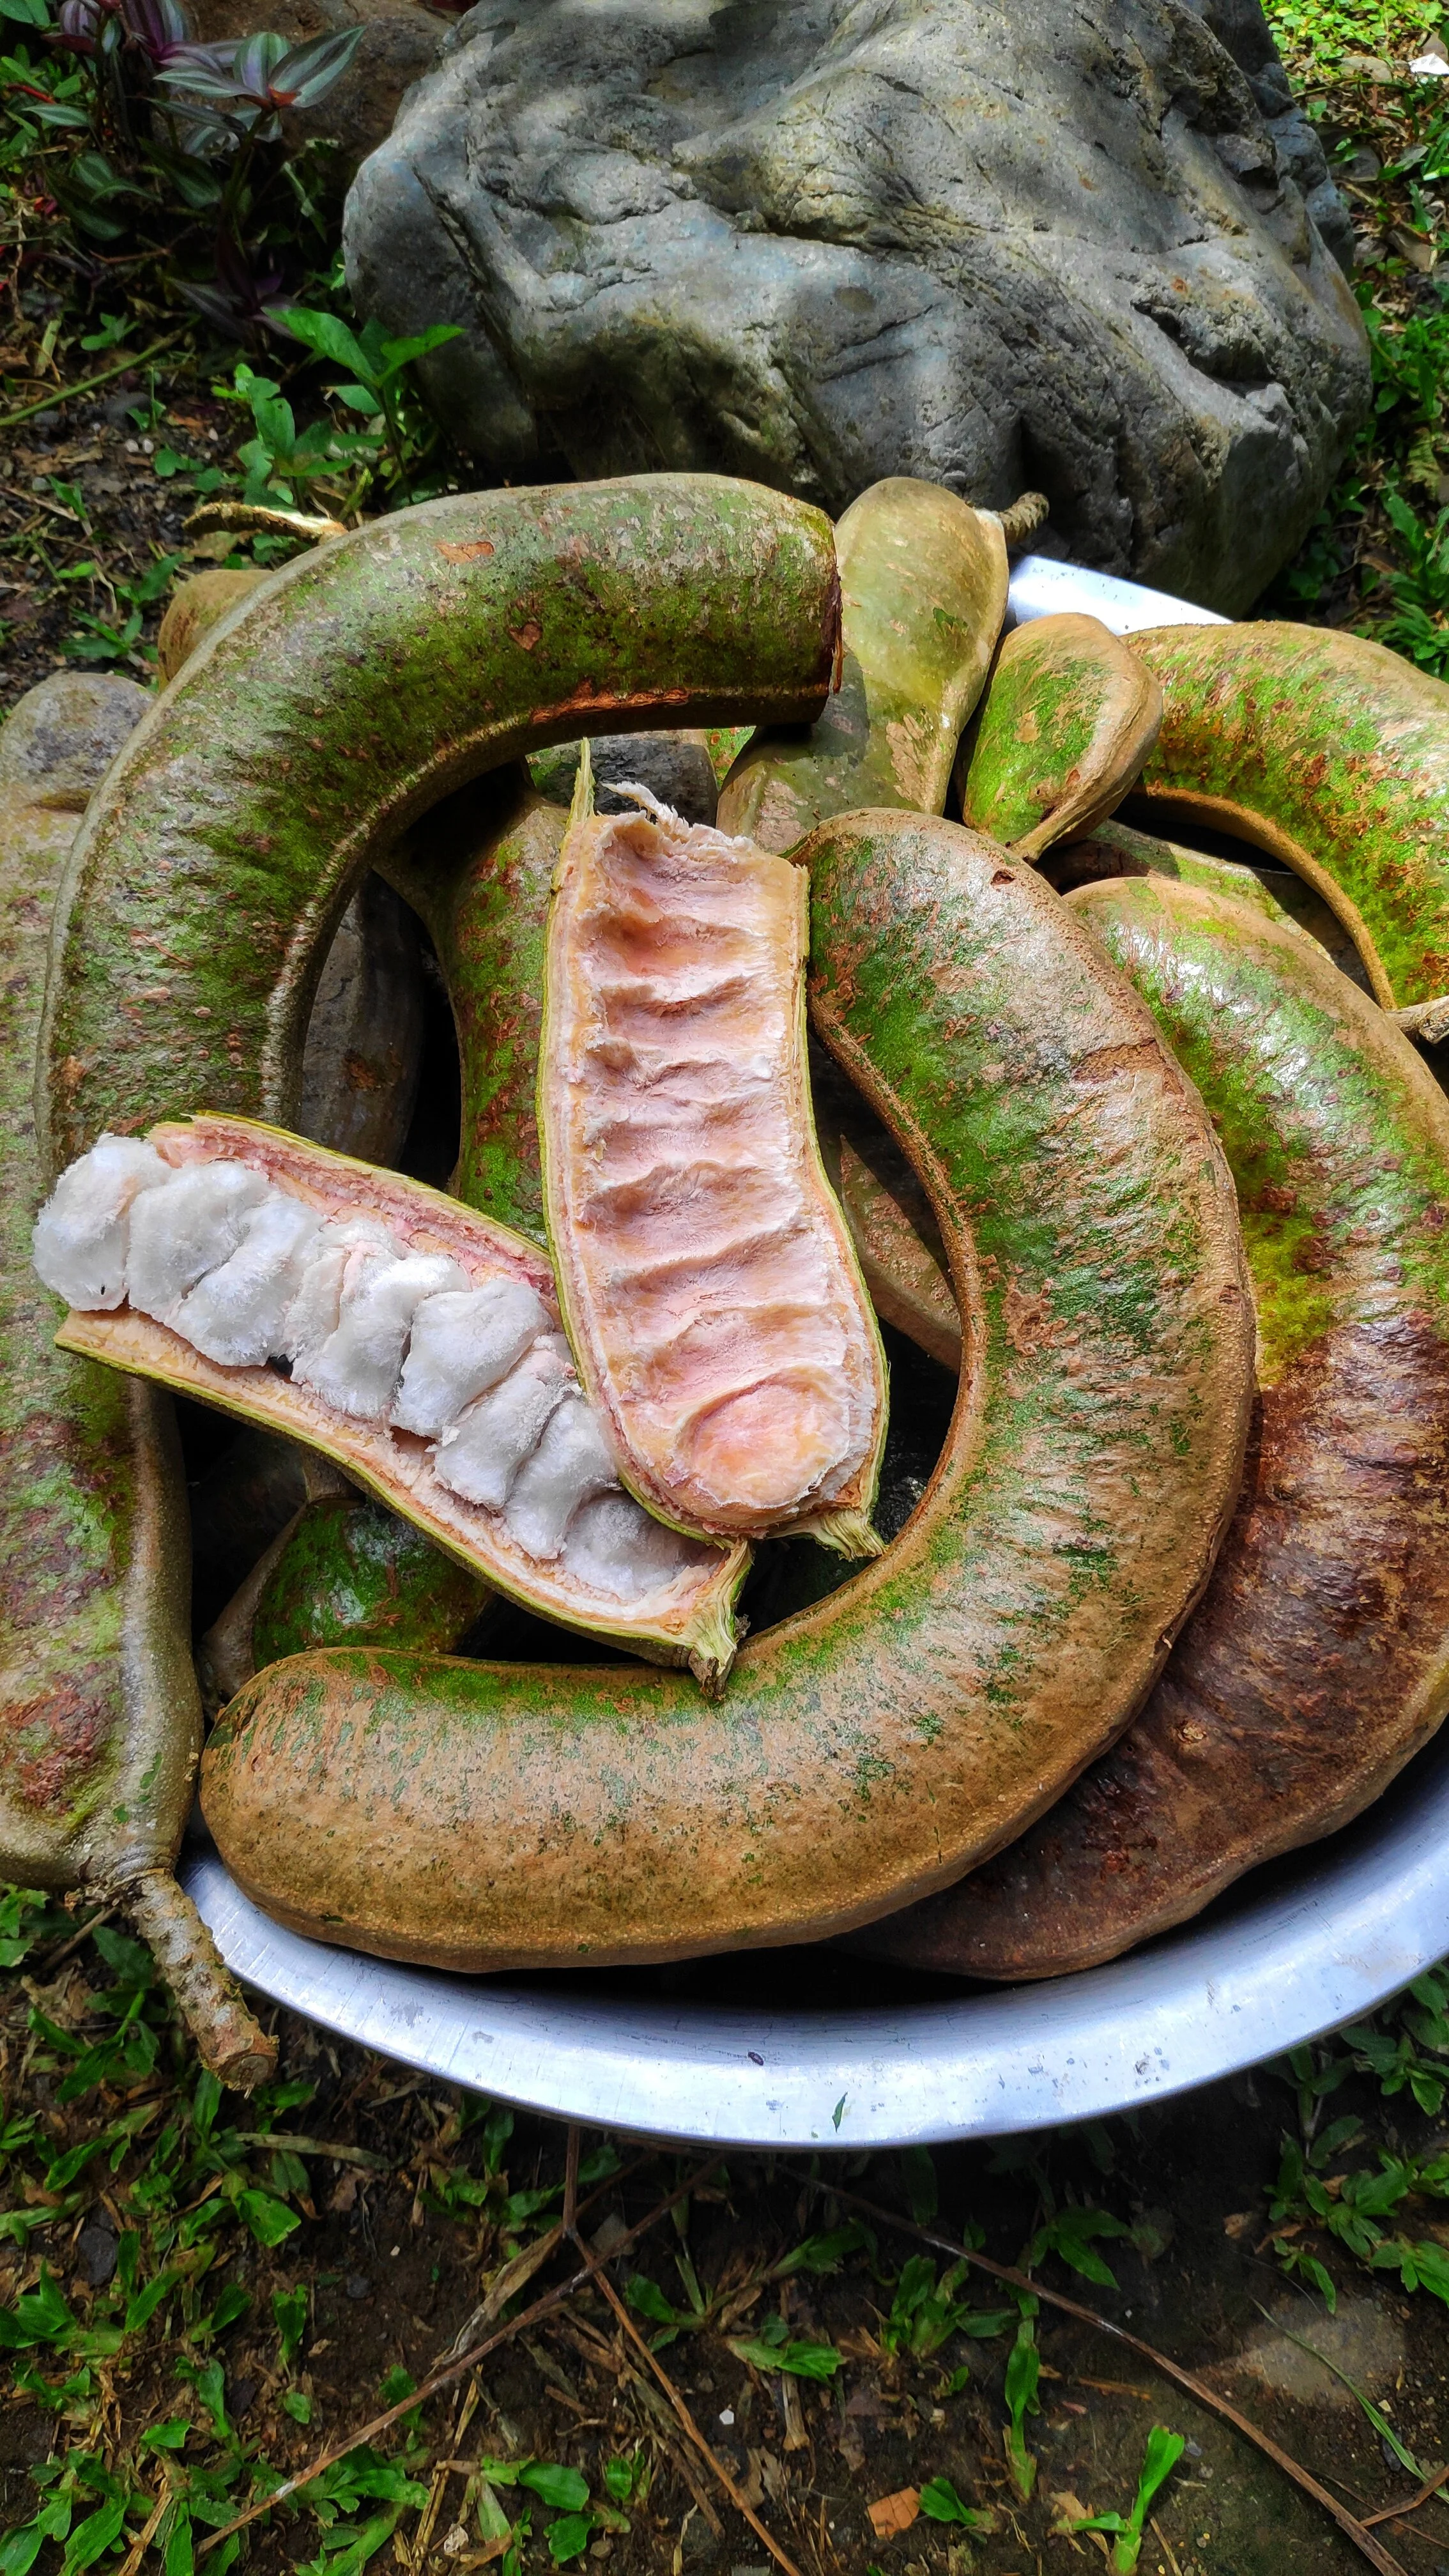
The fruit of the ice cream bean
This is one of the few NFTs that also produces an edible fruit in our environment. Locally the fruit is known as Guava or in English it is called Ice Cream Bean. There are often many wild forest varieties of this tree, some of which produce beautiful heartwood timber. Inga Edulis however produces useable timber, but it is prone to termite damage and should only be used for furniture and non structural elements. It produces huge and abundant leaves and reacts quite well to pruning, making it an excellent choice as an NFT. If you are continually pruning it though for biomass don’t expect to get any edible harvest from the tree. This will grow into a very large tree if left unmanaged.
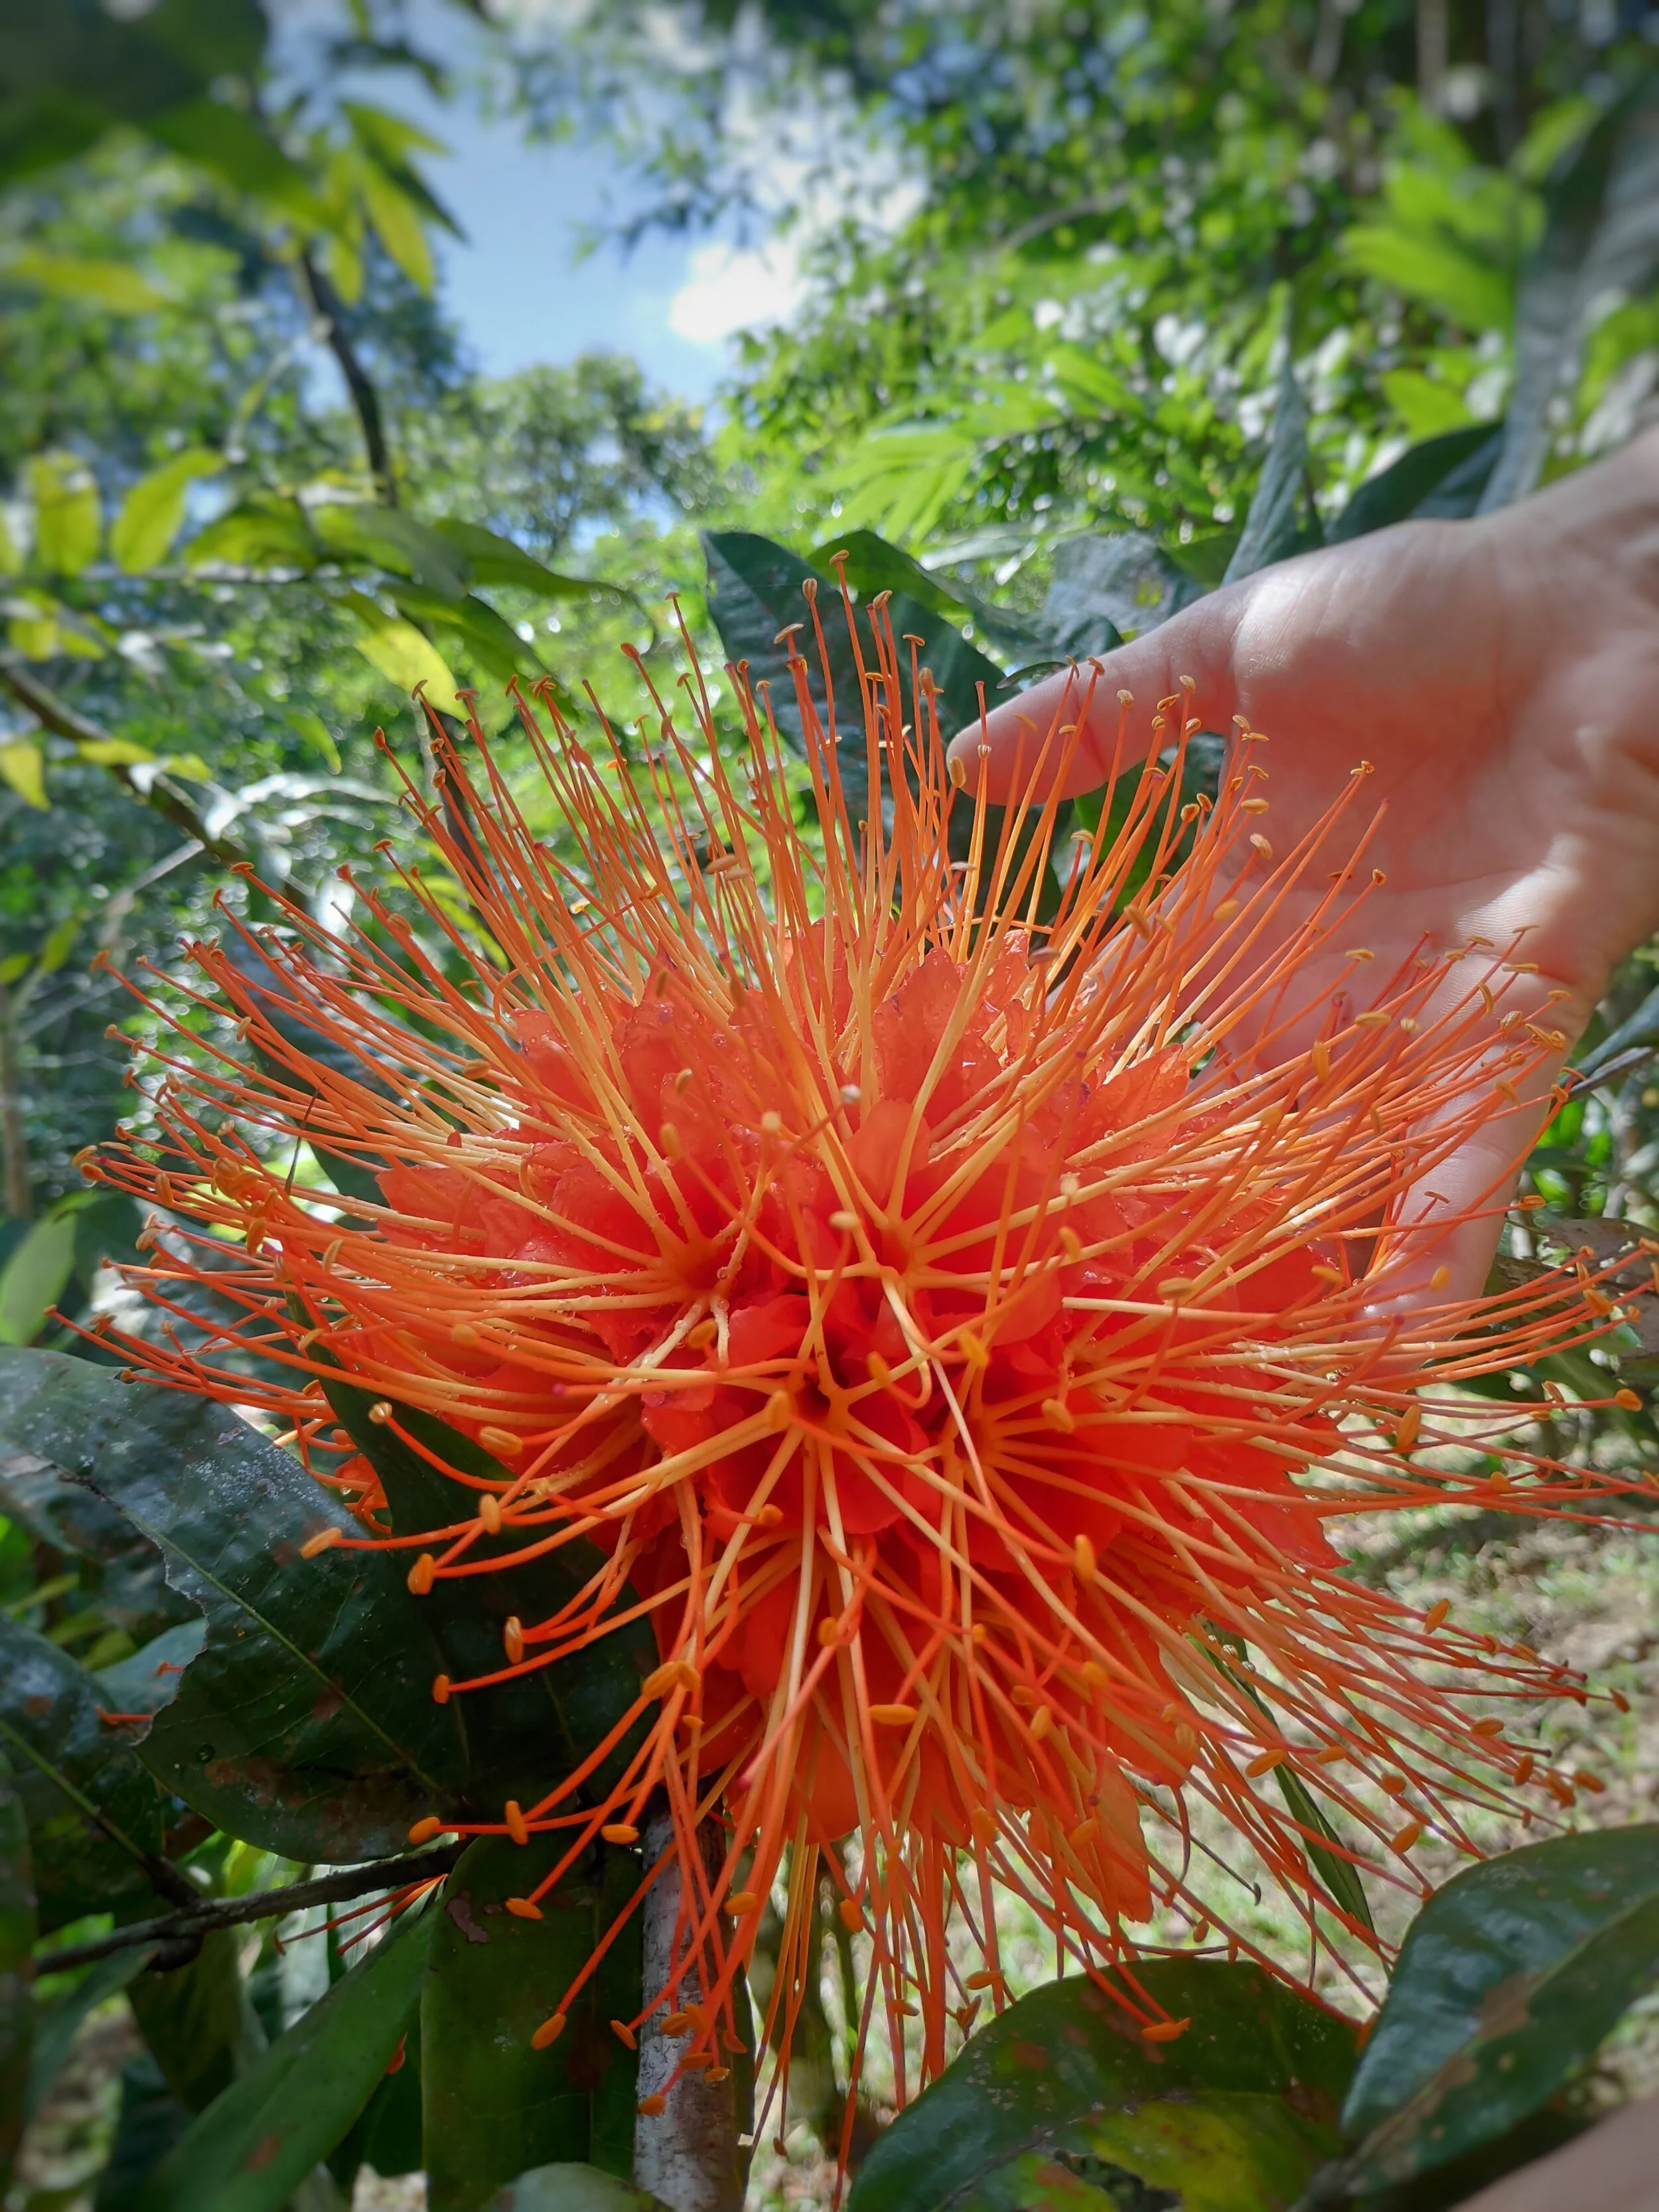
7. Venezuelan Rose (Brownea macrophylla)
This is primarily planted as an ornamental, that produces a very beautiful and striking flower at the end of the rainy season. It also tolerates shade quite well and will still produce some flowers. It can be frequently pruned but doing this will effect flowering. We struggled for many years to source this rare beauty!
8. Peanut Grass (Arachis pintoi)

Again not technically a tree but provides a formidable and fast growing ground cover. One of the important permaculture principles that we apply is covering all of our soil. Peanut grass is able to do this quickly and effectively even in very poor soils and can survive our harsh dry season and bounce back quickly once it starts raining again. It produces pretty yellow flowers and is very resistant to mowing or weed whacking. We try to use this as much as possible as a groundcover however it prefers full sun and whilst it will survive in shady areas does not really grow or spread quickly. It is most easily produced by cutting and has a very, very high success rate. Seeds can be purchased but really why would you bother? It is easier to plant via cutting.
9. Wild Hops (Flemingia macrophylla)
A bushy shrub that doesn’t get taller than a couple of meters on our site which is one of its biggest benefits! It is easy to propagate from seed and cuttings making it a great choice for our site. It seems to tolerate shade relatively well, but does prefer full sun. Its low bushy growth habit means it doesn’t swamp other plants like the Cratylia can, but it doesn’t produce nearly as much biomass. Although relatively small amount of biomass is produced in comparison to some of the other NFTs the leaves do take comparatively long to break down and provide excellent mulch. In comparison to the Schizlobium’s feathery leaves that break down incredibly quickly. We mainly start these in our bamboo planters either from seed or cuttings and use them to fill holes where other NFTs have died or not taken well.

Want to learn More?
These are the main NFTs we use at the Ranch. If you are interested in learning more about how to use Nitrogen Fixing Trees in your landscape why not join us for a Permaculture Design Course or Agroforestry workshop.
We also have some of these trees available seasonally in our nursery, so get in touch if you would like to buy some.
Happy planting!
Other blogs related to soil fertility
Improving Soils in the Humid Tropics
Making Microbes: Fungal vs Bacterial Soil Life

The Magical Benefits of Fasting
Fasting is one of the strongest cleansing and healing natural methods existing. It has been used since ancient times in many cultures and religions either as a medicine or for spiritual reasons.
By Nico, Apprentice 2020
Looking for alternatives
Human behaviors are very hard to change. Especially in today’s world where everything goes so fast, our brains have to deal with hundreds and thousands of pieces of information each day. Overwhelmed by the capitalists’ ideals of growth, money and defining ourselves through our productivity, when do we really take the time to take a step back and reconsider what it is we truly want to engage in? But some things are changing. Each day, people all around the globe feel that wrongness and fight against it through learning, teaching and developing alternatives for sustainable housing, transportation, education and the food industry.

What’s wrong with our diet?
A couple of years ago I dedicated myself to finding alternative solutions that could help me build a lifestyle in harmony with my values. But where to start? Out of the many challenges we will have to face in the upcoming decades, the food system is one the most important. It is also the one where we, as individuals, can have the biggest impact through small changes is our everyday choices. We all know that those fast food chain restaurants surrounding us in the city are bad for our health, that the greenhouse gas emissions generated by the meat industry is nowhere near sustainable, that we should be paying more attention to the origin and process of how our food is made. The public’s’ hunger for nutritional information is more present than ever, diet books are perennial best-sellers, almost every popular magazine features nutrition advice, newspapers, radio programs and TV constantly discuss diet and health. But once again, there are so many sources, so many programs, so much contradictory advice, what should we be listening to? I believe that if we truly want to change the way we eat, we should start by listening to the one and only true expert of our health: our body.
Why fasting?

Jackfruit harvest
My goal was not to lose weight, nor to go vegan. I didn’t want to be on a diet restricting myself from certain foods. I wanted to redefine my relation to food so that I could start enjoying it more at each meal, and start feeling the benefits of eating healthy food on my everyday energy. I wanted to understand why my body feels so tired after some meals but not others, even though it seems like I’ve been eating the same quantity. I wanted to truly enjoy each delicious meal without just stuffing myself with twice the amount of food my body needed. That’s when I came across fasting (we will be talking here about long term fasting on water only, not about intermittent fasting which is a whole other process). The studies about its many health benefits from helping with allergies, skin diseases, cancer, how it helps with setting you in a special meditation mind-set, and the challenge it represented, immediately got my curiosity. I have always thought I couldn’t go more than a day without eating, yet so many people were able to spend weeks, sometimes months just surviving on water, so I decided to take the challenge and prove myself wrong.
As I am neither an expert on fasting, nor nutrition or health, I will not talk about the medical science behind fasting but more about my personal experience and what it has brought me. If you are considering a fast I do however recommend you to read as much expert’s advice about the process, how to start it, end it (the most important parts about fasting are before you start and after you break the fast), what the dangers are, and precautions to take. I do not recommend that you start your first fast if you are alone for it can be a very dangerous process if not properly prepared.
So what is fasting?
There are many kind of fasts but the original and purest one is when you stop eating any kind of food and only drink water for a certain amount of time, usually longer than 3 days. Fasting is one of the strongest cleansing and healing natural methods existing. It has been used since ancient times in many cultures and religions either as a medicine or for spiritual reasons.
What happens during a fast?
The first three days of fasting are mentally challenging. Because we have been so used to eating three times a day, at very specific hours, our brain will send signals through hormones telling your body, “hey dude, we usually have food coming in around this time, what’s happening?” You have to understand that this does not mean you are in danger and start seeing those signs and hunger as a signal, not as pain. Keep yourself busy, go for walks in your favorite place, do yoga, exercises (on the first day of fasting you still have a lot of energy from the remaining food in your digestive track so you should be able to still enjoy intense activities).
On the second day things start to slow down, you feel your energy level going down and hunger is present. I find that this is a nice opportunity to be a little by yourself, doing small activities you enjoy where time flies like drawing, reading, walking in the woods, etc.
The third day is the trickiest one, because you will reach the real fast. After three days that the body doesn’t receive nutrients from the outside, it moves to a kind of emergency mode and starts to digest all kinds of proteins from unnecessary cells, excess proteins from overeating, germs and bacteria. The body knows exactly where all the garbage is stored and start eliminating it. It enters a serious deep cleansing. During the fast, the body uses all the energy that is normally used for digestion and assimilation (which represent a great amount of energy, especially if you eat the average American diet) to clean and repair the tissues, and many organs have the chance to rest and recuperate. Make sure you have this day for yourself and rest, watch some movies, listen to relaxing music. This phase varies a lot in time and effects depending on each individual, but from my experience after three fasts I find that the better I prepare my fast (by gradually stopping all processed food before I start fasting), the easier this phase is. The first time I fasted I was so prepared and excited that I didn’t even feel any of the downside effects people talk about except just wanting to be on my own. In ancient times people didn’t need to prepare so much for fasting because they didn’t have the poisons of the 21st century, so they could go bravely into long fasts. With today’s food system, and depending on your diet and health, it is really important not to shock your body too hard by preparing adequately for your fast. You can find a lot of information and programs on the internet, but the most important thing is that you do it at a rate which correspond to you, by always paying attention to your body. I also find that whenever I start having small headaches and unpleasant sensations on the first three days, being a bit active helps, “Movement creates energy.” You’ve done the hardest part, all the rewards and benefits are yet to come, don’t stop there!
After those three days (sometimes it can take 2 days before reaching the “ketosis”), things get interesting: you don’t feel hunger anymore, your energy level goes up, and you truly enter the “fast trance” I like. I find it is important to start a fast with some ideas about what you want to dedicate the fast towards. It could be researching more about nutrition, focusing on your body and how you feel, thinking about things you want to accomplish in the future, etc. It’s important to live your fast with some ideas about what you want to be thinking about but not setting yourself goals or objectives, since the fast is challenging and you never know what you will come across during the process. Keep an open mind, be focused on what your body is telling you and what it is asking for and enjoy the time you have dedicated to yourself. Don’t be afraid to change your initial plans according to the situation, fasting is all about yourself and how you feel, it might feel a bit selfish to cancel plans you have made with your friends, but I think it is important you realise that before starting the fast. Tell those around you about your plan to fast and that you might cancel last minute. It is better for you, better for your fast and also better for your friends since nobody wants to be around someone that doesn’t truly feel like being there in the first place. This doesn’t mean you shouldn’t do anything social during the fast. After 6 days of fasting I was going to parties and dinner without any problem, but pay attention to what you feel like doing, not what is expected of you.
Breaking the fast
After several days without consuming any food, it is essential to break the fast wisely. Your body will not handle it if the first thing you eat is a huge hamburger with fries and mayonnaise, I guarantee you’ll be sick. Plus, you’ve gone through all the process of cleansing your body, do you really want to start off a fresh start by putting some unnaturally heavily processed food in your system? You want to start with something very light and easy to digest but flavourful, some fruit you truly enjoy. Take the time to choose it wisely, smell it and feel it, and start eating it only when you feel that you are ready. I find that during the fast my smell sense is way more developed than usual, and when you start eating, each bite will feel like heaven. Eat only one fruit and pay attention to the amazing taste, feel it going down your throat and sense all your digestive organs starting to work again after so long. They will truly thank you for the first rest you have given them in years, maybe decades, and your whole body is not craving food: it is craving good food. Think about all those delicious natural fruits and vegetables and all the amazing nutrients they will bring to your body. Enjoy each food like it’s the first time you had it, for me it truly tastes like that.
What fasting brought me
Fasting helped me redefine my relationship towards food. It helped me realize most of the time we don’t eat because we need it but by automatism. Sometime we are not even hungry, or we think we are hungry but we don’t truly need to eat, we just eat because it is the common thing to do. Our brain tricks us into thinking we want something while everything about our health tells us something is wrong with that. Like Paul Nison said: “Listen to your own body sense. If you listen to common sense, you will end up like common people in today’s world.”
Fasting also helped me enjoy more the food I eat. It helped me rediscover flavors I stopped tasting because I couldn’t see the beauty behind it anymore. Enjoying food is not about what your taste buds are receiving, but about how you are receiving those flavors and how you pay attention to them. It’s all about the setting. The best meal you’ll ever have will probably not be the most sophisticated or expensive one, but the one you took time to enjoy because you were with people you liked, in a place you like, like your grandmother’s homemade casserole, or the first time your dad took you out for ice cream. Like Anthony Bourdain says in his book, a cook’s tour “Nothing illustrates them more than the Last Meal Game.” You’re getting the electric chair tomorrow morning. […] You’ve got one meal left. What are you having for dinner? When playing this game with chefs – and we’re talking good chefs here – the answers are invariably simple ones.” Imagine you could rediscover the sensations you had the first time you took a bite out of your first pizza, your first ice cream, or the first apple pie you ever ate.
Fasting also brought me a lot of unexpected things not related to eating. It helped me push my limits and increase my willpower. It taught me that whatever people think is good or bad for you, the only true way to find out is to experience by yourself. It reaffirmed the idea that we shouldn’t be doing things blindly because it is the “normal” thing to do, because we have been doing it for a long time or because of social convention, but we should put everything in perspective and ask ourselves why is it that we do this. Only when we understand fully why we do something can we change it, improve it, or just decide that this is the way we want to go, and then human behaviour becomes easy to change.
People sometimes ask me how did I stop eating meat so easily after so many years as a meat lover? Not eating meat was not the hard part, just as spending 7 days without eating is not the hard part for me. The hard part was putting everything I have learned until here in perspective, unlearn what I thought was true and questioning the fundamentals about nutrition. It might be a hard and tiring process, but only from there can we start building on new foundations, towards a lifestyle in harmony with our values.

Apprentices doing yoga in the Hankey House
What is Lacto-Fermentation
What would a traditional Korean Barbecue be without kimchi, your scrambled eggs without Tabasco and a hot, sunny afternoon without a fresh pickle? Lacto-ferments are around us every day. Often they are made into dishes that we don’t even consider as fermented.
By Constantin Demuth, apprentice 2021

One of our favorite lacto-fermented condiments- Green Papaya Kimchi
What would a traditional Korean Barbecue be without kimchi, your scrambled eggs without Tabasco and a hot, sunny afternoon without a fresh pickle? Lacto-ferments are around us every day. Often they are made into dishes that we don’t even consider as fermented. Many of which are staples that have backed up our diets for hundreds of years. Try and think of the last lacto-fermented goodie you ate.
Recently, lacto-fermentation is going through a renaissance. People are realizing how easy it is to recreate flavors of their cultural ancestry. Kraut is just cabbage, salt and water. Pickles are just cucumbers, salt and water. It’s easy to make at home and much better than the stuff you buy in the supermarket. In this article I would like to take you on a little journey through the wide world of lacto-ferments, share some of the Ranch’s deepest secrets, and how we take foods from the farm and transform them into delicious, nutritious, and long lasting dishes.
History
In a time where we can buy produce all year around from every corner of the world and store them conveniently in the fridge, the reason why people ferment their food is becoming obsolete. In the beginning, they were not looking for the most incredible flavors that people at Noma’s Food Lab try to create. They were more interested in preservation, keeping their produce edible, eliminating molds and buffering cold winters without harvests. As farm to table cooking is becoming more popular again, being able to preserve foods through the year is increasingly important. The easiest method of preserving large quantities of raw vegetables is by using salt. Salt creates an environment that allows good bacteria to survive while killing bacteria harmful to humans. Today, we know salt preservation also makes nutrients bioavailable, increases digestibility and creates a great source of raw foods in our diets.
Preservation

Lacto-fermented pickles
Let’s go into a bit more detail of what happens in our jars when we mix vegetables with salt. Adding salt or salt brine to vegetables helps Lactic Acid Bacteria (LAB) to develop. LAB then turns the natural sugars of the vegetables into lactic acid. This acidified environment inhibits the growth of bacteria that makes the vegetables go bad and mold. This way we can store lacto-fermented vegetables for long periods of time without worrying about spoilage. The acidity gives these ferments their original flavor and preserves the satisfying crunch that we all crave.
As opposed to other fermentation methods, lacto-fermentation does not require any input of certain bacteria. When using fresh (preferably organic) produce we are able to work with LAB that is native to the vegetables and helps create the environment we want. As a result of their work, LAB often produce oxygen that makes our ferments bubbly. In case you find bubbles in your jars, don’t worry. That’s a sign that it works!
Lacto-ferments at the Ranch
Here at the Ranch we use lacto-fermentation every week and we eat it basically every day. Our favorite staples are Green Papaya Kimchi, Salsa Starter and some sort of pickled vegetables. The most recent and exciting experiments in the test kitchen include pickled Katuk (our daily salad green) and fermented black beans for our home made Hoisin Sauce.
We use lacto-fermentation for three basic reasons. Reason one: It’s good for us. It makes all the nutrients that fresh vegetables have to offer available to us. Reason two: We can store fresh harvests and consume them later, which is super convenient when you have an amazing orchard that produces a variety of things all year around. Reason three: It is delicious and we love delicious food!

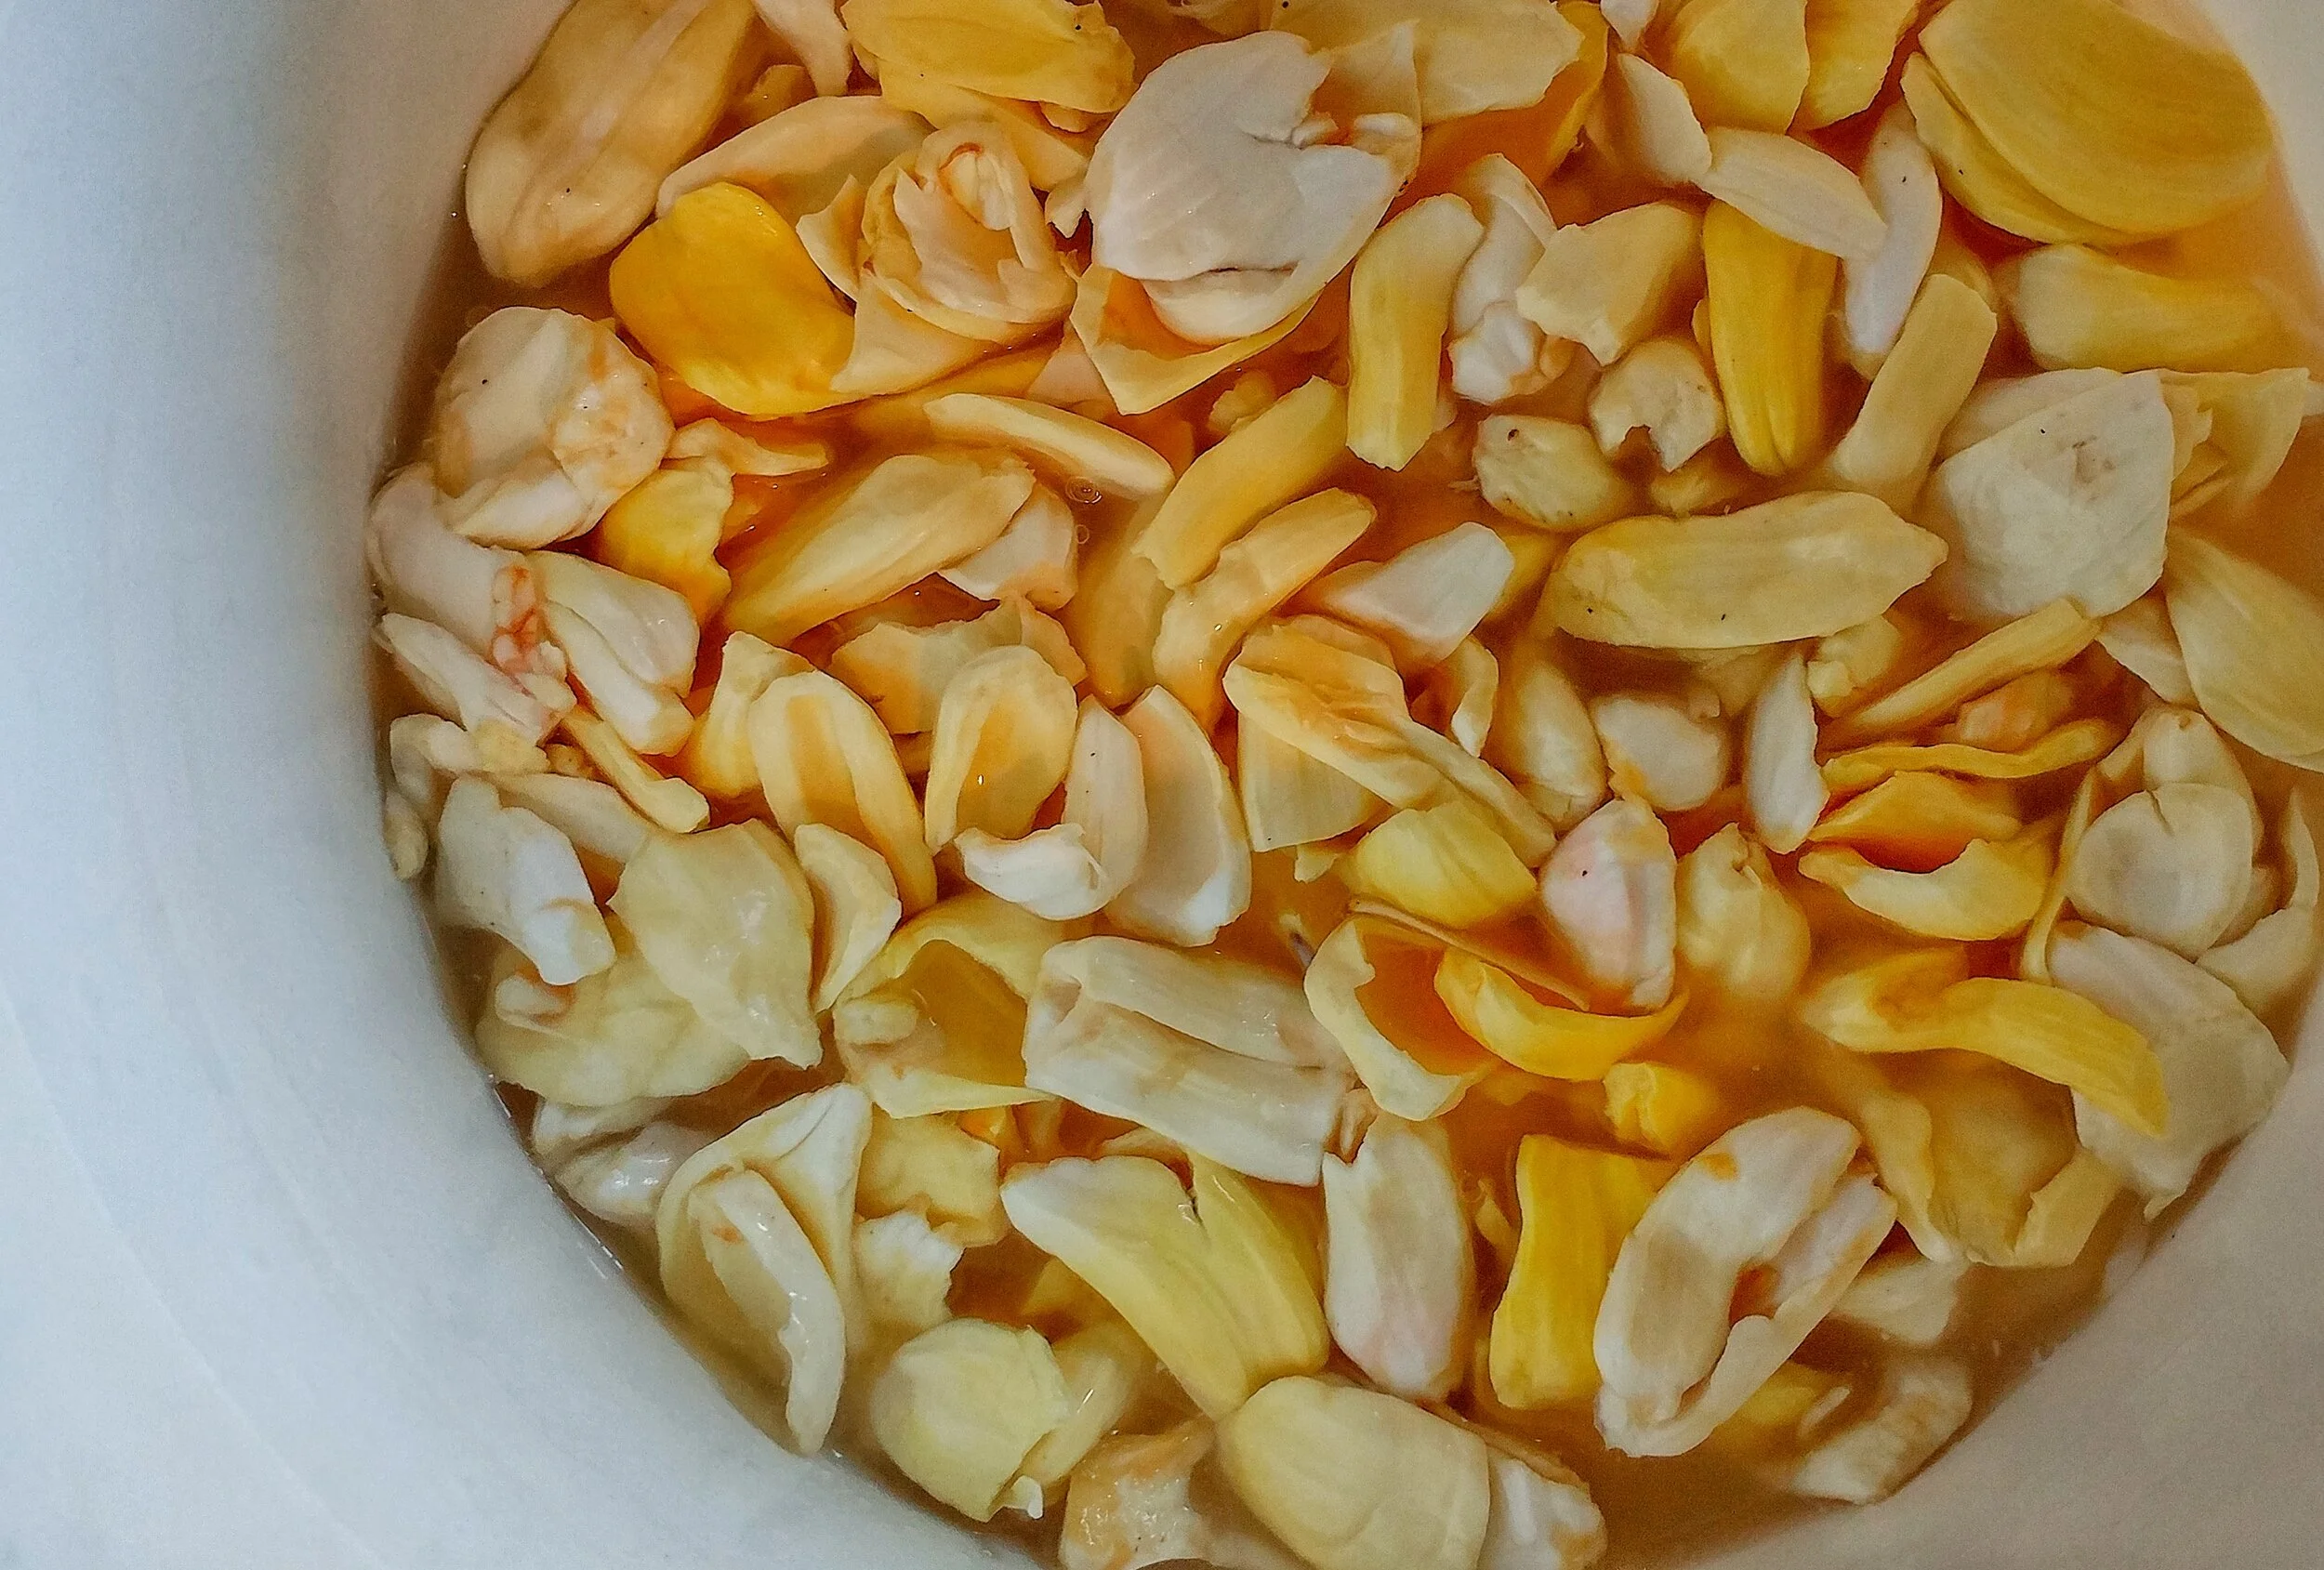
Green jackfruit processing
Green Jackfruit
Jackfruit is a perfect example of how we use lacto-fermentation as a way to preserve fresh produce. Jackfruit is the biggest fruit in the world and we have several trees in our orchards. Once jackfruit is ripe, it goes bad relatively quickly and some people don’t like its flavor when ripe. We started harvesting them when they are still green to incorporate them as a vegetable into our diet. Even here where we feed many hungry souls every day, we cannot consume the amount of jackfruit we harvest. This is where our friend lacto-fermentation comes into play. We submerge all the jackfruit meat in a 2% salt brine, which inhibits growth of undesirable bacteria, prevents oxidation and gives a deep, rich salty flavor that we want in our dishes.
Green Papaya Kimchi
The purpose of our Kimchi is less for preservation and more for the “ooh “and “ahh” moments when we serve fresh condiments with all our foods. The kimchi accompanies eggs in the morning, hearty slow roasted pork on special occasions and provides the freshness in our weekday burritos.

We use green papaya, but you can use any local, seasonal, crunchy vegetable
As opposed to jackfruit, where we submerge the flesh in a brine, for Kimchi we use its own juice. Again, salt is our partner in crime. Shredding 20 kg of green papaya on Wednesday mornings is not everyone’s favorite exercise, but the result makes up for the work. We used to do this all with hand graters, but recently we purchased an industrial hand cranked shredder by Nemco Food Equipment. We highly recommend this tool if you are making large batches of sauerkrauts, kimchi, etc. By shredding the fruit, we make it easier for the salt to penetrate. After mixing papaya, salt and spices (aka the *flavor bomb) enough brine is being produced for the ferment to be safe. Three days in the fermentation bucket and voila, kimchi is ready. Pack this into glass jars that can be stored in the fridge.
Now it’s time to reveal the big secret you’ve been waiting for. Rancho Mastatal is giving out its kimchi recipe for the first time. Two things that are important: First, if you cannot find green papaya, use any type of cabbage. It’s important to use fresh, local and seasonal (when you live in a temperate climate please, please do not go to the supermarket and buy green papaya!). Second, fermentation is no science! Don’t get overwhelmed by ratios, phrases or utensils. Trust your senses; look at it, smell it and taste it. Your nose knows best.
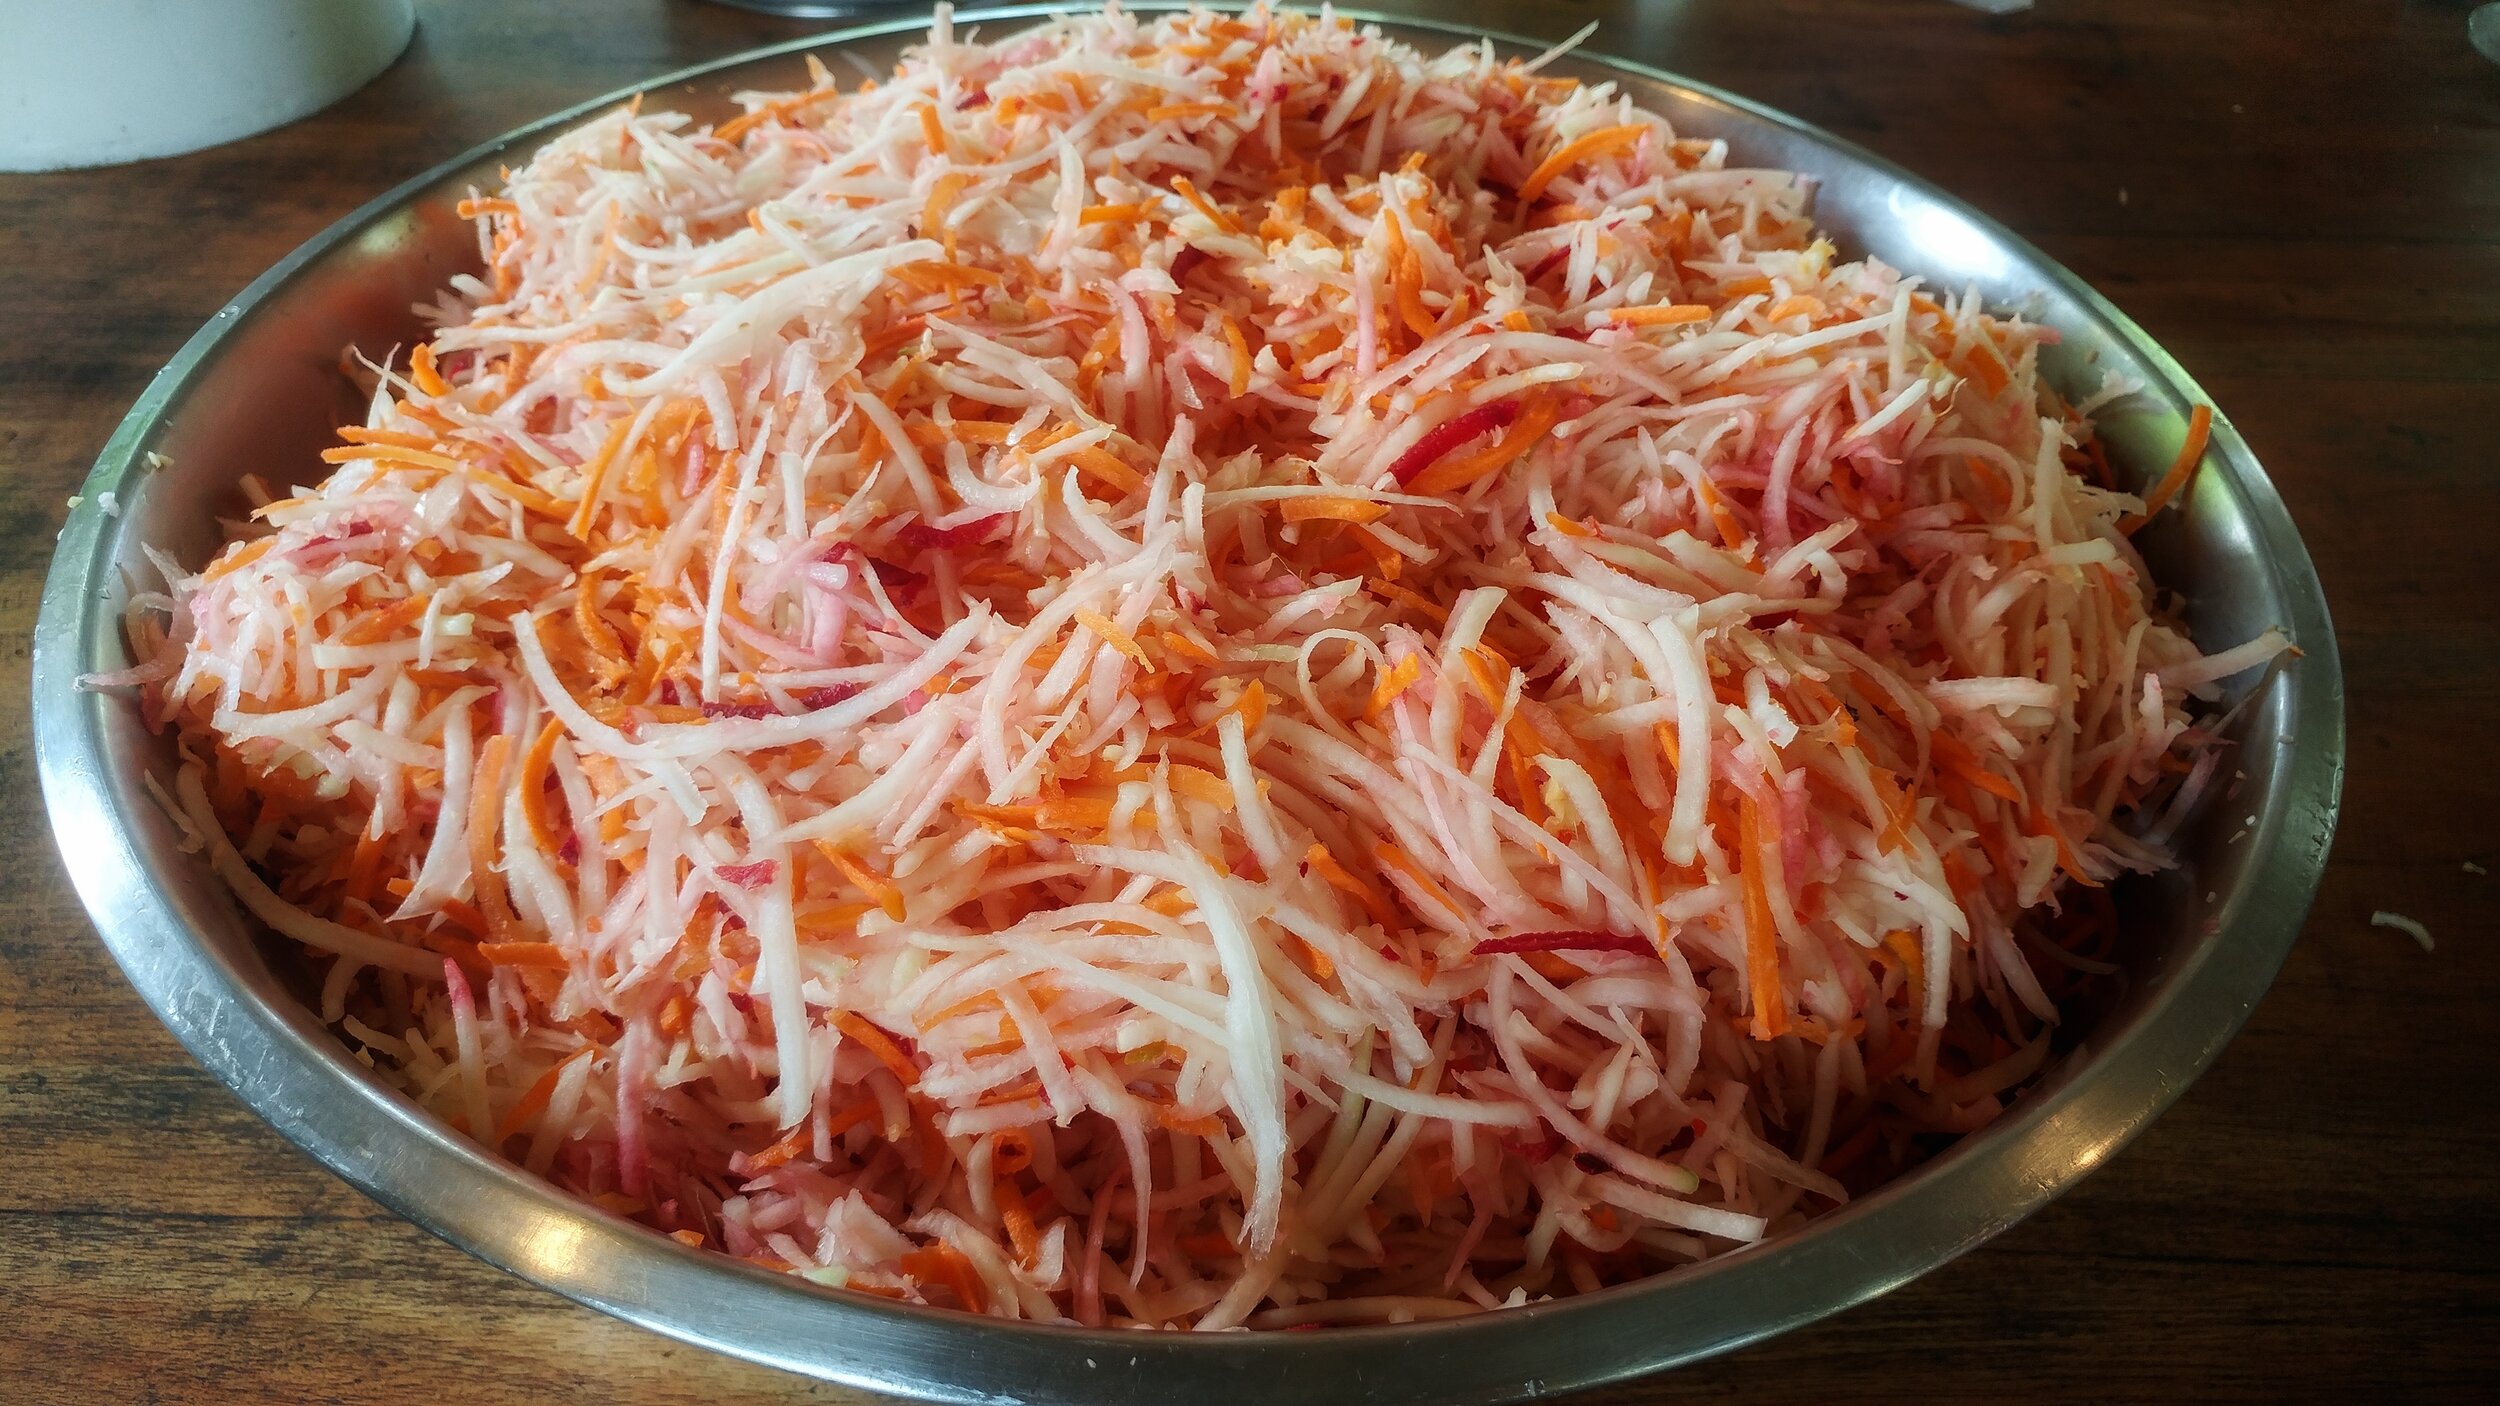
Shredded ingredients ready to be combined with salt and flavors
Recipe
3 green papaya, peeled and seeded
1 carrot and/or 1 beet
Salt (2% of the total weight)
*Flavor Bomb
1/2 cup peeled ginger
1/2 cup peeled garlic
1 chili (optional)
Equipment
Fermentation vessel: A food safe container that can hold all the vegetables plus at least 20cm of headspace (buckets, mason jars, big Tupperware all work perfectly fine).
Instructions
1. Cut the papaya in half and discard the seeds. Peel the papaya.
2. Using a kitchen grater, grate the papaya, carrot and/or beet and set aside.
3. Peel the ginger and garlic. Cut the chili in half and discard the seeds. Blend all the ingredients for your flavor bomb in a food processor.
4. Weigh out all your vegetables and place them in your fermentation vessel.
5. Add 2% Salt to the total weight of the vegetables (e.g. if you have 1kg of vegetables, use 20g of salt) and mix the salt in. Stirring it helps to break up the papaya and releases the brine.
6. Make sure your Kimchi is submerged in brine. Keep it on the counter at room temperature and wait for at least three days (this will depend on your climate). You will see bubbles and be able to smell the acidification after a few days. When it’s reached your desired flavor, bottle the Kimchi in jars and keep them in the fridge. Enjoy!

Green papaya cut in half
Learn more
Those are just a couple of the many vegetables we lacto-ferment. Lacto-fermentation has made our farm to table cooking and preservation more efficient, produce less waste, and create delicious, unique and fun foods.
Join us for a workshop to learn more about fermentation, farm to table cooking, permaculture and more.
Other Farm to table blog articles
Eating Local: Reconnecting to Food
Turn Local Rice and Beans into Fermented Bread
Happy fermentation, happy microbes!

Farm to Table Chocolate Bonbons
It wasn’t long into my apprenticeship that Robin handed me a piece of a chocolate bonbon, made with raw cacao picked from the farm down the road, that I experienced something like awe; and that in the old sense of both amazement and terror. This is what chocolate is supposed to taste like?
By Kara, Apprentice 2020
Beautiful beaches, abundant wildlife, fresh fruit, incredible coffee, and local chocolate; these are some of the things I anticipated experiencing in Costa Rica. While everything but the beaches has been a part of my experience here at Rancho Mastatal so far, one thing in that list stands out to me. The chocolate.
I’ve splurged on the good chocolate bars back home in Canada, the fair trade, single-origin, handmade stuff- and I enjoyed every bite to get my $10 worth- but I know now that I had never truly experienced chocolate. As fair-trade and handmade as all of that was, it was still flown halfway around the world and had sat on a store shelf for who-knows-how-long.

Cacao being toasted
It wasn’t long into my apprenticeship that Robin handed me a piece of a chocolate bonbon, made with raw cacao picked from the farm down the road, that I experienced something like awe; and that in the old sense of both amazement and terror. This is what chocolate is supposed to taste like? And I’ve been missing out on it for the last 27 years? Memories of foil-wrapped bunnies and coins surfaced, and I tried to make the connection between that waxy-sweet substance and what I had in my hand now; something subtle, complex, layered with sweet and smoky and earthy and bitter- no additives necessary.
I was hooked after that first taste, and when Robin said that she wanted a flight of bonbons for her
birthday dessert, I was ready to take on that challenge. The recipes we created for that event were truly a farm-to-table experience- nearly everything sourced from the Ranch property or from farms
around Mastatal (salt and peanuts being our exceptions). The focus on sustainable, local sourcing did nothing to impede the quality of our bonbons, in fact, it’s that parameter that brings out the most creativity (and the best flavors, oftentimes) of most food made at the Ranch.
So instead of going on waxing poetic about chocolate, I want to share those recipes we made and some tips on working with raw cacao. The funny thing about these recipes is that I don’t intend for them to be followed, not exactly, at least. We used what we had on hand; fruits in season, experimental condiments and flavorings from other projects- and I want to encourage the same approach in you. Look through the foods you have available, both in your pantry and in the local market. Can something be dehydrated? Fermented? Powdered? Turned into wine, vinegar or syrup?
Get creative, play, then eat some chocolate.

A productive harvest of cacao at our local family run chocolate farm, La Iguana Chocolate
Basic Chocolate mix
1 cup raw cacao
1 tsp salt (or to taste)
1 Tbsp grated tapa dulce (or sugar)
1. In a hot, dry skillet toast the raw cacao. They will blacken as they toast, and become wonderfully fragrant. You will know they are done when they start to make popping sounds as the skin separates from the seed.
2. Remove from heat, and let the cacao cool until you can comfortably handle them. Once cool, remove the outer skin by pinching the seed between thumb and forefinger of each hand, and twisting in opposite directions. Remove the skin, but don’t discard it! The little flakes of toasted skin make a wonderful cacao tea.
3. Grind the cacao. We use our hand-cranked corona coffee grinder, but a food processor or a mortar and pestle could work, too. Add the salt and tapa dulce to the cacao as you’re grinding to incorporate it into the resulting mix. You should end up with a mix the texture of gritty sand.
4. This is the base mix to which you will add all of your flavorings. For any bonbon flavor, you
will need something sticky to bind the cacao mixture. Syrups, dulce de leche, finely chopped gooey dried fruits such as dates, have all worked successfully for us. If you add liquids as flavoring, make
sure to watch the texture of the resulting mix. It needs to be wet and sticky enough to bind the cacao together, but not so wet that it slumps.
5. Roll your bonbons into spheres, or any shape of your choice, decorate, then refrigerate until serving.

Cacao seeds being crushed

A freshly picked cacao pod. The white pulp around the seeds is delicious!
Recipe Ideas
*all made with basic chocolate mix
Ranch-oreo: Make two small balls of chocolate mix per bonbon, mixing in dulce de leche to bind, then flatten them into bite size discs. Add a dollop of dulce de leche between the disks, and top with cinnamon and grated tapa.
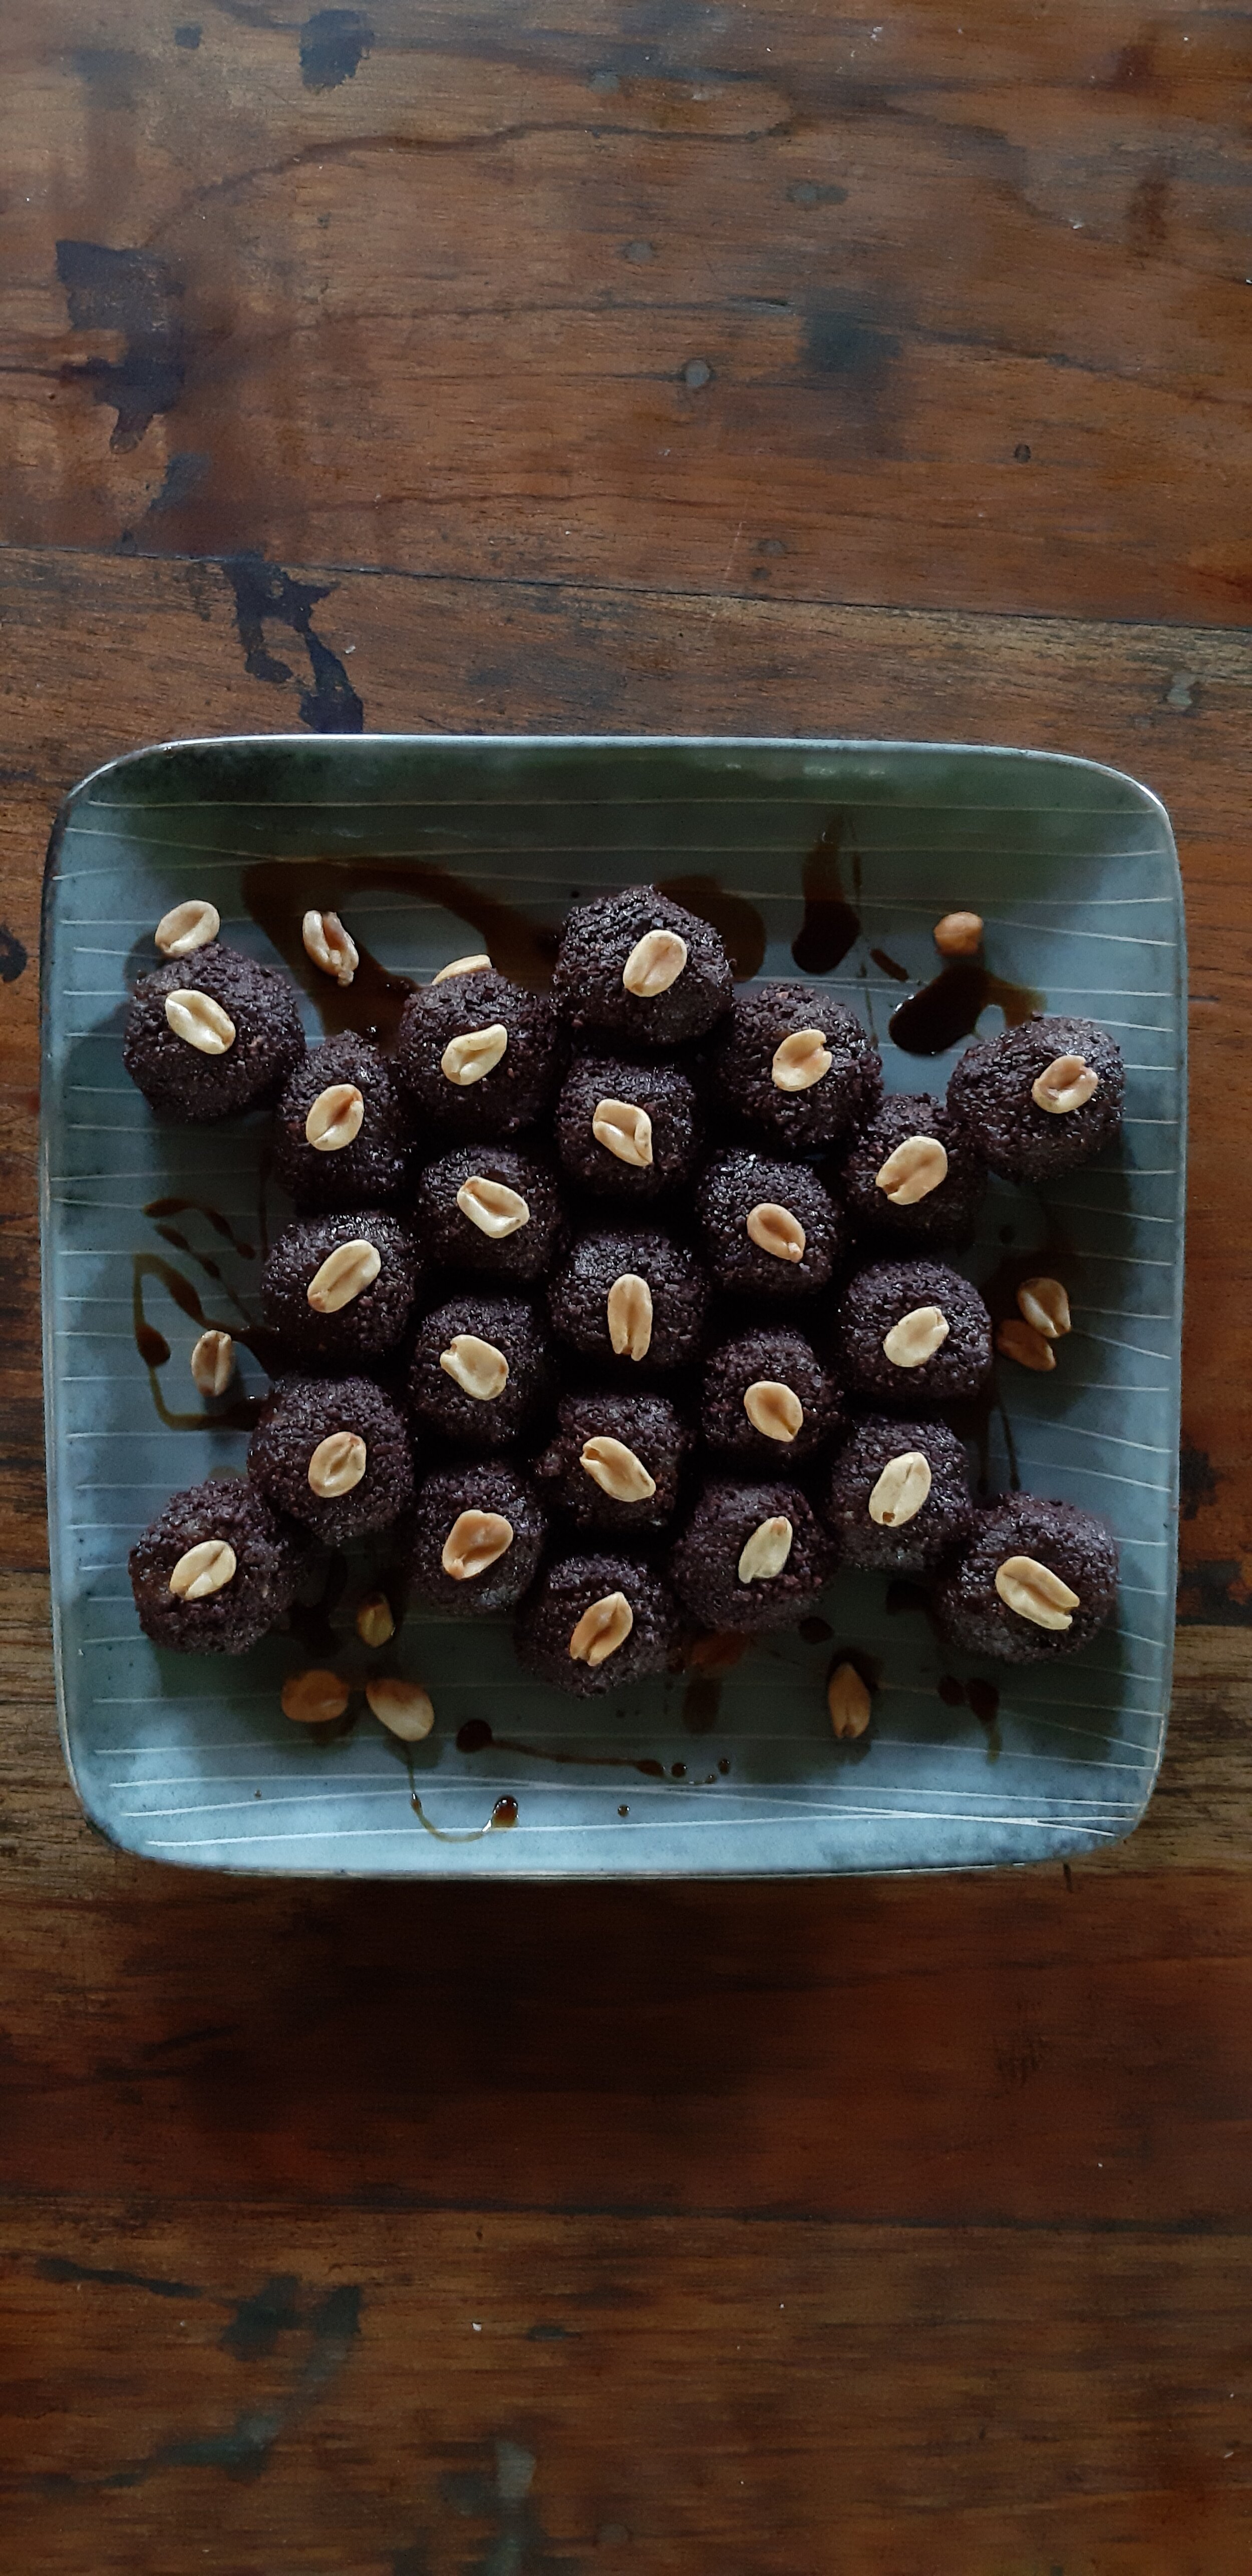
Peanut Butter Balls: Bind the chocolate mix with coffee flavored syrup (we used a coffee kombucha reduced with tapa dulce), and make a quick peanut butter to fill the bonbon. Toast peanuts with salt, and put them in a food processor with sour cream until it reached your desired texture. Make a ball of the peanut butter, then wrap a layer of the chocolate mix around it.
Ginger Jack Bites: Add ginger syrup and lime (we used powdered) to the chocolate mix, then incorporate finely chopped dried jackfruit. Roll into balls, and top with a slice of dried manzana de agua.
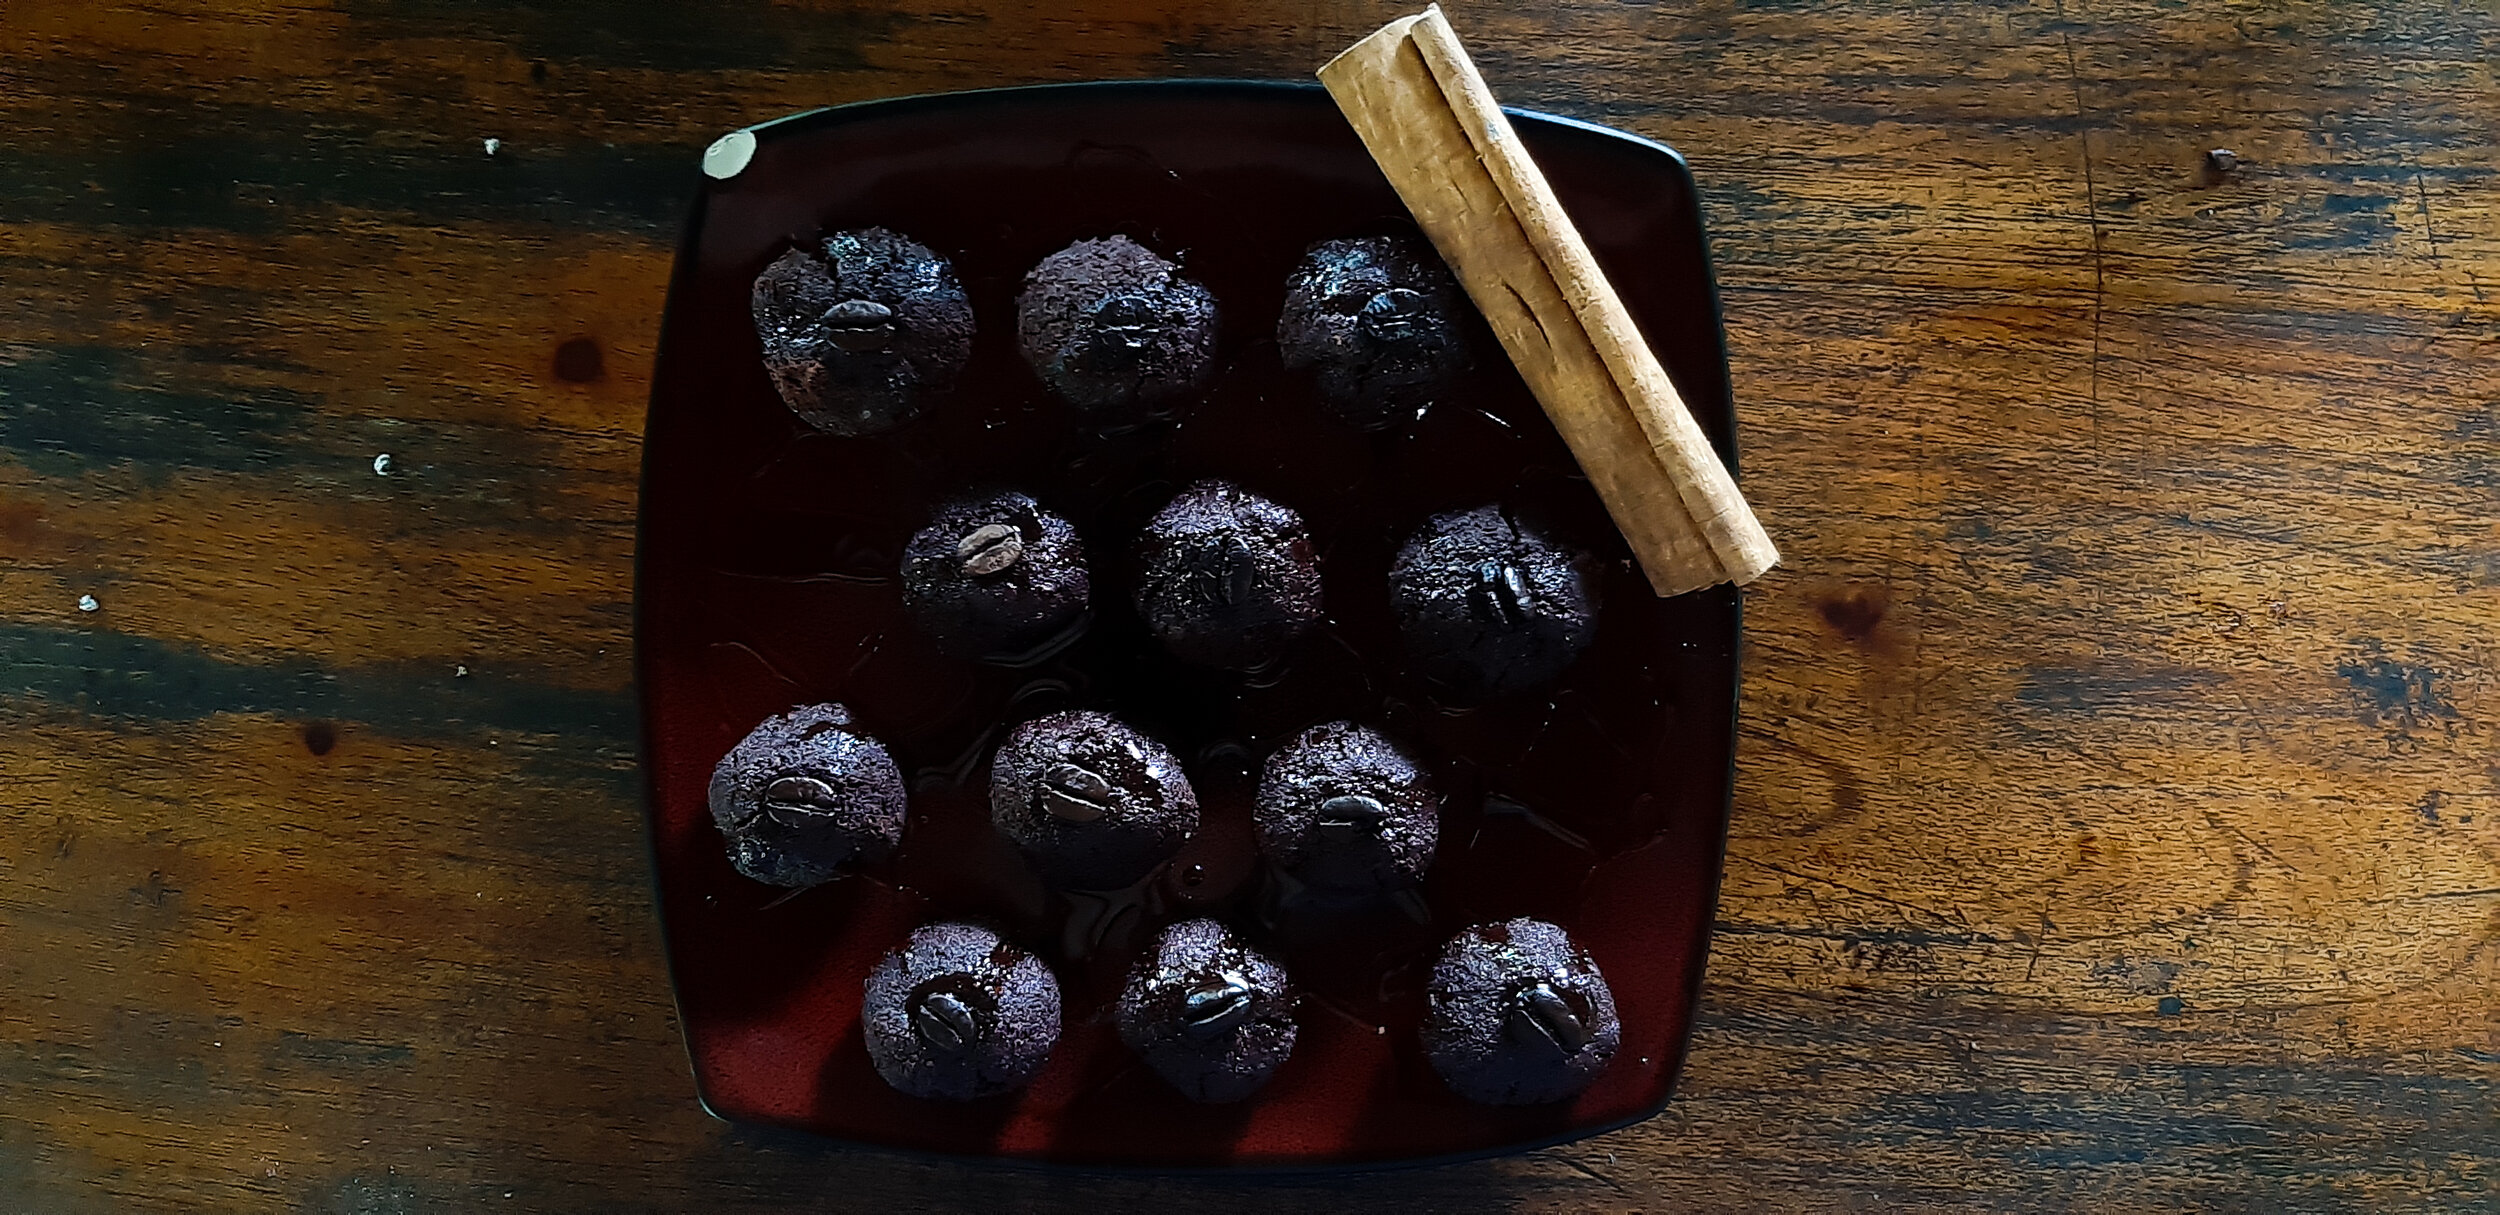
Coffee Cinnamon Balls: Mix the chocolate with coffee kombucha syrup to bind, roll into balls and top with a coffee bean and sprinkled cinnamon
Chilli Chocolate Bites: Mix the chocolate with starfruit syrup, chilli infused vinegar, lime, and dried chilli flakes. Roll into balls. Careful, this one gets hotter the longer you leave the chilli flakes infusing in the chocolate!
Simply Sweet: Mix the chocolate with dulce de leche, roll into balls, then create an indent with your finger in each bonbon, and fill it with a dollop of dulce de leche.
want to learn more?
Come stay with us as a guest and you’ll get to enjoy and make these tasty treats on a day trip to La Iguana Chocolate.
Visit our guest page for more info on coming and being a part of the Ranch and Mastatal community.
Past blog articles about cacao and farm to table products:
From Tree to Bar: How to Process Raw Cacao
Life of Spice: Farm to Table Cinnamon
Vanilla Cultivation: A Practical Guide for the Tropical Homestead
Workshops we host and teach that are related to agriculture and homesteading:
Permaculture Design Certification
Agroforestry Skills
Plants as Medicine
Syntropic Farming
And more! Visit our website for more information on our upcoming workshops.

Locally sourced and made chocolate from our neighbors at La Iguana Chocolate

Bioconstrucción en Rancho Mastatal: respuestas cercanas a peguntas pertinentes
Llegar a un curso de bioconstrucción es una señal. Quien busca el conocimiento teórico y práctico en este campo, probablemente haya empezado a transitar un camino hacia el cambio de mentalidad y forma de vida; posiblemente muy pocas personas que aterricen en un curso de este tipo lo harán por azar y la mayoría lo hará como consciente consecuencia de su inclinación por un cambio de paradigma, de estilo de vida, por la búsqueda de coherencia entre el discurso y la práctica. Este fue nuestro caso.
Por Amanda Calvo Santana
Llegar a un curso de bioconstrucción es una señal. Quien busca el conocimiento teórico y práctico en este campo, probablemente haya empezado a transitar un camino hacia el cambio de mentalidad y forma de vida; posiblemente muy pocas personas que aterricen en un curso de este tipo lo harán por azar y la mayoría lo hará como consciente consecuencia de su inclinación por un cambio de paradigma, de estilo de vida, por la búsqueda de coherencia entre el discurso y la práctica. Este fue nuestro caso.
Llegamos a Rancho Mastatal en febrero 2021 (con mascarillas y distanciamiento) para internarnos en el mundo de la construcción natural, guiados por los mejores profesores (Nic, Robin y Ali) como resultado de un proceso lento pero constante, que empezó hace años con pequeñas acciones (reducción de consumo, cambio de dieta, participación comunitaria, acción ecológica, entre otras) y aplicación de filosofías y métodos para intentar vivir en creciente balance con nosotros mismos y nuestro entorno. Sin duda, todas esas acciones originaron, al lado de algunas respuestas, cientos de preguntas, que aún estamos tratando de resolver. Una de esas preguntas fue: ¿Cómo deberíamos construir la casa en la que queremos vivir?
La pregunta es pertinente por varias razones. Por un lado, creemos necesario ser conscientes de las múltiples problemáticas globales relacionadas con la vivienda de las personas y, por otro, nos parece importante ser parte, aunque pequeña, de algunas soluciones.
¿Por qué considerar la bioconstrucción?
a. Contaminación
Según Tiwari (2001) y López-Mesa (2009), el sector de la Arquitectura consume más del 20% del combustible y el 40% de los recursos materiales a nivel mundial y se estima que genera al menos el 35% del total de residuos industriales en todo el mundo. Numerosos autores concuerdan en que las consecuencias de las actividades de este sector son realmente impactantes no sólo en la naturaleza, si no en la salud de las personas y de forma multidimensional en las relaciones económicas y sociales de nuestro mundo. Un resumen de algunas comparaciones entre autores se encuentra en el artículo “Evaluación de los impactos medioambientales de los proyectos de construcción” de Enshassi, A., Kochendoerfer, B. y Rizq, E. (2014), quienes expresan:
Shen et al. (2005) sostienen que la construcción es la principal fuente de contaminación ambiental en comparación con otras industrias. Li et al. (2010) concuerdan con Shen (2005) y señalan que cualquier proceso de construcción requiere diversas maquinarias, recursos naturales y que genera muchos contaminantes. Muchos escritores (Morledge y Jackson, 2001; Ball, 2002; Chen et al., 2004; Lam et al., 2011; Zolfagharian, 2012) resumen estos contaminantes como: contaminación por ruido, contaminación atmosférica, desechos sólidos y líquidos, contaminación del agua, gases dañinos y polvo. Por otra parte, los proyectos de construcción constituyen la fuerza impulsora de la economía nacional y cuyo consumo eléctrico, emisiones medioambientales e impacto social son muy significativos (Chang et al., 2011). (párrafo 2).
Del párrafo anterior, es importante resaltar que los autores se refieren a “cualquier proceso de construcción”, lo que nos lleva a pensar si en sus estudios habrán analizado los métodos y materiales que la construcción natural propone, y si habrán evaluado la diferencia en términos de impacto de su aplicación en torno a todas las variables (contaminación, extracción de recursos naturales, relaciones sociales y económicas, uso de maquinaria entre otros). Probablemente no.

Contaminación con polvo por actividades de construcción y demolición en Beijing. Imagen tomada de http://www.china.org.cn/environment/2015-02/28/content_34913197.htm (sin fecha)
b. Urbanización y sus consecuencias
Junto a los temas de contaminación por parte de sector constructivo, es importante recordar los temas de urbanización. Es en la urbe donde se visualizan los métodos constructivos más violentos, tanto por su densidad e intensidad, como por los materiales utilizados. En contraposición, es en la ruralidad donde se evidencian prácticas constructivas más apegadas al uso de materiales naturales y de fuente local (no siempre) y que muchas veces obedecen a conocimiento y tecnología ancestral.
Desde inicios del nuevo milenio, la mayor parte de la humanidad habita en centros urbanos. “En América Latina, los procesos de urbanización se han intensificado en las últimas décadas” (Narváez, Durán, Menoscal & Jiménez, 2019:1, en: González y Calvo, 2020) debido al rápido crecimiento poblacional y los cambios acelerados en las dinámicas económicas y sociales, que caracterizan a los modos de vida impuestos por el contexto de la globalización (Pujol & Pérez, 2012:1 en: González y Calvo, 2020). Indudablemente, la vida de las personas en las zonas urbanas se ve afectada por la intensidad y rapidez de su crecimiento, resulta sencillo comprender que las relaciones sociales y la cosmovisión de los habitantes son notablemente diferentes entre el campo (zonas rurales) y la ciudad (zonas urbanas). Aunque por naturaleza humana existan similitudes, ambos sitios promueven diferentes ritmos de vida, afloran diferentes satisfactores, distintos miedos, diversas interacciones y muy diferentes soluciones a similares problemas. Para nosotros, una pareja citadina que desesperadamente intenta salir de la lógica citadina y encuentra en la ruralidad de Mastatal algunas respuestas, esto fue bastante evidente y no hizo sino aumentar nuestra inclinación por vivir en el campo y construir con tierra. Dos más a la cola.
En las ciudades en crecimiento, se encuentran dos procesos simultáneos de relocalización de las poblaciones en función de su capacidad adquisitiva: se intensifica la segregación debido a la expansión periférica y se instauran procesos de gentrificación como resultado indirecto de la renovación de áreas centrales de las ciudades. En consecuencia, las ciudades buscan “recuperar el patrimonio arquitectónico y promover el turismo y el desarrollo de actividades terciarias en áreas degradadas o en proceso de tugurización” (Marengo y Buffalo, 2019:10, en: González y Calvo, 2020), aumentando así la plusvalía del suelo urbanizado y promoviéndose el desplazamiento de la población local.

Imagen tomada de https://www.diarioextra.com/Noticia/detalle/308996/vecinos-de-precarios-sin-acceso-a-bonos-de-vivienda?fb_comment_id=1085312144880326_1085411618203712, Septiembre 2016.
La cuidad de San José, Costa Rica, no ha sido la excepción a estos procesos. Con un origen de pequeñas ciudades y poblaciones rurales, la Gran Área Metropolitana (GAM) de San José, ha experimentado una importante transformación del uso de suelo en las últimas décadas, debido, según Pujol y Pérez (2012), al crecimiento poblacional, el relativo aumento de los ingresos económicos familiares y una motorización creciente. Ello, acompañado de insatisfactorias regulaciones locales y regionales, ha causado “importantes externalidades ambientales negativas” y procesos de desplazamiento y sectorización económica cada vez más marcados. Pareciera lógico pensar que, así como la GAM, sus habitantes, o al menos una parte de ellos, experimenten en paralelo cambios en sus ambientes internos, tal vez de manera no siempre consciente, que en el caso personal han dado al traste con la sensación de confort y satisfacción, generando nuevas preguntas, posiciones y acciones, todo esto acompañado por la incertidumbre que a casi todas las personas costarricenses no persigue: ¿Cómo generar el dinero para la tierra, cómo evitar endeudarme para la construcción, cómo mantener mi vida de esta manera? Más preguntas en proceso de resolución. Para quienes, como nosotros, buscan una tierra donde sembrar sueños, este proceso significa una evidencia que nos insta a volver la mirada al mundo rural y nos hace analizar sus potencialidades al tiempo que nos confronta, pues no se trata de invadir el campo, si no de entrar en su lógica y balance, empezando por “el nido” que queremos construir.

Imagen tomada de laciudadparalela.com (http://i1.wp.com/www.laciudadparalela.com/wp-content/uploads/2015/06/la-ciudad-paralalela-planificacion-urbana-san-jose-costa-rica-invu.jpg) sin fecha.
Ante el escenario de un San José que no para de crecer y con cada vez menos zonas verdes y más lejos de los alimentos, es necesario utilizar estrategias que amortigüen los efectos y promuevan la construcción de sistemas de vida que resulten menos depredadores y más proveedores. Rescatar prácticas y elementos que aboguen por la sanidad de las relaciones interpersonales y de las personas con su entorno en un sentido amplio es crucial, incluida la forma en que se construye la casa. (Adaptado de Gómez y Calvo, 2020).
Sin duda, la rápida urbanización es un fenómeno multidimensional complejo, como también lo es enterarse de que el fenómeno en sí está ocurriendo, valorarlo con objetividad y buscar respuestas diferentes a su convulso y acelerado modo de imponerse. Para quienes, aun en medio de la expansión de concreto, ruido y humo, sea posible pensar y poner en práctica formas alternativas de vivir, de construir sus hogares y producir sus alimentos, podrían aflorar posibilidades de regeneratividad social, pedagógica, emocional, política y cultural. En eso estamos.
c. Evidencia para bioconstrucción
La evidencia de la factibilidad y eficiencia de las viviendas construidas mediante métodos de bioconstrucción es tan difícil de encontrar como la evidencia en su contra. A pesar de que se suele escuchar que “es insegura, poco duradera, peligrosa y prohibida” en algunos círculos de arquitectura convencional, existe casi nula documentación que corrobore estos elementos, e incluso no hay normativa en Costa Rica que prohíba su uso, si la construcción se comprueba antisísmica, cosa que la madera bien usada desde los cimientos puede solventar.
El tema tiene cada vez más atención y se ha vuelto toda un área en desarrollo dentro de la disciplina de la Arquitectura, incluso, se han publicado modelos metodológicos para certificación de bioconstrucciones (Carvalho, 2016), análisis sobre el discurso (Montesinos, 2014) y propuestas para la recuperación arquitectónica (Torres, 2017) desde hace años. Existen muchos sitios que proveen listas de revistas, artículos, libros y blogs que pueden demostrar la creciente en el interés y la práctica bioconstructiva, fundamentados tanto en la consecución de modalidades sostenibles de desarrollo como medio de protección de la salud humana y planetaria como en la inaccesibilidad del mercado de la vivienda en general. Algunos de estos sitios los compilan Soto (2006) y Etbul (2012) en los sitios http://www.ub.edu/geocrit/aracne/aracne-090.htm y http://caminosostenible.org/mediateca/construccion-natural/ respectivamente.
Sin embargo, las mejores evidencias se encuentran en las casas y comunidades que existieron desde tiempos inmemorables, algunas de las cuales siguen en pie hoy en día. Desde Grecia y Egipto, hasta Latinoamérica y Asia, civilizaciones antiguas y vivientes han utilizado materiales y tecnología local para construir sus viviendas y ciudades, como piedras, madera, arcillas, mármol. “Incluso las clases menos privilegiadas, a lo largo de la historia y el desarrollo de la Humanidad, han empleado materiales como el carrizo, el lodo, las hojas de palma, para construir viviendas apropiadas para todo tipo de climas, templados, fríos o cálidos.” (Oseguera, Trinidad, Guerrero, Guerrero y Reyes, 2011)
La arquitectura sostenible o bioconstructiva es un tema que tomó relevancia desde principios del siglo XX. Nader Khalili fue uno de los vanguardistas en retomar y adaptar el tema, creando el concepto y técnica del “súper adobe”; aprobada por los altos comisionados de la ONU en materia de vivienda sustentable y digna. “Este modelo de construcción ha sido tomado en cuenta para edificar de manera sustentable no sólo en la comunidad rural, sino en la ciudad con materiales de reducido impacto ambiental.” (Oseguera, et al, 2011)

Fotografía de Rose Marie Hernández Vargas. Casa de Adobe en Santo domingo de Heredia, junio 2012. Tomada de https://semanarioextensionista.blogspot.com/2012/06/198-herencia-cultural-casas-de-adobe-de.html

Fotografía de la casa de campo del expresidente de Costa Rica José María Castro Madriz, en El Salitral de Desamparados, que data de los años 1800, declarada patrimonio histórico arquitectónico desde 1982. Fotografía de Kevin Piedra en https://www.tec.ac.cr/hoyeneltec/2018/06/06/bienal-arquitectura-premio-talento-tec (junio 2018).
Para nosotros, la mayor evidencia se encuentra en las calles de pequeños poblado de Heredia, Escazú y otros lugares de Costa Rica, rurales y urbanos, en los cuales aún permanecen las casas de Adobe y Bahareque entre edificaciones de concreto, cemento y metal, así como las hermosas casas construidas en Rancho Mastatal, unas más viejas que otras, que permiten conocer no sólo el proceso de evolución que esta comunidad ha vivido a través de la experiencia, si no la durabilidad y sensación de bienestar que las mismas edificaciones representan.

Fotografía propia de la primera vivienda de Tim y Robin, construida en Cob y de la cual surgieron muchos aprendizajes sobre el ambiente local y las mejores prácticas constructivas para garantizar durabilidad en esta zona de Costa Rica.

Fotografía propia, de una parte de la fachada del cuarto de estudiantes, en la que e aprecia un gran corredor, paredes más delgadas y amplias ventanas para contrarrestar las altas temperaturas de la zona, así como un techo alto.

Fotografía propia: hermosas formas curvas como parte de un baño con cimiento de concreto y paredes de ladrillos de adobe.
Otros contenidos sumamente interesantes del curso son los cimientos, los pisos de arcilla y sus acabados; las herramientas y los materiales, los cuales merecen realmente un extenso texto, pero que a la vez se encuentran disponibles para quienes tomen la decisión de aventurarse en este fabuloso curso, altamente recomendable y de increíbles alcances. Es sin duda uno de los procesos de aprendizaje más motivadores que hemos podido tener, con la total certeza de haber contado con los mejores y más experimentados profesores del país, que además resultan ser personas encantadoras y dispuestas a compartir sus conocimientos. No está de mas decir que en Rancho Mastatal se come delicioso y muy saludable y que, sobre todo, se encuentra una atmósfera de vida esforzada y pacífica que reconforta en todo tiempo.
A través de la participación en este proceso de aprendizaje una puerta se nos ha abierto, ya la construcción de nuestro hogar de una forma coherente con nuestro discurso, que nos permita un balance y una sensación de bienestar en nuestra forma de vivir y relacionarnos con todo lo que nos rodea dejó de ser una idea y empieza a tomar forma de realidad, poco a poco, con la seguridad de que no somos los únicos, ni los primeros en buscar las respuestas sencillas y eficientes que la naturaleza guarda y con la certeza de estar bendecidos en un camino de paciencia y libertad.

Fotografía propia de una habitación en una de las casas de Rancho Mastatal, que muestra un hermoso fresco aplicado sobre repello de cal en paredes de Bahareque. El piso es de arcilla, sumamente fresco al tacto, el techo alto y hay varias entradas de aire que permiten una estancia fresca a pesar del calor y la humedad.
El curso de bioconstrucción
El curso de Natural Building (Bioconstrucción) en Rancho Mastatal aborda temas amplios y específicos, complejos y sencillos, en una semana intensa y de mucho trabajo práctico. Entre los múltiples contenidos, algunos que llamaron fuertemente nuestra atención fueron los repellos y las paredes.
Las clases empiezan con lo que más tiempo y persistencia representa: los repellos, para poderlos trabajar y mejorar a lo largo de toda la semana. Los repellos son capas de mezcla, que pueden contener diferentes proporciones de arcilla, arena y fibras vegetales; o cal, arena y fibras vegetales, dependiendo de la durabilidad, acabado e impermeabilidad que se quiera obtener. Desde repellos crudos de cal o arcilla, hasta la hermosa y codiciada técnica marroquí del tadelakt, todas y cada una de las distintas posibilidades toman un considerable tiempo de práctica y paciencia, para poder garantizar un acabado que proteja y embellezca el trabajo constructivo interno, ya sea este de cob, adobe, bahareque u otra de las técnicas de construcción con arcilla.


Fotografías propias: paredes de práctica para las personas participantes del curso, sobre las que se aplican capas ya sea de arcilla o cal, en concentraciones diferentes, para aprender sobre la permeabilidad, secado, duración y belleza de estos acabados. En la segunda fotografía se aprecian acabados finales de arcilla, cal, tadelakt y fresco.
Para la construcción de las paredes, se hace necesario entrar en el detalle sobre los tipos y cantidades de los diferentes materiales a utilizar. En la técnica del bahareque, básicamente se utiliza una mezcla de arcilla, arena y fibra vegetal que se vierte con las manos sobre un trenzado de madera delgada o bambú. En esta técnica, las posibilidades de tratamiento para la mezcla son amplias, desde fermentar la arcilla con o sin materiales como la caballaza o el estiércol, hasta utilizar fibras más o menos resistentes para crear un nivel de adhesividad que permita construir mejor. En este sentido, siempre será necesario considerar el ancho de la pared y las condiciones climáticas de la región.

Fotografía propia: pared de varios paneles de líneas de bambú rellenadas con mezcla de arcilla, arena y fibra, todo rodeado de marco de madera.

Fotografía propia: interior con paneles hechos de madera, bambú y mezcla de arcilla, arena y fibra.

Fotografía propia: mezcla de arcilla, arena y fibra lista para aplicar en las paredes.
Para la técnica de bioconstrucción con ladrillos de adobe, se utilizan los mismos materiales, pero en distintas proporciones. Los ladrillos de adobe tienen un grosor mucho mayor al de las paredes de bahareque y por tanto deben contener mayor cantidad de arena, para garantizar resistencia no solo del techo, si no de sí mismos, pues por lo general no se usa un marco de madera que sostenga la pared. La forma de prepararlos es sumamente divertida, pues idealmente hay que hacerlo entre varias personas, pisoteando la mezcla hasta obtener la contextura adecuada. Luego, debe verterse la mezcla en moldes de madera que después se retiran, dejando las formas de ladrillos para secarse al sol. Esta técnica permite construir con curvas y hacer hermosas y resistentes figuras en la construcción.

Fotografía propia: se muestran los ladrillos de adobe que se pegan entre sí con mezcla de arcilla y arena. Se depositan sobre cimiento de concreto.
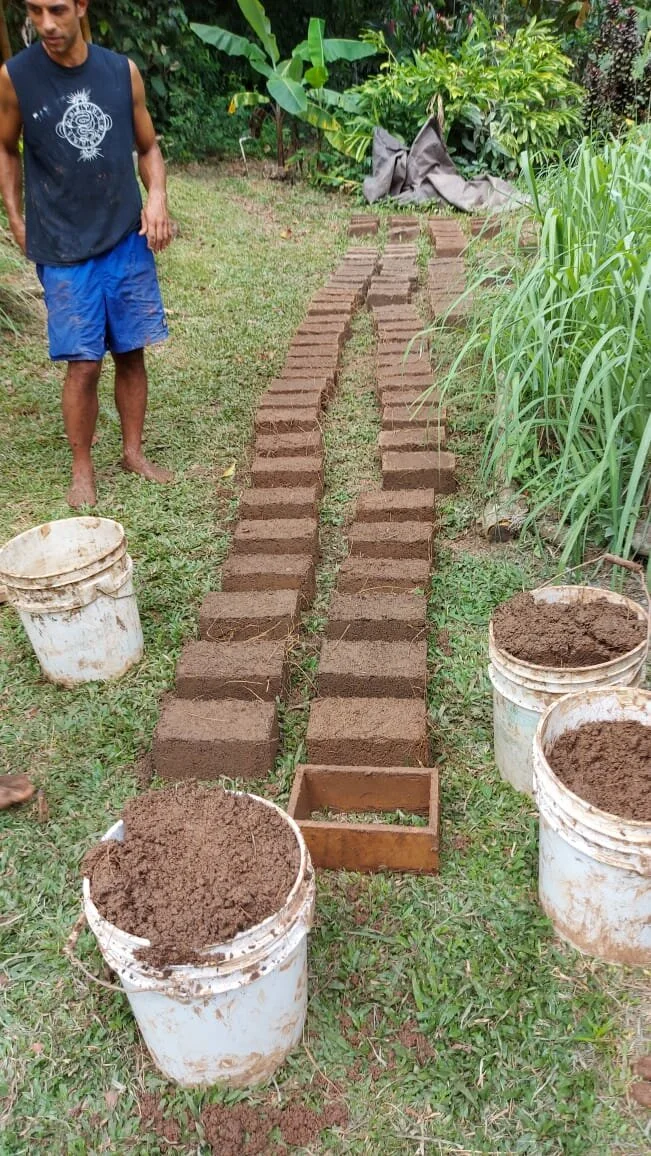
Fotografía propia: Zack, uno de nuestros compañeros, junt a los ladrillos de adobe preparados y secándose al sol.


Ducha exterior en proceso de construcción, que muestra una curva y paredes de adobe bien logradas. Al lado derecho, una pared de bahareque que incluye una malla sintética para hacer puente entre el barro y la madera.

Vista externa de la parte frontal de una de las nuevas casas de Rancho Mastatal. Incluye un arco de adobe increíblemente logrado y hermosas paredes de bahareque en proceso.


A la izquierda, la profesora Robin muestra diferentes pruebas con tintes para los acabados de las paredes. A la derecha, vista interna del arco construido en la misma casa.
Molde para la práctica de pisos. Dentro del molde una mezcla de arena y piedra que simulan una de las primeras capas de piso a colocar después de los cimientos.


En ambas fotografías estudiantes del curso de Natural building aplicando y nivelando capas de arcilla mezclada con arena y fibras para el piso.
Otras fuentes interesantes:
http://caminosostenible.org/wp-content/uploads/BIBLIOTECA/manual_bioconstruccion.pdf
https://dspace.ups.edu.ec/bitstream/123456789/14491/1/UPS-QT12146.pdf
https://www.academia.edu/42332672/LA_PERMACULTURA_COMO_OPORTUNIDAD_DE_COLABORACI%C3%93N_ENTRE_EL_ENTORNO_Y_LA_SOCIEDAD_HACIA_LA_BIOCONSTRUCCI%C3%93N
Bibliografía:
Calvo, S., A. y González, M., T. (2020). Recuperando la colectividad como una aproximación hacia la soberanía alimentaria en las zonas de transición rururbana. Diplomado Agrobiodiversidad y Soberanía Alimentaria, Módulo 6, trabajo final del módulo.
Carvalho, K., M.L. (2016). Herramienta de certificación para la Bioconstrucción. Universidad Politécnica de Madrid. Recuperado de: https://dialnet.unirioja.es/servlet/tesis?codigo=116580
Enshassi, A., Kochendoerfer, B. y Rizq, E. (2014). Evaluación de los impactos medioambientales de los proyectos de construcción. Recuperado de: https://scielo.conicyt.cl/scielo.php?pid=S0718-50732014000300002&script=sci_arttext&tlng=p
Etbul, A. (2012). Construcción Natural. Camino Sostenible. Recuperado de: http://caminosostenible.org/mediateca/construccion-natural/
López-Mesa, Belinda, Pitarch, Ángel, Tomás, Ana, and Gallego, Teresa. (2009). “Comparison of Environmental Impacts of Building Structures with in Situ Cast Floors and with Precast Concrete Floors.” Building and Environment 44 (4): 699-712. doi:10.1016/j.buildenv.2008.05.017. En: En: Mercader, M., M.P., Camporeale, P.E., y Cózar-Cózar, E. (2019). EVALUACIÓN DE IMPACTO AMBIENTAL MEDIANTE LA INTRODUCCIÓN DE INDICADORES A UN MODELO BIM DE VIVIENDA SOCIAL. Rev. hábitat sustentable vol.9 no.2 Concepción dic. 2019. http://dx.doi.org/10.22320/07190700.2019.09.02.07 Recuperado de: https://scielo.conicyt.cl/scielo.php?pid=S0719-07002019000200078&script=sci
Marengo, M., C. y Buffalo, L. (2019). Introducción: crecimiento urbano, una transformación sustentable del territorio. En: Marendo, M., C., Buffalo, L., Silveira, M.L., Bustamante,P., L., Arreortua, S. L., Lima, A., C., Rollan, del C., A., Bachmejer, A., O. y Bel, S., J. (2019). Crecimiento Urbano, hacia una transformación sustentable del territorio. Centro Latinoamericano de Formación Interdisciplinaria (CELFI). Recuperado de: https://rdu.unc.edu.ar/handle/11086/14647. (html). (en línea).
Tiwari, Piyush. (2001). “Energy Efficiency and Building Construction in India.” Building and Environment 36 (10): 1127-1135. doi:10.1016/S0360-1323(00)00056-1. En: Mercader, M., M.P., Camporeale, P.E., y Cózar-Cózar, E. (2019). EVALUACIÓN DE IMPACTO AMBIENTAL MEDIANTE LA INTRODUCCIÓN DE INDICADORES A UN MODELO BIM DE VIVIENDA SOCIAL. Rev. hábitat sustentable vol.9 no.2 Concepción dic. 2019. http://dx.doi.org/10.22320/07190700.2019.09.02.07 Recuperado de: https://scielo.conicyt.cl/scielo.php?pid=S0719-07002019000200078&script=sci
Montesinos, L.A. (2014). El discurso de la bioconstrucción arquitectónica: divulgación y legitimación en revistas profesionales. Universidad Politécnica de Valencia. doi:http://dx.doi.org/10.6035/clr.2014.13.11 ̇issn1697-7750 · v o l. x iii\2014, pp. 201-220. Recuperado de: https://www.raco.cat/index.php/CLR/article/view/292242/380758
Oseguera, F., L., Trinidad, H., J.E., Guerrero, J., N., Guerrero, J. I y Reyes, Z., M.M. (2011). Manual de construcción (Bioconstrucción). Instituto Tecnológico Superior de Pátzcuaro. Recuperado de:http://caminosostenible.org/wp-content/uploads/BIBLIOTECA/manual_bioconstruccion.pdf
Pereira, L. (2017). La bioconstrucción como alternativa de recuperación de la arquitectura tradicional en las edificaciones del distrito de Muquiyauyo-Jauja. Tesis para optar el título de Arquitecta, Escuela Académico Profesional de Ingeniería, Universidad Continental, Huancayo, Perú. Recuperado de: https://repositorio.continental.edu.pe/handle/20.500.12394/3412
Pujol, M., R y Pérez, M., E. (2012). Crecimiento Urbano en la región metropolitana de San José, Costa Rica. Una exploración espacial y temporal de los determinantes del cambio de uso de suelo, 1986-2010. Lincoln Institute of and Policy. Recuperado de: https://www.lincolninst.edu/sites/default/files/pubfiles/2242_1578_Pujol_WP13RP1SP.pdf (en línea).
Soto, V., J.A. (2006). Bioconstrucción. Ar@cne REVISTA ELECTRÓNICA DE RECURSOS EN INTERNET SOBRE GEOGRAFÍA Y CIENCIAS SOCIALES Universidad de Barcelona Nº 90, 1 de diciembre de 2006 ISSN 1578-0007 Depósito Legal: B. 21.743-98. Recuperado de: http://www.ub.edu/geocrit/aracne/aracne-090.htm

Natural Log Cultivation of Shiitake Mushrooms in the Tropics
Even though growing shiitake in bags of synthetic logs is more common due to labor and material costs for bigger scale production, we decided to go for the traditional natural log cultivation, as it has been grown for thousands of years. So if you’re thinking about starting mushroom cultivation, here are a few tips on how to do it:
By Nico, Apprentice 2020

Apprentices inoculating the logs
Managing an orchard space involves dealing with a lot of biomass, especially here in the tropics. From weeding, to pruning, chopping down NFTs that are getting way to big, etc. We are then left with a lot of plant material. Most of this biomass is returned to the soil around our beloved fruits trees, decomposed by microorganism and turned into a nutritious soil, hence completing the life cycle of our healthy ecosystem. But, every once in a while we are faced with the dilemma of having to take down bigger trees. At the Rancho we always try to honor the life of those trees by using them in the best way possible. Following permaculture principles, we don’t see any by-product as waste but rather as a resource. So when we had to take down a magnificent Pau d’arco for safety reasons, we took this opportunity to give it second life. The biggest logs were milled by 2 local sawyers, and are currently drying in the barn to be turned into the next piece of beautiful furniture. We used the smallest logs/branches to make a tincture, since the tree has so many wonderful medicinal properties. The bark, a powerful botanical medicine that restores the immune system, has been cited traditionally to treat the following health problems: anaemia, arteriosclerosis, arthritis, asthma, bronchitis, boils, cancer, candida, colitis, colds, constipation, coughs, cystitis, diabetes, diarrhoea, emphysema, dysentery, eczema, fevers, flu, gastritis, gallbladder problems, infections, liver problems, lung problems, leukaemia, pain relief, parasites, prostatitis, pyorrhoea and wounds!
*Learn more about Plants as Medicine in our annual workshop*
Finally, having noticed that the wild Oyster mushrooms are growing pretty well on this species once dead, we decided to use the medium sized logs that were too small to be used for furniture, to tackle one of my many long-time wishes: growing shiitake mushrooms. Shiitake is one of the most popular and important mushrooms in many countries. It has a long-standing history as a culinary delicacy and an immune system booster that produces lentinan, which is recognized in Japan as an
anti-cancer drug. An anti HIV property has also been detected along with other health benefits that are still being studied. It is widely cultivated not only in Southeast Asia but also North America, Europe, Australia and New Zealand, and each year more and more small scale farms are popping up.
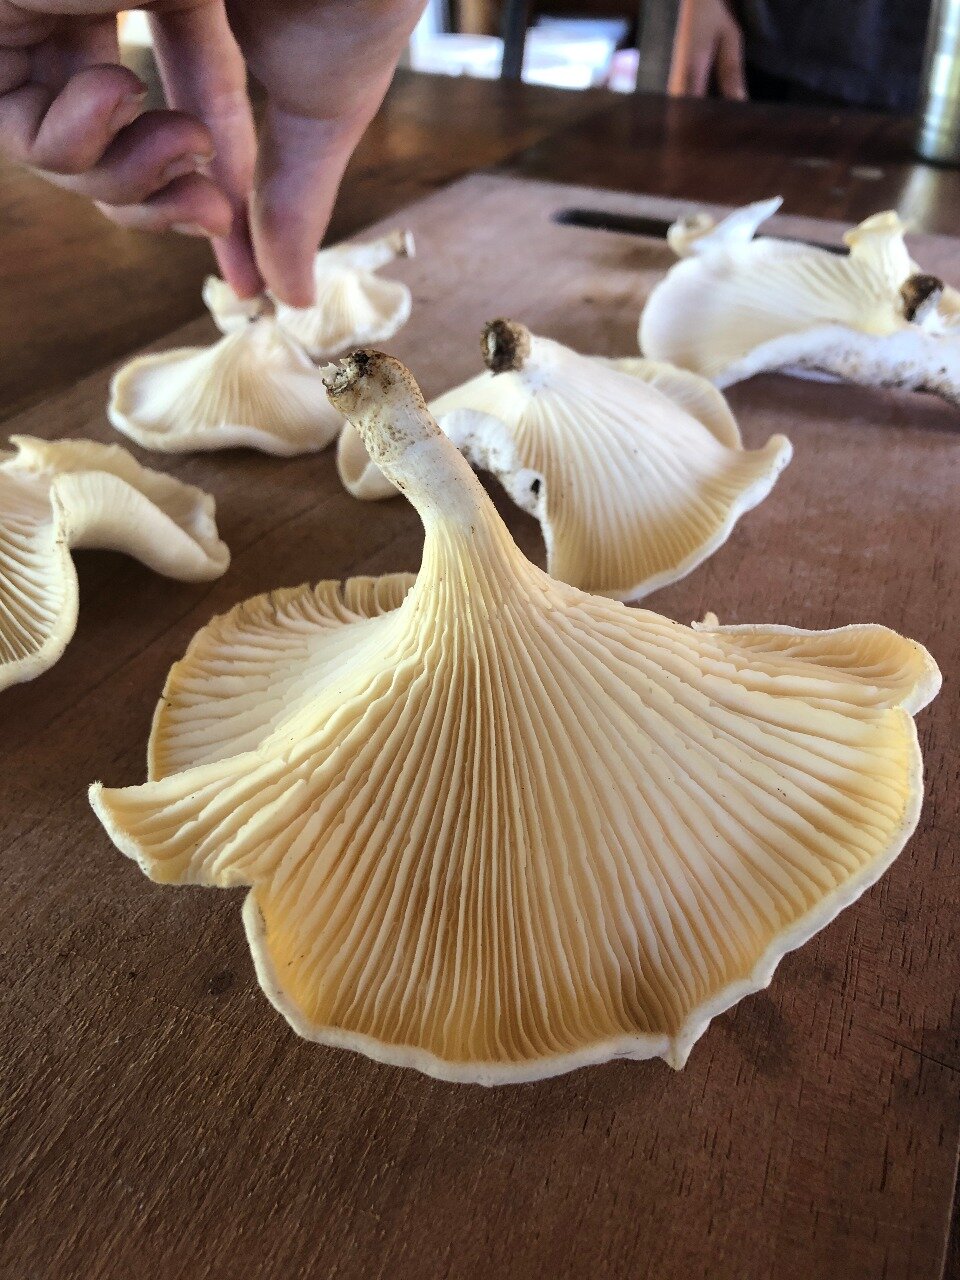
Wild oyster mushroom harvest
Even though growing shiitake in bags of synthetic logs is more common due to labor and material costs for bigger scale production, we decided to go for the traditional natural log cultivation, as it has been grown for thousands of years. So if you’re thinking about starting mushroom cultivation, here are a few tips on how to do it:
Selecting the logs
Mushroom spores
The most common species for growing shiitake in temperate climates are Oaks, Poplar, Alder, Maple, Birch, Elm and Sweetgum. On softwoods such as alder and birch, the mycelium will colonize the logs faster, but hardwood will give you a longer production time and less risk of contamination by other undesired mushrooms or molds. Growers should check to see what kind of suitable trees are available locally. Once you know which tree you will use as a substrate, you can start selecting and cutting the logs. Shiitake grows best in the sapwood and cambium because they contain the most readily available nutrients and have higher moisture content than the heart-wood, so the larger the sapwood area, the better. As Shiitake is a saprophyte, it can only grow on dead wood, so you want to make sure you inoculate your logs at least 2 weeks after the tree was chopped down so all the wood cells are dead. If inoculated sooner, the trees' natural chemical defenses against invasion may still be active and could prevent the shiitake fungus from growing. It is a good idea to soak the logs in water 24h before inoculation in order to increase the moisture content above 40%. The Ideal size for logs is about 1m in length so they are easy to manipulate, and a diameter somewhere between 7 and 15 cm (3”-6”). You want to select logs with an intact bark and try to keep it on as long as possible, as it creates an extra layer of protection against other wild molds, fungus or contaminants. Lime water can be applied on the exposed surface at the end of the logs for the same reasons, or you can also seal them with wax when doing the next step.
Inoculating the Logs
Inoculation is the introduction of the live fungus into the log. This live fungus is mixed with sawdust, grains, and other nutrients or is grown on a wooden dowel. This mixture, called spawn, is the mycelium of fungi growing on a substrate and prepared for propagation of mushrooms.

Brushing wax onto the ends of the logs
To inoculate, simply drill holes into the logs and fill them with spawn. The holes should be 0.8 cm in diameter and about 3cm deep. As mycelium spreads faster along the wood grain than across, you can place those holes 5cm apart around the log, and 10 to 15 cm apart lengthwise. Place the next row of holes diagonally, creating a diamond pattern and fill them with the spawn. Once all the holes are filled, seal them with melted beeswax to prevent drying and contamination.
Contamination is the most common reason of failure in mushroom cultivation, hence it is really important to always work in a clean environments and with sterilized tools. The more you pay attention and dedicate time towards this, the higher the chance of success.
Aftercare
Once all your logs are inoculated you want to let them sit in a warm and shaded area, in order to give the spawn the best conditions for propagation. What you’re looking for is a good balance of humidity, shade, ventilation and temperature. Each strain of mycelium has its optimal conditions, so make sure to get as much info as possible to find the perfect place. Too much heat with high humidity increase the risk of contamination, and you can balance that with good ventilation, but too much ventilation will dry out your logs, and you want to keep a stable humidity level. Think of it as having to choose a place to hang your hammock if you had to spend a whole day in it: you want it to be warm and cozy, but not in direct sunlight so you don’t start sweating. You want to have access to water (humidity) and a nice small breeze to rock in your hammock while you fall asleep.

Inoculated logs in a warm, shaded area
Give it Some Time
There you have it! Your logs are now freshly inoculated with the shiitake spawn (or any other variety you choose). The only thing left to do is give it some time to propagate and colonize the log before fruiting starts. Don’t forget to control humidity level and temperature, and check for any contaminants that might spread and steal the thunder from your precious shiitake. For fruiting to start, you can either let nature do the work or induce fruiting through different techniques that we will develop in next post, when or shiitake spawn is ready to fruit. Stay tuned for more info about fruiting, harvesting and all the next steps in your mushroom cultivation!
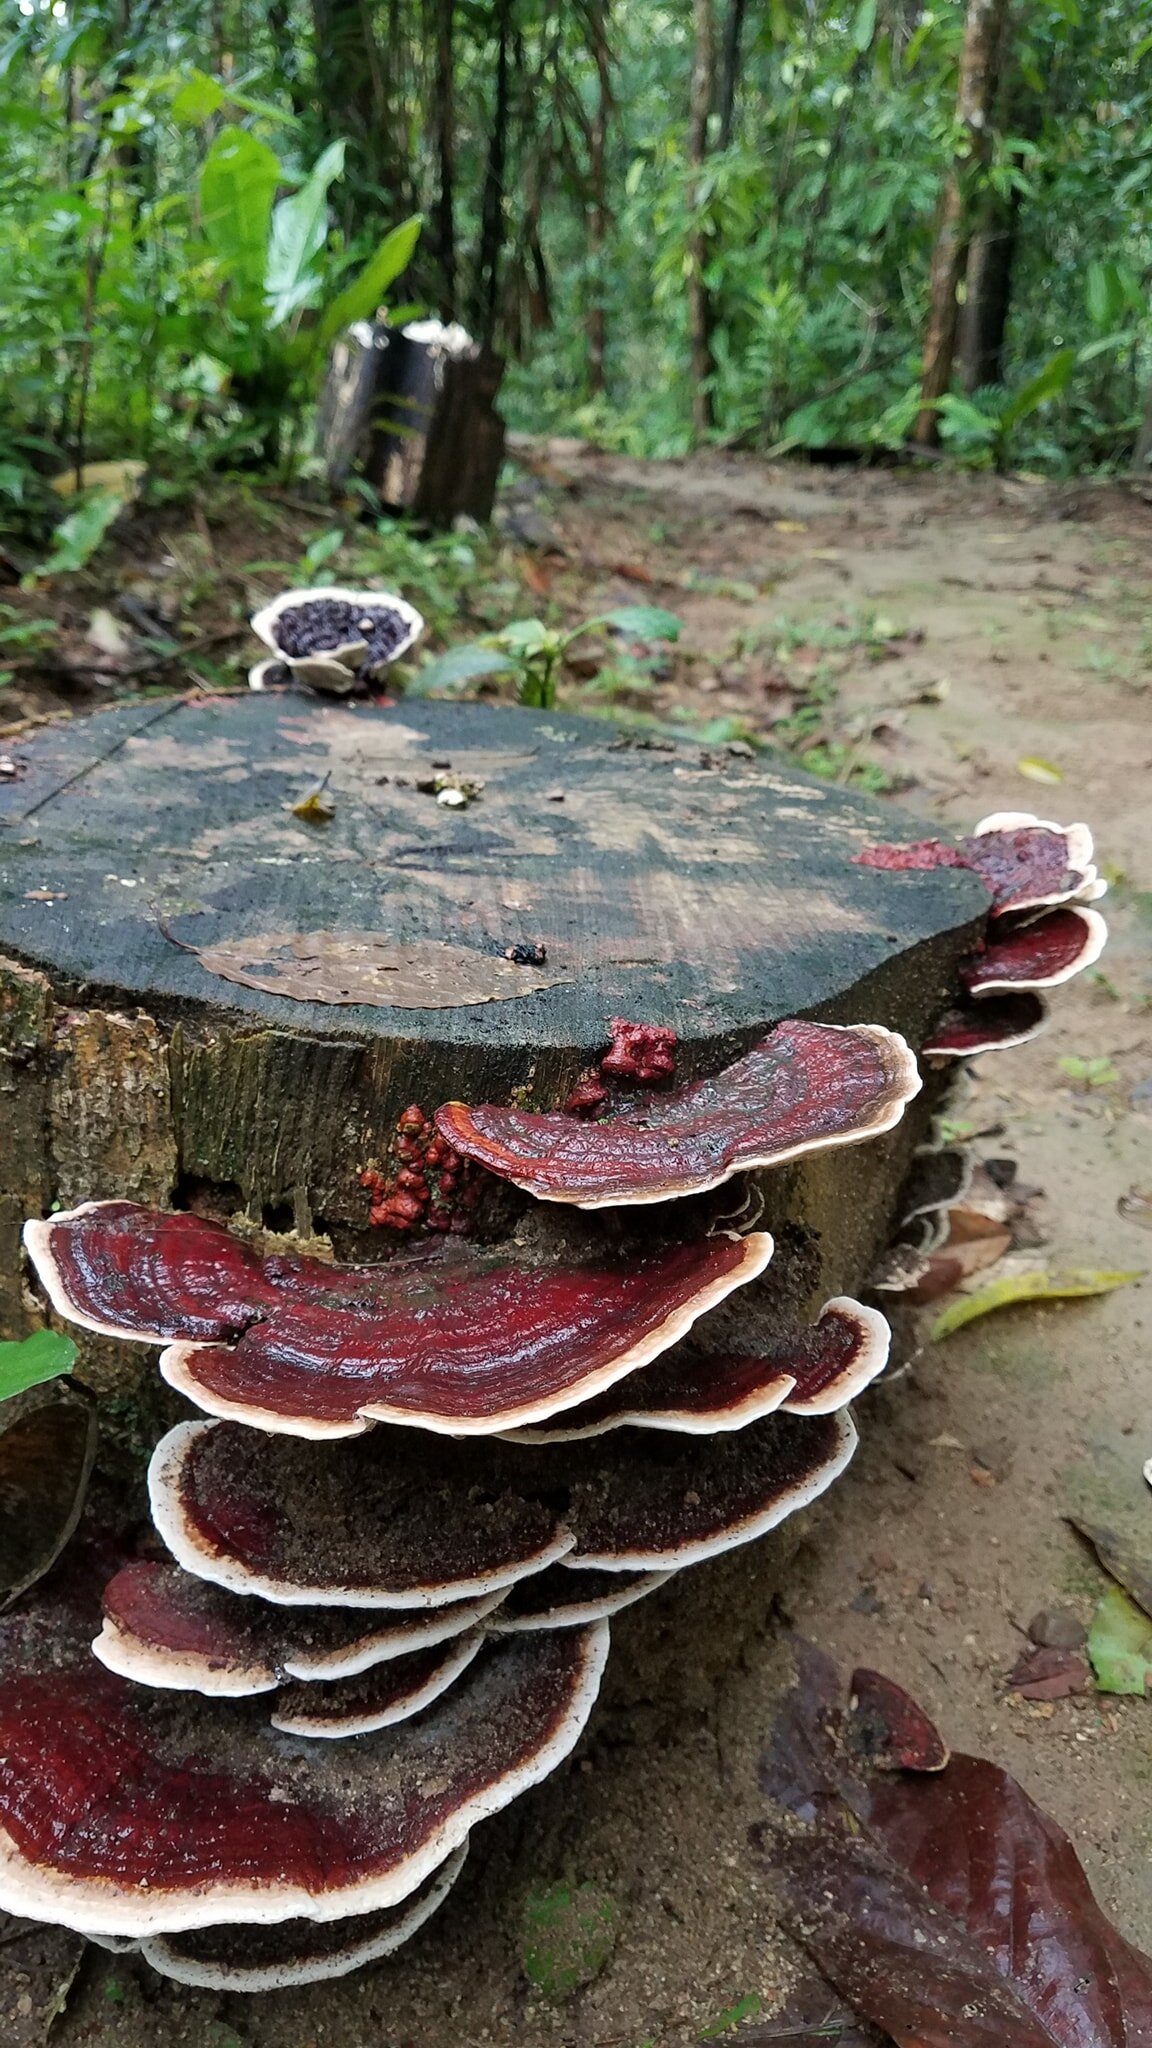
want to learn more?
Don’t forget to check out our yearly workshops and our apprenticeship program to get some hands on experience in sustainable living in the tropics!
Yearly workshops related to plants and homesteading include:
Happy mushroom growing!

Life of Spice: Farm to Table Cinnamon
When cooking over a fire, I often imagine that I am a witch brewing a potion. As I stirred with a big wooden spoon, the cinnamon began to sizzle, wafting its wondrous fragrance into the air and taking me to another place.
By Dani, Apprentice 2020

Farm to table cinnamon sticks!
Local Cinnamon
One morning at the Rancho, I was toasting some cinnamon to try to spice up an orange kefir water concoction. When cooking over a fire, I often imagine that I am a witch brewing a potion. As I stirred with a big wooden spoon, the cinnamon began to sizzle, wafting its wondrous fragrance into the air and taking me to another place.
The scents of spices are fantastical, and I have always thought that the spice rack is a mystical, magical place of otherworldly ingredients. As I learn more about spices , that magic has not faded, but rather has revealed new perspectives. We grow cinnamon in the permaculture orchards at the Ranch, and using this magnificent spice from tree to table has made me appreciate it so much more.
The cinnamon in my potion that morning is about as local as you can get. As the cinnamon toasted, the aroma traveled into my nose, triggering my memory, as scents often do. I was captivated by the smell when someone walked into the food smithy and exclaimed, “It smells like Christmas!” I snapped out of my cinnamon induced daydream and concurred. Even though it was a hot February day in the tropics, with temperatures around 85 degrees Fahrenheit, I could almost taste the crisp cold air of Wisconsin. It took me home. To me, the scent of cinnamon evokes feelings of cold winter nights with Christmas cookies by the fire. It feels like cool fall air and spiced apple cider at the orchard. It tastes like pumpkin pie at the dinner table. Cinnamon is for days of wool socks and sweaters. It smells like home to me. It is cozy. It is comfortable. It’s nostalgic.
But I had never even seen a cinnamon tree until coming to the tropics. So how did I come to associate this tropical flavor with with cold cozy evenings in Wisconsin? How did it become the holiday flavor of a climate where it doesn’t grow?
Origin of the Spice
By definition, spices come from the aromatic parts of tropical plants: roots, flowers, seeds, or bark. Unless you live in the tropics, the likelihood of consuming local , farm to table spices is slim to none.
Cinnamon comes from the bark of an evergreen tree which is native to Sri Lanka (Ceylon), and in ancient times, it was one of the most sought after spices. Like pepper, it has thousands of years of history in the globalization of foods and was known in China as early as 2700 B.C. It is even mentioned in the old testament as well as in Sanskrit texts. The globalization of cinnamon is not new, and the magical qualities of cinnamon ignited ideas of paradise in the minds of many, causing them to set sail in search of the heavenly lands from where they believed the magical spice must have come.
Cinnamon has a powerful scent, so powerful that it played a part in progressing the sharing of cultures and globalization as we know it. Some wonderful new cuisines came out of the spice trade, but it was not without a cost; the spice trade was also linked to slavery and centuries of abuse towards the local producers. It is important to remember both the fascinating and dark histories of the foods we eat.
Today, Great Britain is the leading consumer of cinnamon, followed by the United States and Spain, all places where the spice does not grow. The word, cinnamon, comes from the Greek word for spice and the prefix ‘Chinese’. Cassia is another spice, closely related to cinnamon, and they are often sold interchangeably, though cassia has a more delicate taste. Most of the cinnamon sold in the United States is actually cassia. Cassia is native to Myanmar and northern India as well as some Indonesian islands. Records of this spice date back over 6,000 years, and it was grown around present-day Hanoi during the Han Dynasty.
Cinnamon and Cassia can be distinguished by their color, true cinnamon being tan and cassia being more of a darker reddish brown. I had no idea that most of the cinnamon I have consumed in my life was probably not even cinnamon
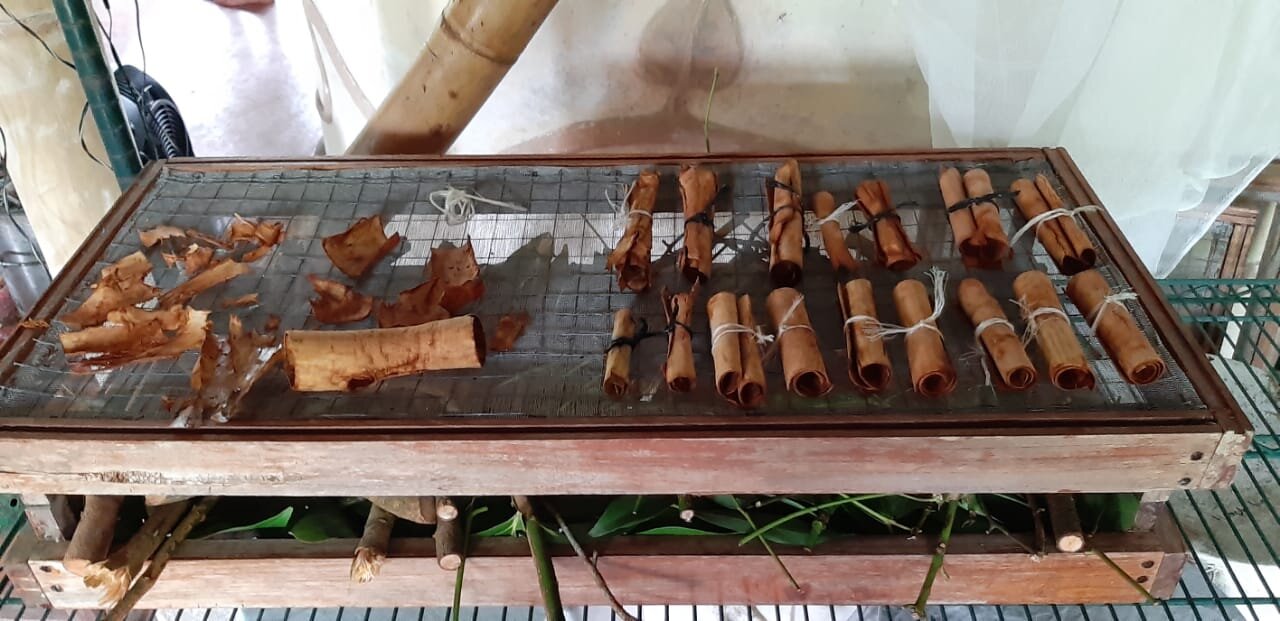
Cinnamon sticks rolled and drying
Permaculture Processing
The journey of cinnamon from the farm to our tables is neither short nor simple. After harvesting and processing cinnamon here at the Ranch, I would argue its processing is truly an art.
Ideally, cinnamon is grown to be long and straight to maximize yields. The offshoots should be pruned as they take energy away from the trunk, which is where the good stuff is. The darker bark is harvested to use as the spice. Once the tree reaches about 2 meters and the trunk is about 2-4 inches thick, it is ready to harvest. It’s good practice to chop the tree down to 10-15cm at a 30-degree angle for water and sun protection. After the tree is chopped, it will produce 2-6 new shoots, increasing the yield of the next harvest which will be ready in about 2 years. This practice can be continued for the lifespan of the tree. With a permaculture mindset, we harvested some cinnamon at the Ranch with hopes that in a few years, yields will increase with the new shoots. After chopping the tree, we took off the lateral branches and leaves. The wonderful cinnamon flavor is also contained in the stems at the base of the leaves so we saved and dried these for tasty tea. We then chopped it into smaller, more manageable pieces, and using a knife, we shaved off the outer bark. The next layer down is called the cambium, and that is the stuff you want in your carrot cake.
The cambium is the part of the tree between the outer bark and the heart wood and what we know as cinnamon. To separate it from the heart of the tree, we made an incision using a knife down the entire length of the piece. Then, we slowly began to peel it off using a spoon, trying to keep it is one piece. It was not easy, especially if there was a knot in the wood. Finally, we rolled the cinnamon cambiums and tied them, and put them to dry. Sometimes cinnamon is cut into quills of over three feet in length! Though I have always thought that cinnamon sticks were beautiful in form, after struggling with my three-inch piece, I realized there is a whole layer of beauty I had not seen. I was blind to the artists behind them, the growers and processors of this special tree.
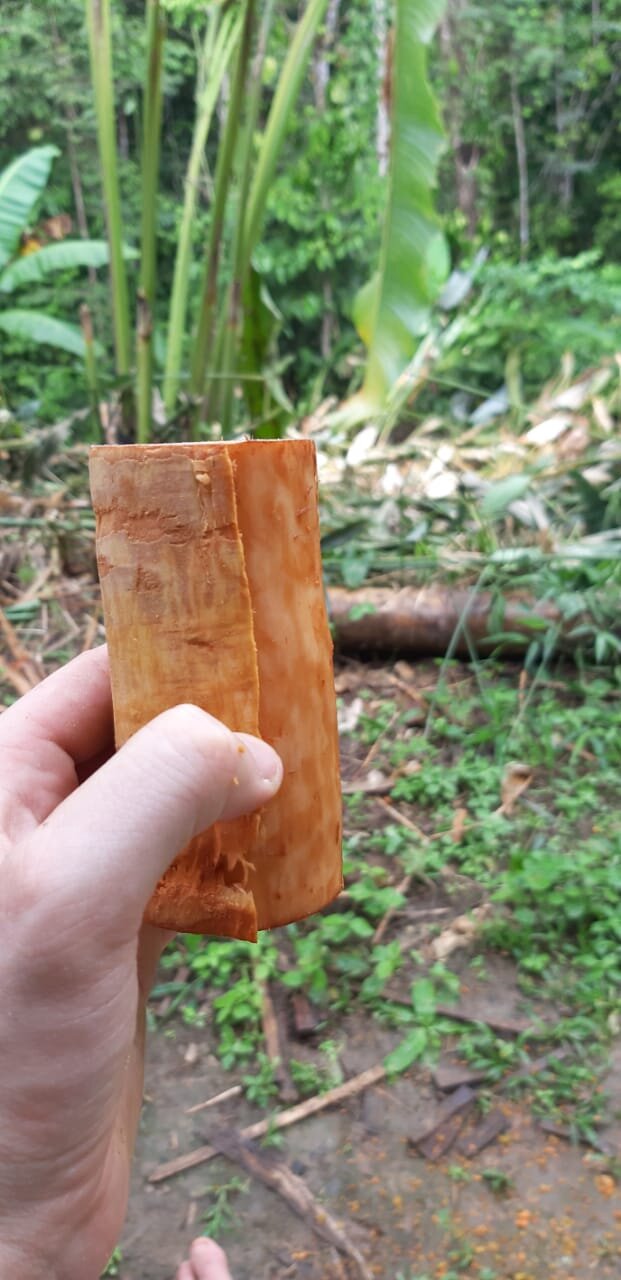
The outer bark shaved off, exposing the cambium layer
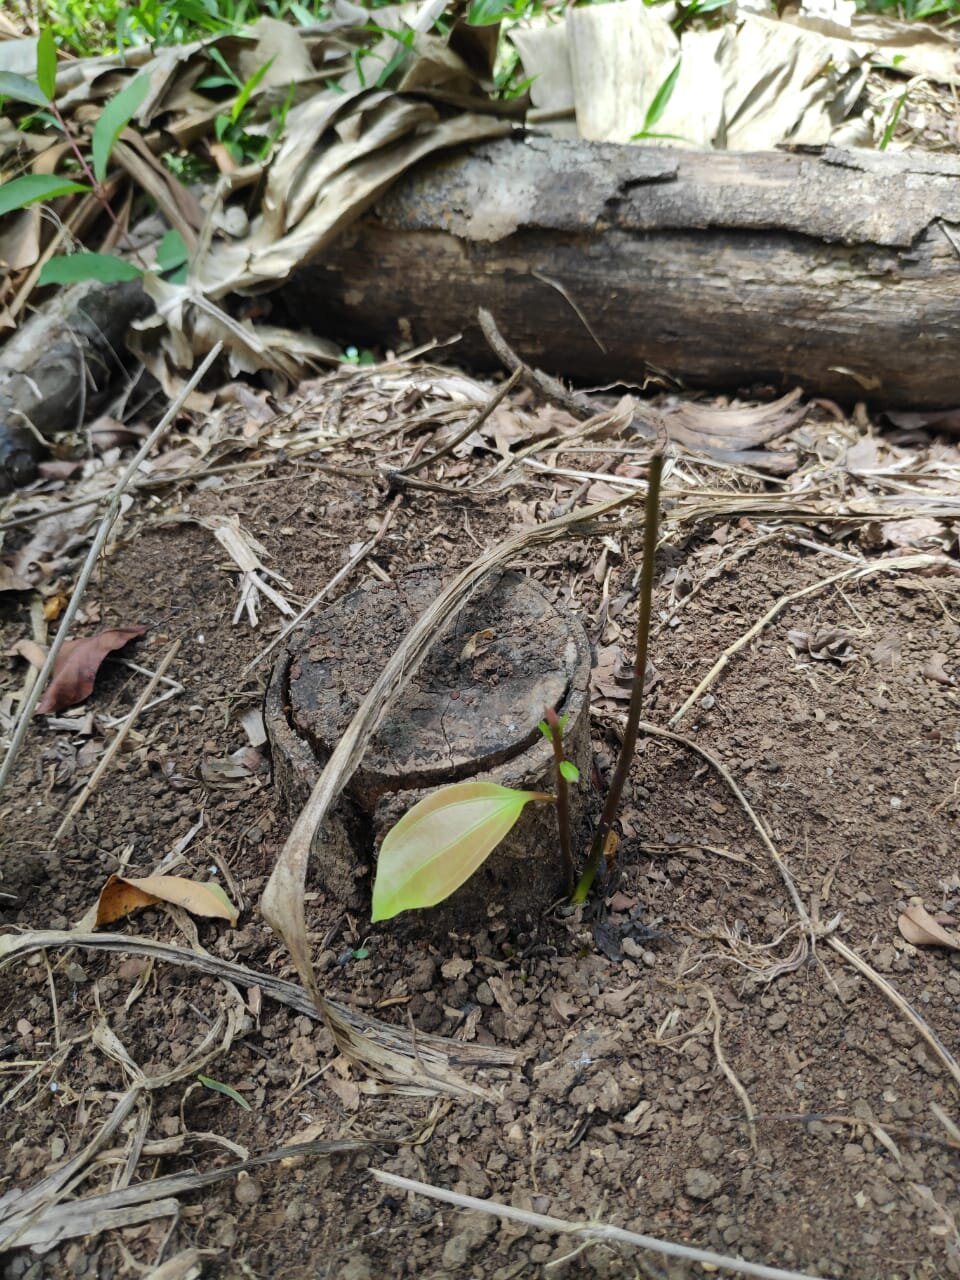
The new shoots coming up
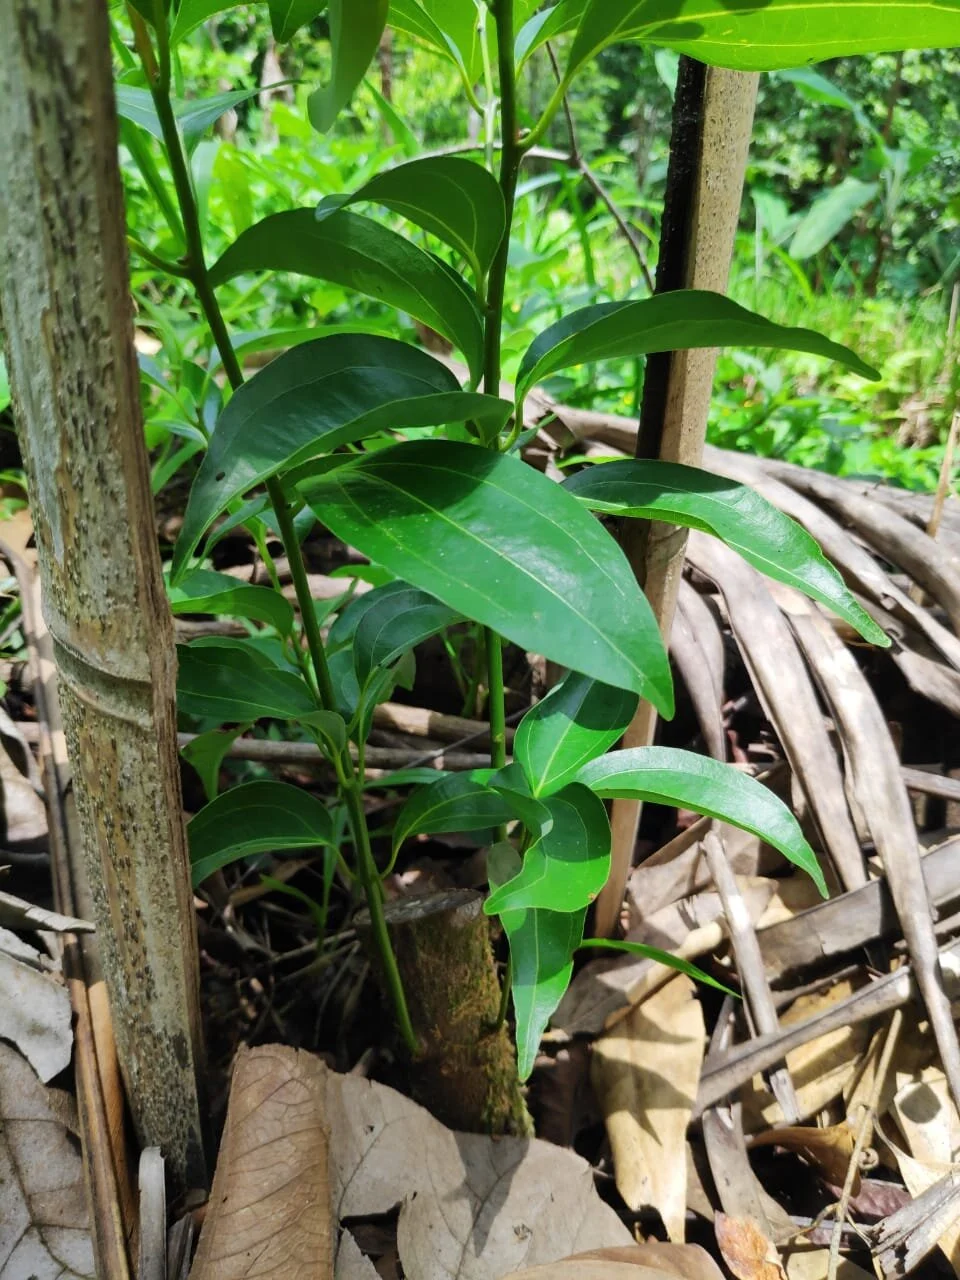
A healthy cinnamon tree re-growing
Conscious Consumption
There is so much in the food we eat: natural resources, back-breaking labor, rich traditions, culture, history, and beautiful artistry. It is important to consider where our food comes from, not only for our health, but for the well-being of those who grow and process our foods, and for the sake of our planet.
I think this is more difficult when it comes to spices. But these days, there are companies striving to produce fair trade spices through sustainable farming practices. Vermont-based Forestrade, started in Sumatra, demonstrated to local farmers how cinnamon can be grown without clearing huge sections of land that would endanger the surrounding national park. They now collaborate with 6,000 indigenous producers in Indonesia and Guatemala. Another example is a group of Hindu People on the mainly Buddhist island of Sri Lanka, the Salagama, who traditionally peeled the cinnamon bark from the trees. These people were devastated by the spice trade, controlled by the English, the Dutch, and the Portuguese. Today, the situation has changed, and they are able to sell their product to a fair trade association for 4o percent above the market rate.
These programs only work if we as consumers are aware of where our spices come from and are willing to pay a little more for our products. Through our consumption habits, we have the power to improve the lives of so many. I encourage everyone to enjoy cinnamon in their hot chocolate on a crisp cold evening, but as the aroma fills the room be mindful of how it got there. Spices truly are incredible, and I hope that while we are doing our best to eat local, we can be conscious of the magic contained in the spice rack.

Achiote to be made into paste

Fresh turmeric harvest

Farm to table peppercorns
Want to learn more?
Stay tuned for my next Life of Spice blog! And if you didn’t read my last blog about farm to table black pepper, read it here!
Want to learn more about growing your own foods and spices? Join us for our annual Permaculture Design Course or Agroforestry Skills Workshop, you can find more info on both these workshops here.
Check out these past articles about farm to table foods we are planting and processing here:
Sources and Further Reading
Heinerman’s Encyclopedia of Healing Herbs and Spices by John Heinerman
Spices – A Global History by Fred Czarra
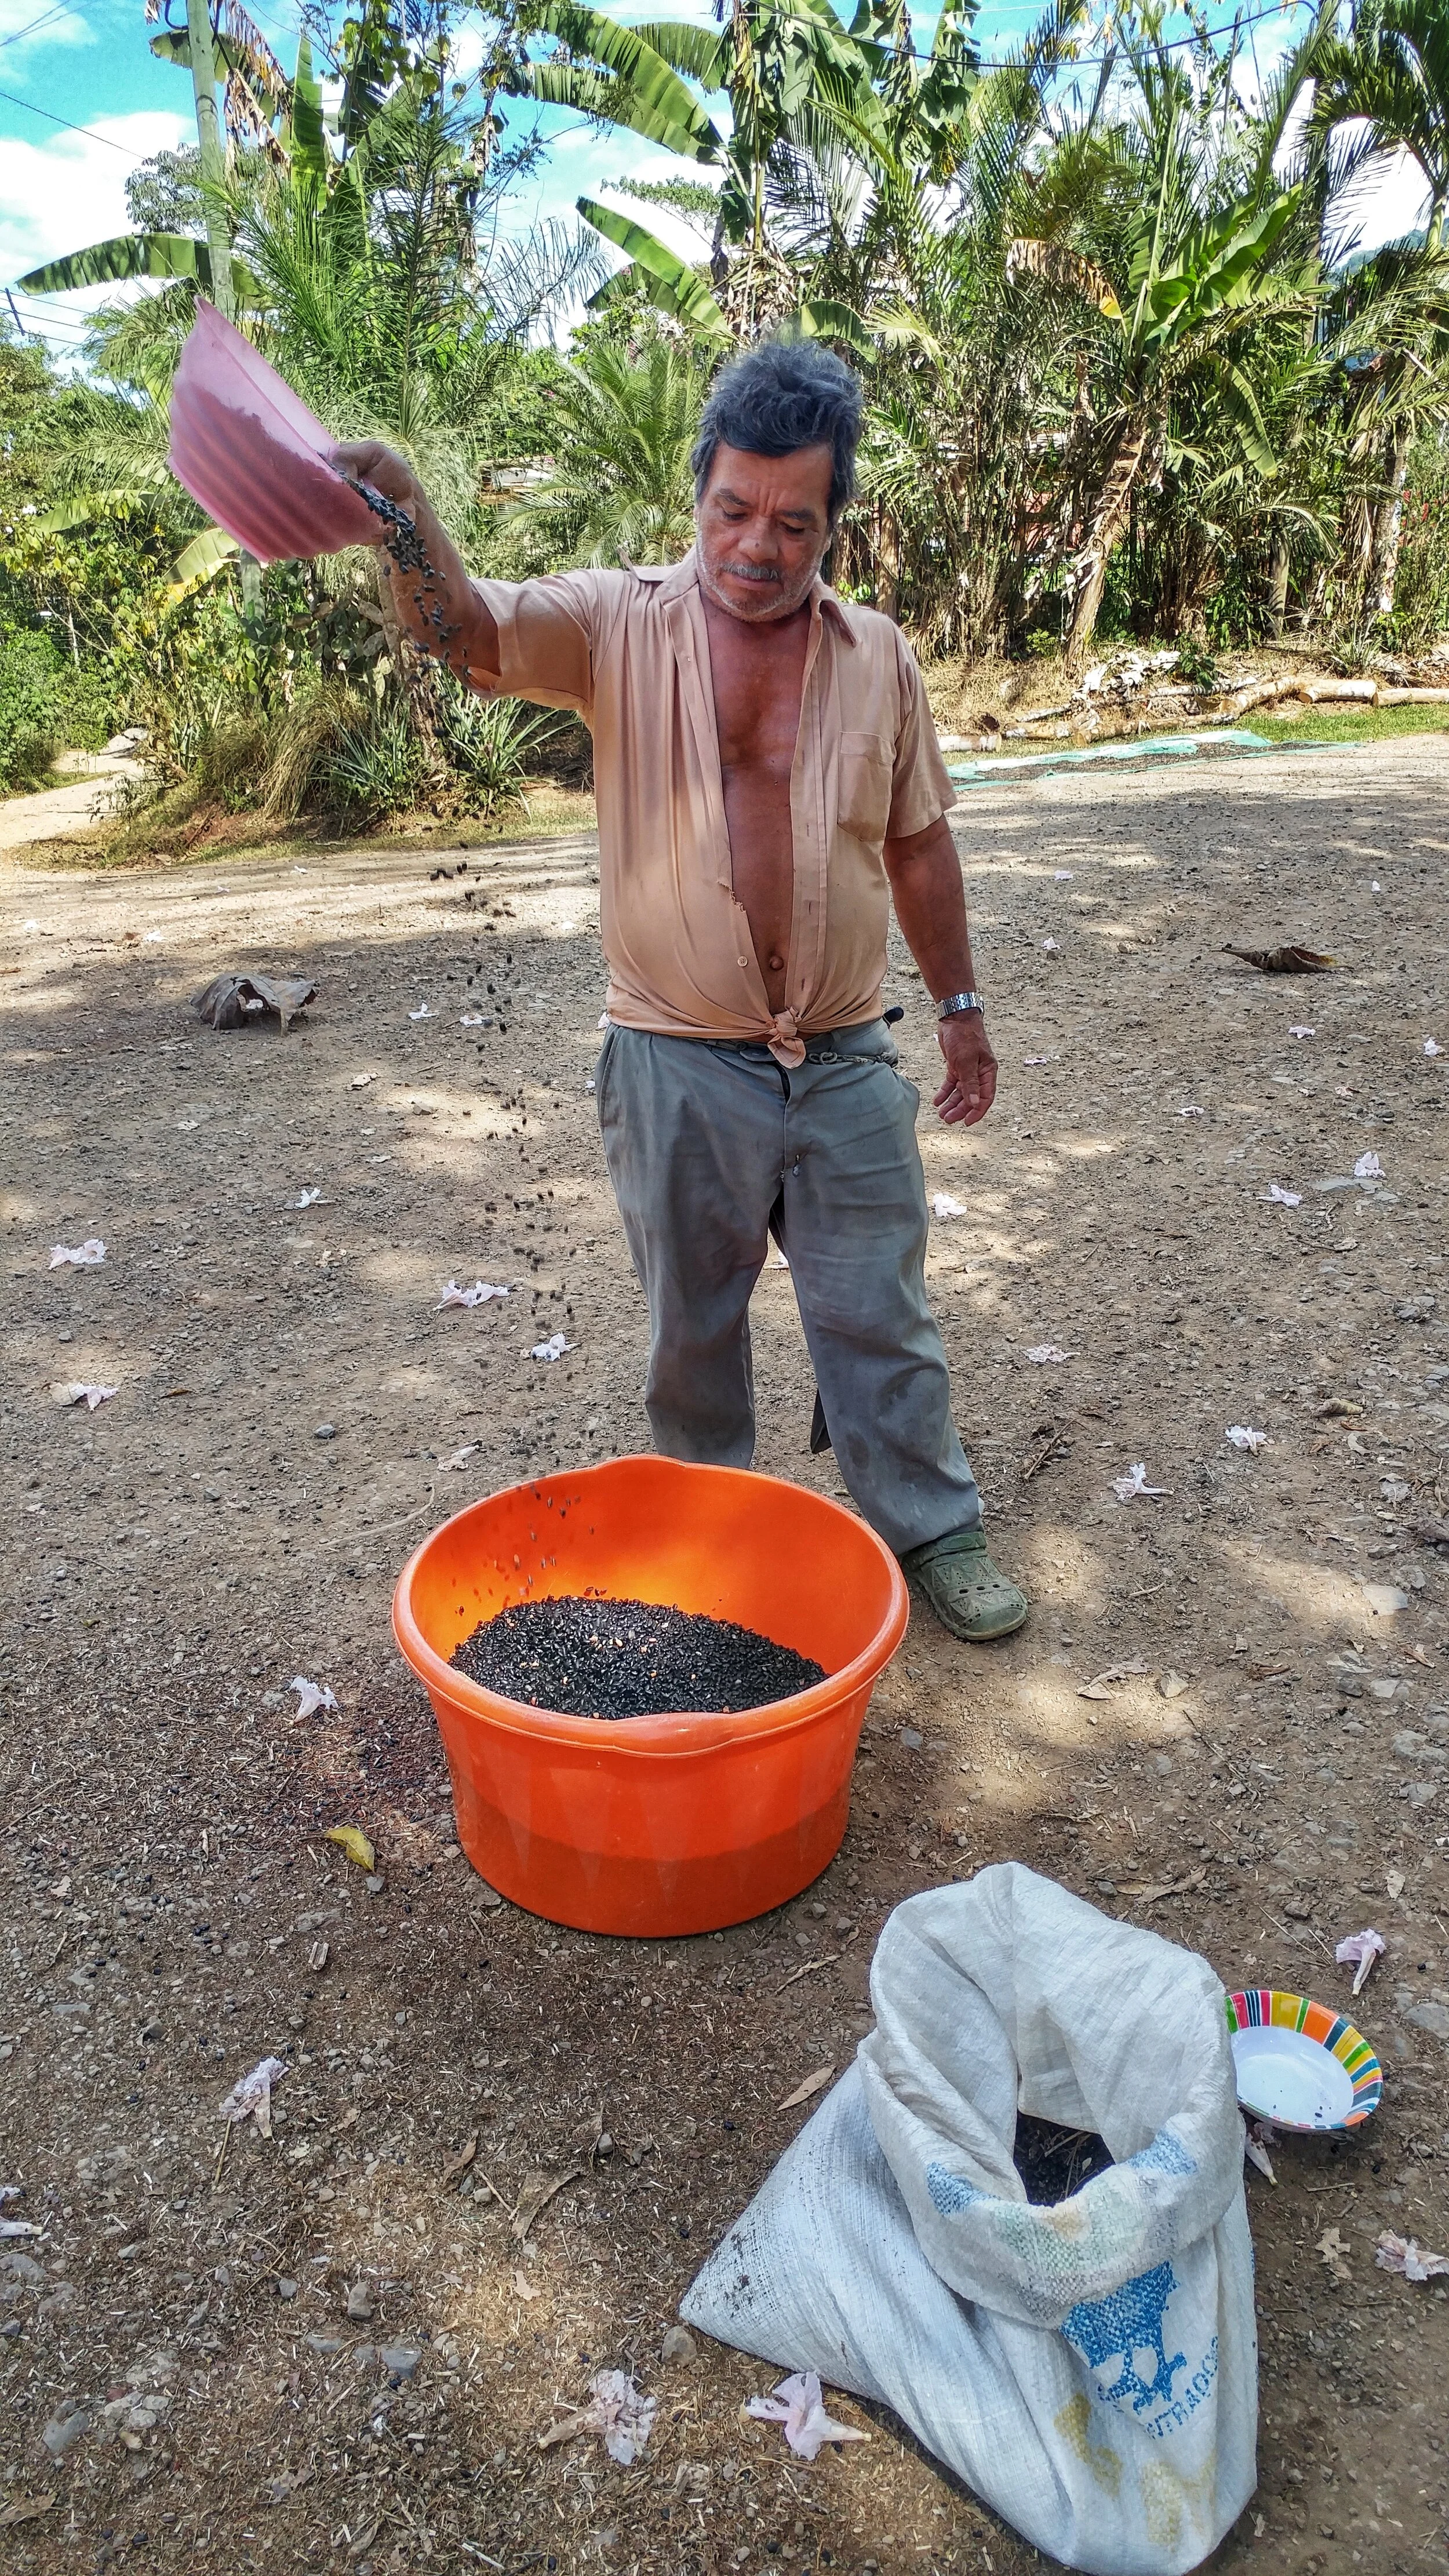
Eating Local: Reconnecting to Food
Food nourishes us and forms the heart of our community. Understanding where it comes from, how it is grown, and who has grown it helps us value our food in a way that we have lost in the modern era. We can get overwhelmed by the challenges of the modern world and food can provide us with some of the easiest and most accessible ways that we can begin to regenerate our planet.
By Nic, core team member
Food nourishes us and forms the heart of our community. Understanding where it comes from, how it is grown, and who has grown it helps us value our food in a way that we have lost in the modern era. We can get overwhelmed by the challenges of the modern world and food can provide us with some of the easiest and most accessible ways that we can begin to regenerate our planet.

Pejibaye: One of the delicious, nutritious and locally available staple tree crops
Since the agricultural revolution, our communities have been molded by the food we produce. Thriving when abundant and starving when scarce. The quest to guarantee our food security has led to mass population movements, wars, terrible famines and giant metropolises. But as we stand on the edge of environmental catastrophe, does it also hold the key to our own redemption? Does revisiting and re-valuing what has become just another commodity on the store shelf give us the opportunity to take back the power that we have given up with our disassociation from our food production and provide real tangible solutions to the current climate crisis? In Paul Hawken’s excellent book Drawdown: The Most Comprehensive Plan Ever Proposed to Reverse Global Warming, 2 of the top 3 solutions are food based (reducing food waste and eating a plant based diet). Each one is totally achievable on an individual level and something that we must demand on a wider commercial and political level.
Working at the Ranch people often ask me what they can do to be more sustainable or environmentally friendly when they return home. This is a question that I could answer in any number of ways. The answer that is the easiest and most accessible is to simply “eat local”. This is by no means the only answer, but today I am going to discuss just this one, simple act. that could help us move to larger changes for our climate and population.
Eat Local
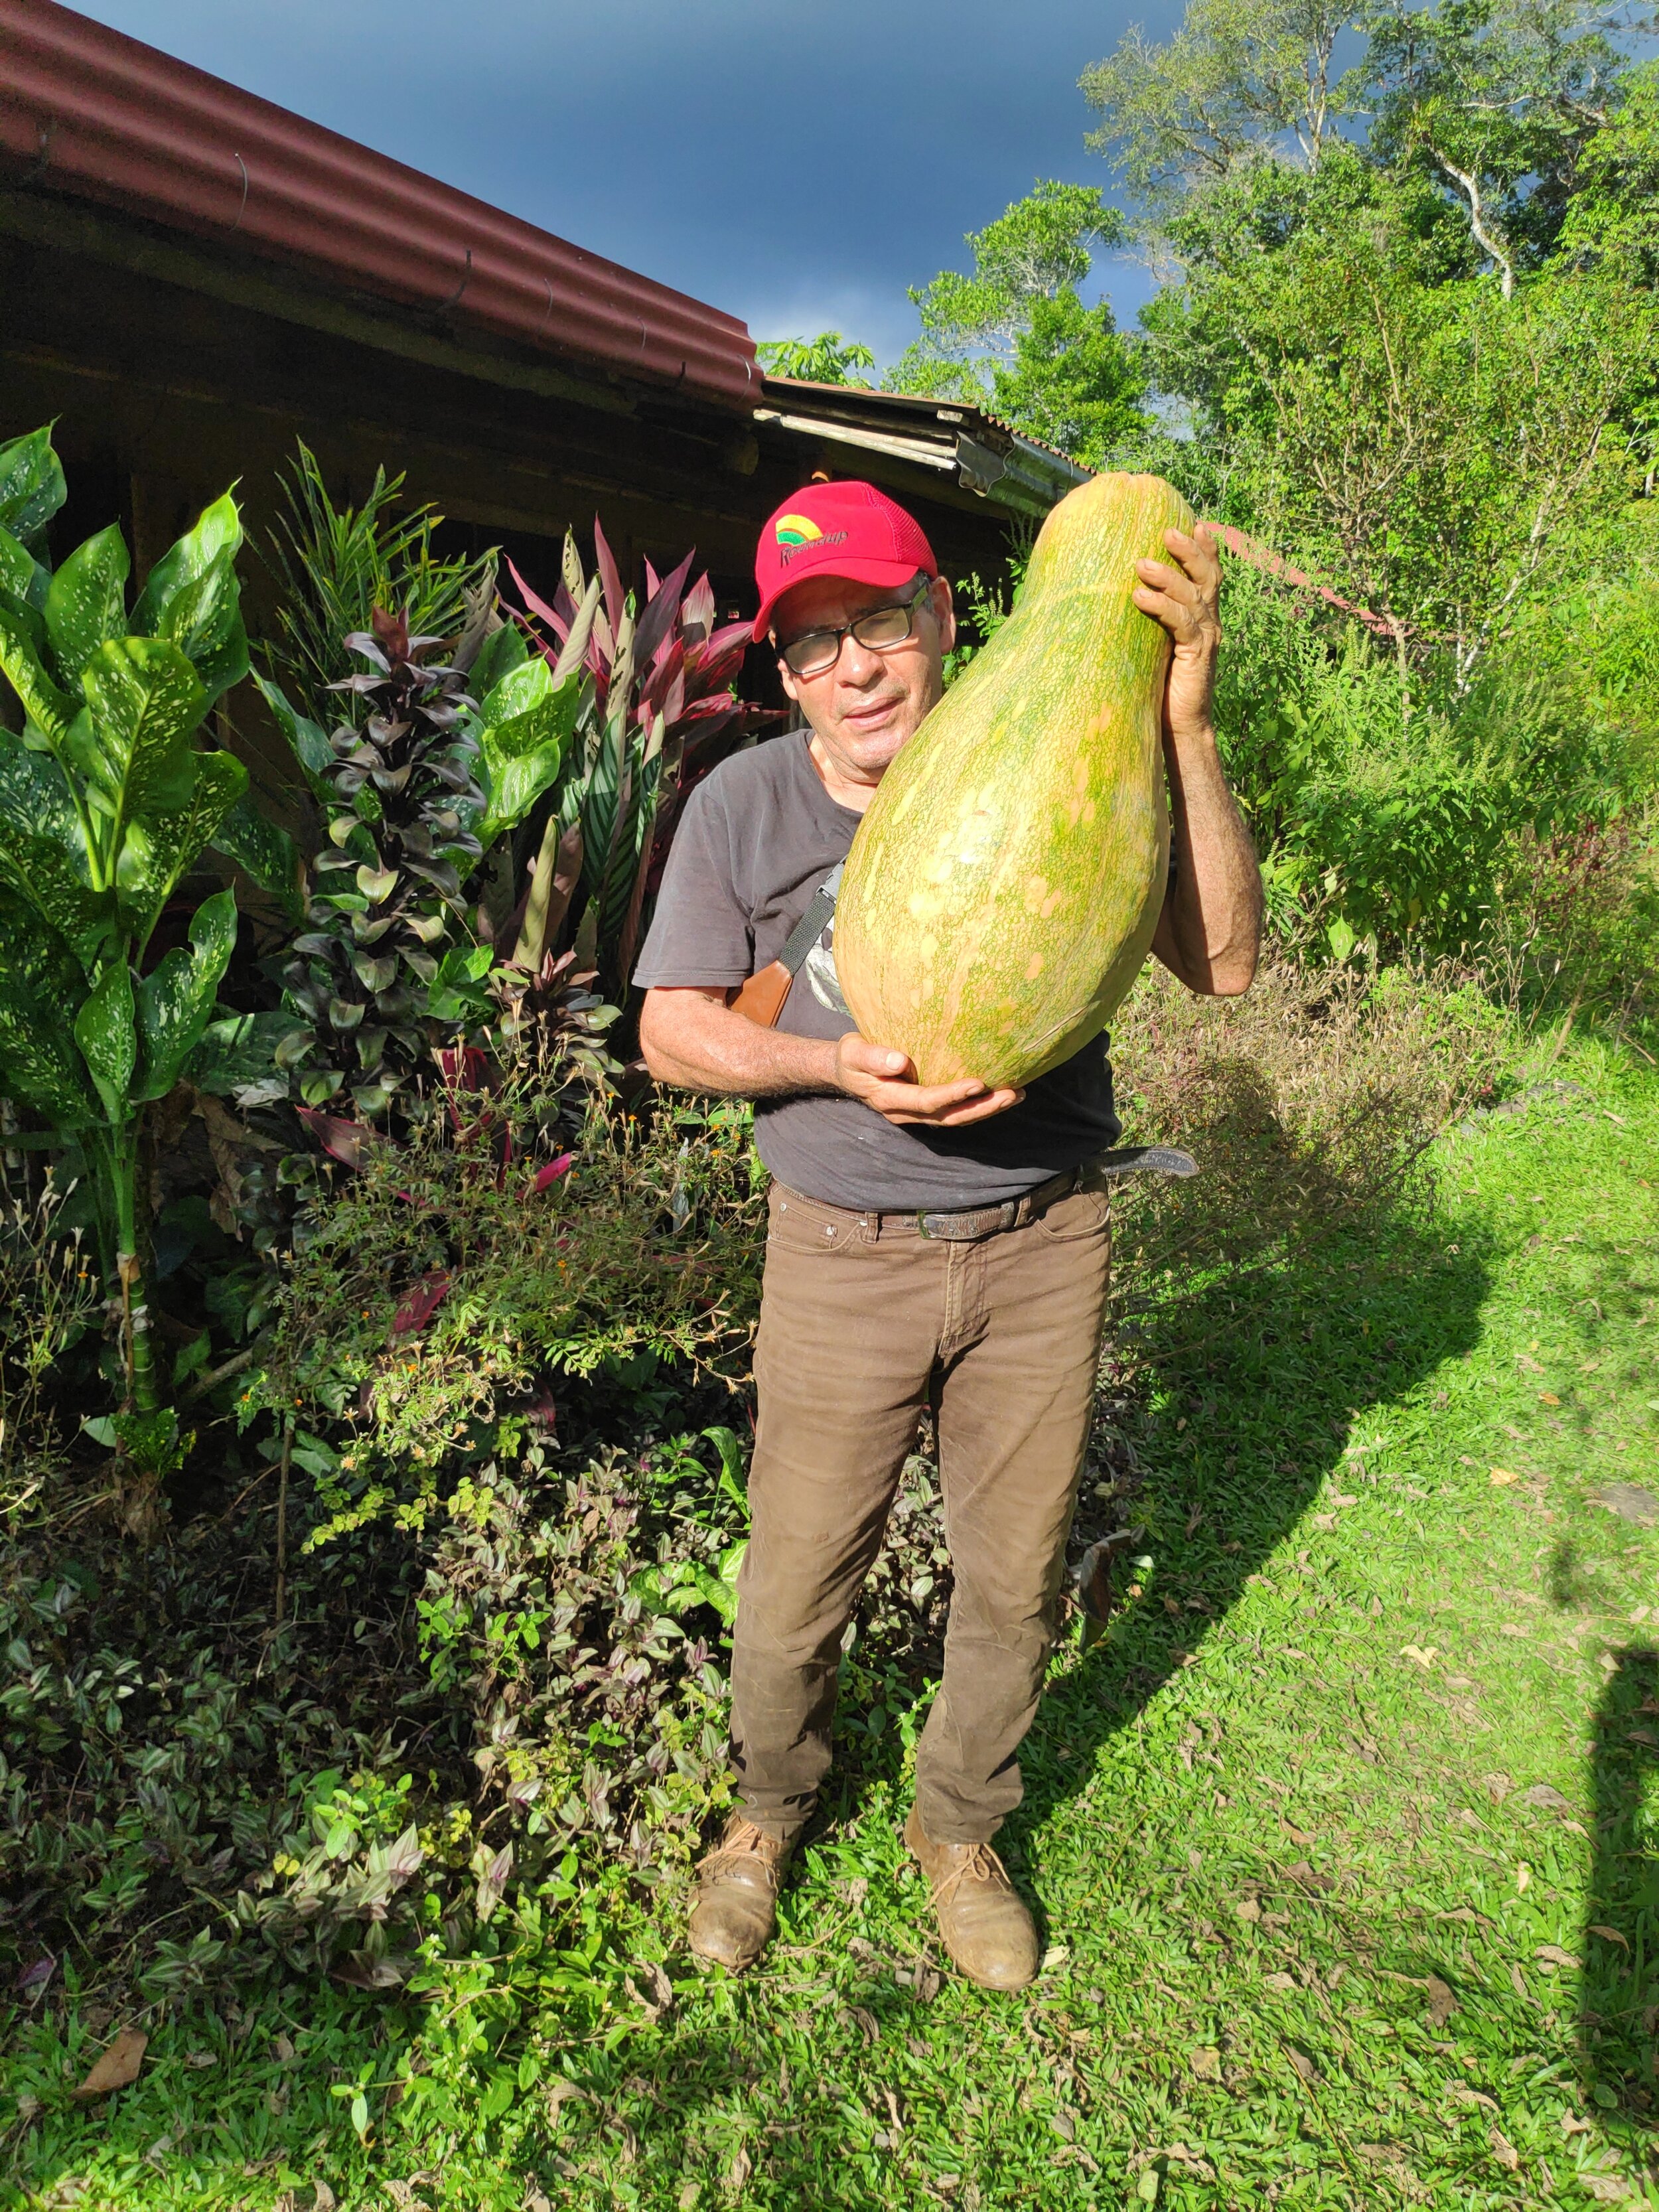
Nelson holding a giant squash he grew for us.
Since the early days of the Ranch, local foods have been a cornerstone of our cuisine. One of our goals is to create an easy market where local producers can sell their products. Not only does this reduce the carbon footprint of our meals, it helps to ensure that this region’s farmers continue to grow food. Unfortunately, people worldwide are moving to urban areas and abandoning the farming practices of their parents. Essentially, by buying whatever is brought to our door, we are saying to the local community; “if you produce it, we will buy it.” We want to let them know that we value their products and are committed to work with them to maintain the food security of our region. After 20 years we continue to buy from many of same producers. This results in delicious, locally grown food for our table, while providing an essential income to numerous households in our community.
Over the years the Ranch has produced increasing amounts of its own food as our agroforestry systems have matured and our understanding of tropical agriculture has evolved. We serve over 20,000 meals yearly with about 90% of our calories coming directly from the Ranch, the community of Mastatal, or the local area (within a 20 km radius from the Ranch). We are fortunate to still enjoy food security regionally. We purchase the following directly from the producers themselves: milk, eggs, cheese, sour cream, tapa dulce (unrefined sugar cane), coffee, corn, beans, rice, squash, yucca, plantains, avocados, chicken, pork, lard, peach palm, citrus, papaya, pineapple, citrus, mango, palm heart, lettuce and chocolate. We have created a diverse and delicious menu based on what we can either grow or buy from our friends and neighbors. We have taken the cuisine of the “ticas” and tweaked it a bit while adding an international flare.

One of our indulgences: wheat based pizza party!
This transition to eating a local based diet has taken some adjustments. As Westerners, our diet is heavily dominated by wheat products. Wheat comes in the form of cereal for breakfast, bread in a sandwich for lunch and pasta for dinner. Wheat is by far the most heavily consumed grain in the western world. After moving to Central America we needed to adapt to a new food culture full of new ingredients and tropical comestibles. We look to the wonderful traditions of our region and Asia to inspire our new diet and to create new and wonderful food that is based on locally available ingredients. We are not purists however, and of course we love to have a pizza party every now and again, but we have spent much time experimenting with wheat free, local doughs (read about our Permaculture pizza quest).
Why is eating local so important?
There are many pieces that make eating local such powerful change. I think one of the most appealing is that it is relatively easy to do, it is not really much of an inconvenience and does not require huge changes to your lifestyle. What follows are some of the reasons I believe eating local to be important.
Local Economy
By creating a market for local producers to sell their agricultural products we are supporting the local economy. This happens on many levels that are all intertwined. Firstly, you are valuing agricultural products that people know how to grow successfully. This means that farmers in our region can continue to do what they know how to do and are not forced from their land to cities to find other work. Secondly, they can get a much better price selling their products direct to the consumer as this removes the middle man (the supermarket) from the equation. When you buy a $3 head of lettuce, how much of that do you think goes to the farmer and how much goes to the supermarket? Thirdly, it keeps the money in town. By keeping transactions local the money tends to stay in our community, creating a circular economy that can support more than just the farmer. In this scenario the farmer can now buy products from other local people who can develop businesses that further support the community that in turns creates more economy!

We have been purchasing local eggs for Doña Flor for as long as I can remember.
Transportation and Carbon Footprint
This may seem obvious, but by buying local food you are reducing the carbon footprint and the transportation inputs that are associated with that food product. Unfortunately, in our globalized world, many of our products are shipped all over the world before making it to the final consumer. This is not just true of food, but also of many consumer goods. Cotton is often grown in the US and then exported to a country with a cheap labor force and poor working conditions so that it can be fabricated into a t-shirt, only to be shipped back to the US to be sold in the US market! Isn’t that crazy? If we buy our food from a local farmer then we know where it has come from and we know that the transportation of that food is minimized.
Fresh Food

Farm fresh: these bananas are simply delicious, ripening naturally.
By reducing transportation, you also increase freshness! Did you know that the majority of fruits are shipped when they are still unripe in order to reduce damage during shipping? The banana is a classic example. When the banana arrives to its destination it is gassed with a chemical that induces the fruit to turn ripe so that it can be sold at the market. This effects freshness and flavor massively, not only because these commercial fruit varieties have been selected for good shipping quality rather than taste, but also because when the banana ripens like this it tastes totally different. I have eaten many supermarket bananas and after now living in the tropics can confidently say that they’re weird. They never hover in the perfect ripe zone like a farm fresh banana does, and it goes straight from green to brown and bad tasting. A banana that is harvested freshly and allowed to ripen naturally has a far superior flavor and hovers in that perfect zone of ripeness for many days.
Developing Relationships
By interacting directly with your farmer you can have your say about what is grown and how it’s grown,. You can visit their farm and see for yourself the practices that they use. This is a powerful tool as there are many misunderstandings as to how food is grown and where it comes from. This can only be reconciled through personal experience and empathy. Maybe you really love blueberries, but the organic type only come from far away, whereas all the local blueberries are not organic. Why might that be? Maybe this is worth further investigation that developing a relationship with some local berry farmers might shed some light on. Maybe this will lead you to understanding something that you didn’t know about berry farming in your area, or maybe it won’t, but you won’t know until you investigate!
Creating Community
Our globalized world has broken up small communities where everyone traditionally knew one another. It is not uncommon now to not know your neighbors or the people who live on the same street as you. This has broken down the fabric of our communities and our relationships with one another. It is up to us to rebuild those relationships and it is going to require time and effort. A great place to start is with your food choices. If you can buy food directly from farmers then you can begin to create that direct relationship with your food and the land that grows it. Maybe it will be with a local butcher, or a local shop, where you get to know the person or people who are selling the food. Once you have formed this relationship you can cultivate a mutual understanding of what you are looking for in your food. You will begin to see the same people also shopping in these places and this is the way that we can begin to cultivate community for ourselves in urban and rural environments. Another fantastic place to develop community is at your community gardens, “pea patches” or allotments. Food is so fundamental to us as humans that communities based around food are incredibly powerful and resilient.
Connection to Place
The average American moves 12 times in their lifetime. This is a long way from our lives just 100 years ago when most people grew up and died in the same house or the same town. By moving so frequently we lose our connection to place. Our homes, our food, our street are just commodities to be bought and sold. This loss of connection to our local environment creates a disconnect between our realities of the world and the limitations of our land. Avocados, believe it or not, are not in season all year round. You wouldn’t know it by going to the store though, as they are pretty much available all year round. In fact most food products are available all year round and we don’t even think about it. By eating locally you are by default also eating seasonally and this will allow you to truly connect to your place and environment, deepening your connection to the land and local climate.

Lights on in the food smithy!
How Can I Eat Local?
What follows are some of the simplest and most accessible ways that we can begin the transition to eating local.
Farmer Markets
In most urban centers now there are farmers’ markets. Usually they take place just a day or two a week so you might need to schedule time to go to these markets when they are open. Here you should be able to find local, seasonal and fresh food.
Directly from Farmers
If you live in a rural area it is likely that you have farmers all around you. You can approach them directly, ask them what they are cultivating and see if they already have a farm stand or go to farmers’ market on certain days. This is an opportunity to get know your neighbors! If you live in an urban center, check out if there is some innovative commercial urban or city farm that is selling their produce.

Tapa Dulce: locally sourced sugar - purchased directly from the local farmers
Grow your Own
Depending where you are, this could be on your balcony, at a community garden or in your yard! The scale of your new garden will have to be proportional to your available space and your time. Growing herbs on your window sill is a great place to start!
Local Business
Try and buy as much as you can from local business rather than going to a supermarket. It is not always cheaper from the supermarket and the quality and freshness can vary massively.
CSA or Veggie Box
If you can’t find a farmers’ market you could look into a veggie box or CSA (community supported agriculture). These are great ways to directly support farmers and you can often get the food delivered or pick it up close to your house to make it more convenient.
Farm to Table
Lastly, where do you choose to eat out? It might be worth exploring a local farm-to-table restaurant and make that your special treat for birthdays or special occasions.

Farm to Table meal at the Ranch, green banana chips, pejibaye dip, starfruit pickles and jackfruit salsa….Yummy!
I hope this has inspired you to think about your food and where it comes from and how to incorporate more locally available foods into your diet. Next time you see a farm stand, stop, buy your weekly fruits and veggies from there, and skip the supermarket. It wasn’t long ago when we all had a hand in the food we ate. To think about the separation that the majority of the world has from food now is astounding. So, plant something whether it’s big or small, find out where the nearest farms are to you, and change your diet to eat locally available products. I bet you’ll enjoy fresher, more delicious food and make a few connections along the way.

Farm to Table Permaculture Pizza
Being a permaculture and sustainable education centre, we try to source as many of our ingredients either directly from the farm itself, or from the local community. Some parts of the pizza are easy to source locally, others not so much. This has come to pose a few challenges at times, and often we make some compromises for the sake of indulgence.
By Marco, Apprentice 2020
Why pizza?
Pizza. What a concept. Basically just some bread with tomato and cheese on top. But, we all know it’s so much more than that. I’d go as far as to say it’s probably one of the, if not the, most widely adored foods in the world. In fact, it sometimes feels like people answer “what’s your favorite food?” with something other than pizza just to not come across banal, even though deep down they know all they really want is a calorific disk of doughy deliciousness. At the Ranch we don’t kid ourselves. We know what we want and we satisfy that desire whenever we find a good enough excuse to fire up the cob oven – i.e. birthdays, leaving parties and periods of over a month without pizza.
Rancho Pizza Parties

Our new cob oven with just a few finishing details left
Our farm-to-table pizza parties are pretty epic, and not just because of the pizza (though, obviously, they’re awesome). No, a pizza party entails the whole community coming together and working towards a common goal. They take up most of the day and require a fair amount of coordination. We divide the labor up like so: 3 people on toppings, 3 people on dough, 1 person on tomato sauce, 1 person on fire building, and 1 person cooking. The fire alone takes 3-4 hours to get the cob oven up to the right temperature (800-900°F); the dough must be prepared 4-5 hours in advance to give the dough enough time to rest and the dough makers enough time to mix, knead and roll 40+ pizzas; sauce is usually made a day in advance to give it a chance to really cook down and yummify, and the toppings…well, you get the picture. All of this we try and do with permaculture principles in mind, which is what drives the evolution of our pizzas forward…
Farm to Table Pizza
Being a permaculture and sustainable education centre, we try to source as many of our ingredients either directly from the farm itself, or from the local community. Some parts of the pizza are easy to source locally, others not so much. This has come to pose a few challenges at times, and often we make some compromises for the sake of indulgence. However, it has encouraged us to become creative with our recipes; trying to find local, tropical alternatives to some of the classic Italian
ingredients. So, below is a break-down, top to bottom, of our permaculture pizzas…

Cheese
The cheese we use on our pizzas comes from our friends’ farm about 1/2km down the road. It’s the same place where we get our milk (learn to make dairy kefir here) and the cow manure for our biodigester. Needless to say, they make good sh*t.
Toppings
Easy. You can put anything you want on a pizza! Here are some examples of toppings we make on the Ranch:
Fried banana flower – tastes a bit like artichoke when it’s been lacto-fermented for a few days and then fried with a bit of garlic (and soy sauce, if we’re feeling naughty). Learn about how amazing bananas are here.
Katuk shoots – katuk is an edible green that grows abundantly on the Ranch. The new, young shoots from these are crunchy and slightly nutty, reminiscent of asparagus. Learn about greens that thrive in the tropics here.
Grilled pineapple – Classic. Suffice to say that I am 100% a fan of pineapple on pizza *Italian ancestors turn in their graves*. Sorry, not sorry. Sweet and salty combo. It’s delicious. Plus, we grow a lot of them so, perfect for farm to table.

Farm fresh papayas
Tomato Sauce
A tough one. Tomatoes don’t grow well in this area, so we have to buy our tomatoes from elsewhere, they are typically coming from the highlands of Cartago about 100km away. Can’t be having pizza without tomato sauce, it’s just not right. And hence, this was one of the areas where we compromised… was. Then, we discovered papaya sauce! I must admit, I was skeptical at first. Being half-Italian, I grew up with nonna’s and mamma’s sugo di pomodoro, and a good tomato sauce is a rite of passage in my family… but this papaya stuff is really good! In fact, when it’s on a pizza with the cheese and toppings, it’s quite difficult to tell the difference. It’s also way quicker to cook than a tomato sauce as there’s less moisture in papayas. The recipe is the same as it would be for a tomato sauce – oil, onions, garlic, oregano, basil, splash of vinegar (banana vinegar recipe)/lemon juice – just that you replace the tomatoes with papaya and add a little more vinegar and salt to compensate for the added sweetness of the papaya. We also tried a 50-50% mix of tomatoes and papaya, which actually was my favorite of the 3 sauces we trialed (tomato sauce, papaya sauce, tomatoes + papaya sauce) as it had a great balance of sweet and sour. Now, with every passing pizza party, we are reducing our dependence on regional tomatoes and turning towards our locally grown, tropical, farm to table variation, and that’s alright with me.

Rolling dough
Dough
This is the biggie. How to replace wheat flour, which has to be imported from the US or Canada, with something from the farm? A question that has no doubt tormented many apprentices before me, and one that will probably continue to torment those after me.
Wheat’s going on?
The thing about wheat is that it’s great. It’s just great at what it does. Or, more precisely, what
we’ve bred its seeds to be able to do for us over millennia. You see, plants want to provide their seeds with the best chance in life and so they store energy in them in the form proteins, which the seed can access, once germinating is triggered, to power its growth. It’s sort of like a tiny packed lunch that it can take with it into the wide world before foraging its own food from the ground with roots. Most grasses have a protein called globulin in their packed lunch, but in wheat’s packed lunch there are two different proteins - glutenin and gliadin. Yum. When wetted these two form an elastic mesh structure known as gluten. They work in unison in dough – one allows the dough to be stretched (gliadin), while the other helps the dough contract back in on itself (glutenin). When baked, this elastic mesh helps trap gases and aromas created by the yeast and bacteria present in the dough, which is why bread rises, or in the case of pizza, why you get those lovely little puffy bits in the base. The trouble is that gluten is difficult to replace and so replicating wheat-based pizza dough is tricky… did we let that deter us? Pff. As if.

Dough experiments
This past pizza party we experimented with a few different doughs. Keeping permaculture principles in mind, I wanted to make use of the resources we have readily available on the farm. In this case, I decided on cuadrado (type of Musa sp.) and yuca. First, we peeled, sliced and dehydrated the cuadrado and yuca. Next, we milled the dried slices in a corona mill to create the two flours (one of each). I then divided them into 6 bowls (3 for each) and mixed them with equal parts water. Each bowl was to be a different combination – solo flour, 50-50% with wheat, dried water kefir SCOBY. (Dried SCOBY is supposedly a sort of faux xantham gum, which we’ve read may provide some of the same characteristics as gluten… worth a shot!). Below is a summary of the various combinations we tried:
Cuadrado flour + water (5-day ferment)
Cuadrado flour + wheat flour + water (5-day ferment)
Cuadrado flour + water + dry SCOBY (5-day ferment)
Yuca flour + water (5-day ferment)
Yuca flour + wheat flour + water (5-day ferment)
Cuadrado flour + water + dry SCOBY (5-day ferment)
Cuadrado flour + water (no ferment)
Yuca flour + water (no ferment)
Cuadrado flour + water + baking powder (no ferment)
Yuca flour + water + baking powder (no ferment)
Cuadrado flour + yuca flour (no ferment)

Local pizza dough trials
There was enough dough to make one small pizza of each. The results? Quite varied, actually, and
surprisingly successful. I must say that I wasn’t particularly hopeful, but was very pleasantly surprised. They had a kind of store-bought frozen pizza vibe about them… not amazing, but also not awful. There didn’t seem to be any outstanding winners either, and people were choosing different ones as their favorites, implying that there is potential to please a variety of palettes. In my personal opinion, the Cuadrado sourdough was the best one as it had a beautiful dark, whole-grain look and a unique but not overpowering aroma and taste. The Cuadrado-yuca mix was also quite popular and seemed to have the closest resemblance to actual pizza dough.
So, in conclusion, I think there is definitely potential and progress has been made… but, that wheat
pizza is still on top. To be continued…
Conclusion
So, there you have it folks, farm to table permaculture pizza, Rancho style. Please comment if you’ve
had any experimental pizzas you’d like to share! Pura vida.

Robin cooking the dough in our cob oven
want to learn more?
Join us for one of our upcoming workshops to learn more about sustainable living and ideas.
Or come stay as a guest and maybe you’ll luck out being here when we have a pizza party! Either way you will enjoy farm fresh meals, access to our beautiful property and facilities including acres of wildlife refuge, and be welcomed into an alternative community living in the rural jungle of Costa Rica. Hope to see you here someday!
Stay tuned for more farm to table recipes and ideas!
Check out past blog articles on food, fermentation and more:
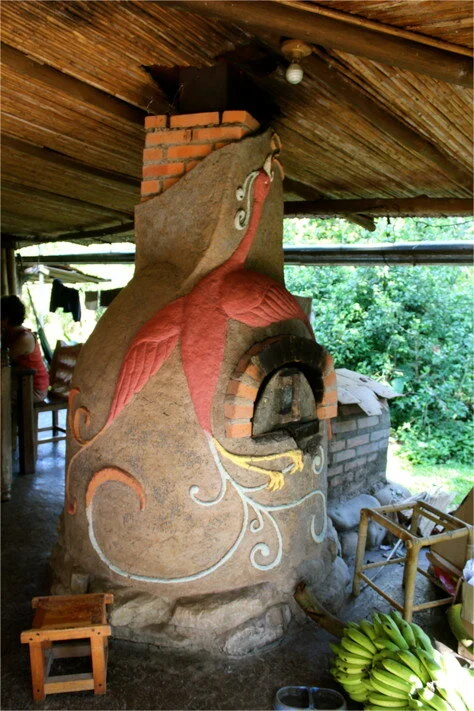
Endeavors to End Propane: Local Fuel Sources and Efficient Cooking Technologies
Cooking food can make it tastier, easier to digest and absorb nutrients, and safer and healthier to eat. Cooking at the Ranch happens multiple times a day, and on some days, pretty continuously throughout the day. We generally have a lot of hungry bellies to fill! Over the decades we have been steadily reducing our use of propane to meet our cooking needs.

Self-made rocket stove at the Ranch
By Tim O’Hara
Ranch Core Team Member
Endeavors to End Propane: Local Fuel Sources and Efficient Cooking Technologies
Cooking food can make it tastier, easier to digest and absorb nutrients, and safer and healthier to eat. Cooking at the Ranch happens multiple times a day, and on some days, pretty continuously throughout the day. We generally have a lot of hungry bellies to fill! Over the decades we have been steadily reducing our use of propane to meet our cooking needs. Propane is a refined product that comes from crude oil or natural gas. The negative environmental impact from its extraction and refinement on communities and the earth are well documented. We have lessened our dependency on this imported product (Costa Rica has few crude oil resources and a moratorium on oil drilling) through the production and use of our own biogas, the utilization of solar cookers, dehydrators, and hay boxes and perhaps most importantly by incorporating efficient wood burning stove technology into our culinary domain.

Our woodshed
Wood is renewable and abundant in and around Mastatal. That’s not to say that wood can’t and isn’t managed poorly in many parts of the world where it is used for cooking. For us, fortunately, we have a plentitude of this resource in a country that does a commendable job of taking care of its timber resources. We have almost limitless supplies of firewood coming from our woodshed, local small-scale bandsaw mills that operate in the region, and our own agroforestry systems.

Common open cook stove
According to the World Health Organization, approximately 3 billion people worldwide still cook using solid fuels such as wood and dung in open fires and on inefficient stoves. Poorly designed stoves and age-old cooking practices can produce high levels of small soot particles and other pollutants that penetrate deep into our lungs. Exposure is particularly high among women who cook indoors and their children resulting in 3.8 million premature deaths a year from pulmonary illnesses. The extensive use of wood for cooking can also contribute severely to deforestation and its associated devastating social and environmental impacts. It can also consume precious and considerable time to gather and haul.
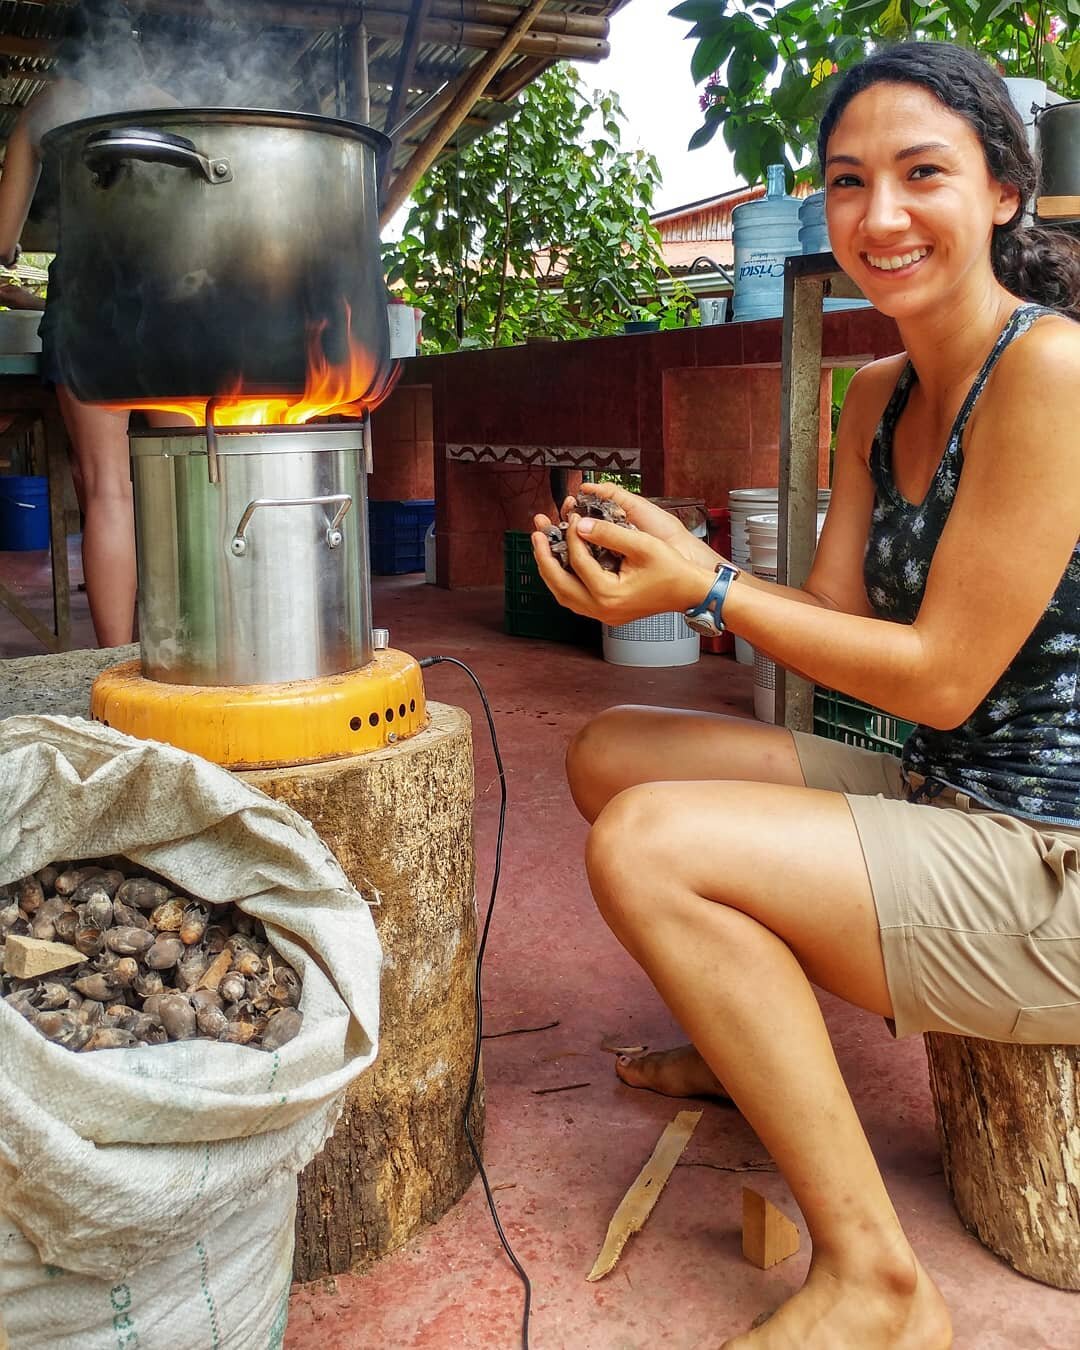
ACE One in action!
These worrisome facts have led us to build and invest in efficient wood burning technologies and food production methods that allow us to sustainably and safely use this local resource to cook with. Our alternative cooking workhorses are our 5 rocket stoves; 3 purchased ACE Ones, and two adobe/cob stoves designed and built in-house. These stoves produce little to no smoke based on a design that features an air intake or fan that produces extreme heat in the combustion chamber that ignites and “burns away” any smoke that is produced. This can be referred to as “complete combustion” and reduces or eliminates soot from the cooking process. The ACE One stoves use small pieces of wood whereas the home-built versions use slightly larger pieces of wood. These efficient stoves burn smaller quantities of wood and produce less or no smoke while retaining the many benefits of cooking with this local and accessible resource.

One of Ranch’s agroforestry systems
When possible, efficient rocket stoves can be coupled with a well-managed agroforestry system that through the extensive planting and pruning of nitrogen-fixing and food producing trees can yield a steady supply of accessible firewood and the food that will be cooked on the rocket stoves. This is yet another example of the closed-loop systems that we oftentimes strive for on our farm.

Adobe rocket stove being built at Ranch
Rocket stoves can be small or large, take many shapes, and can be made from a wide variety of materials. What’s common to all of them is the their ability to efficiently produce extremely hot combustion chambers. To improve performance, your rocket stove chamber can be insulated and your burning surface sized and designed to effectively support your favorite cooking pot. You can even buy rocket stoves for camping these days though if you’re a do-it-yourselfer or on a tight budget, we’d encourage you to design and build your own. There are plans all over the internet.

Our cob oven
In addition to our repertoire of rocket stoves, we have a self-built cob oven that we use for pizza parties and other baking endeavors, 3 Wonderbags, a solar and electric dehydrator and of course our magical biogas stove. We’ll tell you more about these in a future article but in the meantime I’d encourage those that love simple solutions to check out the wonders of the Wonderbag and see how you can help transform a family’s life in Africa while saving a considerable amount of cooking fuel.
Let us know if you have any questions and come and check out are array of alternative cooking technologies if you find yourself in our neighborhood. We love to share our experiences and hope that this has found you well well.

Simple rocket stove being built in community of Mastatal

Bamboo Shoots
Bamboo is of huge economic value and is not only used in the building industry, but it can be used also for eating (more on this later!), as a cooking device, burnt for charcoal, woven into a fabric, made into paper, used as a musical instruments, and much more!!
By Nic, Core Team member
Bamboo
Bamboo is a wonderfully sustainable building material due to the speed in which it grows and its weight to strength ratio (stronger than steel for its weight!!). Bamboo is of huge economic value and is not only used in the building industry, but it can be used also for eating (more on this later!), as a cooking device, burnt for charcoal, woven into a fabric, made into paper, used as a musical instruments, and much more!! At the Ranch we use it for many of these things; the most noteworthy being our use of it in our natural buildings (read here about how to treat your bamboo). We have 6 structures that are built almost entirely from Bamboo including a nursery, a meeting room, our classroom and the popular guest structure the Hooch. We have also used it as firewood and to make biochar and we have several bamboo instruments. Today however we are going to talk about the latest way we have learnt to use bamboo and that is in our farm to table world!

A clump of bamboo on our farm
Bamboo as Food
Humans have a long history of eating bamboo, but we are not the only animals that love eating bamboo. The Giant Panda loves eating the young bamboo shoots as well as the leaves and stems, along with a number of other animals including the bamboo lemurs of Madagascar and mountain gorillas in central Africa. Chimpanzees have also been seen drinking fermented bamboo sap which has turned alcoholic. It will not be a surprise then to hear that Yes! we can eat bamboo too, in fact its delicious and during the beginning of the wet season it is an abundant source of food.
At Rancho Mastatal we have some of the most revered species of bamboo for eating and for building. The species that we have that are known for providing tasty bamboo shoots are Dendrocalymus asper, Gigantochloa sp. and Bitcheeyana sp.

These are just 2 week old bamboo shoots!
Farm to Table Bamboo Shoots
Bamboo shoots contain a cyanogenic glycoside that produces cyanide in the gut. This is not good for you as you might know, cyanide is very poisonous, so we have to be careful to process our bamboo shoots carefully in order to make them edible. As it turns out this is relatively simple! Just boiling the bamboo for around 10 minutes removes that compound and can also remove any bitterness that can be present in the shoot. We found that adding ample salt and some sugar to the water before boiling makes them instantly a delicious crunchy snack! We have also lacto-fermented them (make a very pungent ferment!), pickled them in vinegar, and just boiled them and added them to dishes. But before you get to eat the bamboo shoots you have to know when to harvest them and how to prepare them.
Harvesting bamboo shoots

Peeled bamboo shoot
Generally speaking you want to harvest them as young as possible as they can become bitter if they are too old. As you may know bamboo grows incredibly quickly, so you will need to keep an eye on your clumps as a daily practice. As the rains start here in Costa Rica around April/May (on the pacific side) we found that initiated the growth of the new shoots. There is a delay though between the start of the rains and the shooting of the bamboo and this will vary be species and by the year. So its safe to say that once it starts to rain you need to start checking your clumps regularly. We found that this year the Guadua started shooting first (not a good bamboo to eat) and Dendrocalymus was the last one to start shooting in late June/July. Ideally you will want to harvest the bamboo shoot when it is around ~10-15” (~25-35cm) tall. Cut it at an angle as low as you can. This will then shed water and is less likely to lead to disease entering the plant. Generally speaking from a well-managed clump you should be harvesting about 33% of the new shoots. Take them from the places where they are not as ideally situated ie. Close to another shoot, with a blocked path etc… To learn more about how to manage you bamboo, join us for our bamboo management workshop.
Processing Bamboo Shoots
Take the bamboo shoot back to the kitchen and cut it lengthwise in half. You should be able to get your thumb and then your hands between the outer layers and the inner solid part and pry off the sheathing. This will leave you with a rather alien looking shoot. At this point it’s a good idea to chop it into strips several inches wide and then slice across the strips into thin pieces. The thinner the pieces the more bitterness is removed by cooking. At this stage you have the option to lacto-ferment the bamboo in a 2-3% by weight salt brine. This produces a very pungent ferment that smells very reminiscent of canned bamboo shoots from the grocery store. By lacto fermenting the shoots you also remove the cyanogenic glycoside and you gain the nutritional value of a raw bamboo and the probiotic qualities of the ferment.
By cooking these thin pieces of bamboo in a salty and slightly sweet brine we were able to produce a delicious treat with a great crunch, the flavor is not too dissimilar to Heart of Palm, although there was a large spectrum of views on what it tasted like. Everyone agreed that it was a delicate flavor that had an excellent texture.

Cut lengthwise
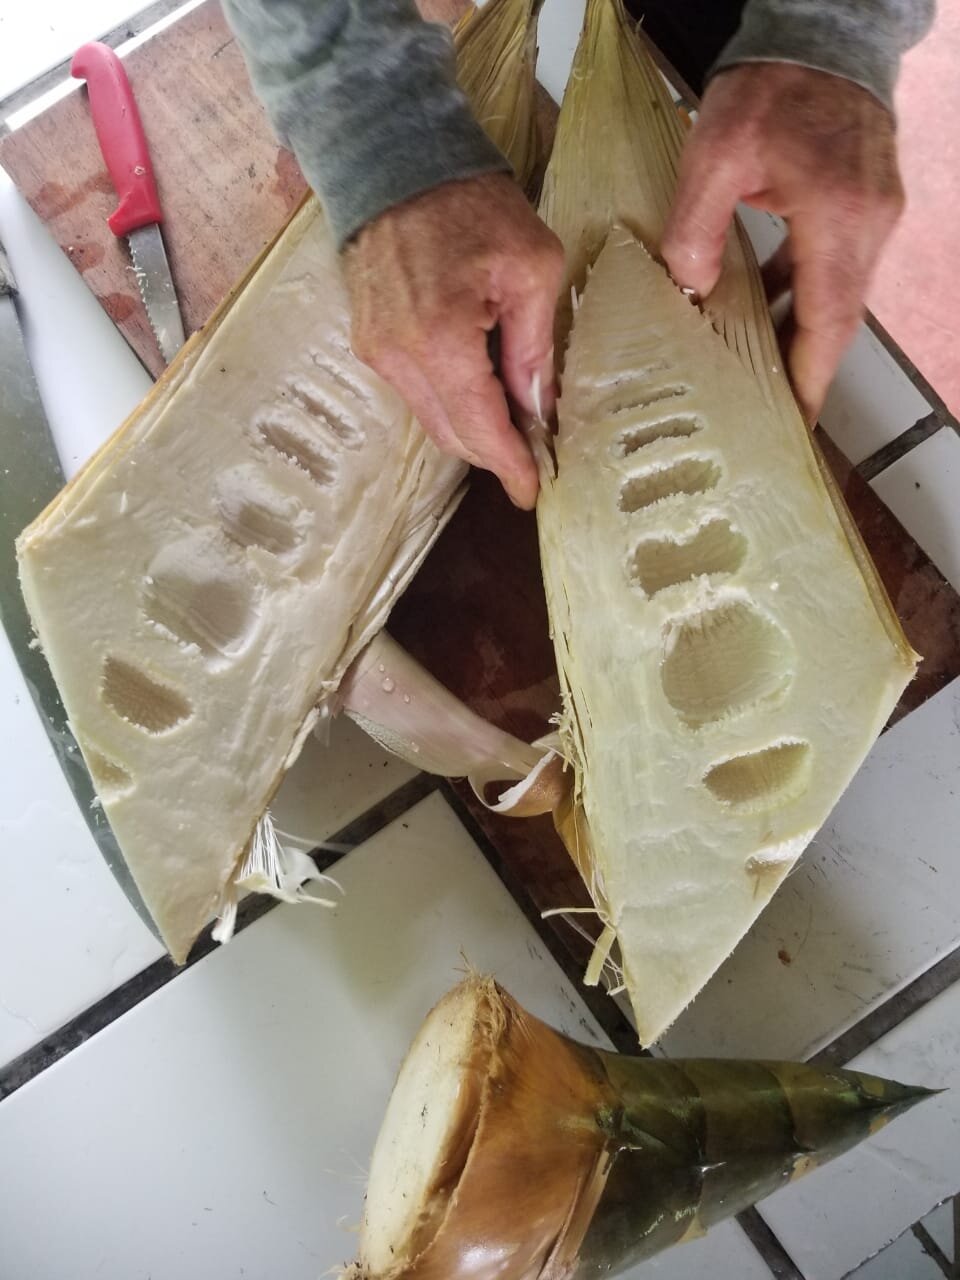
Then using your thumbs peel off outer layers
Bamboo Tea
The upper parts of the shoot that will have been left attached to the sheathing when you pried it out makes a very nice and refreshing tea. By taking a paring knife you can remove any of the soft parts still attached to the sheathing and dry them in the sun (or a dehydrator). This can then be added to hot water and left to steep.

Fresh bamboo shoot
Want to Learn More About Bamboo?
Join us for one or both of our upcoming bamboo related workshops!
Bamboo Management April 6 - 9, 2021
Bamboo Construction April 12 - 17, 2021
Stay tuned and up to date on what’s happening around here by subscribing to our monthly blog and visiting our website.
Check out our past blog article on Bamboo Treatment

Bamboo Treatment
Bamboo is a wonderful fast growing grass, it comes in all shapes and sizes and has an incredibly diverse list of uses from many cultures all around the world. Bamboo is incredibly fast growing and can grow up-to a meter a day and achieves 80% of its height in the first 2months of its life! This ability to grow quickly and produce a huge variety of usable products has got many a permaculturists and green living enthusiasts excited by its potential.
By Nic, Core Team member

What is Bamboo
Bamboo is a wonderful fast growing grass, it comes in all shapes and sizes and has an incredibly diverse list of uses from many cultures around the world. Bamboo is incredibly fast growing and can grow up-to a meter a day and achieves 80% of its height in the first 2months of its life! This ability to grow quickly and produce a huge variety of usable products has got many a permaculturists and green living enthusiasts excited by its potential. Generally speaking bamboo falls into two categories, running or clumping (although there are some that are in between). Running bamboo has the capacity to become very weedy and hard to manage if allowed to get out of control, we spent many years pulling out random culms that appeared throughout the Ranch’s front garden from the “living fence” that had been inherited upon the purchase of the property. This battle against the running bamboo Phyllostachys sp. was not an uncommon story as many people around the world can probably attest to, but was a great reminder of the will to live that bamboo species have!
In the early years of purchasing the Ranch property, Tim and Robin sought advice from well-known bamboo builder and furniture maker Brian Erikson. They purchased several varieties of giant clumping bamboos, which we are now learning about how to manage. 20 years later these bamboo have grown to full maturity and tower above some of our orchard spaces and buildings! As the clump matures the culms get successively larger in diameter until they reach their maturation diameter. This varies from species to species, but one bamboo known as Dendrocalymus asper is massive! Each culm measuring 8” in diameter with a wall about 2” thick and approximately 30m tall, this is quite the impressive bamboo. Not only is it incredibly impressive it is incredibly intimidating to harvest!
Problems With Bamboo
Since the very beginning we have used bamboo as a building material. We had always purchased this bamboo and over time have become quite disillusioned by the varying quality of the purchased product, despite paying premium prices for the bamboo (each 6m culm at 4” diameter costs around $30 plus transportation). Not long after buildings were completed we were finding that a significant proportion of the culms were suffering from insect damage (a sign of improper curing and drying) and replacing these pieces, which were now inside of a building, was incredibly challenging and a lot of work.
The other major problem that we were facing was that typically when bamboo is treated correctly it is using an acid or a salt of Boron. Boron is a natural mineral that at approximately 10% solution is toxic to fungus and insects. Boron is an essential element for plant development and by diluting the solution down it is actually used as an organic fertilizer. Boron therefore gained a reputation of being an excellent, organic and safe treatment solution for bamboo and is the most widely used treatment for bamboo around the world. Unfortunately one of the problems of using an acid or a salt (boric acid or borax, disodium octoborate etc….) is that it is corrosive to steel and in order to attach roofing and even to combine pieces of bamboo, steel is often one of the fastening materials used (yes there are others but steel is the most practical and commonly used). We were finding that over time even galvanized steel was corroding and becoming dangerously damaged.
These two major problems had us move to using timber more and more and limiting our use of bamboo to non structural/permanent uses such as harvesting poles, temporary structures, propping posts, trellis etc… We got deep into Timber Framing and structural bamboo became a thing of the past.
Bamboo at Rancho Mastatal

Henry setting up a scaffolding system in our bamboo
We continued to treat our own bamboo for wattle and daub walls through this period and the potential of bamboo continued to intrigue us but just seemed beyond our reach. As our stands of bamboo grew older and more daunting to manage we decided to hire in an expert to help us manage our bamboo. We found Henry Glen, a bamboo expert living in Costa Rica at Finca Bamboo in the south of the country and he was willing to come and help train us in the proper management and treatment of bamboo. With Henry’s help we have been able to (mostly!) get our bamboo under control after years of neglect and we have begun to treat our own bamboo using his very simple modified boucherie technique that I will outline below. He also sells a bamboo treatment solution called “Bam Blue” that is based on boron and copper sulphate (another organic chemical used to treat mold and insects) and also has a penetrant and anticorrosive properties. In one go Henry has solved our bamboo problems and we are now well on our way to building with bamboo again.
Please contact Henry directly through Finca Bamboo to purchase his treatment solution or enquire about his consultation services. He comes highly recommended by Rancho Mastatal.
Modified Boucherie System
Things you will need:
2” high pressure water PVC tube (schedule 40)
2” ball valve
2” Elbow
Fernco couplings
¼” NPT Tap and drill bit
¼” NPT Threaded Male compressor part
Roll of Teflon



Process:
Cut one piece of 60cm 2” PVC and one piece of 15cm.
Glue your elbow to one end of the 60cm piece and the 2” ball valve on the other end. The valve handle should face opposite the direction of the elbow.
Glue the 15cm piece on the other side of the elbow.
Drill your 2” ball valve through the section that is glued to the 60cm piece of PVC and use the tap to create the threads in the hole.
Wrap your threaded male compressor piece with Teflon and screw into the PVC until tight.
One the end of the short section after the elbow attach the Fernco coupling.
Replace the Fernco pipe clamp with the stainless steel pipe clamp by constant Breeze. You can tighten these to 92 in/lb.




This is your basic modified boucherie set up, from here you will attach the bamboo to the Fernco coupling, fill the solution into the PVC pipe by opening the valve, close the valve and connect the compressor. Its important to keep the pressure low, around 12 PSI otherwise you will blowout the coupling. As you force the solution through the bamboo you will see the water from the bamboo coming out the other end. Soon you will begin to the see the Bam Blue begin to come out and when the full concentration is coming out the other end you can stop it running. Now you have a treated piece of Bamboo, this needs to dry vertically and can then be stored horizontally.

A piece of bamboo hooked up to the boucherie

A treated piece of bamboo
WANT TO LEARN MORE ABOUT BAMBOO?
Read our other blog about Bamboo Shoots
Stay tuned for our annual workshops that cover topics in natural building, permaculture, fermentation, and more!

10 Things You Didn't Know About the Banana
They are funny looking, absolutely delicious and have so many gifts – here’s why everyone should go bananas for the banana.
By Moanna, Apprentice 2020
They are funny looking, absolutely delicious and have so many gifts – here’s some interesting facts about the banana.
The banana with the permaculture lens on is an element that serves many more than just 10 things. Especially with the diversity of varieties that is grown here at Rancho Mastatal in Costa Rica, with 13 different types of both edible and ornamental bananas in our agroforestry systems. We are always looking at how to work with nature, and in case you already knew all of these amazing things about the banana, this blog shares how the banana can be used as a perennial staple and an easy farm to table crop.
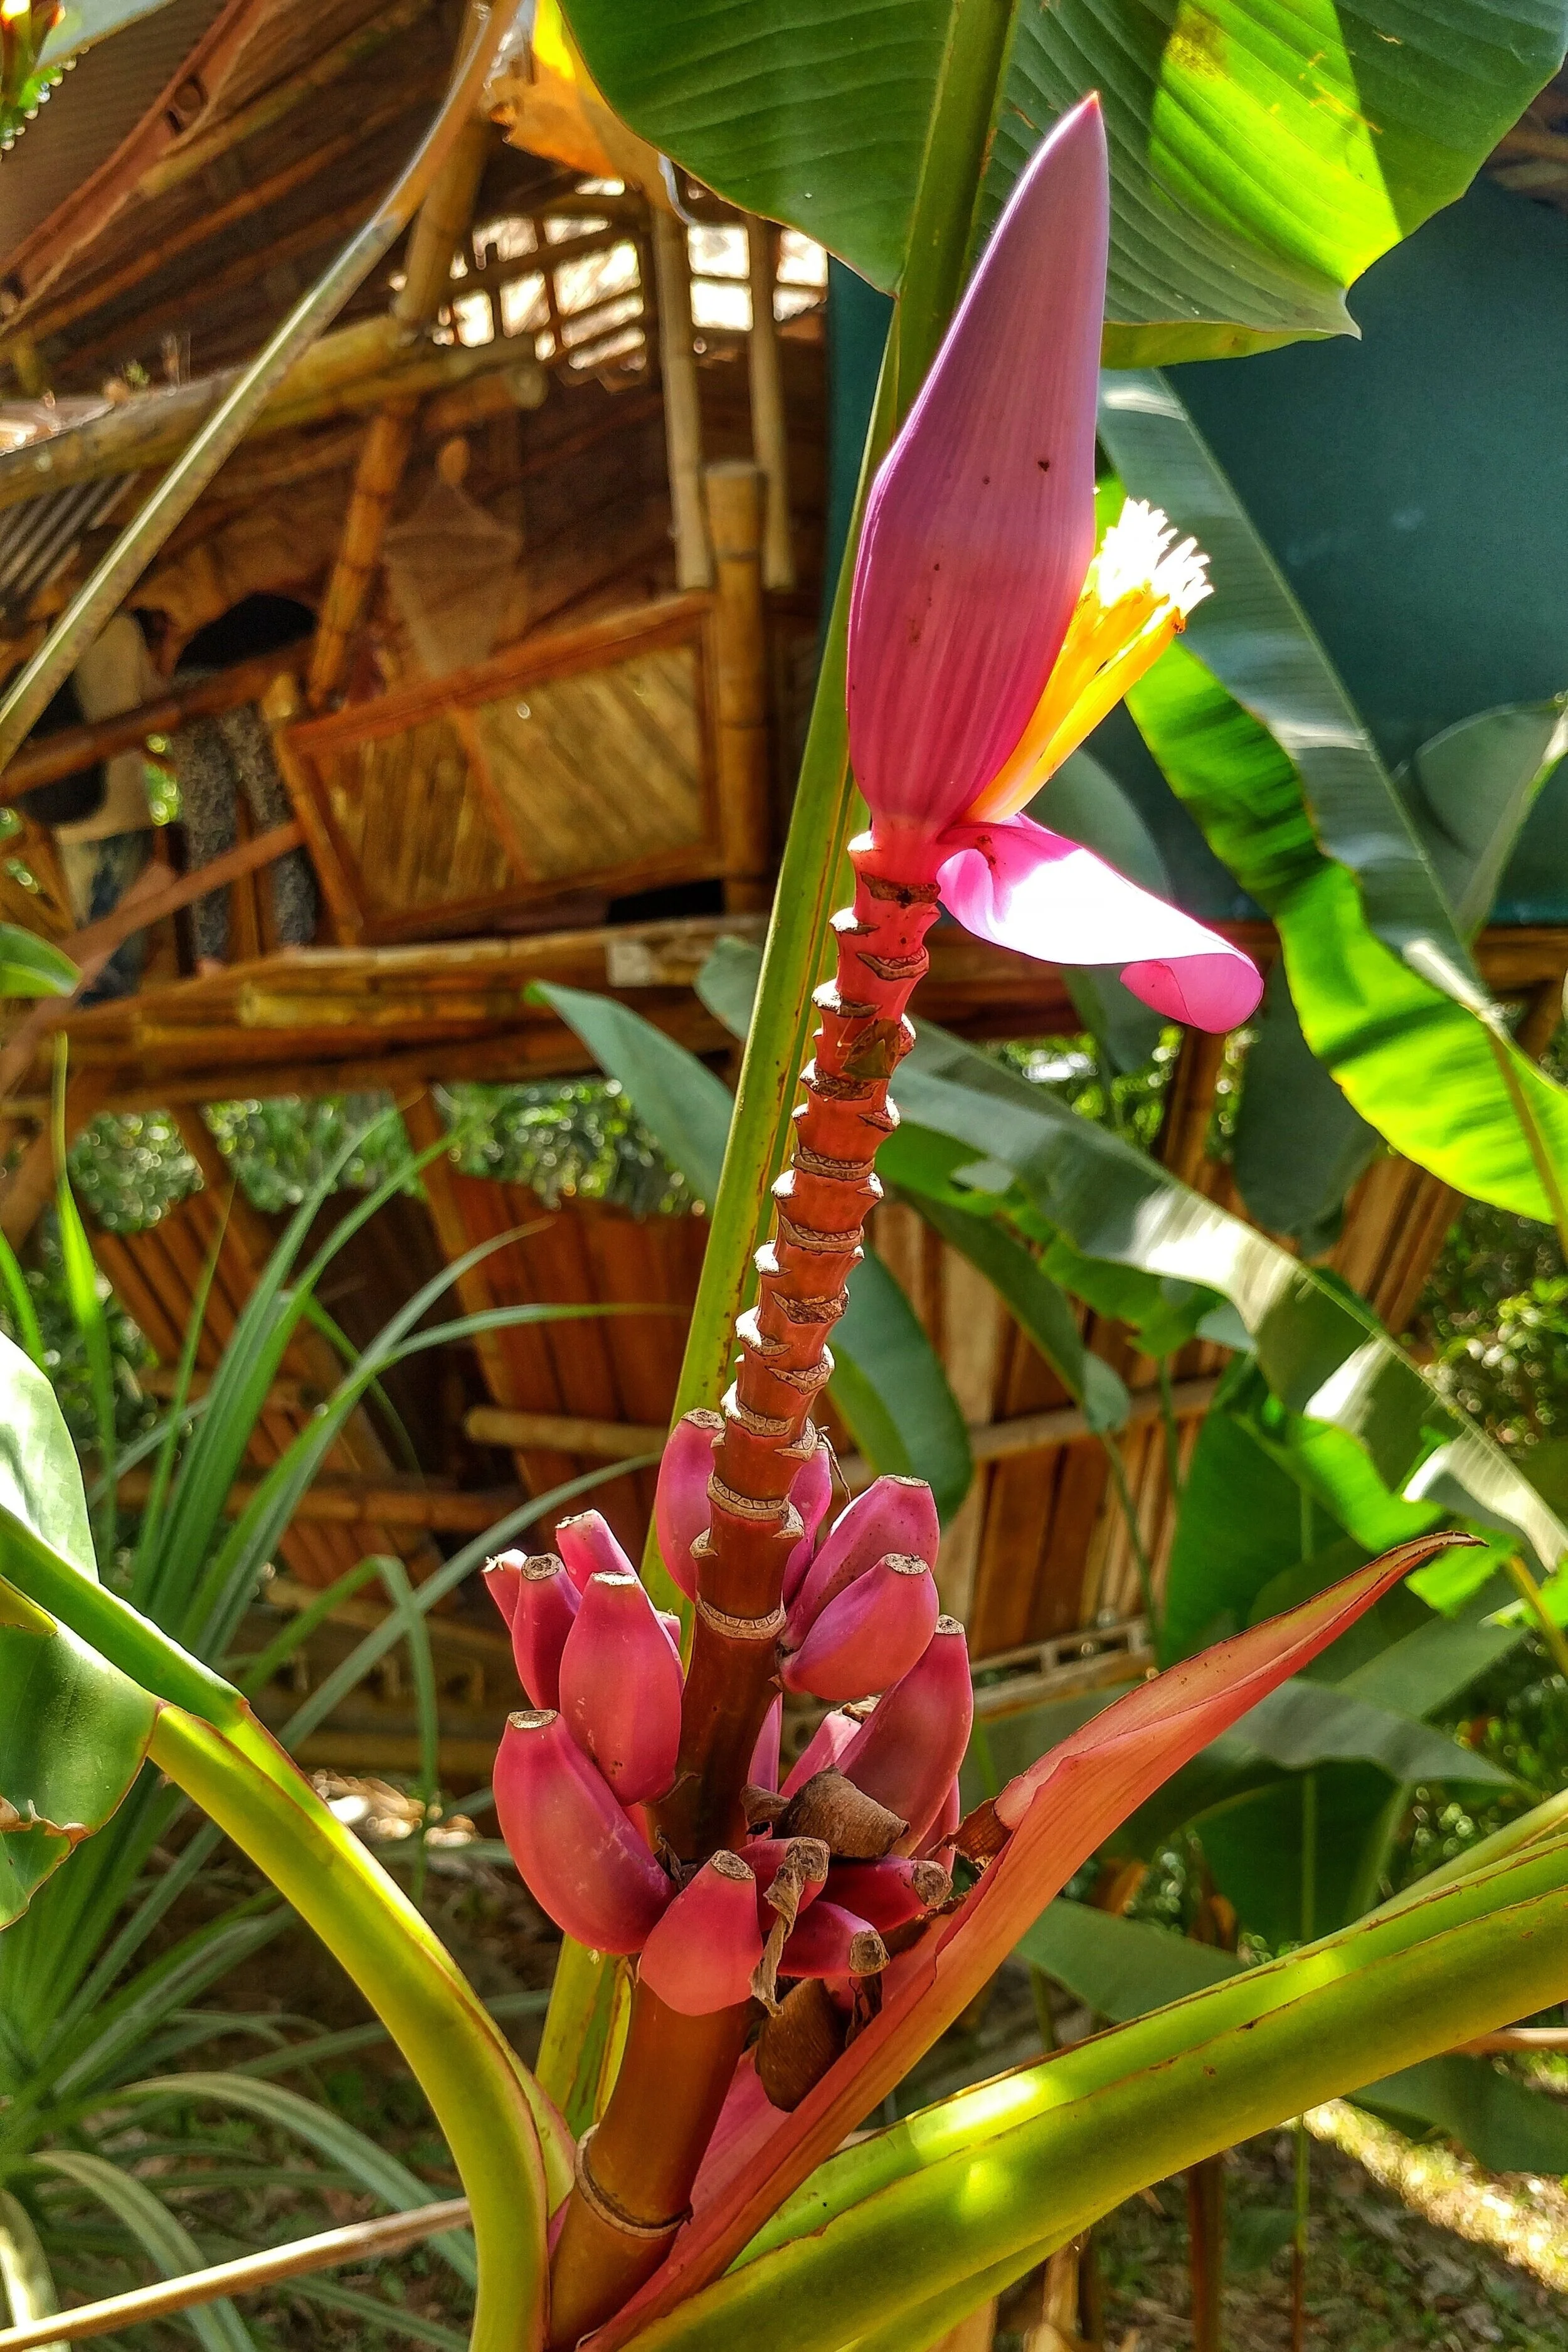
A pink ornamental banana in front of our guest, bamboo cabin, the Hooch
10 Amazing facts about Bananas
1) Bananas can be black, red and blue!
Red and blue, long and thin, fat and short, round or softly squared, there are more than 300 varieties of the Banana, which is in the Musa family. The classic yellow banana found in supermarkets is called the Cavendish, after a British dude who found a way to grow them in greenhouses in England, making it possible for Iceland to be one of the biggest exporters of bananas. Mostly people who leave Rancho Mastatal and who live outside of the tropics, stop eating bananas because the supermarket ones (grown in monocultures far away or in greenhouses) are just not worth eating anymore.

They can be very tiny too!
2) Bananas are not a tree, but a very big herb!
Bananas are such a majestic fruit, but they do not grow on trees as they have no woody trunk or bough. The “trunk” of the banana is rather a leafstalk, as it is a dense clump of leaves ready to curl out.
3) You can eat the flower.
Like so many wonders of the world, it is both beautiful and edible! Here at the Ranch we have cooked it into a picadillo: chopped fine and cooked down with a bit of oil, salt and farm to table pepper. It is delicious. Especially if you’re a lover of the consistency of artichoke or mushroom!
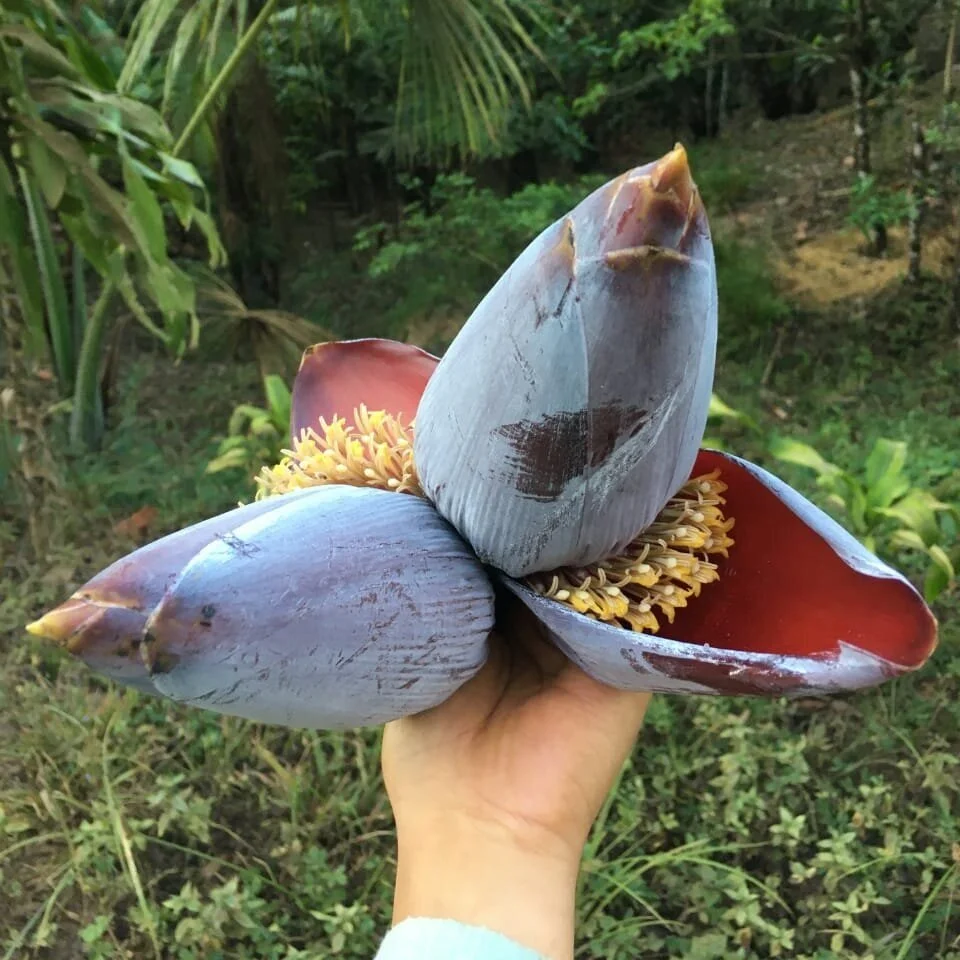
A banana flower
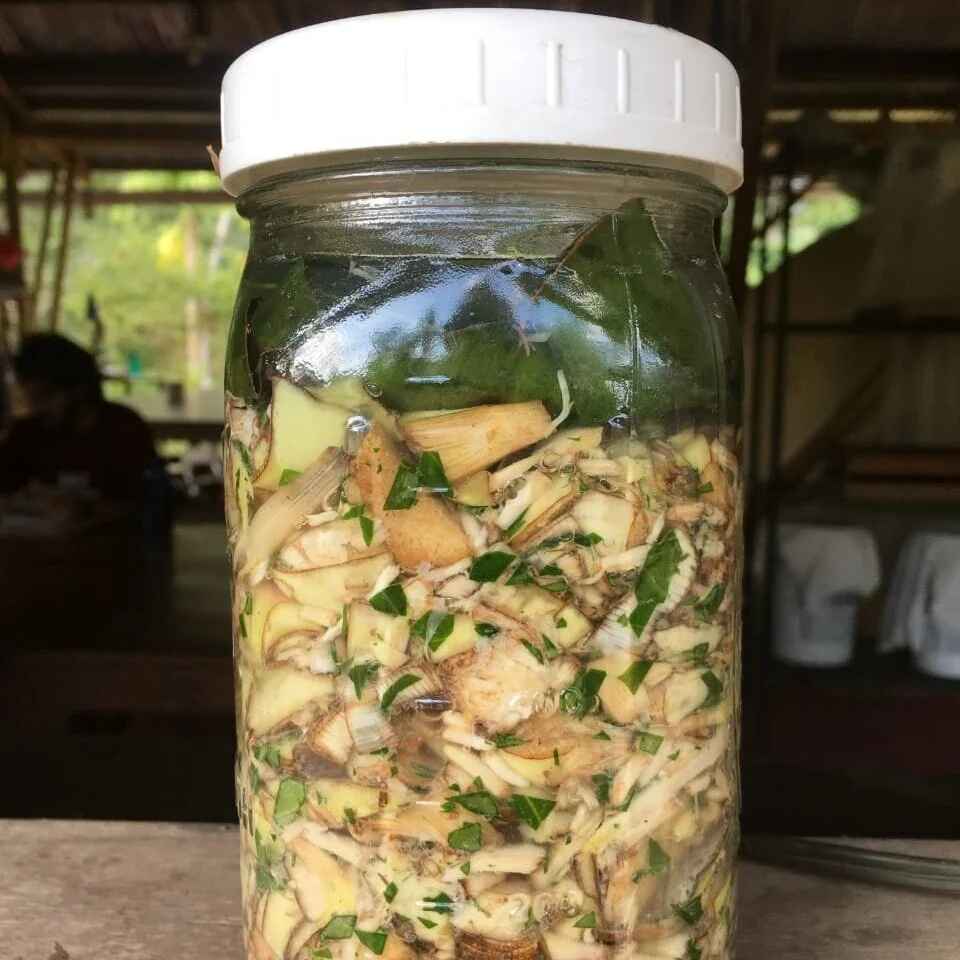
Lacto fermented banana flower
4) The “trunk” can be turned into weaving material.
Peel the skin of the “trunk” from top to bottom, dry the strips in the sun and you’ll have very strong fiber material to make baskets, mats or belts out of. Banana fibers can be woven into an attractive silk like fabric, which in Japan and Indochina are used for clothes and hats. In Tahiti the leaves and “trunk” of the fe’i variety is used as weaving material and turned into thongs, lashings and fans!
5) You can eat the trunk.
If you are actively managing your bananas you probably cut away younger ones in the clump, only keeping the three generations (grandmother, mother and daughter) growing. In south East Asia they eat the young “trunks” as commonly as lettuce! Very thinly sliced, and then soaked in water and vinegar for a while, they add it as a fresh garnish in their soups, or turn it into a salad adding herbs, fish-sauce and toasted peanuts.
6) Green bananas are a perennial staple.
They can be used in cooking like we use the potato, simply boil them in water – the whole thing with its skin – and do as you please! You can also cut them into smaller pieces to add to a delicious stew, blend them with herbs and fry them into fritters, grate them and make a green banana hash, slice them thin and dehydrate to make banana flour. We enjoy all these creative ways to use a local food as a staple in our diets.

Green bananas getting ready to be boiled
7) Banana skin helps reduce itching.
The plant itself flourishes in tropical, hot and damp environments, mostly filled with mosquitoes – fortunately the banana skin eases the itch. I’ve tried it, and it worked!
8) Dirt or ash helps remove its sticky juice.
Harvesting bananas gives off all kinds of juices, especially when you process the green banana and flower. You can clean the machete, knifes or cutting boards by rubbing dirt or ash on it. It may sound crazy but it works.
When harvesting, rub the stem in dirt; when processing/cooking them green, use as much banana leaves/paper to protect table and other material from the juice. But once you have it on a knife or cutting board, it helps to rub any kind of dirt or ash and then wash.
9) Once they are too ripe, you can turn them into wine or vinegar!
You can never have too many bananas. Well maybe you can have too many to eat out of hand, which happens to use often. That’s when we make homemade banana vinegar! The super ripe, falling off the bunch-juicy-black-kinda ripe, means loads of sugar, which is an opportunity for yeast to have a big feast, eating the sugars and making alcohol! Permaculture principle- produce no waste.
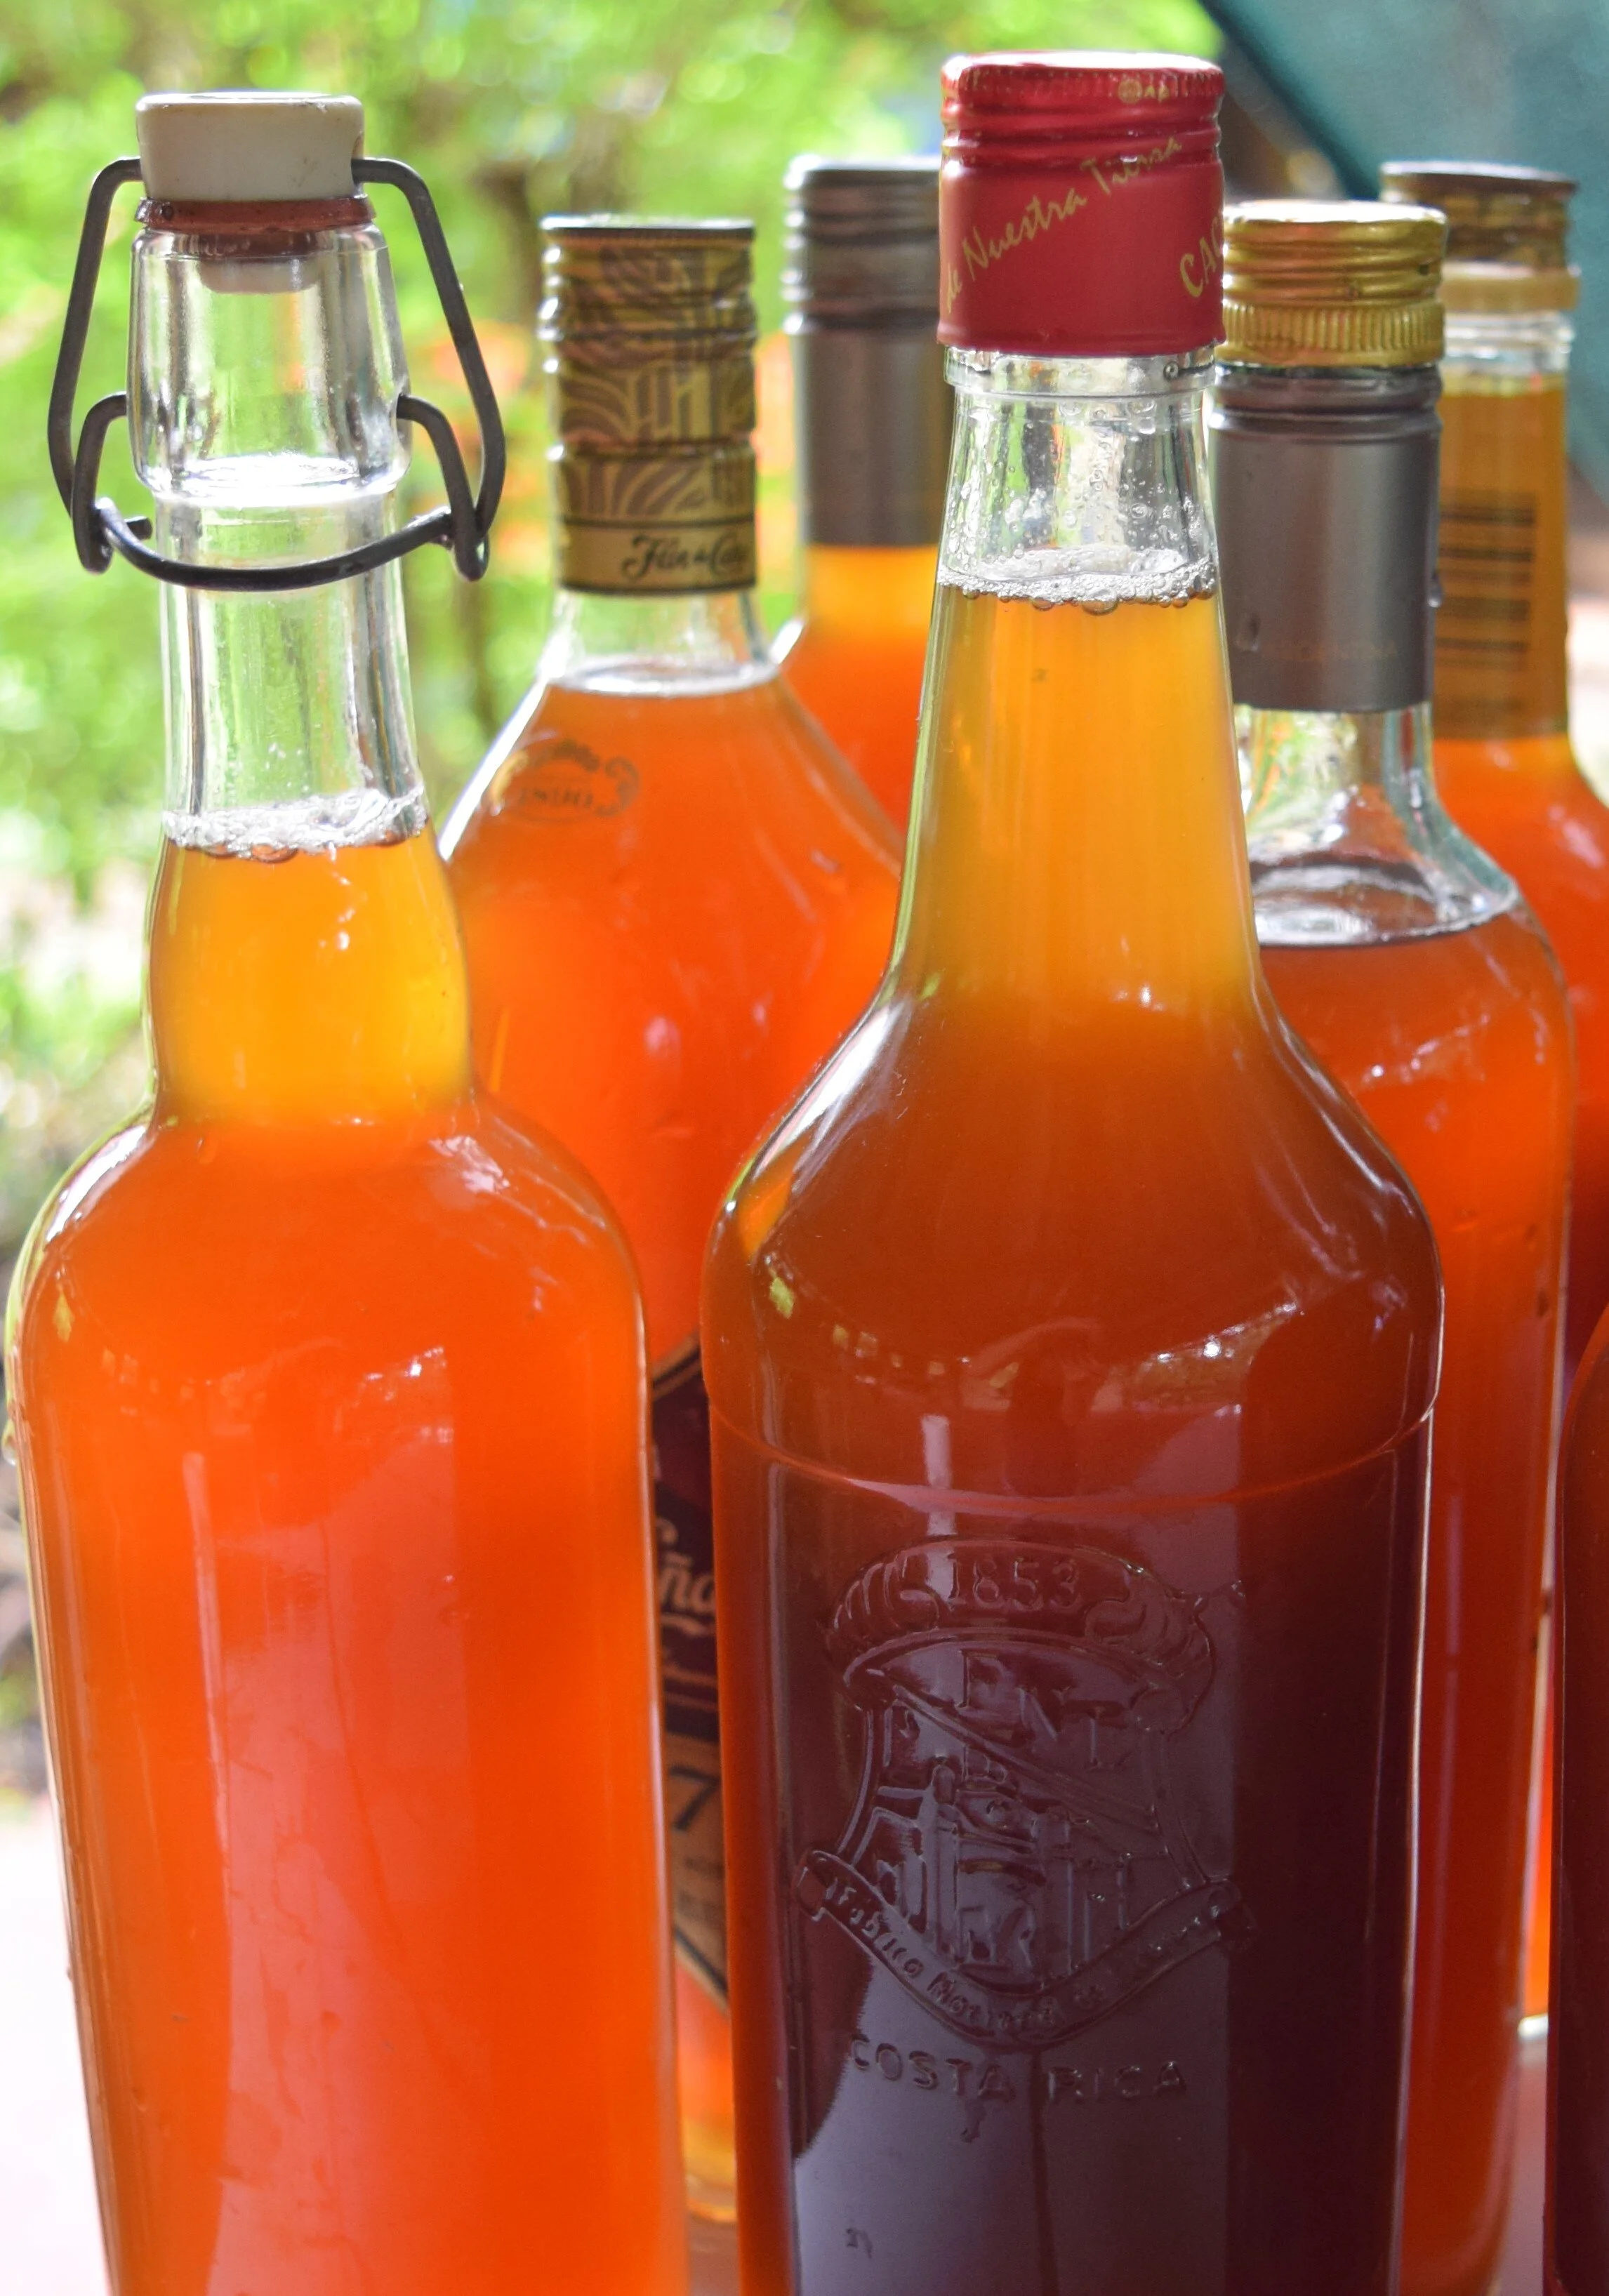
Aging banana vinegar
10) PACKED with potassium that reduces muscle spasms very efficiently.
After one month on the Ranch, where the average daily banana intake is about 3 to 5 bananas, many find that their muscle spasms has completely disappeared. Bananas also contain the neurotransmitters, dopamine and serotonin that lifts up the mood.
Bananas make you strong too!
Do you understand why we’re going bananas over the banana? May the awe and excitement that you felt going through this list make you want to go deeper into the world of bananas. They serve well in the tropical permaculture garden or agroforestry system, provide a variety of uses, and are a nutritious food to be used as a perennial staple.
A bunch of bananas blossoming
Hope you’re as excited about bananas as we are! If you live in the right environment, go plant some, they’re super easy to plant and maintain!
want to learn more?
Join us for our upcoming Permaculture Design Course or Agroforestry Skills Course to learn about bananas and more! Learn more about all our upcoming educational workshops on our website here.
Check out these past blogs that are also about the banana

Just KIS Me: A Neighboring Project focused on Plants and Indigenous Culture
About eight years ago, Kealy and Ivannia were talking about how they wanted to continue to be strong, badass women. They wanted to support one another and thrive, and step outside the stereotypical woman’s role that is often seen in the Mastatal community. Kealy was once again visiting for a few months from the States and was leaving in a few days so plans needed to happen soon!
Just KIS Me: A Neighboring Project focused on Plants and Indigenous Culture
By Kealy Rudersdorf
About eight years ago, Kealy and Ivannia were talking about how they wanted to continue to be strong, badass women. They wanted to support one another and thrive, and step outside the stereotypical woman’s role that is often seen in the Mastatal community. Kealy was once again visiting for a few months from the States and was leaving in a few days so plans needed to happen soon!
The previous year, they had decided to go to the river at night to catch shrimp together--the snakes and darkness under the new moon never scared them off. This year, they were going to bushwhack to the top of La Cangreja National Park mountain. If you have gone in recent years, this was before the path was maintained and the hike was truly an adventure in the jungle. They needed a guide, as neither had ever been. Ivannia suggested her cousin, Solin, who was incredible with the machete and always full of jokes. It was bound to be a great day!
That day marked the very beginning of KIS Botanicals, as Solin described different uses of a variety of plants and Solin and Ivannia shared stories about how their family used the different plants they found along the trail. It was an immemorable day, filled with laughter, love, and the sharing of stories - the same energy we strive to bring with us into KIS Botanicals today!

What is KIS Botanicals?
KIS Botanicals is a growing herbal business, up the road from the well-known Rancho Mastatal. We are focused on the preservation of plant knowledge and culture in the Mastatal/Zapaton region of Costa Rica. As Solin and Ivannia say, our ancestors have a beautiful interwoven history with plants from the rainforest; our goal is to awaken and share this history.
In our project, we make a series of plant-based, herbal products (to heal the skin, aide in sleep…), using recipes we learned from our grandparents and community members. We also provide educational programs for locals and tourists through medicine making workshops, medicinal plant tours, and food-as-medicine classes.

PRODUCTS
Our artisanal products are inspired by tried-and-true recipes. All of our plants are hand-harvested and our products are handmade – by us! We have access to nearly 100 different medicinal plants that Solin farms sustainably, using traditional agriculture and permaculture techniques.
We currently have 8 artisanal herbal products that we absolutely love! These include a skin healing salve, a muscle and bruise salve, a sleep aide tincture, a tincture for colds and flus, a cough tincture, a bug repellent, an immune booster tincture, and a bug bite relief roll-on. There are many more products in the works, for example an aphrodisiac spray, an anti-fungal spray, stomach calming tincture, energy clearing spray, anti-anxiety tincture, etc. With so many plants to choose from, it’s hard to know where to start! As our apothecary grows, we will continue to add to our line of products.

When we start to make a new product, first, Solin and Ivannia remember plant uses they’ve witnessed throughout their lives. In addition, we frequently talk to community elders or remember conversations from years past. With these memories and conversations, we make a list of plants. We spend time trialing recipes and researching to make sure our products are stellar. The stories and memories are shared on the back of our products, so you too can share in the story!
Currently, we are selling our products at our wonderful friends and neighboring projects: Rancho Mastatal, Villas Mastatal, La Iguana Chocolate and La Choza del Mundo.

EDUCATIONAL PROGRAMS
We are excited to offer a variety of educational programs. Come, partake in our programs - we can’t wait to learn with you! Here are our current and future offerings:
A Cultural and Medicinal Plant Walking Tour: Come walk leisurely with us while we share with you our local history and culture. We will bring artifacts and stories from our grandparents' lives and describe the uses of many of our medicinal plants. We will provide a tasty and traditional treat or drink!

Medicine Making Workshop: Together, we will enjoy a short leisurely walk to explore medicinal plants. We will share with you an ancestral recipe (or two!). Tradition will be combined with modern herbal techniques. You will leave with an herbal product, made by you!
Food is Medicine – A Traditional Cooking Class: Come to a cooking class, using traditional techniques and foods. Over a wood burning stove, we will share a traditional recipe (or two!), laughs and stories.

In the future, we plan to offer an intensive two-week long course on cultural and medicinal plants. We will offer the opportunity to learn from us and other community members, as well as play and experiment with our farm of medicinal tropical plants. Your teachers will be primary-source voices!
Once we are properly on our feet, we plan to provide classes to the local schools. We will teach students about how their/our ancestors used plants to cook, to clean, and to heal. Students will learn new and old techniques with hands-on lessons and tutorials. We hope that they take these lessons back home with them and share their enthusiasm with their parents and grandparents, calling forth memories and providing inspiration. We are SO excited about providing this service to our community.

Who is KIS Botanicals?
The original KIS Botanical team consists of three people: Ivannia, Solin and Kealy. Ivannia and Solin are cousins and lifelong members of the Mastatal / Zapaton community and grew up learning about the medicinal plants in the area. Ivannia is a wiz in the kitchen. She is the one responsible for processing the plants, making the products, and giving thanks to the plants as we compost them. Solin has been working with plants his entire life, being handed a machete as a 2-year-old. The depth of his plant knowledge, understanding of nature, and love of plants is key to KIS’s success. Kealy has been visiting the Mastatal / Zapaton area for over 11 years, and Solin and Kealy are now married with a baby. Her role in KIS is to research plants, formulate recipes, share her knowledge of making shelf stable herbal products, translate our programs into English, promote KIS with marketing, and give the plants extra love.

Why we started KIS Botanicals?
From the words of Ivannia and Solin: We started KIS because we saw our generation and the following generations pull away from plants and the environment. We witnessed the high schoolers obsessed with their new cell phones and motorcycles, littering the street with their chip wrappers and soda bottles. Our community was changing dramatically. Starting in the late 1980s, houses received electricity, running water, and phones, but also within that same generation, the community received access to the internet, cell phones arrived, and all of a sudden there was almost a motorbike or car per person in town. In most of the United States and Europe, these changes happened over several generations.
We have witnessed a huge disconnect from our ancestors and the understanding of how they lived in harmony with the rainforest. This younger generation has mostly left the area for other opportunities after high school, leaving the community void of a generation. With KIS Botanicals, we hope to show that our ancestor’s way of life continues to have value. We aim to re-awaken our ancestral plant knowledge in the younger generations with our products and educational programs within local schools. We also want to be an example of how to be a successful, locally owned business, making our local economy stronger and more diverse.

How to help us??
We have come a long way from 3 friends bushwhacking to the top of the La Congreja mountain to making KIS Botanicals a reality. To be successful in preserving and sharing our ancestral knowledge, we need your help!! This is what would be most helpful to us:
When you visit Costa Rica, come to the town of Mastatal to buy our products and learn with us by signing up for one of our educational programs.
Help us spread the word. Tell your friends and family about us. If they plan to visit Costa Rica, encourage them to take a workshop or tour with us and check out our products.
DONATE! Keep your eyes peeled. Shortly we will be fund raising to build a Ministry of Health approved processing kitchen. We would greatly appreciate your assistance in reaching this goal!!
Send us love and positive energy.
Like us on Facebook and follow us on Instagram @KISBotanicals
We can be contacted at KISBotanicals@gmail.com.
Thanks for your support! We hope to see you soon.
With love,
Ivannia, Solin and Kealy

Lime Plasters Are In
Lime plastering as a craft form has endured the test of time due to its versatility and the accessibility of limestone as a building material. When produced and applied with care and experience, lime plasters yield an elegant finished product.
By Anthony, Apprentice 2020
Plastering is an ancient tradition in the building trades that continues to hold cultural importance in modern times. Amongst the typical plasters that can be found in the building world include clay, gypsum, portland cement, and the focus of today’s blog, lime. The rich history of the use of lime in the plastering trades can be traced back to all continents. Of particular note are the styles that have emerged from Italy and Morocco, as well as the beautiful examples that are found in Japan and the ancient Mayan temples of Mexico. This craft is experiencing a resurgence through the increased global interest in natural building.

A clay carving with a lime fresco background

Tadelakt (water resistant lime plaster) shower- Read our blog about how to make an earthen/tadelakt shower
Why people love Lime Plasters
Lime plastering as a craft form has endured the test of time due to its versatility and the accessibility of limestone as a building material. When produced and applied with care and experience, lime plasters yield an elegant finished product. Some of the many benefits of using lime include high vapor permeability (‘breathability’), flexibility, autogenous healing, stickiness, and durability. Perhaps of greatest interest is the ‘breathability’ factor, which contributes to drying interior spaces and the general avoidance of condensation inside buildings. Additionally, where other stiffer plasters, such as cement, might fail due to the formation of large cracks, flexible lime plasters have the unique characteristic of self-healing (‘autogenous healing’) with which micro-cracks are naturally filled with ‘free lime’. This contributes greatly to the durability of ancient structures, particularly in seismic zones.
Hawk and trowel
Overview of the Lime Cycle
Understanding the benefits of using lime in our buildings, let’s review the source of these plasters by exploring the lime cycle. Our desired binder begins as calcium carbonate in the form of limestone, coral rocks, or sea shells. This base material is heated to around 900°C (a ‘cherry-red heat’) where it undergoes a chemical change by giving off carbon dioxide gas and forming calcium oxide (quick lime), a highly reactive, dangerous compound. Don’t mess with it. From here, quick lime is hydrated by combining it with water and calcium hydroxide is formed. At this point, our hydrated lime is being prepared for final application by slaking it, that is, to be stored in water. Once we are ready to use this hydrated lime, it is prepared in a mix with aggregate and fiber, according to our desired use of the plaster. Generally, multiple coats are applied with each successive layer receiving a thinner application. The final layer, or our finish coat, can be applied as thin as 1/16th of an inch, or even less.

Lime Plaster Finishes
There are many ways that lime plasters can be applied to create different visual and textural effects. This is where the magic happens. Some of the well-known finishes include frescos, venetian plasters, lime wash paints, and tadelakt. All require a detailed attention to the timing and moisture levels during their application.

Benito Steen stoning our tadelakt shower

Fresco design
Learn Lime Plastering in Natural Building Workshops in Costa Rica
The annual Natural Building Workshop at Rancho Mastatal in Costa Rica is focused on developing simple and elegant wall systems for sustainable homes using readily available natural materials. The course focuses on Natural Building techniques, such as wattle and daub, adobe bricks, cob, earthen floors, and the mixing and application of multiple kinds of plasters, including clay and lime. Workshop attendees have the opportunity to learn from some of the most experienced natural builders in Costa Rica, and to develop their skills in creating elegant lime plaster finishes such as tadelakt, fresco, and venetian plaster. This year’s course was attended by people from more than 10 countries, and was just as diverse in its variety of natural building techniques demonstrated.
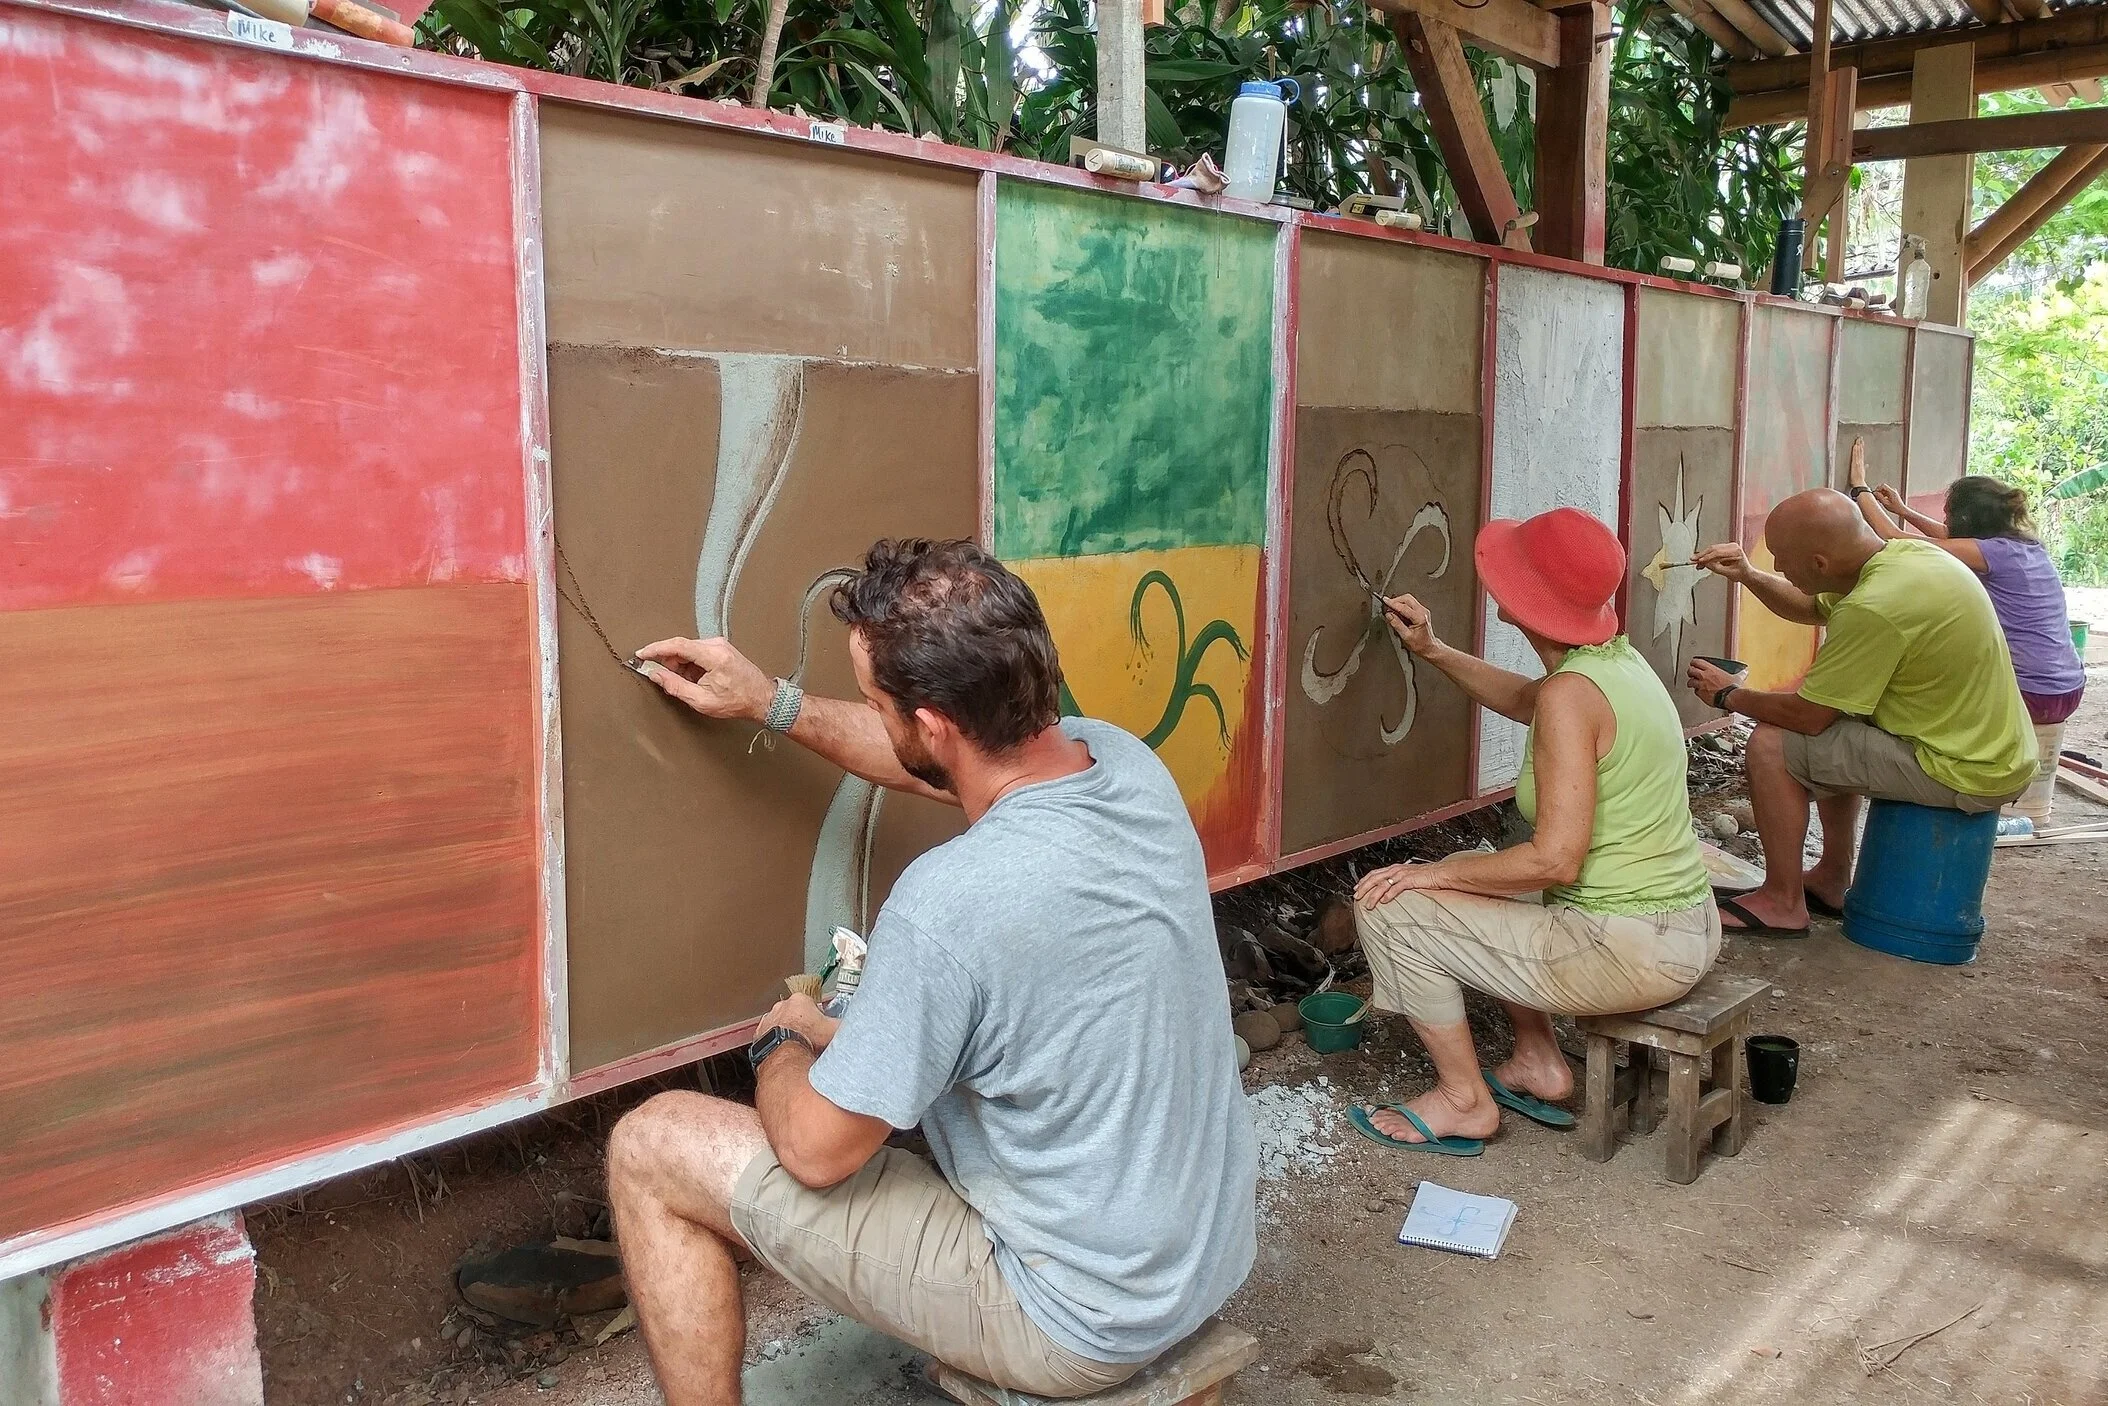
Students practicing different plasters and techniques during our annual workshop

Pigments, fibers, sands, and more
Want to learn more?
Hope you feel inspired to begin learning the ancient art of lime plastering. You can really beautify and add special touches to your home and spaces with a variety of different lime plastering techniques.
If you want some hands on practice and instruction, sign up for our annual Natural Building Workshop.
Also check out Benito Steen’s YouTube channel all about natural building techniques.
Stay tuned for the wide array of upcoming courses conducted at Rancho Mastatal in Costa Rica.
Check out these past blog articles about natural building techniques we practice and teach:
How to Make an Earthen Floor for Your Sustainable Home
Natural Building & Clay Carving: Add Artistic Expression to Your Home

Turn Local Rice & Beans into Fermented Bread
Being in Latin America, rice and beans are a part of almost every meal. They make up a huge portion of many people’s diets across the globe. While I love a good Gallo Pinto, I think flatbreads and breads are better vehicles for my condiment consumption!
By Dani, Apprentice 2020
Why is Food important?
We can’t stress enough how important food is, not just here at Rancho Mastatal but in the lives of every human being. Just in case it isn’t obvious food is a major part of our lives, we need it to survive, and the quality of our food directly impacts our health. We should think about what we put in our bodies, where it came from, how it was processed, and why we are consuming it. Being in Latin America, rice and beans are a part of almost every meal. They make up a huge portion of many people’s diets across the globe. While I love a good Gallo Pinto, I think flatbreads and breads are better vehicles for my condiment consumption! Wheat breads are not the best option here in Costa Rica as wheat is imported and therefore not local, but there is an abundance of rice and beans.

Fresh locally harvested beans
Eating Local Food
The forms rice and beans have taken throughout human history vary in incredible ways. Some amazing transformations of rice and beans into more breadlike things are dosas, dhoklas, and idlis, delicious bread alternatives we can make using local ingredients. Dosas are fried flatbreads that have been eaten for many centuries in southern India. Idlis come from the exact same batter, but they are steamed instead of fried. These are produced with a delightful combination of rice and black beans, while dhoklas are made with rice and chickpeas. But you can also create these dishes using any bean or legume! We have experimented with chickpeas, black beans, cowpeas, pinto beans, and peanuts. Yes, peanuts. Finding local alternatives is a sustainable way to eat the dishes you love wherever you are. Use your local beans and I’m sure they will be delicious!
Fermented Food is Better!
All these breads are fermented and therefore more digestible and higher in nutritional value than the raw grains. To say fermented foods are made by magic would be an insult to all the little microbes doing the work for our healthy guts, but they certainly are magical. Microbial cultures are necessary for our survival, playing key roles in our digestion and immunity. Reflecting on this relationship can bring us closer to our food and in turn our health. Dosas are traditionally a wild fermentation as microbes live everywhere! They live all over you, me, in the air, and on the rice and beans which we’ll use to make our dosas. Dosas are fantastic for eating curries, sauces, or whatever
condiments you like. They’re also great for stuffing with fillings and can be sweet or savory. After making the dosa base recipe, the possibilities are endless! If you enjoy them, thank the microbes.
Dosa Recipe
The following recipes all begin with the dosa base recipe and then are altered in some ways or cooked differently. There are so many things you can do. For example, you can make the dosa base recipe and then make one pan of bread and one pan of brownies. You can make the base recipe and have dosas one day and dosa bread the next. Keep in mind, here at Rancho Mastatal, the minimum number of people eating together is 12, so serving size is for 12 people. If you have a small group and are just making these for one meal, don’t forget to half the recipe. Buen Provecho!

Dosa Bread with a Garden Herb Paste
Step 1 - Dosa Base
Serves: 12 (24-36 dosas depending on size and thickness or 2 pans of dosa bread or brownies)
Ingredients:
3 cups rice
1 ½ cups of beans
1 ½ cups whey OR 2 cups dairy kefir
*You can also just use water here. The dosas will ferment with just the microflora present on them, but the kefir and whey will kick start the fermentation and add other flavors.
*We use leftover whey from our dairy kefir cream cheese recipe.
I have used many different types of beans to make this recipe. Dosas are usually made with black beans or lentils and dhokla with chick peas, but they work well with, cow peas, black beans, red beans, peanuts, and probably many other types. Experiment!
Fermentation times always vary based on climate. Here in the tropics, things ferment much quicker than in say a temperate climate.
Method:
Rinse rice thoroughly until water is clear.
Soak rice and beans for 12-24 hours making sure they are covered in at least a couple inches of water.
Drain off water, as much as you can, and grind in hand grinder, food processor, or blender. I have found the electric corona grinder we have here at the Ranch works best. It will be a kind of pasty consistency that sticks together when you pinch it. Some legumes or beans are bittier than others. Chickpeas and lentils will have a smoother consistency than say black beans, but small bits are fine. I recommend soaking them for longer for a smoother batter.
Add this to whey, dairy kefir, or simply water until the consistency is like a thick pancake batter. It is better not to make it too thin, as you can thin it out to your liking and for your purposes after the ferment.
Put batter in a bowl and cover with a cloth. Be sure to leave plenty of space for the dough to expand. Make sure the cloth is well secured so no bugs can get it. Those little guys love fermented stuff just as much as us.
Let sit out for 12-24 hours. This really depends on your climate and how fermented you want it to be.
When it is ready, you can do a number of things. Continue on this path to live our your dosa making dreams or go on to make dosa bread or brownies.
Dosas
Serves: 12 (24-36 dosas depending on size and thickness)
Note: This recipe stems from the dosa base recipe (above) so follow that recipe first.
Ingredients:
dosa base
water for consistency
spices of your choice
salt to taste
lard for cooking (or another fat source) *If you want to know why we use lard read this
Method:
For thin and crispy dosas, add water until it is a pourable batter. (You can also add more dairy kefir here if you prefer that flavor.)
Time to spice this mix up! Add whatever you fancy at this point.
I like to add a pinch of salt, fresh culantro, finely chopped, crushed garlic, and some cumin. Always toast your dry spices before adding them. Some other great options are parsley, ginger, cilantro and thyme.
Once your mix is ready, get a skillet hot with a bit of lard, butter, or cooking oil of your choice. Test one dosa to make sure it is the consistency you want. Cook until bubbles start to form and it browns a bit and flip. If it is too thick, you can add more water to the batter.
Variation, more ferments in the ferment:
We love fermented stuff, so why not add more of it! Add some super fermented cabbage kimichi. Also works well with shredded papaya kimichi. For this variation, it is best to have a slightly thicker batter so it holds together. You can mix the kimchi directly into the batter or put on top while frying.
Idlis
Serves: 12
Note: This recipe stems from the dosa base recipe (above) so follow that recipe first.
Ingredients:
dosa base
water for consistency
salt to taste
Method:
Add water until it’s a pourable batter, but it should not be too thin. Pourable, but not too easy to pour.
Add salt to taste.
Once your mix is ready, it’s time to steam your idlis. There are specific idlis steamers made for doing this, but there is no reason to go out and buy a one purpose item unless you fall in love and plan to make these cute little breads on the reg, and hey, I wouldn’t blame ya. You can also rig something up using pots on the stove. Or, take a cupcake pan, grease lightly, and pour idlis batter into each section. Be sure to leave room for dough to expand. Put some water in a hotel pan. Place the cupcake pan in the water, and steam in the oven for about 20 minutes.
Dosa Bread
Oh yes, bread.
Serves: 12 (2 loaves or about 24 pieces)
Notes: Using 9 inch round cake pans, this makes 2 loaves. Following the recipe for the dosa base, you should have exactly enough. If you only want one loaf, half the dosa recipe when making the batter. I usually divide the ingredients in half before starting and make 2 batches in separate bowls. Play with the spices. There are so many different things you can do with this bread!
Ingredients:
6 cups dosa base
2 eggs
2 teaspoons baking powder
2 teaspoons salt
½ cup tapa dulce syrup (or other sweetener) *If using another sweetener, like dry sugar, you may want to add more liquid to the mix.)
1 tablespoon coriander ground
1 tablespoon cumin ground
1 tablespoon turmeric ground
4 tablespoon lard (or other fat source)
Method:
Toast coriander, cumin, and turmeric in about 4 T of hot oil until it’s fragrant.
Combine with other ingredients in a bowl or split between two bowls. At this point, you may want to add some water to the batter. It should be the consistency of a thick pancake batter.
Pour into greased bread pans or round cake pans.
Steam until set, about 15-20 minutes.
Cool.
*One way to steam this is using a round cake pan in a pot on the stove. Another way, if you are using a bread pan is to heat a deep hotel pan with ½” of water in the oven, put the bread inside the pan and bake.
Dosa Brownies
Yes, you can turn these into an epic fermented dessert.
***For this recipe, I love to use peanuts as my legume in the base. It makes for some incredibly tasty peanut brownies.
Serves: 12 (2 loaves or about 24 pieces)
Notes: Using 9 inch round cake pans, this makes 2 loaves. Following the recipe for the dosa base, you should have exactly enough. If you only want one loaf, half the dosa recipe when making the batter. I usually divide the ingredients in half before starting and make 2 batches in separate bowls. Play with the spices. There are so many different things you can do with this bread!
Ingredients:
6 cups dosa base
2 eggs
2 teaspoons baking powder
2 teaspoons salt
1 cup tapa dulce syrup (or other sweetener) *If using another sweetener, like dry sugar, you may want to add more liquid to the mix.
4 tablespoons lard (or other fat source)
Method:
Combine ingredients in a bowl or split between two bowls. At this point, you may want to add some water to the batter. It should be the consistency of a thick pancake batter.
Pour into greased bread pans or round cake pans.
Steam until set, about 15-20 minutes.
Cool.
*One way to steam this is using a round cake pan in a pot on the stove. Another way, if you are using a bread pan is to heat a deep hotel pan with ½” of water in the oven, put the bread inside the pan and bake.
There ya have it, 4 ways to turn rice and beans into a fermented bread! Enjoy!
Further Reading
Wild Fermentation by Sandor Katz
The Art of Fermentation by Sandor Katz
Miso, Tempeh, Natto, & Other Tasty Ferments – A Step by Step Guide to Fermenting Grains and Beans by Kirsten K. Shockey and Christopher Shockey
On Food and Cooking – The Science and Lore of the Kitchen by Harold McGee
Make sure to check out our other food related, farm to table blogs!
Buen Provecho!

Dosa corn bread
Categories
Topics
- Agriculture 6
- Agroforestry 21
- Animals 2
- Apprenticeship 19
- Appropriate Technology 6
- Backpacking 1
- Bananas 1
- Basic Pantry 4
- Biochar 1
- Books 3
- Build Your Own Home 1
- Central America 5
- Chiles 1
- Cinnamon 1
- Clay Carving 1
- Climate 2
- Climate Change 1
- Cob oven 1
- Communication 5
- Community 24
- Compost 2
- Composting Toilets 2
- Condiments 1
- Conservation 2
- Cooking 4
- Costa Rica 18
- Design 10
- Earthen Construction 10
- Eat Local 2
- Ecohome 1
- Education 9
- Environment 3
- Ethics 4
- Farm to Table 12
- Fasting 1
- Fermentation 14
- Food 22
- Food Choices 8
- Food Forest 8
- Food Processing 15
- Food Systems 12
- Gap Year 1
- Gardening 5
- Ginger Beer 1
- Harvest 2
- Health 12
- Healthy living 5
- Homemade 2
- Homestead 8
- Internet 2