

BLOG
Stories, articles, and updates from the Ranch community.
Building an Adobe Shower with Tadelakt Plaster
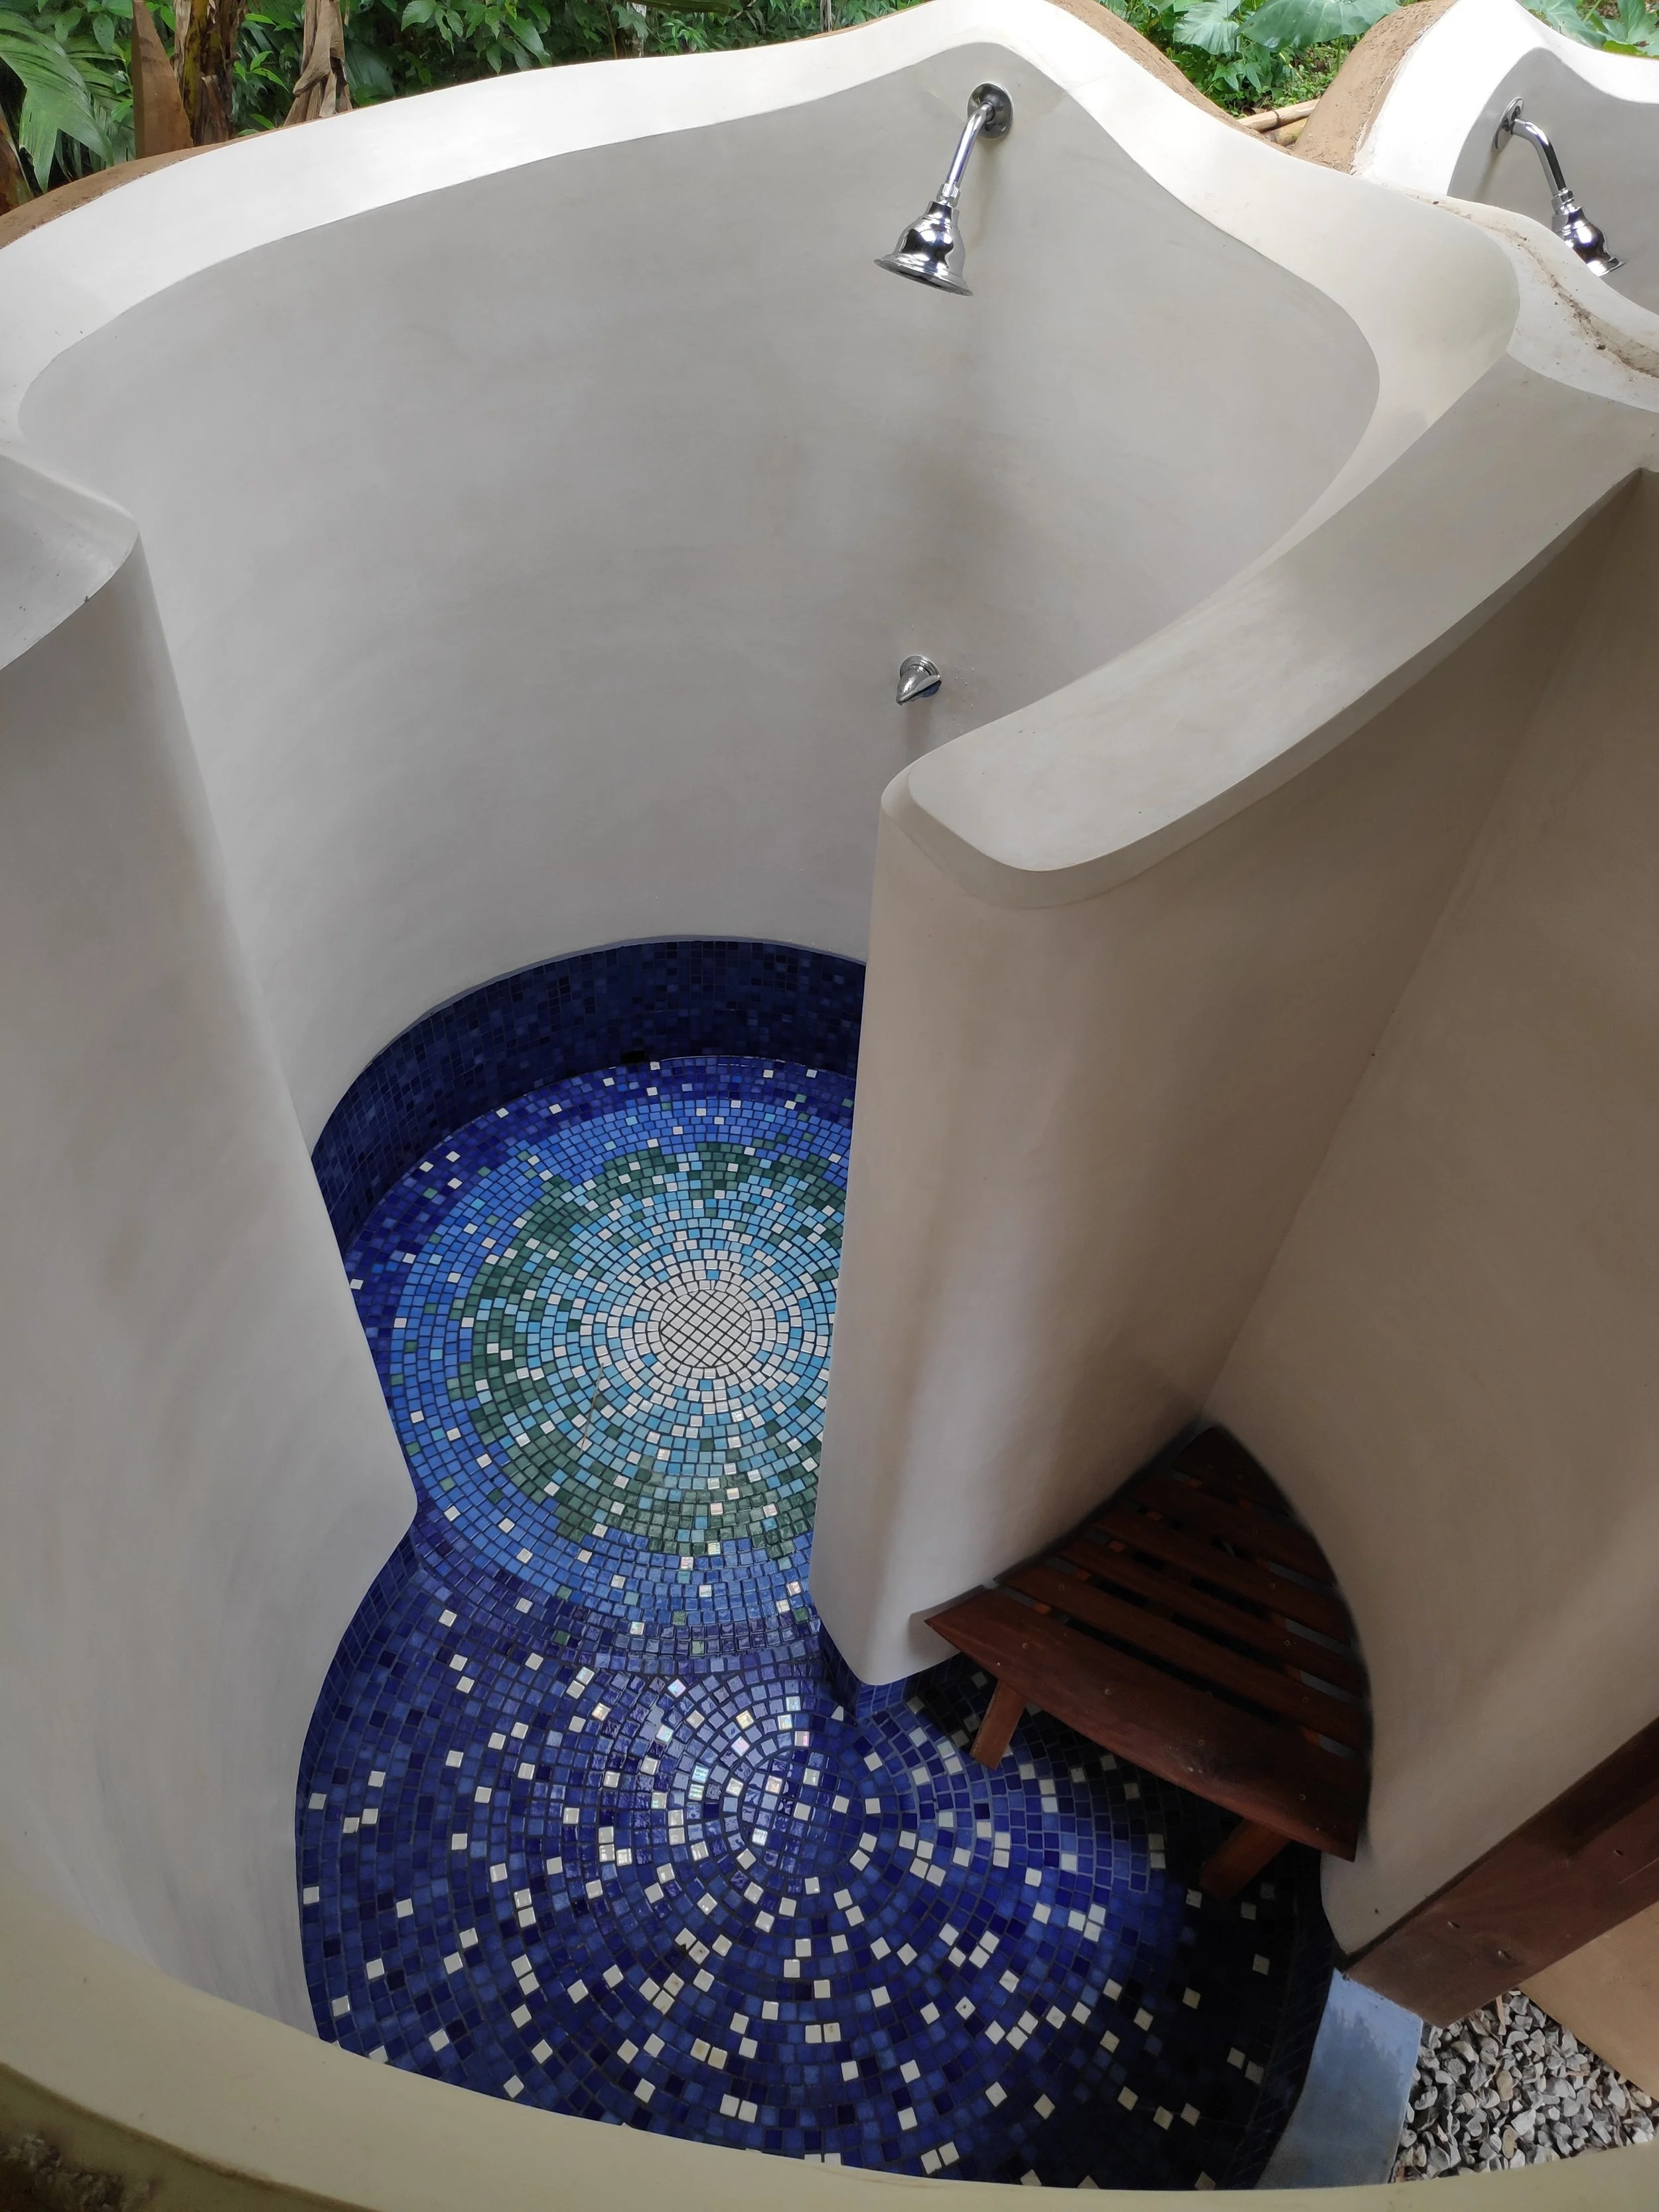
We recently completed our adobe shower and thought we would share with everybody how and in what order it was executed. The building blocks of the design were Adobes that we made with our 2018 apprentices and student groups that visited us through the year
By core team members Nic & Ali
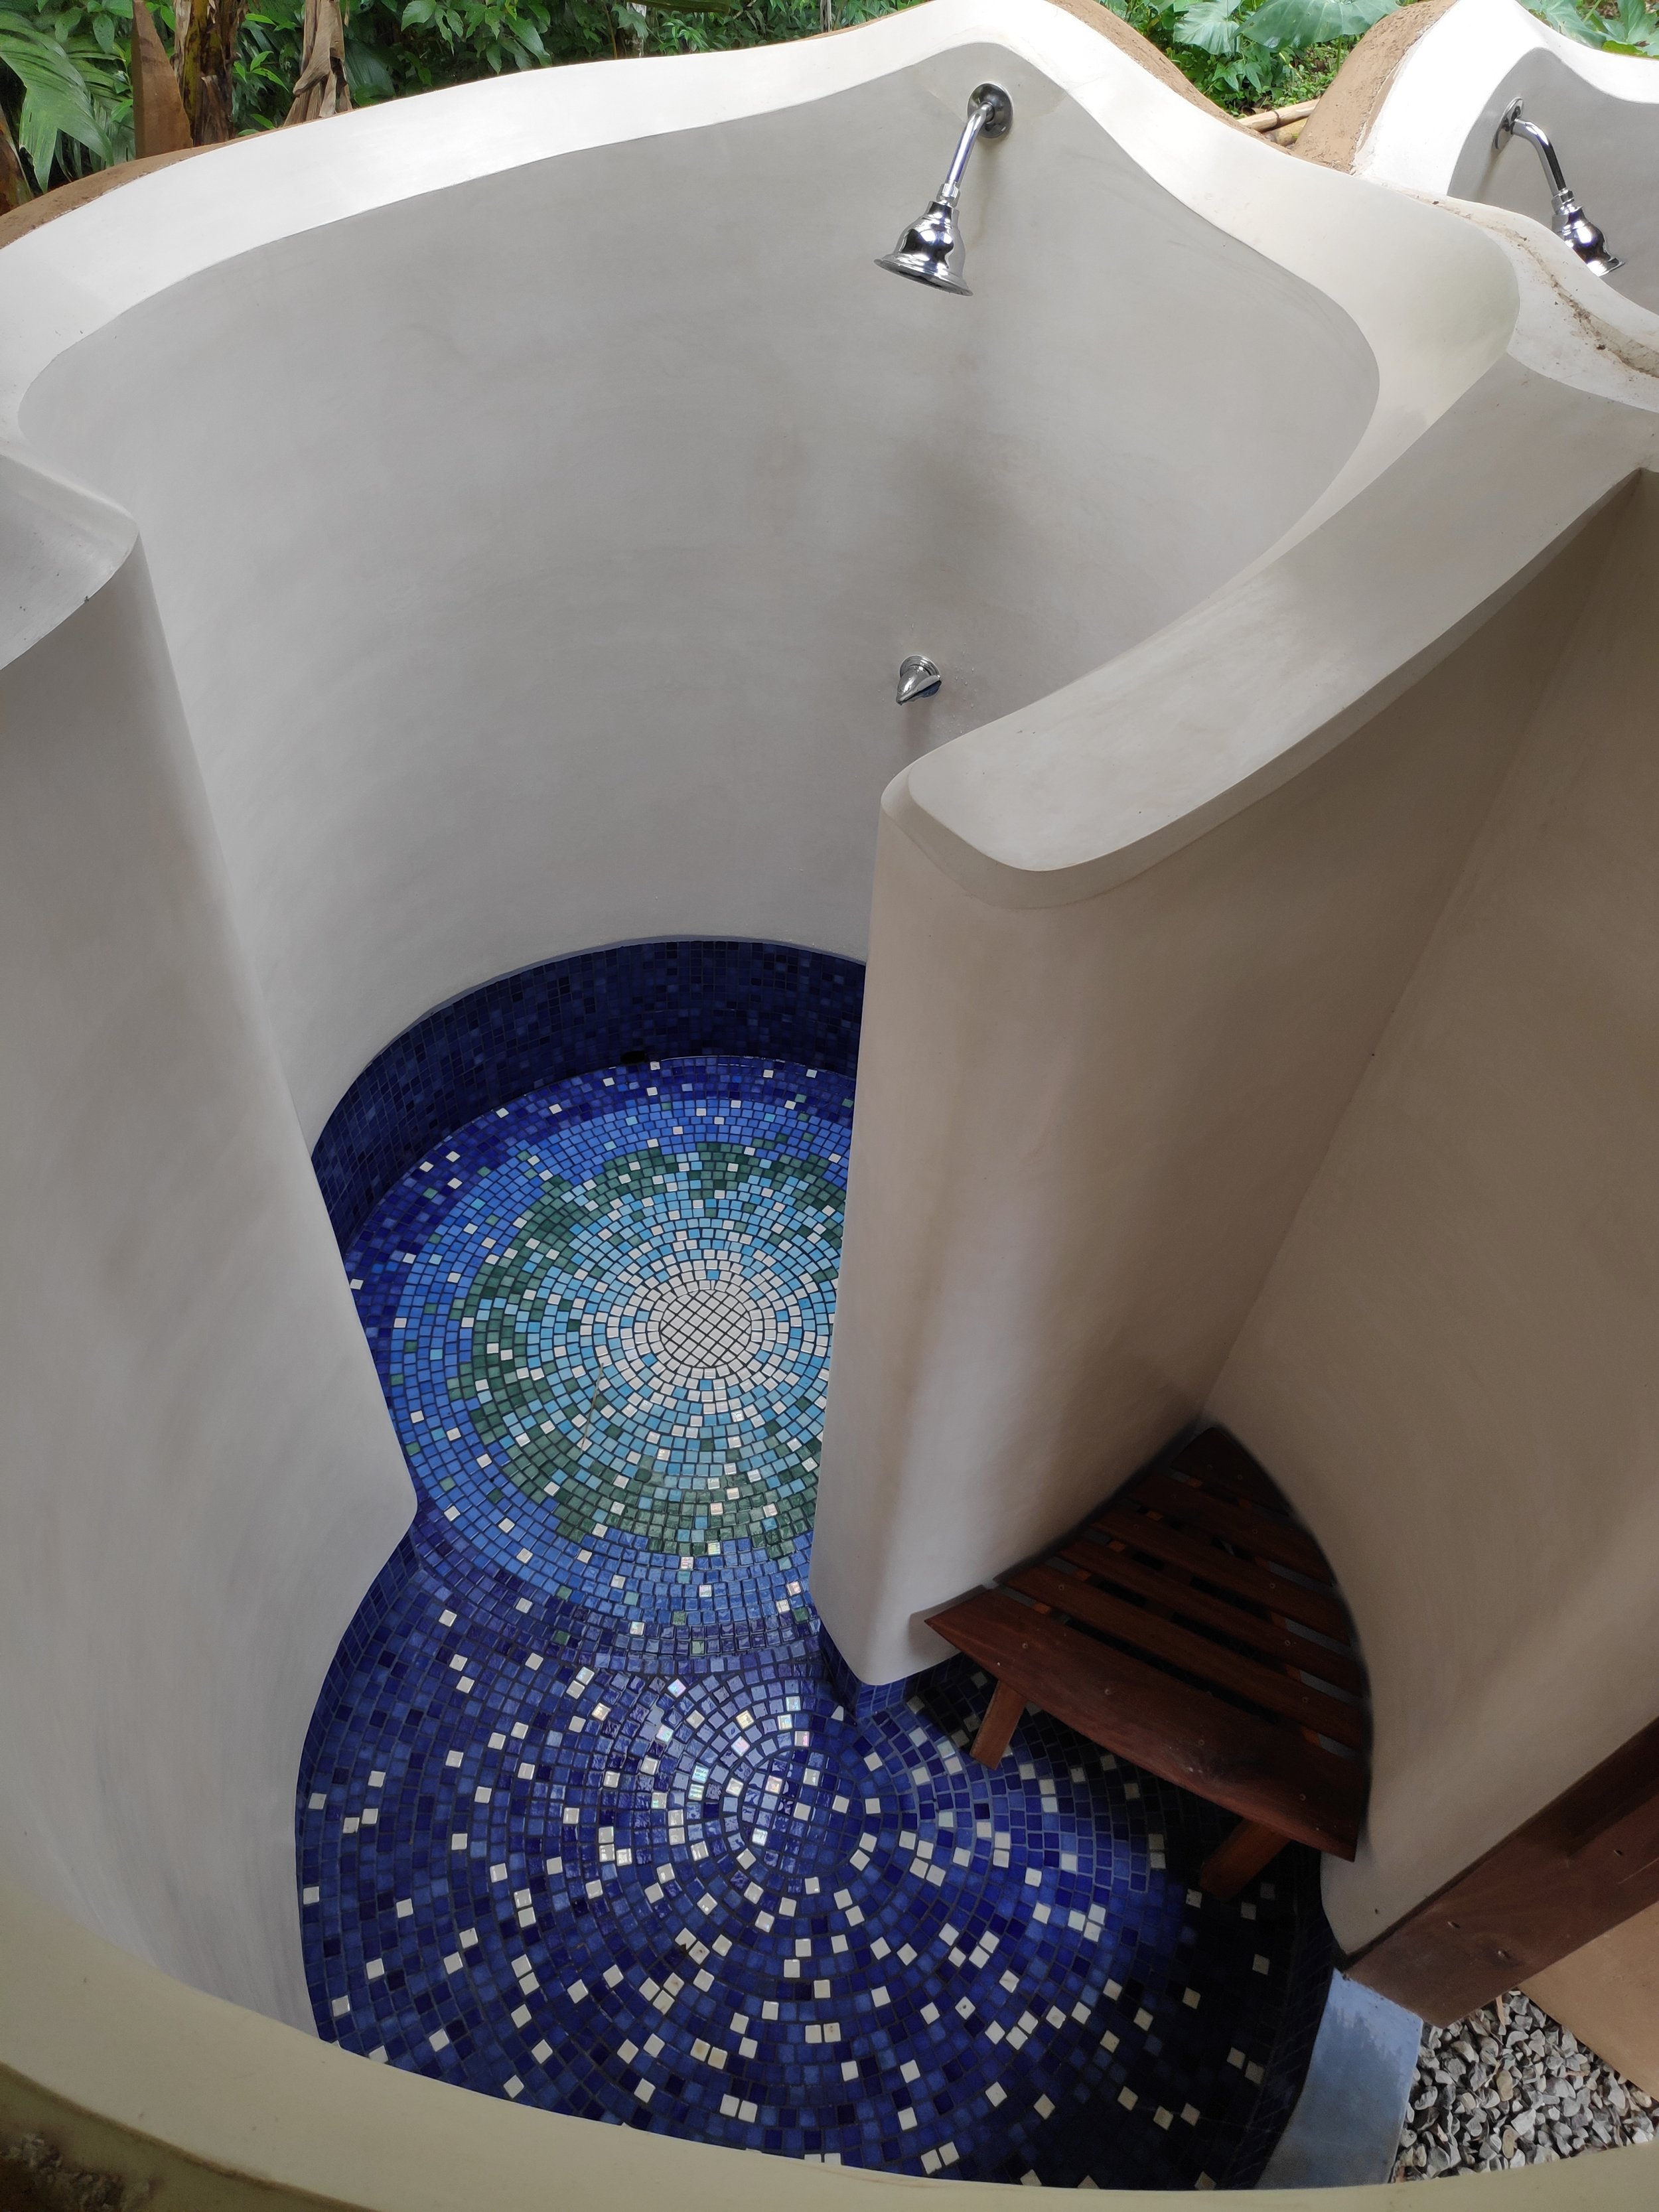
We recently completed another adobe shower and thought we would share with everybody how and in what order it was executed. The building blocks of the design were adobes that we made with our 2018 apprentices and student groups that visited us through the year. In total we used around 500 adobe bricks at 5” x 5” x 10”.
What is an Adobe brick?
An adobe brick is mixture of sand, straw and clay, formed in a mold and sun dried.
How to make an Adobe brick
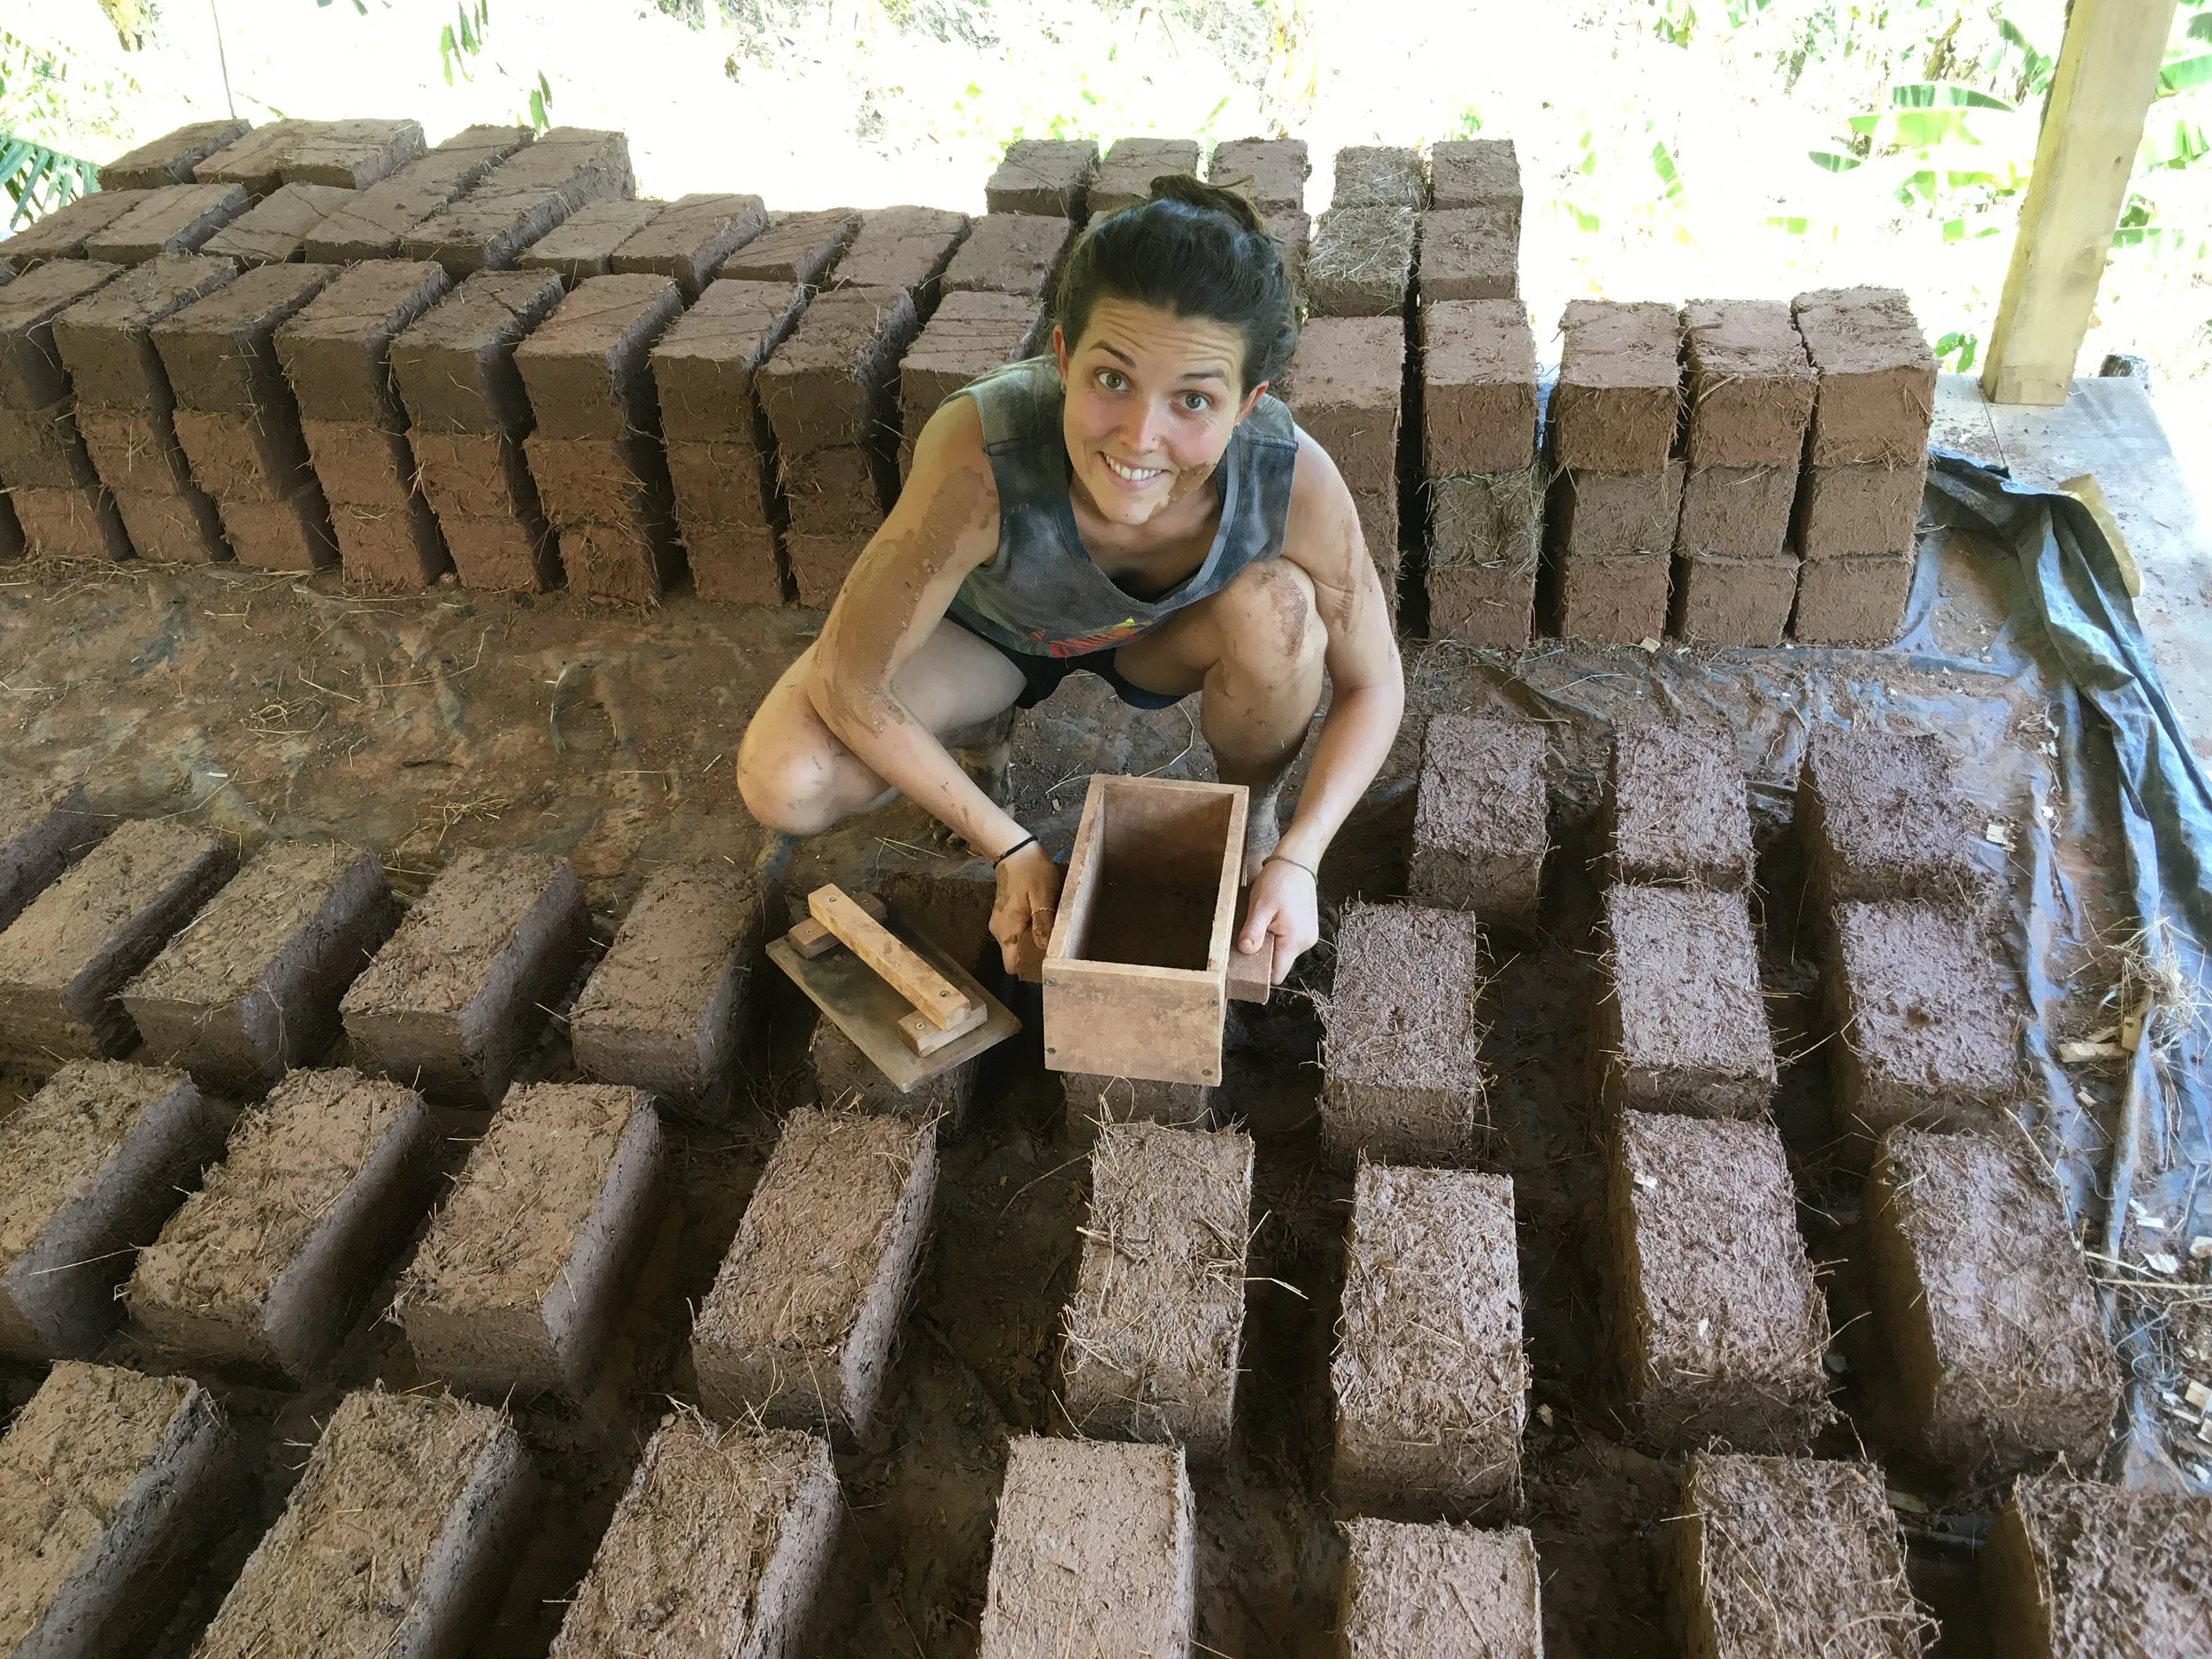
Start by making tests with your soil, if you are not sure what that means, read this article. Where we live we have an abundance of red clay soil. Using our soil, which is almost pure clay, we can use 1 part soil to 3 parts sand as a good starting point, depending on variations in the soil we may need to mix at 1:4 too. We add about ½ a part of long straw too, this gives the adobes some additional tensile strength. We then put all our ingredients on a tarp and begin to mix it together. Once the adobe mix is ready (one uniform color of mixed sand and clay) the mixture is put into an adobe form. When packing the forms make sure to fill all the corners! The form is then removed and the brick is left in the sun to dry until it dry enough to be moved and stacked. In our climate during the dry season this takes 3 to 5 days.
Steps to making a shower
1. Planning
As with all successful projects the key is good planning. We like to use a program called SketchUp to mock up all of our designs, lay out foundations, the frame and even plumbing. Every detail must be planned in advance this makes sure that the correct provisions can be designed in and made in advance.

2. Foundations
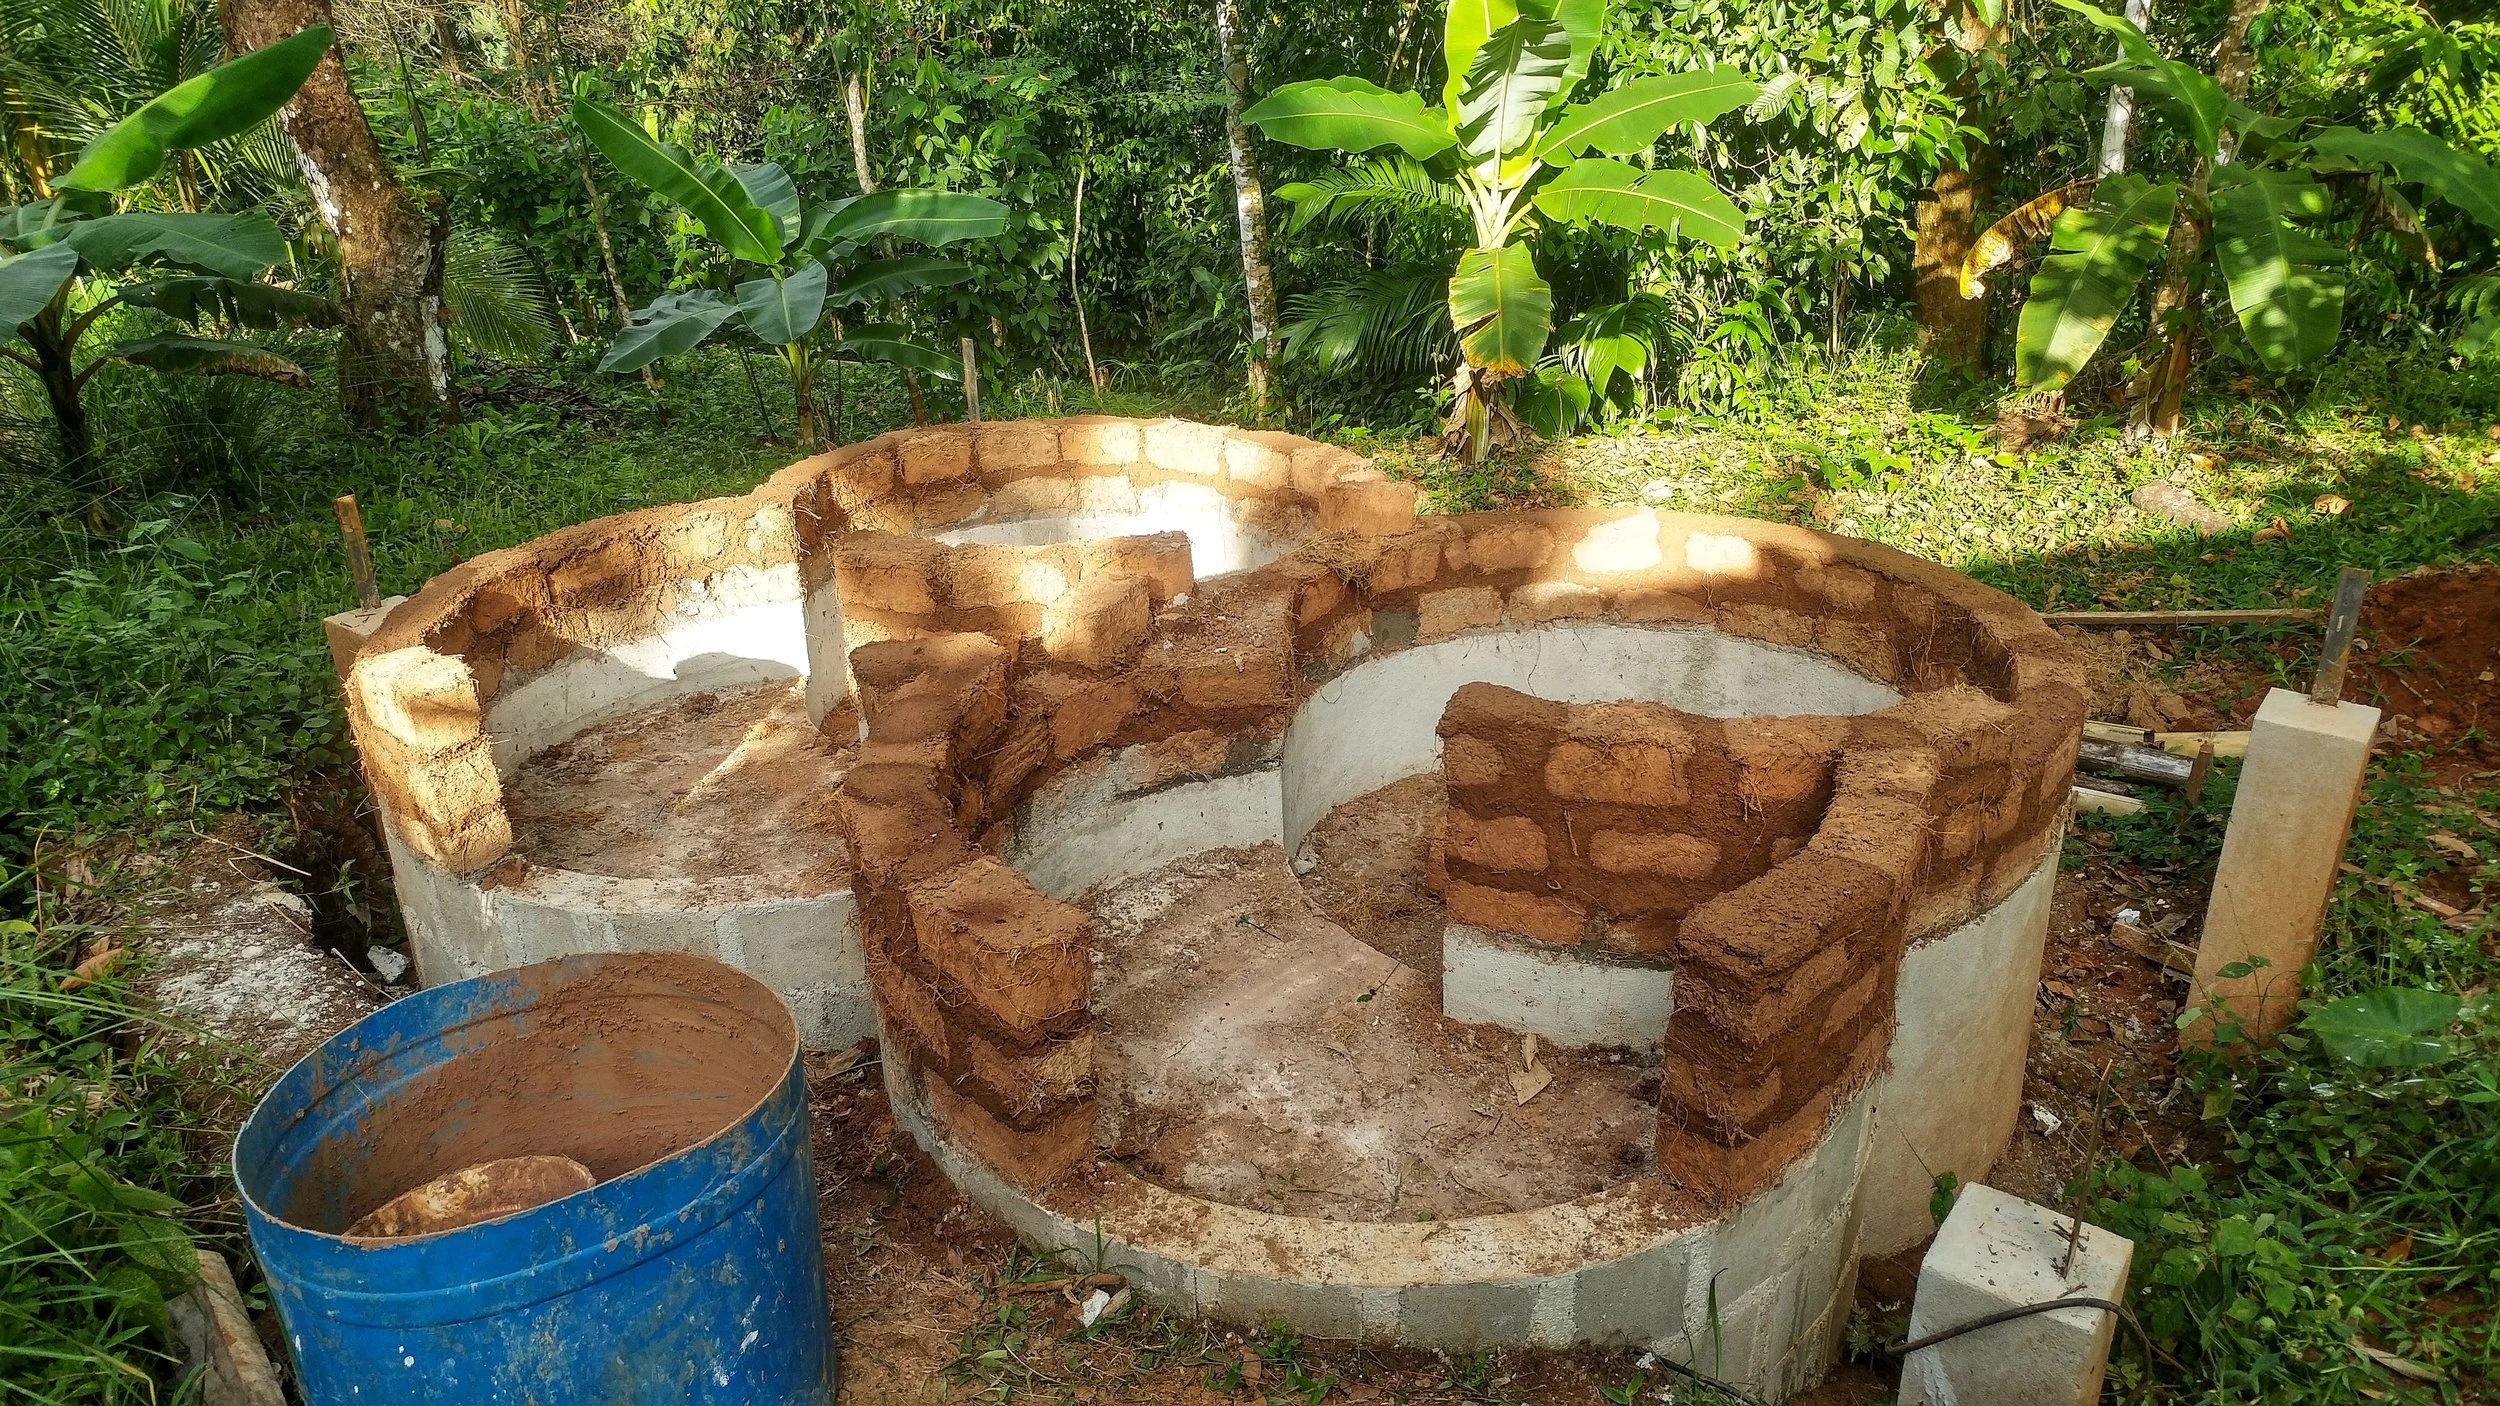
For our shower we used concrete blocks cut in half so that they could form the curves that we wanted. A shower is going to be a wet area so it is important that you think about this during the planning stage, where will the water drain to? Are my pipes embedded in my foundation? How is my roof going to be attached. In our design we decided to have a separate Timber Frame to support the roof structure.

Step 3 - Adobe
The first course of adobes were attached to the foundation using a cement based mortar this helped them bond strongly to the concrete foundation.
Step 4 - Bond Beam
From the second course upwards we used a sandy clay mortar for the adobes. Every 4 courses of adobes we made a cob bond beam for extra strength.

Step 5 - Gringo Blocks
Wooden hollow blocks (known as gringo blocks) were put at the end of each wall to attach in the wooden frame for the doors and a hollow plumbing box was installed where all the plumbing would be inserted for the shower handle. In Costa Rica the plumbing parts easily purchased in the local hardware store are terrible and always leak so we made most of the plumbing accessible from the outside. It is generally a good idea when making your initial design to plan for replacing parts in the future.
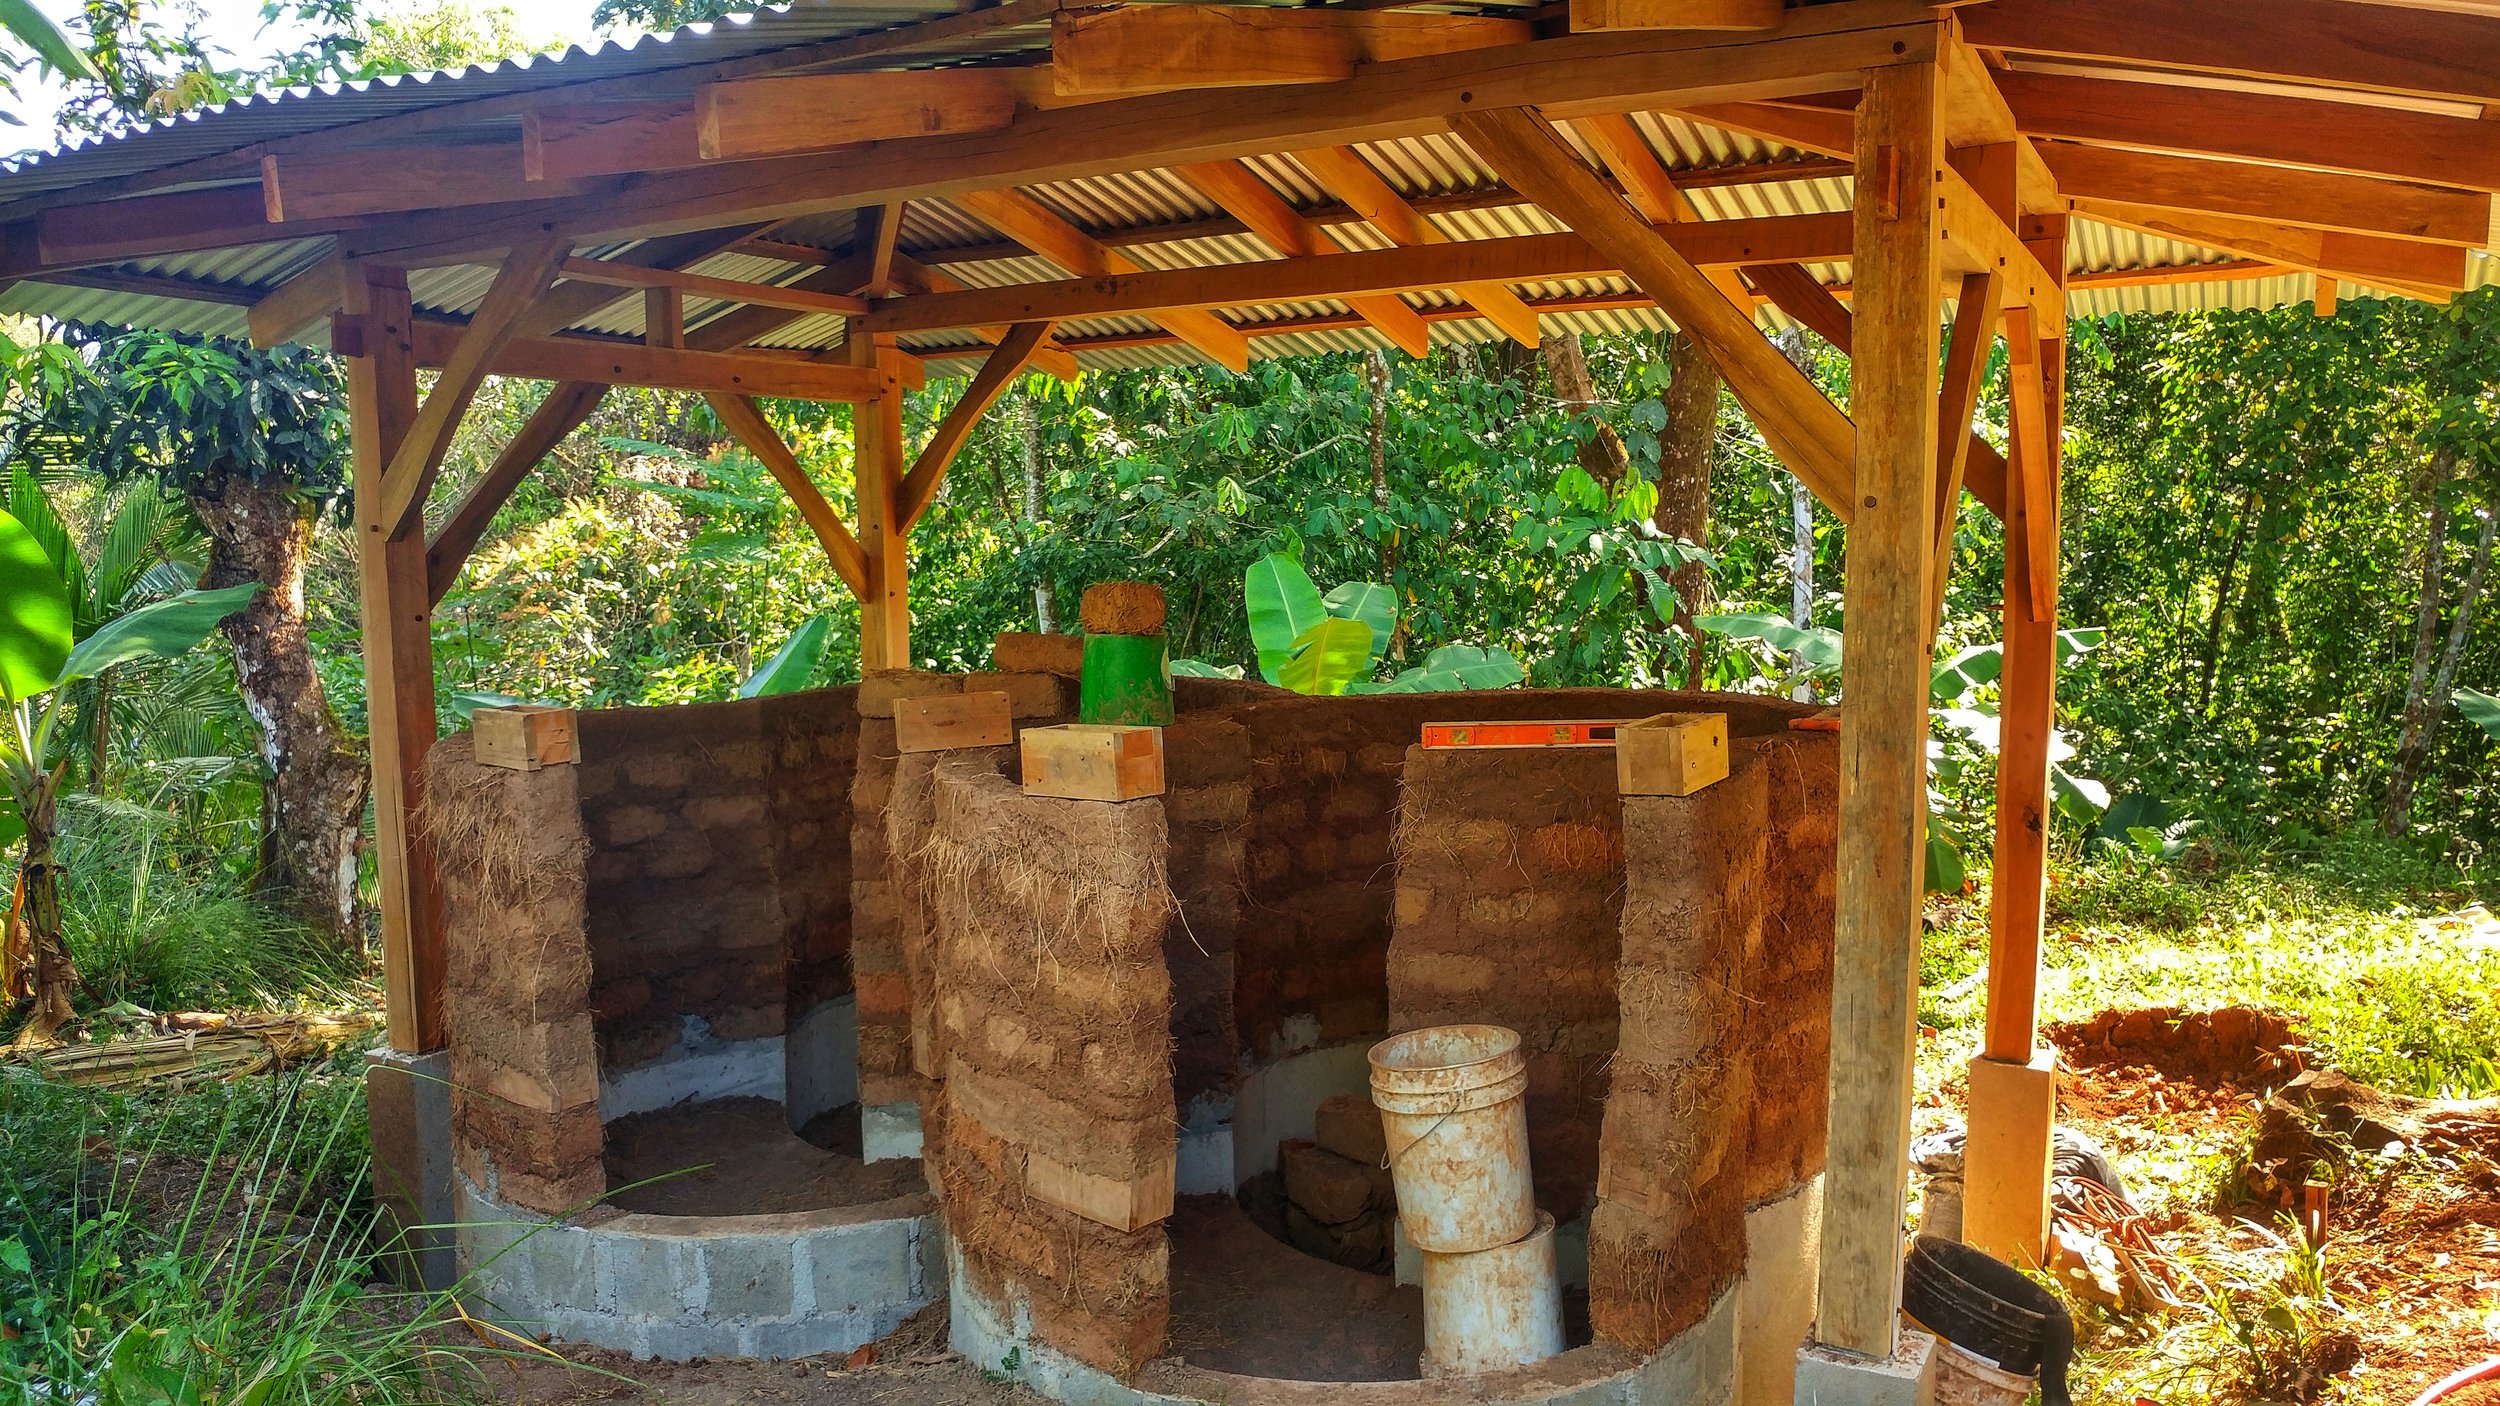
Step 6 - Frames
The door frames were installed at this point and they were screwed into the Gringo blocks. The door frames were also tied into the adobe structure using some mesh, we used what we could locally find which is what they sell for chicken fencing. You could also use a variety of natural alternatives, attaching them to the wood and plastering them in to the wall to give them extra stability.

Step 7 - Leveling
A leveling coat was then applied to sculpt and level the walls, this was tied into the door frame to give extra support too.
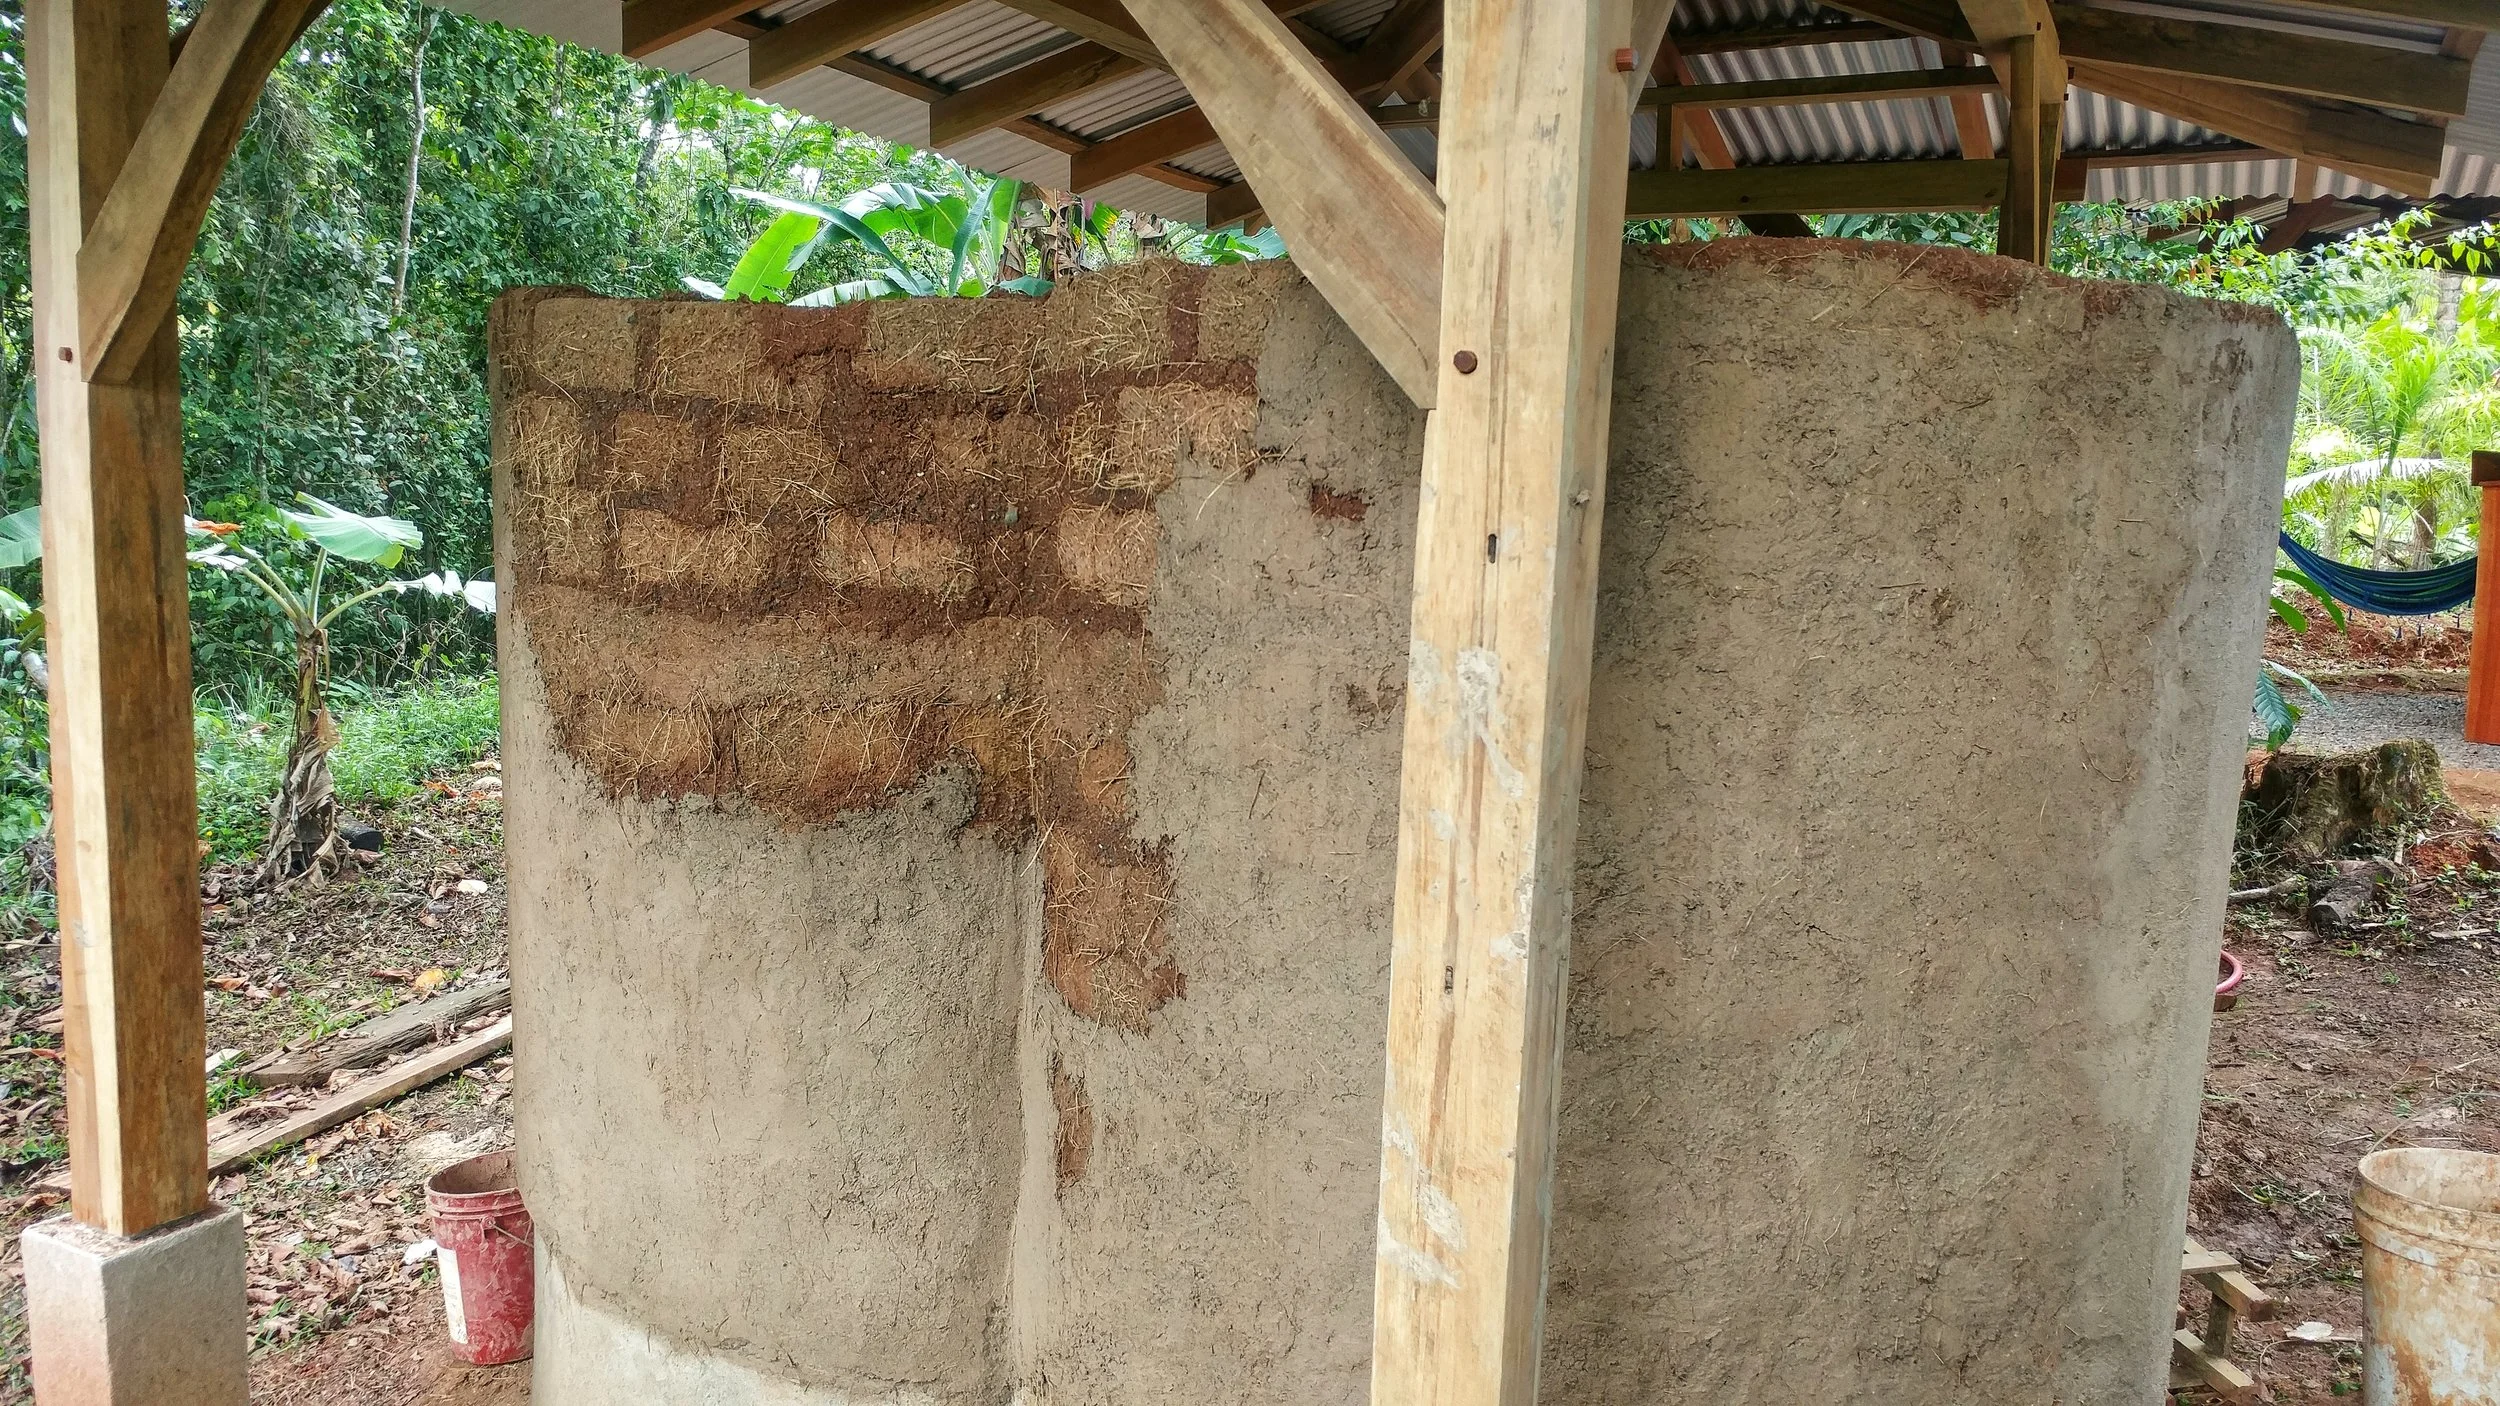
Step 8 - Tiling
The vertical surfaces of the concrete block were tiled to provide a plaster stop on the bottom edge were the plaster would meet the tile.
Step 9 - Plastering
A lime base coat was then applied over the earthen leveling coat. Whilst this basecoat was still damp (before it started wicking moisture again) we applied the tadelakt mix (1 part fine lime sand and 1 part lime). We did the Tadelakt like this as we had such a large continuous surface area to plaster and needed the time to work it all.

Step 10 - Tadelakt
Once the plaster had dried enough we stoned and soaped the wall using our homemade soap. The Stearic Acid in soap reacts with the Calcium Hydroxide (hydrated lime) to make Calcium Stearate which is highly hydrophobic and one of the reason Tadelakt is considered water resistant. Read more about Tadelakt here.
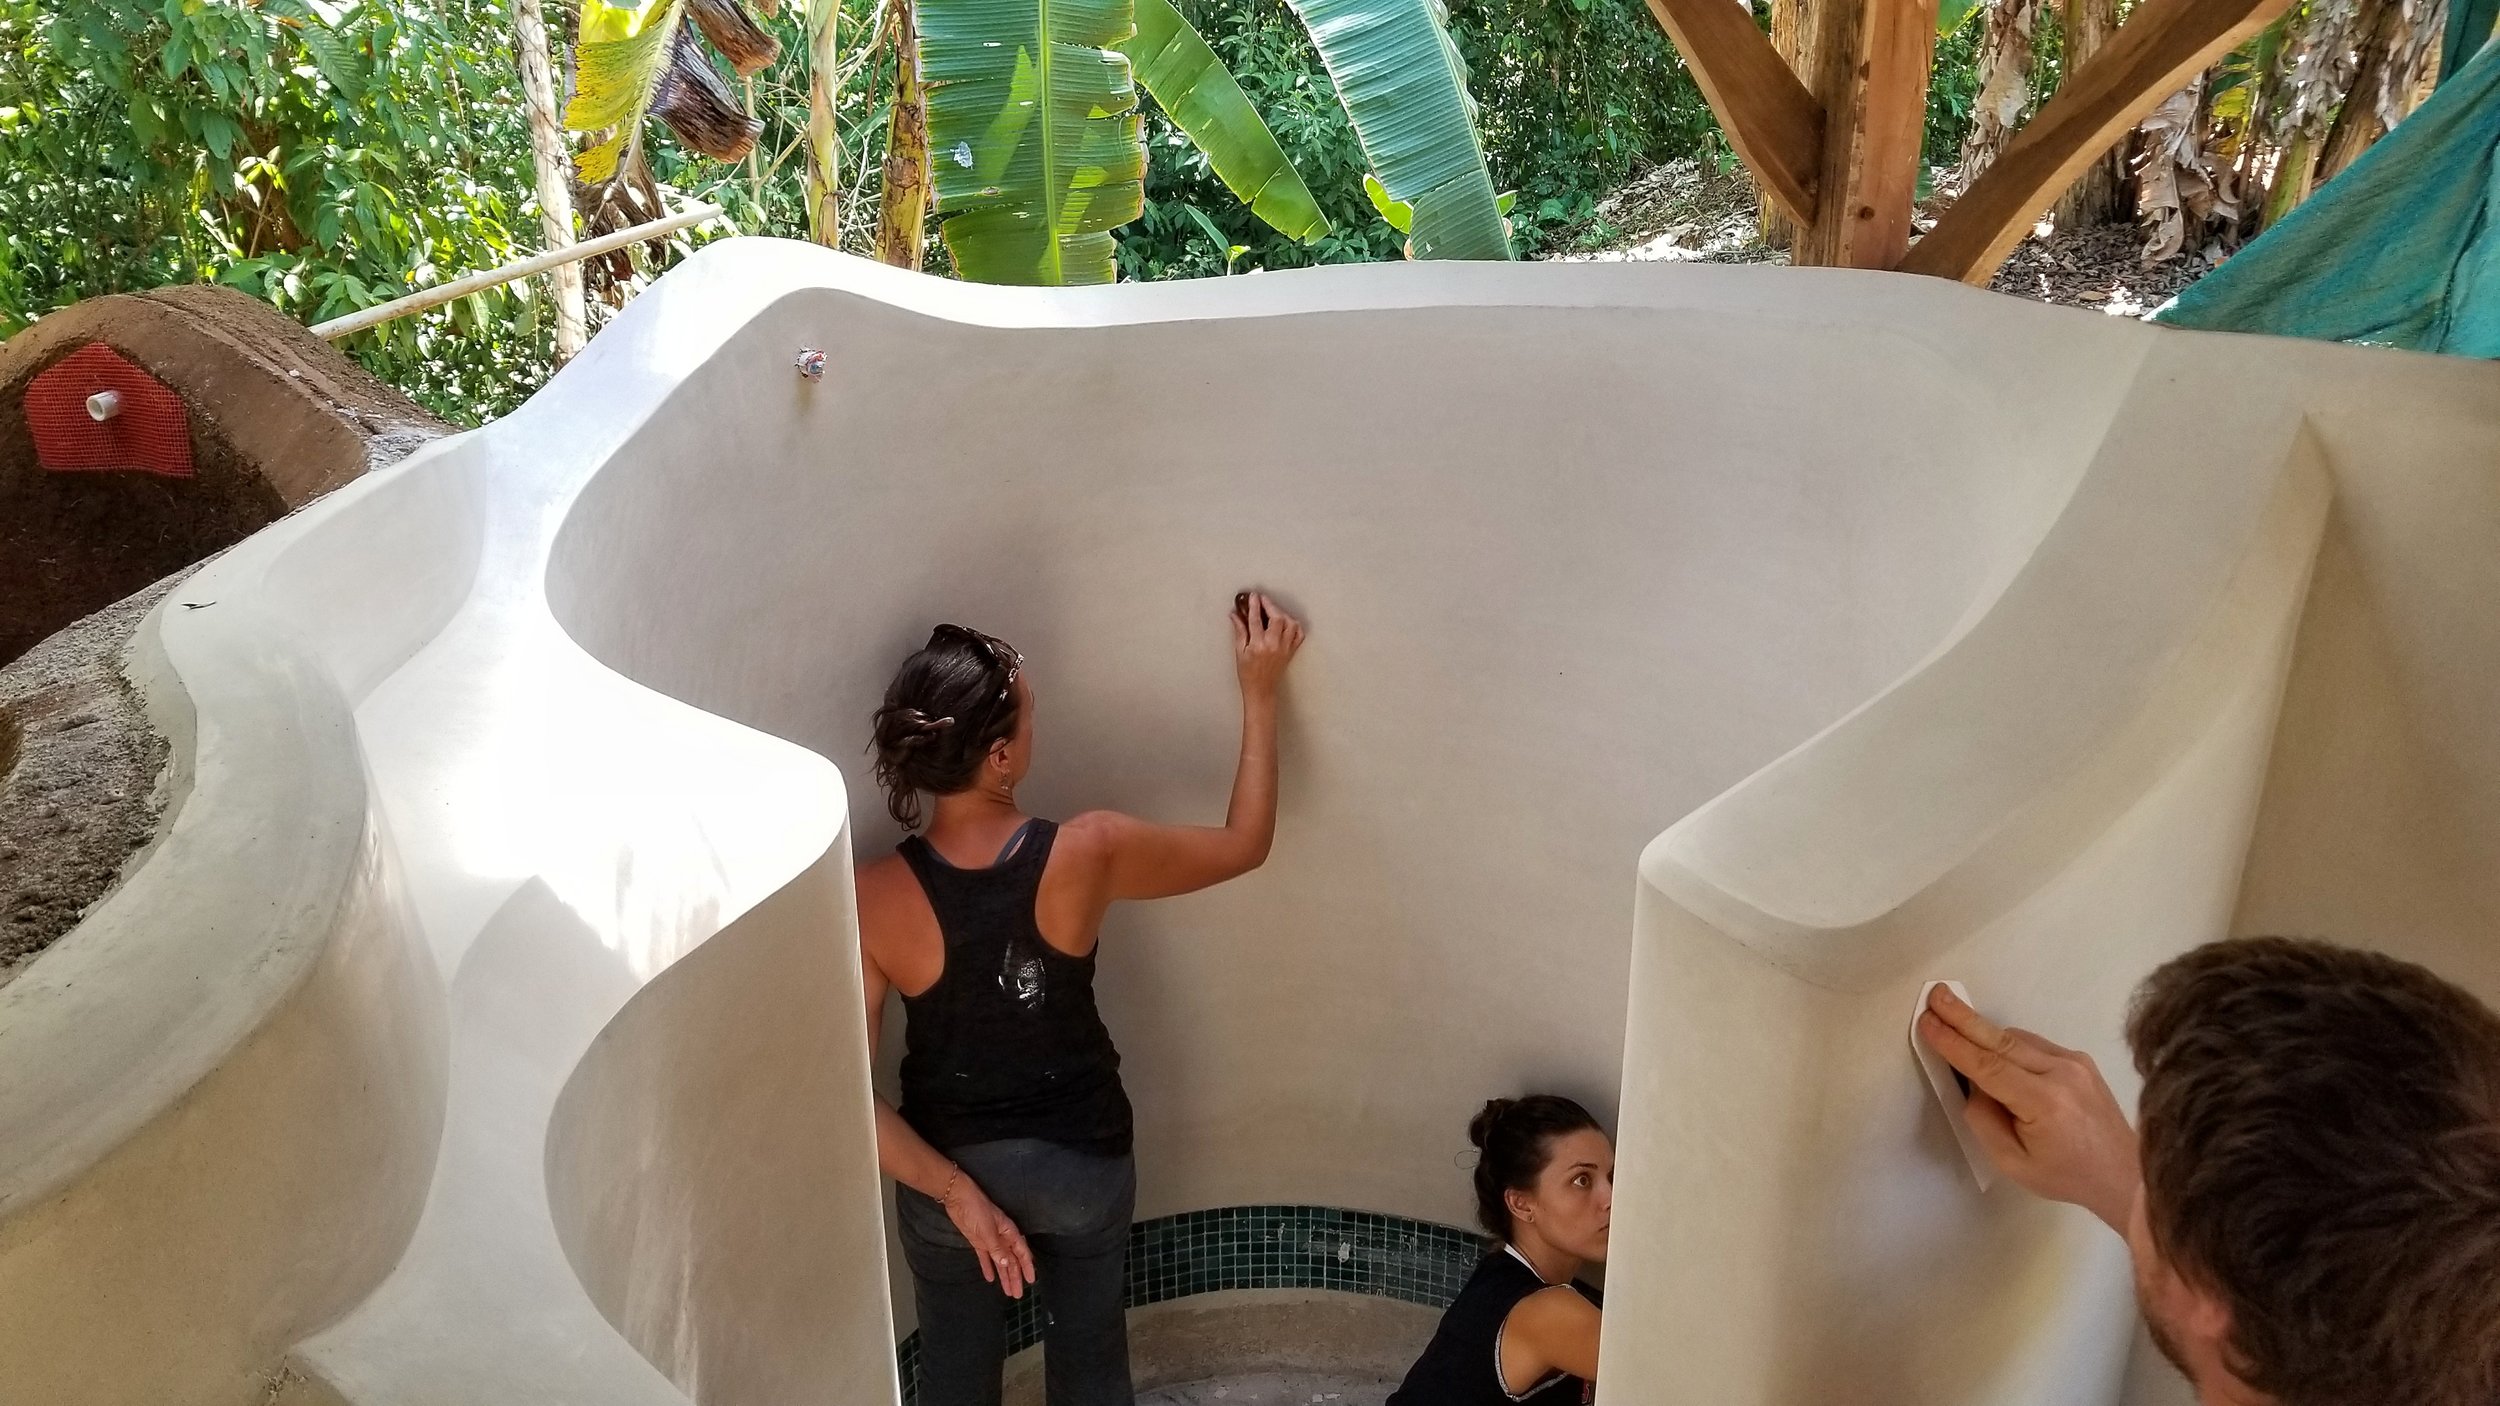
Step 11 - Mosaic
The remaining horizontal surfaces were tiled using different colored swimming pool tiles.

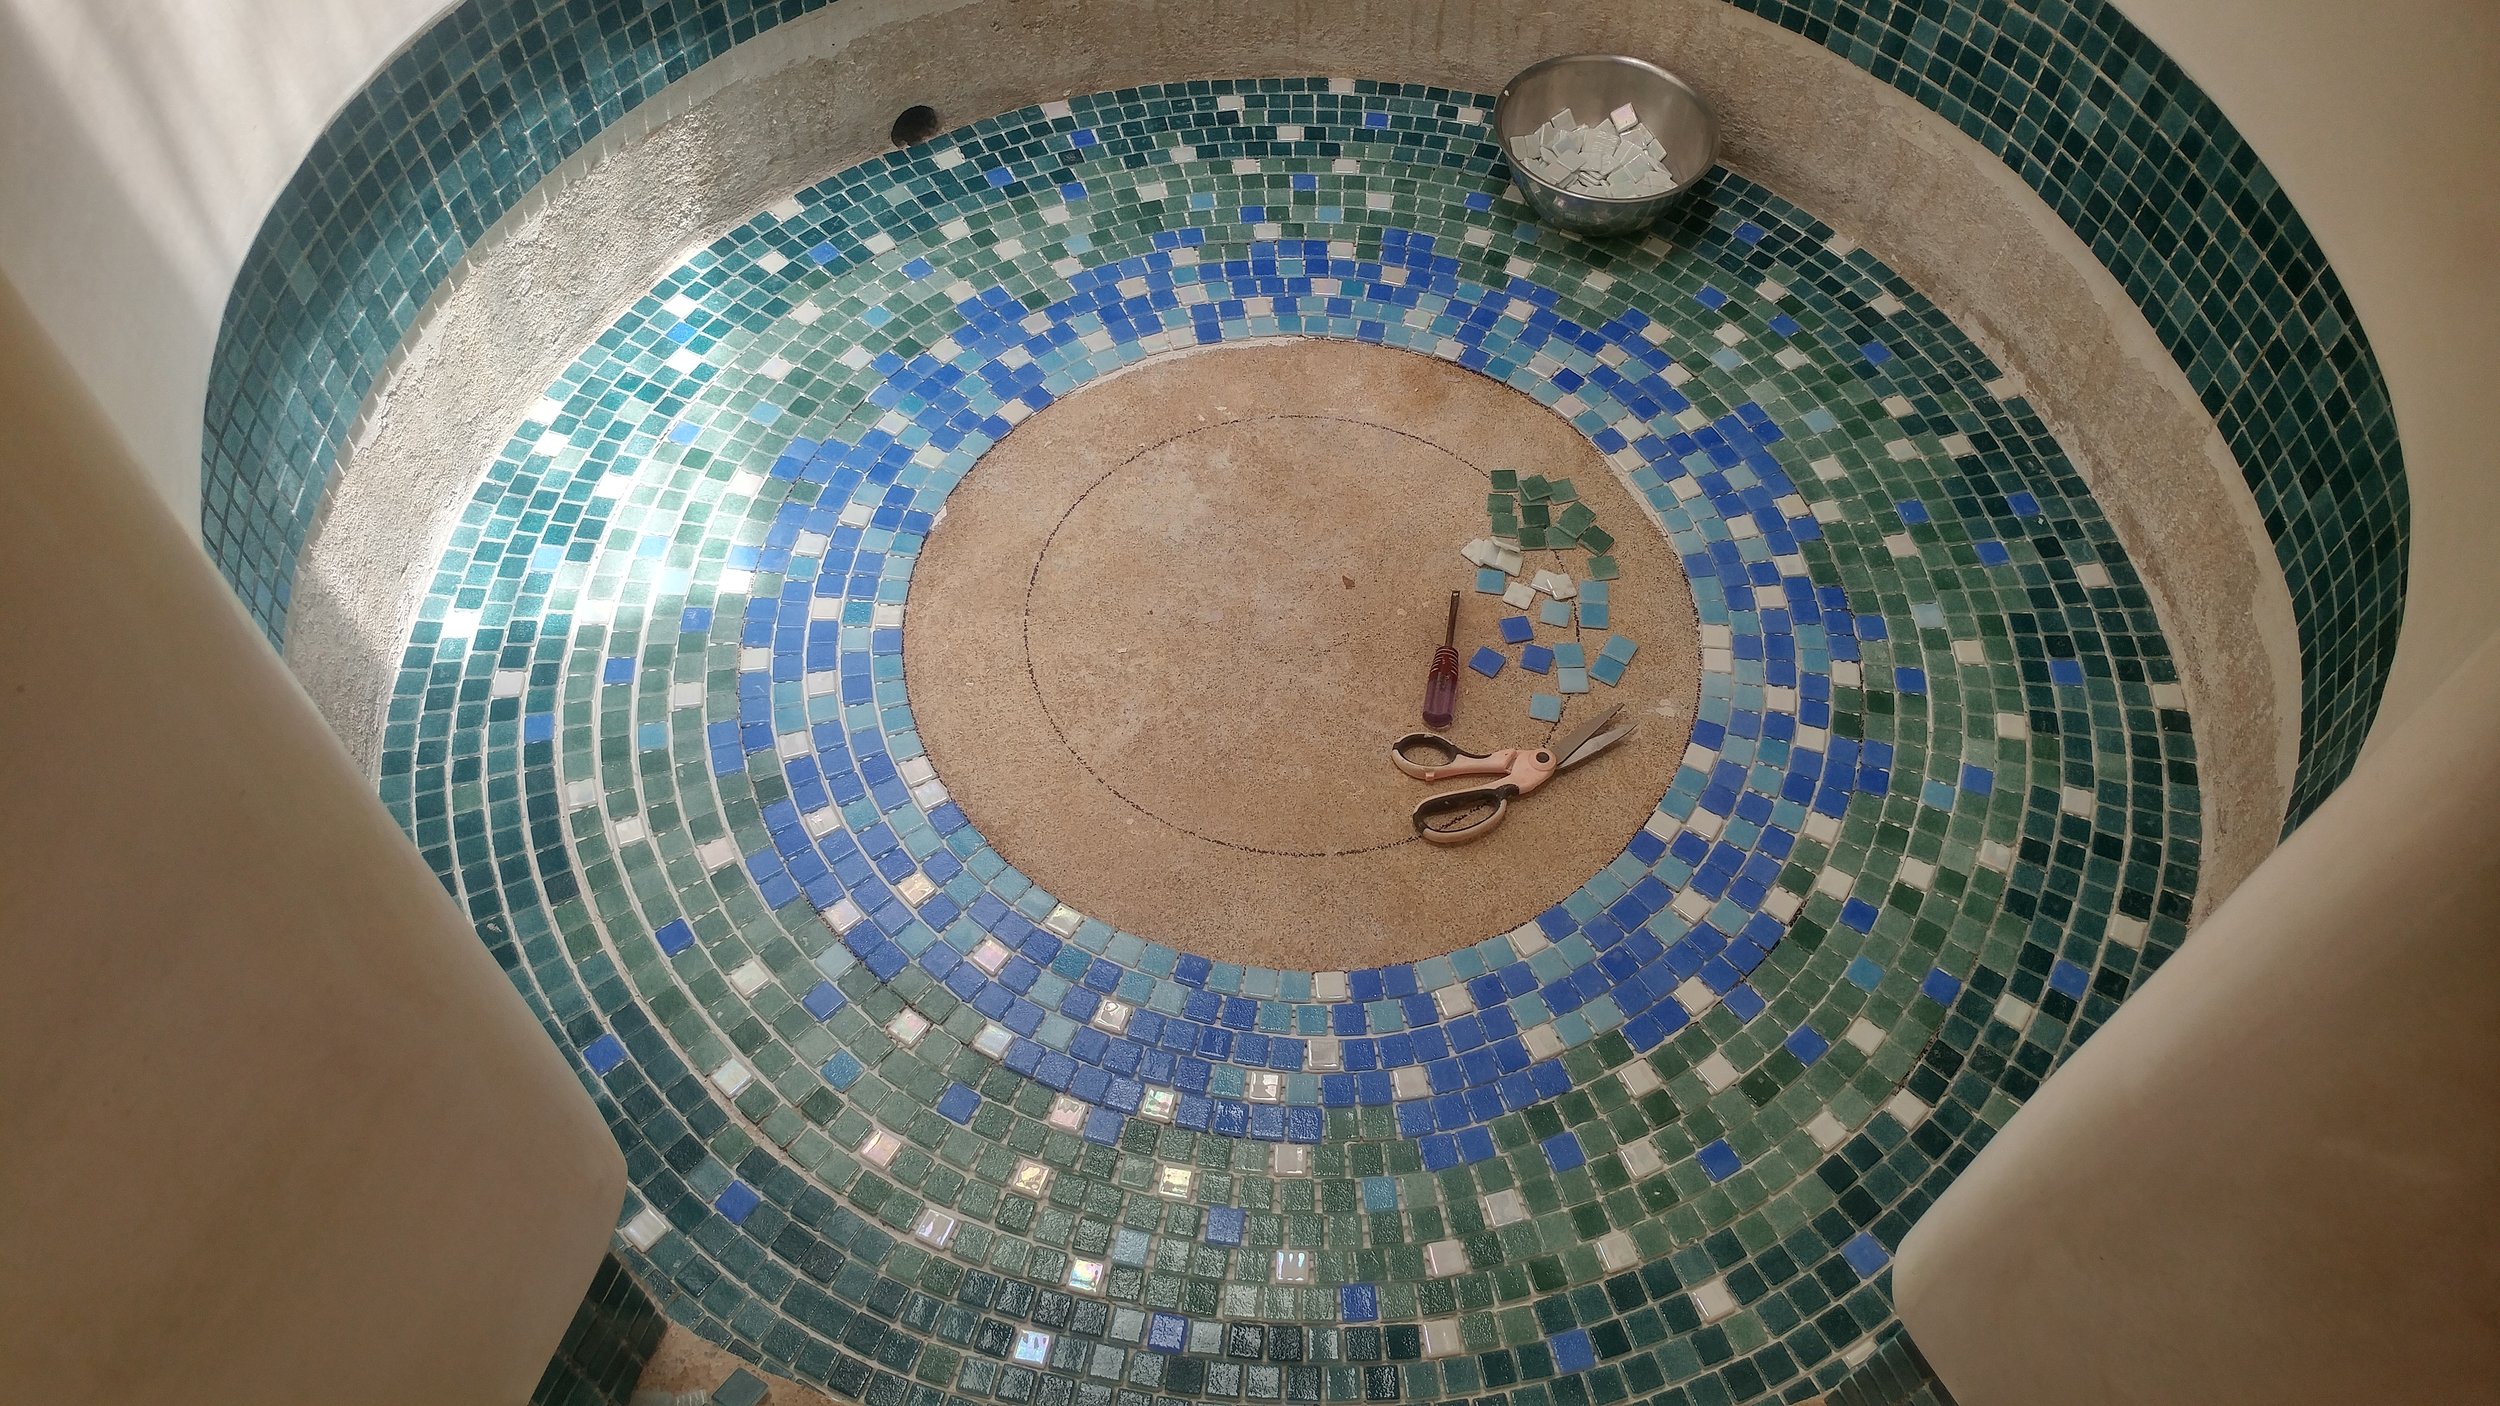

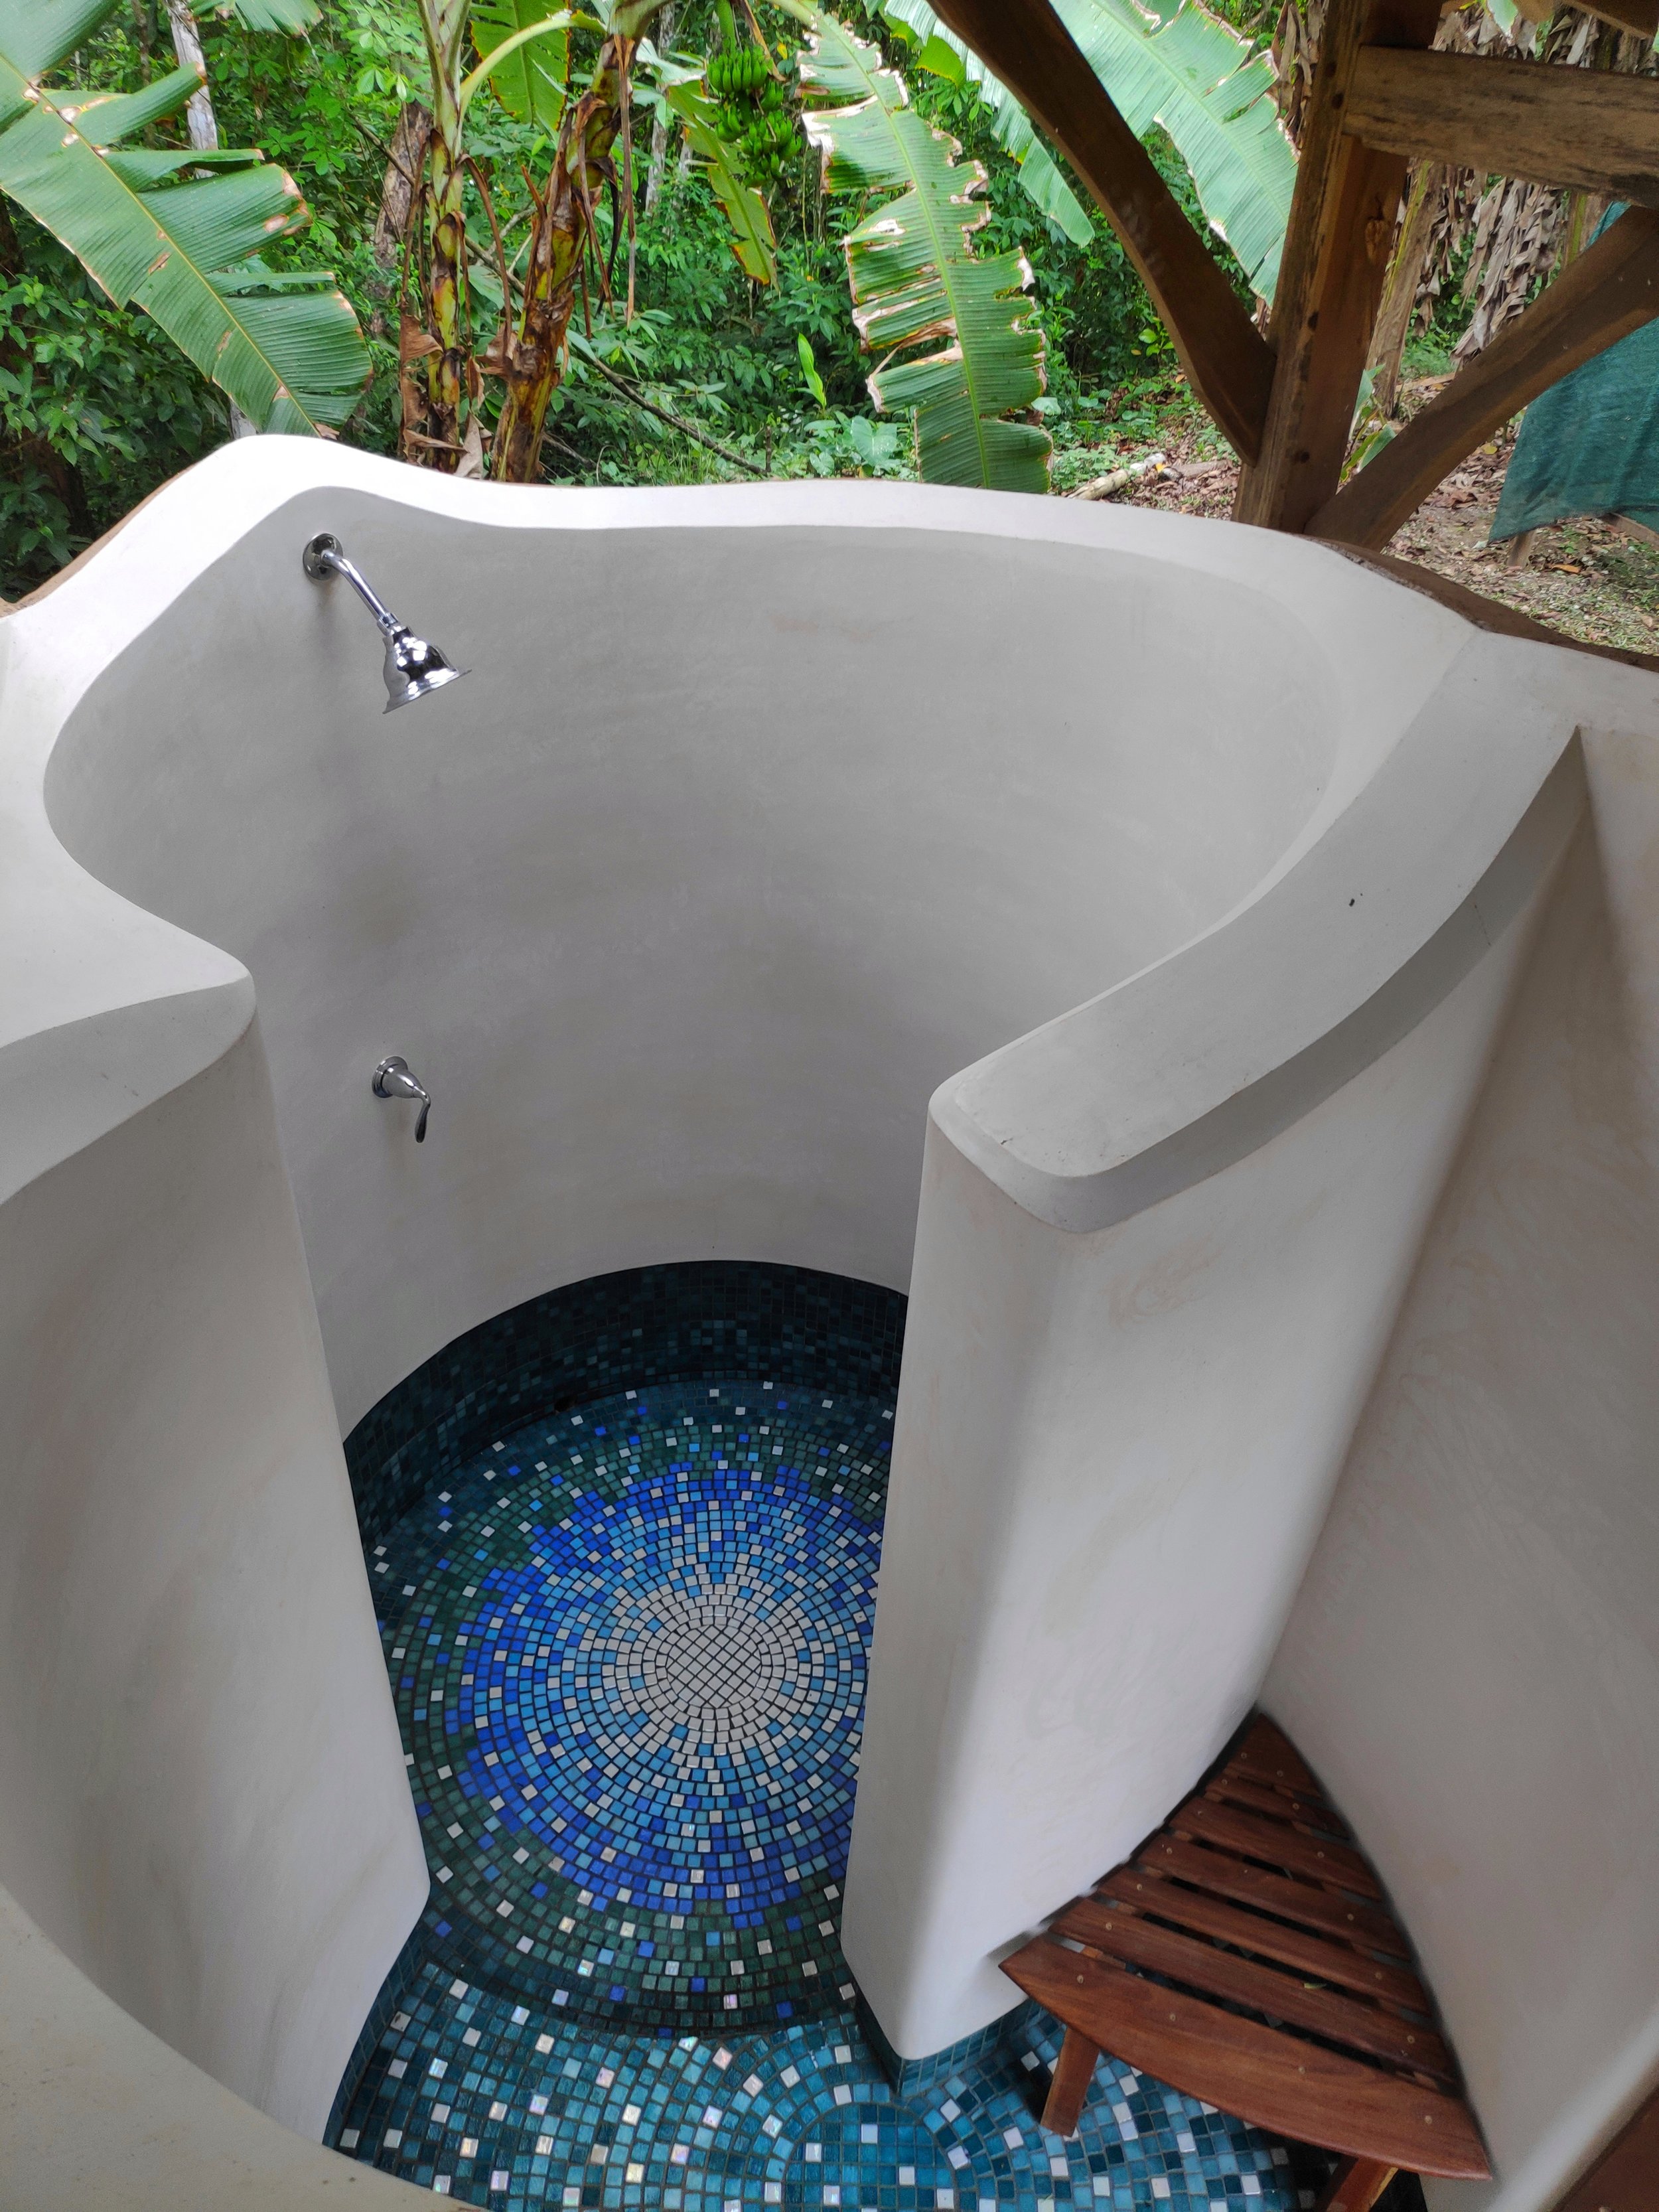
Step 12- Exterior Plaster
We used some of our left over mixes to do a base coat and finish in one pass, adding some pigments to alter the color. We used floats and darbies for the base coat and a sponge float and flexible Japanese trowel for the finish
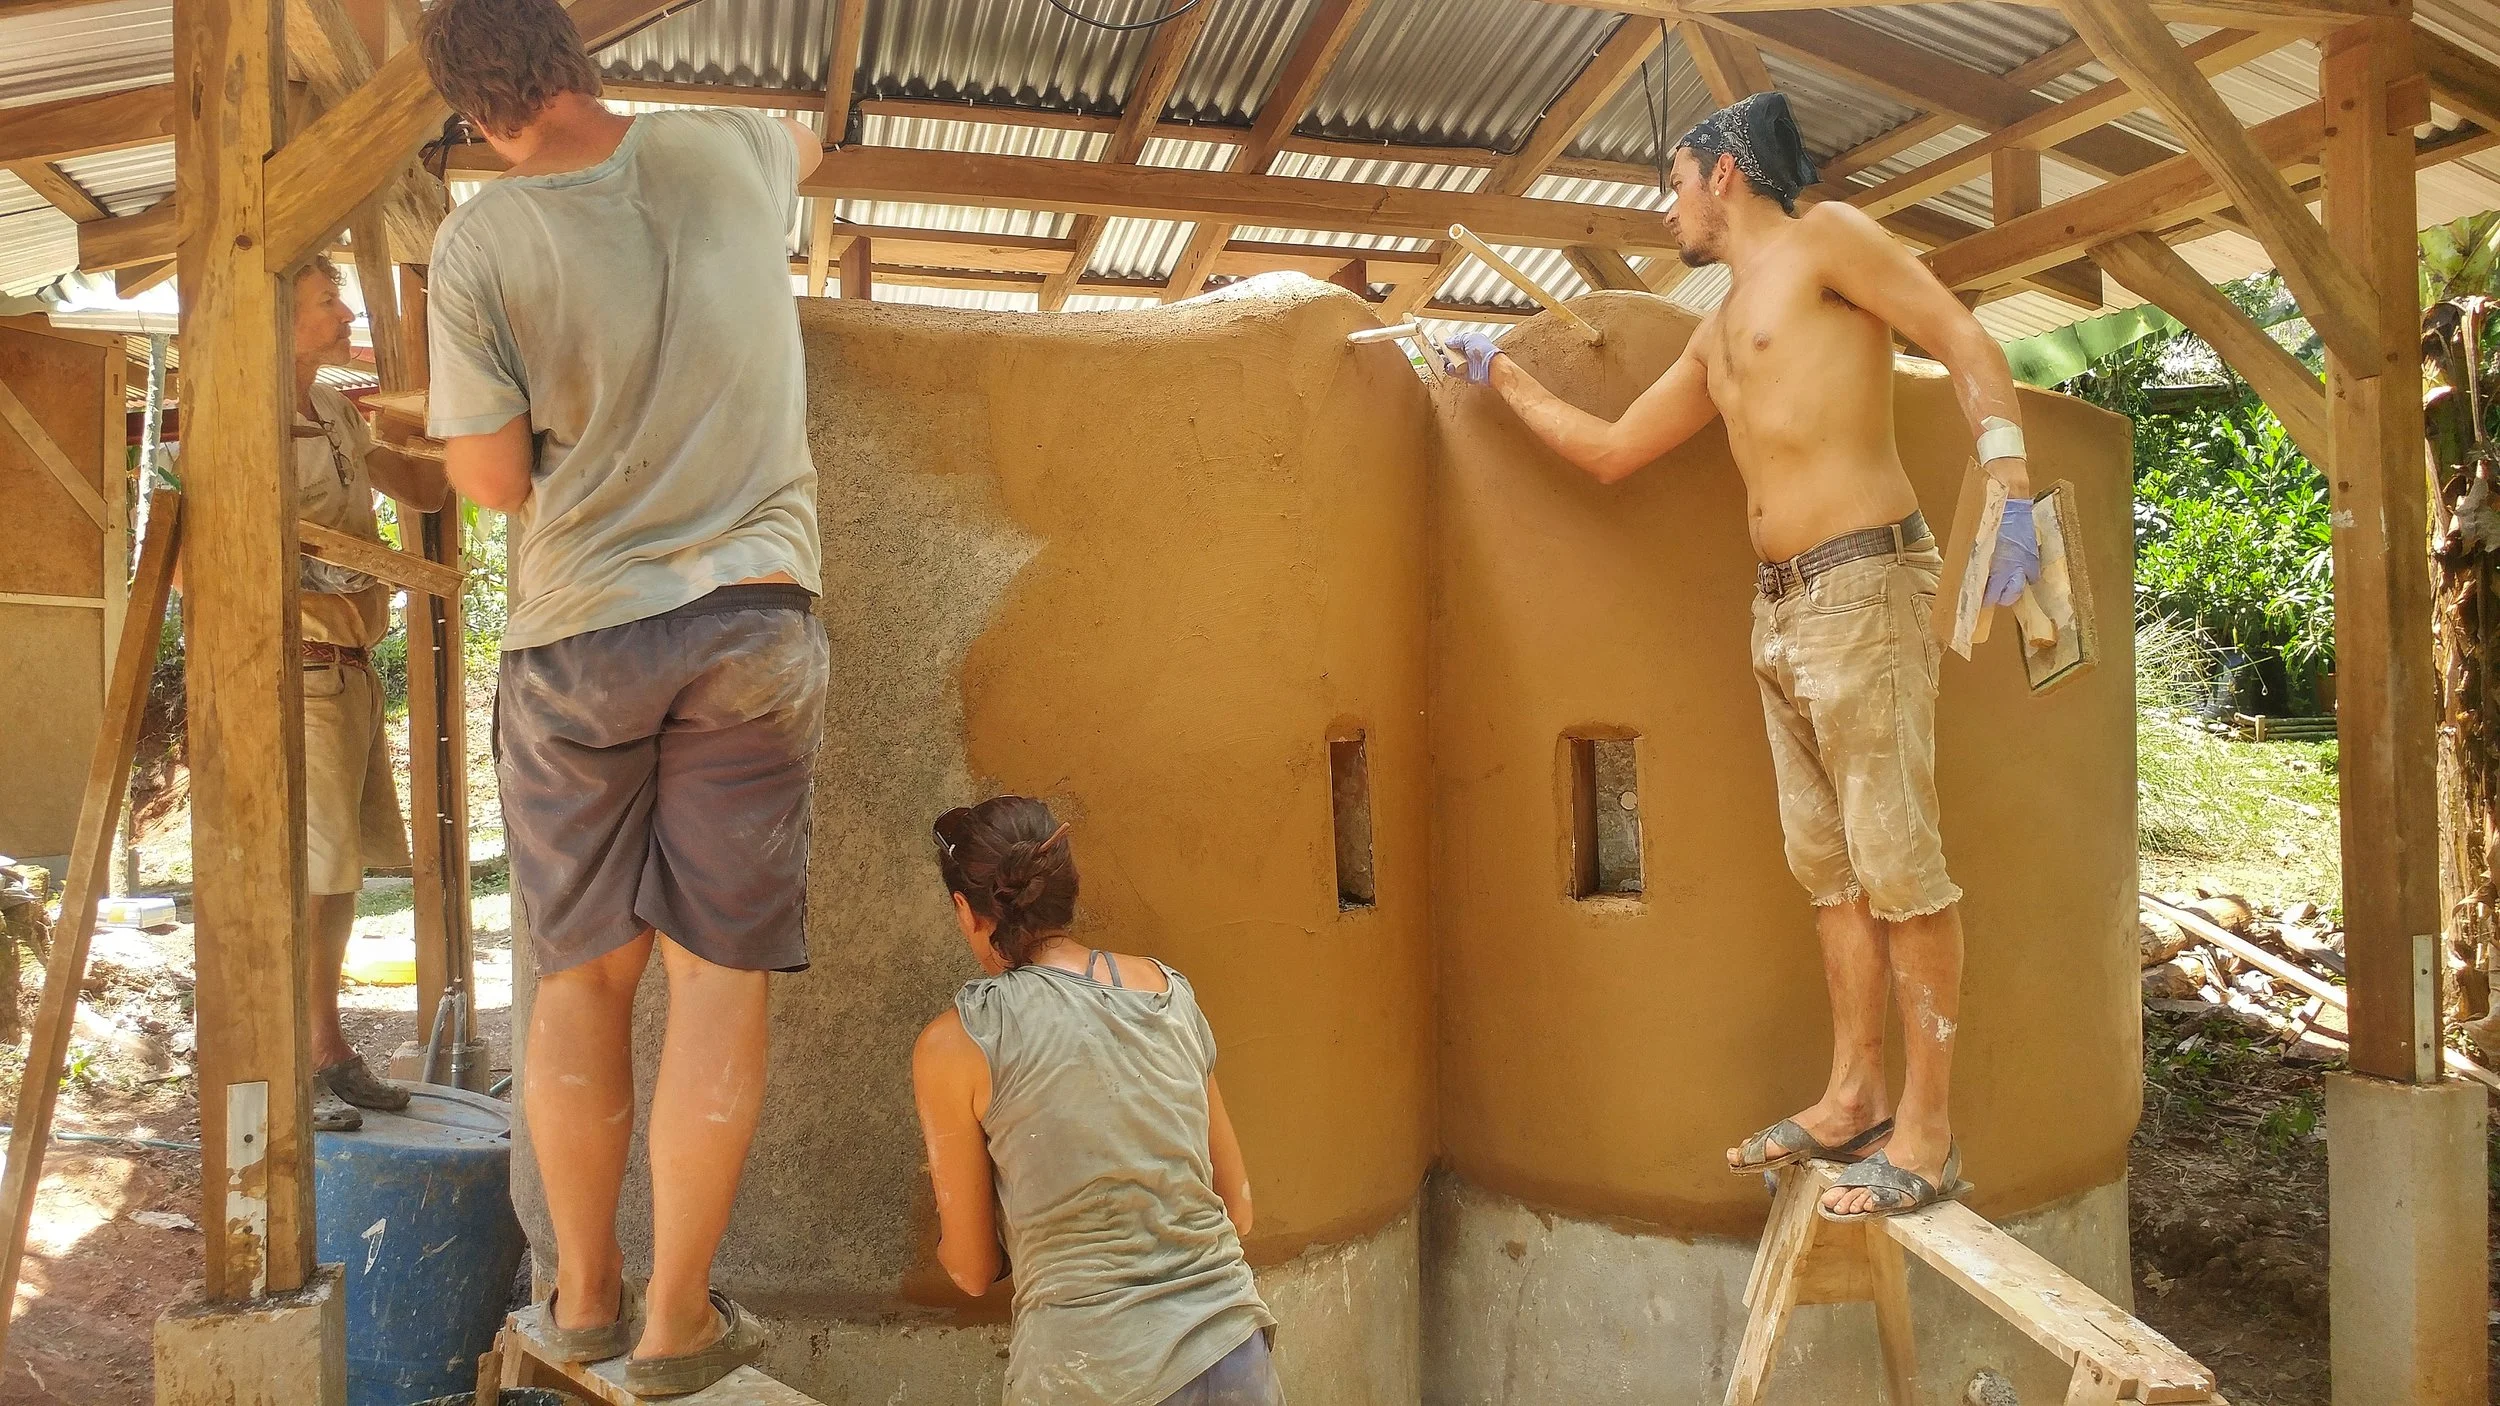
The shower was ready, once the plumbing was connected all that was left to do was enjoy the cool water in these wonderful showers. The two sides of the shower are pretty similar, the main difference being the color combination on the tile mosaic floor. Do you want to bathe in this epic outdoor shower? Come stay with us at Bernies Bungalow!
want to learn more?
Dream of building your own home, outdoor space, or maybe just a simple earthen garden bench?
With over 15 years of experience building and teaching natural building techniques, the Ranch is a perfect setting to get inspired and hands on learning.
Join us for one of our upcoming natural building focused workshops. We generally host a workshop in natural building, timber framing, and/or bamboo construction annually.

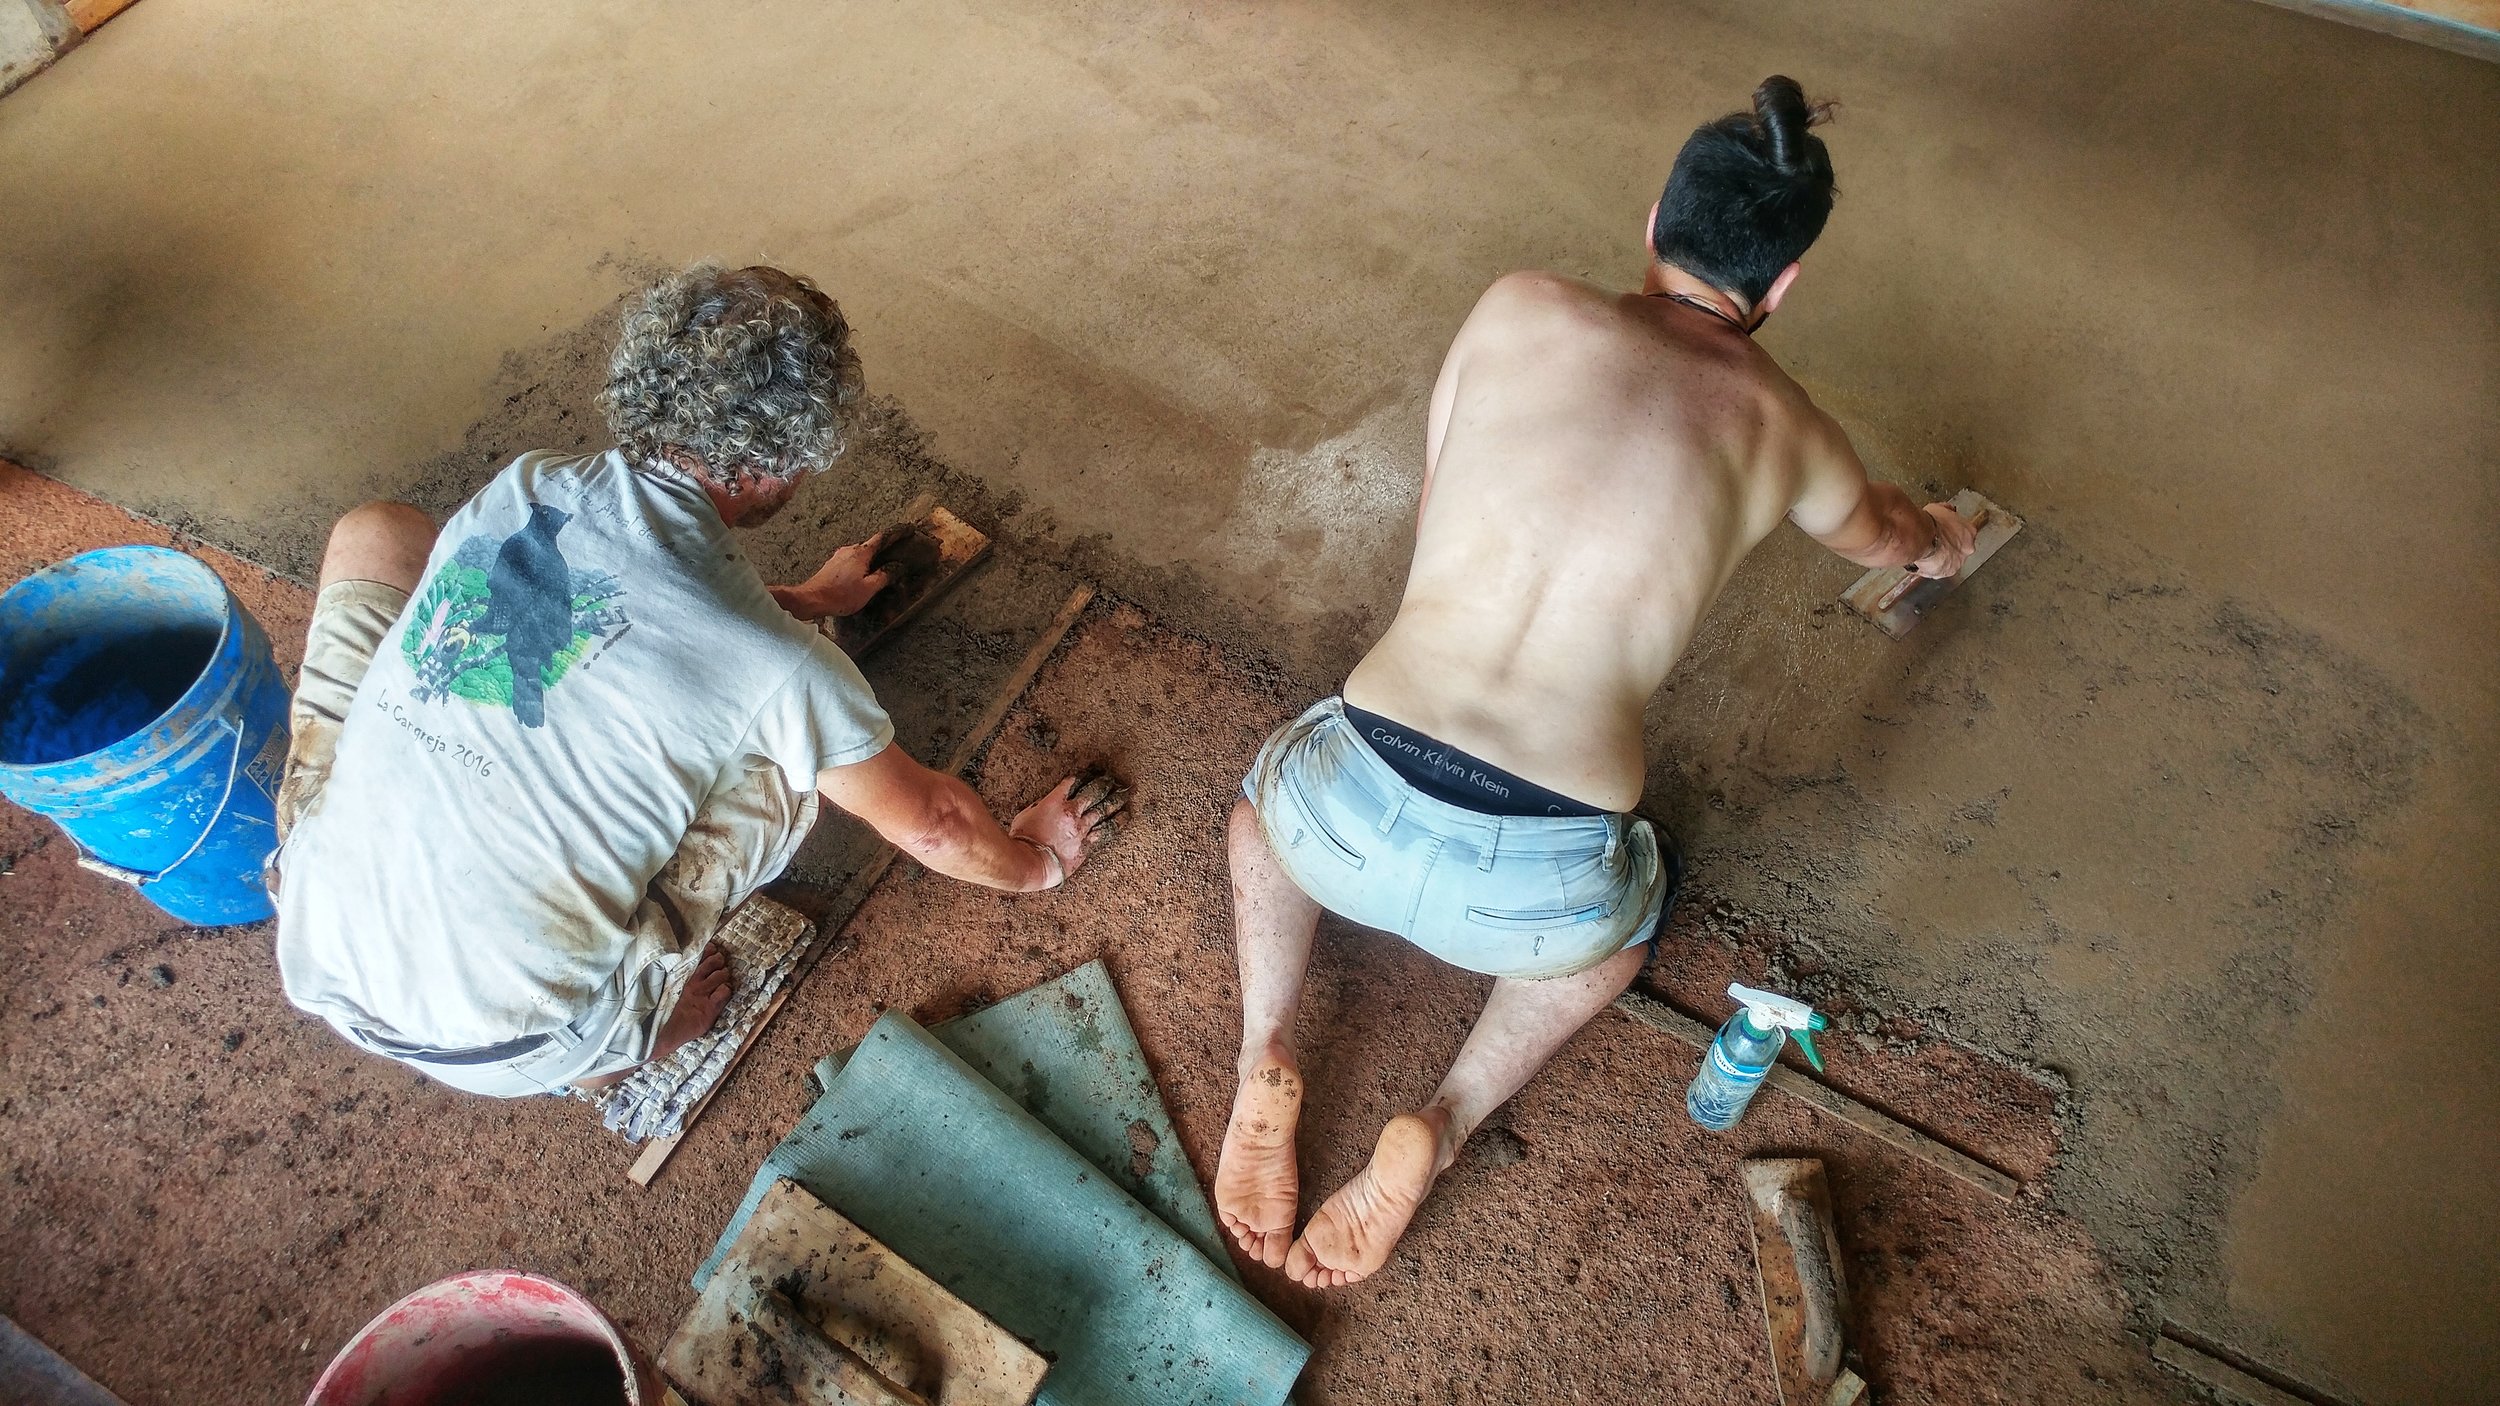
How to Make an Earthen Floor for Your Sustainable Home
Earthen floors add a great earthy touch to your sustainable home; whether that’s in your cob house or conventional stick frame home. They have more give than concrete or tile, meaning they are more comfortable and easy on your feet.
Why Build an Earthen Floor?
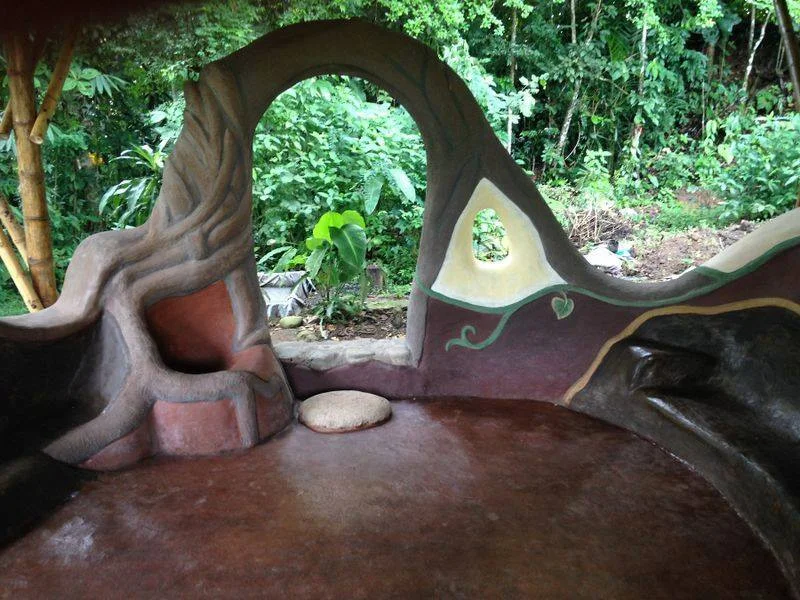
This Earthen Floor adds a wonderful warmth to the Ceiba Lounge
Earthen floors add a great earthy touch to your sustainable home; whether that’s in your cob house or conventional stick frame home. They have more give than concrete or tile, meaning they are more comfortable and easy on your feet. Earthen floors can be durable and last a long time, but are not the best material for all spaces in your home. They will break down faster when there is a lot of moisture on them or heavy items dropped on them. So places like your kitchen and bathroom are not ideal locations for an earthen floor. Earthen floors work great for bedrooms and living rooms.

Mixing by hand gives you a great feel for the mixture
Here at the Ranch we have been practicing and perfecting our earthen floors for more than 15 years. We strive to create sustainable homes from natural, local materials. Natural building is one of the ways we practice green living. We have seen what works and what doesn’t in many different structures and spaces throughout our community. After having an earthen floor in our kitchen, a space that produces three meals a day for an average of 30 people, and after repairing patches again and again, we realized this space is too heavily used for an earthen floor. Spaces like our guest cabins are perfect for earthen floors. Of course with hundreds of people going through these spaces they wear down over time. If you correctly lay an earthen floor in your home, and take care of it, they should last you for a long time.
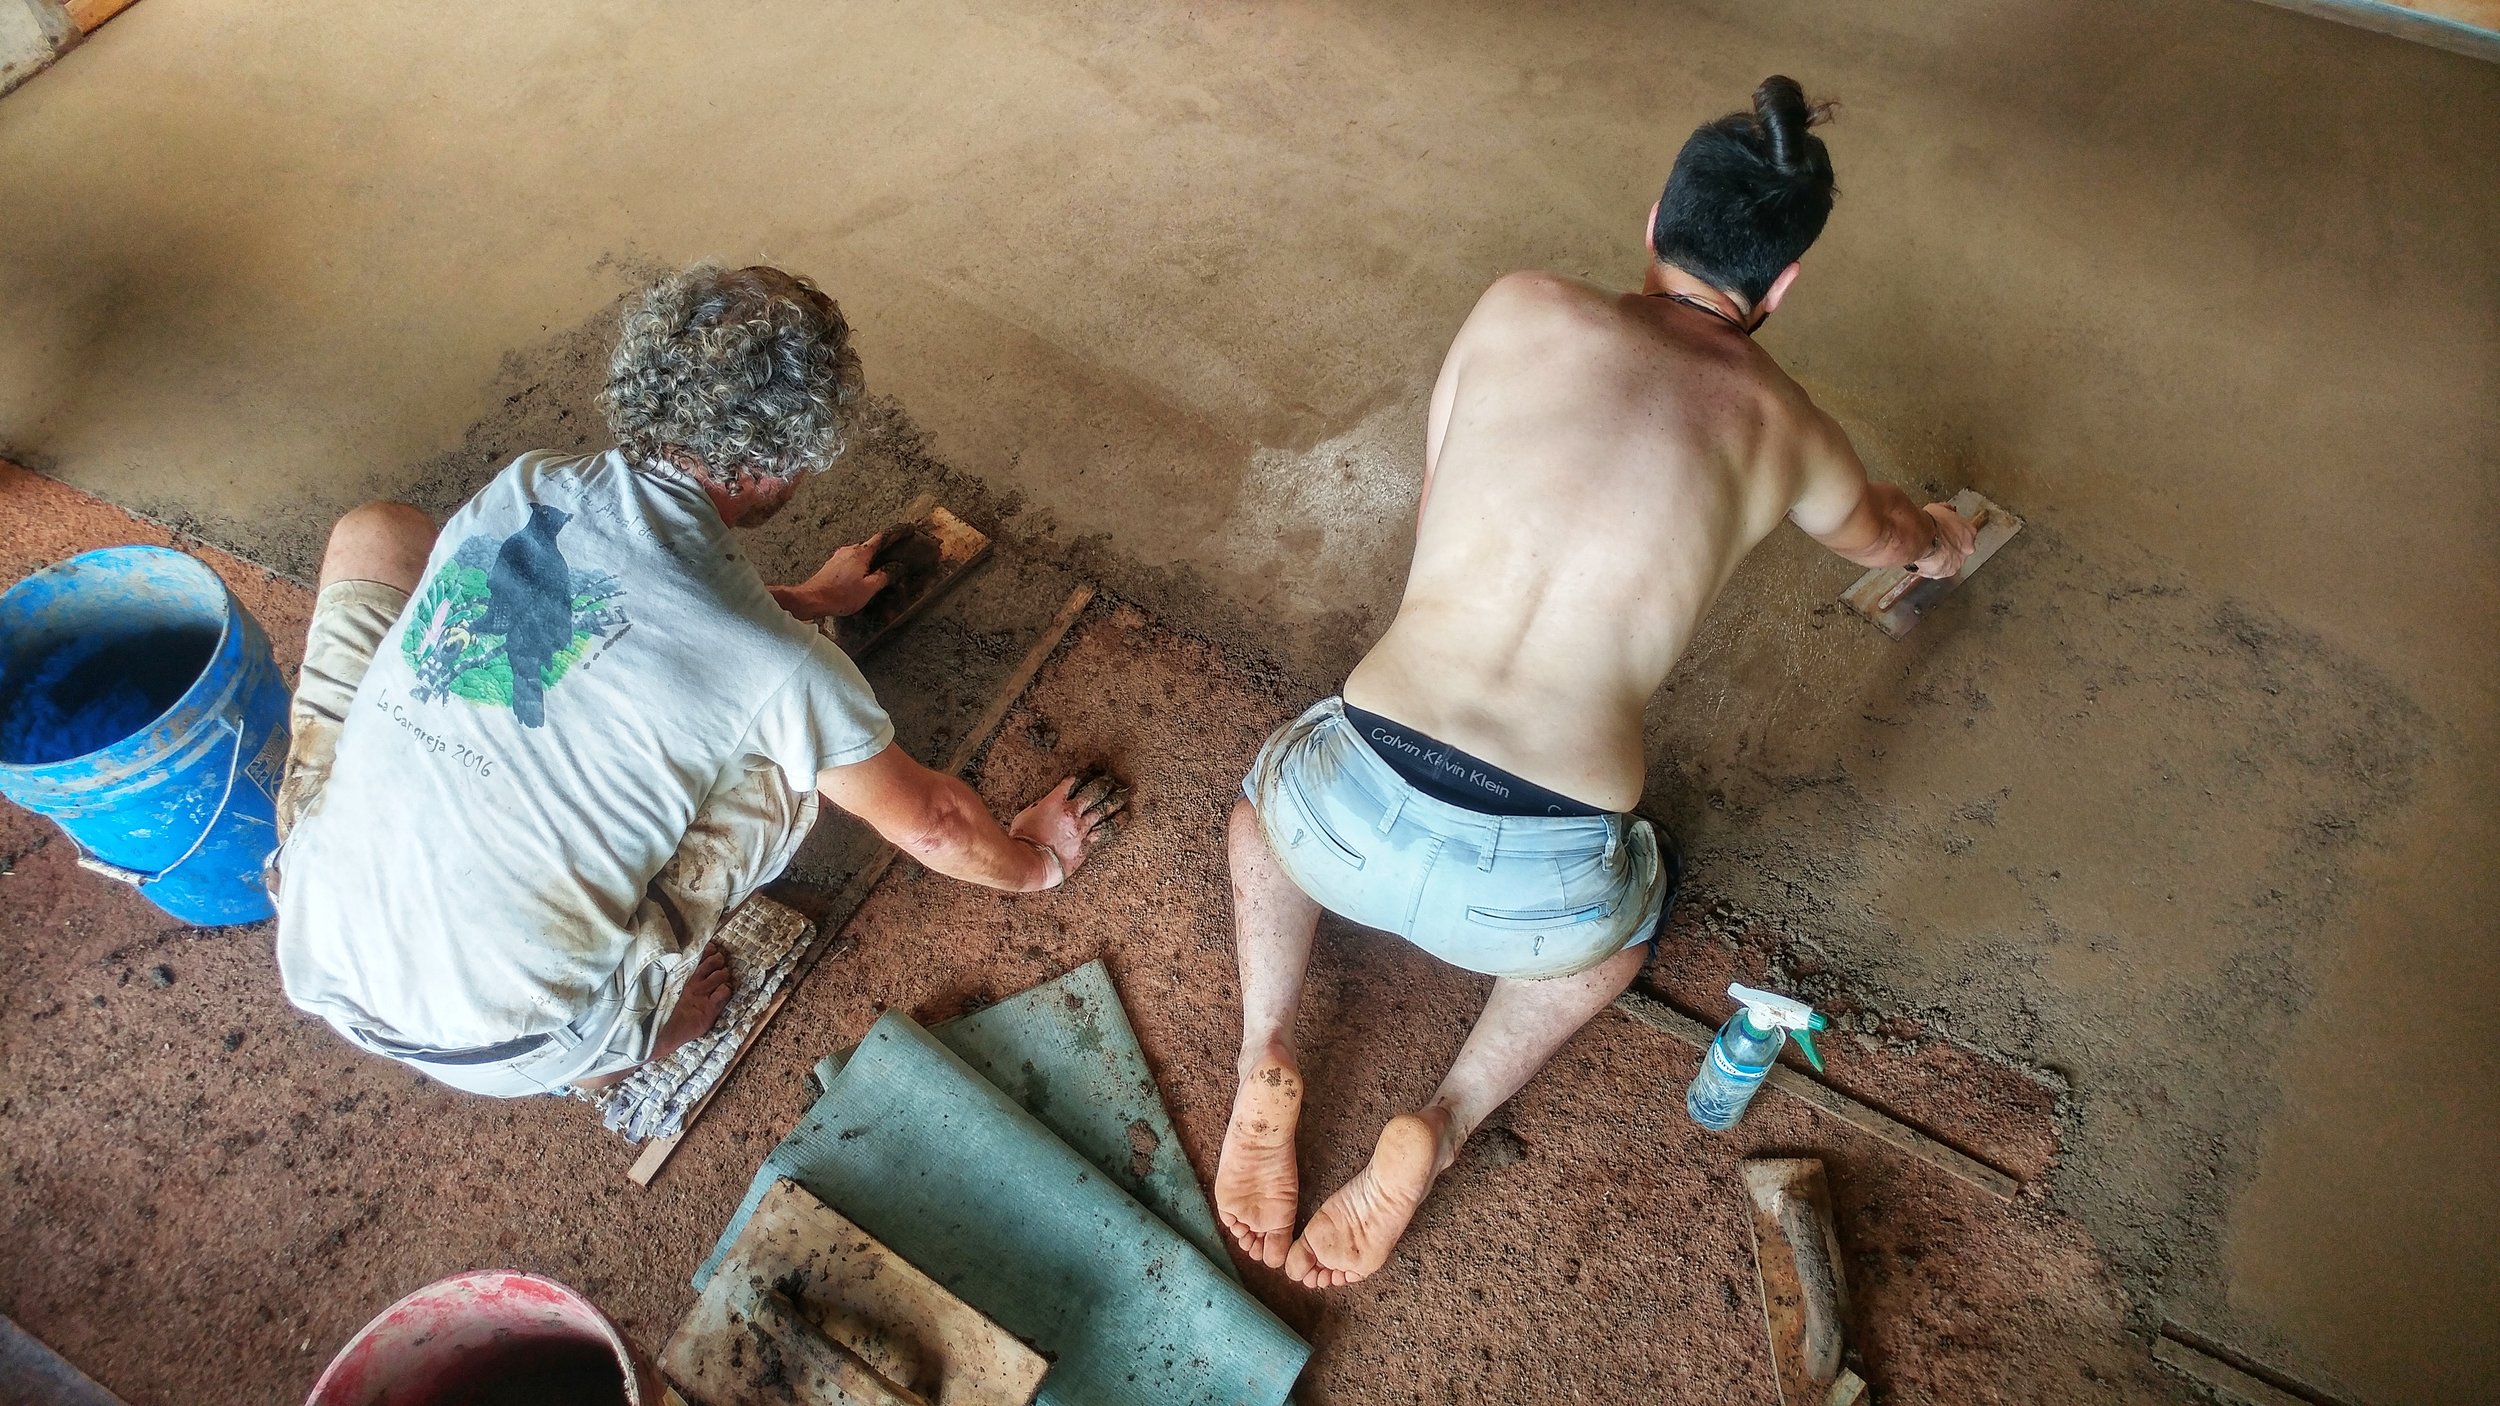
Wooden guides can be used to help keep the correct thickness
How We Build Our Earthen Floors
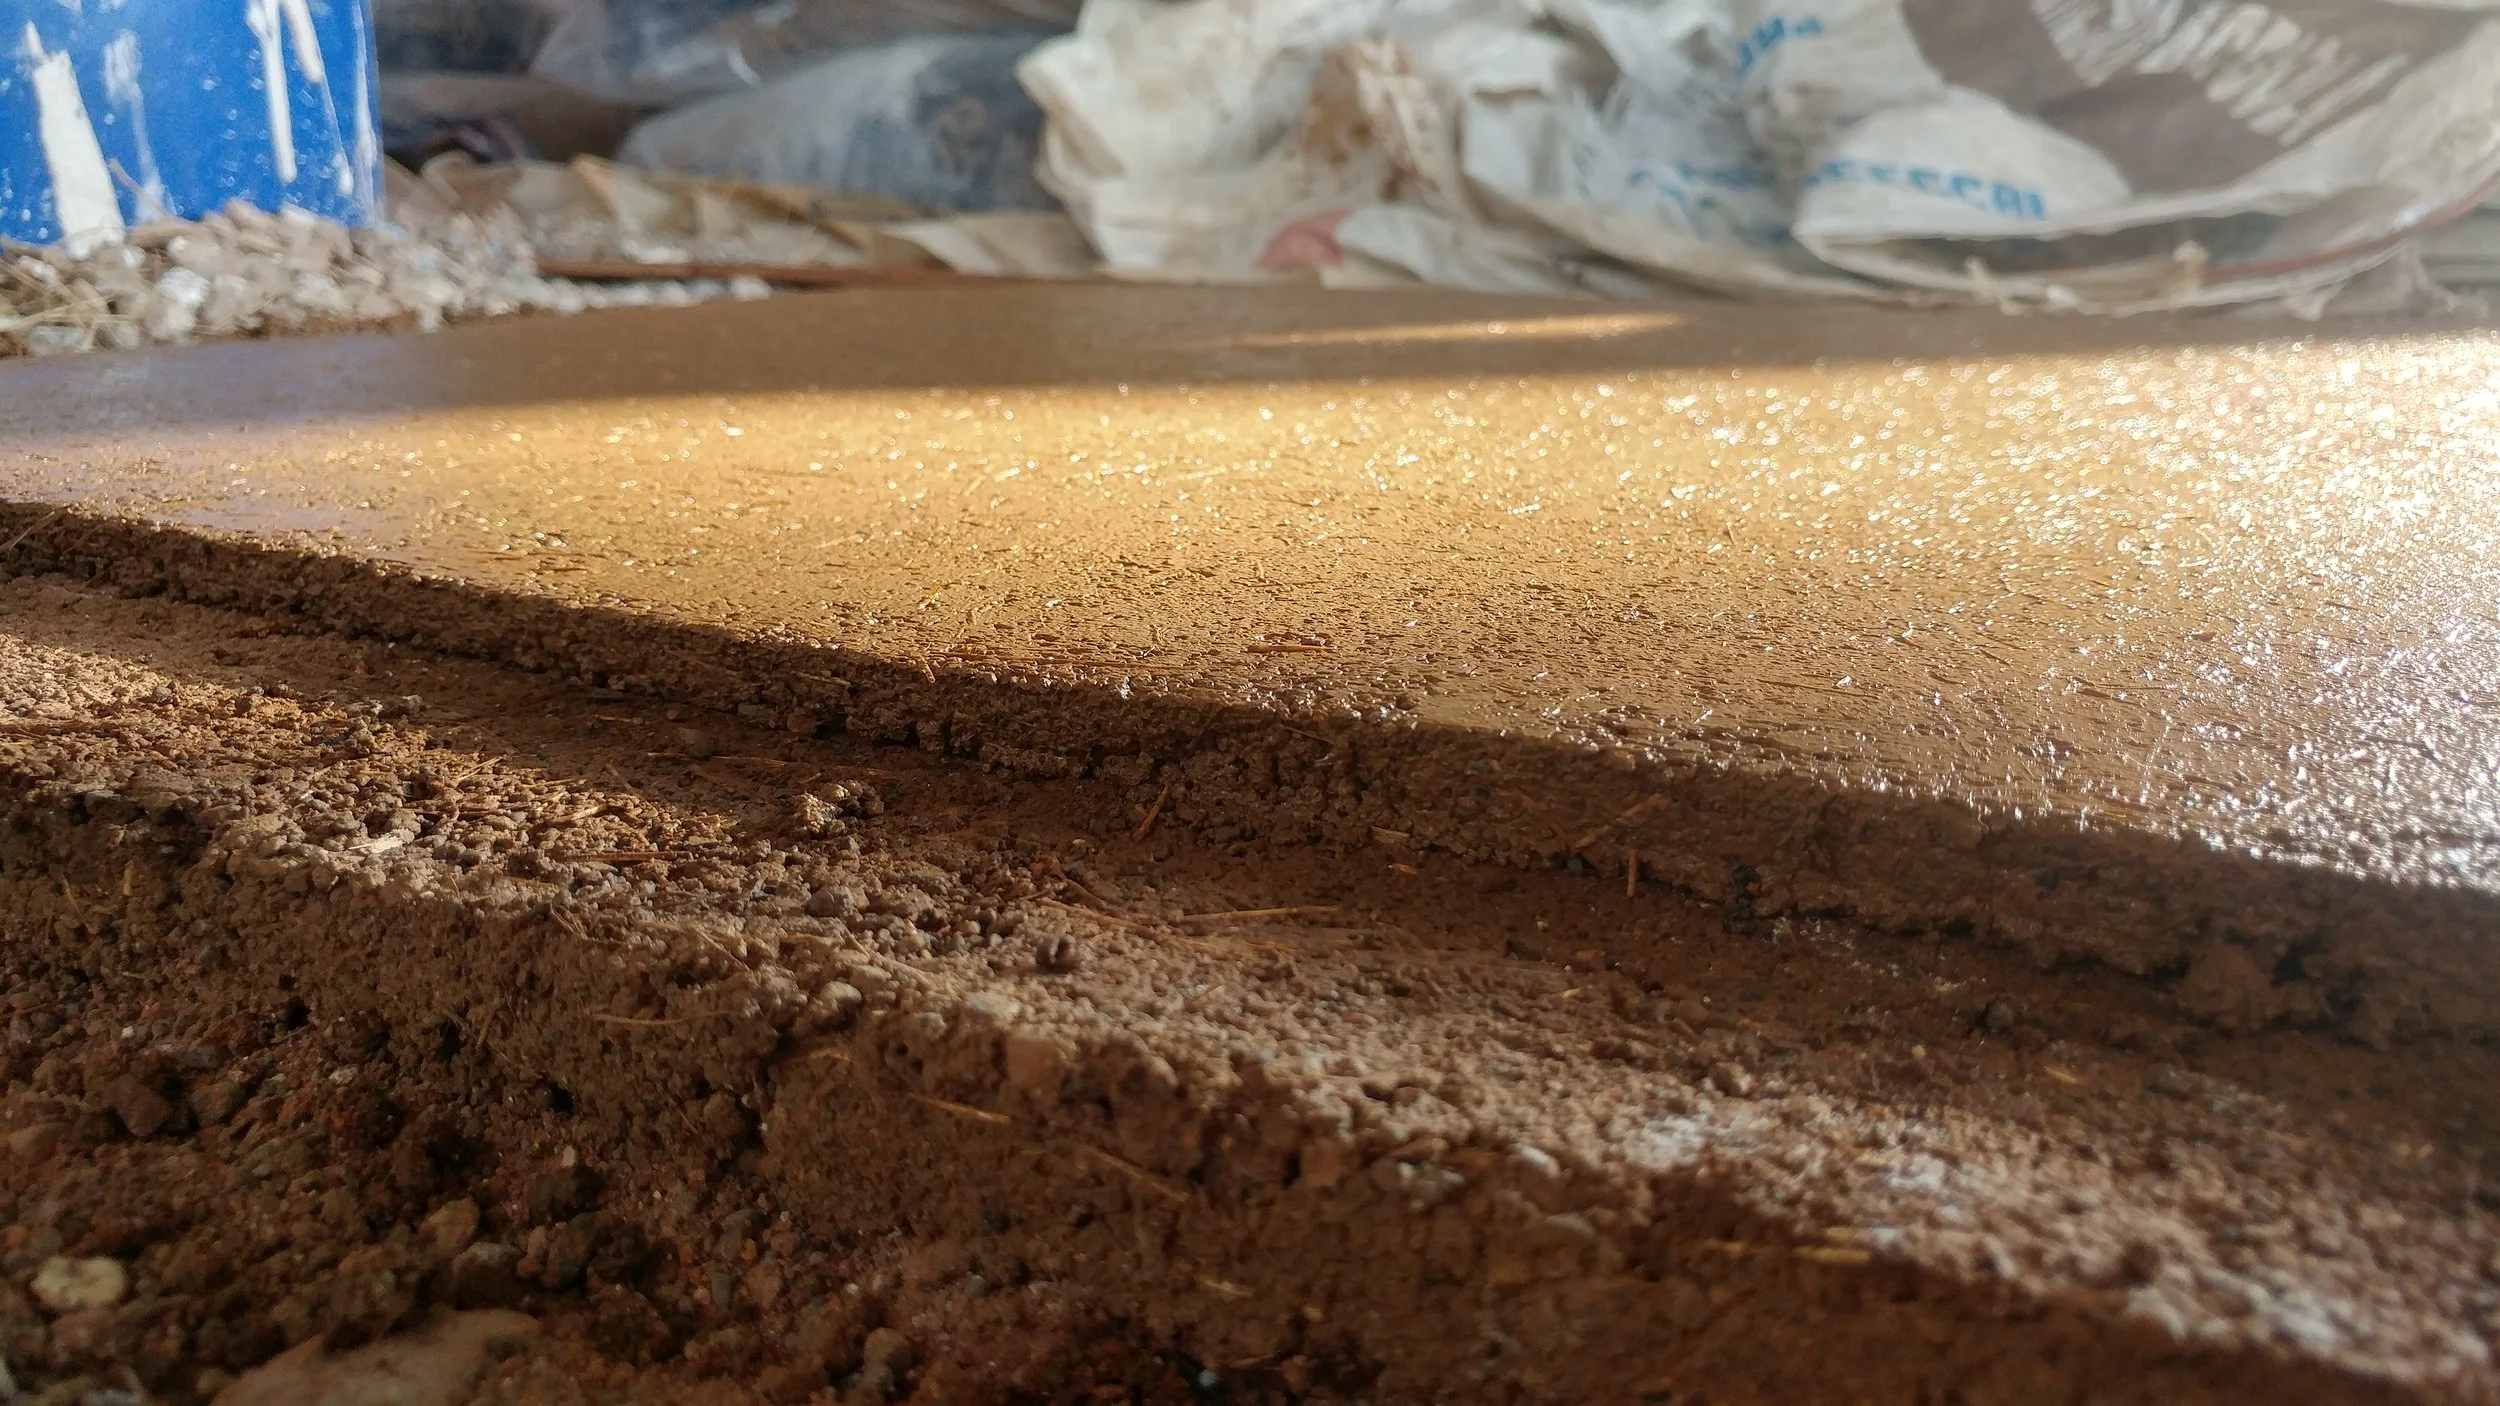
Base and final coat in a sample, always make tests!
Here in our tropical environment, with the materials locally available to us, we have finally figured out a bomber earthen floor. Here is a simple step by step guide on how we lay an earthen floor.
An earthen floor is comprised of 4 different layers
· Water proof membrane
· Tamped gravel (optional to increase total depth)
· Compacted road base (mixture of sand, clay and gravel)
· Two layers of final floor (mixture of sand, clay and chopped straw)
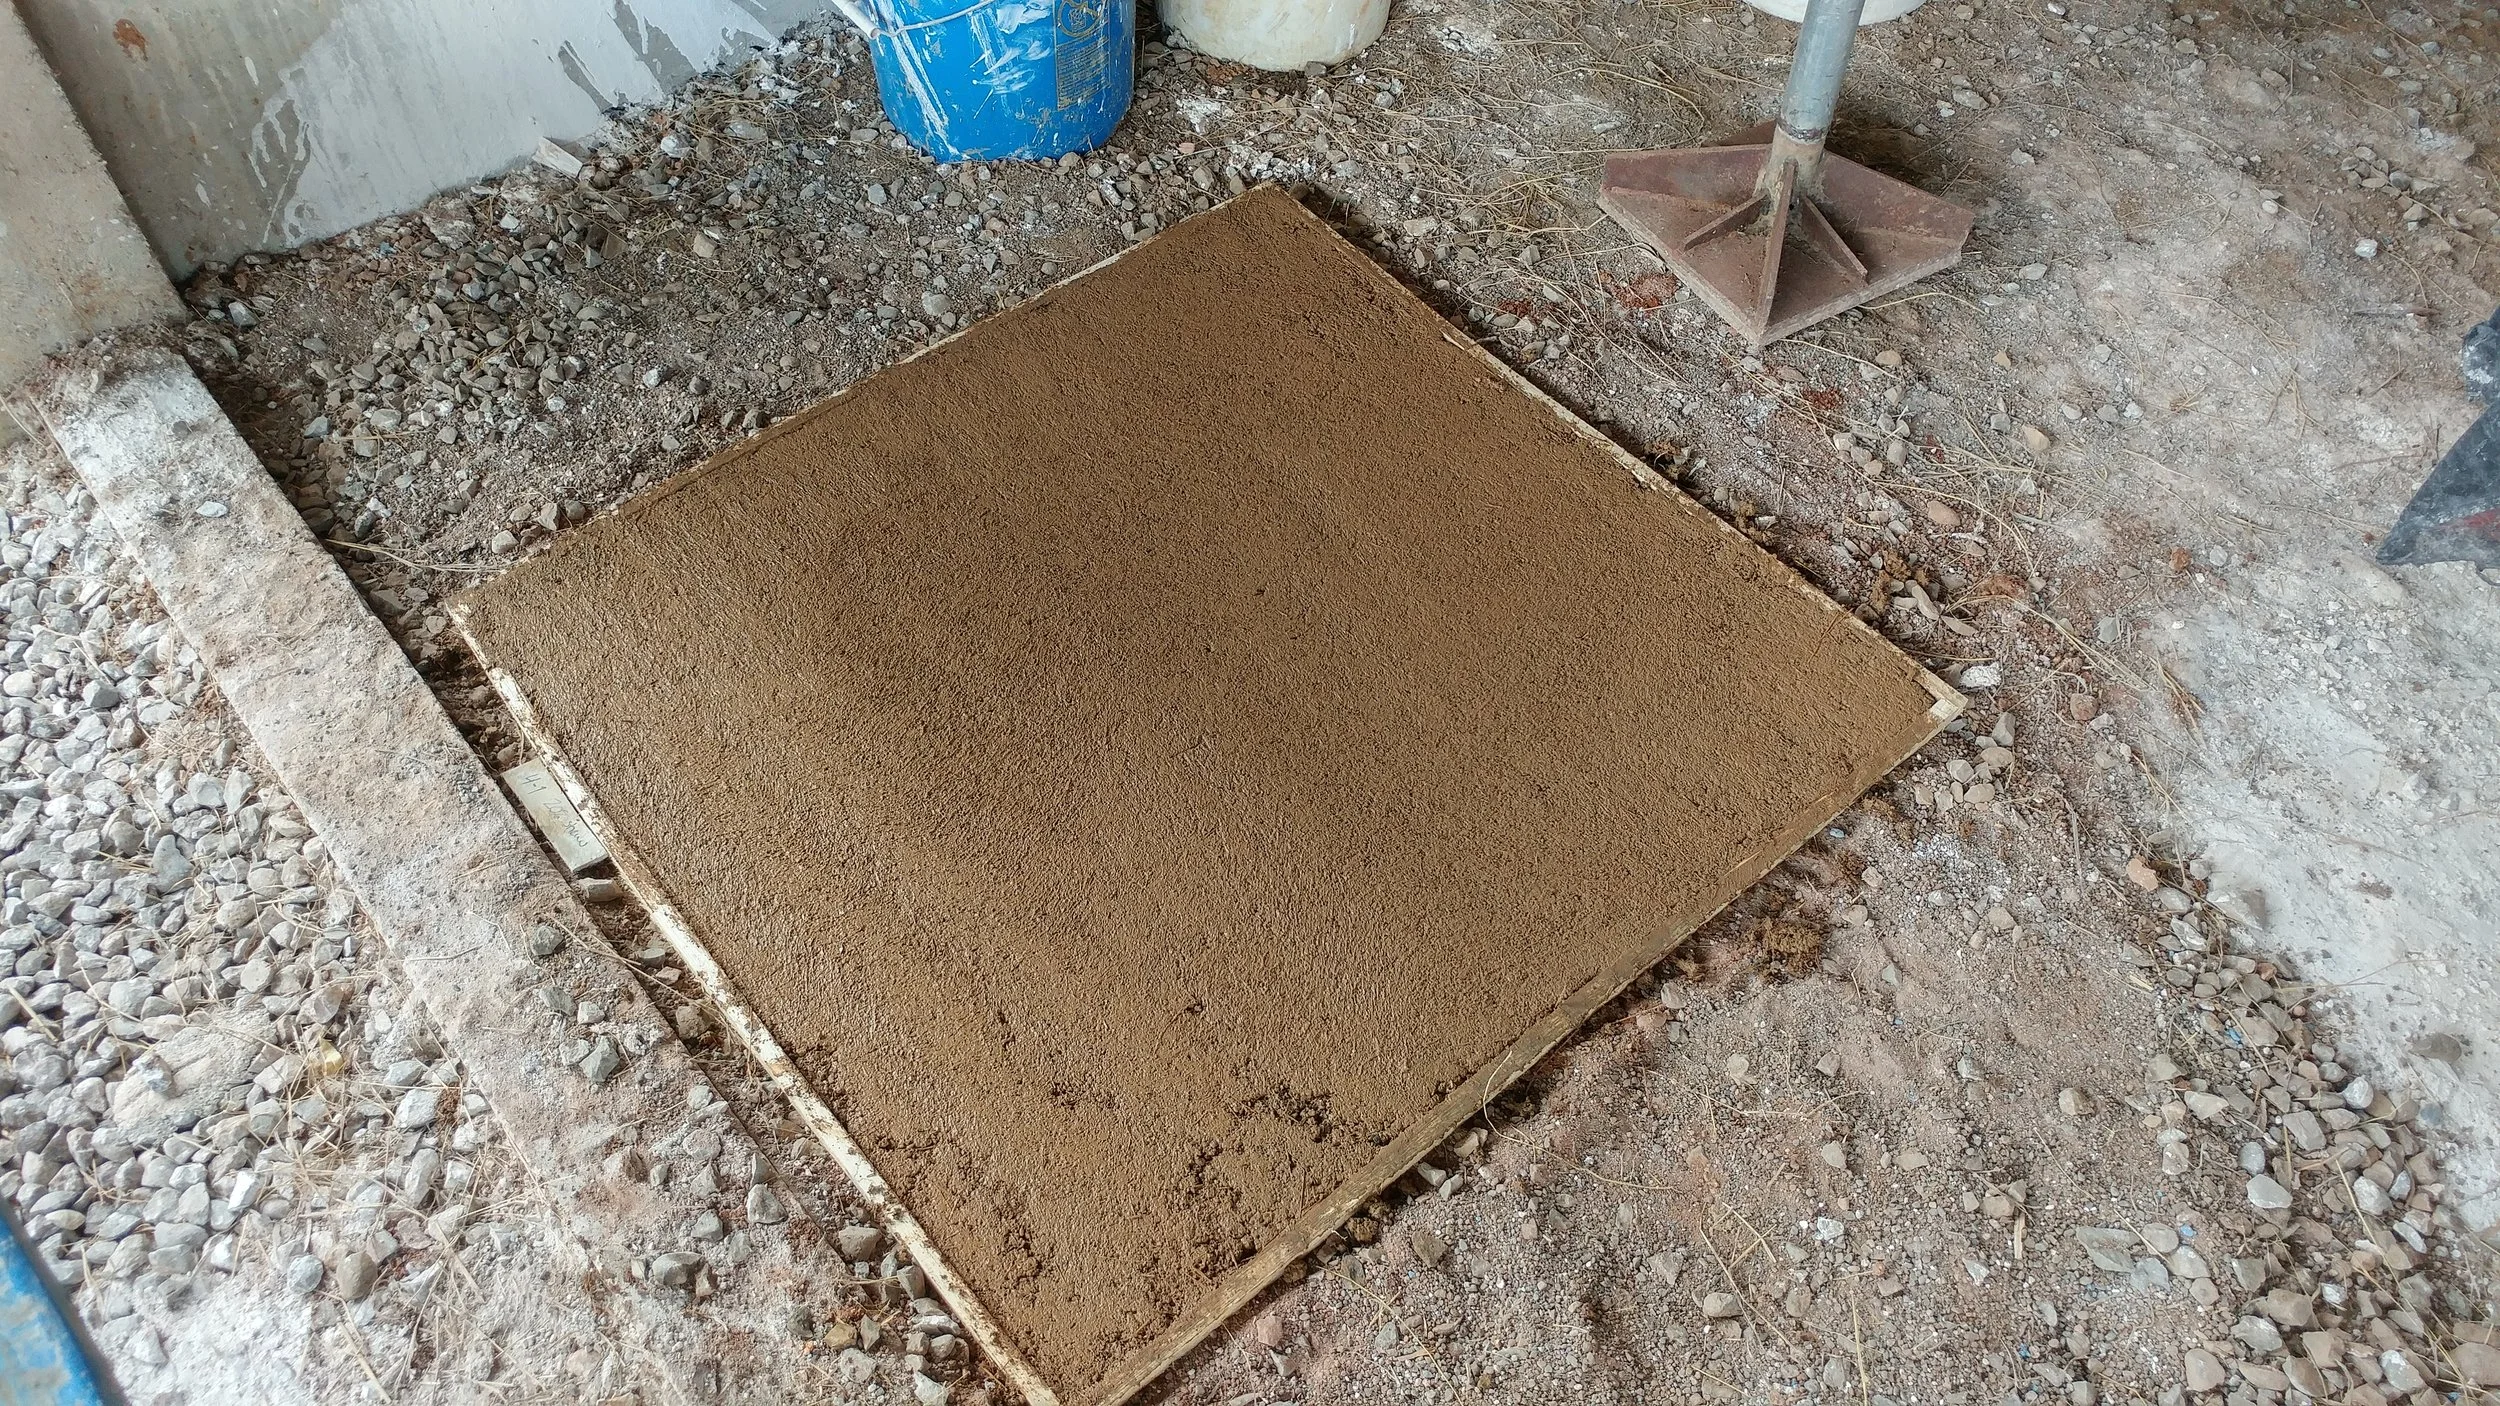
Make sure your samples are large enough to be representative!
Before you begin make samples! Always make samples for anything you plan on building; whether that is for your cob house, outdoor pizza oven, or natural plasters. We recommend making at least 3 samples with different ratios of clay, sand, and straw. These should be at least 1 meter by 1 meter to get an accurate example of the final product.
Steps once you find the correct ratios
1) Lay down a waterproof membrane, wrapping it up the inside of the stem wall.
2) If you need to increase the depth of your floor height you can add tamped gravel.
3) Compact your road base. Minimum depth is 4 inches.
4) Lay down your first layer of final floor. We do ¾ inch thick. Let completely dry.
5) Lay down your final layer of floor. We do ¼ inch thick. This can be troweled smooth to close any holes. Let completely dry.
6) Paint multiple layers of linseed oil/thinners combo at 3:1 ratio. This provides a protective coat that will increase the longevity of your floor.

Want to Learn More?
Perfecting an earthen floor takes time and practice. If you are trying to create a sustainable home consider using earth for your floor and throughout your home.
If you would like to get some hands on experience in natural building join us for one of our upcoming courses check out our workshops page for our latest offerings.
References:
Earthen Floors - A modern Approach to An Ancient Practice By Sukita Reay Crimmel & James Thomson
Categories
Topics
- Agriculture 6
- Agroforestry 21
- Animals 2
- Apprenticeship 19
- Appropriate Technology 6
- Backpacking 1
- Bananas 1
- Basic Pantry 4
- Biochar 1
- Books 3
- Build Your Own Home 1
- Central America 5
- Chiles 1
- Cinnamon 1
- Clay Carving 1
- Climate 2
- Climate Change 1
- Cob oven 1
- Communication 5
- Community 24
- Compost 2
- Composting Toilets 2
- Condiments 1
- Conservation 2
- Cooking 4
- Costa Rica 18
- Design 10
- Earthen Construction 10
- Eat Local 2
- Ecohome 1
- Education 9
- Environment 3
- Ethics 4
- Farm to Table 12
- Fasting 1
- Fermentation 14
- Food 22
- Food Choices 8
- Food Forest 8
- Food Processing 15
- Food Systems 12
- Gap Year 1
- Gardening 5
- Ginger Beer 1
- Harvest 2
- Health 12
- Healthy living 5
- Homemade 2
- Homestead 8
- Internet 2