

BLOG
Stories, articles, and updates from the Ranch community.
Why Are My Homemade Jams So Runny? A Look into the World of Pectin!
Do I need more sugar? More acidic fruit? How do I get more pectin? What even is pectin? This blog will answer all your questions—and more—to help you obtain some beefier jams.
By Kyler Kradle — Apprentice 2026
Based on - On Food and Cooking: The Science and Lore of the Kitchen by Harold McGee
For the past few weeks, I've been trying my hand at making homemade Costa Rican jams here at Rancho Mastatal.
During one of our food processing classes, jam was thrown into the mix. We made two huge batches with tons of ingredients at high heat on a rocket stove for hours on end. The jam turned out well. We used it for fruit roll-ups, and it went nicely with sourdough.
However, our consistency and canning methods must have been a tad bit off in the end. Some jars had different thicknesses, odd smells and tastes, and, honestly, we had an overabundance of jam.
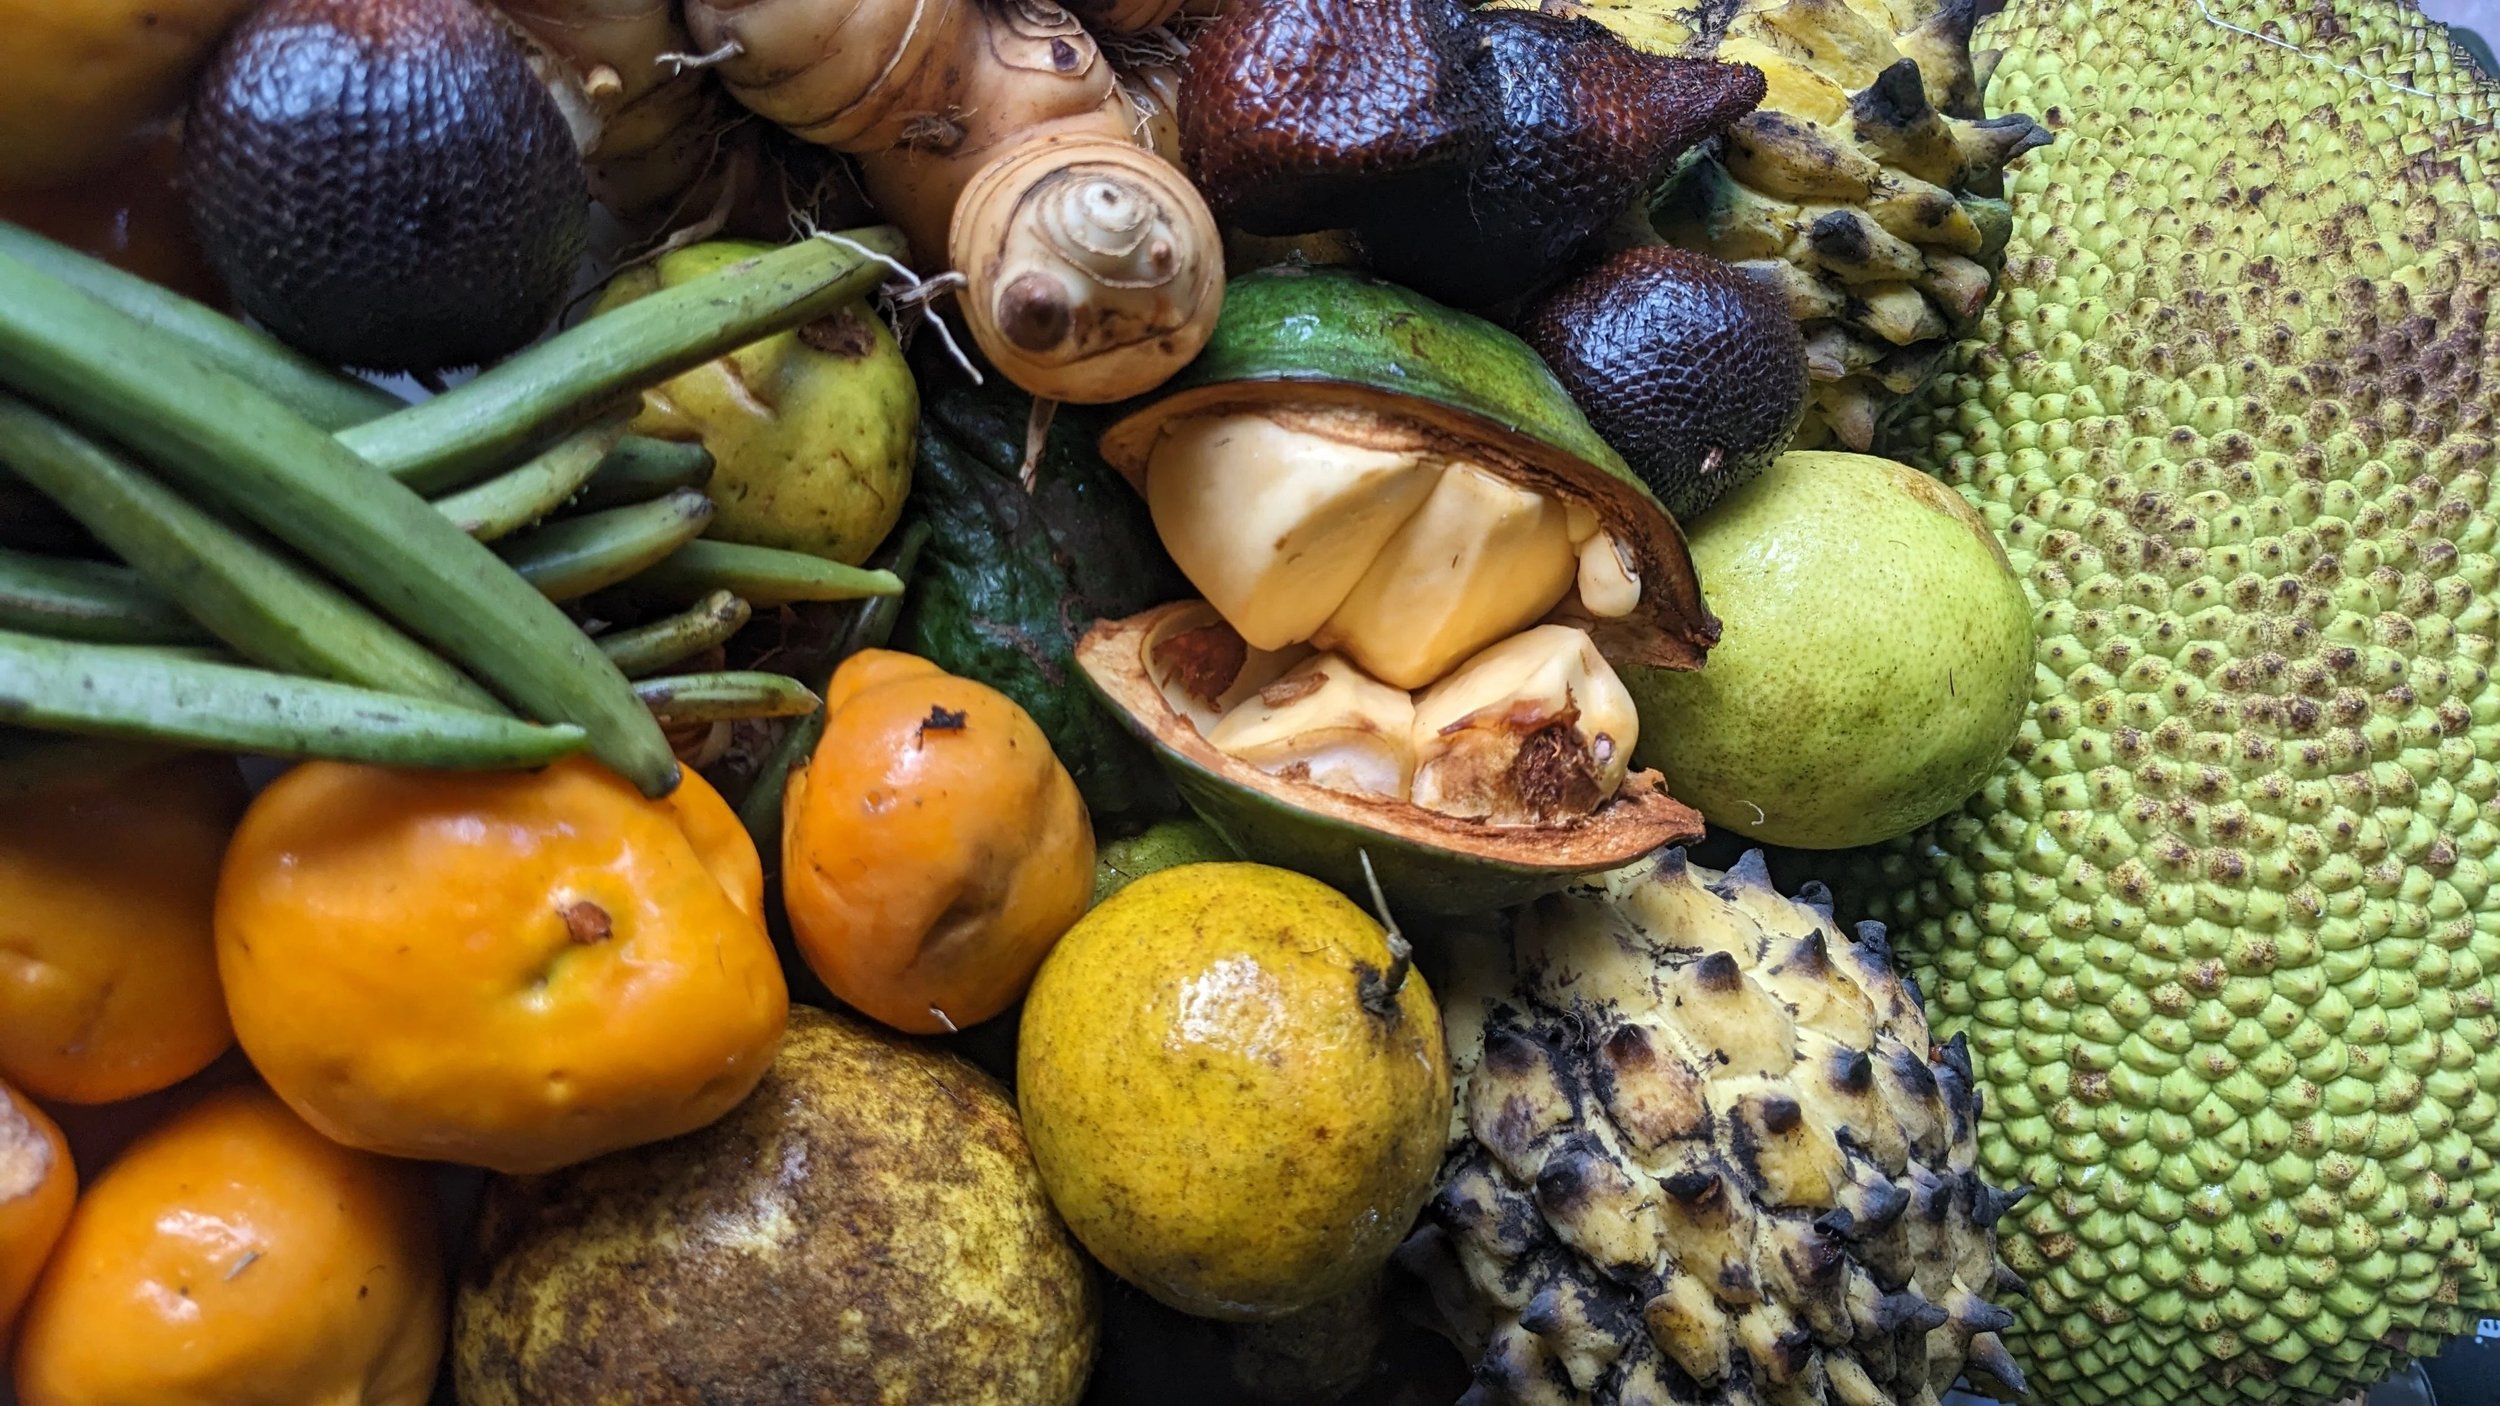
A couple of weeks later, we had some extra Victoriana fruit from our harvest day. I used this to make another jam. Alongside the Victoriana, I used a whole pineapple and papaya. This was tossed into a blender with sugar to create a liquid. The liquid was then cooked thoroughly, and more sugar was added little by little until the sugar percentage was up to about 50–55%.
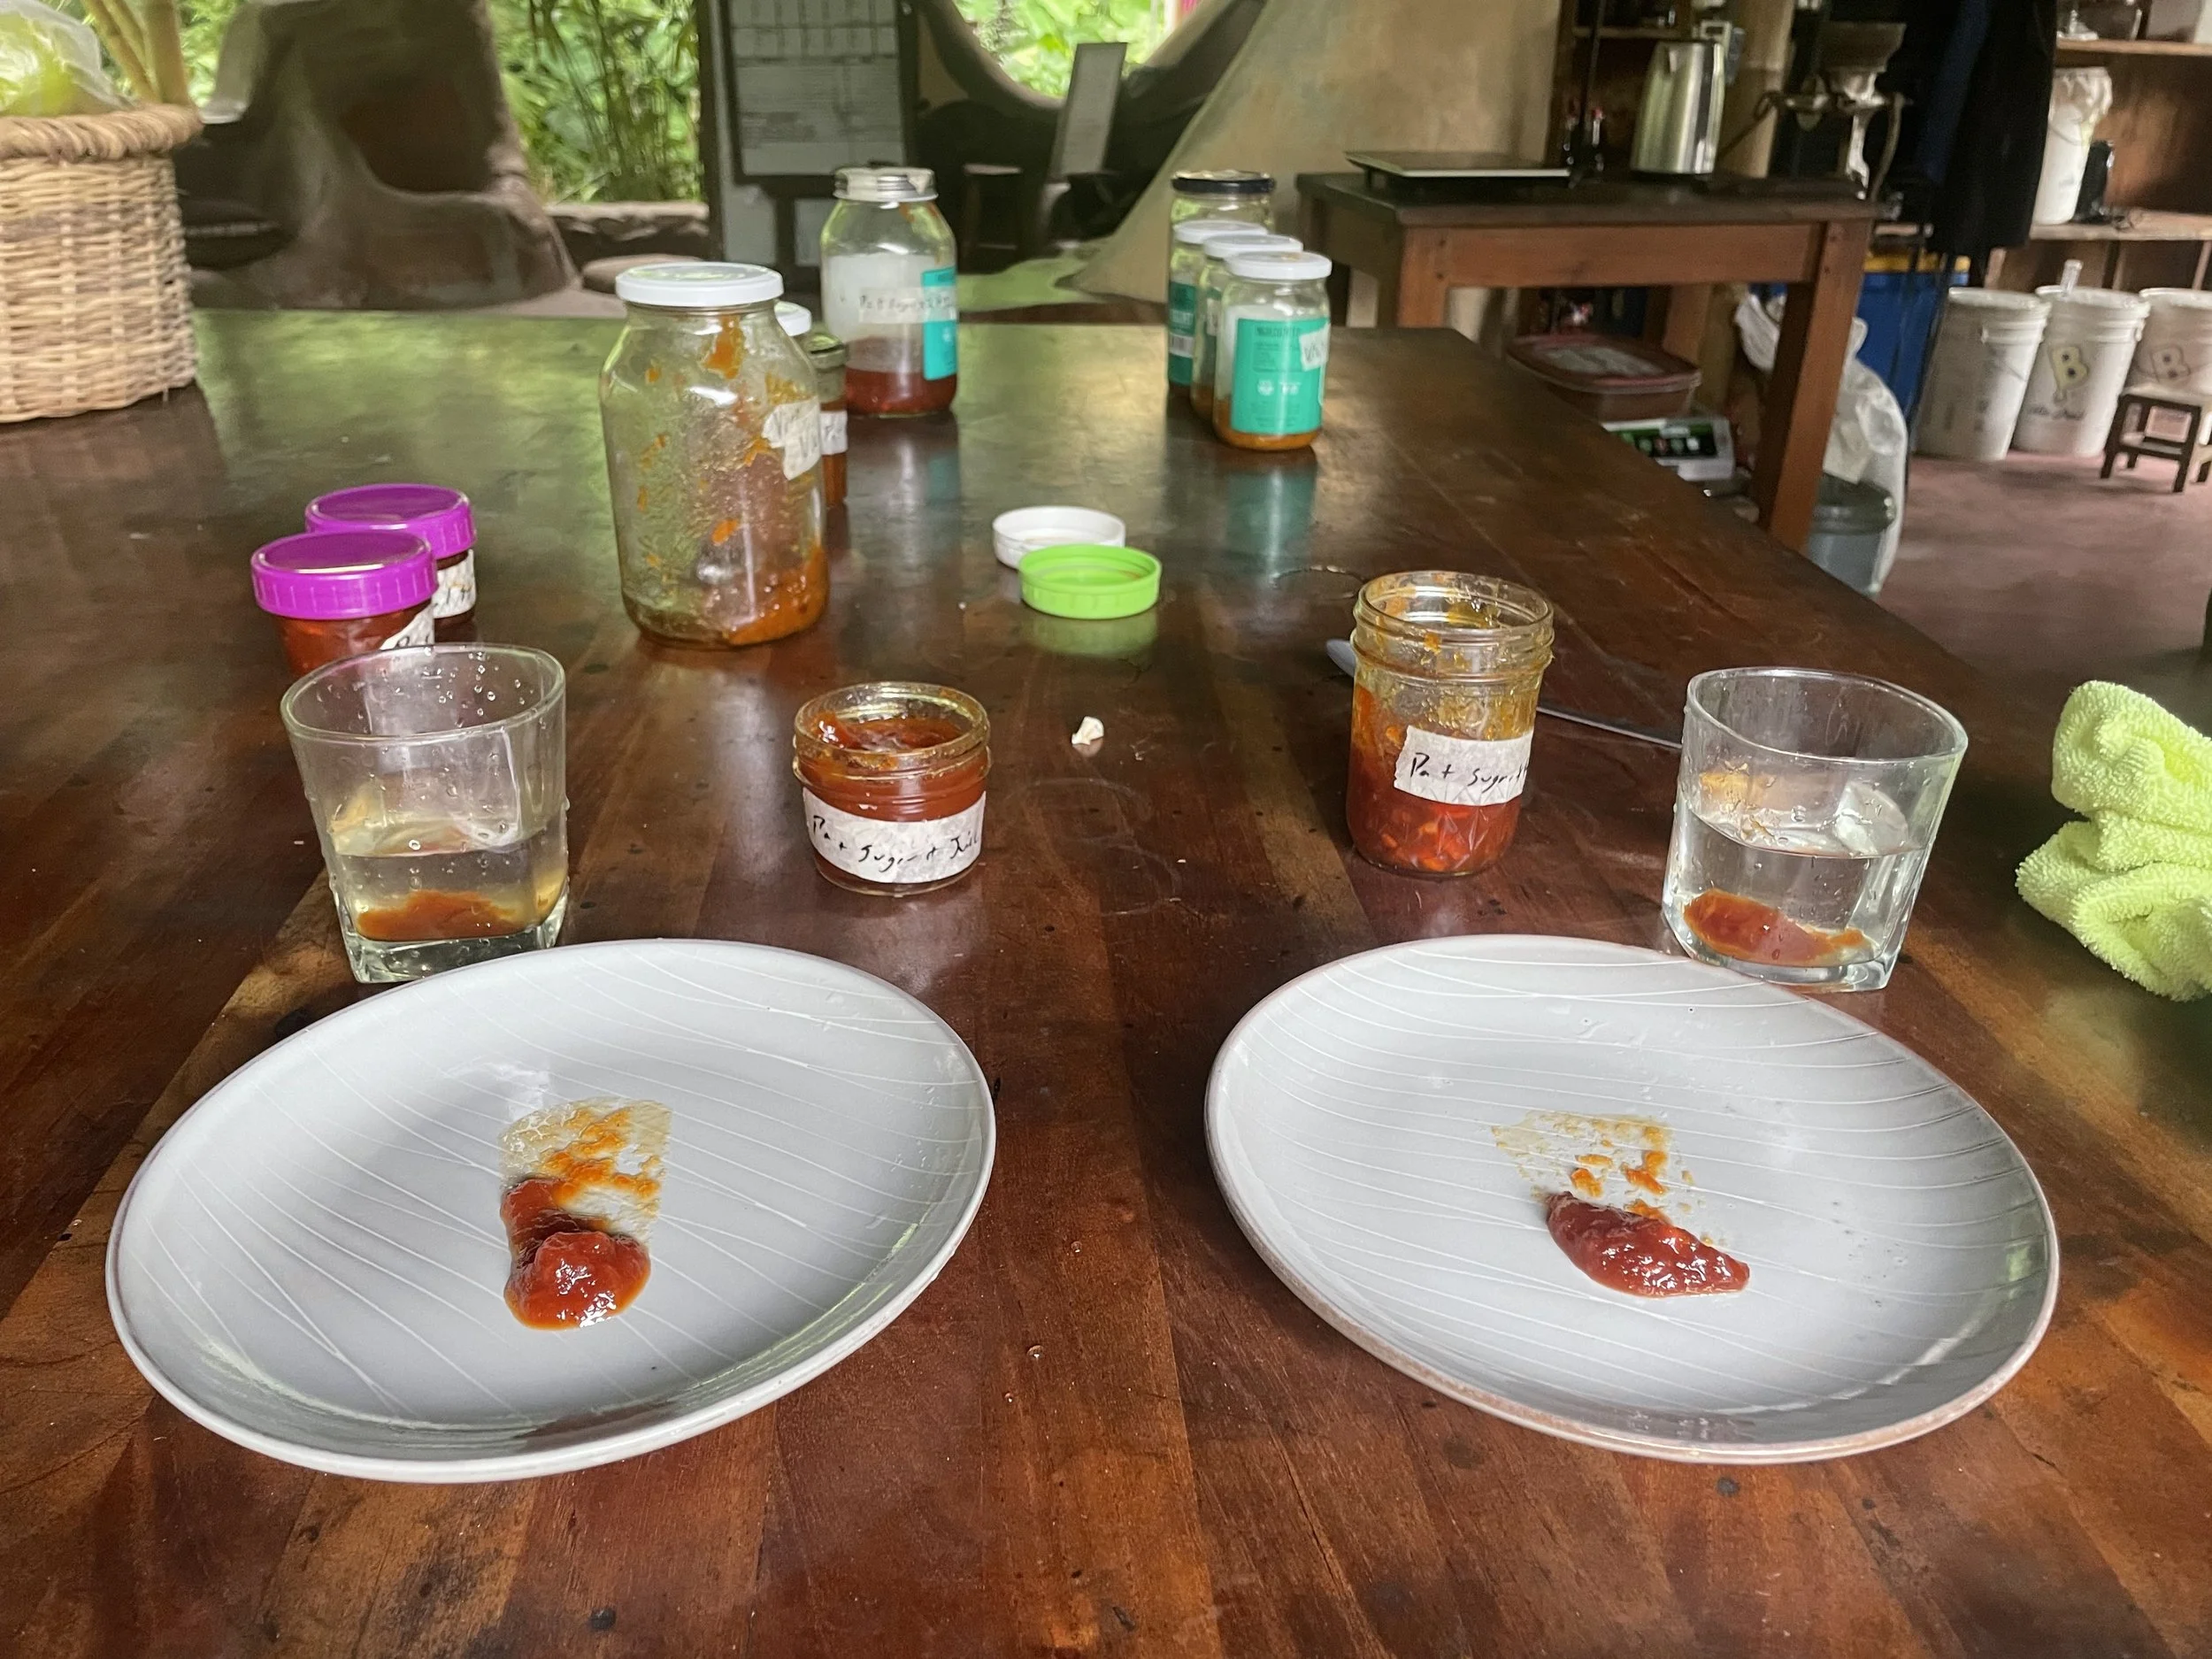
The mixture was very sweet, had what seemed like a good consistency, and passed the plate-tilt test. The plate test involves putting a little spoonful of jam on a plate and tilting it to see its consistency.
However, after letting the mixture set, it was quite liquidy and more like a sauce.
On another occasion, I made a jam for a cheesecake using Victoriana and Arasá fruit. Again, this also turned out runny, even with the more acidic fruit, which I thought had higher pectin.
So the question is…
Why Are My Jams Runny?
Do I need more sugar? More acidic fruit? How do I get more pectin? What even is pectin?
This blog will answer all your questions—and more—to help you obtain some beefier jams.
What Is Pectin?
Speaking of beef, let's think of meat for a second.
Say you cook chicken, put it in the fridge, and take it back out again. The juice turns into this gelatin-like substance around the chicken, binding the liquid together.
Historically, this is where the ideal consistency for jam came from: a mixture between solid and liquid that is bouncy and joyful.
Pectin is the creator of this consistency, but how does it do it?
The best way to think about pectin is like an adobe brick wall. The cells are the bricks, the pectin is the mortar, and the wall itself is the cell wall.
Pectin is the natural substance that holds the cells together, creating a cell wall. When a fruit is firm and underripe, the pectin is strong and long, holding the cells together.
On the other hand, when a fruit ripens, the pectin gets weakened by enzymes.
For those wondering, like I was, enzymes are proteins that help conduct chemical reactions made by living things. Basically, they're a tool that helps complete a job faster—like cutting paper with scissors instead of your hands. The enzyme is the scissors.
When cooking fruit, the wall breaks and the cells open, changing their current structure. Imagine shaving away an adobe brick wall to make a curve. Those shavings still have the same ingredients, but they're just in a different form.
That's the pectin getting dissolved into the fruit juice.
With this crumbly substance, you can't just form another wall again, just like pectin can't simply turn back into a gel. The pectin chains have been diluted in water and now hold a negative charge that makes them repel each other instead of bonding.
They need some help and other ingredients to find each other again.
Similar to rebuilding an adobe wall, the cook—the builder—can use several different methods to help bring pectin back to its gel form.
Four Ways to Help Pectin Form a Gel
1. Lots of Sugar
Sugar molecules attract water molecules to themselves.
This helps reduce the amount of water available in the mixture.
2. Boiling
Boiling pulls water away from the pectin, exposing the pectin chains to each other again.
Sugar increases the boiling point.
Boiling evaporates water, bringing pectin chains closer together while also creating an overall higher concentration in the mixture.
3. Increased Acidity
Acid neutralizes the negative repelling charge that the pectin mixture is currently holding.
The wandering pectin molecules are then able to bond together to form a gel.
4. Supplemental Pectin
Pectin can be bought commercially or found in other fruits.
It can be added directly to a mixture to replace broken-down pectin molecules and help bring the gel form back to life.
Note: Overuse of heat and acid can shorten pectin chains, causing the jam to become liquidy.
Ideal Conditions for Making Jam
The usual challenge of preserve-making is trying to set the mixture at a proper boiling point for a specific amount of time while meeting the correct sugar percentage and creating an overall ideal concentration.
Other problems can occur because of the quality and amount of pectin or acid.
Here are the ideal conditions for creating a proper concentration:
pH: 2.8–3.5, roughly equal to orange juice
Acid: 0.05% by weight
Pectin concentration: 0.5–1.0%
Sugar concentration: 60–65° Brix
If you happen to do what I do and make liquidy jam, there are a couple of troubleshooting solutions you can try.
Liquid or concentrated pectin can be commercially purchased. Another trick is using the zest or peel of acidic fruits soaked in the jam.
Other options include cream of tartar, lemon juice, and a quick reboiling.
I would also recommend doing a quick search for the fruits you want to use and checking their pectin levels.
A Basic Understanding of How to Make Fruit Preserves
1. Cook the Fruit to Extract Its Pectin
Make cooking as brief and gentle as possible.
Prolonged cooking damages pectin.
2. Add Sugar
Rapidly bring the mixture to a boil to remove water and concentrate the other ingredients.
Continue boiling until the mixture reaches 217–221°F (103–105°C).
This indicates that the sugar level has reached approximately 65%, or you can use a refractometer to measure the sugar percentage.
Cook best at a gentle simmer and in a wide pot with a large surface area for evaporation.
3. Add Supplemental Pectin if Needed
Store-bought pectin packets, citrus peel, or green apple stock are common options.
These can be added directly or placed in cheesecloth and soaked in the mixture.
4. Add Supplemental Acid if Needed
Add acid later in the process to avoid completely breaking down the pectin chains.
Too much acid can cause fluid to weep from an overly firm gel.
5. Test the Jam
Readiness can be tested using the plate, spoon, or water test to see if the mixture gels.
6. Pour into Sterilized Jars
The mixture sets as it cools below 180°F / 80°C, but it sets most rapidly around 86°F / 30°C.
The mixture can continue to become firmer over the course of several days or weeks.
Jam Experiment!
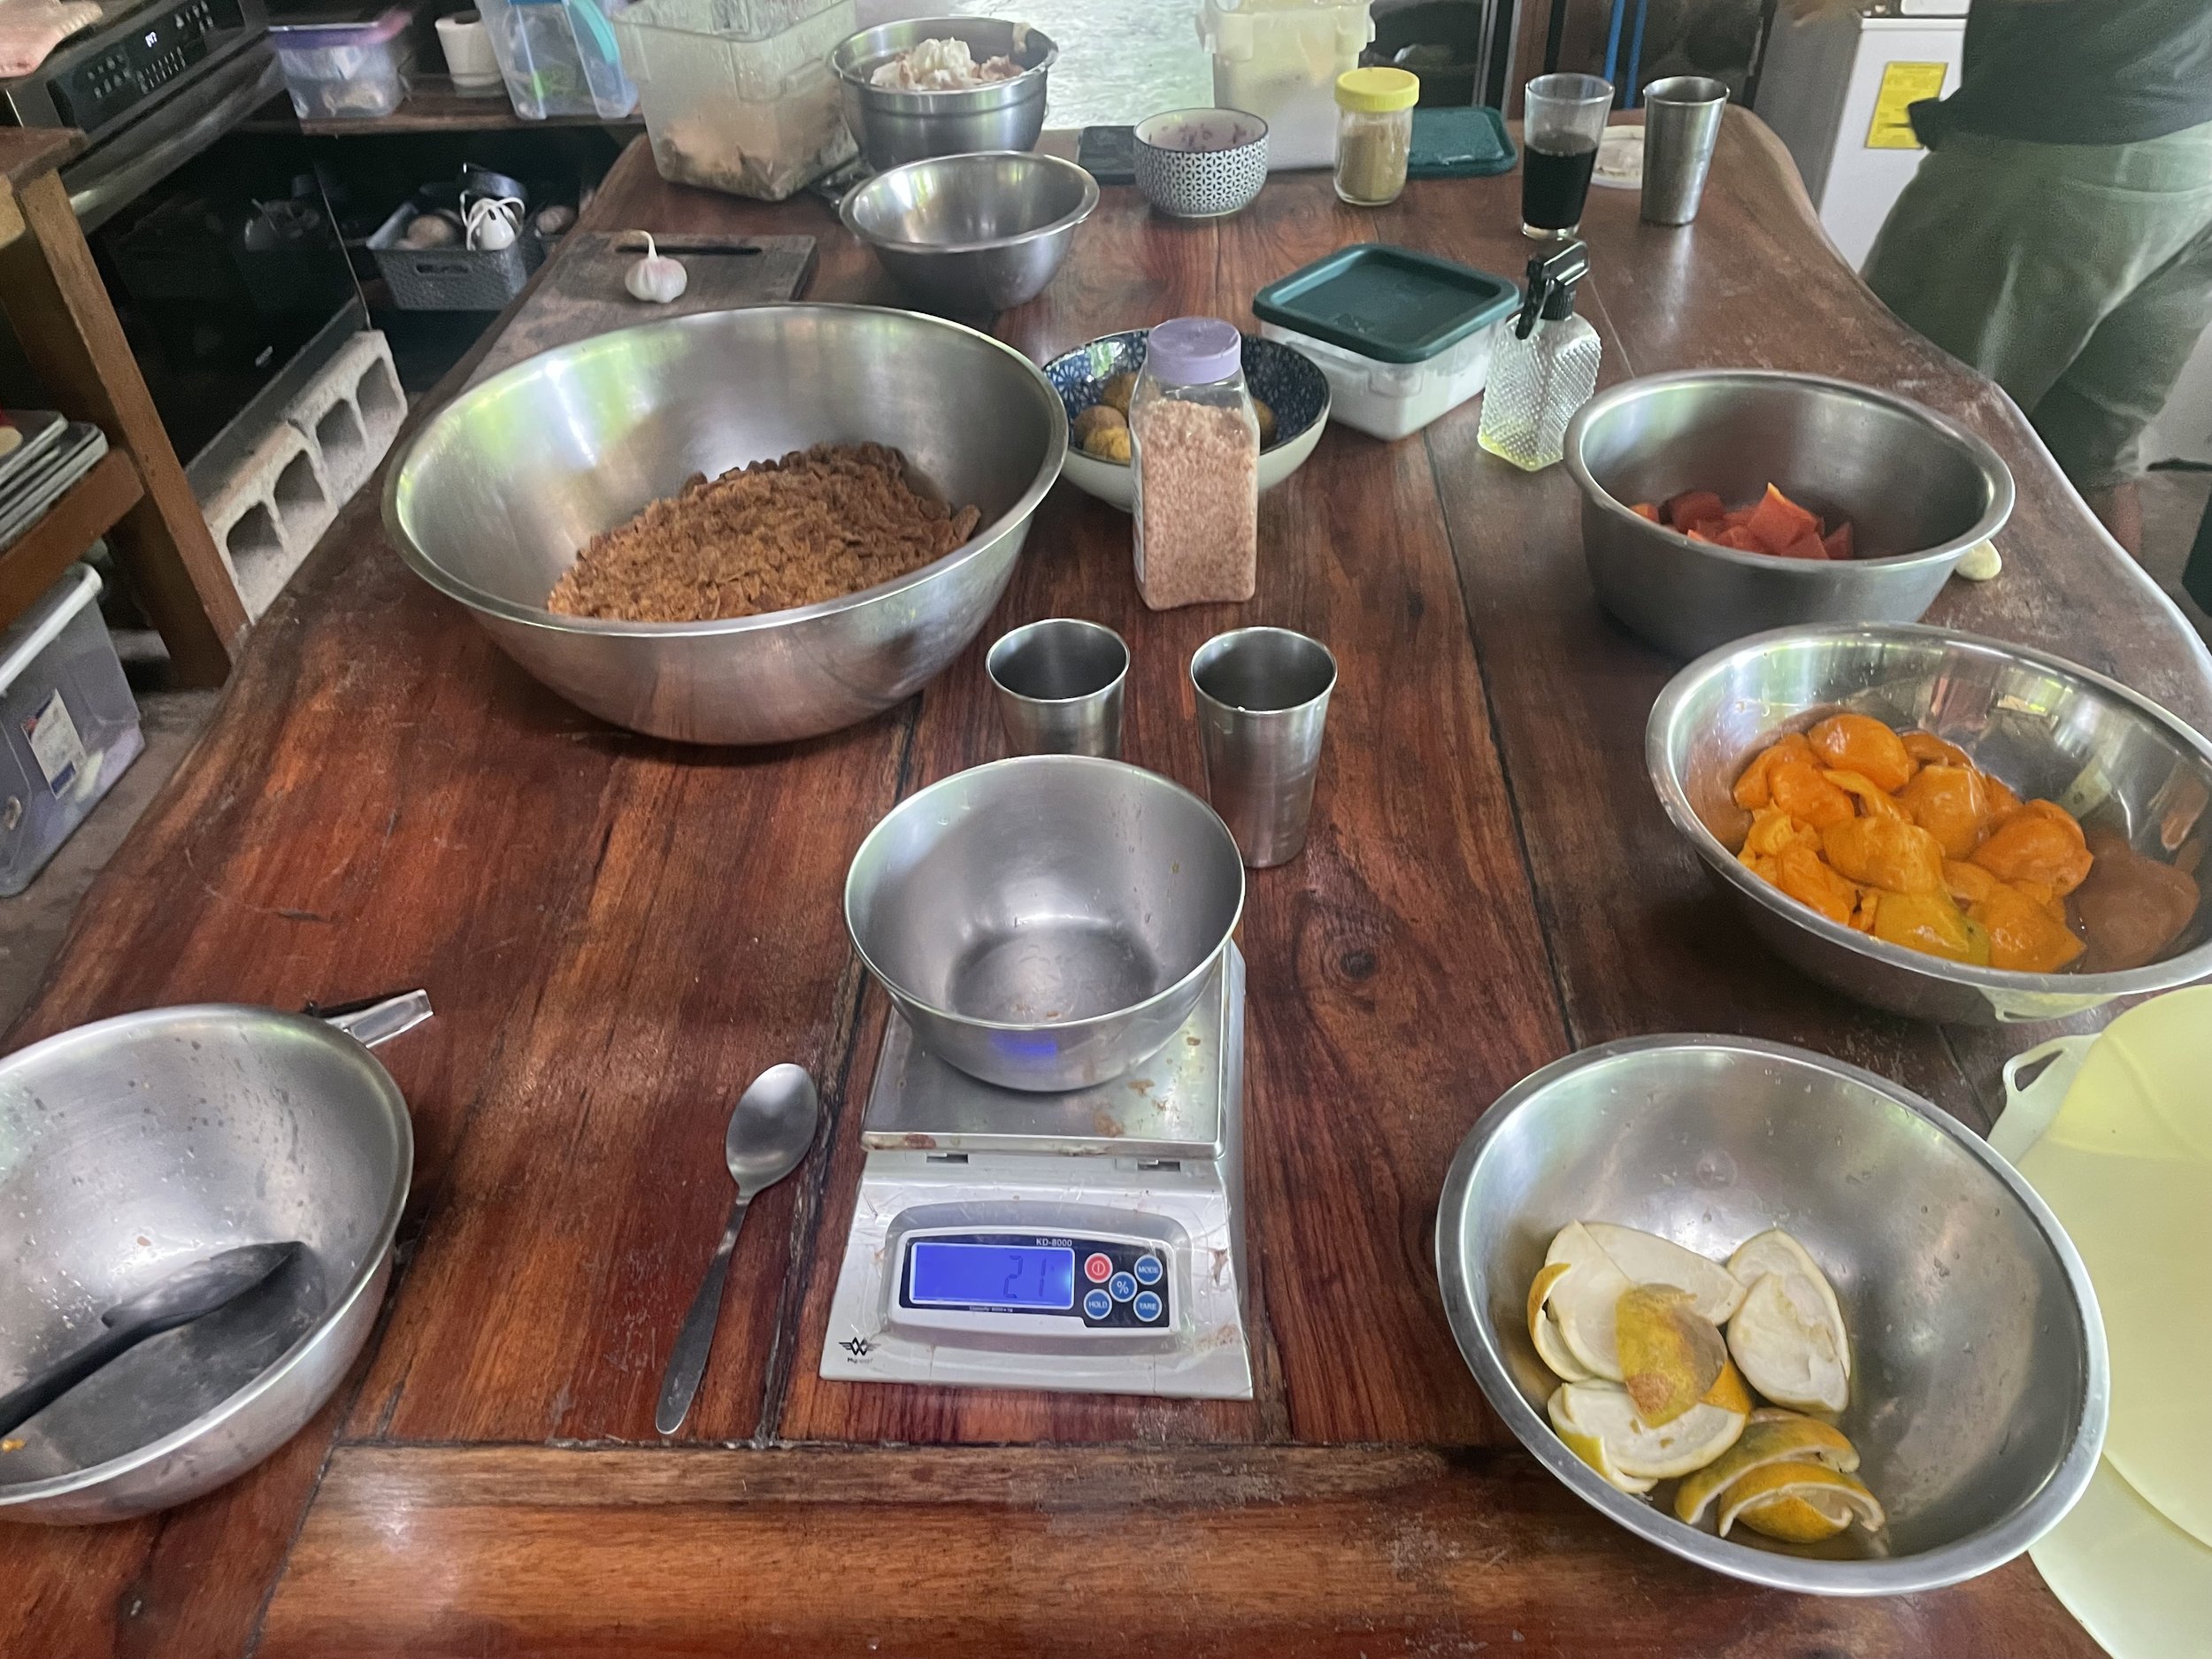
So, I decided to do a little experiment to test out some variables in my jam.
Realizing that pectin is the key ingredient for achieving the perfect consistency, I revolved my experiment around it.
Here's how I broke it down using what I had at the ranch.
I took two fruits, Victoriana, which is high in pectin, and papaya, which is low in pectin, as my subjects.
Sugar is needed for every jam, so that stayed constant for each sample. My fruit weight was 150 g to 100 g of sugar, which gave me a sugar percentage of about 65%.
Basically, I was measuring two-thirds of the fruit weight in sugar.
My pectin variables consisted of orange peels and lime juice.
My controls were:
Cooking time: 10 minutes
Cooking temperature: 100°C on the induction stove
Boiling time: 5 minutes
Pot size
Here's another look for easier comparison.
High-Pectin Fruit
1. Victoriana, 150 g + sugar, 100 g
2. Victoriana, 150 g + sugar, 100 g + 32 g lemon juice
3. Victoriana, 150 g + sugar, 100 g + half an orange peel in cheesecloth
4. Victoriana, 150 g + sugar, 100 g + 32 g lemon juice + half an orange peel in cheesecloth
Low-Pectin Fruit
5. Papaya, 150 g + sugar, 100 g
6. Papaya, 150 g + sugar, 100 g + 32 g lemon juice
7. Papaya, 150 g + sugar, 100 g + half an orange peel in cheesecloth
8. Papaya + sugar + 32 g lemon juice + half an orange peel in cheesecloth
High- and Low-Pectin Fruit
9. Victoriana, 150 g + papaya, 150 g + sugar, 200 g
10. Victoriana, 150 g + papaya, 150 g + sugar, 200 g + 32 g lemon juice + half an orange peel
To compare my results, I used a plate test and water test over a setting time of 48 hours.
I also tried to compare taste to the best of my ability, although taste is obviously subjective.
Overall, I thought the best consistency was going to be the Victoriana with the orange peel because citrus peels are supposedly high in pectin, along with the high-pectin fruit.
Experiment Conducted!
Things That Went Wrong
Lime juice measurements were inconsistent.
I messed up my ratio for lime juice and added way too much compared to the whole mixture.
When mixing in the peel, I think the cheesecloth might have soaked up some of the lime juice and liquid, which, in this case, was probably good because I had added too much.
I used orange peels.
I think I can just toss these straight into the mixture next time.
With such a small batch, I'm not sure if they even totally soaked in.
Was I boiling for too long?
It felt like I might have been over-boiling the mixture because of the liquidness of the majority of my jams.
When compared to my experimental sugar-level test jam, it was so thick I could hold it upside down and it wouldn't fall out.
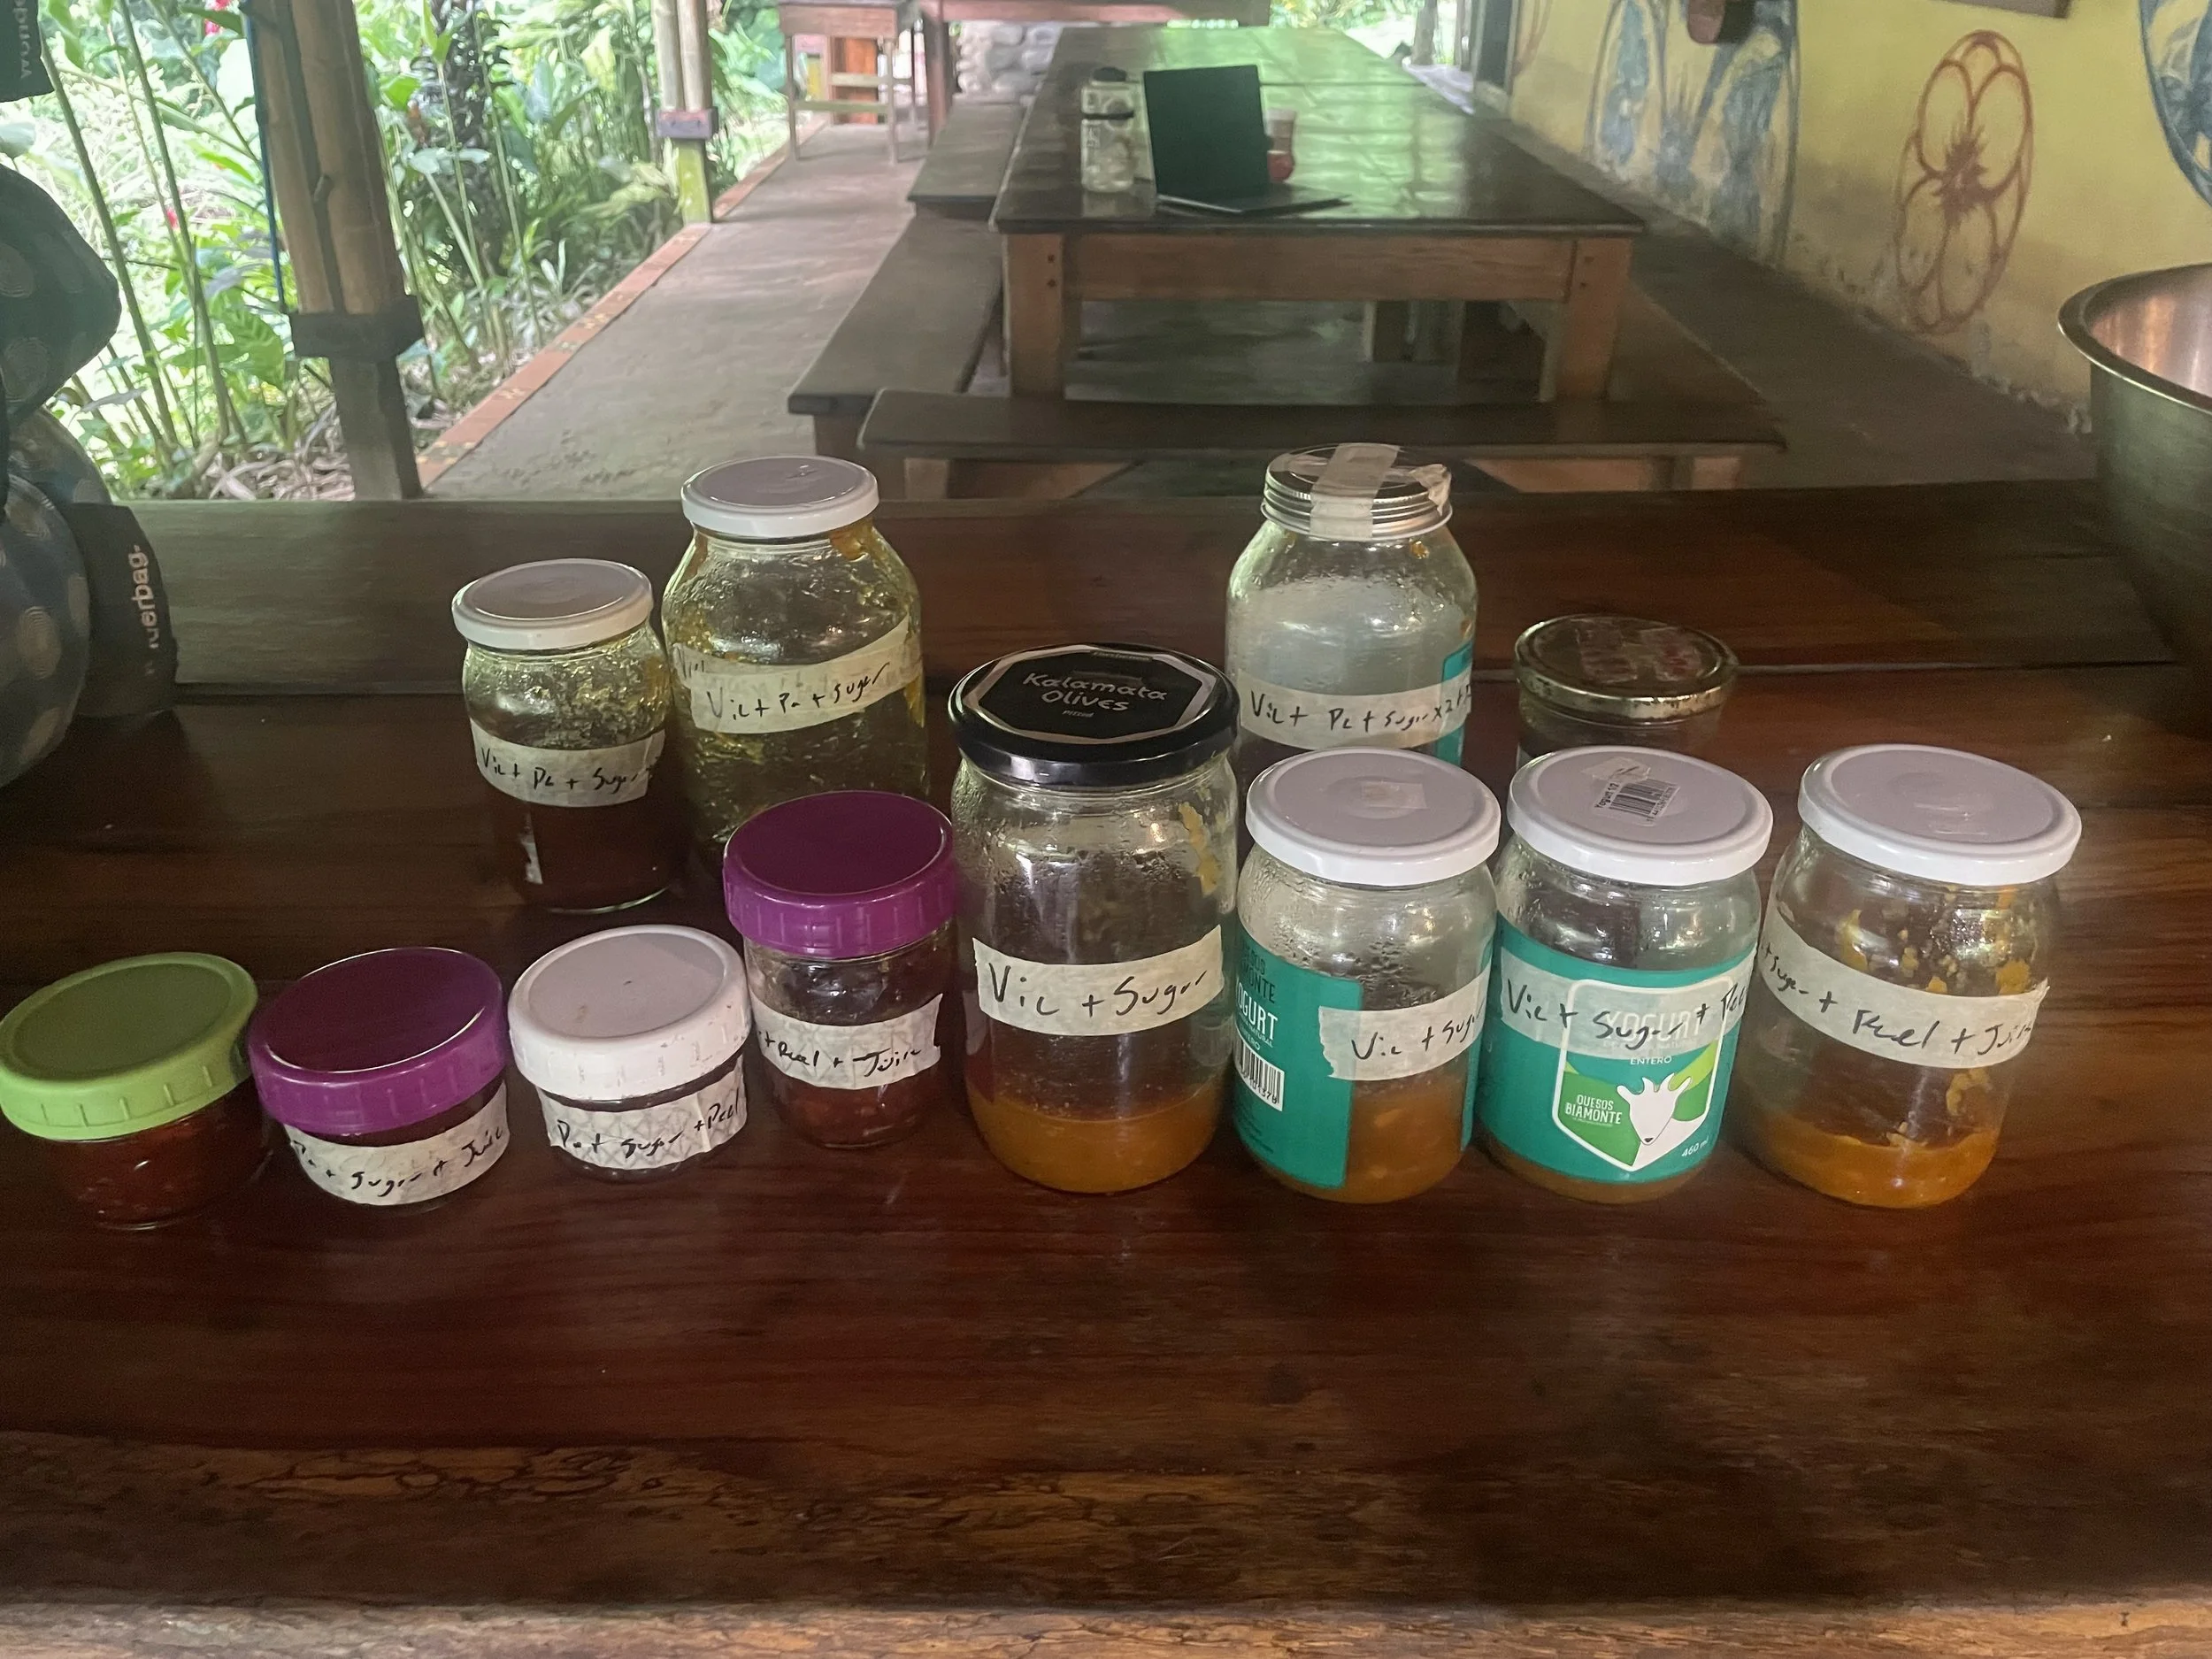
Results
High-Pectin Fruit
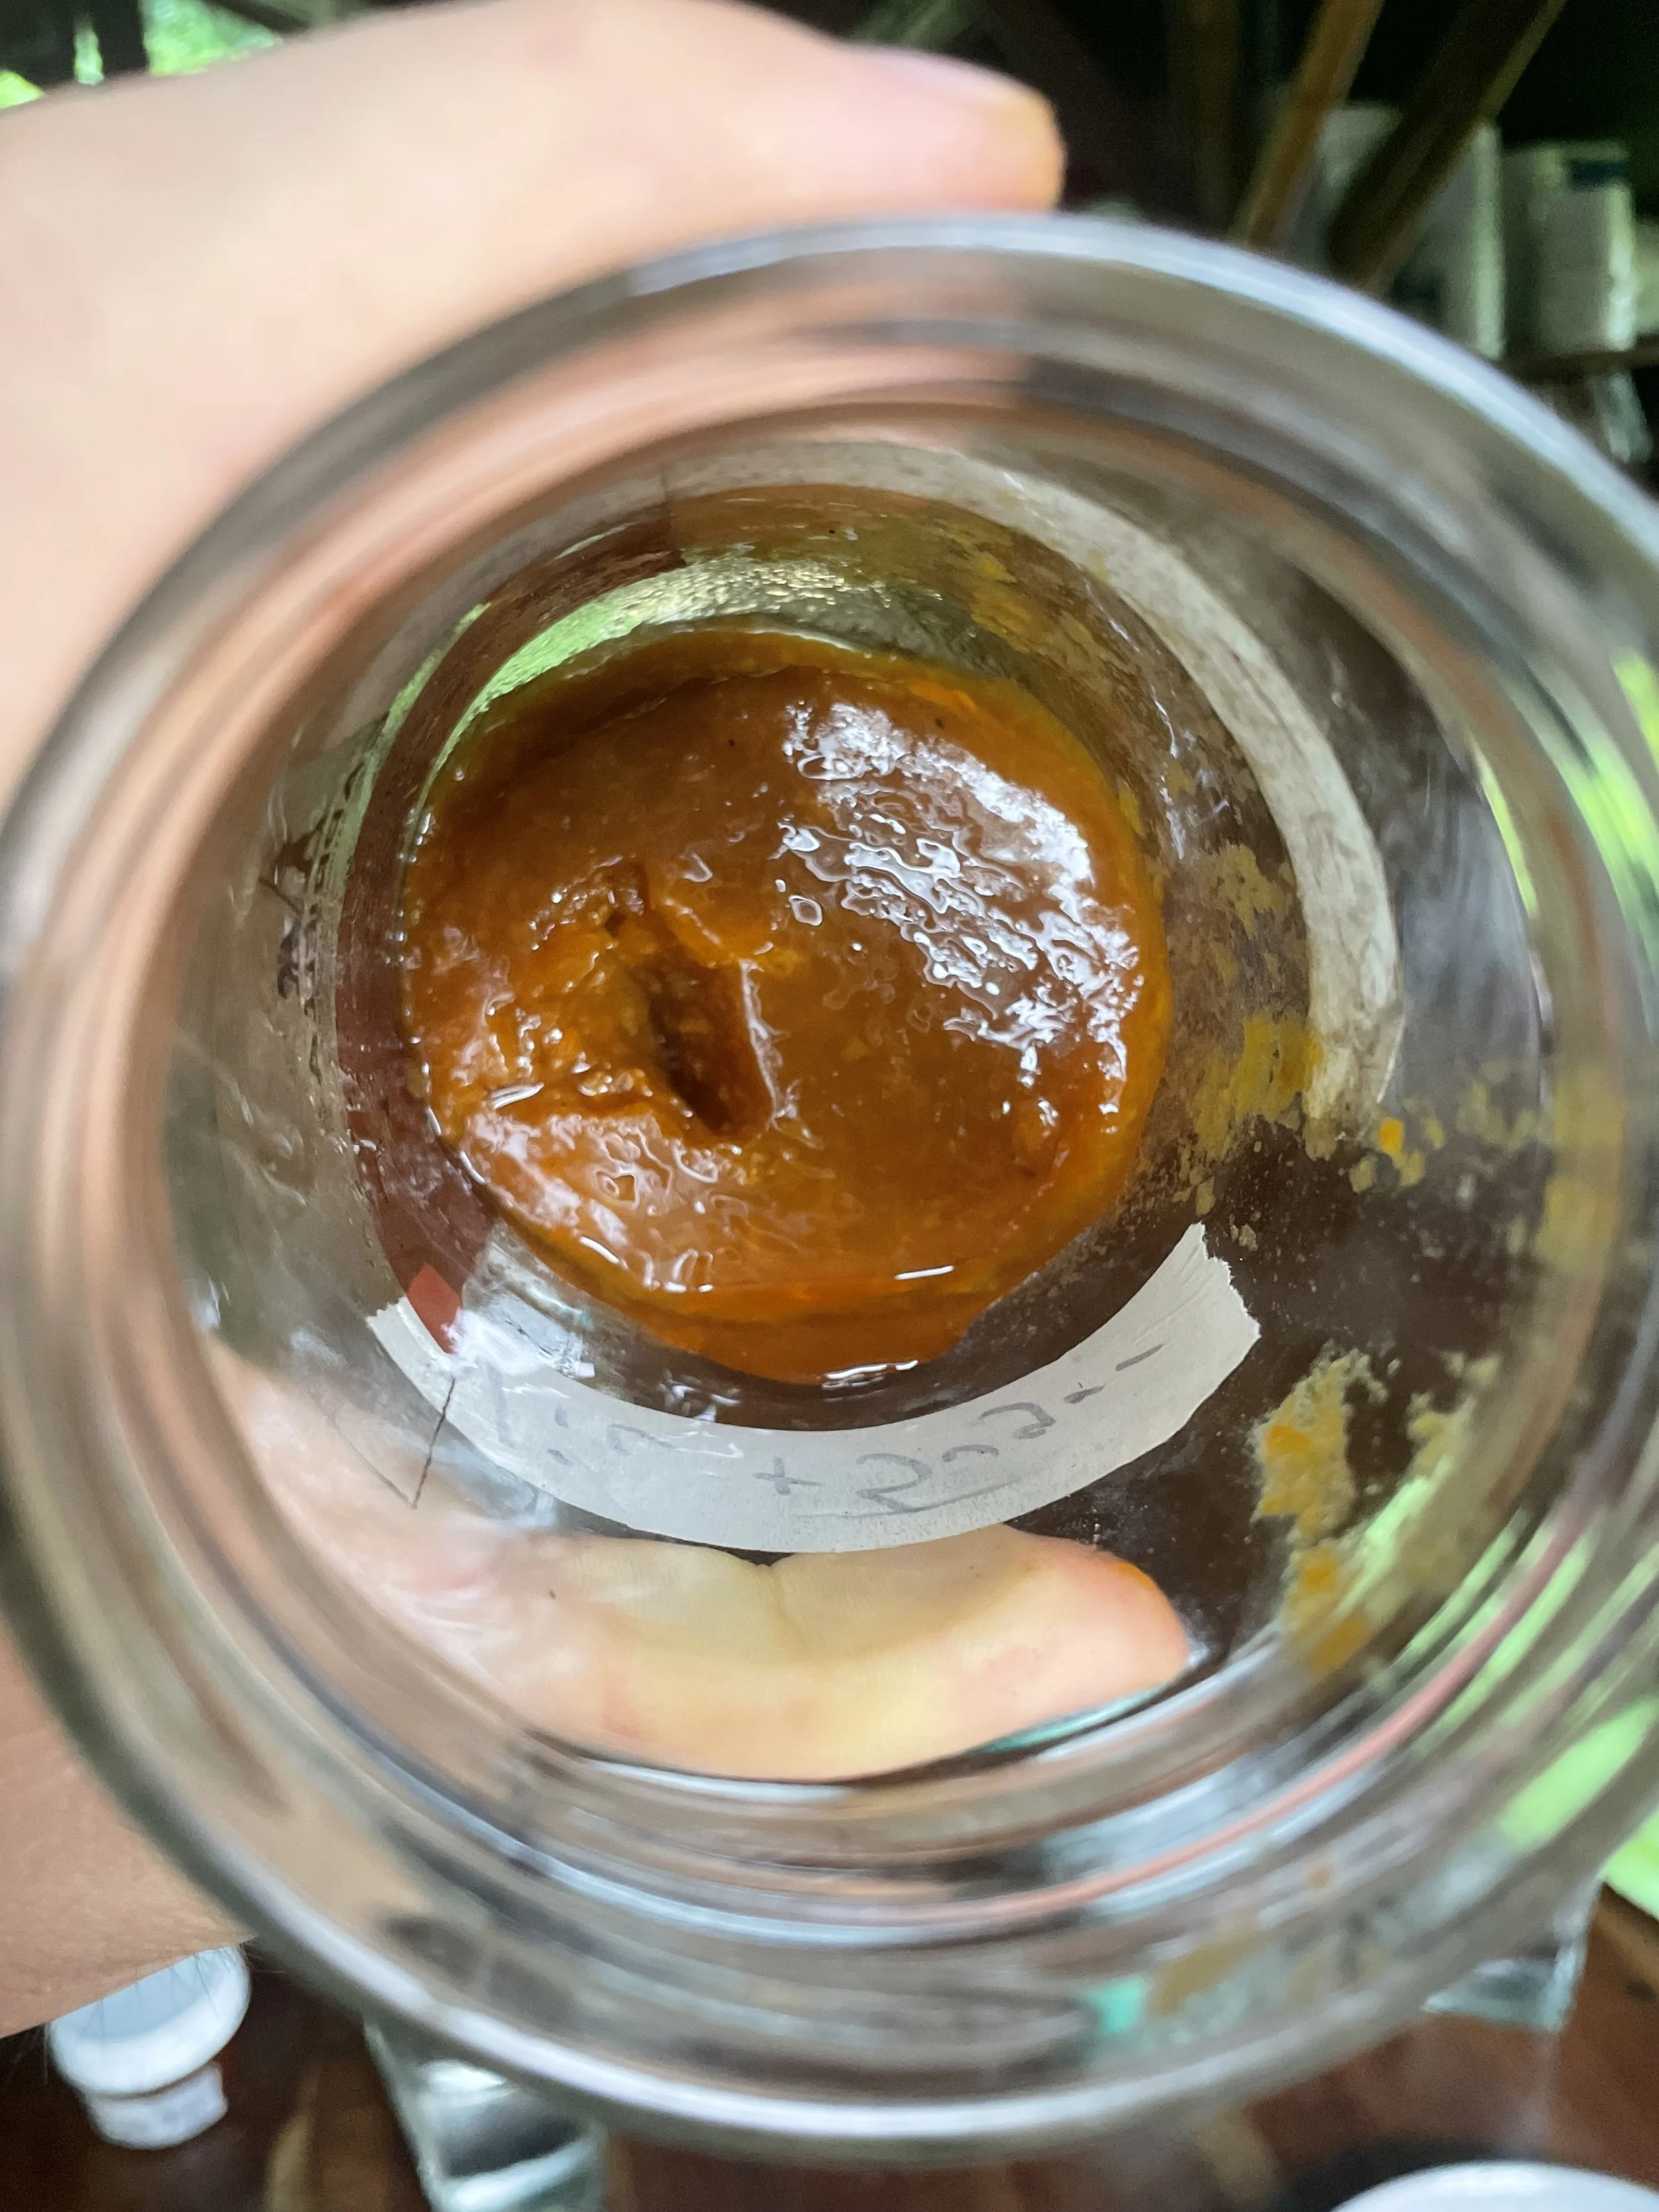
1. You can see the spoon mark—it's so thick! Great consistency, with a small amount of liquid pushed to the top. It left small, clumpy gel trails that were very visible and moved as a solid mass. On the plate test, it stayed completely as one unit. In the water test, there was no fuzz coming off. The taste was sour and delicious.
2. One mass on the top layer, but it dwindled into the same mass deeper into the jar. It was also liquidy on top, with a big snail trail, but still gel-like. It stayed as one mass in the water but left some fuzz in the water. The taste was acidic.
3. Very thick, with little to no gel trail on the plate test. Great consistency and no liquid on top. It stayed as one mass in the water test with no fuzz coming off. The taste was very similar to #1.
4. Good consistency, but with a little more movement. It left barely a mark on the plate test. It stayed as one mass in the water test but was still a little hairy. Solid taste, but kind of sour.
Low-Pectin Fruit
5. Solid structure, with little to no skid on the plate test. It all moved as a solid mass. It stayed as one mass in the water test. The taste was somewhat bland.
6. Biggest snail trail yet. It was still moving as a solid mass but was definitely the most liquidy so far. It stayed as one mass but slightly broke apart in the water. The taste was too acidic from the lime and hurt my teeth.
7. Solid structure. It left a light snail trail on the plate test and moved as a solid mass. It stayed as one mass in the water test. The taste was again somewhat bland.
8. Good consistency. It left behind small gel clumps but still moved as a solid mass. It stayed as one mass in the water test. The taste was relatively better than #5.
High- and Low-Pectin Fruit
9. More on the liquid side. There were clumpy gel spots on the plate test, but it stayed as one mass in the water test. The overall taste was solid.
10. More of a solid-mass consistency on the top, but it dwindled down. It left a noticeable snail trail on the plate test, like small gel bubbles. It stayed as one mass in the water test. The taste was too much like lime.
Observations
First things first: all the jams turned out great and had a solid consistency overall. I would consider none of them to be liquidy or sauce-like.
So, I obtained pectin, and the experiment was a success!
However, they were all so similar that it was kind of hard to differentiate between them. I'm not sure which one even had the best consistency.
I think the plate and water tests are supposed to be done while cooking the jam to check its consistency, but I suppose they still worked here.
I also saw what McGee was talking about with the weeping fluid caused by too much acidic juice. The acid-sample mixtures had a great mass-like consistency, but liquid was sitting on the top and edges.
I definitely added too much lime, and it really wasn't necessary. It also gave the jam a bad taste and hurt my teeth—it was so acidic!
The peel in the cheesecloth worked somewhat, but next time I'm just going to throw the peel directly into the mixture and pull it out afterward, or just leave it out altogether.
Flavor is also something to consider. These jams had the good consistency I wanted, but the flavor wasn't all that great. Combining fruits or choosing better-tasting fruits with less acidity may change the consistency while producing a better taste.
Now the question is: How can I obtain better-tasting jams with solid consistency?
What's Next?
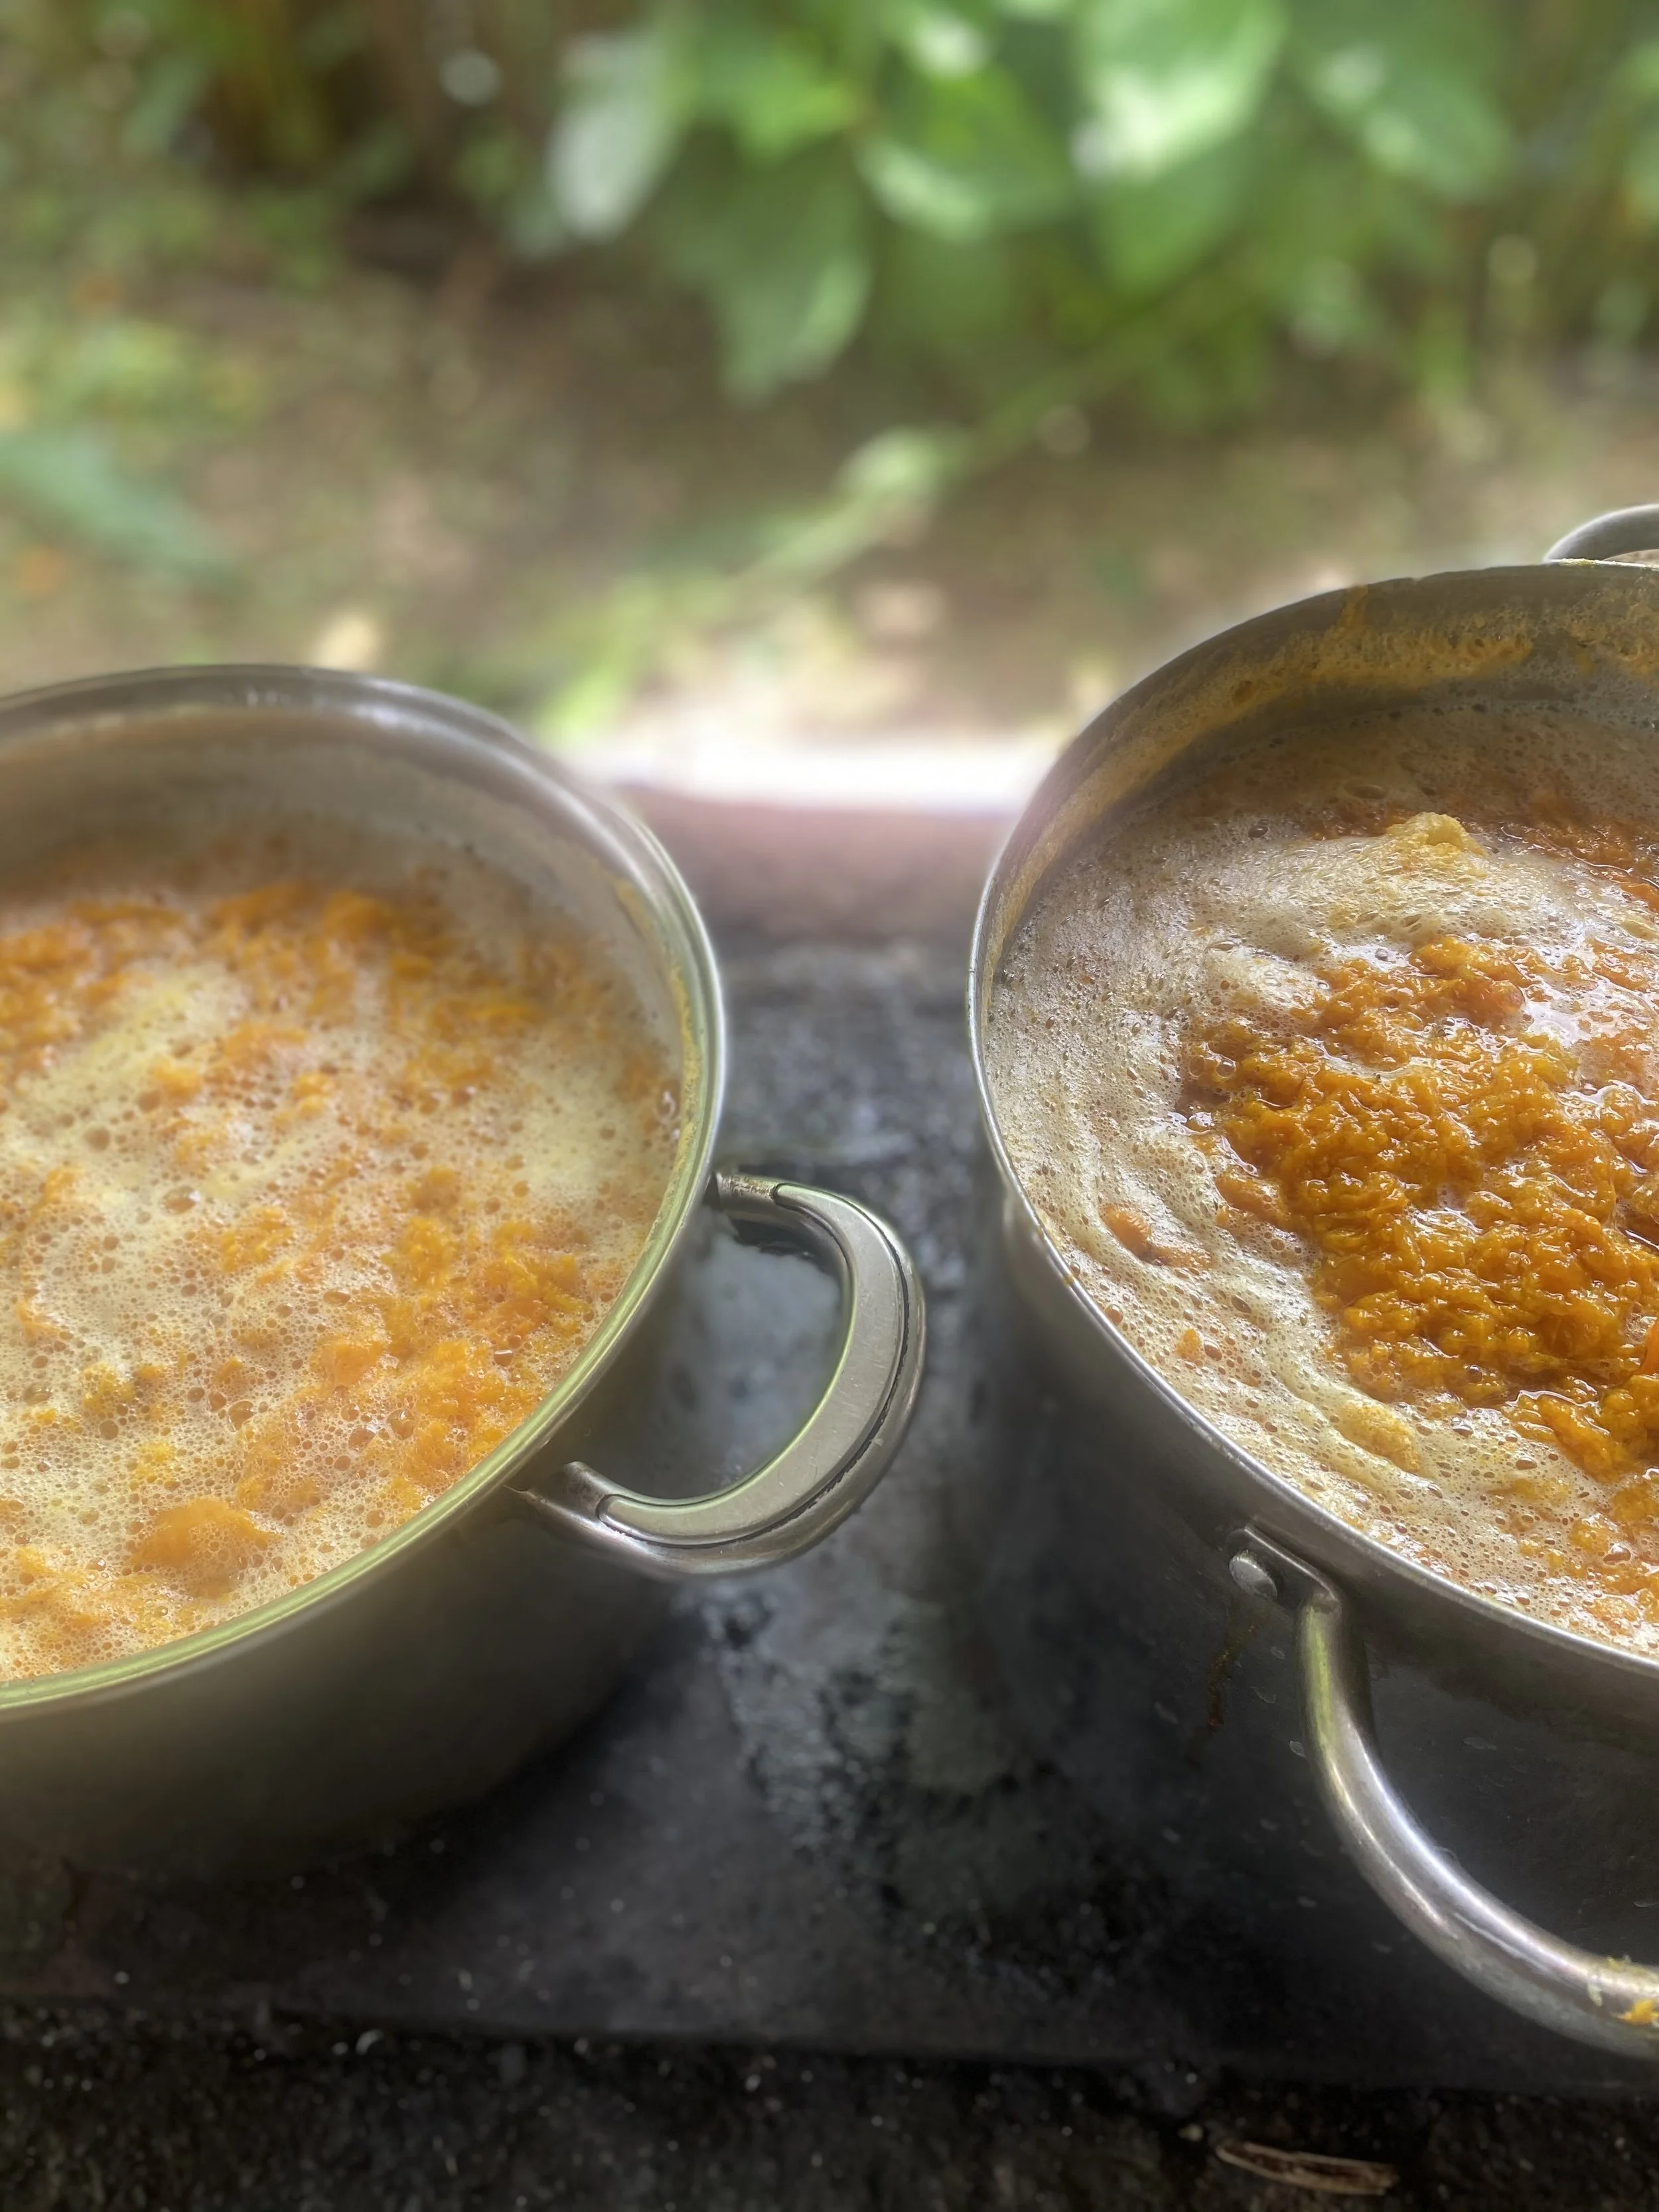
I think sugar percentage and boiling time are other variables to consider when looking at consistency.
When comparing low- and high-pectin fruits with a sugar percentage of 65%, they looked relatively the same.
Also, looking back at my previous jams, I cooked and boiled them for an intense amount of time, which I believe was shortening my pectin levels.
Compared to this experiment, where I only boiled the jams for five minutes, I obtained a great consistency.
Next time I play with jam, I want to experiment with boiling time and sugar percentage.
Time to redesign and prepare another jam sesh!
Tune back in for more jam updates and recipes to come!
Read More
Check out these other blogs related to food processing:

Yuca(n) Do It All - Processing Yuca in Rural Costa Rica
At Rancho Mastatal, yuca is a staple in the kitchen and our bellies. You can find it in at least one of our meals nearly every day in one form or another.
By 2025 apprentice Maivy Xuân Nguyễn
At Rancho Mastatal, yuca is a staple in the kitchen and our bellies. You can find it in at least one of our meals nearly every day in one form or another. Yuca is also commonly known as cassava root or tapioca (in its powdered form). So, if you’ve ever had boba–a Taiwanese milk tea drink with chewy black pearls, or tapioca pudding, you’ve had yuca!

My affinity towards yuca grew rapidly during the past two weeks when we experienced a boon in our yuca supply! I already love yuca, having grown up on boba drinks which had taken its foothold in the San Francisco Bay Area while I was a child. It has since only grown in popularity. Tapioca starch is also a key ingredient in my favorite Vietnamese dish: bánh bột lọc. It’s one of the first dishes that my mom taught me how to make and I intend to find some time to make a Rancho Mastatal version in the future. Look out for upcoming blog posts—perhaps they will have some yummy recipes.
But, my appreciation of it has grown tenfold and beyond after having worked with it on so many levels.
We have planted, harvested, processed, cooked and eaten yuca. Each step has its own set of steps and we’ll get to those in future posts. For now, I’ll talk about processing and preparing yuca for cooking. Yuca must be cooked before we consume it because it does contain some toxins, especially in its skin, that will need to burn off. Plus, it is a hard and starchy root that would be difficult to enjoy raw.
The edible parts of yuca are their tuber roots and also their new baby leaves. There are actually some varieties of yuca where only the baby leaves are eaten because the rest of the plant contains too many toxins. Luckily, we have the sweet kind with delicious roots!
Processing
If you get your yuca from a store, it will have likely gotten a parafin wax treatment. This is to prevent oxidation of the tuber which happens quickly. You’ll want to wash and scrub that off first.
We got ours straight from the ground so our first step was to wash and scrub off the dirt.
Then, cut the tuber into sections.
Make a cut along the tuber and using a paring knife, spoon or your fingers, separate not just the papery skin, but also the thicker white skin from the tuber. The layer of white skin contains cyanide, so you'll want to be sure to get it all off. Sometimes the skin comes off easily with just some maneuvering and other times it is stubborn and you may just need to cut through it.


Once you have the peeled root, give it another rinse and process it further as you'd like. We chunked it and shredded it so it could be cooked for our brunch time fried yuca or hash. The raw yuca will last about a week in the fridge. I will turn black as it oxidizes so try to keep it in airtight containers.
We also made yuca flour by dehydrating the shredded yuca and then blitzing it in a blender or food processor.


To make yuca starch, soak your shredded yuca in water overnight. Then strain and squeeze out the solids and keep the water. The starches will have been released into the water. Let the starch settle to the bottom and then pour off the water once it’s separated. You’ll end up with some wet starch. You can then dehydrate the starch and break it up into powder.
If kept dry and airtight, yuca flour can last for up to a year.
Now you’ve got a few ways to process yuca!


Planting

During one of our earlier work parties in the agricultural systems, we remade two zone 1 garden beds and planted some yuca, among many other plants and veggies.
The method through which we planted the yuca was through cuttings.
Yuca tubers take about 8-12 months to mature. So the ones we planted then are not the ones that we harvested or processed these past weeks. The boom came from outside of the Rancho and from the wider community of Mastatal.
Harvesting
A neighboring farmer, Don Jaime, had been forced off a piece of land that he's been farming for the past 20+ years.
The first week, the apprentice crew just came to pick up the sacks of yuca that Don Jaime had harvested that day, the four sacks totaled to 103 kilos.
It wasn't until the next week, when we came to help harvest more of the yuca from that land, that we got to see the full extent of his work.


Want to Learn More?
Join us for one of our yearly Permaculture Design Courses to get theory and practice in growing your own food.
Homemade Ketchup Recipe
Ketchup over the years has been made in a plethora of different ways. The name originally comes from the Hokkien Chinese word ke-tsiap, meaning fermented fish sauce, and in Europe, the sauce has been recreated with mushrooms, walnuts, oysters, anchovies, and more.
By 2023 apprentice Emme Nederbrock
Ketchup over the years has been made in a plethora of different ways. The name originally comes from the Hokkien Chinese word ke-tsiap, meaning fermented fish sauce, and in Europe, the sauce has been recreated with mushrooms, walnuts, oysters, anchovies, and more. The first recipe that involved tomatoes was in 1812, and in 1876, the American Henry J. Heinz created his variation of ketchup. Today, about 97% of American households have a bottle of ketchup! Maybe the traditional Heinz ketchup isn't desirable to you, or doesn't taste good, try this fermented ketchup recipe made right here at Rancho Mastatal! Lots of the ingredients included in the recipe when it comes to spices and sweeteners can be altered due to desired taste, so get creative! This recipe is interpreted from the book “The Farmhouse Culture Guide to Fermenting” by Kathryn Lucas and Shane Peterson. We recommend checking out that book, learning from it, and trying out all their fun, sustainable recipes.
Before starting, there is an importance of making sure you are working in a clean environment. We are relying on natural bacterias to do their work and make a delicious ketchup, so keeping other random, possibly bad bacterias out of the mixture is key. Wash your hands consistently, wash all your produce, and make sure all vessels used for the fermentation have been disinfected properly.
Equipment Needed:
Food processor or blender
Kitchen scale
Pan for sautéing
Fermenting jar (for this recipe are using a 2 liter jar)
A stopper and weight for inside the jar
Pot for cooking down recipe after fermentation
Ingredients:
MAKES 2 LITERS (about 1/2 gallon or 2 quarts) will yield around 1 - 1.5kg of finished ketchup after boiling down
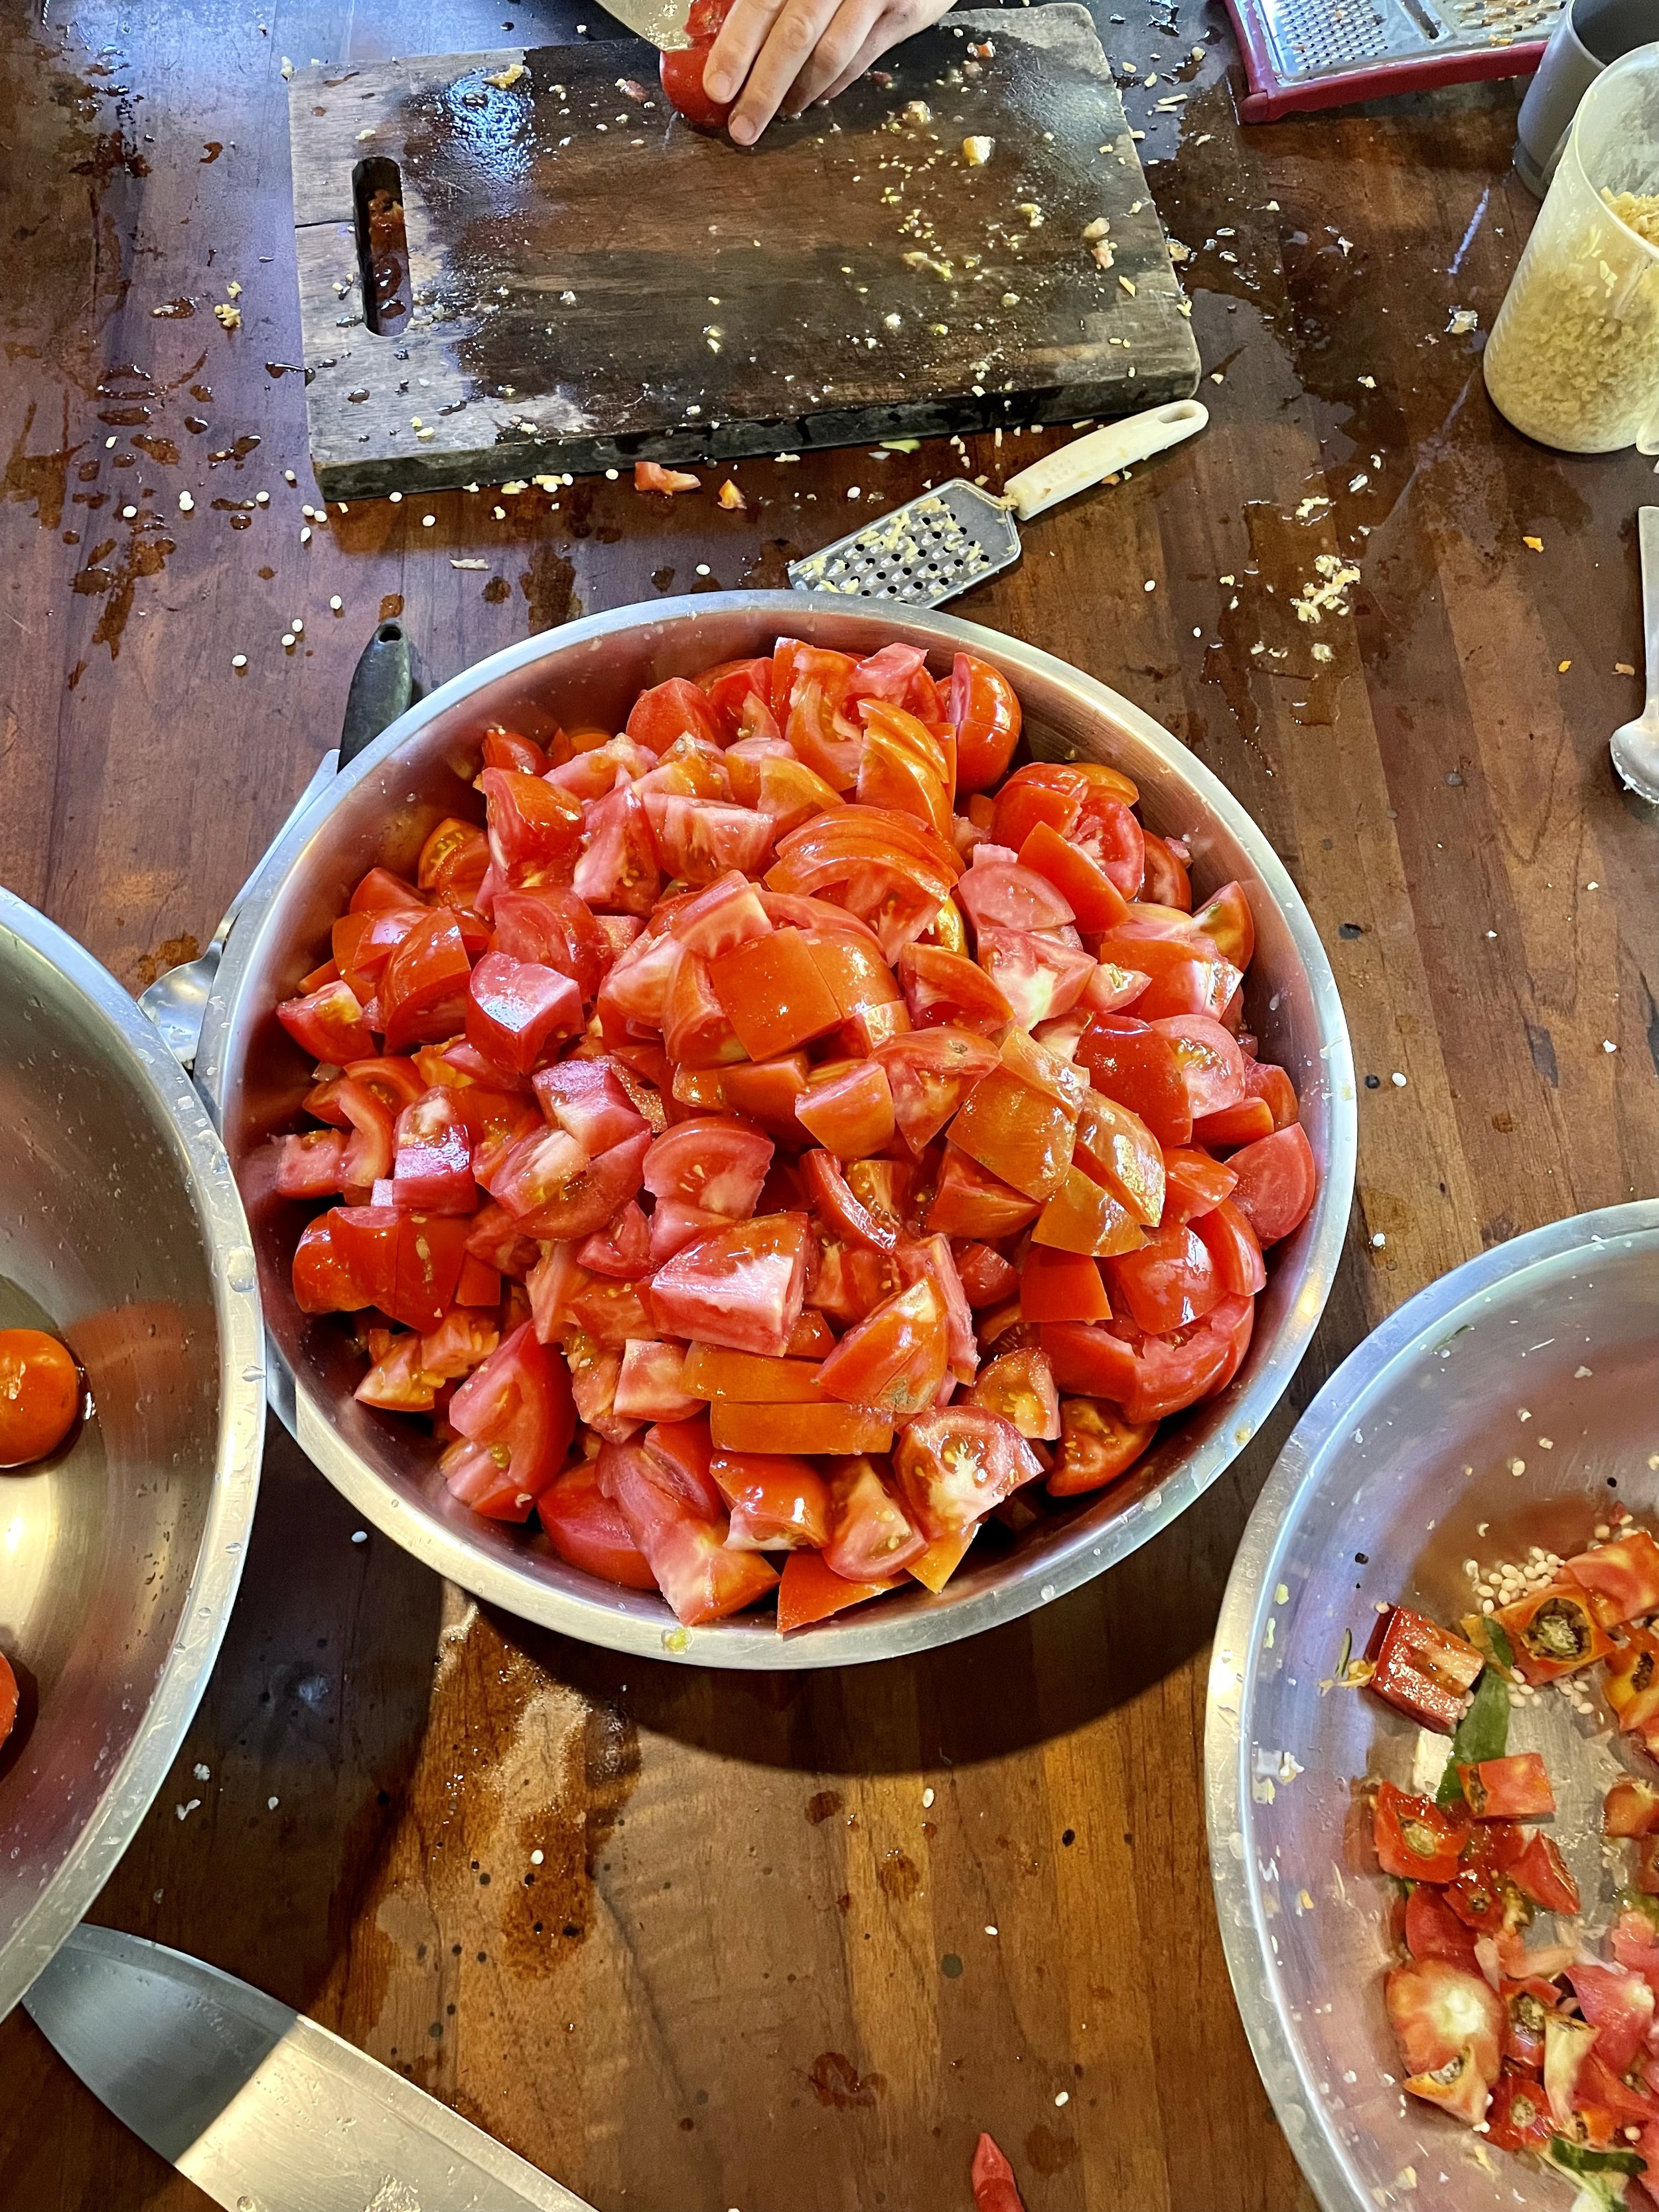
2 kg tomatoes
1 onion
2-4 cm knob of ginger
5 cloves of garlic
Salt (3% of total weight of ingredients above)
Brine (recommended but not a necessary factor)
Sugar (10% of total weight AFTER fermentation, about 200g)
1 Tbsp of cornstarch
Spices to your liking (mustard powder, pepper, smoked paprika, chili powder, etc)
Instructions:
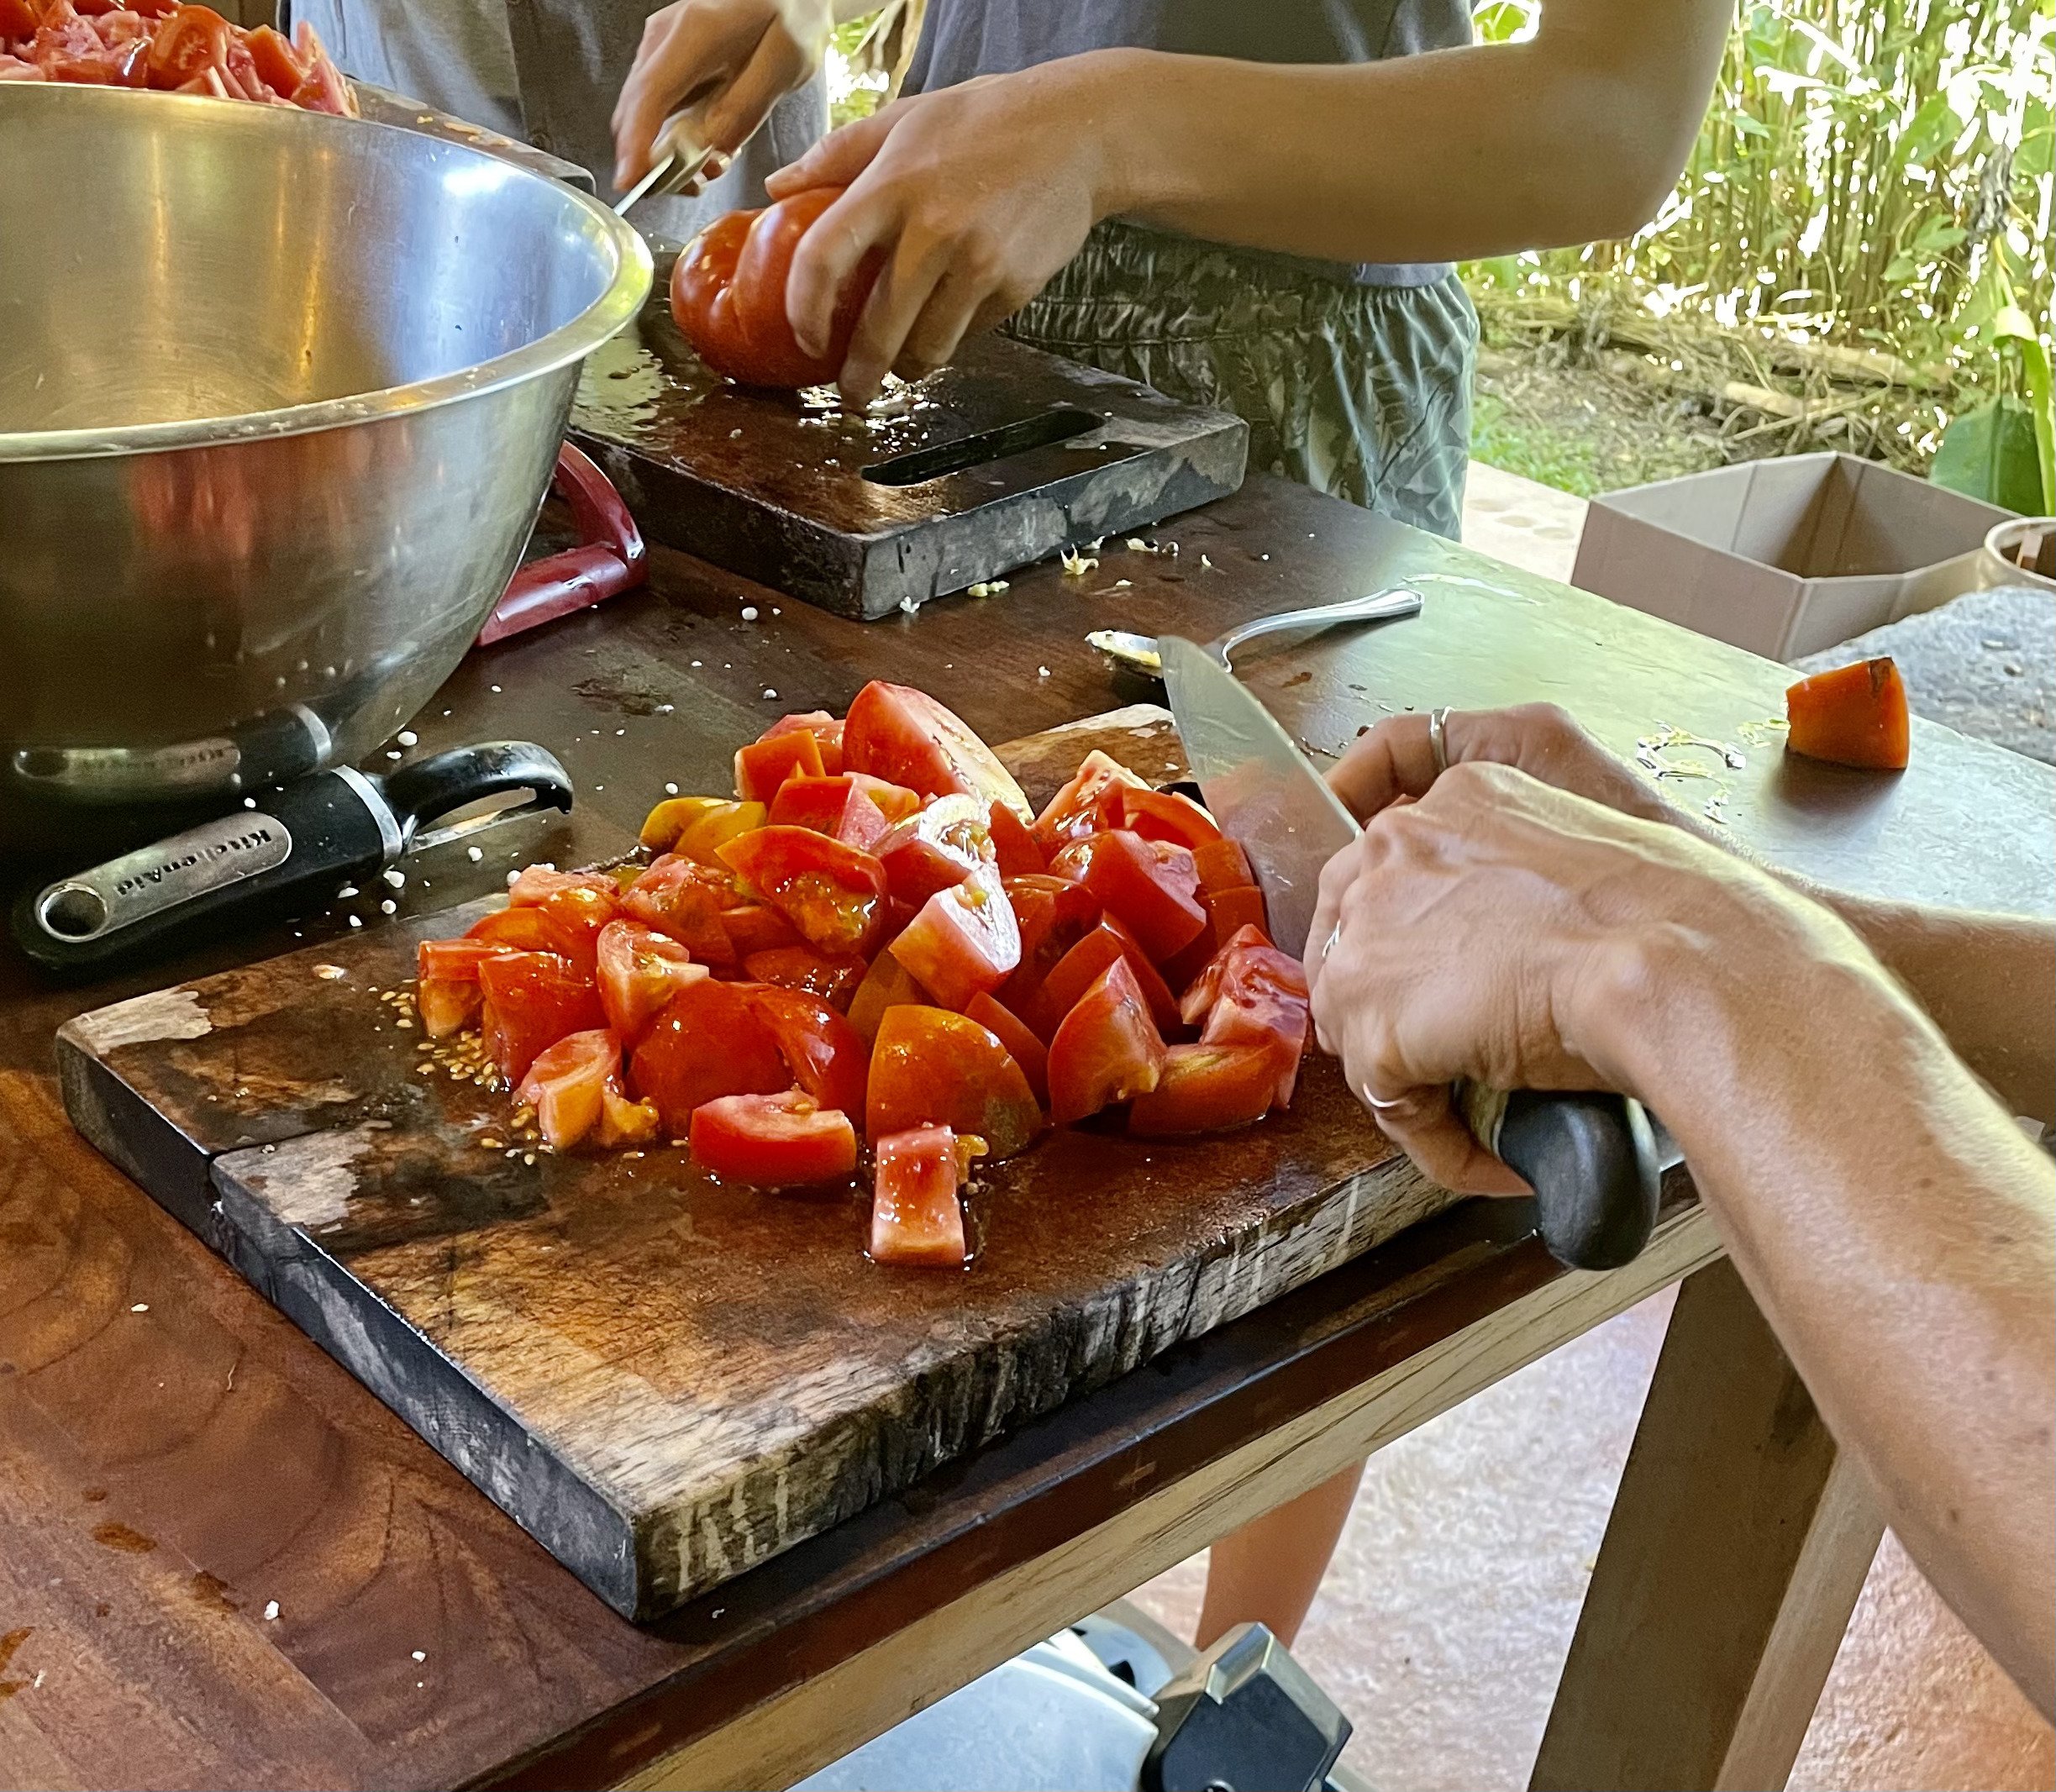
After washing, cut up all tomatoes and remove stems. These tomatoes will be processed in either a food processor or blender so size isn’t too important.
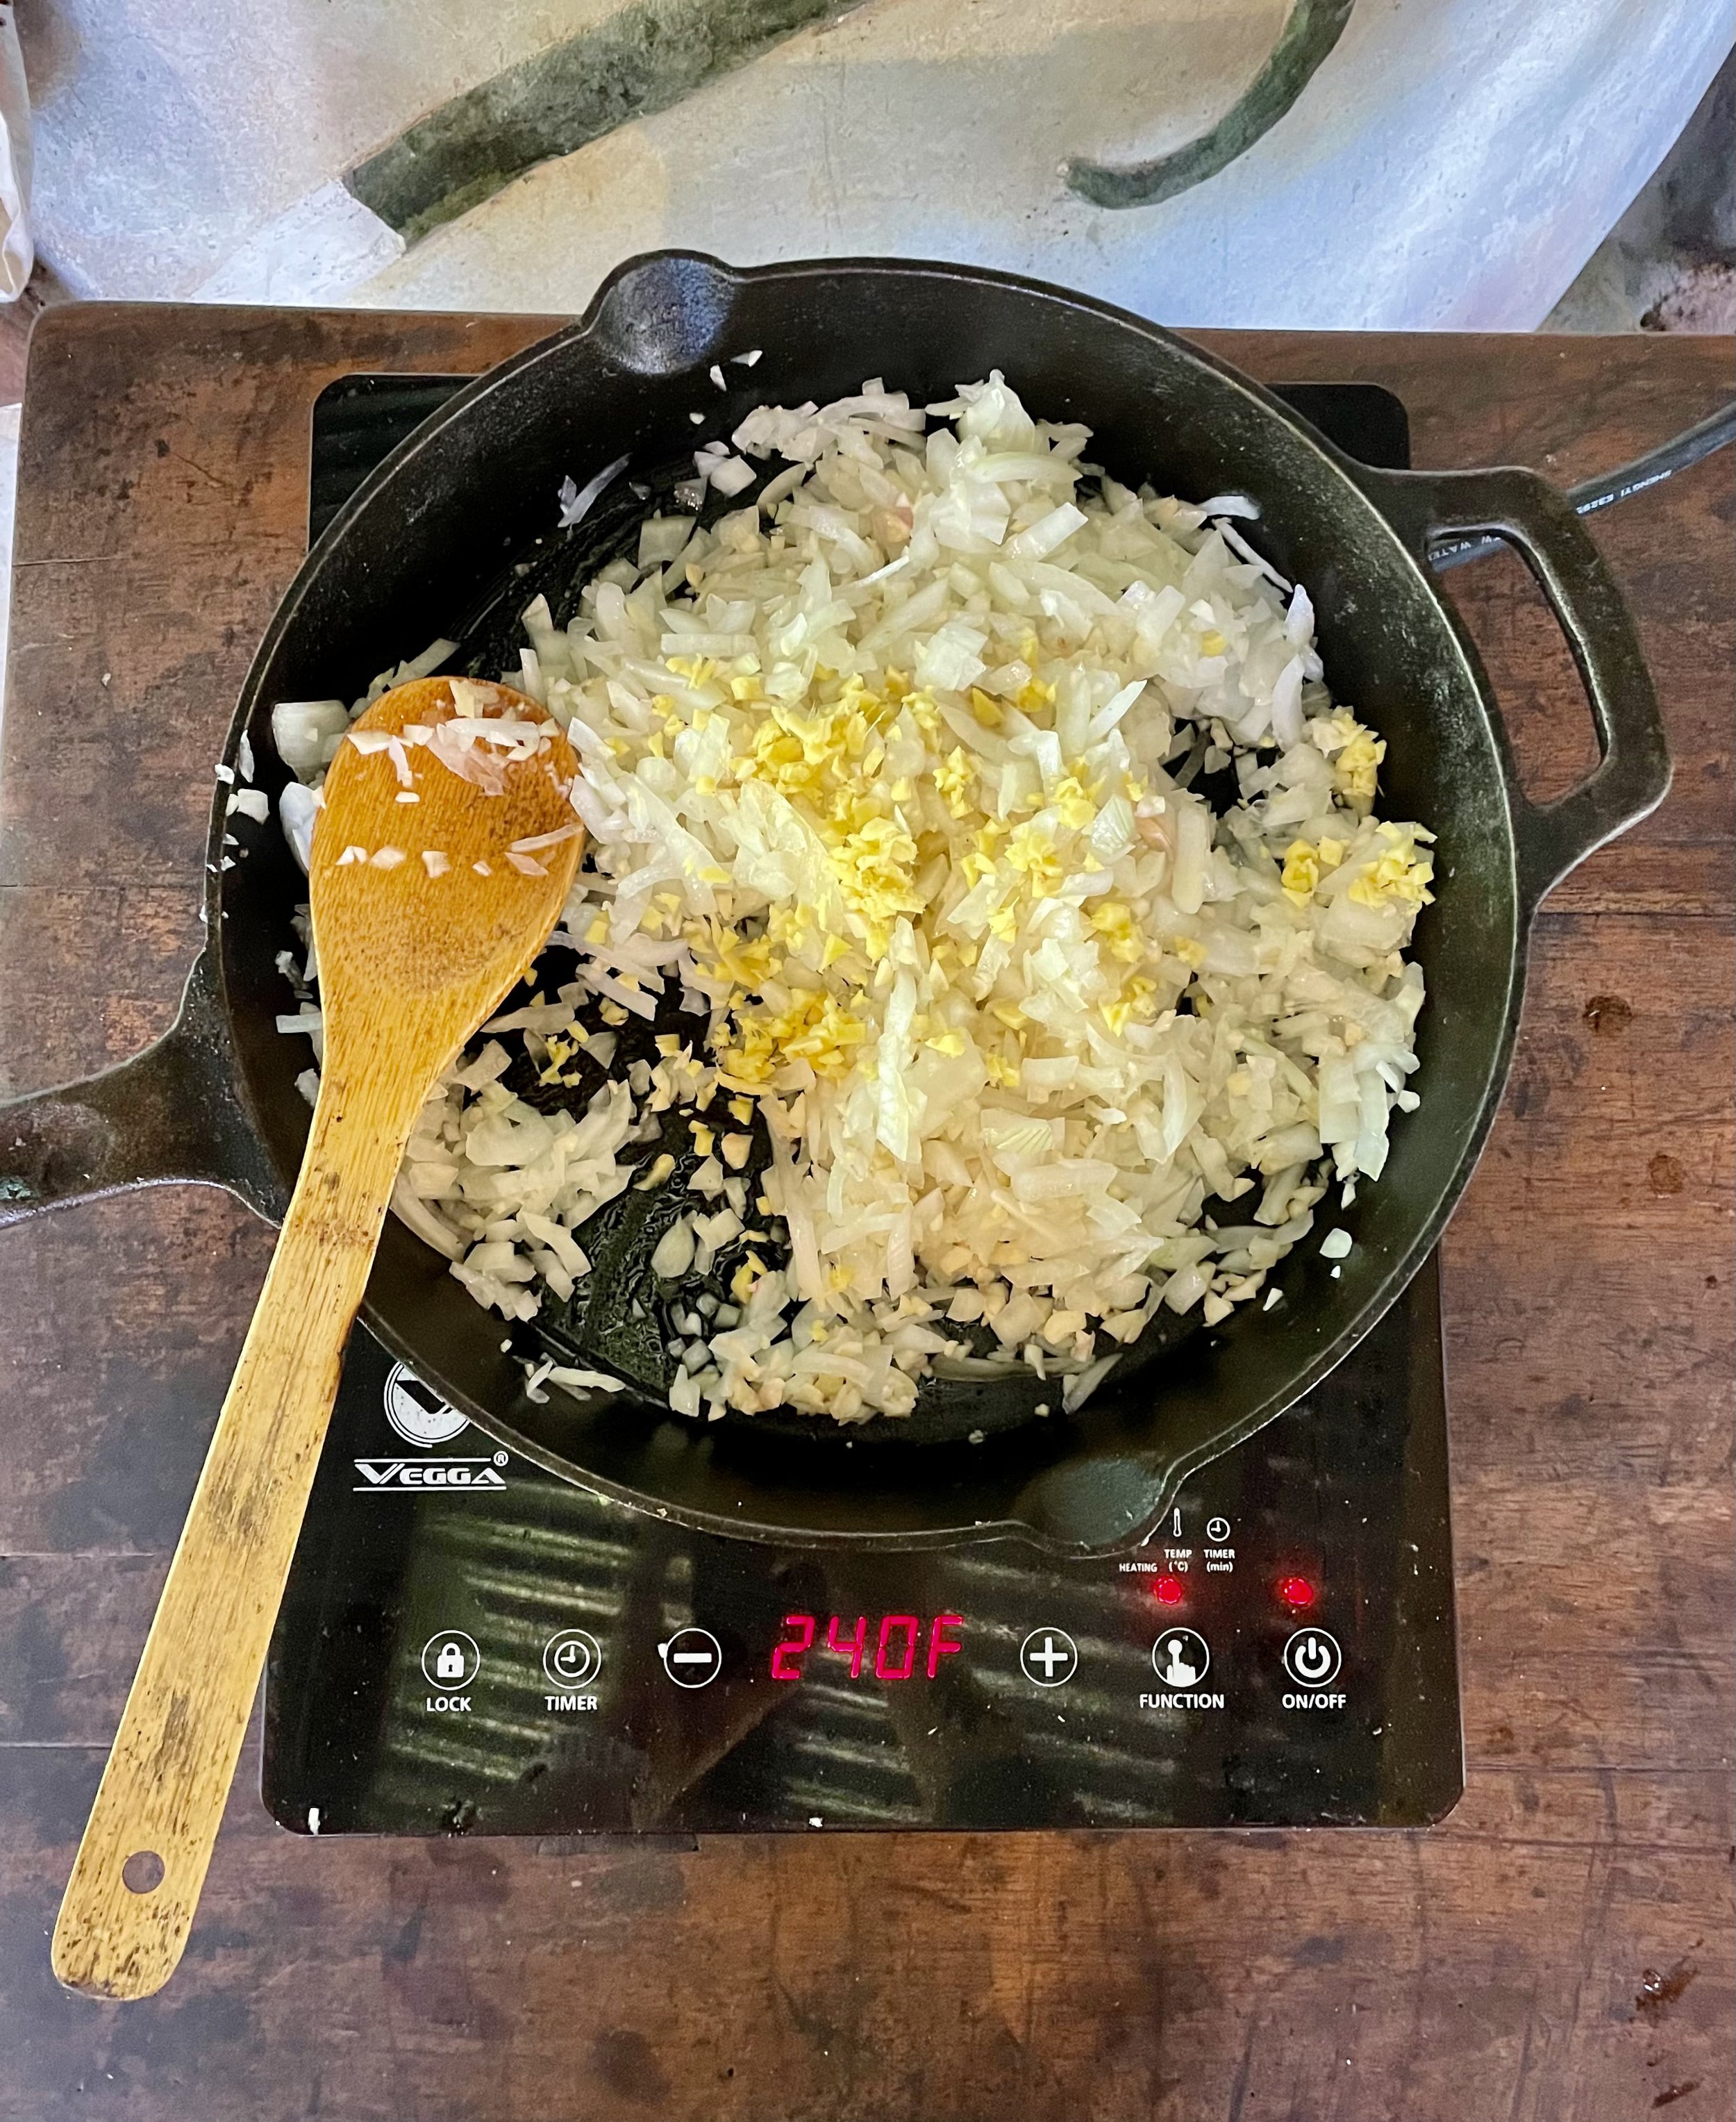
Wash and dice your onion, garlic cloves, and ginger. Add these 3 ingredients to a pan with a little bit of oil and sauté.
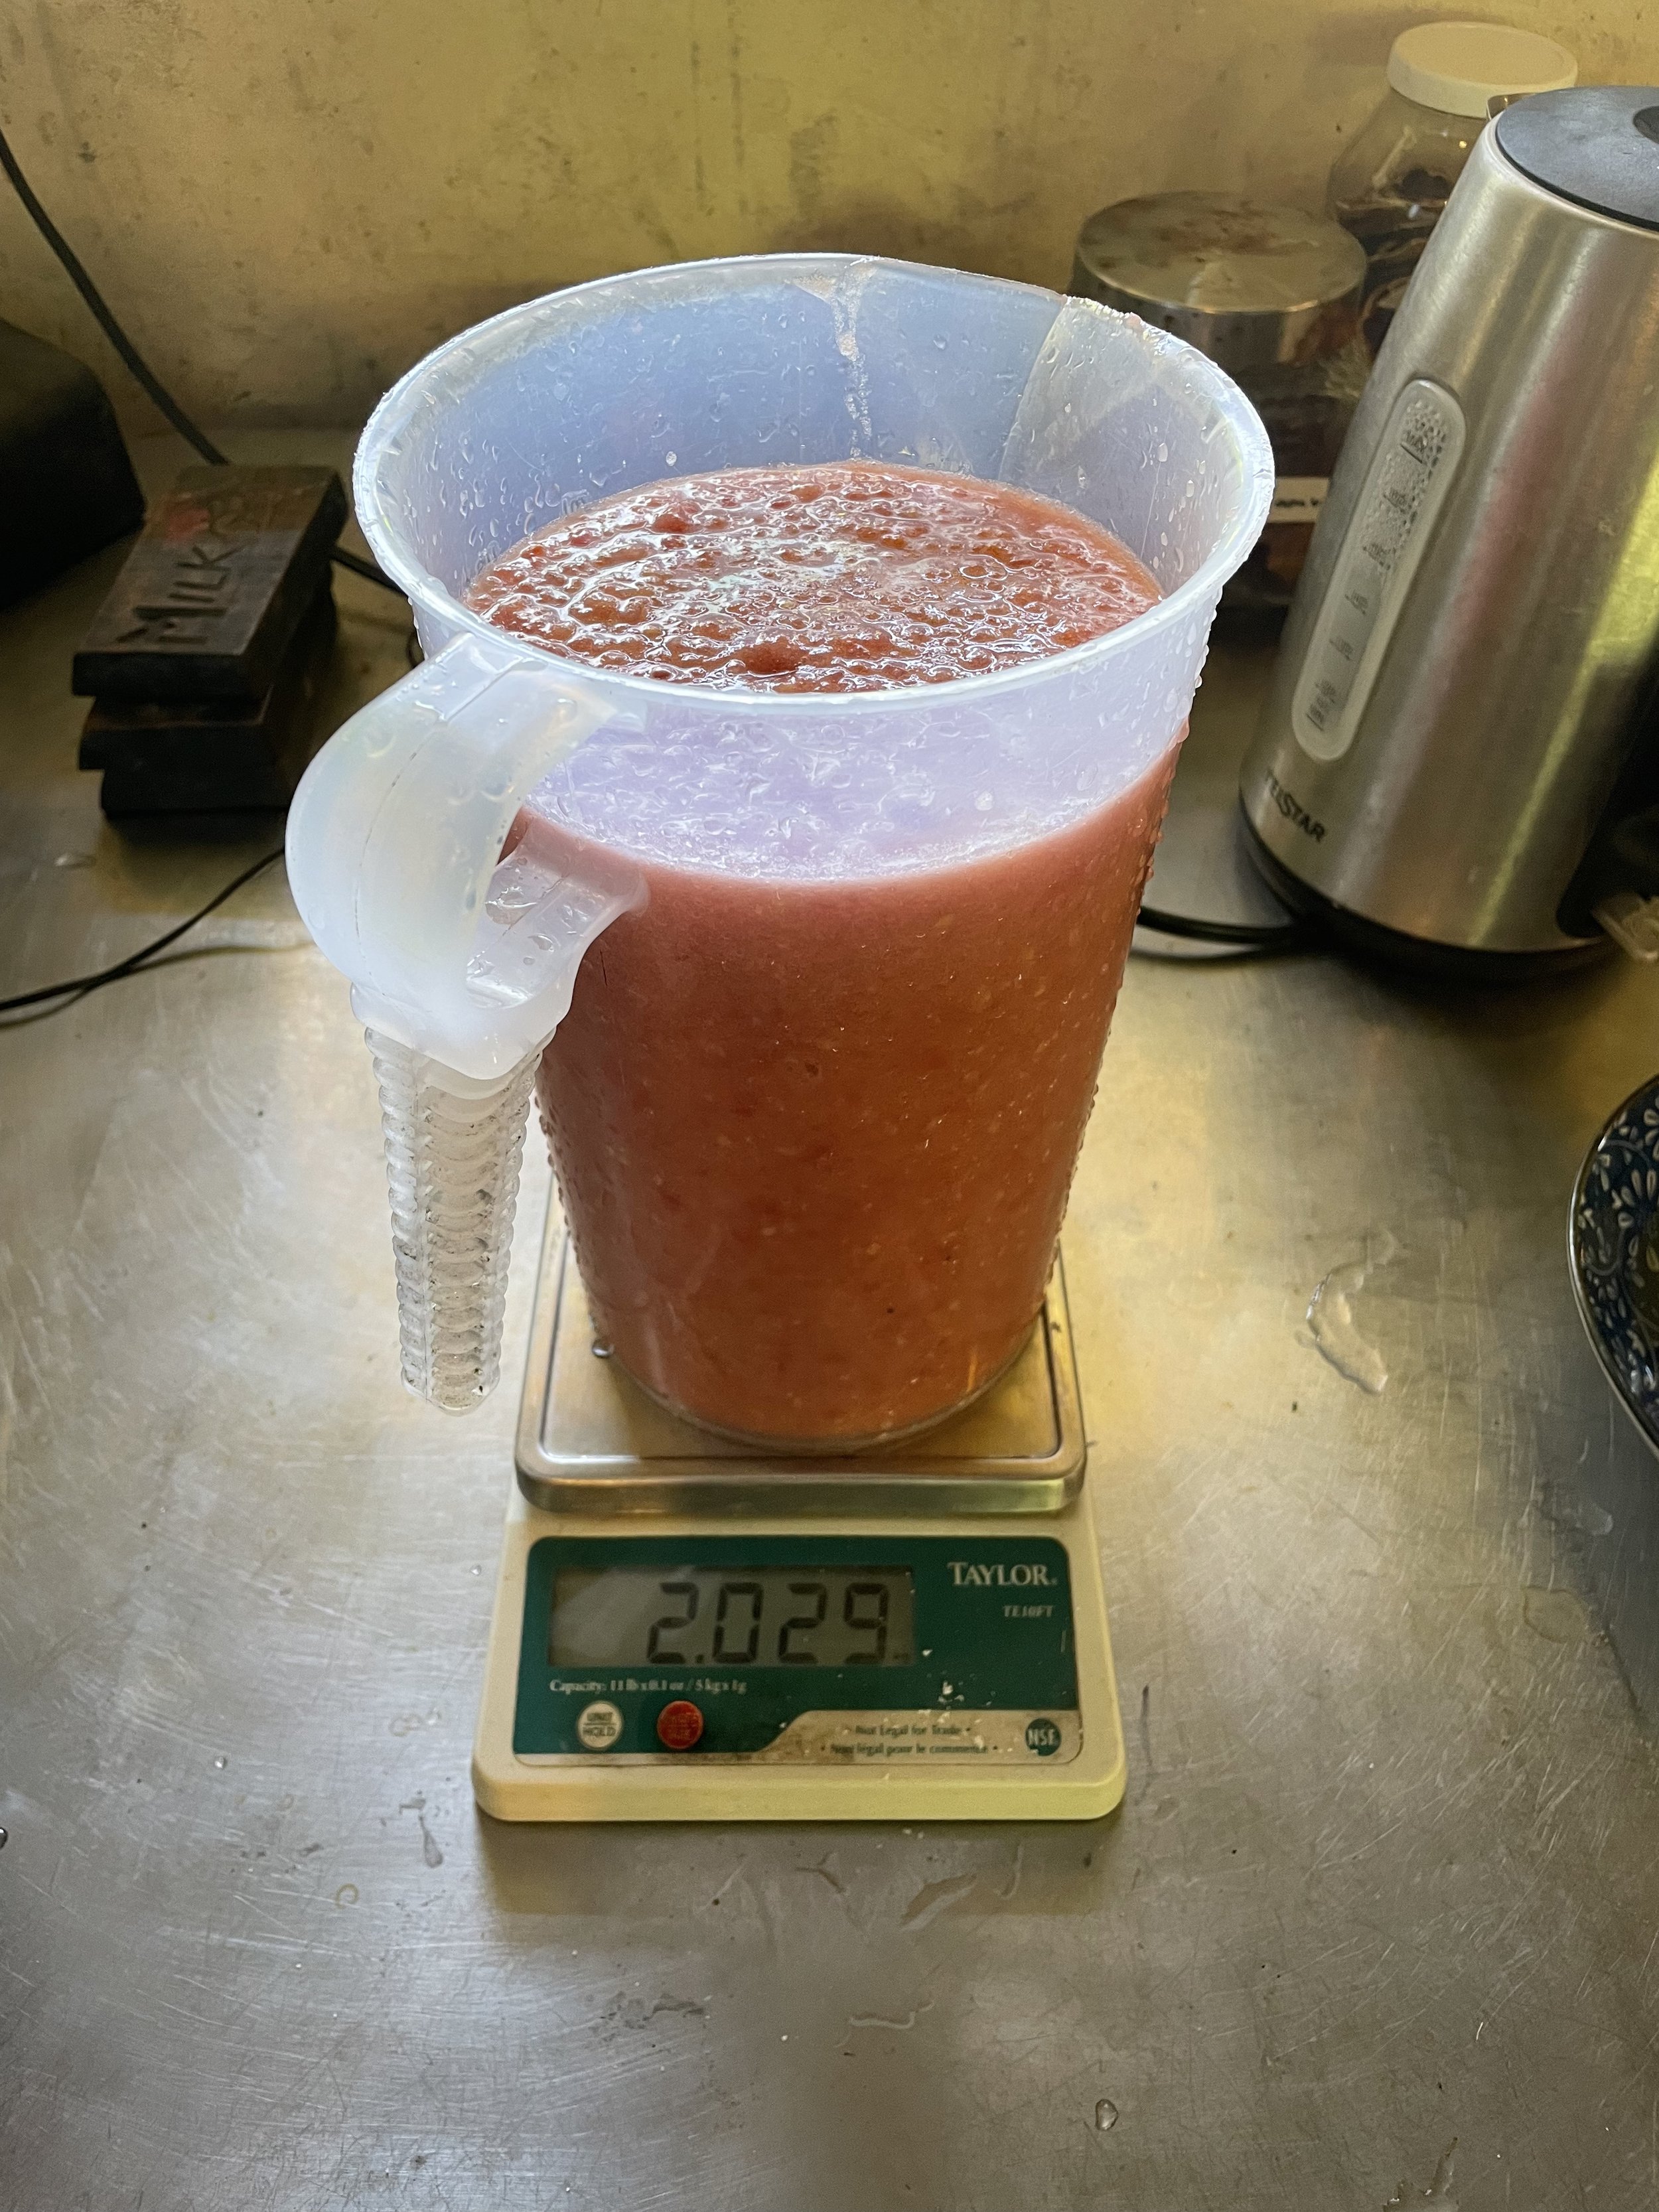
Combine your sautéed mixture and your pureed tomatoes and measure weight. Don’t forget to tare your scale with your glass.
Calculate 3% of weight in grams and add that salt in grams. Don’t lose this number! You will need it again after fermenting to calculate how much sugar to add.
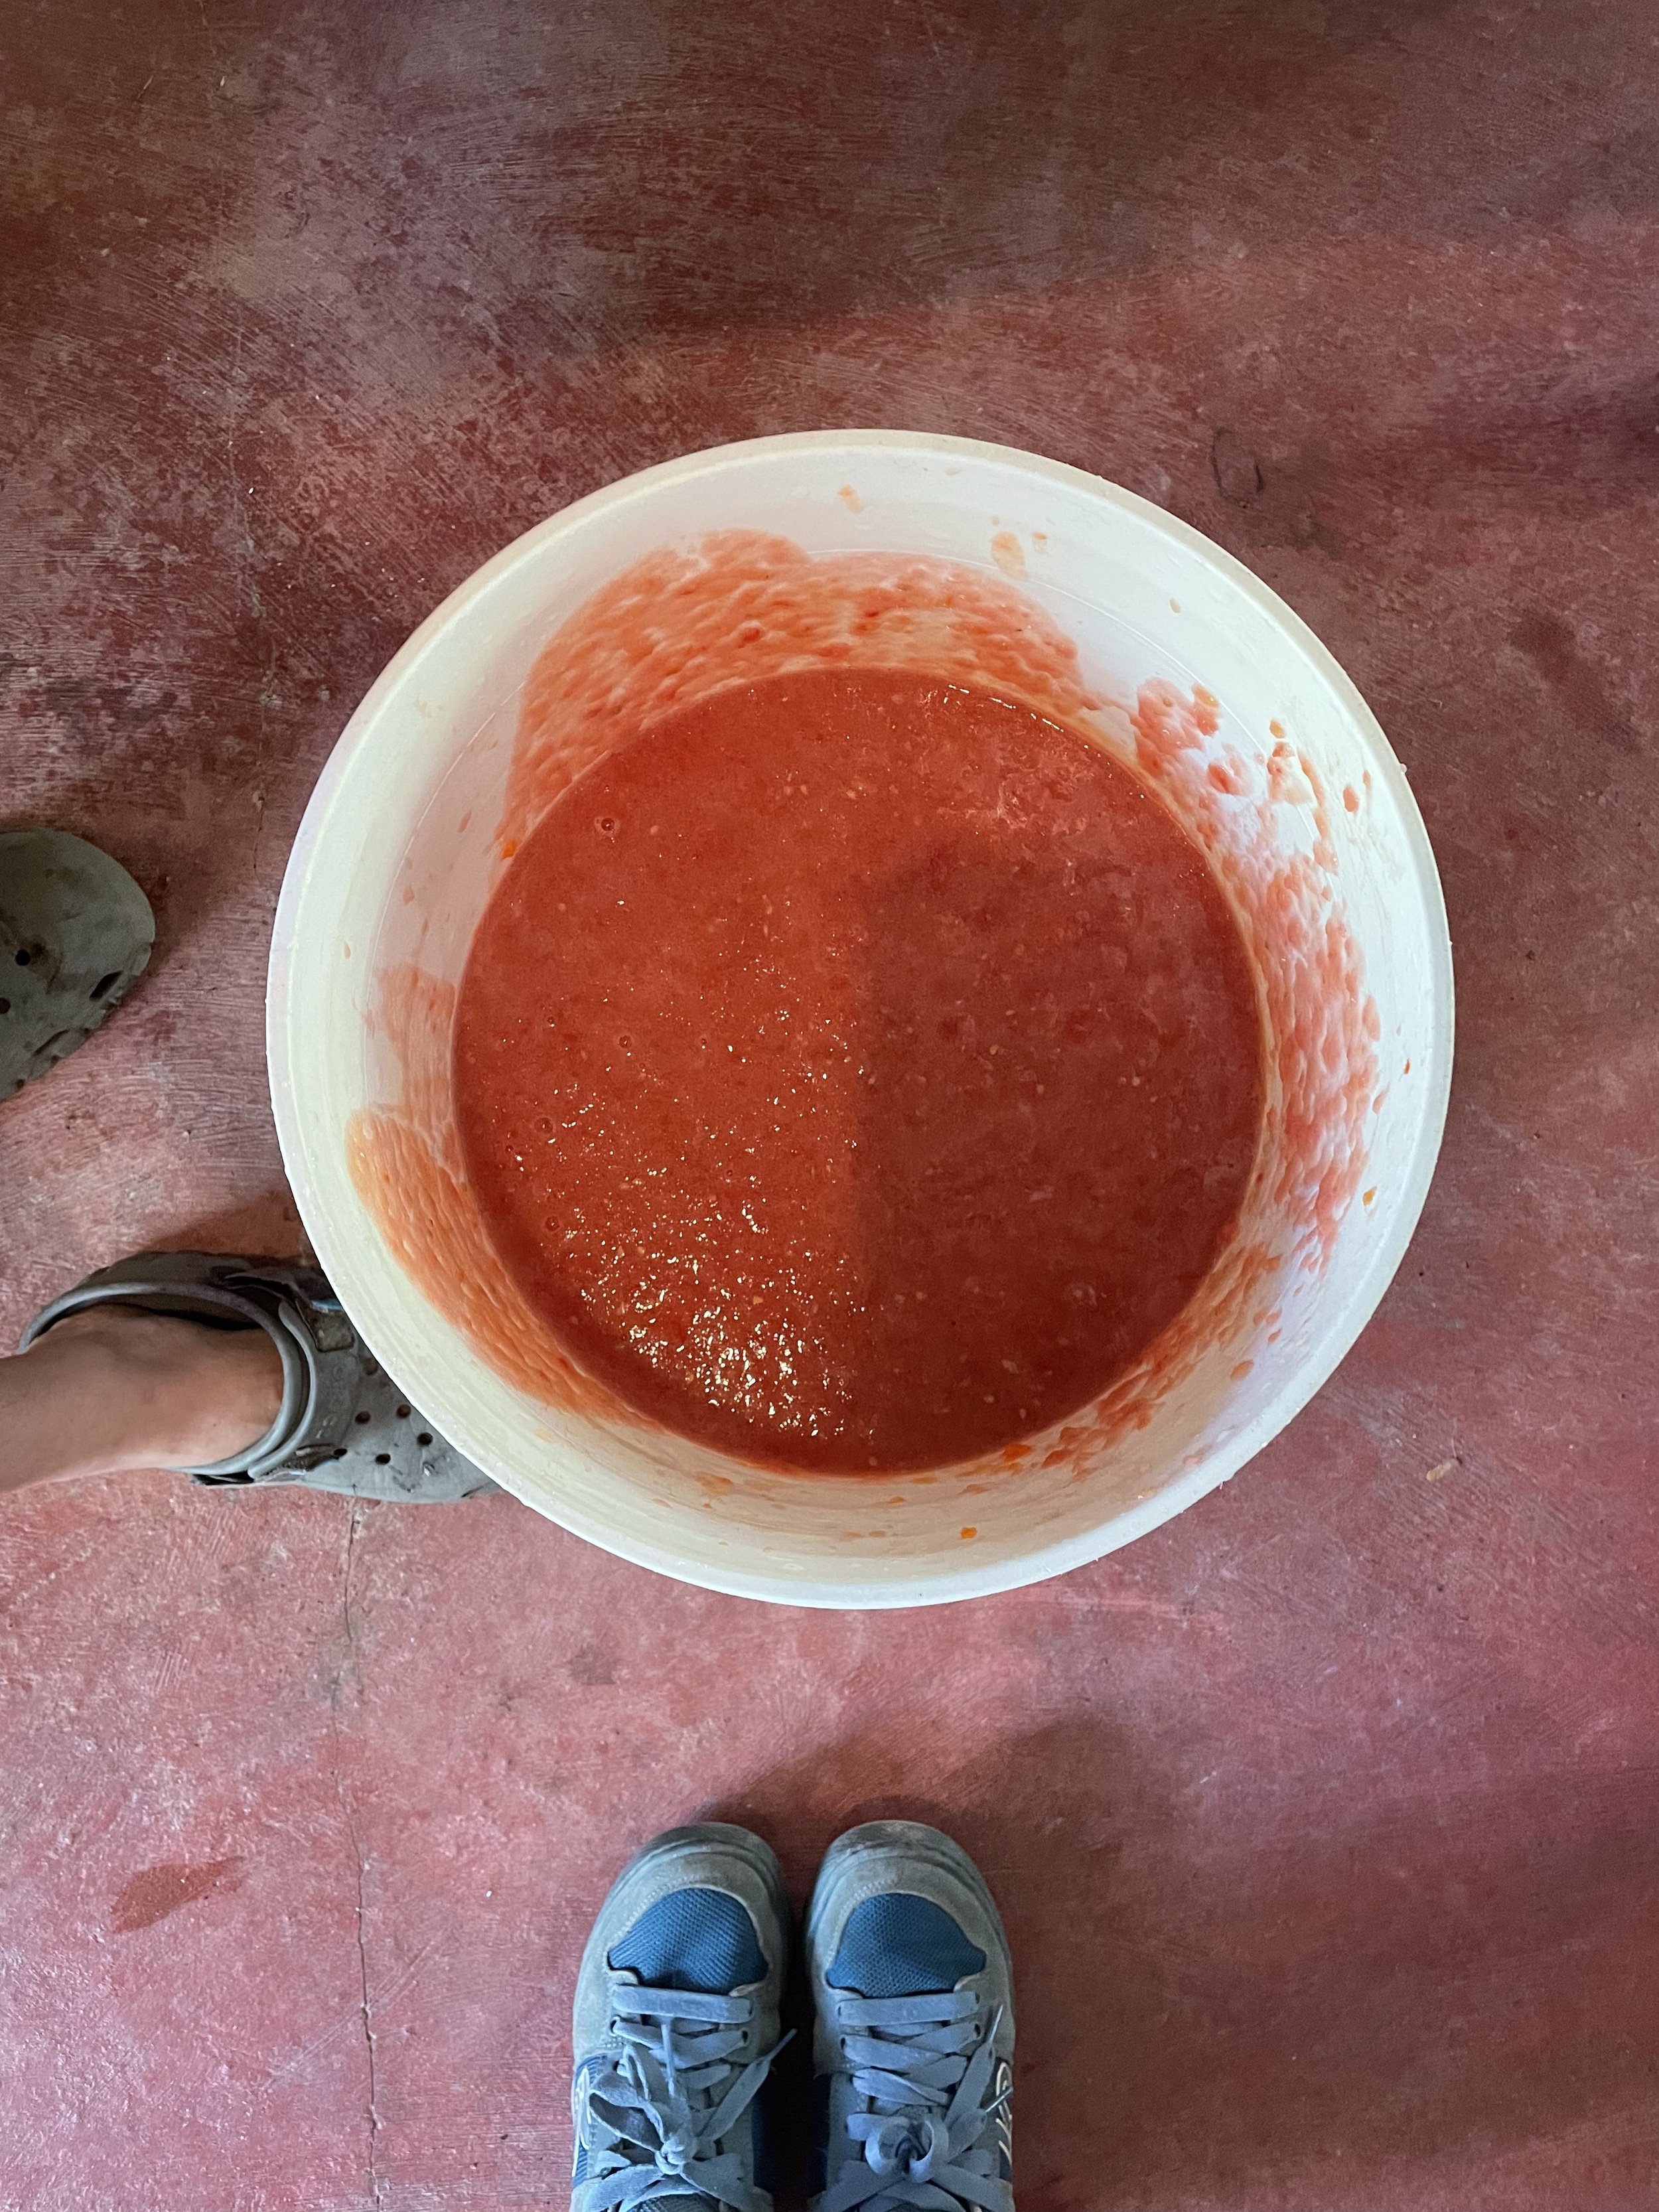
Thoroughly combine the salt into mixture and place into the container that will be used for the fermenting! Make sure the sides of the container are clean after adding mixture.
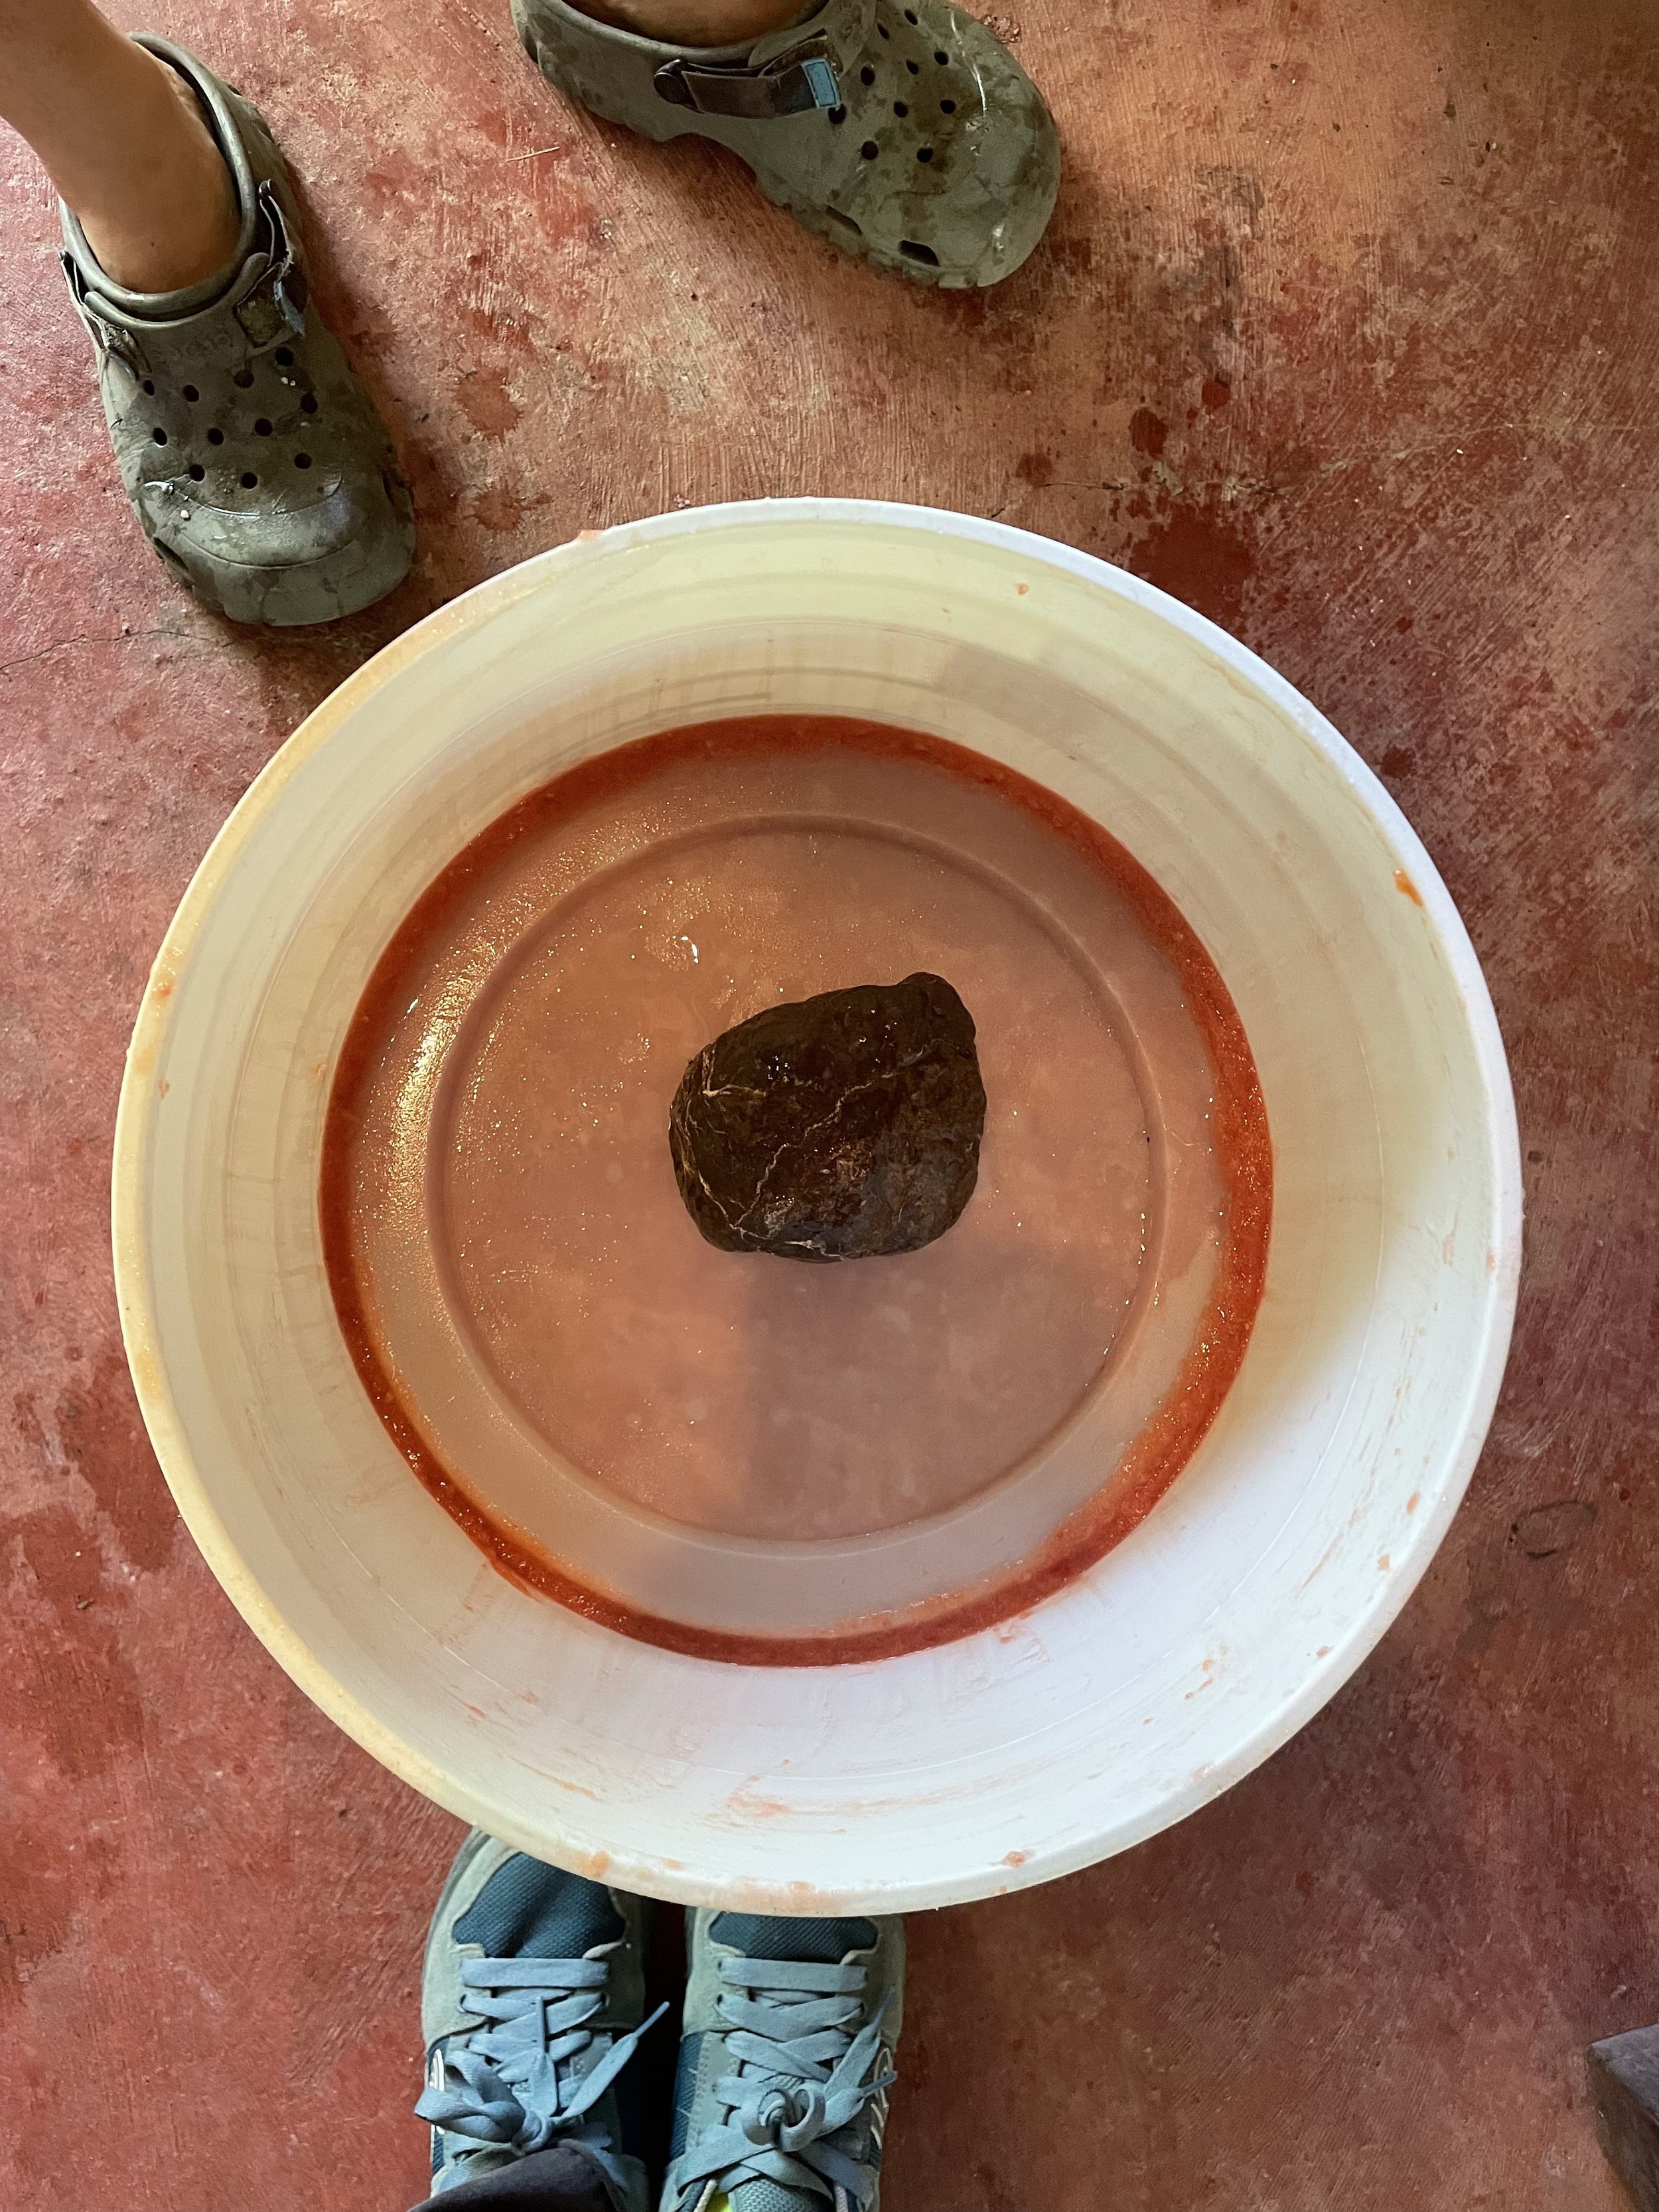
Now is the time to place your follower and weight to keep your new fermented friend submerged! Your follower should fit well into the mouth of your container. Maybe there is a household object that can be disinfected and reused, such as a smaller lid to another container, or a piece of thicker, food safe, plastic you can cut to the desired shape. The weight is extra support for submersion. In our case, we used a disinfected rock. The weight should not cause the follower to sink below the ketchup, but just sit on top and keep everything in place. Worse case scenario, remember this tune, “submerge in brine and all will be fine.”
Close your container and allow to sit in a cool, dry place for about a week, or until desired sourness is acquired. It is possible that kham yeast will grow. Kham yeast is a completely safe, white layer that can sometimes form, even with an airtight lid. You can leave the yeast where it is until the fermentation process is done. When you're ready to finish the recipe, the yeast can either be left in the mixture, or removed.
After about a week, pour your yummy, fermented ketchup into a pot and begin to boil. Stir pretty consistently.
Once in the pot, add your 10% sugar. Maybe a little more or a little less if you prefer more sweet or a more sour ketchup. For our ketchup we used tapa dulce, which is a natural cane sugar, but any sweetener of your choice will do. Support local… and continue to stir!
If the sweetener did not thicken the ketchup enough, adding cornstarch will help. Add your cornstarch to a little bit of cold water and mix together BEFORE adding to your boiling ketchup. Adding the cornstarch straight to a boiling substance will not produce the same result. Keep stirring!
Time to get creative! Add spices of your choice whether that be smoked paprika, pepper, chili powder, and so many more options depending on your palate.
Once you’re done adding seasonings, remove from heat and place your pot in a Bano Maria. This is an ice bath. We do this to cool the temperature of the sauce before we place in into the fridge. Try to stir the ketchup during this process to simultaneously cool the middle and outside.
Final step: Choose your vessel! You can reuse an old ketchup bottle for the squeeze effect, or get fancy by reusing some old glass containers. The cupboard is your oyster.
Place in fridge! This ketchup should last 3-6 months depending on how often the container is opened or left out for dinner purposes. Enjoy!
Check Out These Other Blog Recipes
Make Black Garlic in Your Compost
Homemade Hoisin Sauce and Other Recipes with Fermented Black Bean Paste

Beyond Cacao: The Fruit(s) of the Gods
Like cacao, these trees produce a fruit filled with delicious pulp and seeds and have proven to be amazing additions to our culinary experiments. These pre-Colombian species are still grown on a relatively small scale and have retained significant genetic diversity. They provide hope for a more diverse tropical forest system and chocolate industry.
By 2021 Apprentice Cameron Conklin

Various forms of theobroma processing
You may have heard the term Theobroma (“theo” meaning “God” and “broma” meaning “fruit”) in reference to the genus of the cacao tree (Theobroma cacao) the incredible fruit that creates what we call chocolate. Here at the Ranch we love our cacao, but we also grow two other members of the Theobroma genus - cupuacu (Theobroma grandiflorum) and pataxte (Theobroma bicolor) who have stolen our hearts this year. Like cacao, these trees produce a fruit filled with delicious pulp and seeds and have proven to be amazing additions to our culinary experiments. These pre-Colombian species are still grown on a relatively small scale and have retained significant genetic diversity. They provide hope for a more diverse tropical forest system and chocolate industry.
A Short Description and History
The Cupuacu (Theobroma grandiflorum)

A cupuacu fruit
The cupuacu tree grows to an average height of 6-10 meters, maturing in 4 years. It has a large, brown, smooth oblong fruit (15-35 cm long), that falls to the ground when it is ready to be harvested. There are about 25 seeds per fruit protected by sweet, tangy pulp. Cupuacu is native to the Brazilian Amazon. Today it is still cultivated primarily in Brazil, but can be grown anywhere from southern Mexico to Peru. Right now, the cupuacu pulp is the most commonly used product from the fruit. The pulp is used for drinks, ice creams, pastries and other sweet treats common across Brazil. There is significantly more pulp in the cupuacu than cacao. To my surprise, the seeds are not as commonly commercialized, but there is a growing market. The seed is high in fat, about 48% (similar to 45% in cacao), which has created a budding market for industrialized cupuacu butter being used in cosmetics for skin care. Cupuacu butter has higher yields per fruit than cacao and its price is attractive for farmers. Processing accessibility seems to be the current limitation in production increase.
Yet the seed also makes for a creamy and delicious cupuacu chocolate or “cupulate” that creates light mocha-colored bars or drinks. From what I can see, there is an untapped market for an alternative chocolate product made from the cupuacu bean. The taste is tantalizing - fruity, earthy, and bright. It also has lower levels of alkaloids, theobromine, and caffeine than cacao but still retains high levels of vitamin C and anti-oxidants. The fat content makes for an extra creamy consistency. However it’s high oleic fat content is also one of its logistical downsides. It has a low melting point of 30 degrees Celsius (compared to 35 degrees for cacao) which can make transport difficult. Yet combining cacao and cupuacu together makes for a winning combination!
Here at the Ranch, we have used cupuacu for everything from making vinegars and wines, to bonbons and coconut cupuacu hot chocolate! It is truly a magical tropical fruit that I could see becoming much more popular across Central America soon.
The Pataxte
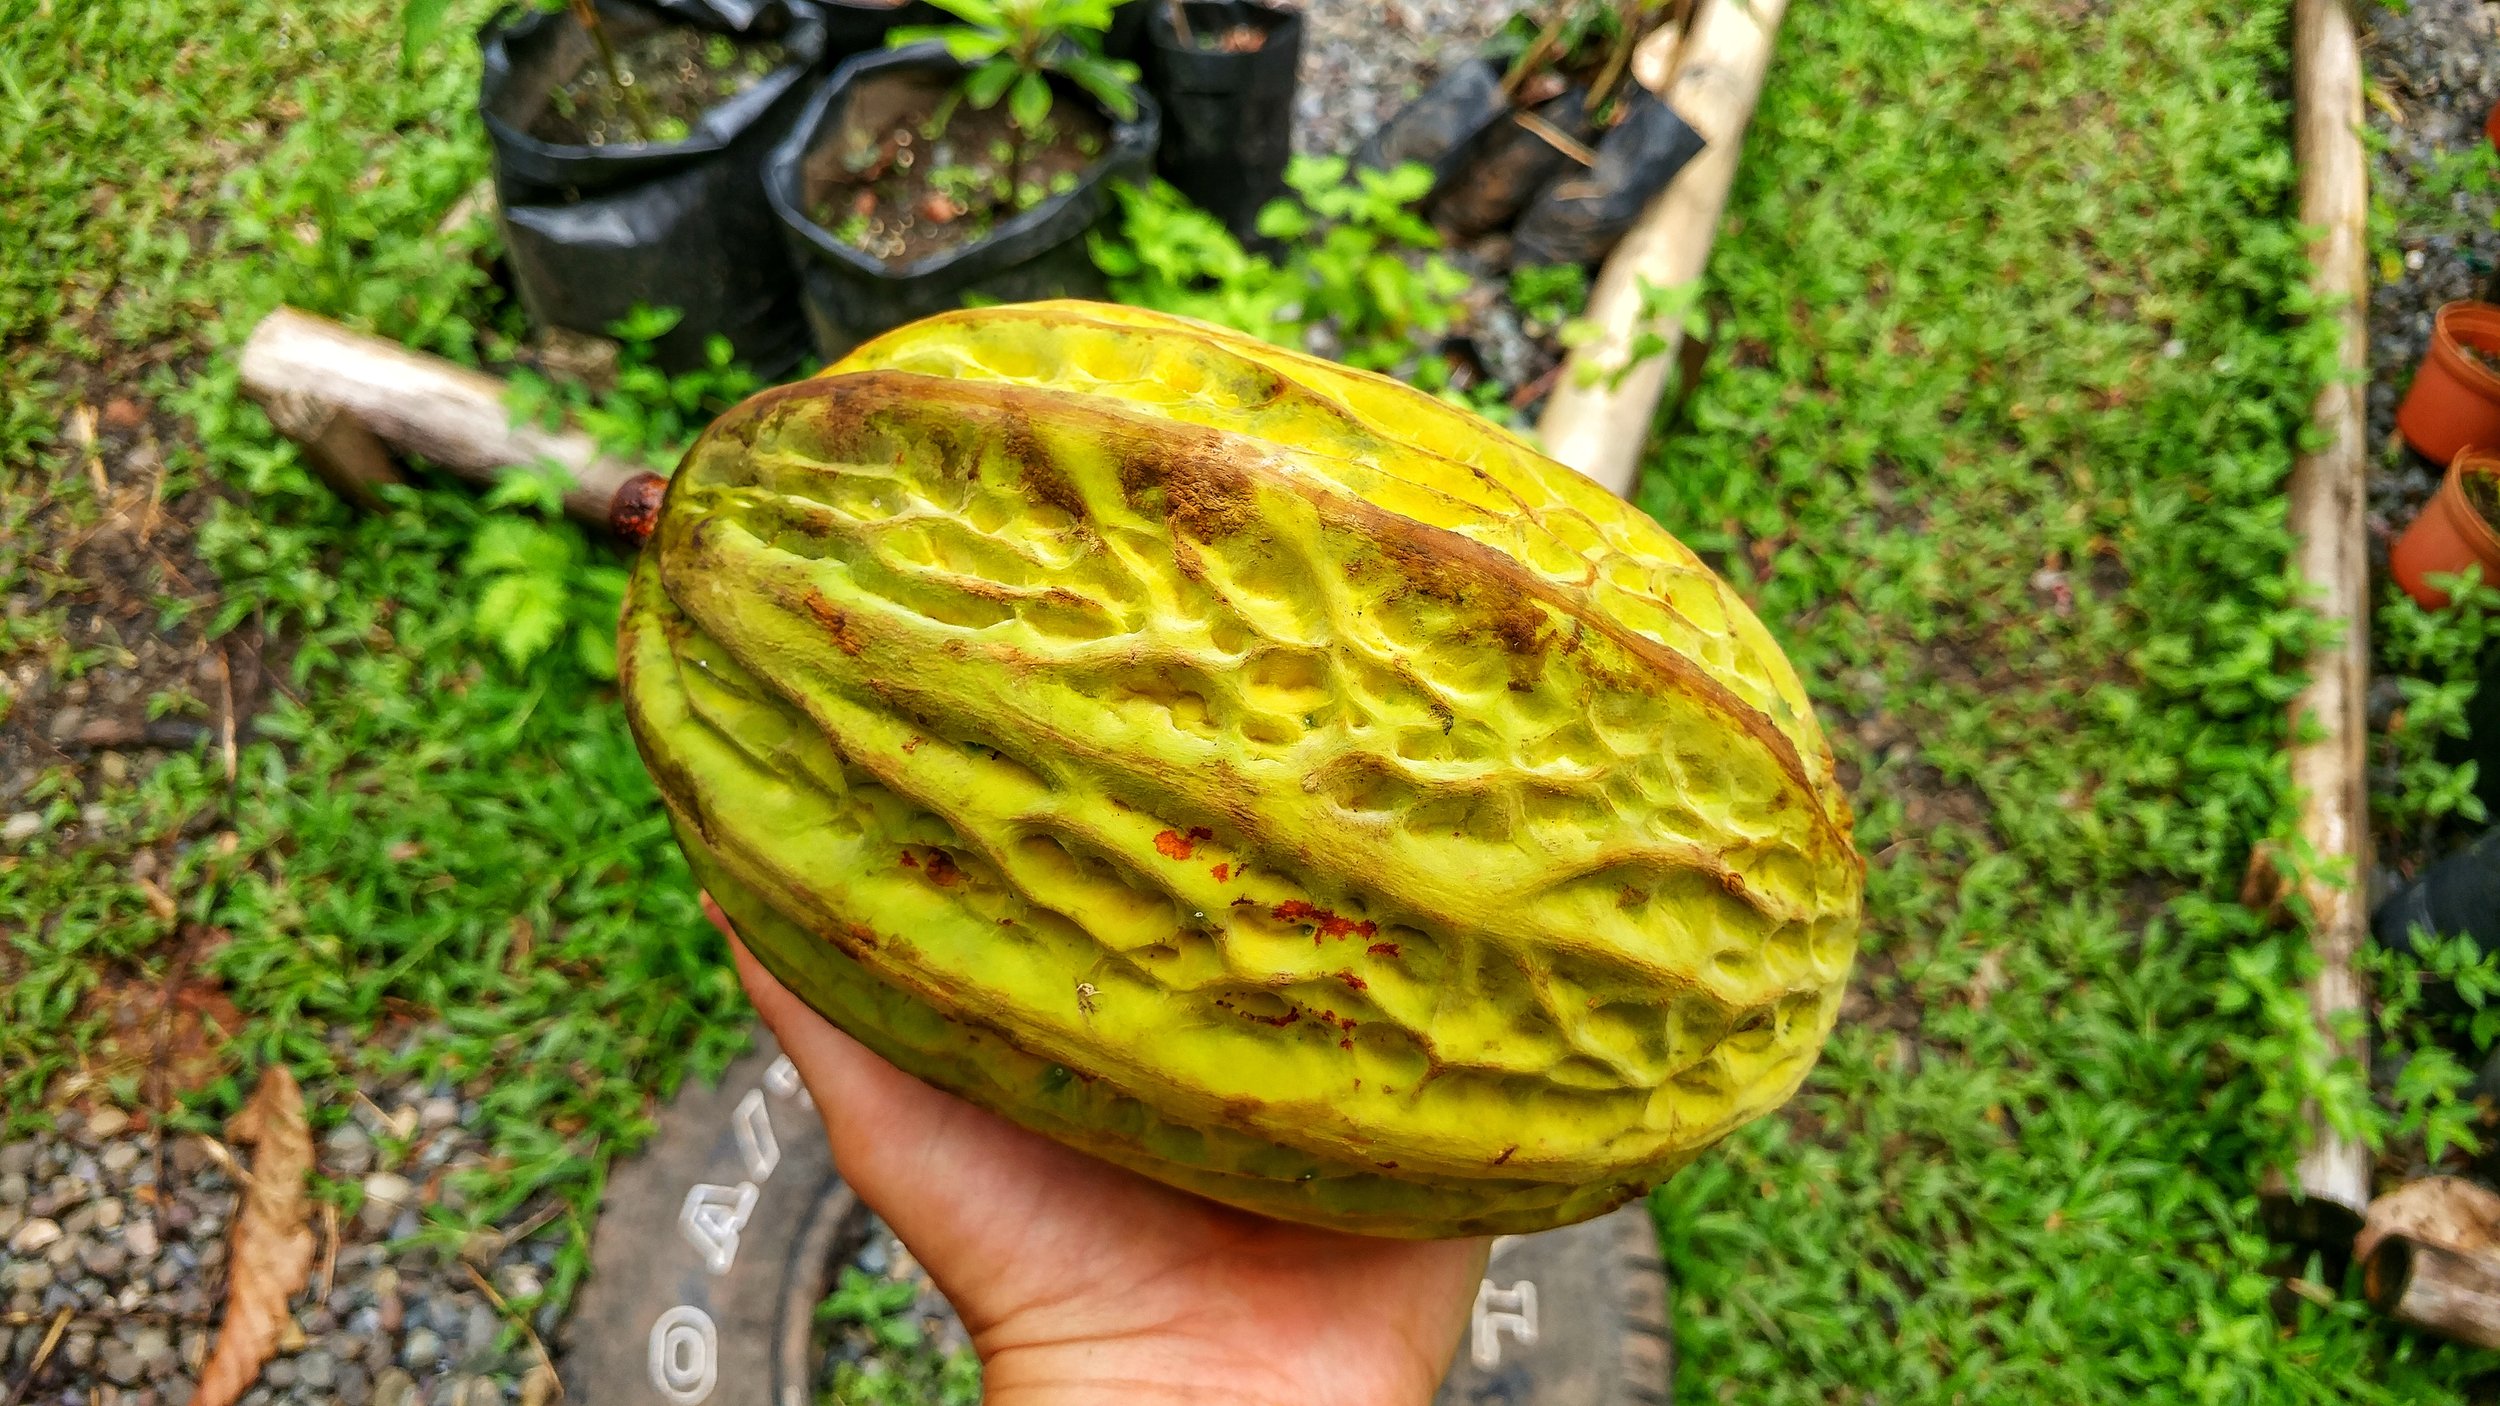
A pataxte fruit
The pataxte tree grows to an average height of 8-12 meters, maturing in 5 years. It has a large, yellow, round to oblong fruit with distinct ribs (12-30 cm long). Its pulp is tangy, and can sometimes give off the aroma of gasoline, but generally has a sweet taste. Here at the Ranch, the pataxte pulp flavor is defnintely more polarizing than cacao or cupuacu. There are about 40 seeds per fruit and the pods fall to the ground when ready to be harvested.
Similar to the history of cacao, the pataxte was developed into chocolate during the Aztec period and likely originates from the Amazon. Mesoamerican civilizations used pataxte in beverages similar to cacao. Pataxte is grown from Peru to Mexico, but today it is most commercially available in Mexico. Its seeds are used in combination with cacao to make chocolate bars or fried/roasted for savory dishes. In Oaxaca, there is a traditional beverage called the “popo” made of pataxte. Pataxte is also often used to create buttery foams on the top of traditional cacao and maize beverages in Maya culture.
Pataxte already has a history of being combined with cacao to make chocolate, but this relationship is still underutilized and certainly not pervasive in Costa Rica. Pataxte provides an incredible nutty, buttery, and sweet flavor to cacao. However, its fat content is much lower coming in at around 20%. This gives us the opposite problem of the cupuacu, making it difficult to create a creamy bar with just pataxte.
Sounds like a combination situation just might be the ticket! Here at the Ranch, we have combined pataxte with cacao and cupuacu to make bon bons, chocolate drinks and delicious chocolate sauce!
Seeing Chocolate in a New Light
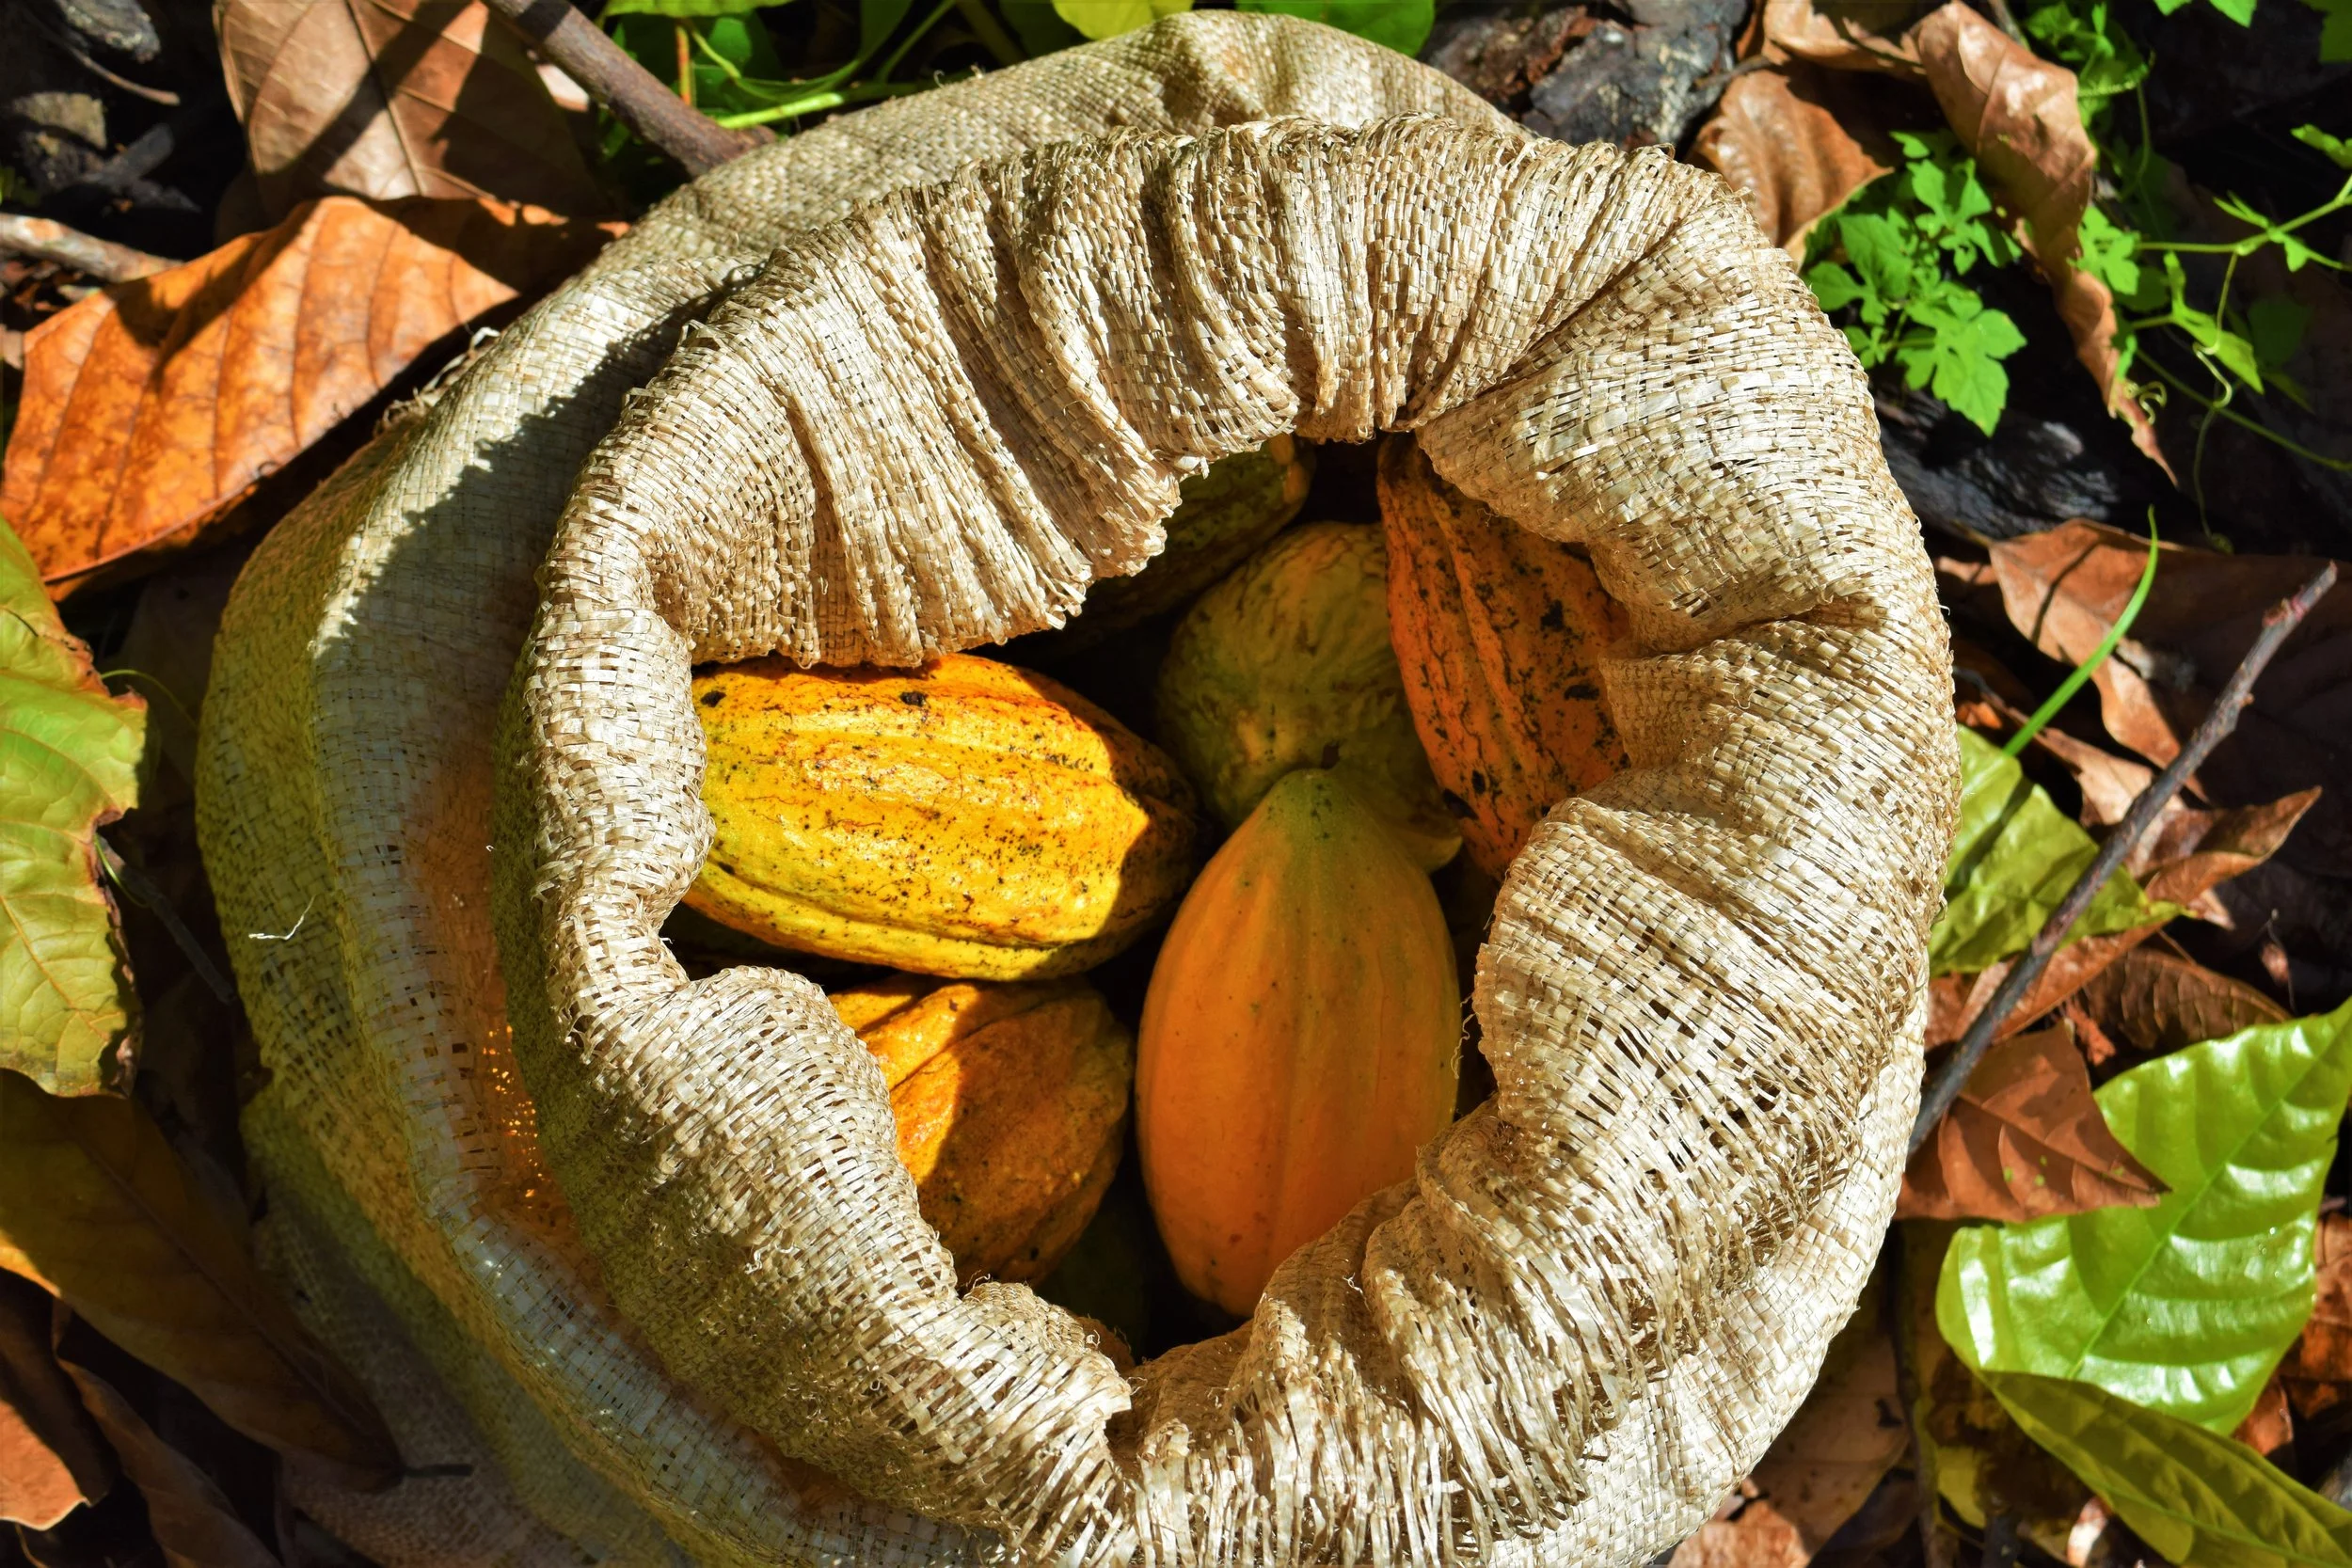
A small harvest of cacao fruits
A beautiful and important lesson I’ve learned this year is that chocolate is more than just dark, hard and bitter. Experimenting with cupuasu and pataxte has showed me that chocolate can be soft, creamy, nutty, floral, and taste like red wine. Expanding my interpretation of chocolate to encompass these other Theobroma varieties has inspired me to learn more about how to grow cacao, cupuacu, and pataxte in combination. This could create a more ecologically and economically diverse and stable chocolate farm for growers across Central America. It could also create more complex and unique chocolate products for everyone to enjoy!
The Fermentation Process
These Theobromas taste best when the seeds have been fermented, letting the sugars in the pulp seep into the seeds and enhance the flavor of the beans. A typical ferment needs a fairly large number of fruits (30+) to reach the desired temperature to initiate fermentation. Due to the somewhat sporadic and limited harvest of cacao, cupuacu, and pataxte we get from our agroforestry systems, we often find ourselves needing to ferment a small number of fruits at a time (under 10). To tackle this problem, we have done everything from warming jars of seeds in hot water baths to heating them in our compost piles!
The recipe below has wound up being one of our favorite ways to “ferment” the beans. It is a two for one process creating both tasty vinegar and beans with a rich flavor profile. As sometimes happens, we actually never intended to use this recipe to ferment beans, we just decided to give the beans a try after making the vinegar. Lucky for us (and for you!) we loved the way the beans tasted after going through this process.
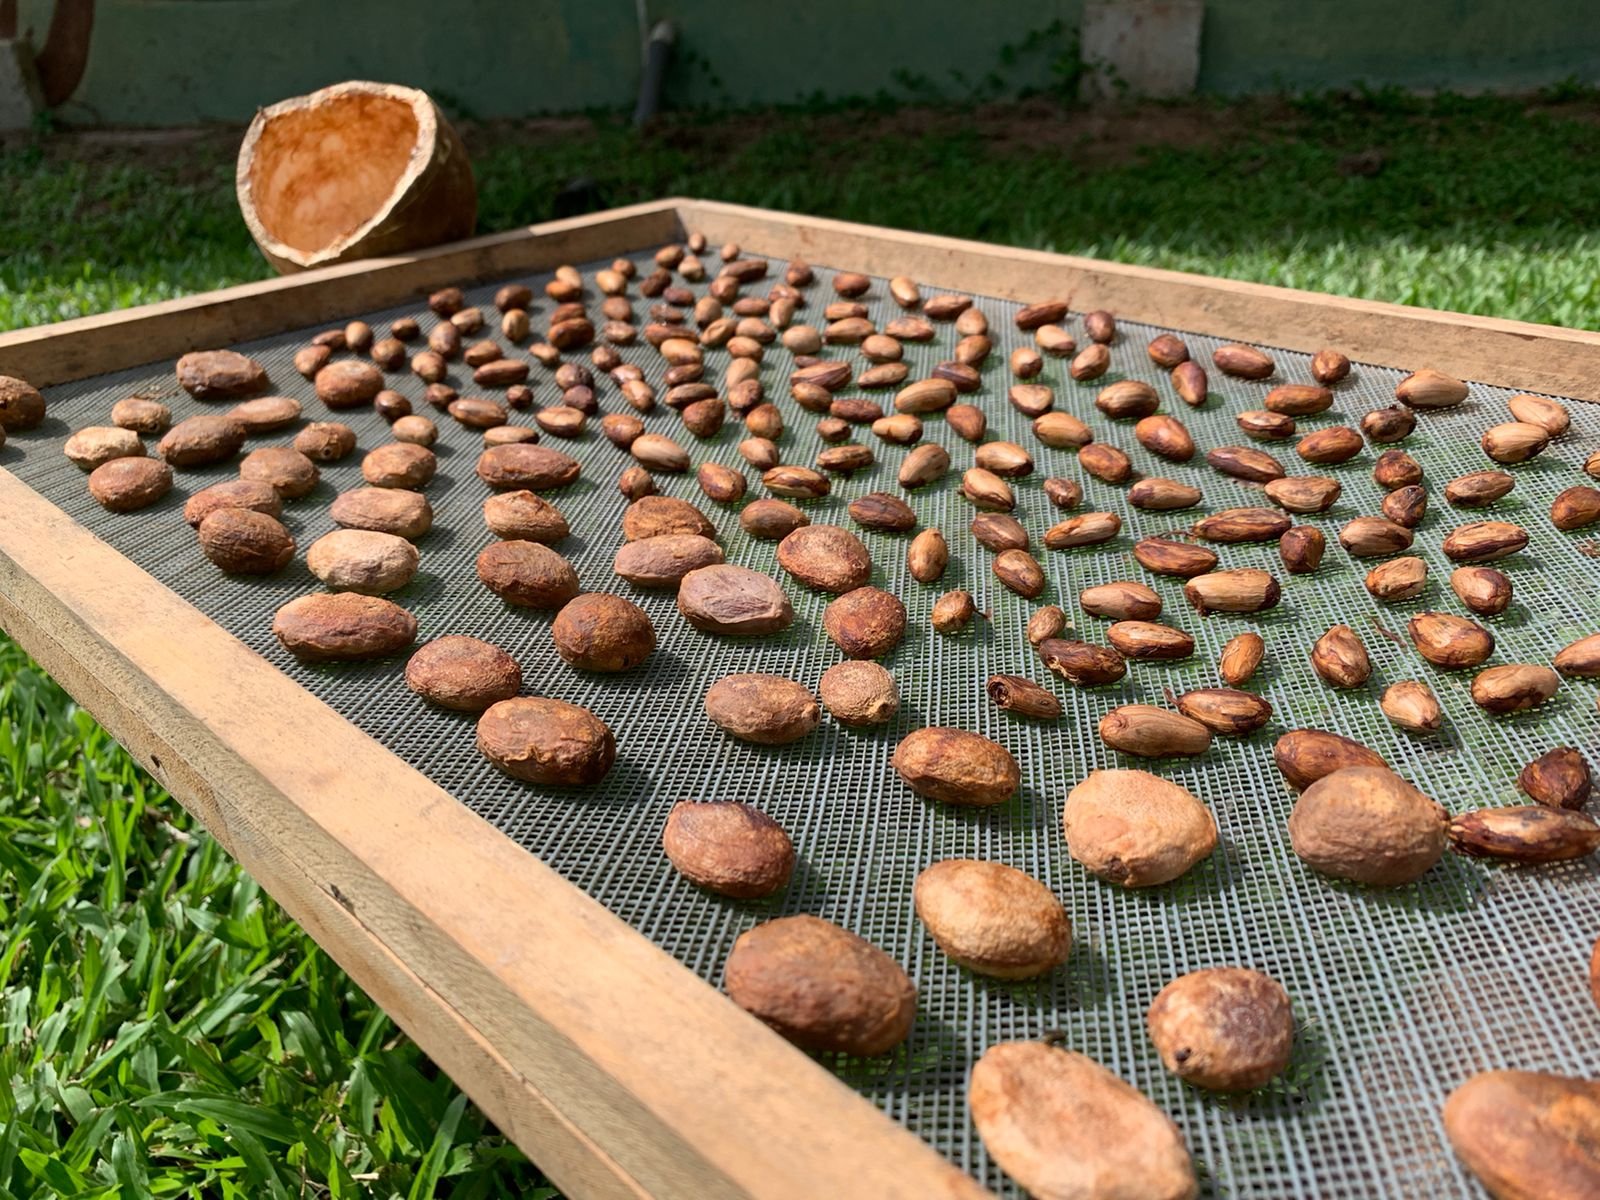
A mixture of Theobroma seeds that have been fermented and are drying in the sun
Recipe: Theobroma Vinegar Fermentation
Every so often, magic is created from a forgotten experiment. This recipe is just that, an experiment that was left on the back of the shelf only to be found again and turned into something delicious! This process actually produces two unique products, vinegar with notes of chocolate, red wine and nuts along with beans ready to be dried, roasted, and turned into chocolate!
When beginning with fresh pods:
Place seeds and pulp of cacao, cupuacu, and pataxte into a bucket. We have used as little as 4 fruits to as many as about 10 fruits for this process.
Fill with water, enough to cover all of the seeds and pulp sufficiently. Add more water if you would like to yield more vinegar. This is up to you!
Add 1/3 cup tapa dulce (our source of raw sugar) for every fruit in the ferment.
Leave open to oxygen but covered for bugs (we use a cheesecloth and string).
Stir once a day for 3 days.
On the third day, check the flavor of the ferment, adding more sugar if the solution has already lost significant sweetness.
Check the vinegar once a week for 3 more weeks, testing the solution to see how well the pulp has soaked off of the beans. Add more sugar if the vinegar flavor is weakening.
After about a month, check to taste - If the vinegar is tangy and the beans are relatively free of pulp (the cupuacu and pataxte will have more pulp than the cacao) then the vinegar ferment is ready.
Strain the vinegar and bottle, storing in an anaerobic environment for 6 months to age.
Wash the beans, removing any extra pulp you can, and lay out to dry in the sun.
These beans can then be used to make homemade chocolate bonbons, ground up and put in smoothies, or in the chocolate sauce recipe below.
recipe: Theobroma Chocolate Sauce
This creation is a delicacy here at the Ranch, made with three different members of the Theobroma family we grow: cacao, cupuacu, and pataxte. This sauce is a great accompaniment to almost anything sweet, but we particularly like it for drizzling over coconut macaroons (stay tuned for our upcoming recipe book). If you only have access to 1 or 2 of these beans, you can follow this same recipe and it will no doubt be delicious. The flavor profile will change as you change the ratios of the beans, so experiment as you have access to different quantities of each!
1/4 cup cacao beans
3/4 cup cupuacu beans
3/4 cup pataxte beans
1/4 cup tapa dulce
1 teaspoon vanilla extract
1/2 teaspoon sea salt
Water to taste
If beginning with fresh pods:
Ferment the beans following the “theobroma vinegar fermentation” recipe above.
Sun-dry or dry beans in a dehydrator (the skins should feel dry and no longer sticky).
Roast beans in a cast iron skillet on low for 15-20 minutes until flavors are released and shells look easy to peel.
Peel shells, separating beans out.
Grind beans all together using a heavy duty hand crank in order to release the fats, creating a paste.
On low heat, melt 1/4 cup tapa dulce (our local sugarcane), stirring in the paste. Slowly add water to create the consistency you are looking for. You can make this sauce as thick or thin as you’d like!
If you already have roasted nibs, you can skip steps 1-4 and continue with the recipe!
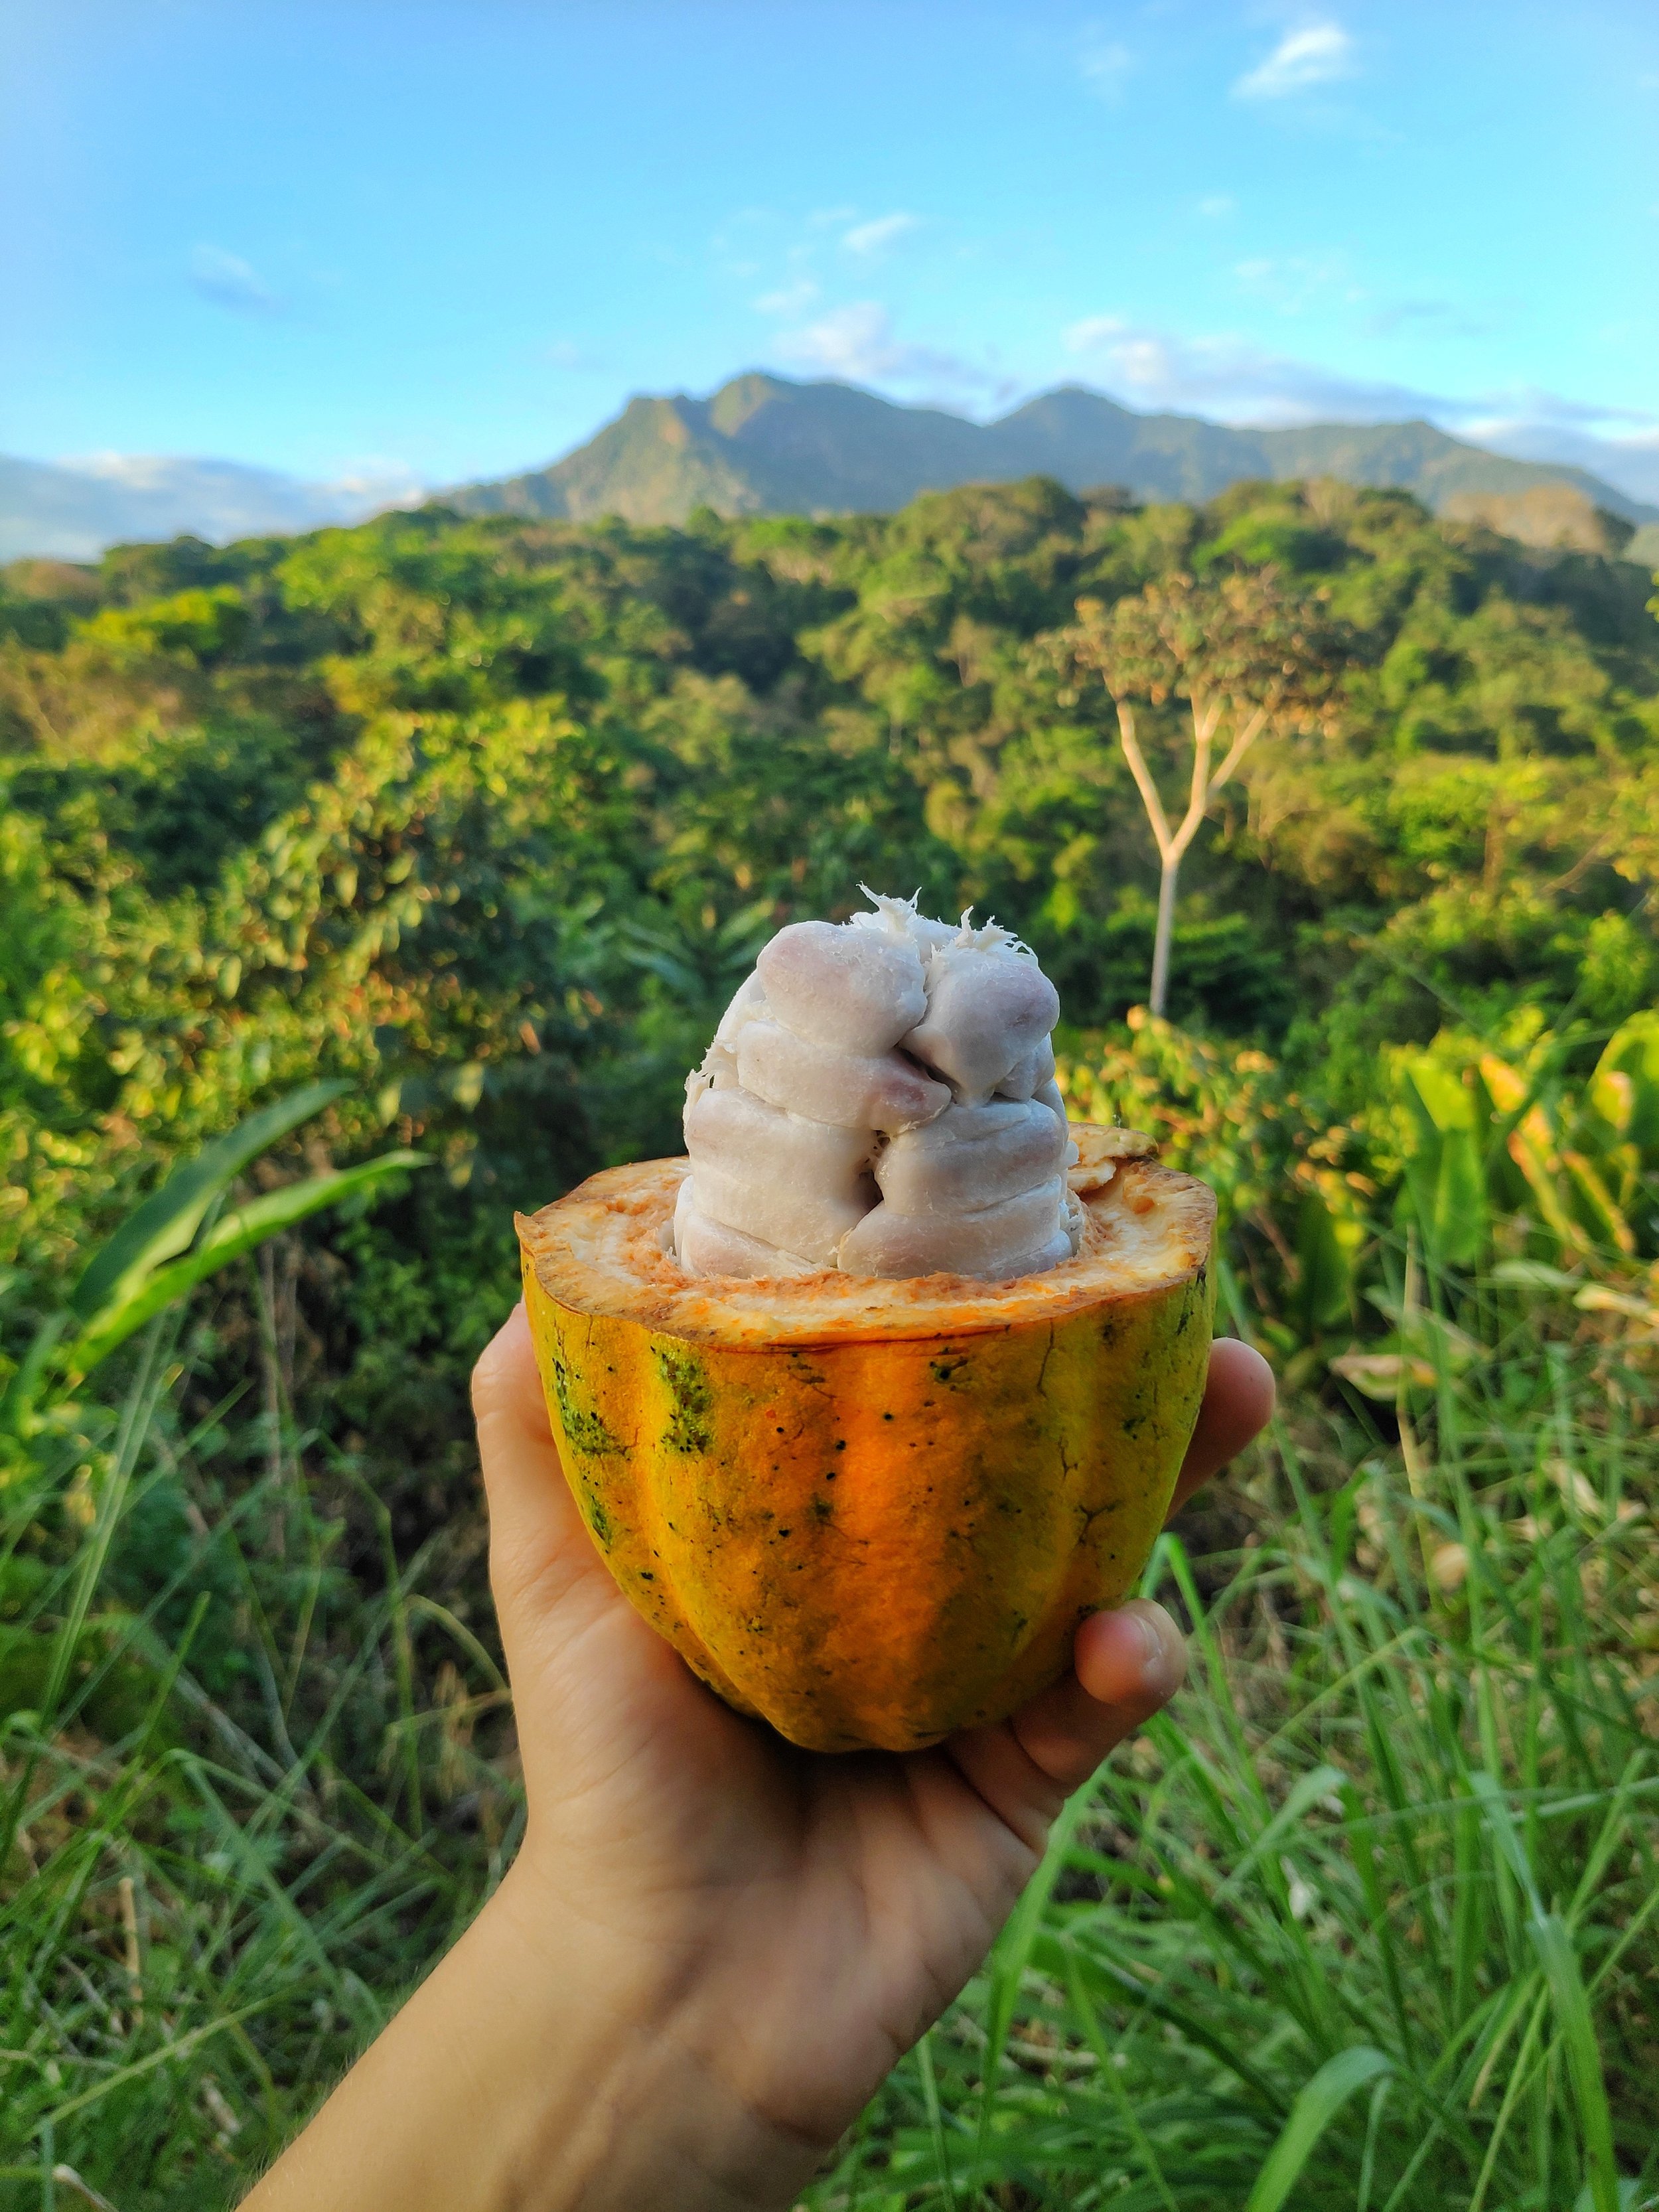
A cacao overlooking La Cangreja National Park
These magical and delicious fruits have some serious potential in the chocolate making market. We look forward to getting larger harvests and experimenting more with these incredible fruits.
Check out these past blogs
Farm to Table Chocolate Bonbons
Life of Spice: Farm to Table Cinnamon
How to Design, Plant, Maintain, and Feast from your Food Forest

Jungle Apothecary: Lemon Balm and Holy Basil
If you are able to start to restructure your thoughts around this concept, you might be begin to reach into an entirely new depth of herbs. In many other systems of healing around the world, a variety of herbs are used mildly and habitually to ensure a lifetime of health and longevity.
By 2021 apprentice Dewey
“It’s balancing, it’s a panacea, a good nervine. Good for the heart, for the soul, for babies, for the elderly, and everyone in between.”
Medicinal Herbs

A selection of dried herbs for tea making
An effective way to begin to more easily incorporate herbs into your life is by making herbal teas. For many, herbal tea is a ritual. Others, however, may just enjoy the warmth and taste of a freshly brewed cup following a meal. Some use tea as a way to prevent and heal disease, while others think it is a tasty and refreshing way to begin their day. Regardless of what role tea has (or has not) played in your life, when we begin to look more reverently into the cup, we can start to understand the deeper workings of the leaves within.
If you have been fortunate enough to have visited Rancho on-site, chances are you were able to take a peek at the incredible tea station we have set up at the main house. Herbal teas are truly an invaluable resource out here in the jungle. They help keep us well... and we mean that in every sense of the word—mentally, physically, emotionally, spiritually. Two of the most loved here at Rancho are Lemon Balm and Holy Basil (also known as Tulsi).

Cup of tea anyone?
When beginning to look at herbs and the impressive impact they can have on our being, it is common for many to see and approach herbs in the same context we tend to approach pharmaceuticals. This makes sense, as we often have the ability to use them to replace or supplement the pharmaceutical industry’s role in our healing journey. However, if you are able to start to restructure your thoughts around this concept, you might be begin to reach into an entirely new depth of herbs. In many other systems of healing around the world, a variety of herbs are used mildly and habitually to ensure a lifetime of health and longevity.
The usage and recommendations of herbs in this blog are intended to inspire deeper love and further independent research into the role herbs can play in your own individual journey. It is important to note that we are all unique. In the same way that everyone can have different reactions to foods, allergens, medications, etc., herbs can and will have different impacts on different people. Something that might work wonders for me, might have a completely different impact on someone else.
Many herbal teas are safe for all to consume in moderation, but it is important to pay attention to your body. If you introduce a new herb or plant into your life and you notice any negative side effects, listen to what your body is telling you and stop consuming it. Make sure to do your own thorough research and check with your local herbalist, naturopath, or doctor about any long term or high volume consumption of an herb to ensure safe use.
LEMON BALM
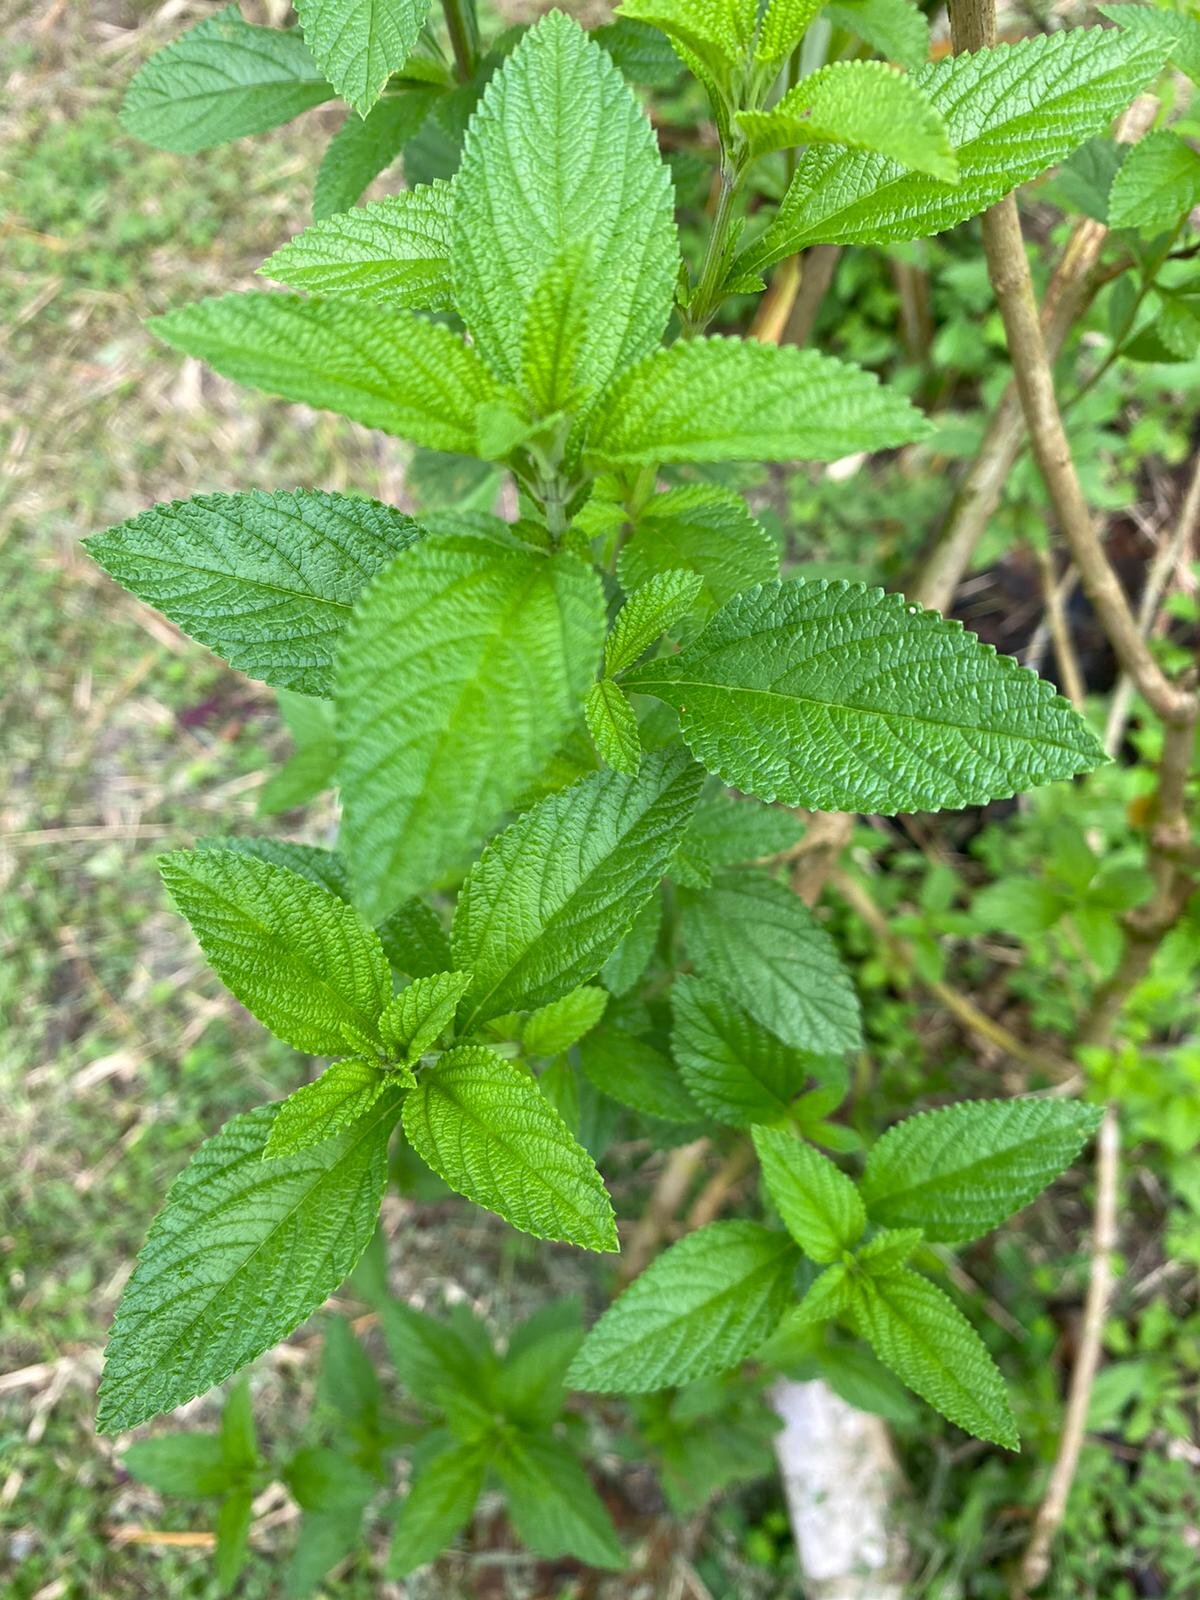
Lemon balm, with its sweet-lemony aroma and delicious taste, is an incredible plant to have and grow in your medicinal garden. This member of the mint family is relatively easy to grow and can even thrive in containers if you are without your own land or space to cultivate herbs. Although it is hard to put it’s far reaching abilities and potential into a box, lemon balm is typically classified as a nervine. Nervines are herbs that soothe, relax, and support the nervous system. Interestingly, it’s high volatile oil concentration, most significantly of citronellal and citral, has been proven in modern studies to confirm the plant’s ability to calm both the digestive and the nervous systems.
The versatility of this herb cannot be understated. Lemon balm is incredibly calming and is used to mitigate feelings of stress, anxiety, and nervousness. It is also used as an antiviral to ward off a variety of viral infections (even ones as aggressive as the herpes simplex), as well as anxiety, stress, fevers, coughs, and so much more. For example, the plant can be used topically as a powerful agent in your herbal first aid kit for insect bites and stings, but also used internally as a powerful relaxant. Due to its high antioxidant levels, studies have shown that lemon balm is even capable of markedly improving oxidative stress levels and plasma DNA damage.
Lemon balm is a very safe herb to incorporate into you and your loved ones lives. Cascade Geller, an herbalist and activist is quoted as saying, “It’s balancing, it’s a panacea, a good nervine. Good for the heart, for the soul, for babies, for the elderly, and everyone in between” in regards to lemon balm. Here at Rancho we love brewing a nice cup of lemon balm to help us relax after a busy day of working hard. To make a simple, nourishing cup of lemon balm tea, use one teaspoon of fresh or dried leaves per cup of hot water. To make a stronger brew this amount can be increased to desired taste up to one ounce of leaves.
HOLY BASIL (TULSI)

Holy basil has a loooong history. It has been used in India for over 3,000 years! It is used widely and often around the world. Ayurveda (one of the oldest systems of medicine) reveres holy basil as a powerful tool for optimal health. When seeking to utilize the health benefits of this powerful herb, it is important to make sure you are working with the correct species. Holy basil is not the same species as the common culinary plant we are all familiar with. Out of the (over) 60 different species of Ocimum genus, there are three that are considered Holy Basil and can be used somewhat interchangeably: Rama tulsi, Krishna tulsi, and Vana tulsi.
Holy Basil is one of many powerful adaptogens that have been identified to help reverse chronic damage and bolster overall health. Adaptogens are a classification of herbs that are building and nourishing. When used consistently, they help the body adapt to stress and move it toward overall wellness. David Winston and Steve Maimes are co-authors of an incredible book on adaptogens, and speak highly of holy basil, “Holy basil is classified as a Ramayana, an herb that nourishes a person’s growth to perfect health and promotes long life.” The adaptogenic nature of holy basil can even aid in the mediation of stress related damage and subsequently improve the overall cardiovascular health of an individual.
Some major health benefits holy basil is also known for providing are: reducing stress and anxiety, supporting a healthy heart, and strengthening the immune system. When it comes to stress and anxiety, holy basil has also been shown to reduce peripheral symptoms such as forgetfulness and lethargy. Researchers have even proven it to act as an effective treatment of generalized anxiety disorder. Due to its ability to slightly thin our blood, it also promotes good circulation. In regards to overall health, holy basil modulates and supports our immune system. It is also an antimicrobial herb and therefore can be utilized in the treatment of bacterial, fungal, and viral infections.
Fresh holy basil is ideal, but the dried leaves can also be used to make a tea. Begin with about a teaspoon of leaves to each cup of hot water and increase from there to desired taste and potency. One thing to consider is the high volatile oil content of this herb- for ideal results to not steep covered for more than ten minutes.
Keep drinking your herbs! Keep eating your herbs! Keep learning your herbs!
Want to Learn More
Join us for one of our permaculture related workshops, including Plants as Medicine.

Sign up for our monthly blog updates if you want to keep learning with us!
Read some of our past food related blog articles!

Make Black Garlic in Your Compost
Ok, now everyone is confused. But please hang on a second and I will show you how compost piles, often considered to be smelly mosquito havens and high cuisine flavour profiles can live alongside each other.
By 2021 apprentice Consti

Getting busy in the compost pile
Finding an article on compost piles on a permaculture blog is far from uncommon. In fact we have plenty of them on our own website, ranging from our waste management systems (read about our biodigester system) to how we squeeze every bit of energy out of everything we produce. The question you may be asking is why a compost article ended up in the food section. Isn't compost supposed to be the place for the food we didn't eat?
And yes, all these questions are justified and are part of the experiment I want to share with you today. This experiment started in the end of February 2021, when I read through Nomas Guide for Fermentation, the sacred manuscript of food experiments. When I saw a recipe for Black Garlic, I could almost taste its particular flavour from my travels to Japan and was determined to give it a shot.
Ok, now everyone is confused. But please hang on a second and I will show you how compost piles, often considered to be smelly mosquito havens and high cuisine flavour profiles can live alongside each other.
What is Black Garlic?
Black Garlic, for those who haven’t yet tried it, is the most magical flavour. The garlic loses its spiciness and develops a deep, sweet and mellow flavour paired with a creamy soft texture. Its color varies from an intense rich caramel to almost entirely black. Black Garlic and other blackened vegetables and fruit are relatively new to Western cuisine but are a staple in lots of Asian cooking.

The final product smells amazing!
So what happens to black garlic that changes its appearance so considerably? The answer is the good ol’ Maillard reaction, the flavor we all crave when we want our fried green beans a little dark or tortilla a bit burned on the top. It is essentially a redox reaction that takes place while cooking at high temperature. But I do not want to spend too much time on the chemistry because first, I hated chemistry in school, and second, cooking is an art not a science (I am looking forward to the comments).
When we make Black Garlic, we basically recreate the same reaction, but we decrease the temperature and increase the time. The goal is to cook the garlic at very low heat for a very long time. Time, no problem! Heat, ironically while living in the tropics, more of a problem. At Noma, they use heating mats and insulated rooms or chambers. Two things I don’t have and don’t miss. But luckily, alternative energy is being produced everywhere around us, all the time. We just lost connection to these sources and think of energy only as electrical and a product of relentless burning of fossil fuels.
how I made Black Garlic in a Compost Pile
I started thinking about how I could slow-roast my garlic and brainstorming the hottest places on the Ranch. One day, while piling on some food scraps and noticing the heat of our compost pile, a light bulb went off- the heat from decomposition was the perfect solution. As so often in the experimental culinary world, bacteria are our closest friends. Besides many other helpers, bacteria and fungi are the most important forces in the breakdown of our food. A well-aerated and maintained compost pile can heat up to around 77°C/170°F, and thanks to the many hungry guests and residents at Rancho, we fill up at least one five gallon bucket of compost every day. This means our compost piles fill up quickly and produce lots of heat.
Once I realized the slow and steady temperature of the compost pile was the solution for my Black Garlic experiment, all I needed was an air-tight container that would protect my garlic from any creepy crawly visitors. I started off with two buckets. I just put a small bucket in a big bucket and it worked! I didn’t get any mold or funny smells. There was only one problem. The heat transfer through two buckets wasn’t quite good enough. The pile itself reached a temperature of 54°C/130°F, but the bucket only heated up to 38°C/100°F. Version two is much smaller, but potentially more inviting for the living world. It consists of a 4" PVC pipe with a sealed lid. Additionally, the garlic is in a zip lock bag that hopefully keeps it dry. And yes, I said hopefully, because as I write this, Maillard is doing his job outside in the piles.

Garlic into an airtight bag

Place the bag into the PVC

Place PVC into middle of active compost pile
Did it work?
Fast forward three months in the compost pile… and yes it worked! We got some beautiful, smooth, creamy, black garlic. Made it into a paste and served with homemade tortillas, it was beyond delicious!

Final black garlic experiment complete
want to learn more?
Stay tuned for more food blog articles and always keep up to date on our workshops that often include fermentation, permaculture design and more.
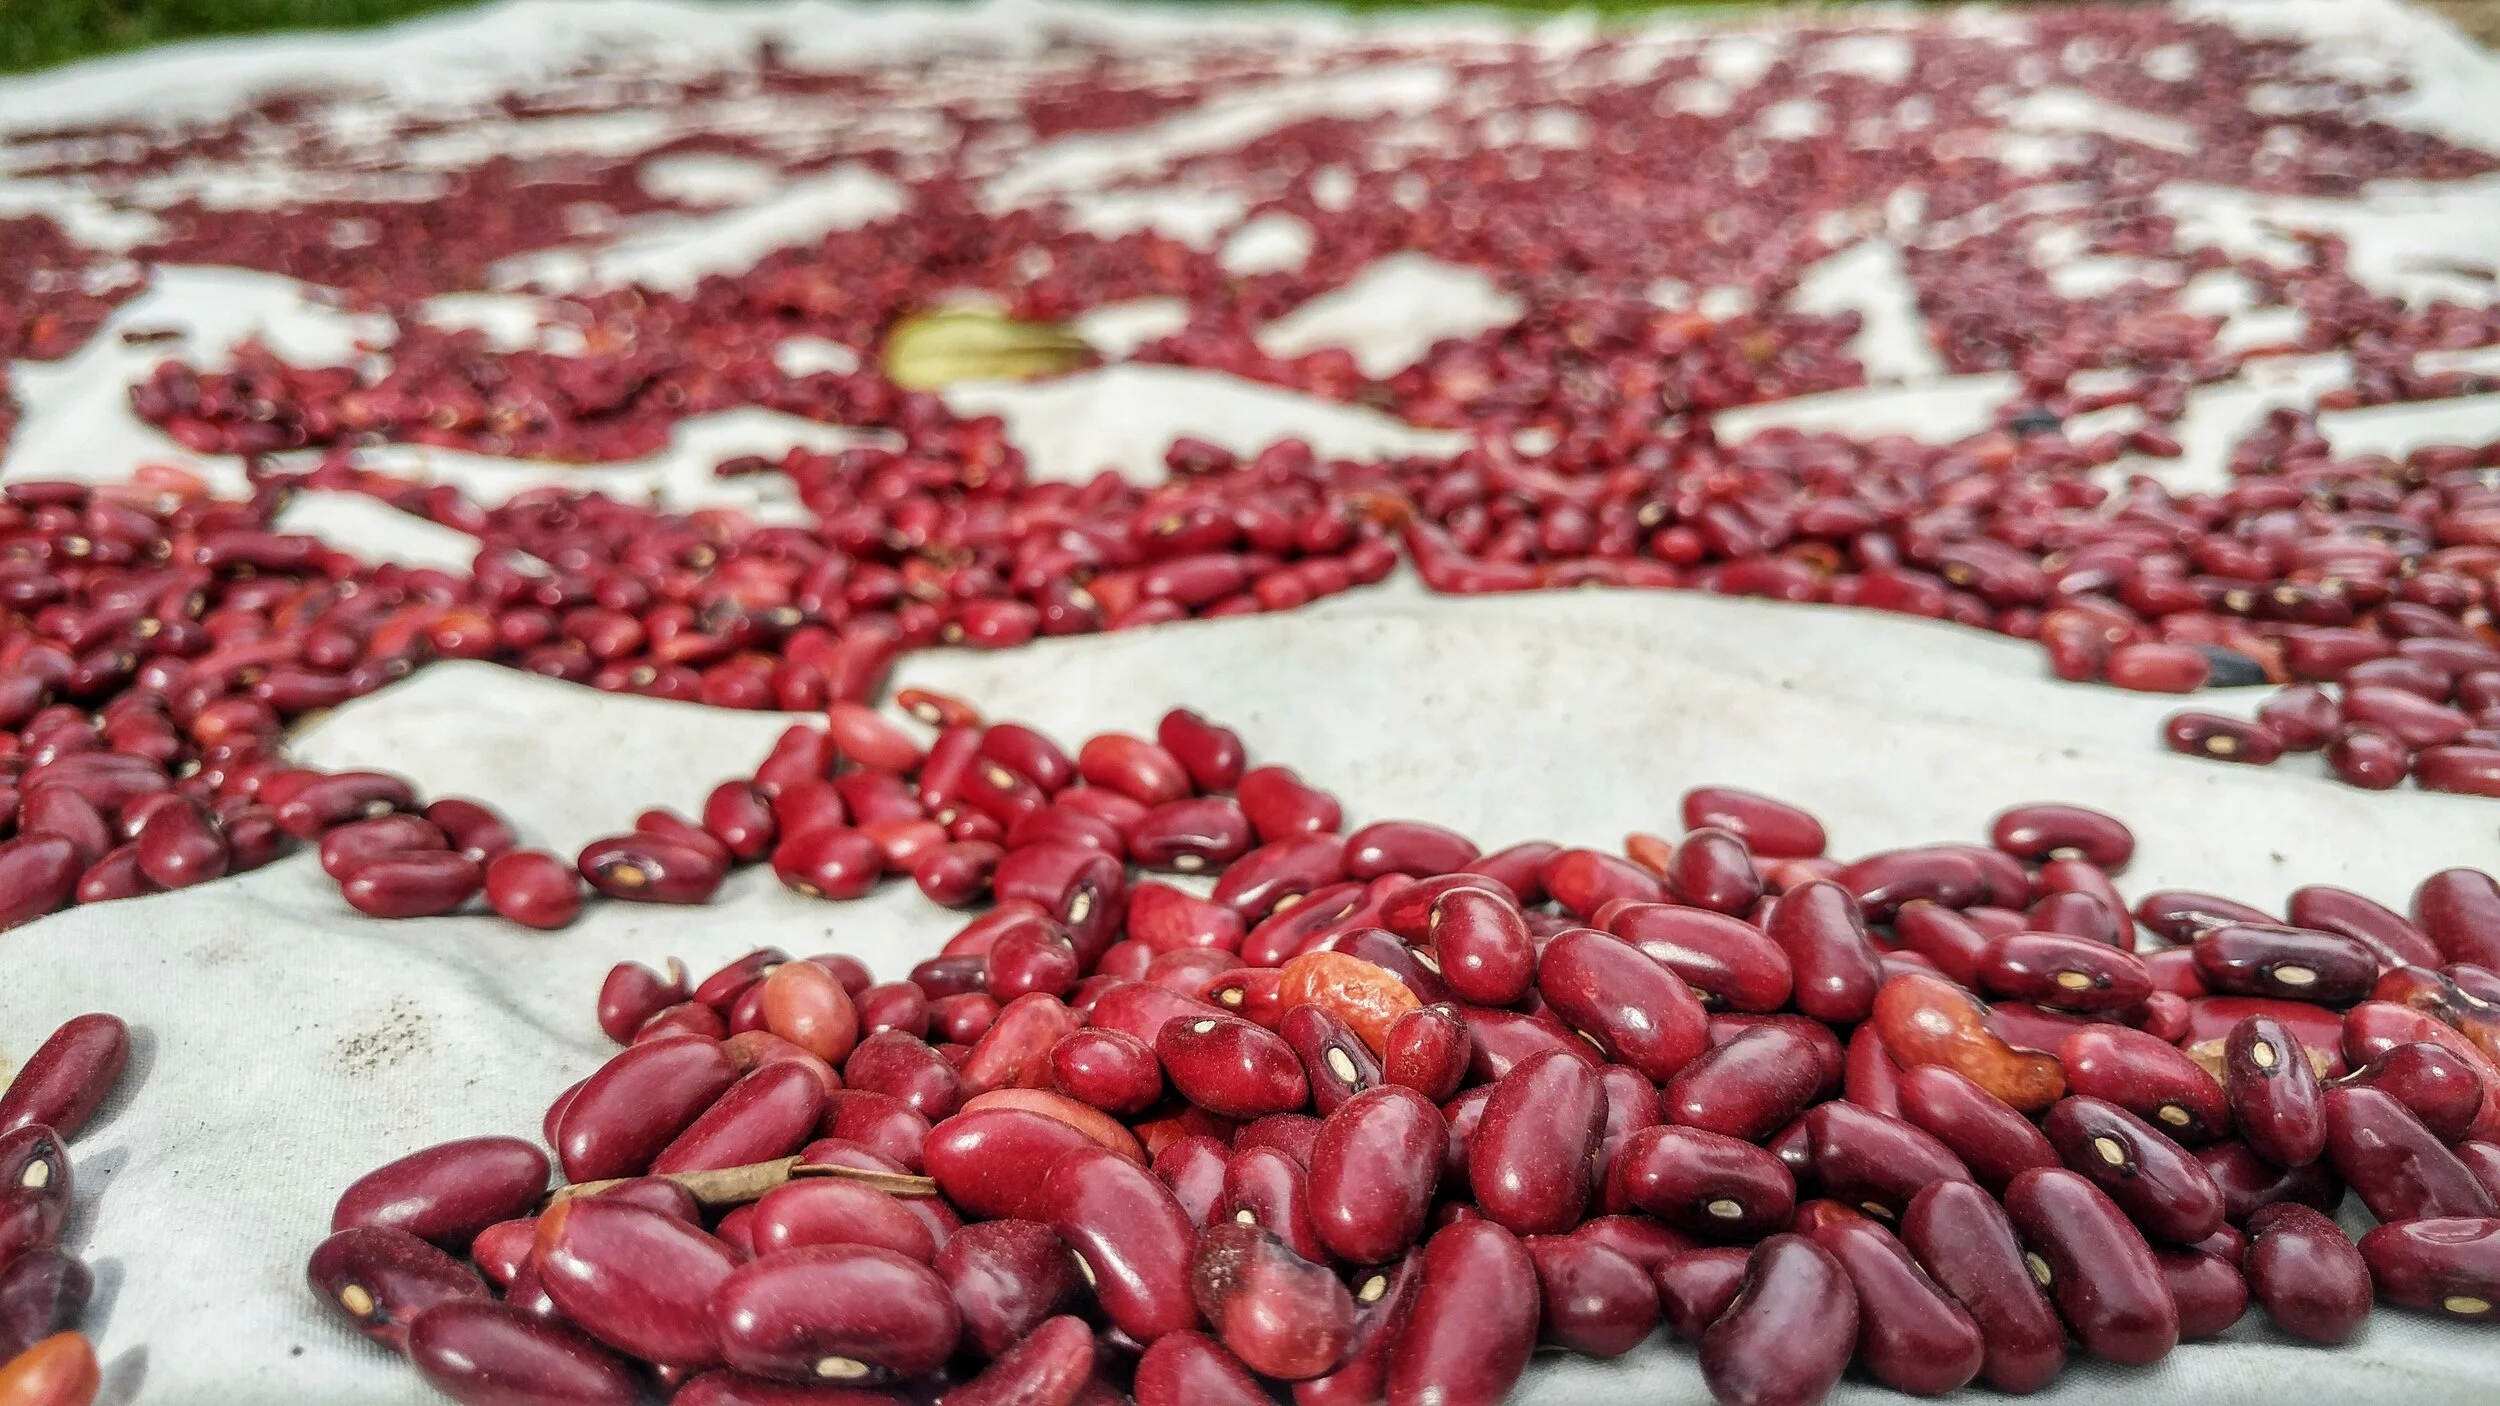
Homemade Hoisin Sauce and Other Recipes with Fermented Black Bean Paste
Although we love our traditional uses, we also like to get creative. A few weeks ago we decided to start experimenting with fermented black beans, inspired by our love of fermentation and quest for a homemade hoisin sauce. Yumm!
By 2021 apprentice Cameron Conklin
We Love Beans!

Don Chepo winnowing his yearly harvest of beans
Beans are an important staple in our diet and a traditional food here in Costa Rica. Beans are a great way to provide vegetarian, balanced nutrition to large groups of people - full of complex carbohydrates, fiber, and protein. We consume beans in many forms at the Ranch, often as as pinto (a traditional Costa Rican rice and bean dish served at breakfast), as frijoles molidos con queso (refried beans with cheese), or frijoles baja (baked with tomatoes and onions).
Although we love our traditional uses, we also like to get creative. A few weeks ago we decided to start experimenting with fermented black beans, inspired by our love of fermentation and quest for a homemade hoisin sauce. Yumm!
But they are even better fermented!
Beans are packed full of nutrients, but can be difficult on the body, potentially causing flatulence and indigestion. So what is there to do? The answer is fermentation!

Beans fermenting for bean paste
By fermenting your black beans (or any bean), you are essentially letting lactic acid bacteria pre-digest the beans, breaking down the complex proteins into amino acids that the body can more easily absorb. The fermentation process also increases the lactic acid bacteria in the body, improving gut health and the microbiome.
We don’t ferment all of our beans, but this method is super easy and a great way to include delicious, extra nutritious bean paste into your condiments. We particularly like this as an addition to our asian style dishes.
Below are a few recipes that we have been adding to our meal rotations lately. I have to say this hoisin sauce is one of the best sauces I have ever had. Whip up some fermented black bean paste and start experimenting in your own kitchen!
Recipes
Homemade Fermented Black Bean Paste
8 cups of black beans (cooked)
8 tablespoons brine from previous ferment
Smash beans with a fork, breaking the skins, until about half have become a paste consistency
Fill the jar(s) with the beans
Add 8 tablespoons (1 tablespoon per cup) of brine from a previous lactobacillus ferment (homemade kimchi) or whey ferment (how to make dairy kefir)
Make sure to not fill your jar more than 3/4 full
Note: because the beans are already cooked, they will not have the lactobacillus bacteria naturally occurring on their skins. This requires the previously inoculated brine
Screw lids on the jars and let sit for 3 days to 1 week. Testing for taste. The beans will be sweet and sour and have become more paste like in consistency
Once the beans have reached your desired taste, you have your paste that can be added to all kinds of dishes, some examples below. Store in the fridge for months
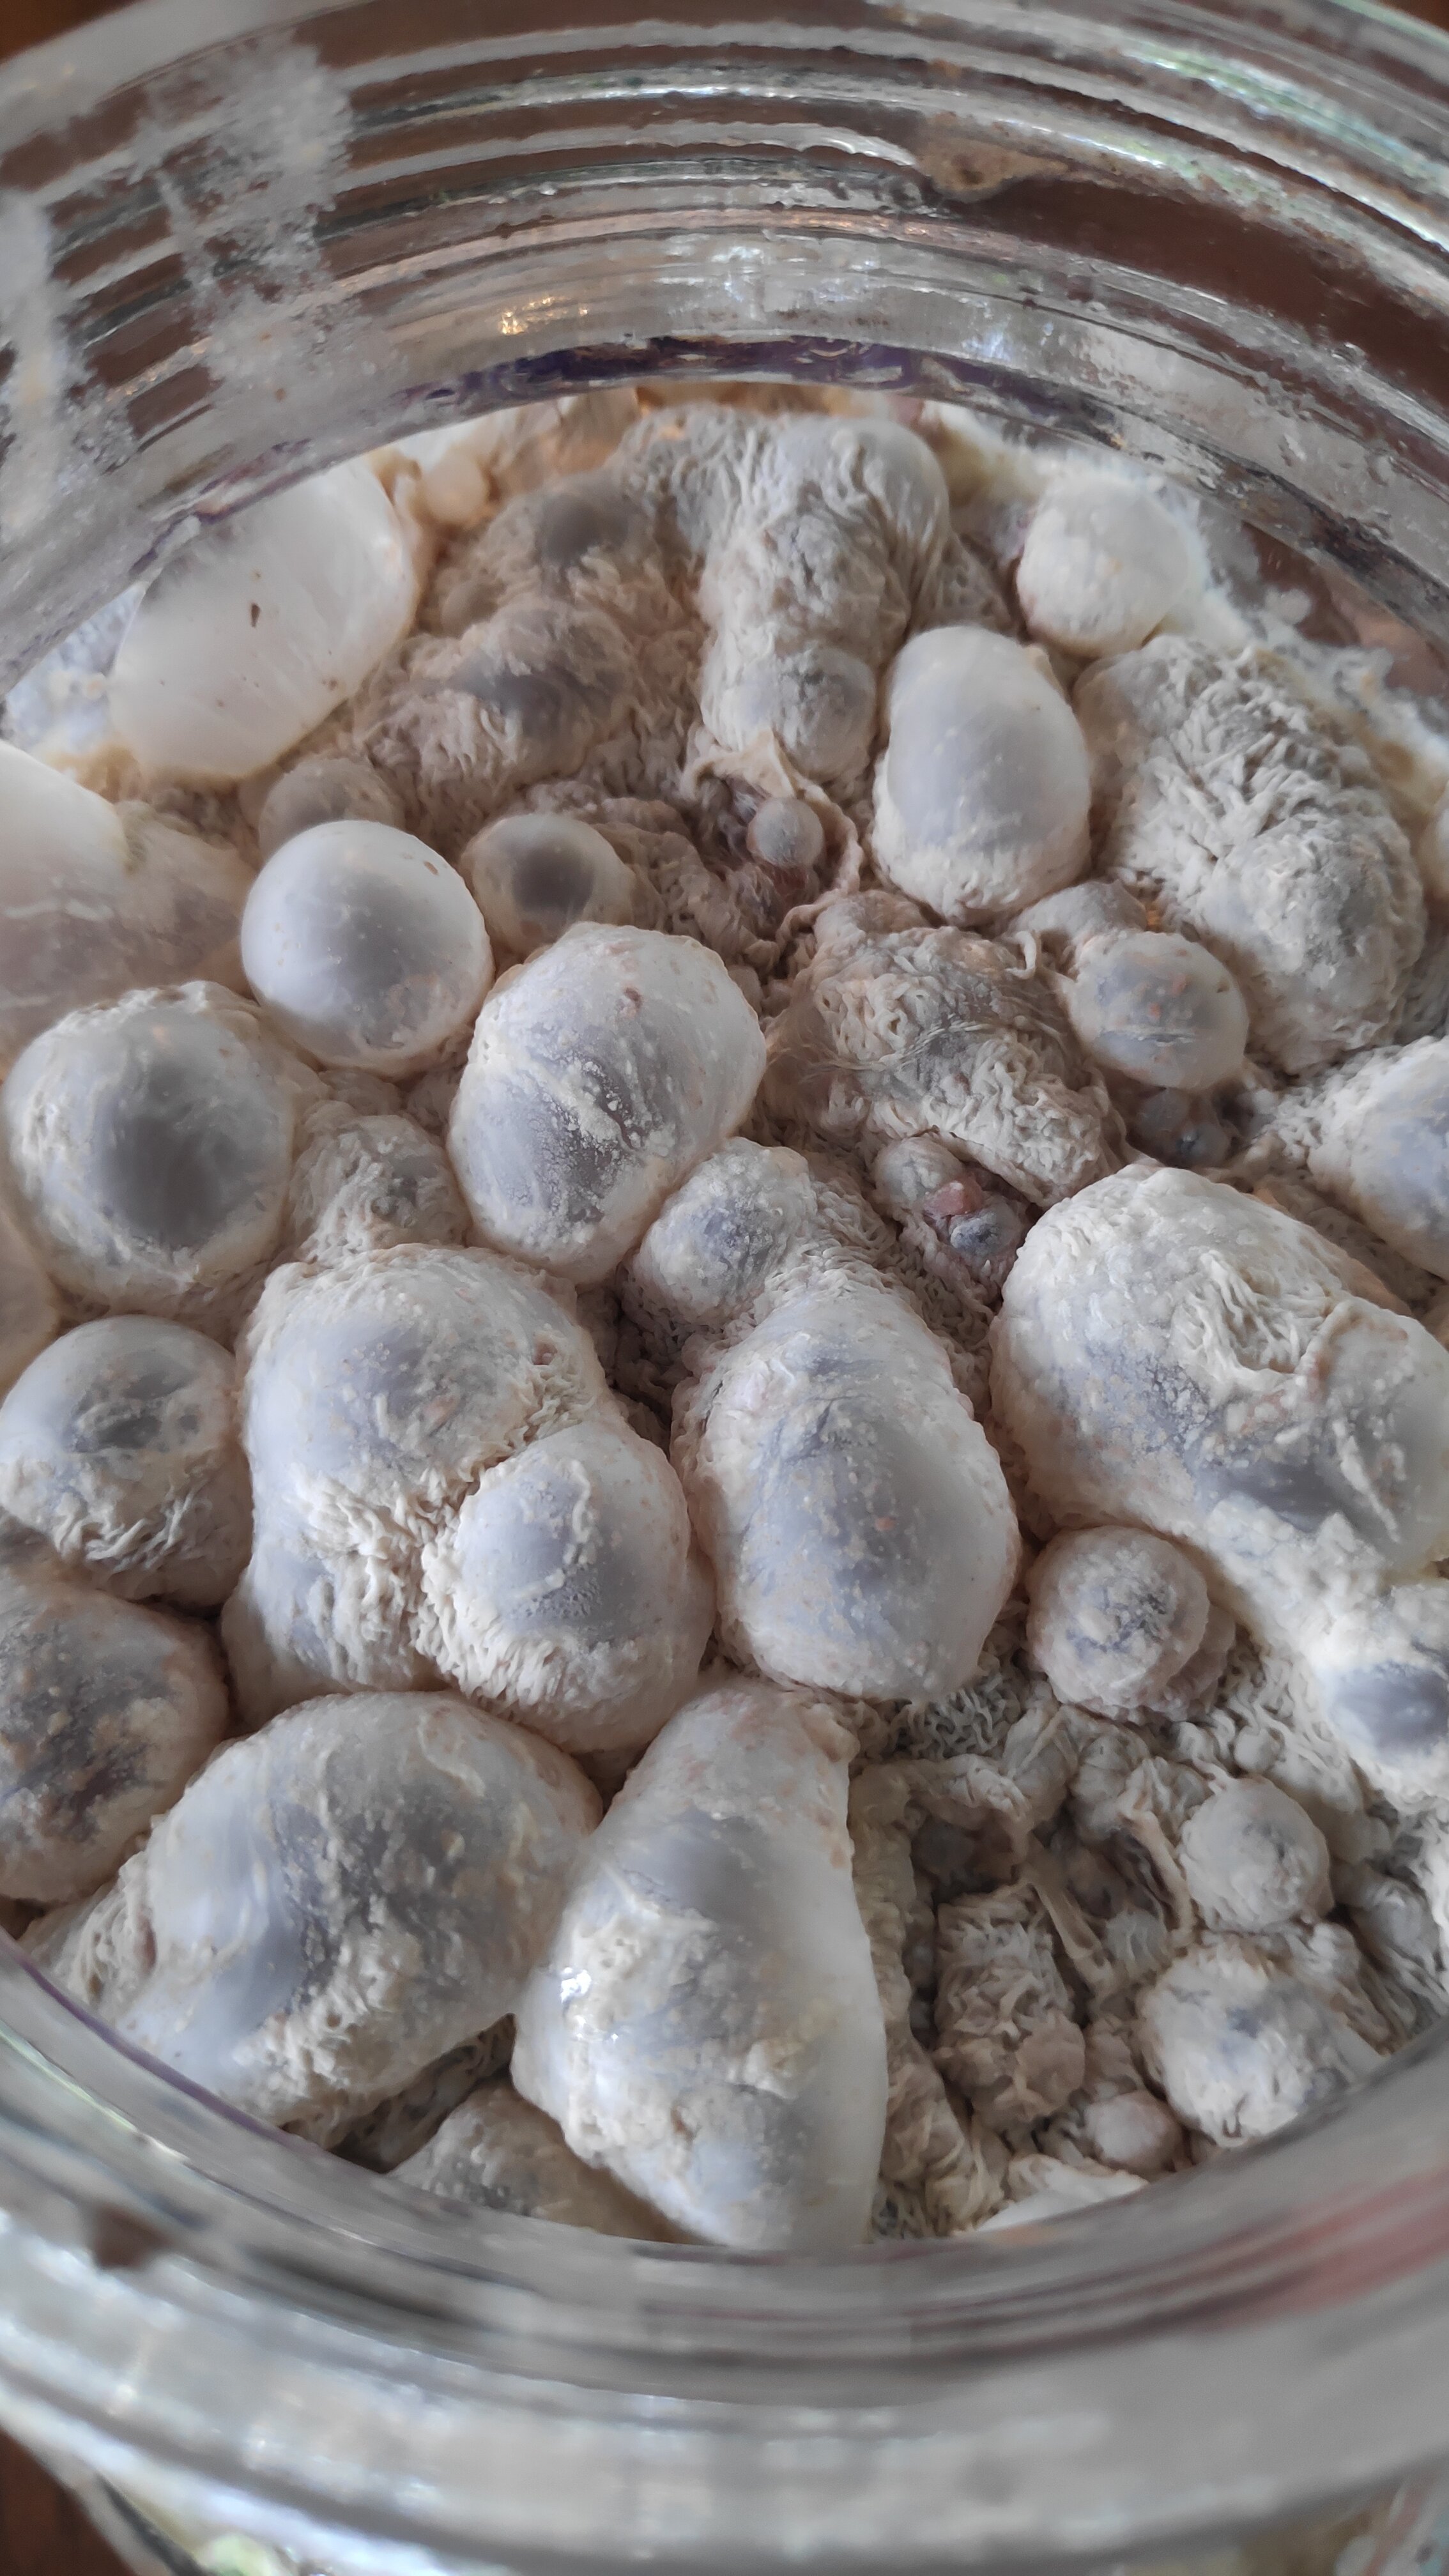
Don’t be afraid of a little white mold that will form on your fermenting bean paste
Homemade Hoisin Sauce
1 cup tapa dulce (or your local sugar source)
6 tablespoons water
9 tablespoons homemade fermented black bean paste (see recipe above)
6 tablespoons soy sauce
2 tablespoons homemade vinegar
12 pieces of dried mamey sapote (any local dried fruit such as prunes)
1 1/2 teaspoons sesame oil
1 1/2 teaspoons homemade Chinese 5 spice (see recipe below) powder
Combine all the ingredients together and blend well
Can store in the fridge for months
Chinese 5 Spice
10 Star Anise
2 1/2 teaspoons whole fennel
1 small cinnamon stick
6 whole cloves
2 teaspoons black peppercorns
Blend all together super fine
Homemade “Ketchup”
1/4 cup homemade vinegar
1 teaspoon black peppercorns
5 whole cloves
1 star anise
1 cinnamon stick
2 tablespoons peanuts
1 teaspoon oil (lard or vegetable)
1 small onion diced
2 garlic cloves
4 small ripe bananas
4 tablespoons homemade fermented black bean paste (see recipe above)
1/2 teaspoon salt
1/2 teaspoons powdered turmeric
Homemade Chinese 5 spice (see recipe above) powder to taste at the end
(Adapted from “Miso, Tempeh, Natto And Other Tasty Ferments” by Kristen K. Shockey and Christopher Shockey)
Combine the vinegar, peppercorns, cloves, anise, and cinnamon stick in a small sauce pan. Bring to boil and simmer low for 15 minutes
Sauté the onion, garlic, and peanuts in the oil until slightly caramelized about 5 minutes
Combine the bananas, onion mixture, salt, black bean paste and turmeric
Once the the vinegar mixture is cooled, strain and add to the other ingredients
Blend everything together in a food processor
Your sauce is ready to be used immediately or you can put it in a jar to ferment for a few days. Remember to burp your jar daily as carbon dioxide builds up.
Your ketchup is ready when you like the taste! Store in fridge for months.
Homemade “Mustard”
To create this mustard, simply let your homemade “ketchup” ferment for about a week or more! This recipe was actually a beautiful accident. We went to the beach for a week, and I forgot I had left the ketchup to ferment while we were gone. When I got back, I expected it would be completely ruined, especially in the tropical heat. This condiment ended up being delicious, tasting and looking just like mustard. That is the beauty of fermentation! It will often turn your mistakes into delicacies.
Pro Tip: Don’t be afraid of a little white mold on the top layer. That’s just fine! Just scoop it off and enjoy what is underneath.

Experimenting to create your own sauces, condiments, etc is fun and exciting!
Want to Learn More
Check out our past blog articles about food creations. Also join us for a day workshop on fermentation.
Stay tuned for more interesting experiments happening here!

Harnessing Wild Yeast: How to make your own Fruit Alcohol (Hooch)
Fruit alcohol, or what we like to call hooch, is a great way to use an abundance of seasonal fruit and transform it into a tasty alcoholic treat. With a community of 15 plus people here, we can drink a fair amount of alcohol, and being able to make it ourselves allows us to know the ingredients, process, who is benefiting from it, and save a lot of money!
By Adriaan Van Duuren, apprentice 2021
Fruit alcohol, or what we like to call hooch, is a great way to use an abundance of seasonal fruit and transform it into a tasty alcoholic treat. With a community of 15 plus people here, we can drink a fair amount of alcohol, and being able to make it ourselves allows us to know the ingredients, process, who is benefiting from it, and save a lot of money!


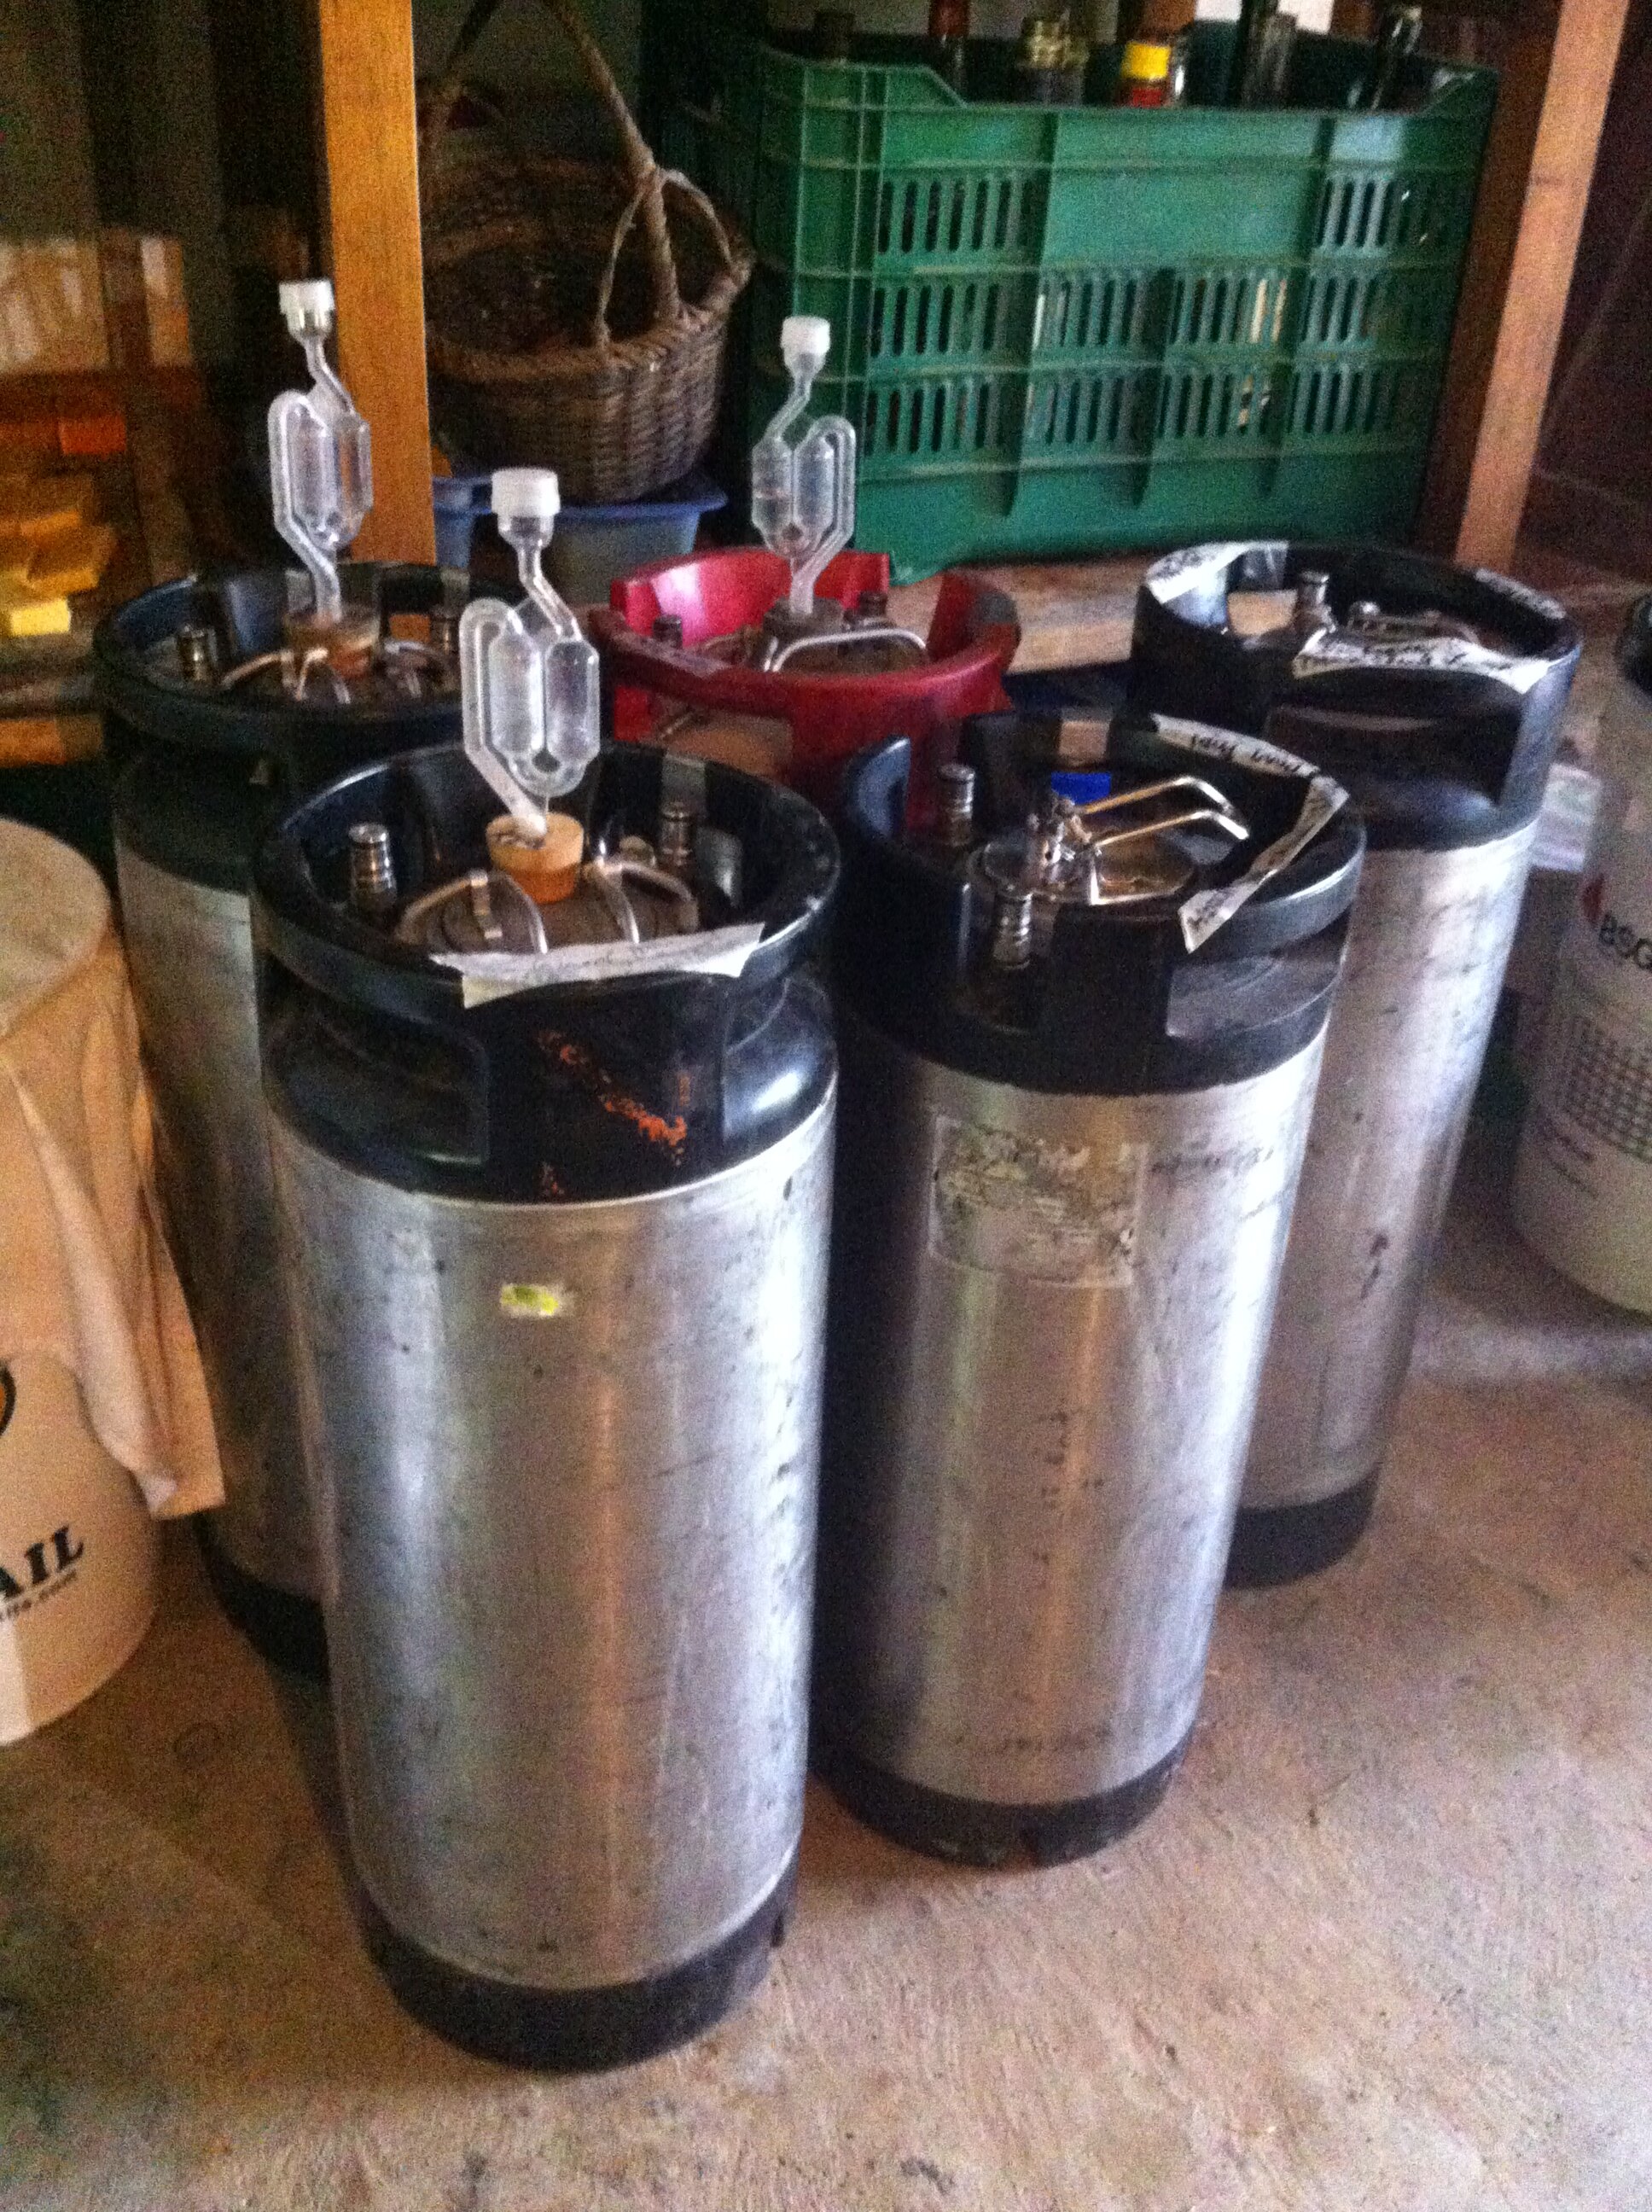
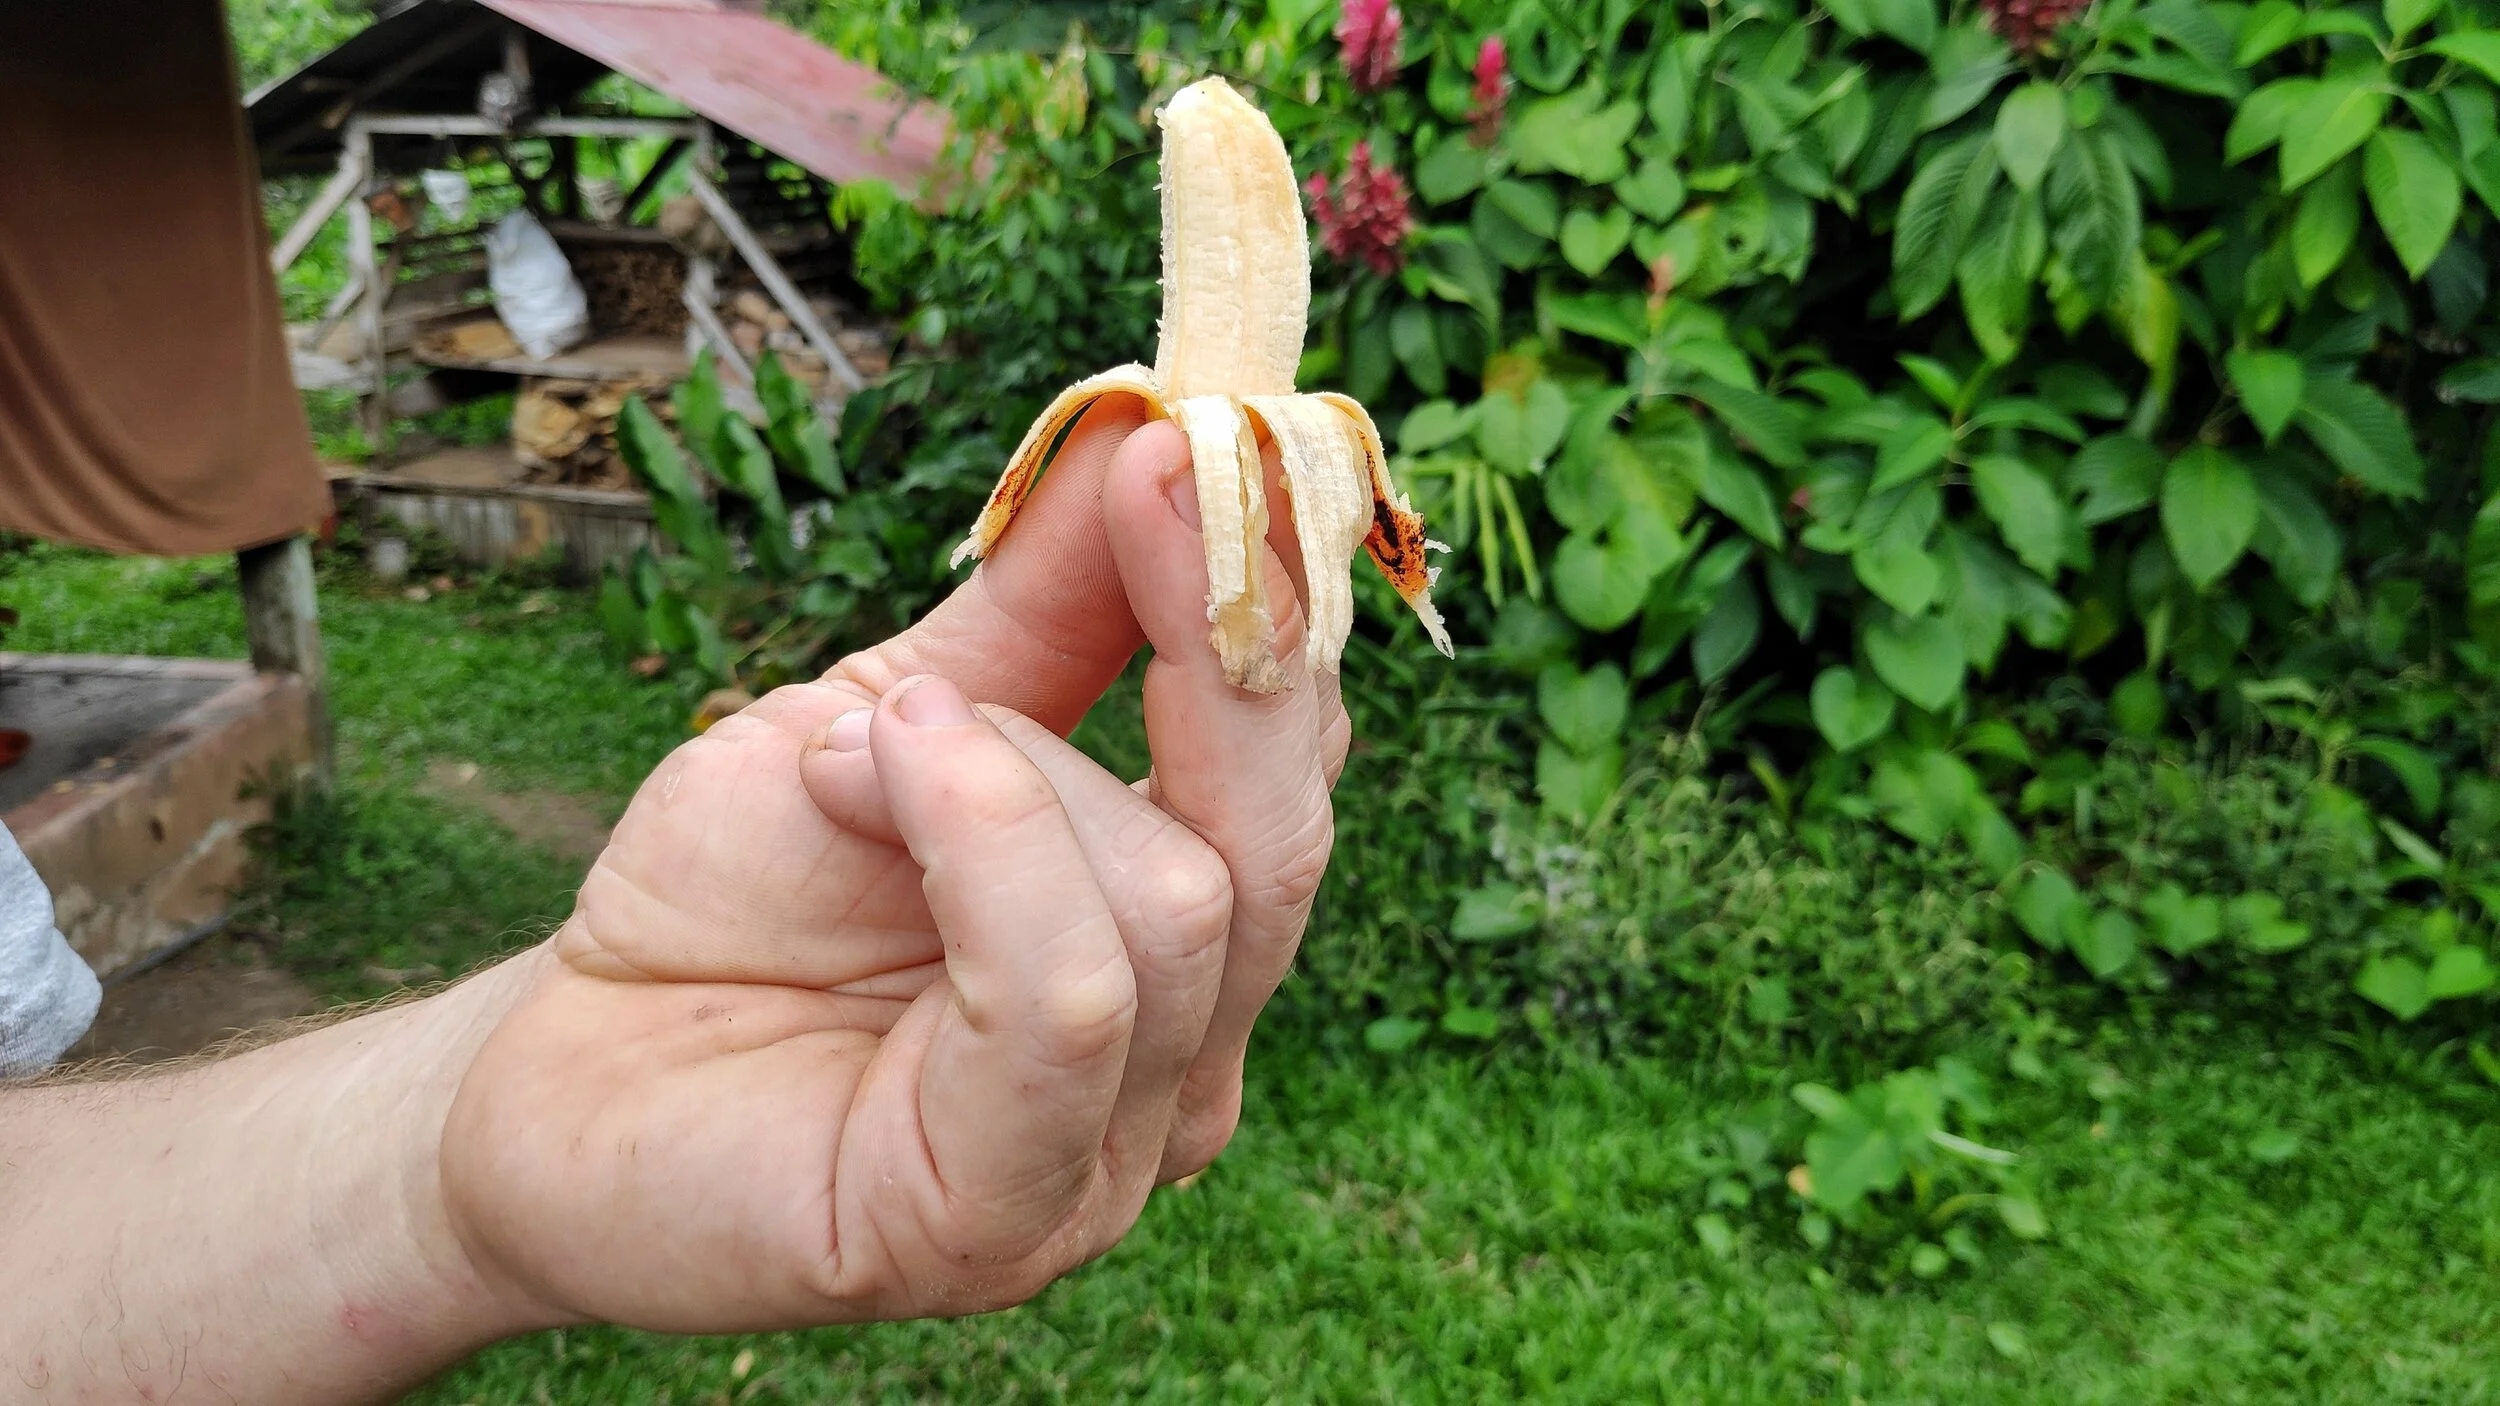
This blog is going to explain how to make a fast and simple hooch with basic/cheap accessories that everyone normally has or can buy. I will use my banana hooch that I made here at the Ranch as an example, but that doesn’t mean that you can’t use different or multiple kinds of fruit that are local to your place.

Equipment
· Cutting board
· Knife
· Kettle
· Air tight food grade container
· Bubbler
· Strainer
· Siphon (optional)
· Airtight bottles
Ingredients (makes 5 liters)
· 1000 ml fruit
· 4500 ml water
· 500 ml sugar (we use locally sourced sugar known as tapa dulce)
Instructions
Making a Batch of Wild Yeast
First, we need to create a small batch of wild yeast to be able to make sure our hooch will have a good taste and smell. You can use store bought alcohol yeast, but making your own is more fun, creative, and can bring different flavors to your beverages! Yeast live where there is sugar! Yeast will convert the sugars into alcohol. Different ingredients will create different flavors and aromas in your yeast and your batch of alcohol, which is why it is important to try out different yeasts in a small quantity. Take a small container and put chopped fruit, water and some sugar in it. Here are three different examples of the wild yeasts I made in order to test what would give me the best flavor.
1. Dried banana with water and sugar syrup
2. Ripe banana with water and sugar syrup
3. Ripe banana, lemon juice, water and sugar syrup
After three days of daily stirring, I tasted the mixes and decided to use the first mix with the dried banana to cultivate my big batch of banana hooch. The sweet smell and honey like taste was what I wanted.
To know your wild yeast is ready, things you're looking for are: the pieces of fruit are floating to the top, you can see the liquid is starting to get bubbly and active, and it's still sweet but not as much as the beginning.

Brewing
Before we can start brewing a big batch of hooch we need to chop the fruit into smaller pieces and put them in the fridge for two days. I'm doing this to give the fruit some more time to ripen and create more natural sugars.
We then begin the brewing process by putting our fruit in the big airtight container that we want to make our hooch in.
Pour 1000 ml of hot water from the kettle on to the fruit. Make sure that all the fruit is surrounded by water to kill the non cultivated yeasts. Seal the container and let the mixture cool down until you can comfortably put your finger in it.
Add the rest of the 3500ml of water, the liquid sugar, and your batch of wild yeast (be sure the overall liquid temperature is not above 110 degrees Fahrenheit or it will kill your yeast). If you only have crystalized sugar available, boil it in a little bit of water to liquify it. Stir this mixture and seal the container air tight. Put the bubbler in a hole on the lid and make sure that no air can escape from the container except through the bubbler. Let your brew ferment for 4 days while stirring gently everyday. After four days strain the pulp and store the liquid in the airtight bottles. Let the hooch carbonate for one day in the closed bottles and then put them in the fridge for two more days. Now you should have a fruity and sweet carbonated hooch to drink and show off to your friends!
Tips and Tricks
If you forgot about some stored bottles of hooch or just made too many of them, don't panic! After one to two weeks your alcohol will turn into vinegar and you can use it to cook with. Store your hooch in the fridge if you want to keep them for longer, but with enough time the hooch will turn to vinegar in the fridge. You can store in the freezer for a longer lifespan. ATTENTION!!! Make sure there is enough air in your bottles when you store them in a freezer or your bottles will explode from the pressure.

Thank you for reading this blog and I hope you enjoy drinking your hooch!
Other Blogs on Fermentation
Happy brewing, happy microbes, enjoy!
TROPICAL FRUITS: knowin’ em, eatin’ em, and pickin’ em
Fruits and vegetables have not always existed in the way we know them today. Farmers, the agriculture industry, and plant scientists have taken native plants and reshaped them into the crops we now consume in our daily diets. This has happened over time for a variety of reasons. In some cases it was to improve their palatability, in others to make them easier to grow, harvest, or eat. For better or for worse, the produce we grow in our home gardens or purchase at farmer’s markets, grocery stores, and CSA boxes have developed alongside us for centuries.
By Dewey, apprentice 2021
CONSIDERING THE EVOLUTION OF PRODUCE
Fruits and vegetables have not always existed in the way we know them today. Farmers, the agriculture industry, and plant scientists have taken native plants and reshaped them into the crops we now consume in our daily diets. This has happened over time for a variety of reasons. In some cases it was to improve their palatability, in others to make them easier to grow, harvest, or eat. For better or for worse, the produce we grow in our home gardens or purchase at farmer’s markets, grocery stores, and CSA boxes have developed alongside us for centuries.

Although we have had a strong hand in their evolution, some of these changes have happened through random genetic mutations— nature’s way of ensuring diversity, adapting to conditions, and creating new varieties. One good example of this is corn. Although we have, in recent times, bred and mutated the corn to appear the way we see it on our plates today, it originally underwent a series of four or five key mutations, each involving a single gene. These mutations created a taller plant with larger ears that had more kernels per cob and only one or two stalks. Our farming ancestors ran with nature’s changes and began further breeding and developing the corn to its current state. This has happened over the course of time, to varying degrees, with pretty much all of the food we consume today.
The tropics are known for producing sweet, juicy, colorful fruits that top people’s favorites list across the globe. Living at Rancho Mastatal, we are surrounded by an abundance of fresh, vibrant farm to table, tropical fruits that keep us fueled and energized for all of our various projects. Some of the most commonly loved and consumed being bananas, pineapples, and papayas. If you’ve ever been fortunate enough to experience a Rancho Mastatal brunch, you know it consists of gallo pinto, eggs, a pan of delicious hash made of various tubers and vegetables, and a bunch of fruit bowls filled to the brim with delicious tropical fruits. Oh, and you can’t forget a glass of our refreshing, homemade water kefir (recipe here) AKA balm to us and some famous chili jam (recipe here) to top it off.
So! How did these tropical fruits we get to enjoy every day come to look, taste, and be the fruits they are? Why should we eat them? What are their nutritional benefits? How do we know which ones to choose? And how do we properly store them to maximize their quality and shelf life? Let’s get into it!
BANANAS- A (very) BRIEF HISTORY

Bananas, they come in all shapes, sizes, flavors and colors!
Bananas are one of the first fruits humans began domesticating. As early as 6000 BC people in Southeast Asia began planting and propagating the banana. Although in many supermarkets you will commonly only find the Cavendish, there are thousands of varieties of bananas that exist in the world. They range in color from pink to purple to red to black to green and, of course, yellow. They grow in all different sizes and historically had big seeds throughout their flesh.
At some point in our banana cultivating history, a different banana bush appeared. This bush bore a fruit whose seeds were reduced to a column of soft, dark flecks running down the center of the fruit. This new variety with its novel, easy to consume seeds was a hit. This new “seedless” banana was propagated by cuttings and quickly spread throughout the tropics and subtropics. It was this one banana that led us down the path to the seedless bananas we all know today.
Read our other banana blog “10 Things you Didn’t Know About the Banana”
SWEET OR STARCHY

Experts estimate that there are around twelve thousand seedless banana varieties grown throughout the world. These bananas can mostly be categorized into two different types: sweet bananas and starchy bananas. Although there are very few genetic differences between these two groups, they are remarkably different in texture and taste. Generally speaking, we consume more sweet bananas than starchy ones, however, starchy bananas are an excellent source of carbohydrates and many people around the globe rely on them as a sufficient source of carbohydrates. Most starchy banana recipes call for the fruit to be skinned before being steamed, baked, or fried. At the Ranch we love coming in from our morning work parties to a crispy plate of hash loaded with green bananas. Patacones, a delicious dish of pressed and fried green bananas, is another lunch or dinner favorite all around.
VARIETY IS THE SPICE OF LIFE
The aforementioned Cavendish is the most widely available banana (especially in US stores). It has around 3.5 grams of soluble fiber per serving and a good amount of potassium. It is lower in beta-carotene and its general overall antioxidant value is lower than many other types of banana, so be sure to keep your eye out for less common banana varieties. As with a lot of produce, the deeper and more potent the color of the flesh the higher the nutrient content so many of the varieties you might find at farmer’s markets or growing in the wild are worth trying out.
When you visit Rancho you will see a wide range of banana varieties, colors, shapes and sizes all around the property. We harvest these when ready and then hang them in our banana snack station behind our cob oven (read about our “Endevors to End Propane”) at the main house for all to snack on between meals. Without a doubt, they give us the energy we need to keep going throughout the day.
PROPER BANANA STORAGE
Bananas are a fruit that will continue to ripen after harvesting as long as they aren’t exposed to the cold. If you buy your bananas green and then keep them at room temperature they will typically be ready to eat within a week. Unripe bananas should never be placed in the refrigerator. As a tropical fruit the banana does not like being exposed to the cold. Placing green bananas in your refrigerator will halt the ripening process. If you want to get your green bananas ripe faster, you can place them in a closed paper bag with any natural producer of ethylene gas (like an apple) which will get the ripening process on its way. On the other hand, if your bananas are getting a bit too ripe you can place them in the refrigerator to slow their ripening process. This will often times cause the skin to brown, but the inside will be edible for a little longer than if you kept them at room temperature. Here at Rancho when we have an abundance (which we often do) we love to freeze our superfluous bananas in the freezer to make delicious, creamy smoothies. Be sure to peel the bananas before you freeze them, as they can be hard to peel once frozen.
Cinnamon Chia Banana Smoothie recipe:
4 frozen bananas- cut/broken in half or into thirds
1 cup milk or dairy kefir (recipe here) of your choice
1/2 cup water
1/2 teaspoon cinnamon
Chia seeds (desired amount)
Pinch of salt
*sub water for cold coffee if you are looking for a little caffeine boost!
FOODOMETER
If you are buying bananas at the grocery store, take a minute to acknowledge the miles that banana has traveled to get on the shelf in front of you. The US consumes more bananas than any other fruit, resulting in the importation of twenty million tons each year and an increasingly high carbon footprint. One way you can go the extra mile to ensure none of these imported bananas go to waste is by consuming them consciously. Don’t let them go to waste! If your bananas start to over-ripen consider turning them into a delicious banana bread or cake. Like my grandma always says, “Three overripe bananas in hand, mashed and baked into a delicious bread is better than a whole bunch on the bush.”

Banana vinegar is a great way to transform excess bananas into something that will preserve for a long time
Here at the Ranch, managing our bananas (or as we call it, bananaging) is a big job. To make sure we don’t let our precious harvests go to waste, we freeze hundreds of bananas to make delicious smoothies or to use in recipes at a later date. Other ways we like to transform the banana is:
Dairy Kefir Banana Creme Fraiche
Another way to ensure bananas aren’t being wasted as a supermarket consumer is to purchase the single bananas that get left behind by other customers who picked them off their bunch. These left behind, bunchless bananas are the ones most likely to be thrown away at the end of the day by the grocer, so your actions will ensure their carbon footprint was not wasted! And if you live in an area where growing bananas is possible, try it out! One thing I have learned here at Rancho is that there is nothing quite like enjoying a fresh fruit from your home harvest on a hot day.
PINEAPPLES- A (very) BRIEF HISTORY
The wild pineapples that were the ancestors of our beloved pineapples were not something we would welcome onto our plate today. Originally found in South America, they were bitter and full of pesky seeds, not to mention had ridiculously spiky leaves to keep predators away. The primary pollinator of wild pineapples is the hummingbird, but in cultivation they are pollinated by hand. We do not know much about the domestication of the fruit, but pineapple’s story begins between Brazil and Paraguay. The crop spread throughout South America eventually making its way through the Caribbean, Central America, and Mexico where the Mayas and the Aztecs welcomed it with open arms.
Through colonialist travels, the pineapple was eventually brought to India, the Philippines (where it was surprisingly grown for its fibers which were used in textile production) and Spain. Historically, pineapples were considered a symbol of wealth across Europe. This was because they had to be imported or grown in greenhouses using expensive technologies in the temperate climate. Today, the top producers of pineapples are Costa Rica, the Philippines, Indonesia, and Brazil.

A fresh picked pineapple from the Ranch
The variety by the name of Cayenne was the first pineapple to dominate global markets. Its skin is a mixed green-gold and its flesh is yellow. This variety has a high sugar but also high acid content. Throughout the 1900s Hawaiian pineapple growers began working to breed pineapples that had been collected from the jungles of South America as well as Africa. For decades they crossed and recrossed the plants eventually producing a hybrid that came to be known as MD-2. The skin of this new pineapple was completely golden and the flesh of it was an even deeper hue of gold. It was less acidic and sweeter than the Cayenne, making it even more desirable to consumers. In the 1980s Del Monte brought MD-2 down to its plantations in Costa Rica where it flourished, and the rest is pura vida. Other similar varieties that come from the same genetic stock have appeared on the market, such as Maui Gold and Hawaii Gold.
RECOGNIZING RED FLAGS
As with most industrialized fruit/food production, there exist many ethical and environmental concerns when it comes to large scale pineapple cultivation. Use of toxic pesticides threaten the soil of our earth as well as our global water supply- buy organic if and whenever possible. Labor rights are another issue at hand. Field workers are often overworked and underpaid. Any amount of food you can produce for yourself will allow you to break free of being complicit in these systems. If you live somewhere with the right conditions, consider trying to grow your own pineapple! Although it will take some patience (a pineapple generally takes between nine to fourteen months to grow), you can regrow your pineapples directly from their tops!
Once grown, the momma pineapple plant will send out “suckers” or baby pineapple plants that can also be planted and regrown. This is how most commercial pineapples are produced. Plan ahead and plant early to enjoy your homegrown treat as soon as possible. Like my grandma always says, “The best time to plant a pineapple is nine months ago. The second best time is today.”
NUTRIENT VALUE OF THE PINEAPPLE AND A SWEET SURPRISE
Pineapples are high in manganese (which is beneficial for your bone health) as well as being high in vitamin C (which helps to bolster your immune system). They have a diverse phytochemistry containing many different types of polyphenols. Polyphenols are family of over 8,000 naturally occurring micronutrients that we obtain through eating plant foods. They are packed with antioxidants which, like vitamins, are best when obtained through consuming them naturally in our food. These polyphenols offer many health benefits such as protecting against disease, promoting digestion, reducing inflammation and boosting brain health.
One particularly interesting enzyme found in abundance throughout the entire pineapple plant is bromelain. In folk medicine bromelain is used for pain, muscle soreness, burns, and a variety of conditions associated with chronic inflammation. It is also said to improve heart health, protect against certain forms of cancer, and stimulate digestion. Although there is not yet any solid scientific research to support these claims, bromelain is currently under preliminary research to aid in the treatment of various clinical disorders as we speak.
Interestingly, the new super sweet, cross-bred varieties are higher in sugar- however, they are also higher in antioxidants and phytonutrients. They have 350% more vitamin C and 135% more beta-carotene than their traditional counterpart. Even with their higher sugar content, their glycemic index rating is the same as the Cayenne, making them an overall more healthful choice.
HOW TO BUY EM, HOW TO STORE EM
Pineapples will continue to rippen once harvested. Like most tropical fruits that are exported, they are picked green for transport, allowing time for them to arrive at their destination and hopefully make it to the shelves at a time when they are close to ripe. To choose a great pineapple, examine the crown. You want one that has leaves that are a deep green color and limited or no signs of brown or fading. A good trick is to give the leaves a little tug. If you can pull too many of the leaves right off, it may be a sign that that pineapple is reaching over-ripe. Pineapples can spoil quickly, so store them in the refrigerator and eat them up fast.
SAVE THOSE SCRAPS!
I once watched a man peel, de-core, and cut a pineapple in under 30 seconds flat on an old wooden boat in the middle of the Indian Ocean off the coast of Zanzibar with a machete. Now, impressive as that is, most of our pineapple carving skills are not quite at that level. I am willing to admit that I am guilty for wasting more pineapple than I should when carving due to my still-developing pineapple cutting skills.
There are many things you can do with those pineapple scraps before they head to the compost. One delicious way to maximize the benefits of the bromelain and polyphenols (many of which are found in the skin and crown) is to make a refreshing pineapple skin sun tea. Although keep in mind that pineapples are one of the most chemically sprayed fruit, to prevent insect damages primarily, so either wash your pineapple skins well and/or buy organically grown pineapples. Here at the Ranch we only use our farm grown pineapples for teas and vinegar making.
PINEAPPLE SCRAP TEA

The start of a pineapple
1. To make the tea, first secure a container or jar (preferably glass) that has a tight fitting lid.
2. Collect all of your pineapple scraps (crown, skins, core and all) and put them into your chosen vessel.
3. Fill the vessel with water until the scraps are completely submerged.
4. Tightly cover the vessel and leave in the sun for 4-6 hours (or until the water becomes infused with the pineapple as indicated by a yellowing color).
5. Strain, chill, and enjoy! If you have a sweet tooth you can add a little sweetener of your choice, which here at Rancho is, of course, TAPA DULCE!
Another option with those spare pineapple parts is to make a pineapple vinegar. We are currently doing this at the Ranch with all of our homegrown pineapples. Check out Hanita’s pineapple vinegar article for step by step instructions on how to do this!
PAPAYA - A (very) BRIEF HISTORY

A papaya tree at the Ranch
Originating in the tropical forests of the Americas, the papaya is believed to have been first domesticated and cultivated by our farming ancestors in southern Mexico and Central America. It was brought over into the Caribbean before making its way to Europe and the Pacific Islands eventually landing in Hawaii in the 1800s.
The papaya plant is considered a tree, though it’s trunk is not woody. It is a resilient plant with about a five year lifespan that can often be seen popping up unprompted, wherever the seeds may land throughout the tropics. Fruit from these trees comes quickly, sometimes even within the first year of life. This makes it a great fruit to try growing at home, given you live in the right conditions.
Since the papaya Ring Spot Virus outbreak in the late 1990s almost wiped out the papaya, plant scientists have been working to create new varieties and cross breeds that are resistant to the virus. Because of this, many of the papayas imported from Hawaii and Mexico are genetically modified.
TO RIPEN OR NOT TO RIPEN
Ripe papayas are a delicious and nutritious sweet treat, however people around the world also consume un-ripe papaya. Commonly referred to as “green papayas” these are not another variation, but simply papayas in an unripe state. Green papayas have a pale green or white, firm flesh that is almost tasteless. At Rancho we shred and prepare green papayas into our famous Ranch kimchi (recipe here) every other week to add some fermented, healthful deliciousness to our plates at each meal. Green papayas will keep for up to two weeks, but the sooner you use them the better. Be sure to peel before using!
VARIETY AND NUTRITION
There are many different varieties, but typically you will find a smaller variety named Solo or a larger variety that goes by one of these four names: Sunrise, Caribbean Red, Maradol or Mexican. The pear shaped Solo usually weighs in at just over a pound (2.2 kilos) and has a golden colored pulp. The larger rounded football shaped varieties can weigh in between two and five pounds and have a rosy red-orange flesh. These larger papayas are often cheaper per pound than their smaller relatives and their red flesh has twice the amount of carotenoids, making them the more healthful choice.
Carotenoids are a vast group of over 600 different naturally occurring pigments that are responsible for the bright red, orange, and yellows found in many of our plant foods. These carotenoids are essential to a healthy life. Within the human body they act as antioxidants, neutralizing free radicals and reducing oxidative stress. Some are converted into vitamins while others reduce inflammation, decreasing our risk for diseases like cancer, heart disease, and degenerative eye disease. One of the most prominent carotenoids in papaya is lycopene which has anti-cancer properties. Another being beta-carotene. As a child I remember my grandma, always saying, “A carrot a day keeps the premature blindness away!” Turns out there was more science to that than I understood then— and it applied to more than just carrots! These antioxidants that are crucial to maintaining our prolonged health are not synthesized by the human body so they must be obtained by plant foods in our diet. Eat up!
Papaya is truly a nutritious treat. It contains a good amount of beta-carotene, lutein, zeaxanthin, vitamin C, folate and potassium. In case you weren’t already convinced, papaya is not just good for you internally, you can also use its wide range of antioxidants and nutrients to nourish your skin and hair. Check out this year’s apprentice Abbey’s blog on our spastatal practices to learn more about how to incorporate tropical fruits into your natural beauty routine!
KNOW HOW TO PICK EM

Green papayas ready for our kimchi
Good, ripe papayas are still on the firm side but feel soft when pressed with gentle pressure using the palms of your hands. They are yellow in color. Papayas that are still ripening often have a mixture of yellow and green on their skins. A perfect papaya will have no blemishes, but as these fruits are often shipped from Hawaii, Mexico, or Costa Rica your papaya might have a soft spot or two. These are still totally okay to eat, just cut out the bad spots and enjoy.
Once your papaya is ripe, storing it in the refrigerator will help slow down its ripening process. If your papaya is nearing overripe, it can be peeled, de-seeded, cubed, and stored in the freezer for a delicious addition to smoothies or whatever you are cooking up. One of this year’s kitchen masters, Constantin, LOVES adding papaya into our tomato sauces and salsas for a sweet, local way to bulk them up. Personally, I love papaya best when chilled. Be sure to try some fresh out of the refrigerator for a refreshing experience.
CONSIDERATIONS
If you have a severe latex allergy, consume papayas with caution as they may cause itchiness, swelling, hives, or other signs of allergic reaction. Also note that consuming papaya during pregnancy may cause contractions or early labor.
IN CONCLUSION
These fruits and vegetables that have evolved alongside us help supply our bodies with the antioxidants, vitamins, and minerals we need to stay healthy. Living in the tropics, tropical fruits are an important food group here at Rancho. They ensure we have what we need to keep going and keep moving piles. Although everyone enjoys these tropical fruits, for obvious reasons of that they taste so yummy! We are strong believers of local food and supporting local farmers, therfore if you live somewhere where these fruits are shipped from far away and aren’t local to you, consider looking for fruit and vegetable alternatives that are local. There are plenty of temperate options that hold as high of health benefits and taste just as good! And like my grandma always says, “The more radiant colors on your plate, the more radiant energy in your heart- eat up!”

Fruity Ferments- How to Make Fruit Scrap Vinegar
You can make fruit vinegars from all kinds of different local, seasonal fruits. Using the scraps from the fruits (i.e. the peel and extra bits) is a way to value the marginal (permaculture principle) and turn a “waste” product into something of purpose.
By Hannah Knudson, apprentice 2021
You can make fruit vinegars from all kinds of different local, seasonal fruits. Using the scraps from the fruits (i.e. the peel and extra bits) is a way to value the marginal (permaculture principle) and turn a “waste” product into something of purpose. Here at the Ranch we often make fruit vinegar from bananas (recipe here) and pineapples. But have also done so with a variety of tropical fruits including: patanga, araza and mangosteen. In this article I will explain the process for pineapple vinegar, but this can easily be adapted to meet your local ingredients.
Pineapple Facts

Farm fresh pineapples
Costa Rica is well known for its wide variety of tropical fruits. One of the most loved of these is the pineapple. Many of us around the world are familiar with this tropical treat. The pineapple is one of Costa Rica’s largest exports, trailing close behind coffee and bananas.
Each pineapple plant only produces one fruit and ranges between nine to fourteen months on average for the fruit to be harvested. Here at the Ranch the cultivation of pineapples is an ongoing process. Due to the amount of people we share our space with, we balance between purchasing pineapples locally as well as harvesting what is grown on site.
There are many permaculture values that we try to put into practice in our daily lives here. One being we want to produce as little waste as possible. Even though we have an active composting system, we always try to stack functions - considering if something that normally has one purpose can also find life in other ways. So you can imagine our excitement when a pineapple is finally ready! This magical fruit has been growing for over a year, free of chemical inputs, which is key for this specific recipe. We only use pineapple peels that come from the fruit we grow here on the Ranch because we can ensure they haven’t been sprayed with any pesticides which allows us to give a second life to the peels.
We love our food at the Ranch and do a fair amount of experimentation on a weekly basis, finding new ways to enjoy different aspects of our diet. One way we do this is through fermentation. Each Wednesday we spend our entire day working on creating Kimchi, vinegars, alcohols, chili jams and many other jungle treats. Our pineapple vinegar is a tasty way to connect our love for food and our desire to use our gifts from the earth to their fullest potential.
Fermentation
Experimentations and fermentation go hand in hand in our kitchen here. As apprentices, one of the first things we learn about in our food work parties is the art of fermentation. The beauty of fermented treats is that the possibilities are endless, allowing us to turn our harvests into new recipes.
The word vinegar comes from the French word vinaigre, which translates into “sour wine”. Following the permaculture principle, “produce no waste”, vinegars are also a great way to save some of our alcohol experiments gone awry.
Vinegars are created through alcohol or sugars turning into acetic acid bacteria (AAB). These tiny bacteria are found on almost any surface making them incredibly easy to access. Pineapples are readily available to us so making vinegar from the peel is a quick and easy way to use the whole fruit. We adapted this recipe from one of our favorite books, Wild Fermentation by Sandor Katz. If pineapples aren’t readily available where you are, we hope that this recipe can give you some new ideas on how to preserve some of your own local fruits.

Our homemade fruit vinegars
Recipe
Ingredients:
1/2 cup sugar (we use locally sourced sugar known as tapa dulce, you can use a local sugar source too)
Peel of 1 pineapple (or an equivalent amount of your local fruit)
1 quart water
Instructions:
Mix the sugar and water in an open mouth glass jar.
Submerge the pineapple peels. Ensure all pieces of the peel are completely submerged in your sugar water mix. You can stab the pieces of pineapple peel through a chopstick or secure and wedge them into the jar so all of the peels stay beneath the surface of the water. Add more water and sugar to cover if necessary.
Cover the glass jar with a piece of cloth that is tightly secured (if it is too loose, flies will lay eggs inside which turn into maggots - and for some reason everybody hates maggots). We use a piece of string to tie the cloth around the container.
Stir the sugar water mixture at least once a day. This is in order to prevent mold from growing and to break the surface that is created to allow aeration to occur which is needed for the fermentation process.
When the liquid darkens after about a week, strain out the pineapple peels and compost them.
Ferment the liquid 2-3 weeks more. A gelatinous “mother” may grow on top, which is great. When your vinegar is acidic, strain it into a bottle and cap. The mother can be composted or added to a new vinegar at step number five.
At this stage, you can start to use your vinegar or continue to let it age. We usually let our vinegars age around 6 months.
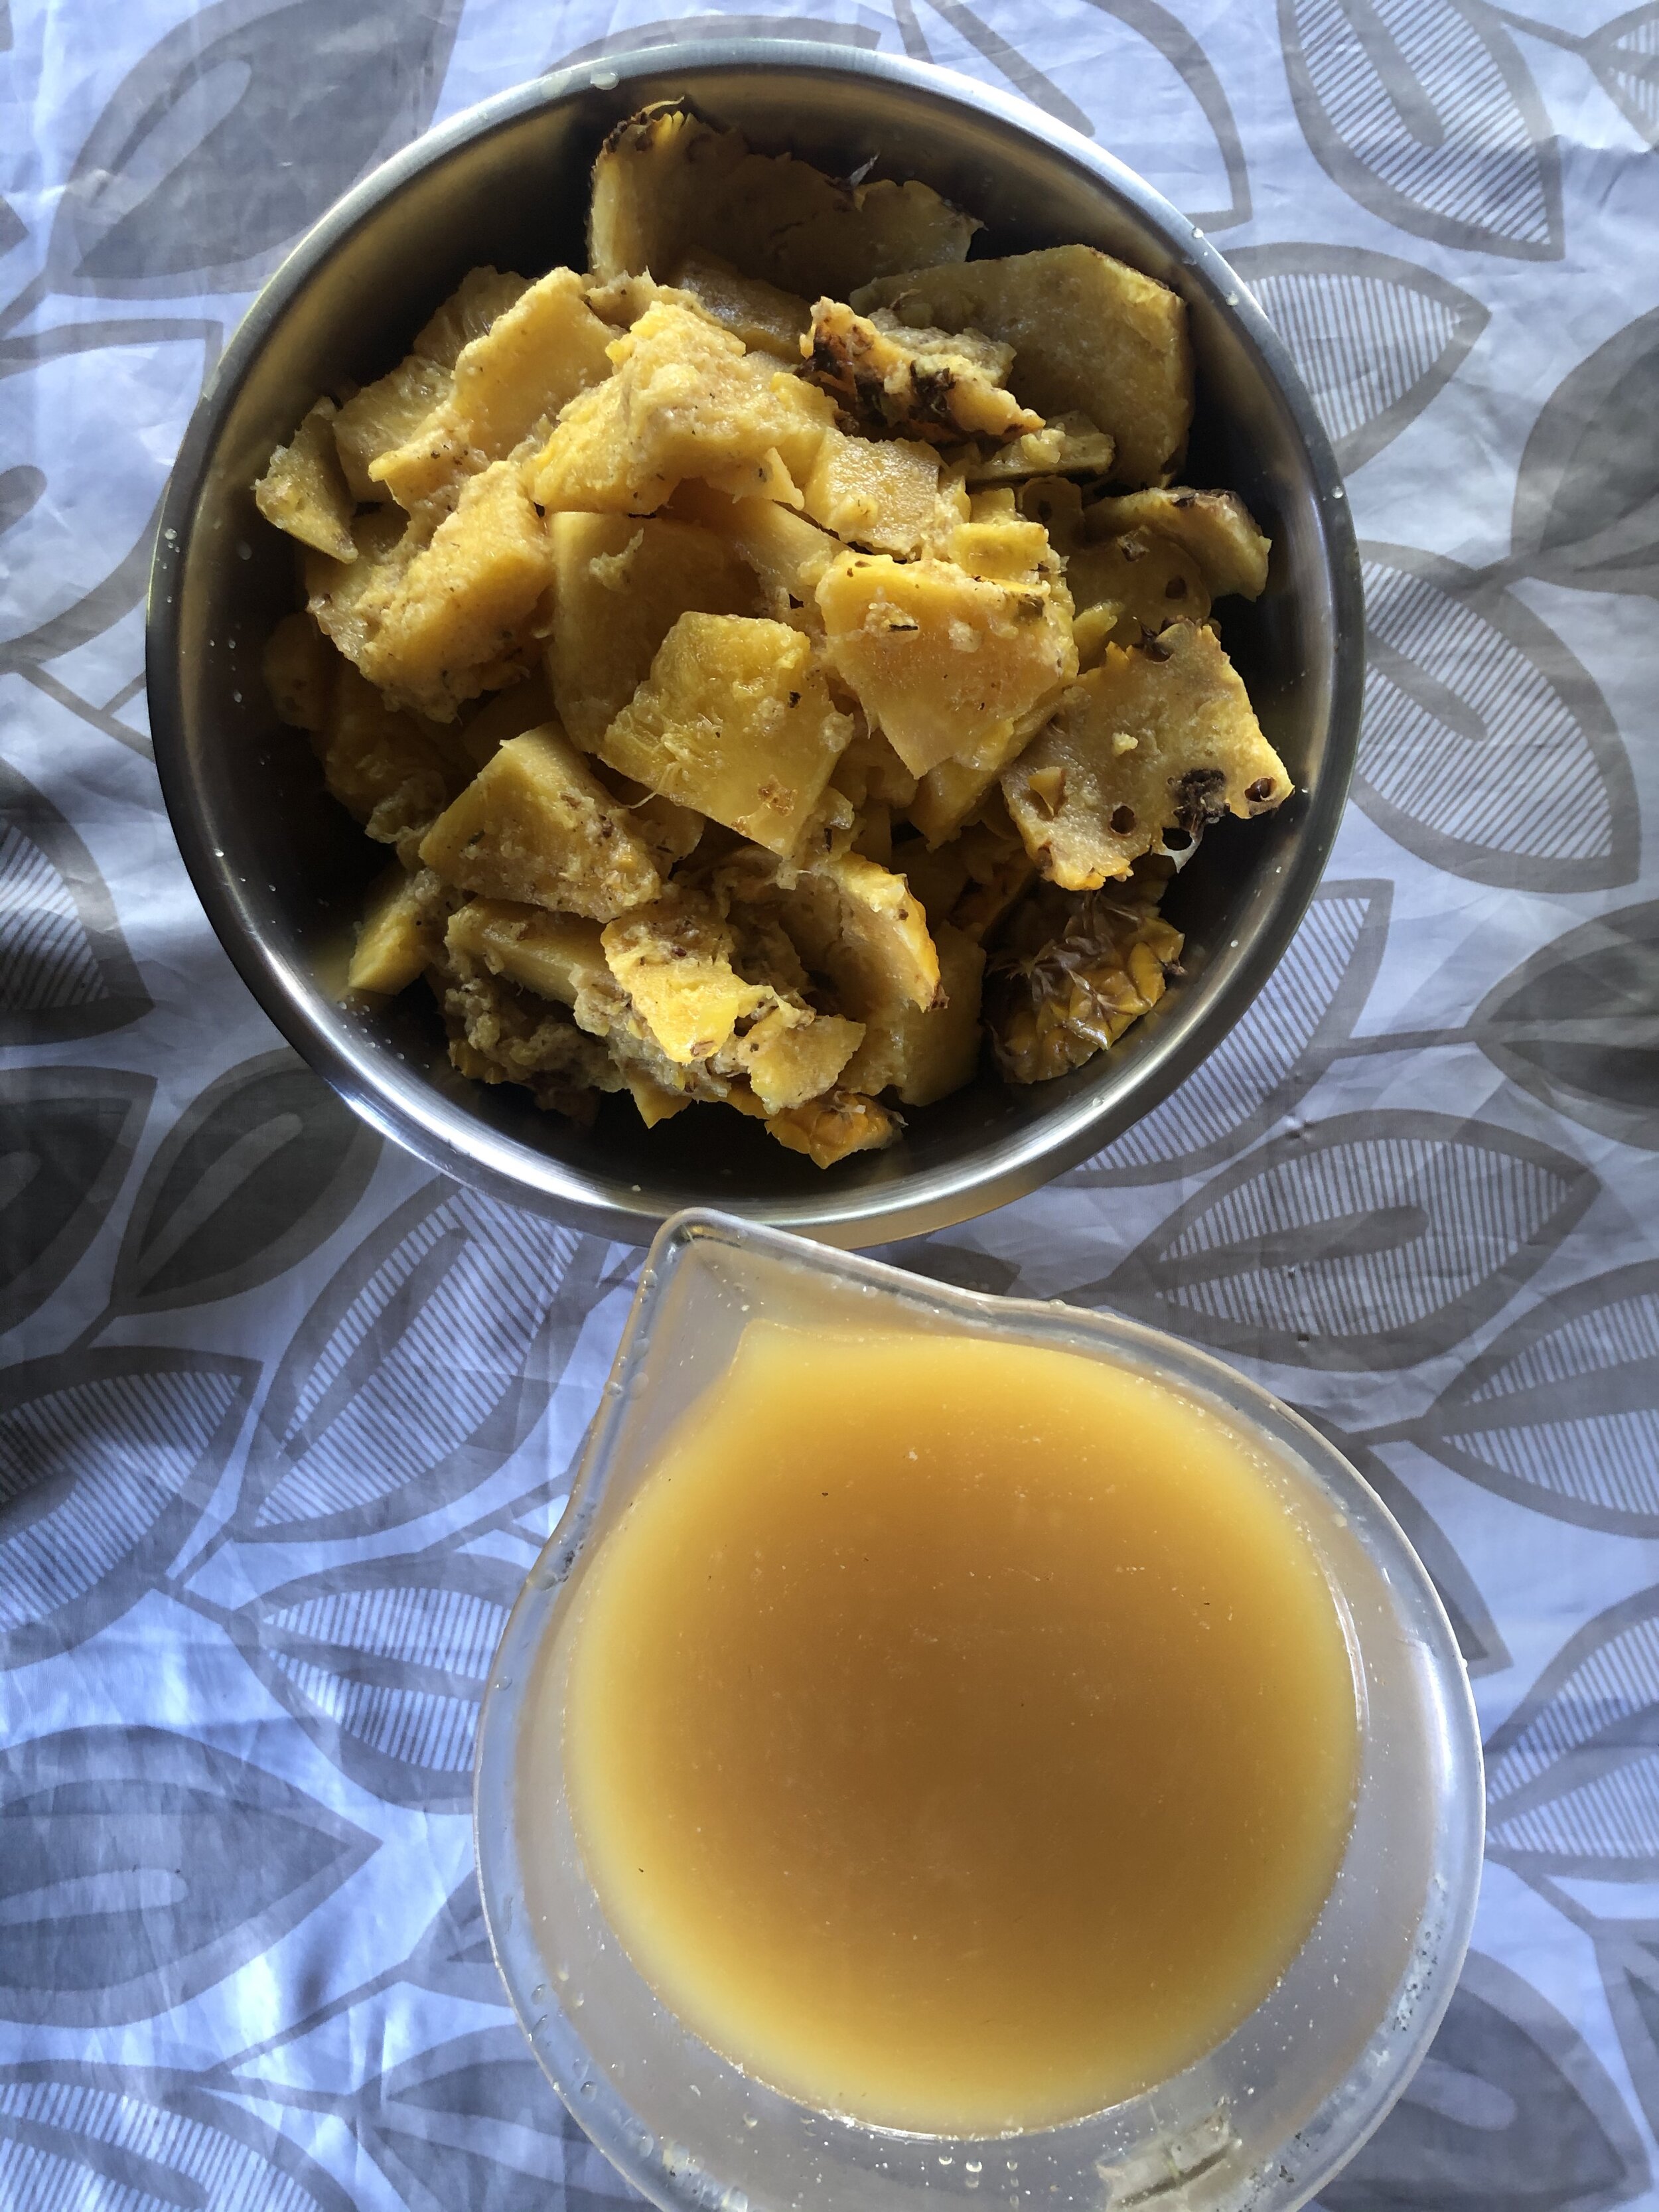
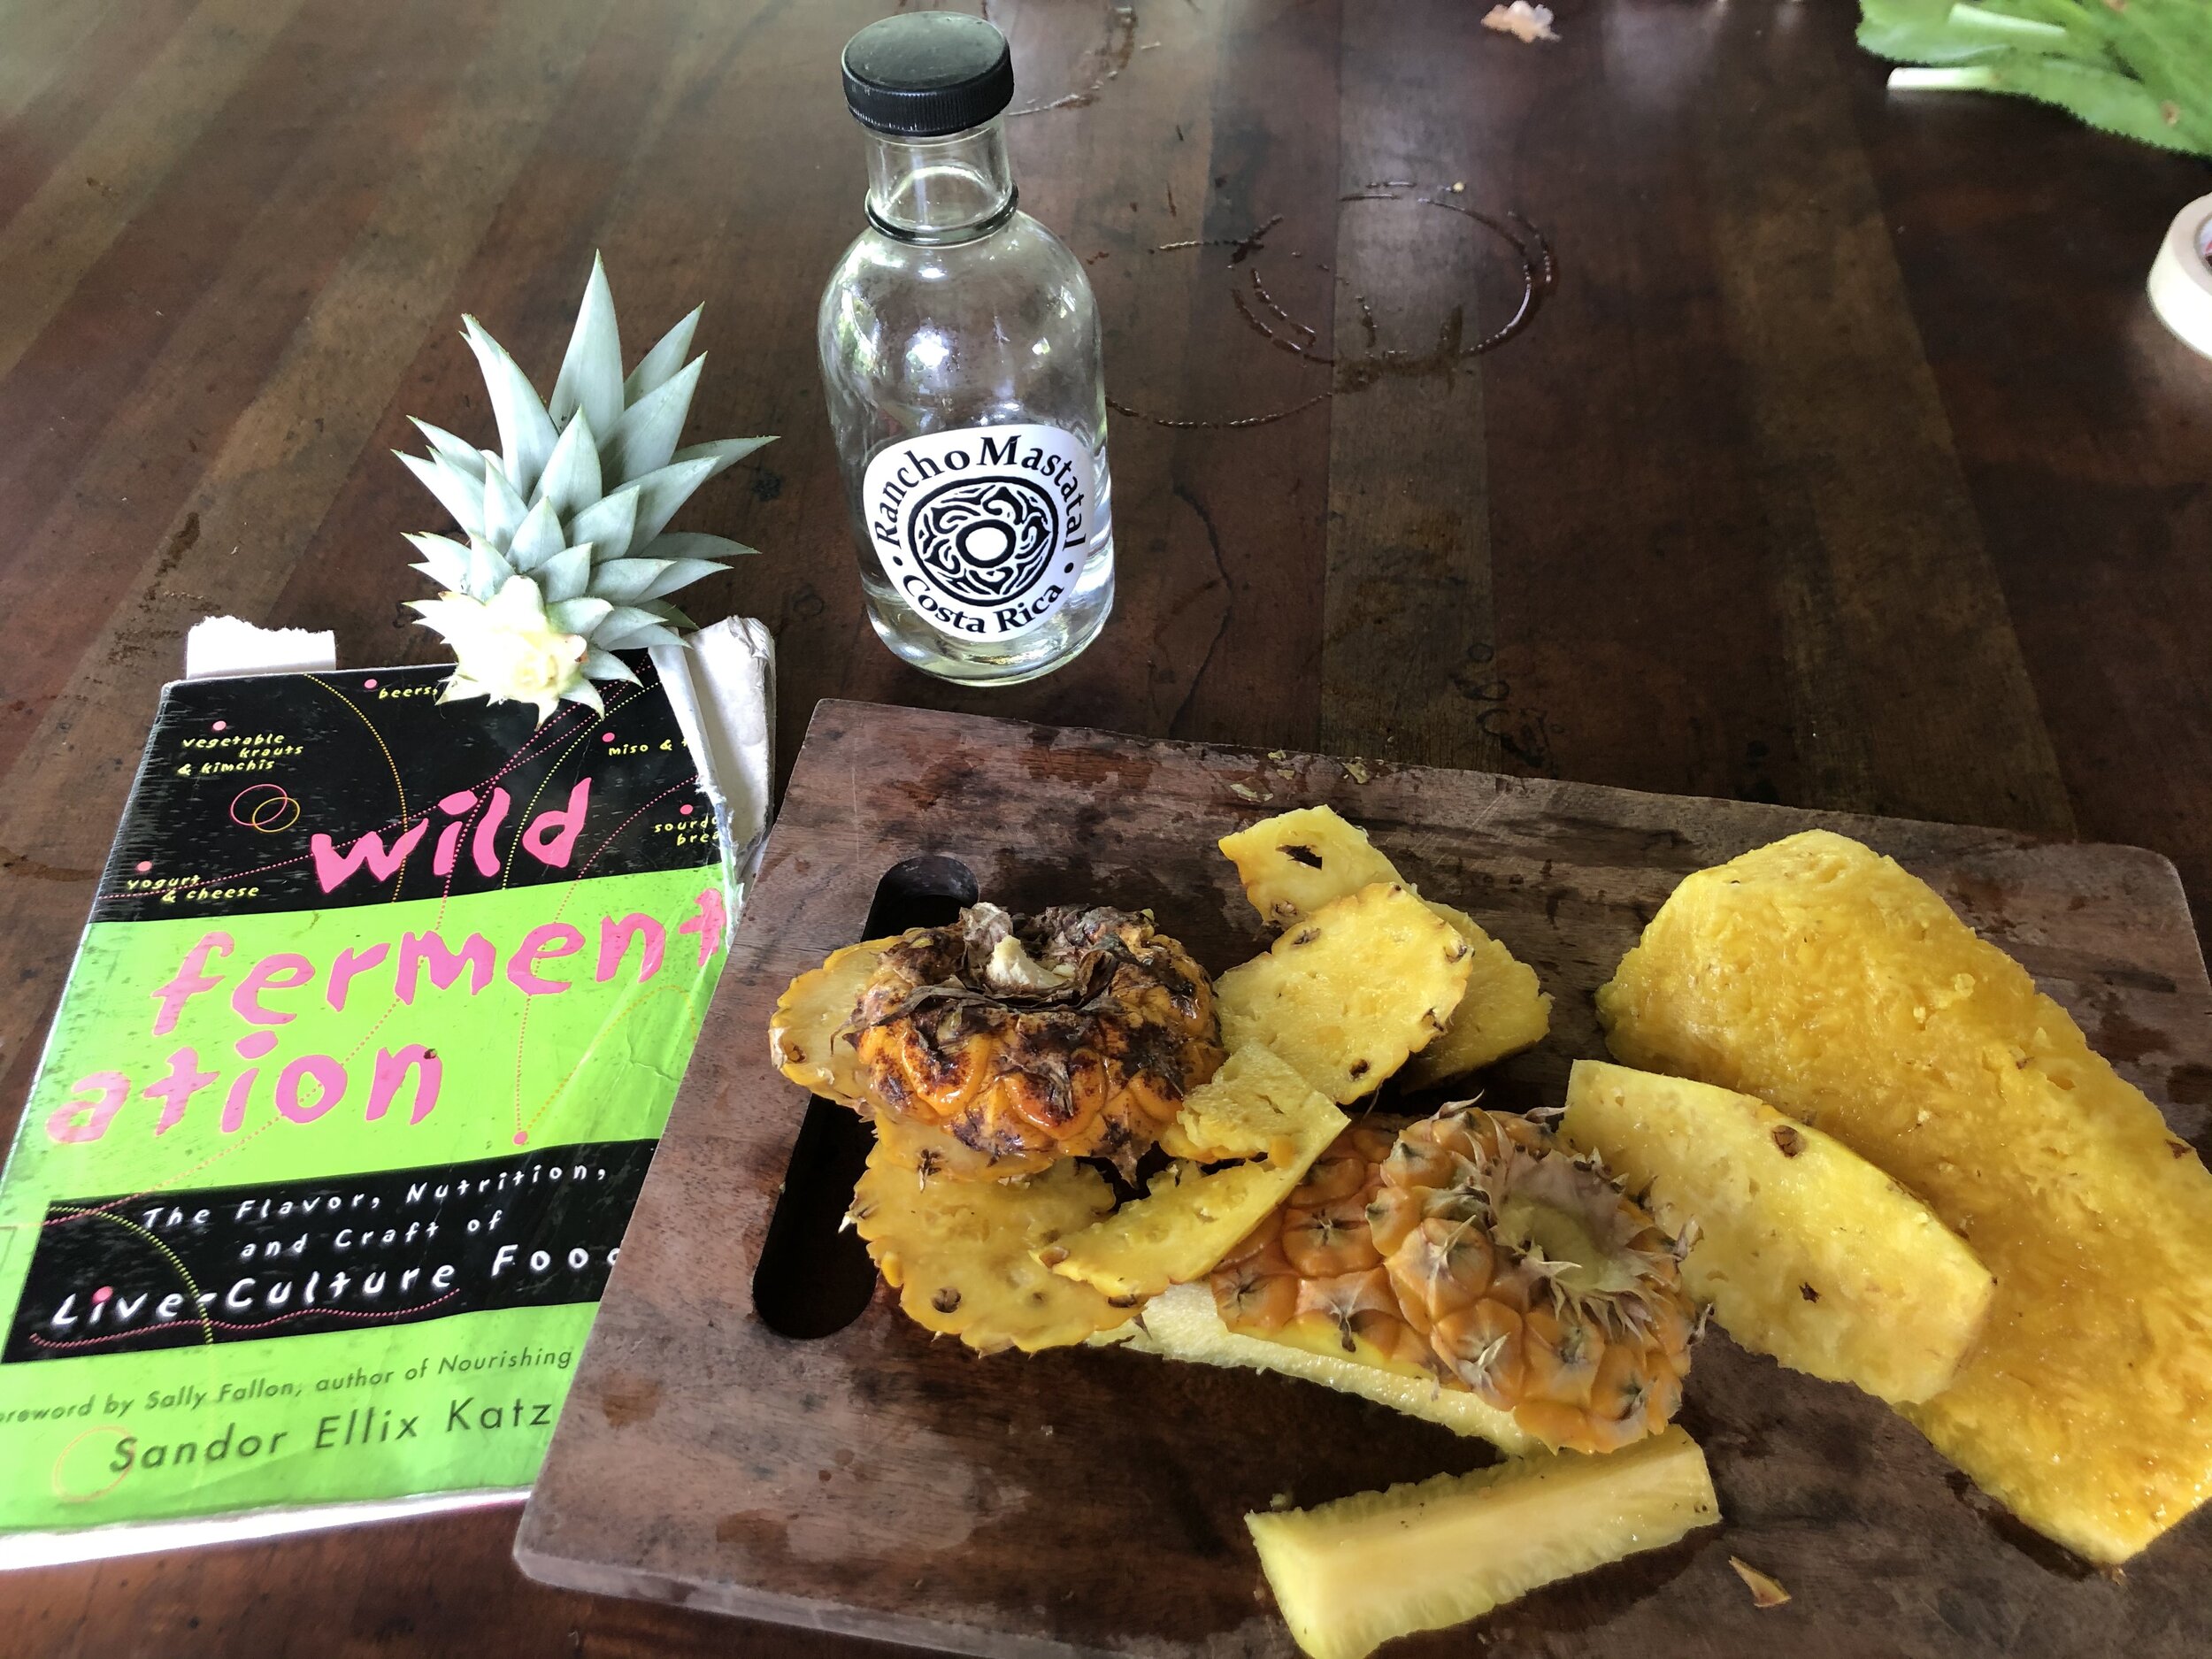
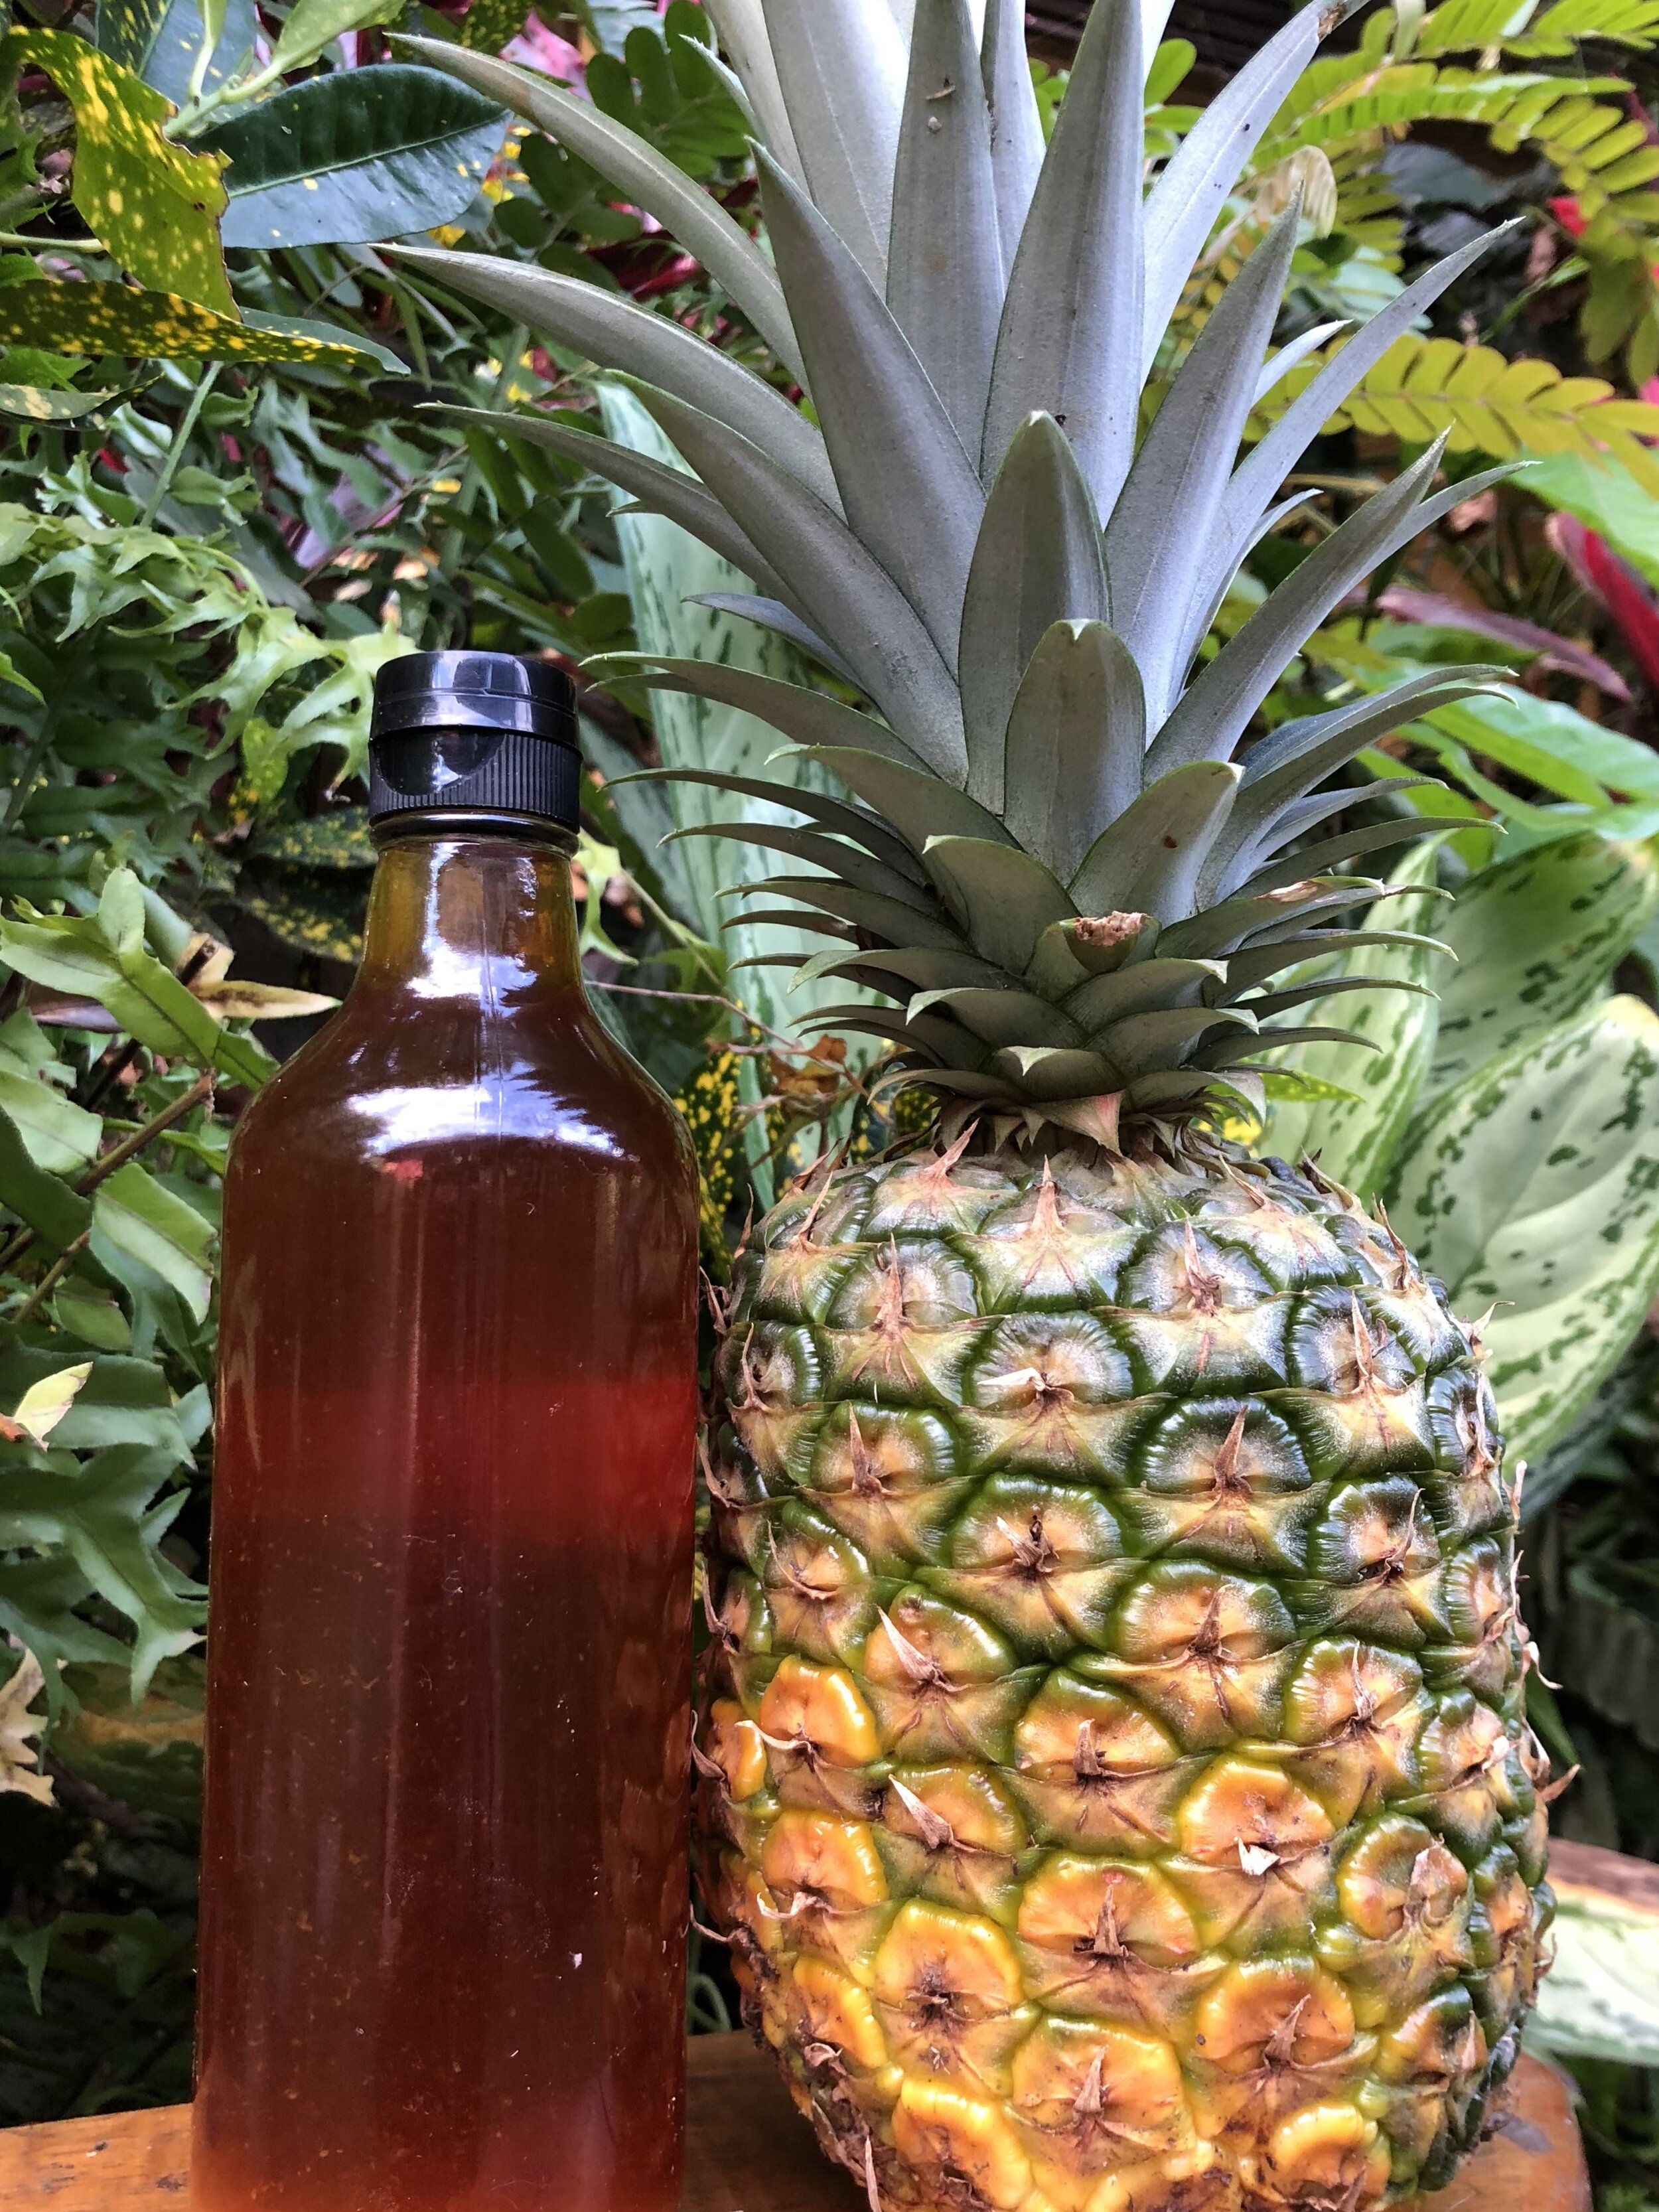
This recipe is adapted from Wild Fermentation by Sandor Katz.
The pineapples we are now harvesting were planted by previous apprentices and our current cooking vinegars were created by them as well. Many times the work we start here is created to be enjoyed by future Ranch dwellers. If this past pandemic year 2020 has shown me anything, it would be the reinforcement of the dangers of full reliance on our large industrial food system. Many of us have the desire to become more self sufficient in producing and conserving our own food. We know that access to healthy, fresh food is a privilege. We are lucky to have both the time and space to grow and experiment with ours. As this same interest and passion is also growing in others, we hope that our jungle experiments can be an inspiration on your journey.
Want to learn More
Join us for one of our workshops that sometimes include farm to table fermentation. Or consider applying to our year long apprenticeship or two month internship, where you will learn all the basics of fermentation, homesteading, growing your own food and lots more!
Happy ferments, happy microbes!

Water Kefir - The New Kombucha!
Before coming to the Ranch, I only knew of kefir as a tasty, sour, probiotic milk product - almost like a liquid yogurt. I loved it, and knew of it’s health benefits, but didn’t think kefir could be anything more. Turns out, kefir can refer to both milk kefir, the product I’ve known and seen in grocery stores, and water kefir, a delicious fermented soda and a staple for us here at Rancho.
By Cameron Conklin, apprentice 2021

Delicious, probiotic, fizzy and homemade soda (Water Kefir)
Kefir is more than just milk!
Before coming to the Ranch, I only knew of kefir as a tasty, sour, probiotic milk product - almost like a liquid yogurt. I loved it, and knew of it’s health benefits, but didn’t think kefir could be anything more. Turns out, kefir can refer to both milk kefir, the product I’ve known and seen in grocery stores, and water kefir, a delicious fermented soda and a staple for us here at Rancho.
Kefir “grains” are not actually grains at all, but instead a type of SCOBY (symbiotic colony of bacteria and yeast), a word you might recognize from researching or making kombucha. Kefir grains are shaped like little translucent miniature cauliflower florets - giving them their name. Milk kefir and water kefir grains look similar, but contain a different combination of bacteria and yeast. So if you want to make both, like we do, you’ll need a different source for each. If you are interested in milk kefir, check out Ryan’s blog post for some great milk kefir recipes here!
Some kefir makers have had luck with rinsing their kefir grains and changing the nutritive liquid they are fermenting. For example, using milk kefir grains with coconut milk instead of dairy milk. But as a rule of thumb, your grains will be trained to like a certain combination of ingredients, and in the case of water kefir grains, water and sugar is the magic recipe!
Making water kefir, what we call “balm”, was my first task here at Rancho. After my first week on balm duty, I thought to myself, “Why isn’t everyone making this stuff?!” It’s easy, delicious, refreshing, and serves as a great base for seasonal flavors, medicinal plants, and culinary creativity.
Water Kefir grains
The health benefits of water kefir
The exact origin story of kefir is unknown, but it is believed to have originated in the Caucasus Mountains. Kefir is Turkish for “good feeling” - which I can’t agree more with when I take a cold sip of bubbly kefir soda. Water kefir is high in probiotics, hydrating, and a great replacement for electrolyte sports drinks like gatorade, since it contains enzymes and minerals. It is known to aid in digestion, reduce inflammation, and relieve skin irritation such as eczema and acne. Water kefir is also said to help with detoxification by cleansing the liver (Mueller, 2014). What a magical concoction!
Water kefir serves as a great conduit for fruits and herbs. There are endless combinations of ingredients you can add to boost nutritional and medicinal potency depending on what your body needs!
How to make water kefir
**Note! If you do not have a water kefir making friend or local grain dealer, you can purchase dehydrated grains online. You will need to rehydrate them before following the recipe below.

Water Kefir SCOBY in the water/sugar solution
Primary Fermentation
Combine 1 gallon of water with 2 cups of sugar into a non-metal container (at Rancho we use tapa dulce which is a locally sourced sugar cane that our grains love, but you can use other sugar sources as well)
Pour in 1 cup of kefir grains
Cover with a cheese cloth or lid to keep out dust and bugs but not oxygen
Allow the mixture to sit for 2 days - this may be longer for you (up to 4 days) if you are in a cooler climate. Here in the tropics things move fast!
When your water kefir is ready you will notice a change in color and you may see bubbles rising to the top or foam settling on the surface
Strain your kefir into airtight bottles or jars (no metal) for the second fermentation, being sure to leave room for added fruit juices, herbs, and bubbles from the carbonation process
Set aside your kefir grains to begin your next batch - you can continue using these grains an infinite number of times if you keep them fed and healthy. You will see them start to multiply and this is a great time to give away extra grains to friends!
You are now ready to move on to the second fermentation and carbonation phase!
At this stage your kefir is ready to drink if you do not want to add flavor or carbonation - but in my opinion that is the best part!
Secondary Fermentation
**Note: This is where you can let your creativity shine! Read below to see some of our favorite recipes. You may wish to adjust the amount of fruit juice or sugar you use based on preference so start experimenting.

Passion fruit makes a great and easy flavor for balm!
Add 1/4 cup 100% fruit juice or fruit puree per liter of water kefir
Add 1/8 cup sugar per liter of water kefir
Add any herbs you’d like (I like to muddle them or blend with the fruit juice first)
Cap the airtight containers and let sit at room temperature for 1 to 3 days to let the secondary fermentation take place. In this stage of the process, the added sugar will be consumed by the SCOBY and create the carbonation as carbon dioxide builds up in the airtight container. The longer you wait, the bubblier and less sweet your beverage will be, so do a few trials to find your perfect combination.
Give your bottles a little burp to make sure you release some carbon dioxide to avoid your bottles exploding. Place your bottles in the fridge and enjoy! Don’t wait too long to burp your bottles and put your soda in the fridge, or your bottles might bust. The fridge will slow down the fermentation process significantly, allowing you to enjoy your balm for a longer period.
Watch out when opening your bottles again, the carbonation can be very intense depending on the ingredients so start slow as you unscrew the cap!
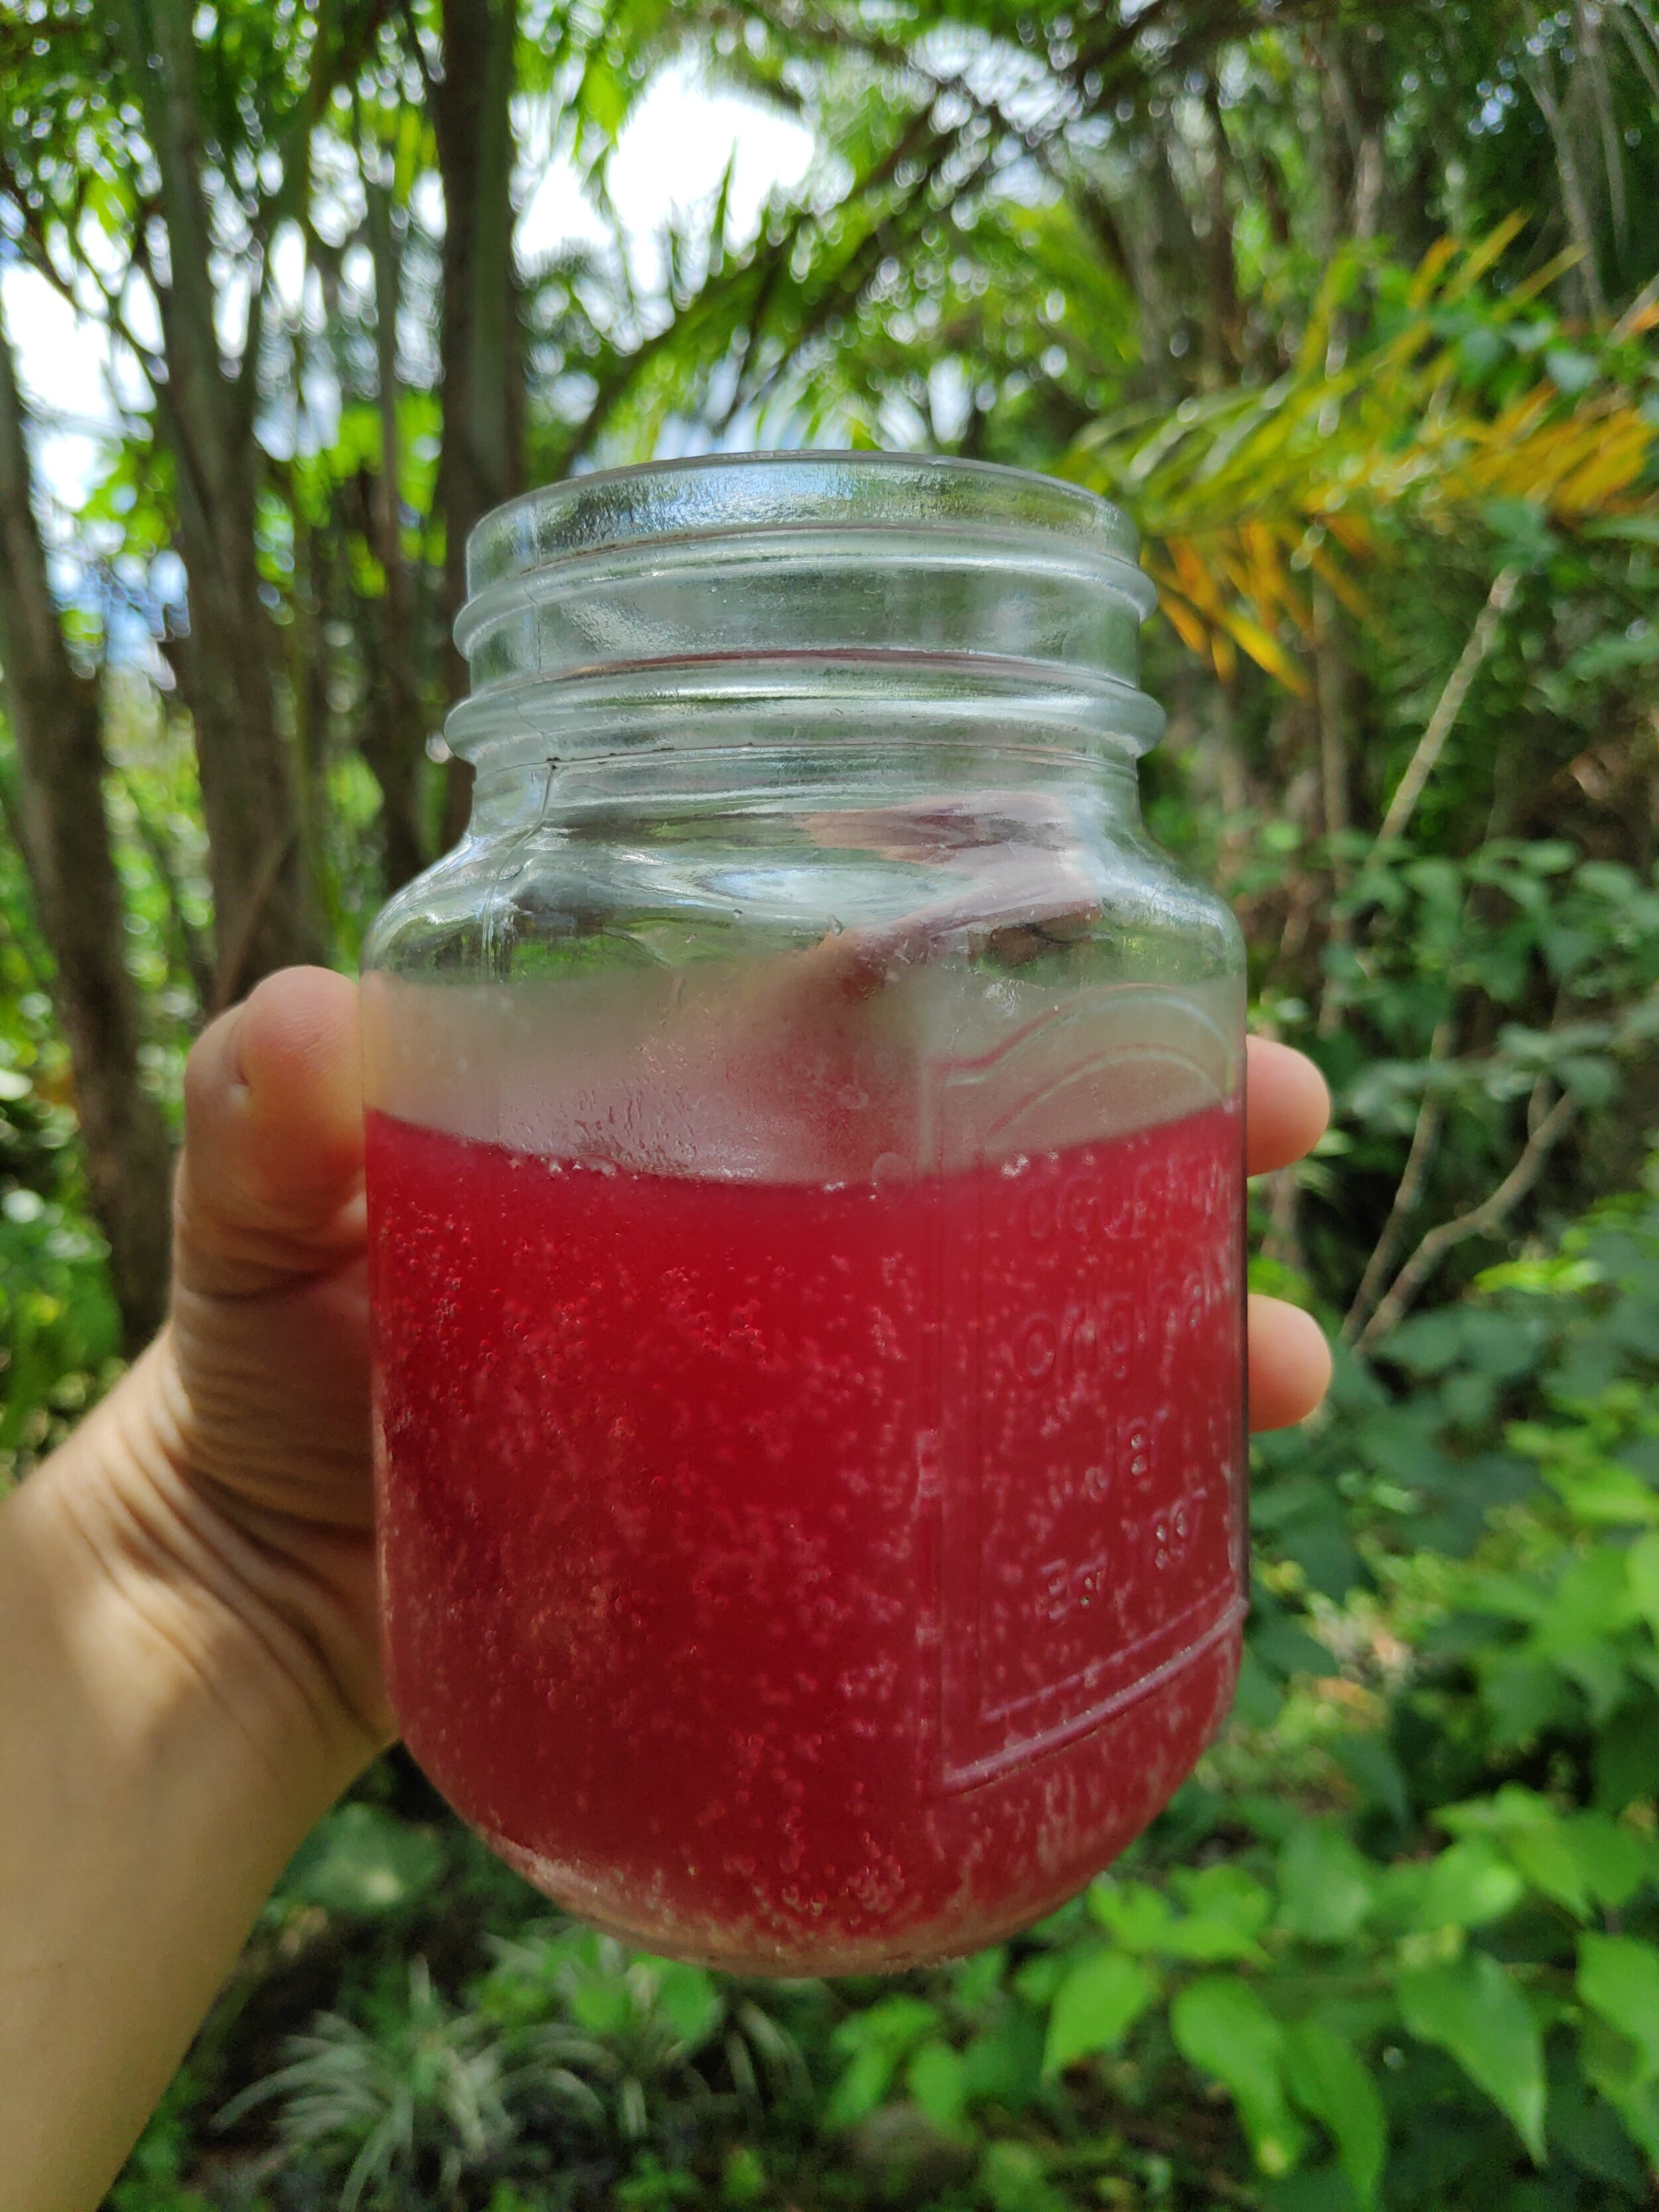
A refreshing, bubbly glass of balm
Our favorite variations
Below are a few flavor combinations that are staples here at Rancho. These flavors are absolutely delicious and come right from our farm. If you aren’t in the tropics and don’t have access to the below, I recommend using local, seasonal, ingredients to flavor your balm - there are so many different options!
Galaxy Bomb:
1/4 cup fresh squeezed starfruit juice
grated fresh ginger to taste
Sunshine Daydream:
1/4 cup fresh squeezed orange juice
1/8 cup fresh squeezed lemon juice
muddled mint to taste
muddled basil to taste
The Queen:
1/4 cup fresh squeezed and strained victoriana
1/8 cup fresh squeezed lemon juice
(be careful with explosions, this one is a firecracker!)
Resources:
Delicious Probiotic Drinks, Julia Mueller, 2014
Wild Fermentation, Sandor Ellix Katz, 2003
More Articles on Fermented Beverages you Can Make!
How to Brew Your Own Ginger Beer
Learn More
Check out our workshops that include farm to table fermentation, medicinal plants, permaculture and more!
Happy brewing and happy microbes!

The Magical Benefits of Fasting
Fasting is one of the strongest cleansing and healing natural methods existing. It has been used since ancient times in many cultures and religions either as a medicine or for spiritual reasons.
By Nico, Apprentice 2020
Looking for alternatives
Human behaviors are very hard to change. Especially in today’s world where everything goes so fast, our brains have to deal with hundreds and thousands of pieces of information each day. Overwhelmed by the capitalists’ ideals of growth, money and defining ourselves through our productivity, when do we really take the time to take a step back and reconsider what it is we truly want to engage in? But some things are changing. Each day, people all around the globe feel that wrongness and fight against it through learning, teaching and developing alternatives for sustainable housing, transportation, education and the food industry.

What’s wrong with our diet?
A couple of years ago I dedicated myself to finding alternative solutions that could help me build a lifestyle in harmony with my values. But where to start? Out of the many challenges we will have to face in the upcoming decades, the food system is one the most important. It is also the one where we, as individuals, can have the biggest impact through small changes is our everyday choices. We all know that those fast food chain restaurants surrounding us in the city are bad for our health, that the greenhouse gas emissions generated by the meat industry is nowhere near sustainable, that we should be paying more attention to the origin and process of how our food is made. The public’s’ hunger for nutritional information is more present than ever, diet books are perennial best-sellers, almost every popular magazine features nutrition advice, newspapers, radio programs and TV constantly discuss diet and health. But once again, there are so many sources, so many programs, so much contradictory advice, what should we be listening to? I believe that if we truly want to change the way we eat, we should start by listening to the one and only true expert of our health: our body.
Why fasting?

Jackfruit harvest
My goal was not to lose weight, nor to go vegan. I didn’t want to be on a diet restricting myself from certain foods. I wanted to redefine my relation to food so that I could start enjoying it more at each meal, and start feeling the benefits of eating healthy food on my everyday energy. I wanted to understand why my body feels so tired after some meals but not others, even though it seems like I’ve been eating the same quantity. I wanted to truly enjoy each delicious meal without just stuffing myself with twice the amount of food my body needed. That’s when I came across fasting (we will be talking here about long term fasting on water only, not about intermittent fasting which is a whole other process). The studies about its many health benefits from helping with allergies, skin diseases, cancer, how it helps with setting you in a special meditation mind-set, and the challenge it represented, immediately got my curiosity. I have always thought I couldn’t go more than a day without eating, yet so many people were able to spend weeks, sometimes months just surviving on water, so I decided to take the challenge and prove myself wrong.
As I am neither an expert on fasting, nor nutrition or health, I will not talk about the medical science behind fasting but more about my personal experience and what it has brought me. If you are considering a fast I do however recommend you to read as much expert’s advice about the process, how to start it, end it (the most important parts about fasting are before you start and after you break the fast), what the dangers are, and precautions to take. I do not recommend that you start your first fast if you are alone for it can be a very dangerous process if not properly prepared.
So what is fasting?
There are many kind of fasts but the original and purest one is when you stop eating any kind of food and only drink water for a certain amount of time, usually longer than 3 days. Fasting is one of the strongest cleansing and healing natural methods existing. It has been used since ancient times in many cultures and religions either as a medicine or for spiritual reasons.
What happens during a fast?
The first three days of fasting are mentally challenging. Because we have been so used to eating three times a day, at very specific hours, our brain will send signals through hormones telling your body, “hey dude, we usually have food coming in around this time, what’s happening?” You have to understand that this does not mean you are in danger and start seeing those signs and hunger as a signal, not as pain. Keep yourself busy, go for walks in your favorite place, do yoga, exercises (on the first day of fasting you still have a lot of energy from the remaining food in your digestive track so you should be able to still enjoy intense activities).
On the second day things start to slow down, you feel your energy level going down and hunger is present. I find that this is a nice opportunity to be a little by yourself, doing small activities you enjoy where time flies like drawing, reading, walking in the woods, etc.
The third day is the trickiest one, because you will reach the real fast. After three days that the body doesn’t receive nutrients from the outside, it moves to a kind of emergency mode and starts to digest all kinds of proteins from unnecessary cells, excess proteins from overeating, germs and bacteria. The body knows exactly where all the garbage is stored and start eliminating it. It enters a serious deep cleansing. During the fast, the body uses all the energy that is normally used for digestion and assimilation (which represent a great amount of energy, especially if you eat the average American diet) to clean and repair the tissues, and many organs have the chance to rest and recuperate. Make sure you have this day for yourself and rest, watch some movies, listen to relaxing music. This phase varies a lot in time and effects depending on each individual, but from my experience after three fasts I find that the better I prepare my fast (by gradually stopping all processed food before I start fasting), the easier this phase is. The first time I fasted I was so prepared and excited that I didn’t even feel any of the downside effects people talk about except just wanting to be on my own. In ancient times people didn’t need to prepare so much for fasting because they didn’t have the poisons of the 21st century, so they could go bravely into long fasts. With today’s food system, and depending on your diet and health, it is really important not to shock your body too hard by preparing adequately for your fast. You can find a lot of information and programs on the internet, but the most important thing is that you do it at a rate which correspond to you, by always paying attention to your body. I also find that whenever I start having small headaches and unpleasant sensations on the first three days, being a bit active helps, “Movement creates energy.” You’ve done the hardest part, all the rewards and benefits are yet to come, don’t stop there!
After those three days (sometimes it can take 2 days before reaching the “ketosis”), things get interesting: you don’t feel hunger anymore, your energy level goes up, and you truly enter the “fast trance” I like. I find it is important to start a fast with some ideas about what you want to dedicate the fast towards. It could be researching more about nutrition, focusing on your body and how you feel, thinking about things you want to accomplish in the future, etc. It’s important to live your fast with some ideas about what you want to be thinking about but not setting yourself goals or objectives, since the fast is challenging and you never know what you will come across during the process. Keep an open mind, be focused on what your body is telling you and what it is asking for and enjoy the time you have dedicated to yourself. Don’t be afraid to change your initial plans according to the situation, fasting is all about yourself and how you feel, it might feel a bit selfish to cancel plans you have made with your friends, but I think it is important you realise that before starting the fast. Tell those around you about your plan to fast and that you might cancel last minute. It is better for you, better for your fast and also better for your friends since nobody wants to be around someone that doesn’t truly feel like being there in the first place. This doesn’t mean you shouldn’t do anything social during the fast. After 6 days of fasting I was going to parties and dinner without any problem, but pay attention to what you feel like doing, not what is expected of you.
Breaking the fast
After several days without consuming any food, it is essential to break the fast wisely. Your body will not handle it if the first thing you eat is a huge hamburger with fries and mayonnaise, I guarantee you’ll be sick. Plus, you’ve gone through all the process of cleansing your body, do you really want to start off a fresh start by putting some unnaturally heavily processed food in your system? You want to start with something very light and easy to digest but flavourful, some fruit you truly enjoy. Take the time to choose it wisely, smell it and feel it, and start eating it only when you feel that you are ready. I find that during the fast my smell sense is way more developed than usual, and when you start eating, each bite will feel like heaven. Eat only one fruit and pay attention to the amazing taste, feel it going down your throat and sense all your digestive organs starting to work again after so long. They will truly thank you for the first rest you have given them in years, maybe decades, and your whole body is not craving food: it is craving good food. Think about all those delicious natural fruits and vegetables and all the amazing nutrients they will bring to your body. Enjoy each food like it’s the first time you had it, for me it truly tastes like that.
What fasting brought me
Fasting helped me redefine my relationship towards food. It helped me realize most of the time we don’t eat because we need it but by automatism. Sometime we are not even hungry, or we think we are hungry but we don’t truly need to eat, we just eat because it is the common thing to do. Our brain tricks us into thinking we want something while everything about our health tells us something is wrong with that. Like Paul Nison said: “Listen to your own body sense. If you listen to common sense, you will end up like common people in today’s world.”
Fasting also helped me enjoy more the food I eat. It helped me rediscover flavors I stopped tasting because I couldn’t see the beauty behind it anymore. Enjoying food is not about what your taste buds are receiving, but about how you are receiving those flavors and how you pay attention to them. It’s all about the setting. The best meal you’ll ever have will probably not be the most sophisticated or expensive one, but the one you took time to enjoy because you were with people you liked, in a place you like, like your grandmother’s homemade casserole, or the first time your dad took you out for ice cream. Like Anthony Bourdain says in his book, a cook’s tour “Nothing illustrates them more than the Last Meal Game.” You’re getting the electric chair tomorrow morning. […] You’ve got one meal left. What are you having for dinner? When playing this game with chefs – and we’re talking good chefs here – the answers are invariably simple ones.” Imagine you could rediscover the sensations you had the first time you took a bite out of your first pizza, your first ice cream, or the first apple pie you ever ate.
Fasting also brought me a lot of unexpected things not related to eating. It helped me push my limits and increase my willpower. It taught me that whatever people think is good or bad for you, the only true way to find out is to experience by yourself. It reaffirmed the idea that we shouldn’t be doing things blindly because it is the “normal” thing to do, because we have been doing it for a long time or because of social convention, but we should put everything in perspective and ask ourselves why is it that we do this. Only when we understand fully why we do something can we change it, improve it, or just decide that this is the way we want to go, and then human behaviour becomes easy to change.
People sometimes ask me how did I stop eating meat so easily after so many years as a meat lover? Not eating meat was not the hard part, just as spending 7 days without eating is not the hard part for me. The hard part was putting everything I have learned until here in perspective, unlearn what I thought was true and questioning the fundamentals about nutrition. It might be a hard and tiring process, but only from there can we start building on new foundations, towards a lifestyle in harmony with our values.

Apprentices doing yoga in the Hankey House
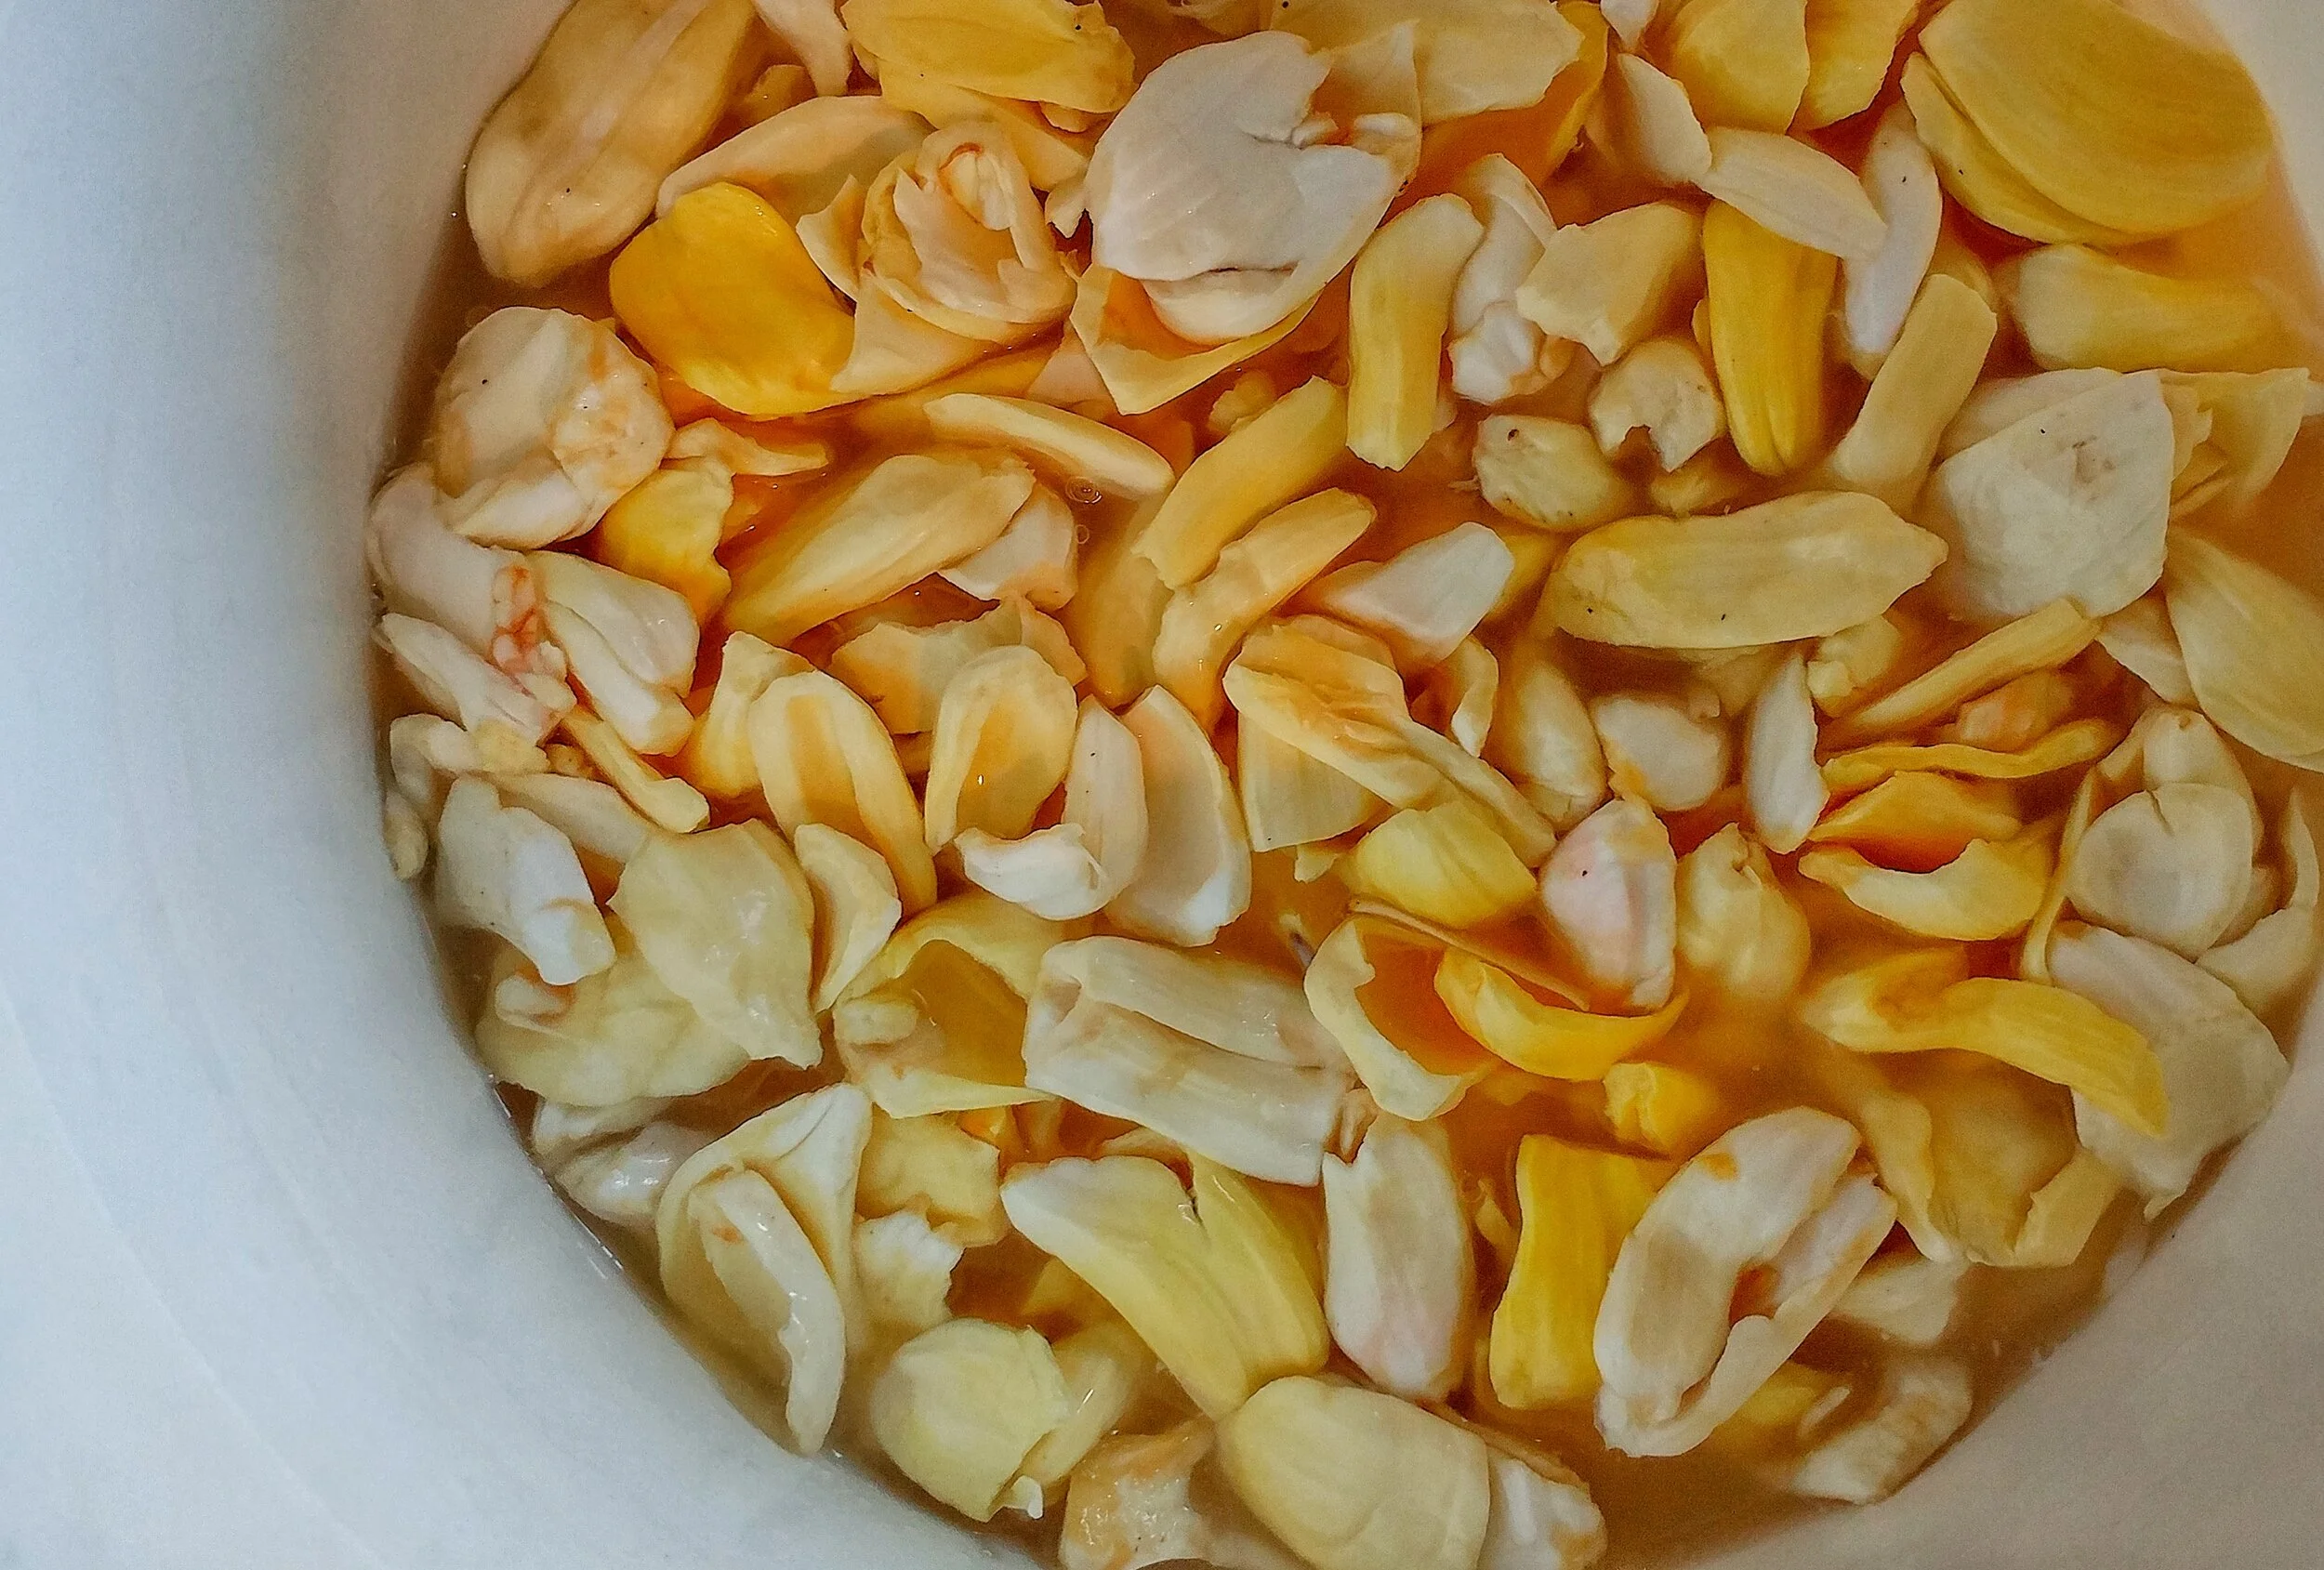
What is Lacto-Fermentation
What would a traditional Korean Barbecue be without kimchi, your scrambled eggs without Tabasco and a hot, sunny afternoon without a fresh pickle? Lacto-ferments are around us every day. Often they are made into dishes that we don’t even consider as fermented.
By Constantin Demuth, apprentice 2021

One of our favorite lacto-fermented condiments- Green Papaya Kimchi
What would a traditional Korean Barbecue be without kimchi, your scrambled eggs without Tabasco and a hot, sunny afternoon without a fresh pickle? Lacto-ferments are around us every day. Often they are made into dishes that we don’t even consider as fermented. Many of which are staples that have backed up our diets for hundreds of years. Try and think of the last lacto-fermented goodie you ate.
Recently, lacto-fermentation is going through a renaissance. People are realizing how easy it is to recreate flavors of their cultural ancestry. Kraut is just cabbage, salt and water. Pickles are just cucumbers, salt and water. It’s easy to make at home and much better than the stuff you buy in the supermarket. In this article I would like to take you on a little journey through the wide world of lacto-ferments, share some of the Ranch’s deepest secrets, and how we take foods from the farm and transform them into delicious, nutritious, and long lasting dishes.
History
In a time where we can buy produce all year around from every corner of the world and store them conveniently in the fridge, the reason why people ferment their food is becoming obsolete. In the beginning, they were not looking for the most incredible flavors that people at Noma’s Food Lab try to create. They were more interested in preservation, keeping their produce edible, eliminating molds and buffering cold winters without harvests. As farm to table cooking is becoming more popular again, being able to preserve foods through the year is increasingly important. The easiest method of preserving large quantities of raw vegetables is by using salt. Salt creates an environment that allows good bacteria to survive while killing bacteria harmful to humans. Today, we know salt preservation also makes nutrients bioavailable, increases digestibility and creates a great source of raw foods in our diets.
Preservation

Lacto-fermented pickles
Let’s go into a bit more detail of what happens in our jars when we mix vegetables with salt. Adding salt or salt brine to vegetables helps Lactic Acid Bacteria (LAB) to develop. LAB then turns the natural sugars of the vegetables into lactic acid. This acidified environment inhibits the growth of bacteria that makes the vegetables go bad and mold. This way we can store lacto-fermented vegetables for long periods of time without worrying about spoilage. The acidity gives these ferments their original flavor and preserves the satisfying crunch that we all crave.
As opposed to other fermentation methods, lacto-fermentation does not require any input of certain bacteria. When using fresh (preferably organic) produce we are able to work with LAB that is native to the vegetables and helps create the environment we want. As a result of their work, LAB often produce oxygen that makes our ferments bubbly. In case you find bubbles in your jars, don’t worry. That’s a sign that it works!
Lacto-ferments at the Ranch
Here at the Ranch we use lacto-fermentation every week and we eat it basically every day. Our favorite staples are Green Papaya Kimchi, Salsa Starter and some sort of pickled vegetables. The most recent and exciting experiments in the test kitchen include pickled Katuk (our daily salad green) and fermented black beans for our home made Hoisin Sauce.
We use lacto-fermentation for three basic reasons. Reason one: It’s good for us. It makes all the nutrients that fresh vegetables have to offer available to us. Reason two: We can store fresh harvests and consume them later, which is super convenient when you have an amazing orchard that produces a variety of things all year around. Reason three: It is delicious and we love delicious food!

Green jackfruit processing
Green Jackfruit
Jackfruit is a perfect example of how we use lacto-fermentation as a way to preserve fresh produce. Jackfruit is the biggest fruit in the world and we have several trees in our orchards. Once jackfruit is ripe, it goes bad relatively quickly and some people don’t like its flavor when ripe. We started harvesting them when they are still green to incorporate them as a vegetable into our diet. Even here where we feed many hungry souls every day, we cannot consume the amount of jackfruit we harvest. This is where our friend lacto-fermentation comes into play. We submerge all the jackfruit meat in a 2% salt brine, which inhibits growth of undesirable bacteria, prevents oxidation and gives a deep, rich salty flavor that we want in our dishes.
Green Papaya Kimchi
The purpose of our Kimchi is less for preservation and more for the “ooh “and “ahh” moments when we serve fresh condiments with all our foods. The kimchi accompanies eggs in the morning, hearty slow roasted pork on special occasions and provides the freshness in our weekday burritos.

We use green papaya, but you can use any local, seasonal, crunchy vegetable
As opposed to jackfruit, where we submerge the flesh in a brine, for Kimchi we use its own juice. Again, salt is our partner in crime. Shredding 20 kg of green papaya on Wednesday mornings is not everyone’s favorite exercise, but the result makes up for the work. We used to do this all with hand graters, but recently we purchased an industrial hand cranked shredder by Nemco Food Equipment. We highly recommend this tool if you are making large batches of sauerkrauts, kimchi, etc. By shredding the fruit, we make it easier for the salt to penetrate. After mixing papaya, salt and spices (aka the *flavor bomb) enough brine is being produced for the ferment to be safe. Three days in the fermentation bucket and voila, kimchi is ready. Pack this into glass jars that can be stored in the fridge.
Now it’s time to reveal the big secret you’ve been waiting for. Rancho Mastatal is giving out its kimchi recipe for the first time. Two things that are important: First, if you cannot find green papaya, use any type of cabbage. It’s important to use fresh, local and seasonal (when you live in a temperate climate please, please do not go to the supermarket and buy green papaya!). Second, fermentation is no science! Don’t get overwhelmed by ratios, phrases or utensils. Trust your senses; look at it, smell it and taste it. Your nose knows best.
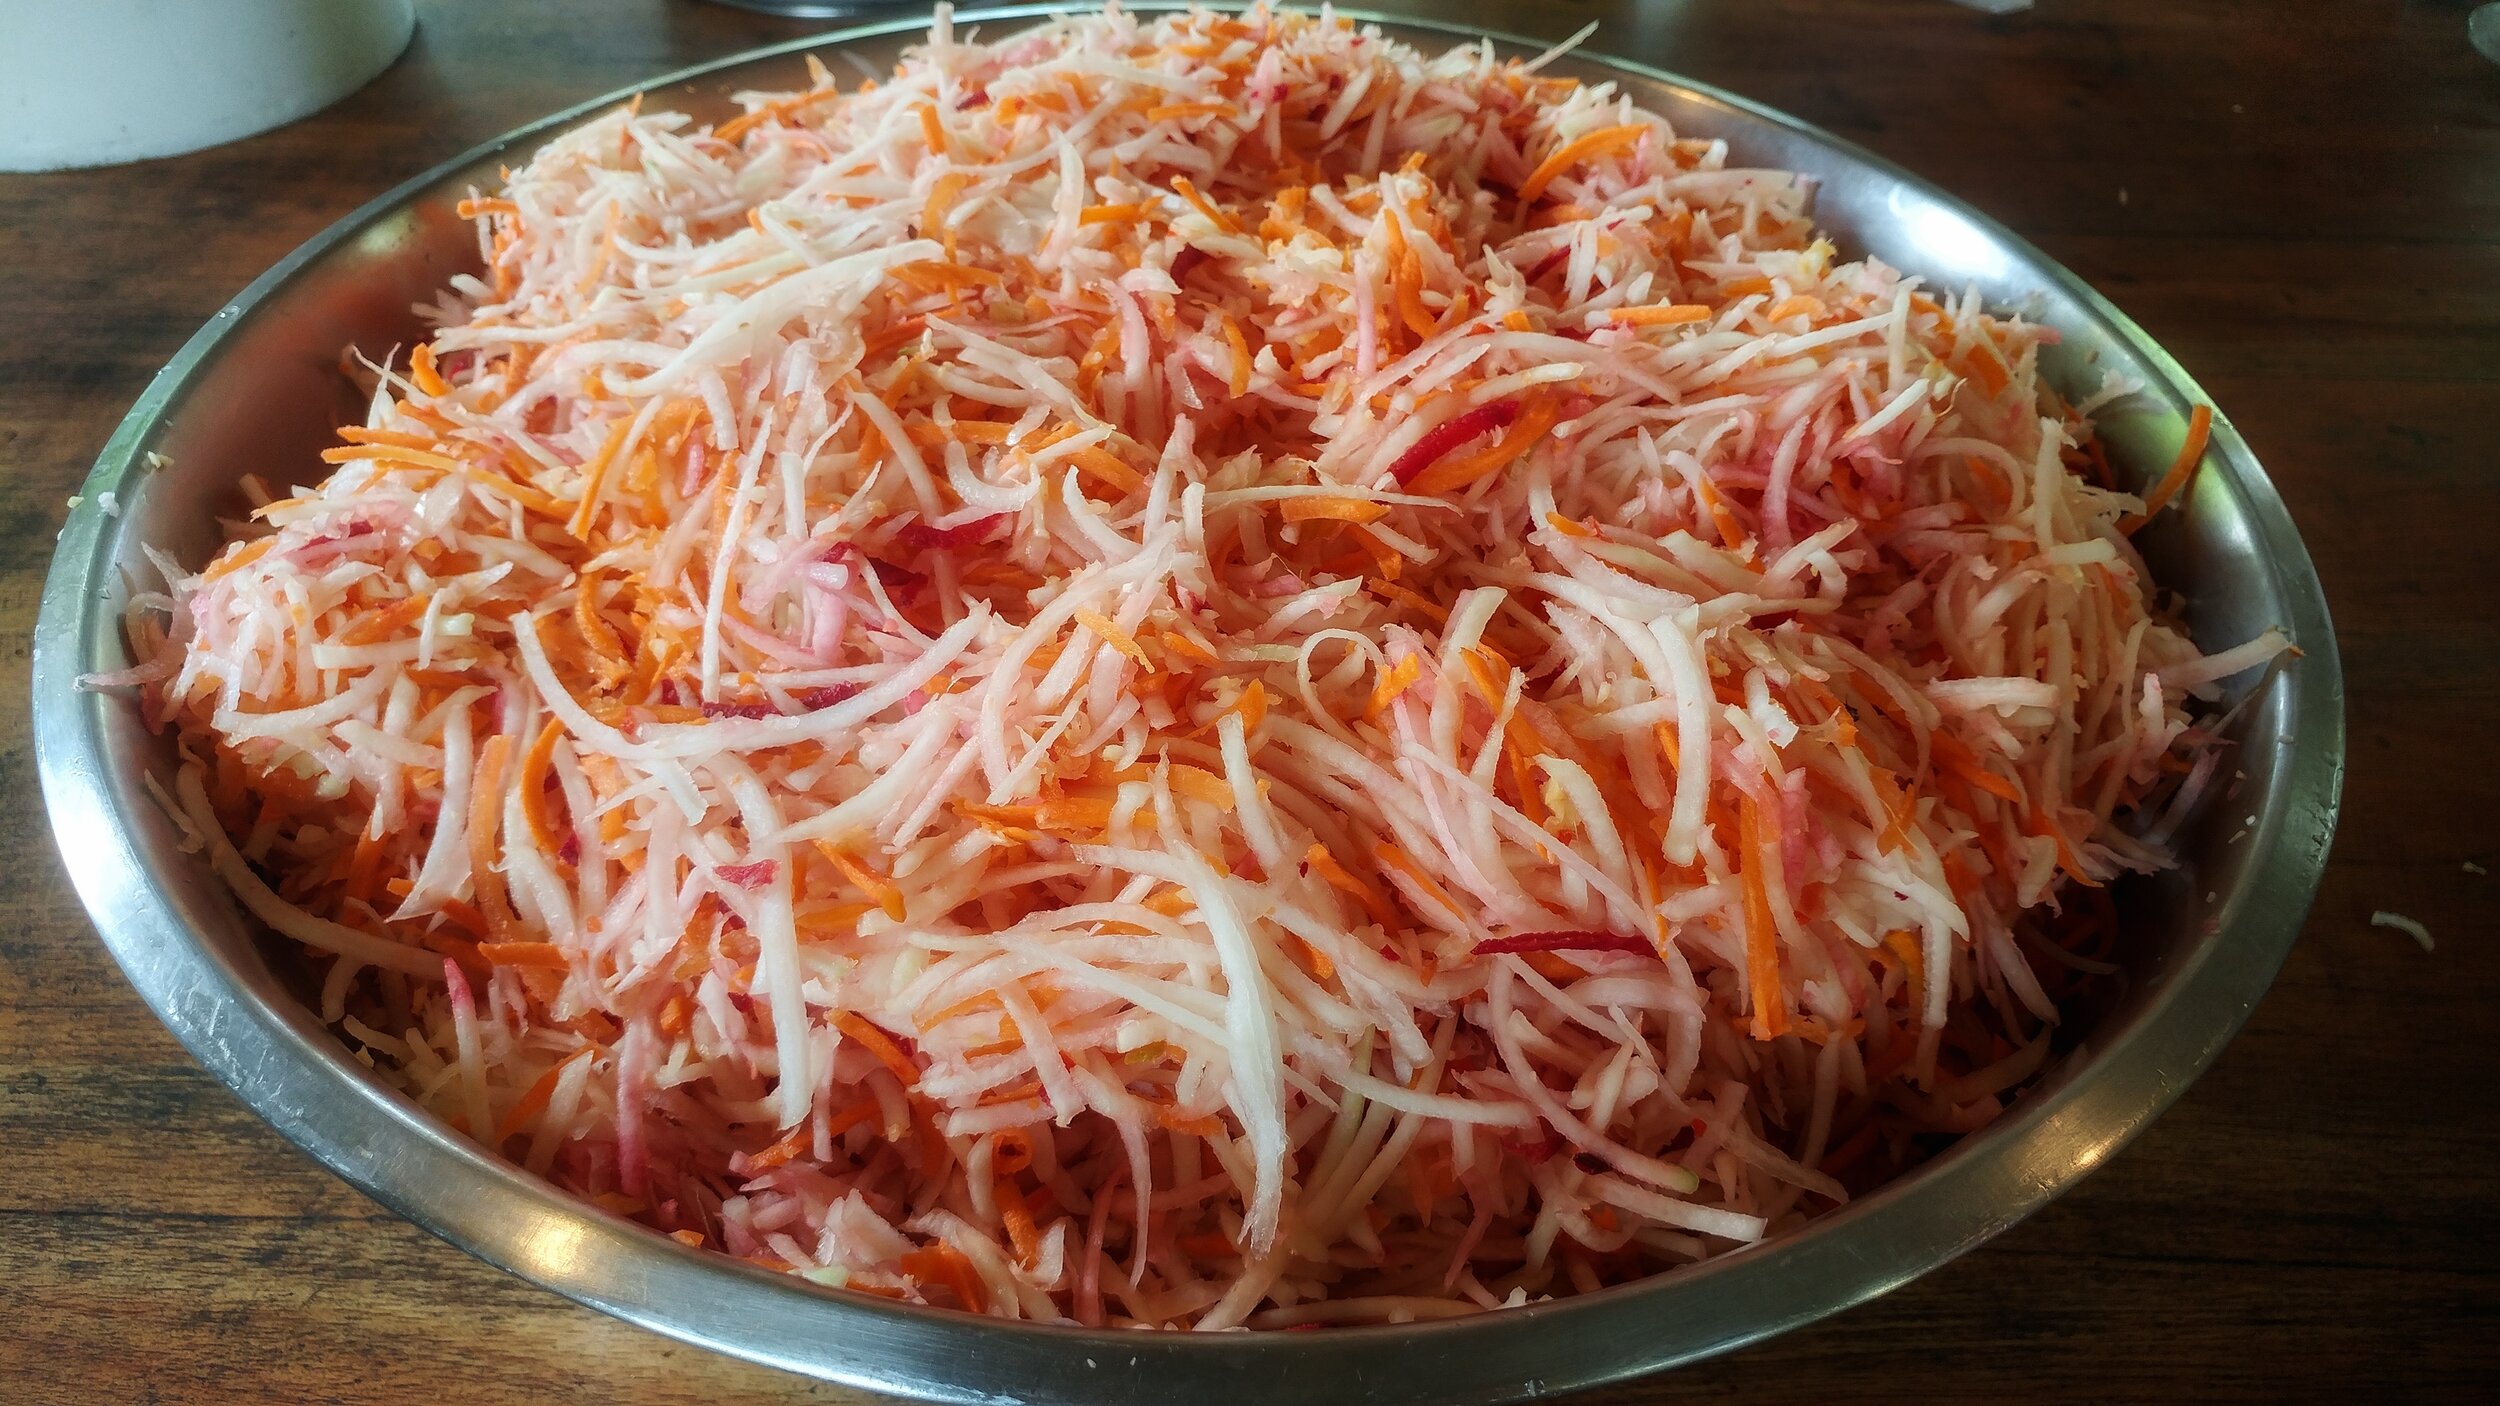
Shredded ingredients ready to be combined with salt and flavors
Recipe
3 green papaya, peeled and seeded
1 carrot and/or 1 beet
Salt (2% of the total weight)
*Flavor Bomb
1/2 cup peeled ginger
1/2 cup peeled garlic
1 chili (optional)
Equipment
Fermentation vessel: A food safe container that can hold all the vegetables plus at least 20cm of headspace (buckets, mason jars, big Tupperware all work perfectly fine).
Instructions
1. Cut the papaya in half and discard the seeds. Peel the papaya.
2. Using a kitchen grater, grate the papaya, carrot and/or beet and set aside.
3. Peel the ginger and garlic. Cut the chili in half and discard the seeds. Blend all the ingredients for your flavor bomb in a food processor.
4. Weigh out all your vegetables and place them in your fermentation vessel.
5. Add 2% Salt to the total weight of the vegetables (e.g. if you have 1kg of vegetables, use 20g of salt) and mix the salt in. Stirring it helps to break up the papaya and releases the brine.
6. Make sure your Kimchi is submerged in brine. Keep it on the counter at room temperature and wait for at least three days (this will depend on your climate). You will see bubbles and be able to smell the acidification after a few days. When it’s reached your desired flavor, bottle the Kimchi in jars and keep them in the fridge. Enjoy!

Green papaya cut in half
Learn more
Those are just a couple of the many vegetables we lacto-ferment. Lacto-fermentation has made our farm to table cooking and preservation more efficient, produce less waste, and create delicious, unique and fun foods.
Join us for a workshop to learn more about fermentation, farm to table cooking, permaculture and more.
Other Farm to table blog articles
Eating Local: Reconnecting to Food
Turn Local Rice and Beans into Fermented Bread
Happy fermentation, happy microbes!

Farm to Table Chocolate Bonbons
It wasn’t long into my apprenticeship that Robin handed me a piece of a chocolate bonbon, made with raw cacao picked from the farm down the road, that I experienced something like awe; and that in the old sense of both amazement and terror. This is what chocolate is supposed to taste like?
By Kara, Apprentice 2020
Beautiful beaches, abundant wildlife, fresh fruit, incredible coffee, and local chocolate; these are some of the things I anticipated experiencing in Costa Rica. While everything but the beaches has been a part of my experience here at Rancho Mastatal so far, one thing in that list stands out to me. The chocolate.
I’ve splurged on the good chocolate bars back home in Canada, the fair trade, single-origin, handmade stuff- and I enjoyed every bite to get my $10 worth- but I know now that I had never truly experienced chocolate. As fair-trade and handmade as all of that was, it was still flown halfway around the world and had sat on a store shelf for who-knows-how-long.

Cacao being toasted
It wasn’t long into my apprenticeship that Robin handed me a piece of a chocolate bonbon, made with raw cacao picked from the farm down the road, that I experienced something like awe; and that in the old sense of both amazement and terror. This is what chocolate is supposed to taste like? And I’ve been missing out on it for the last 27 years? Memories of foil-wrapped bunnies and coins surfaced, and I tried to make the connection between that waxy-sweet substance and what I had in my hand now; something subtle, complex, layered with sweet and smoky and earthy and bitter- no additives necessary.
I was hooked after that first taste, and when Robin said that she wanted a flight of bonbons for her
birthday dessert, I was ready to take on that challenge. The recipes we created for that event were truly a farm-to-table experience- nearly everything sourced from the Ranch property or from farms
around Mastatal (salt and peanuts being our exceptions). The focus on sustainable, local sourcing did nothing to impede the quality of our bonbons, in fact, it’s that parameter that brings out the most creativity (and the best flavors, oftentimes) of most food made at the Ranch.
So instead of going on waxing poetic about chocolate, I want to share those recipes we made and some tips on working with raw cacao. The funny thing about these recipes is that I don’t intend for them to be followed, not exactly, at least. We used what we had on hand; fruits in season, experimental condiments and flavorings from other projects- and I want to encourage the same approach in you. Look through the foods you have available, both in your pantry and in the local market. Can something be dehydrated? Fermented? Powdered? Turned into wine, vinegar or syrup?
Get creative, play, then eat some chocolate.

A productive harvest of cacao at our local family run chocolate farm, La Iguana Chocolate
Basic Chocolate mix
1 cup raw cacao
1 tsp salt (or to taste)
1 Tbsp grated tapa dulce (or sugar)
1. In a hot, dry skillet toast the raw cacao. They will blacken as they toast, and become wonderfully fragrant. You will know they are done when they start to make popping sounds as the skin separates from the seed.
2. Remove from heat, and let the cacao cool until you can comfortably handle them. Once cool, remove the outer skin by pinching the seed between thumb and forefinger of each hand, and twisting in opposite directions. Remove the skin, but don’t discard it! The little flakes of toasted skin make a wonderful cacao tea.
3. Grind the cacao. We use our hand-cranked corona coffee grinder, but a food processor or a mortar and pestle could work, too. Add the salt and tapa dulce to the cacao as you’re grinding to incorporate it into the resulting mix. You should end up with a mix the texture of gritty sand.
4. This is the base mix to which you will add all of your flavorings. For any bonbon flavor, you
will need something sticky to bind the cacao mixture. Syrups, dulce de leche, finely chopped gooey dried fruits such as dates, have all worked successfully for us. If you add liquids as flavoring, make
sure to watch the texture of the resulting mix. It needs to be wet and sticky enough to bind the cacao together, but not so wet that it slumps.
5. Roll your bonbons into spheres, or any shape of your choice, decorate, then refrigerate until serving.

Cacao seeds being crushed

A freshly picked cacao pod. The white pulp around the seeds is delicious!
Recipe Ideas
*all made with basic chocolate mix
Ranch-oreo: Make two small balls of chocolate mix per bonbon, mixing in dulce de leche to bind, then flatten them into bite size discs. Add a dollop of dulce de leche between the disks, and top with cinnamon and grated tapa.
Peanut Butter Balls: Bind the chocolate mix with coffee flavored syrup (we used a coffee kombucha reduced with tapa dulce), and make a quick peanut butter to fill the bonbon. Toast peanuts with salt, and put them in a food processor with sour cream until it reached your desired texture. Make a ball of the peanut butter, then wrap a layer of the chocolate mix around it.
Ginger Jack Bites: Add ginger syrup and lime (we used powdered) to the chocolate mix, then incorporate finely chopped dried jackfruit. Roll into balls, and top with a slice of dried manzana de agua.
Coffee Cinnamon Balls: Mix the chocolate with coffee kombucha syrup to bind, roll into balls and top with a coffee bean and sprinkled cinnamon
Chilli Chocolate Bites: Mix the chocolate with starfruit syrup, chilli infused vinegar, lime, and dried chilli flakes. Roll into balls. Careful, this one gets hotter the longer you leave the chilli flakes infusing in the chocolate!
Simply Sweet: Mix the chocolate with dulce de leche, roll into balls, then create an indent with your finger in each bonbon, and fill it with a dollop of dulce de leche.
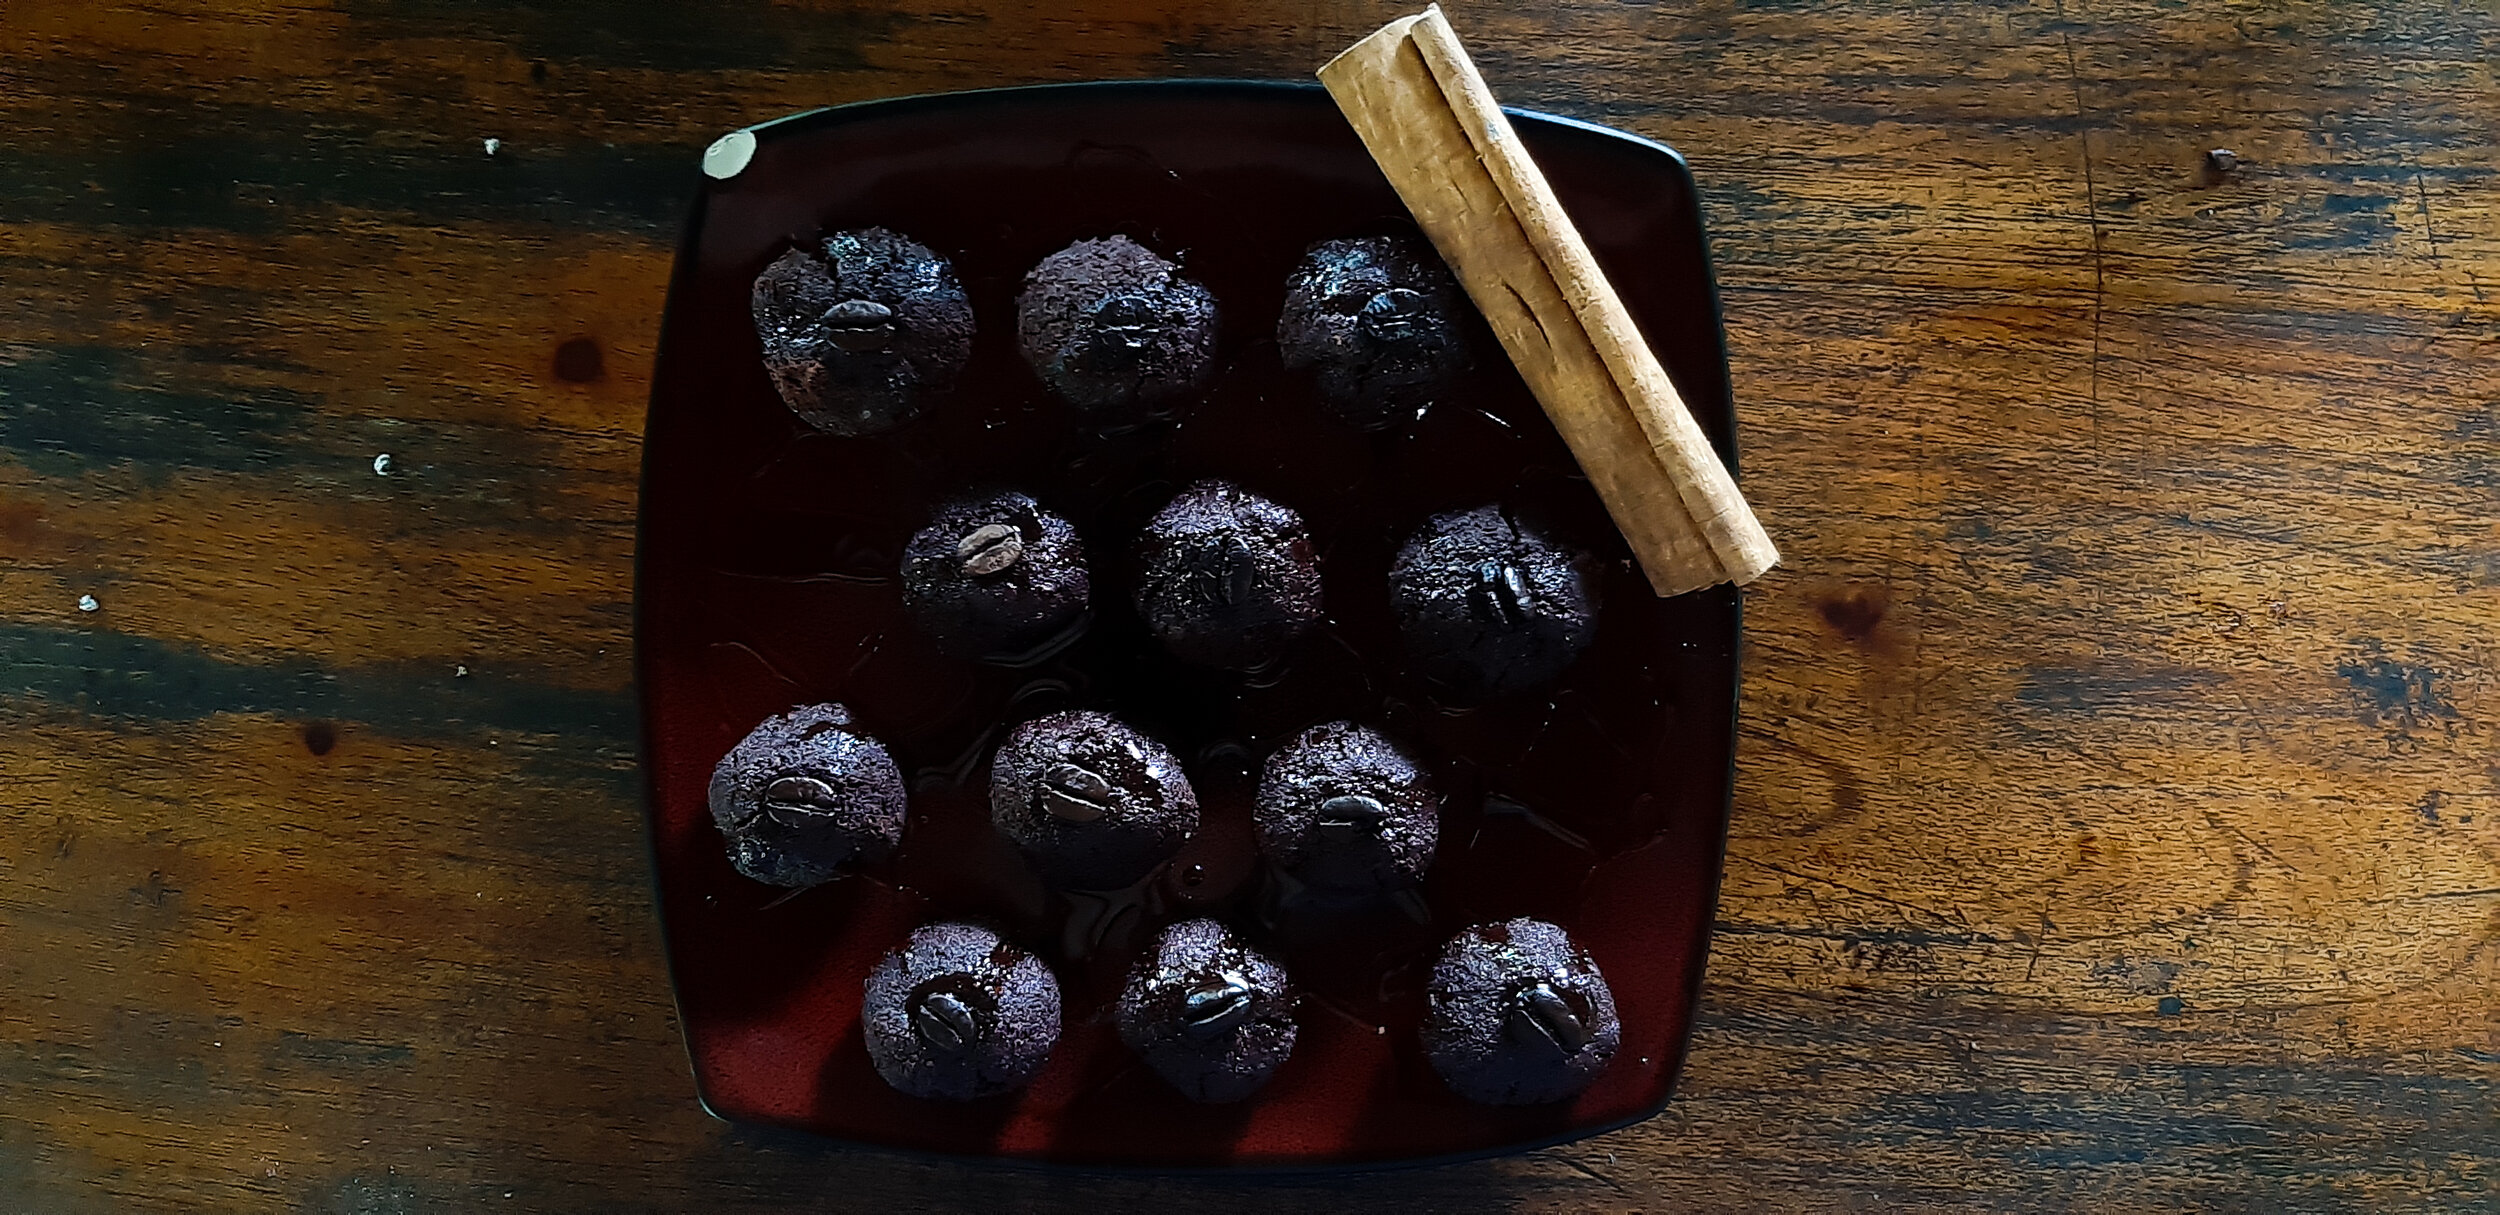
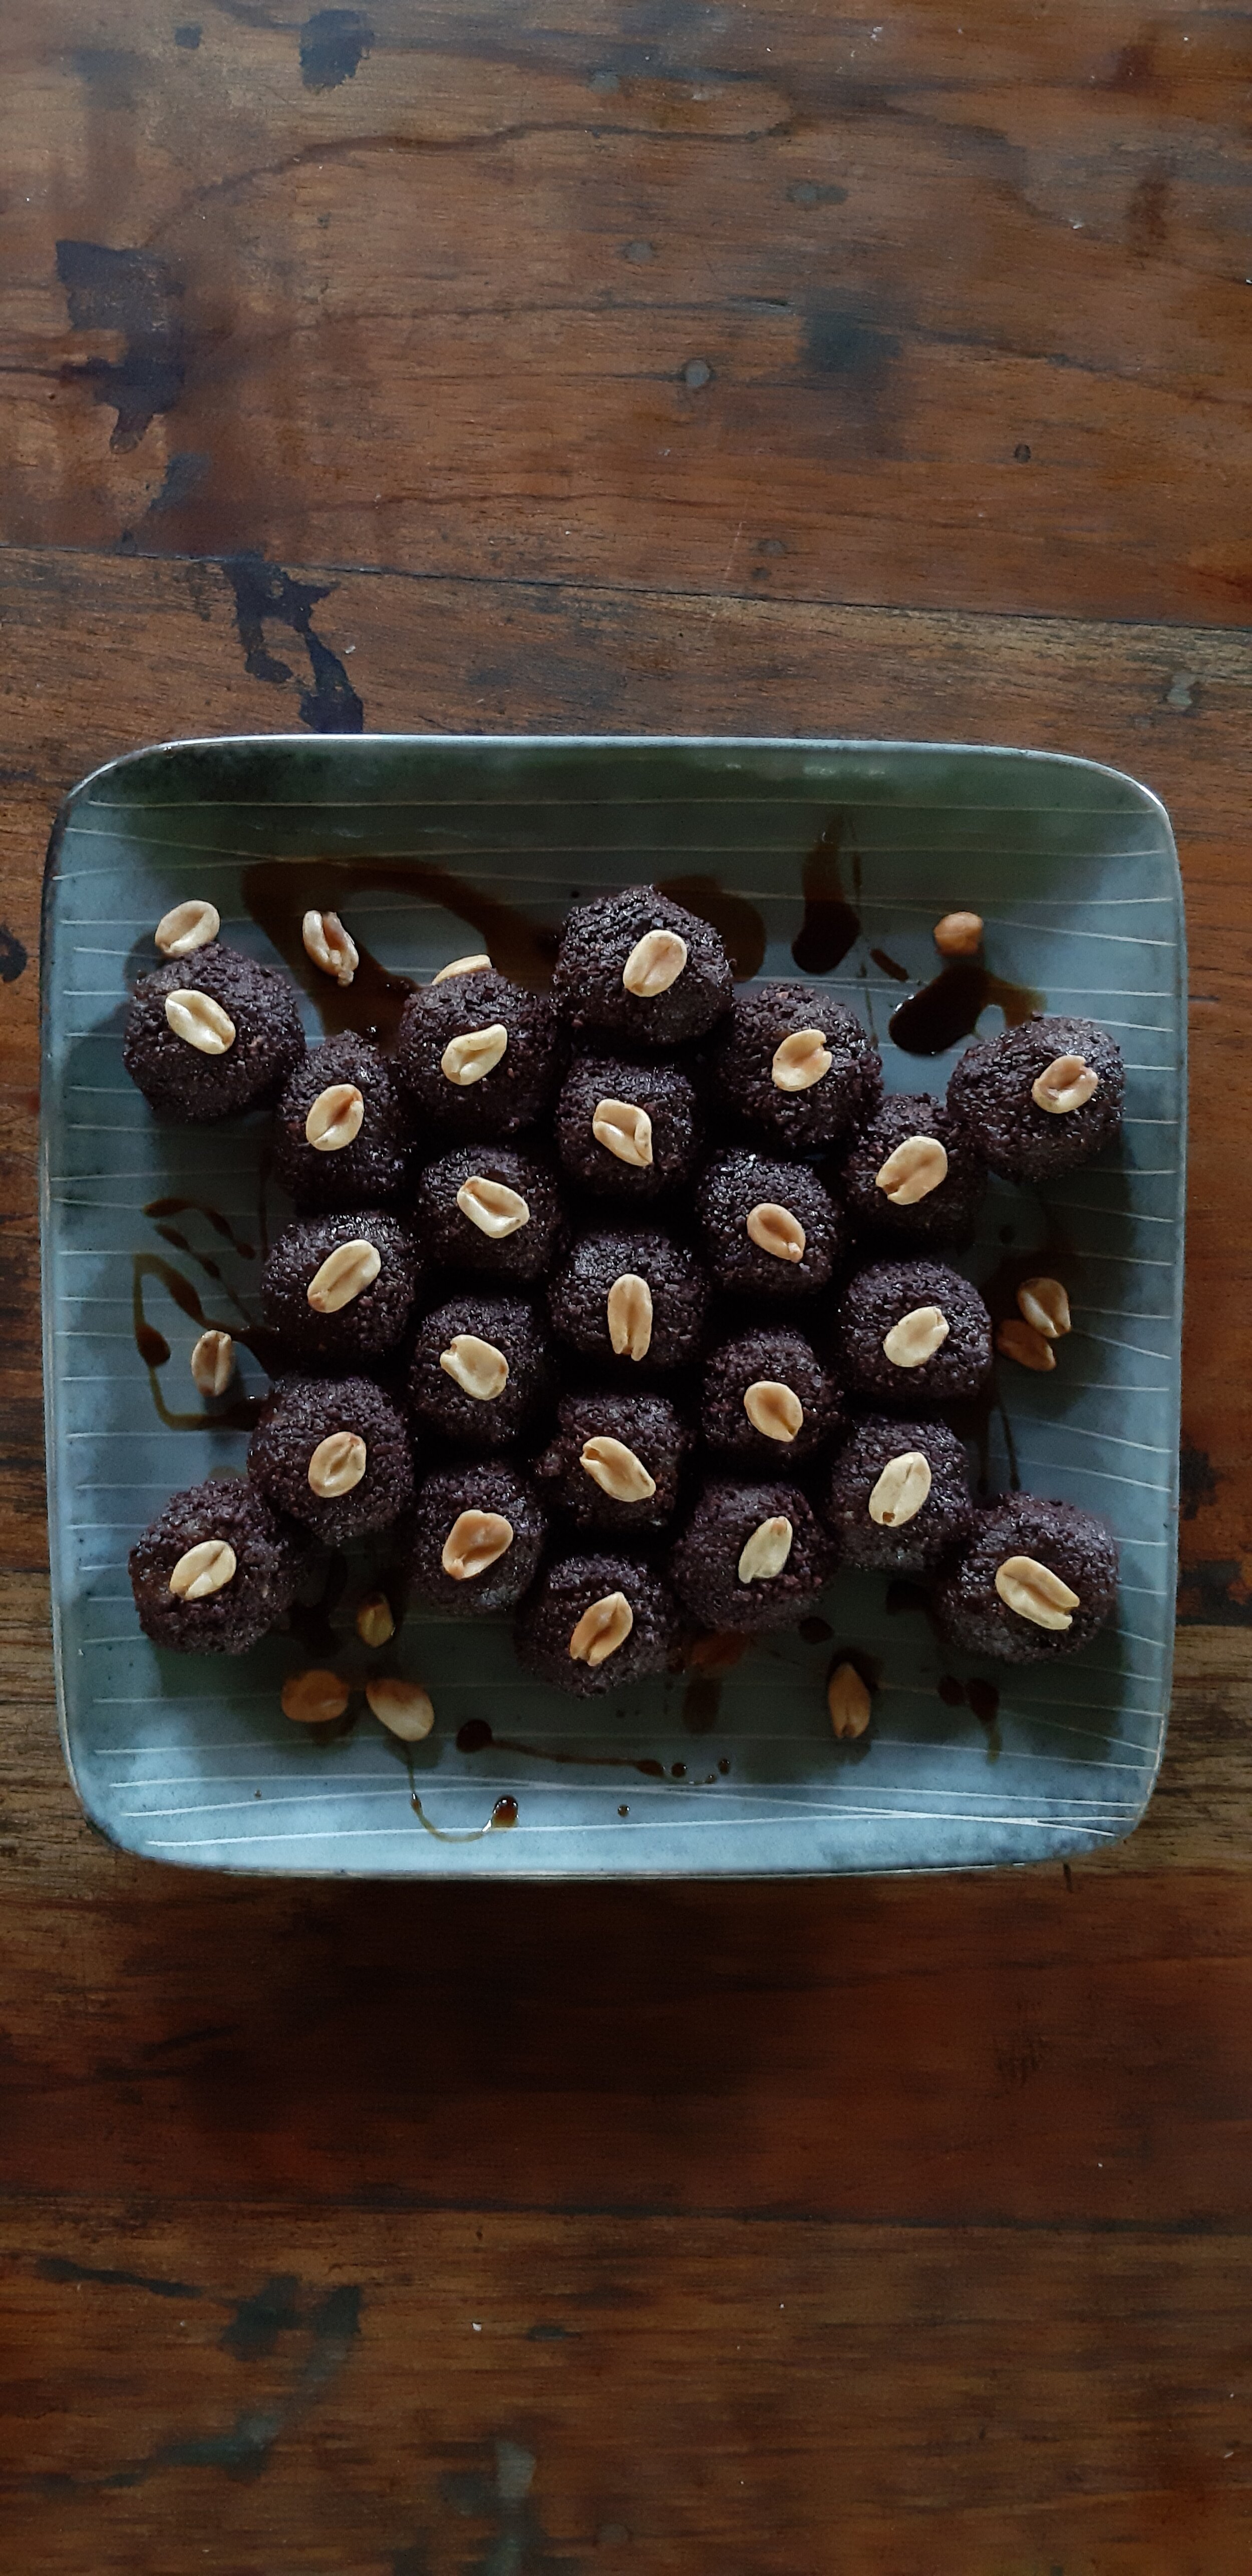
want to learn more?
Come stay with us as a guest and you’ll get to enjoy and make these tasty treats on a day trip to La Iguana Chocolate.
Visit our guest page for more info on coming and being a part of the Ranch and Mastatal community.
Past blog articles about cacao and farm to table products:
From Tree to Bar: How to Process Raw Cacao
Life of Spice: Farm to Table Cinnamon
Vanilla Cultivation: A Practical Guide for the Tropical Homestead
Workshops we host and teach that are related to agriculture and homesteading:
Permaculture Design Certification
Agroforestry Skills
Plants as Medicine
Syntropic Farming
And more! Visit our website for more information on our upcoming workshops.
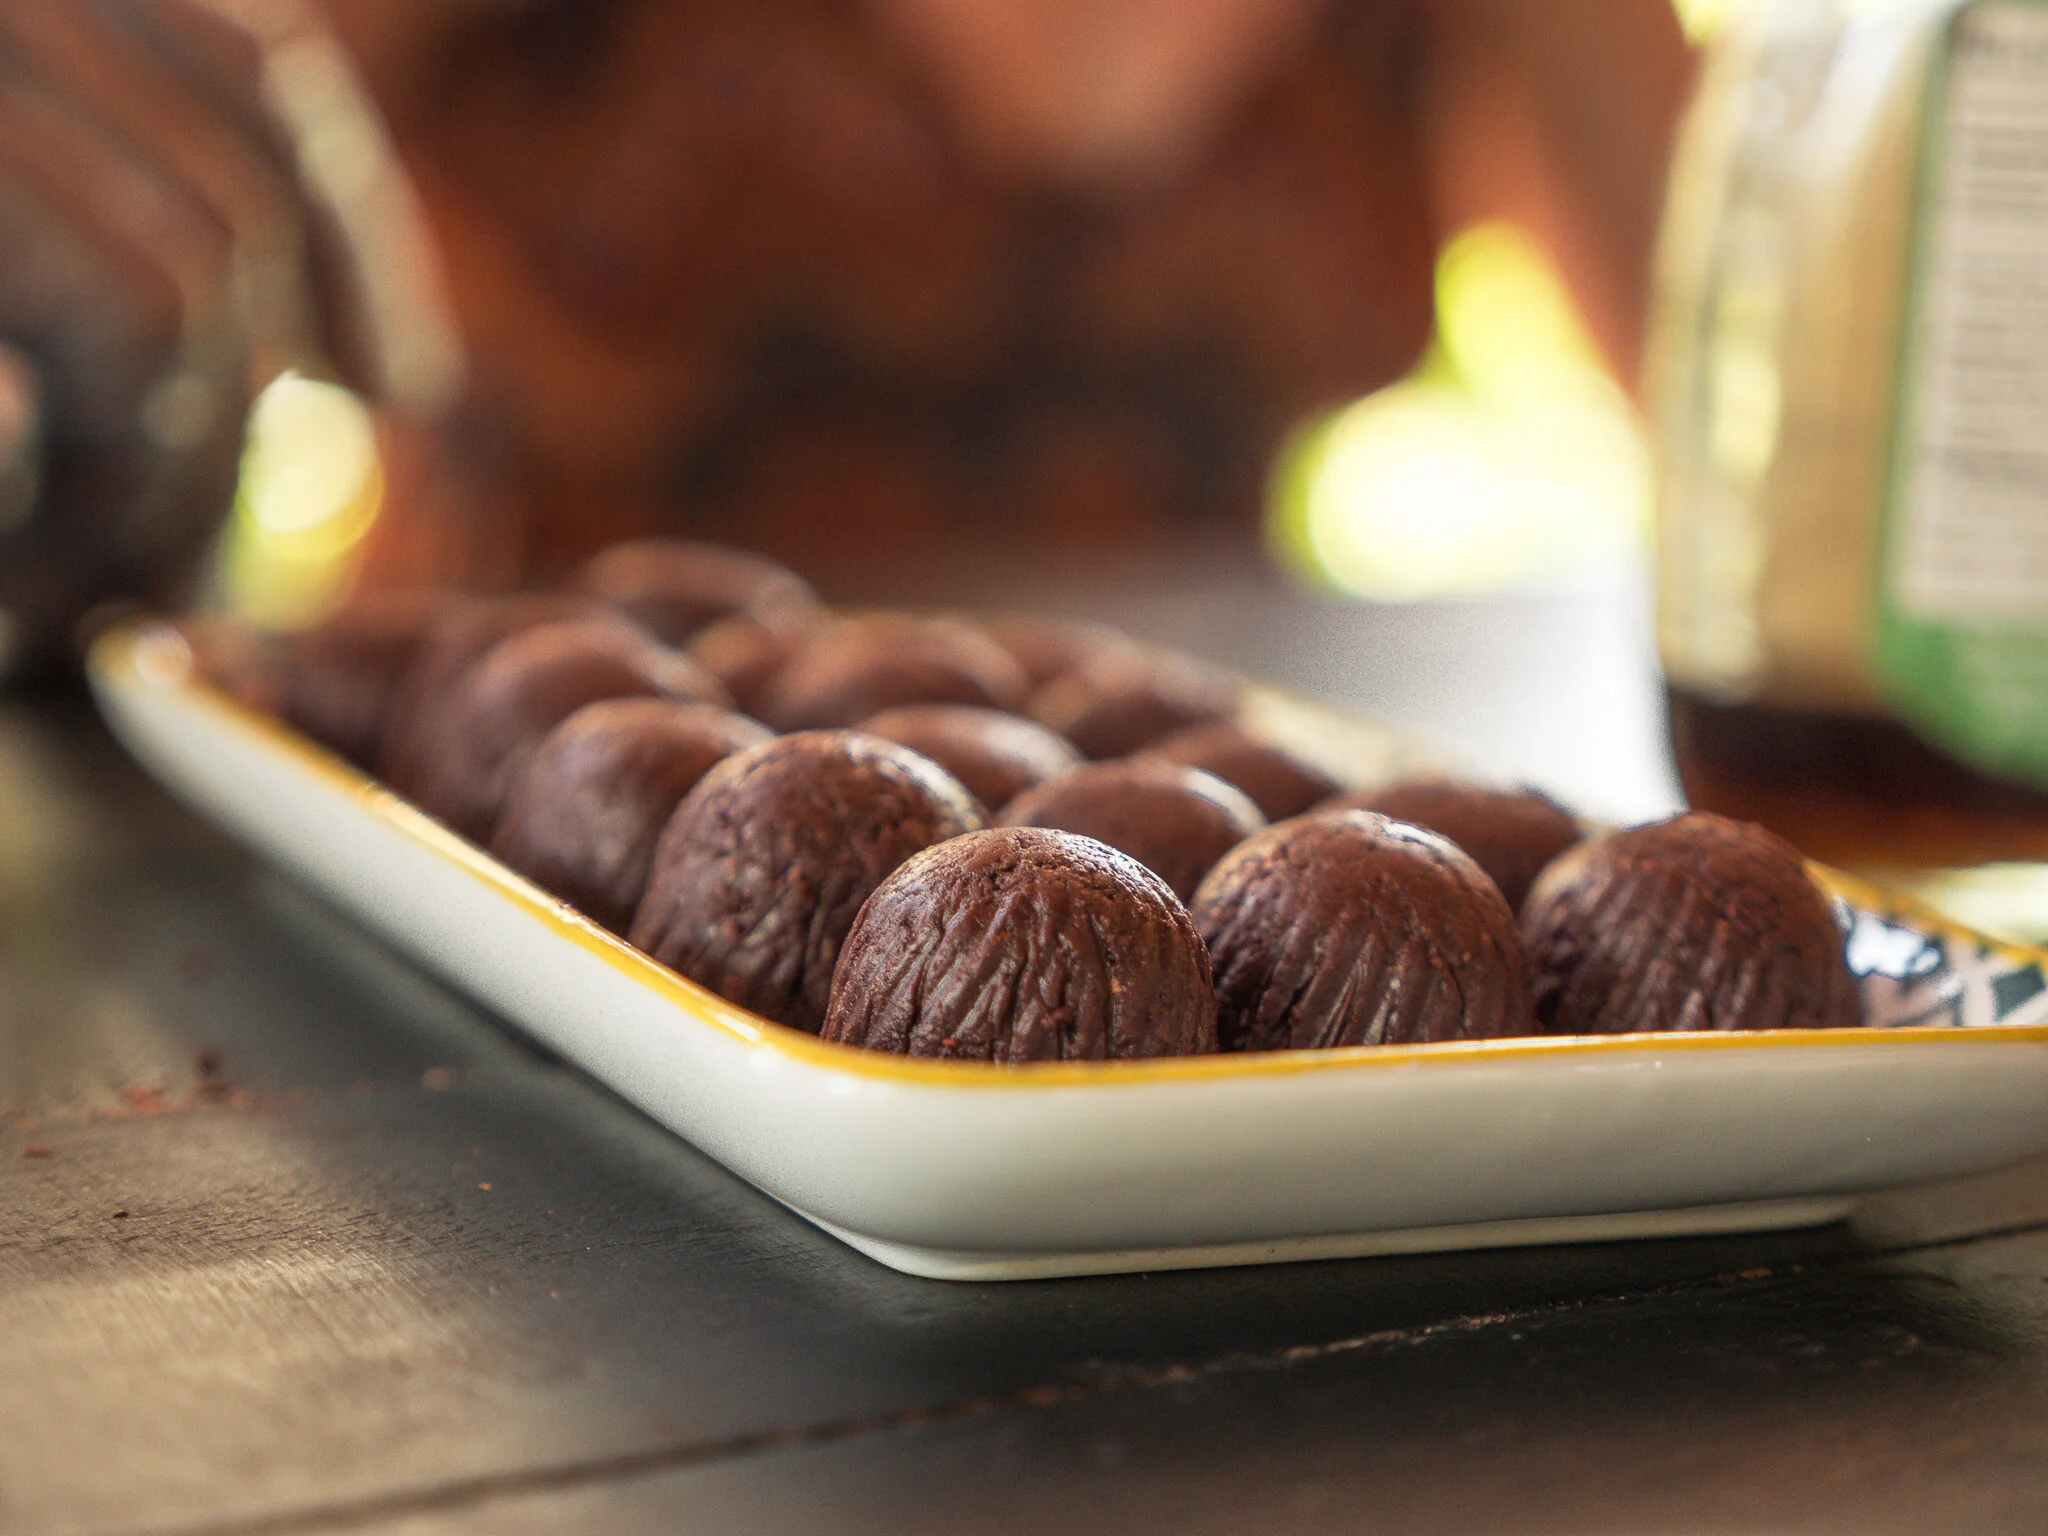
Locally sourced and made chocolate from our neighbors at La Iguana Chocolate

Life of Spice: Farm to Table Cinnamon
When cooking over a fire, I often imagine that I am a witch brewing a potion. As I stirred with a big wooden spoon, the cinnamon began to sizzle, wafting its wondrous fragrance into the air and taking me to another place.
By Dani, Apprentice 2020

Farm to table cinnamon sticks!
Local Cinnamon
One morning at the Rancho, I was toasting some cinnamon to try to spice up an orange kefir water concoction. When cooking over a fire, I often imagine that I am a witch brewing a potion. As I stirred with a big wooden spoon, the cinnamon began to sizzle, wafting its wondrous fragrance into the air and taking me to another place.
The scents of spices are fantastical, and I have always thought that the spice rack is a mystical, magical place of otherworldly ingredients. As I learn more about spices , that magic has not faded, but rather has revealed new perspectives. We grow cinnamon in the permaculture orchards at the Ranch, and using this magnificent spice from tree to table has made me appreciate it so much more.
The cinnamon in my potion that morning is about as local as you can get. As the cinnamon toasted, the aroma traveled into my nose, triggering my memory, as scents often do. I was captivated by the smell when someone walked into the food smithy and exclaimed, “It smells like Christmas!” I snapped out of my cinnamon induced daydream and concurred. Even though it was a hot February day in the tropics, with temperatures around 85 degrees Fahrenheit, I could almost taste the crisp cold air of Wisconsin. It took me home. To me, the scent of cinnamon evokes feelings of cold winter nights with Christmas cookies by the fire. It feels like cool fall air and spiced apple cider at the orchard. It tastes like pumpkin pie at the dinner table. Cinnamon is for days of wool socks and sweaters. It smells like home to me. It is cozy. It is comfortable. It’s nostalgic.
But I had never even seen a cinnamon tree until coming to the tropics. So how did I come to associate this tropical flavor with with cold cozy evenings in Wisconsin? How did it become the holiday flavor of a climate where it doesn’t grow?
Origin of the Spice
By definition, spices come from the aromatic parts of tropical plants: roots, flowers, seeds, or bark. Unless you live in the tropics, the likelihood of consuming local , farm to table spices is slim to none.
Cinnamon comes from the bark of an evergreen tree which is native to Sri Lanka (Ceylon), and in ancient times, it was one of the most sought after spices. Like pepper, it has thousands of years of history in the globalization of foods and was known in China as early as 2700 B.C. It is even mentioned in the old testament as well as in Sanskrit texts. The globalization of cinnamon is not new, and the magical qualities of cinnamon ignited ideas of paradise in the minds of many, causing them to set sail in search of the heavenly lands from where they believed the magical spice must have come.
Cinnamon has a powerful scent, so powerful that it played a part in progressing the sharing of cultures and globalization as we know it. Some wonderful new cuisines came out of the spice trade, but it was not without a cost; the spice trade was also linked to slavery and centuries of abuse towards the local producers. It is important to remember both the fascinating and dark histories of the foods we eat.
Today, Great Britain is the leading consumer of cinnamon, followed by the United States and Spain, all places where the spice does not grow. The word, cinnamon, comes from the Greek word for spice and the prefix ‘Chinese’. Cassia is another spice, closely related to cinnamon, and they are often sold interchangeably, though cassia has a more delicate taste. Most of the cinnamon sold in the United States is actually cassia. Cassia is native to Myanmar and northern India as well as some Indonesian islands. Records of this spice date back over 6,000 years, and it was grown around present-day Hanoi during the Han Dynasty.
Cinnamon and Cassia can be distinguished by their color, true cinnamon being tan and cassia being more of a darker reddish brown. I had no idea that most of the cinnamon I have consumed in my life was probably not even cinnamon
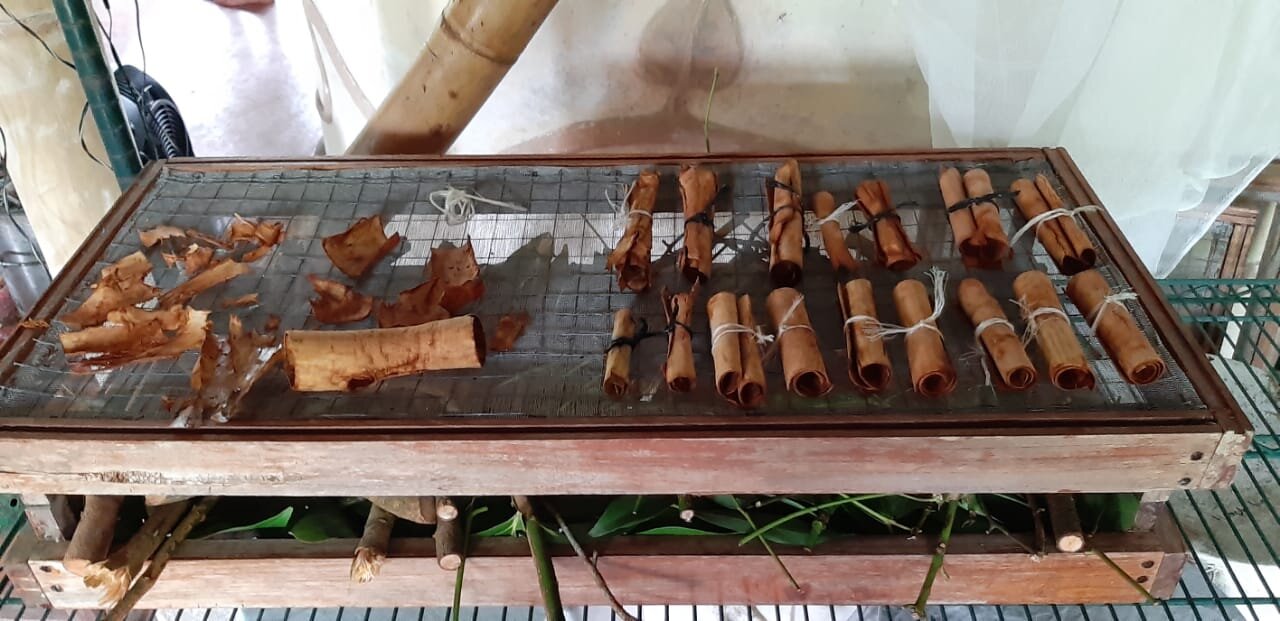
Cinnamon sticks rolled and drying
Permaculture Processing
The journey of cinnamon from the farm to our tables is neither short nor simple. After harvesting and processing cinnamon here at the Ranch, I would argue its processing is truly an art.
Ideally, cinnamon is grown to be long and straight to maximize yields. The offshoots should be pruned as they take energy away from the trunk, which is where the good stuff is. The darker bark is harvested to use as the spice. Once the tree reaches about 2 meters and the trunk is about 2-4 inches thick, it is ready to harvest. It’s good practice to chop the tree down to 10-15cm at a 30-degree angle for water and sun protection. After the tree is chopped, it will produce 2-6 new shoots, increasing the yield of the next harvest which will be ready in about 2 years. This practice can be continued for the lifespan of the tree. With a permaculture mindset, we harvested some cinnamon at the Ranch with hopes that in a few years, yields will increase with the new shoots. After chopping the tree, we took off the lateral branches and leaves. The wonderful cinnamon flavor is also contained in the stems at the base of the leaves so we saved and dried these for tasty tea. We then chopped it into smaller, more manageable pieces, and using a knife, we shaved off the outer bark. The next layer down is called the cambium, and that is the stuff you want in your carrot cake.
The cambium is the part of the tree between the outer bark and the heart wood and what we know as cinnamon. To separate it from the heart of the tree, we made an incision using a knife down the entire length of the piece. Then, we slowly began to peel it off using a spoon, trying to keep it is one piece. It was not easy, especially if there was a knot in the wood. Finally, we rolled the cinnamon cambiums and tied them, and put them to dry. Sometimes cinnamon is cut into quills of over three feet in length! Though I have always thought that cinnamon sticks were beautiful in form, after struggling with my three-inch piece, I realized there is a whole layer of beauty I had not seen. I was blind to the artists behind them, the growers and processors of this special tree.
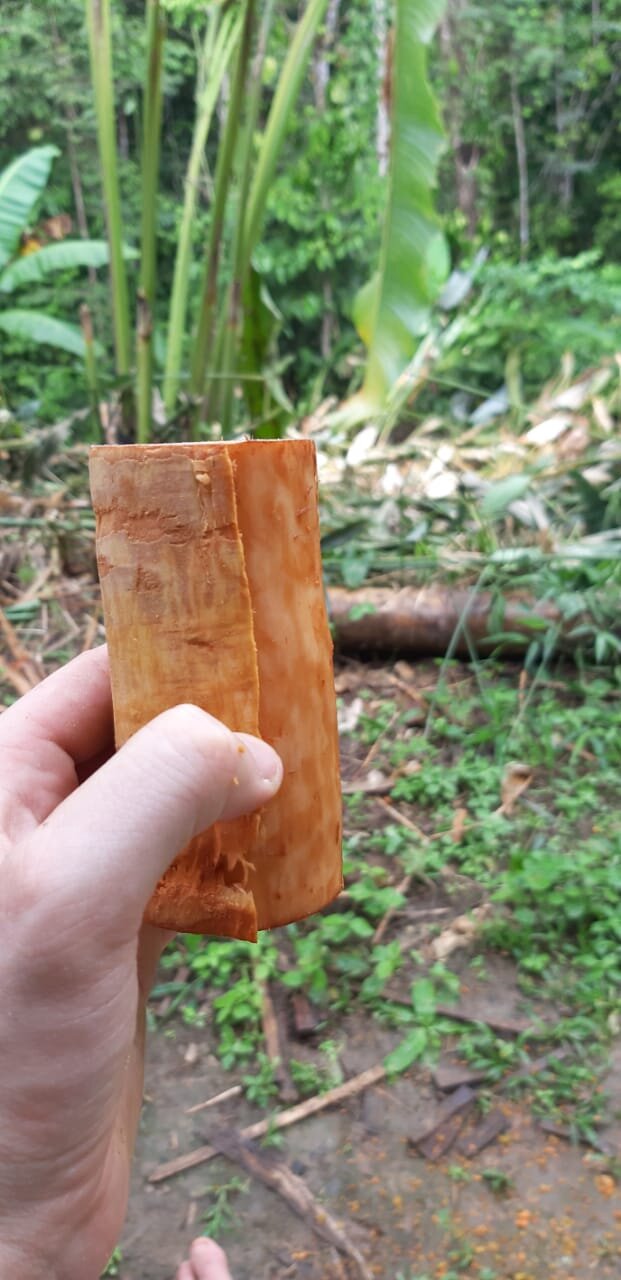
The outer bark shaved off, exposing the cambium layer
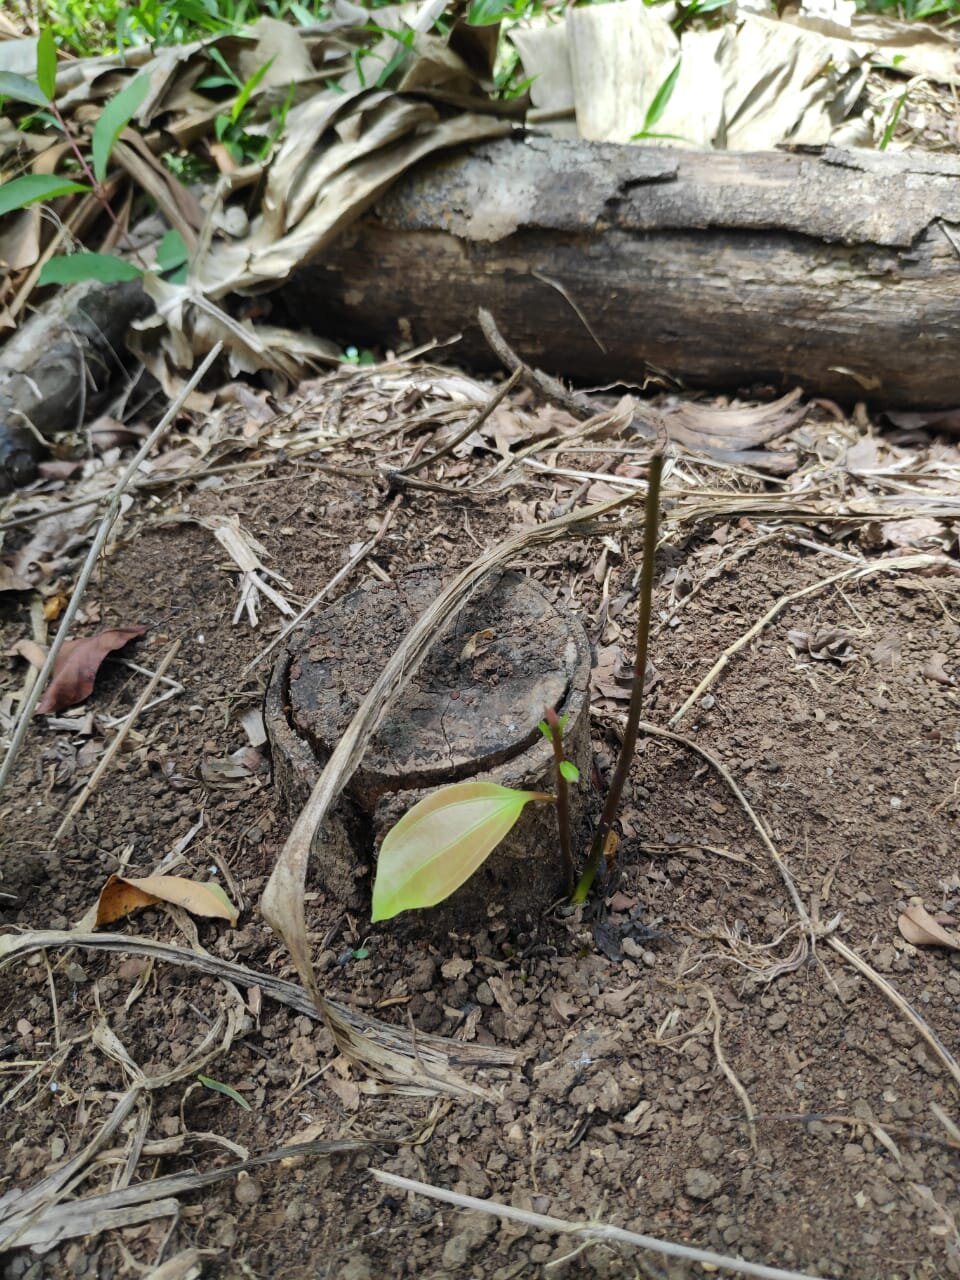
The new shoots coming up
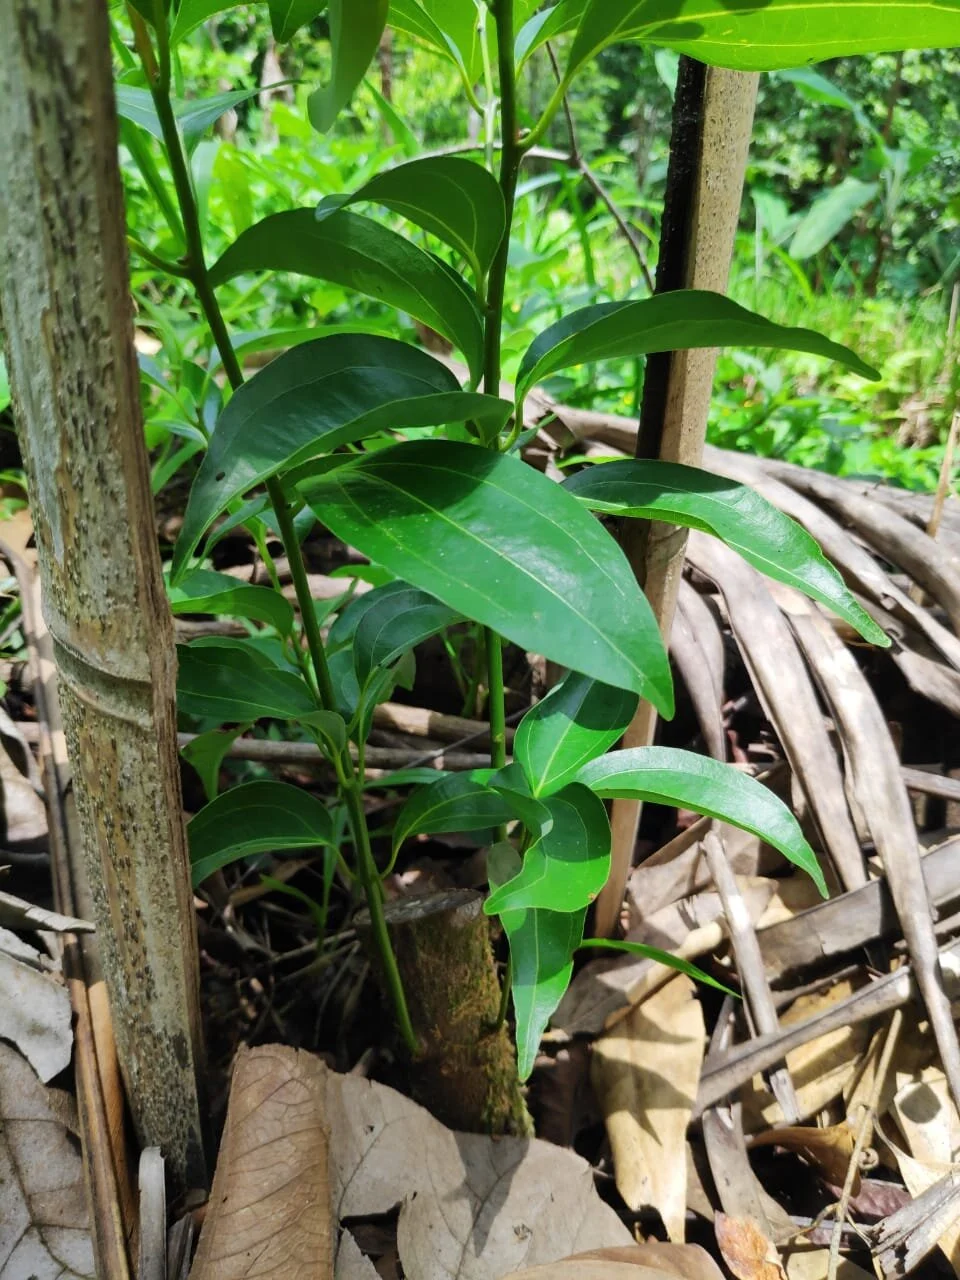
A healthy cinnamon tree re-growing
Conscious Consumption
There is so much in the food we eat: natural resources, back-breaking labor, rich traditions, culture, history, and beautiful artistry. It is important to consider where our food comes from, not only for our health, but for the well-being of those who grow and process our foods, and for the sake of our planet.
I think this is more difficult when it comes to spices. But these days, there are companies striving to produce fair trade spices through sustainable farming practices. Vermont-based Forestrade, started in Sumatra, demonstrated to local farmers how cinnamon can be grown without clearing huge sections of land that would endanger the surrounding national park. They now collaborate with 6,000 indigenous producers in Indonesia and Guatemala. Another example is a group of Hindu People on the mainly Buddhist island of Sri Lanka, the Salagama, who traditionally peeled the cinnamon bark from the trees. These people were devastated by the spice trade, controlled by the English, the Dutch, and the Portuguese. Today, the situation has changed, and they are able to sell their product to a fair trade association for 4o percent above the market rate.
These programs only work if we as consumers are aware of where our spices come from and are willing to pay a little more for our products. Through our consumption habits, we have the power to improve the lives of so many. I encourage everyone to enjoy cinnamon in their hot chocolate on a crisp cold evening, but as the aroma fills the room be mindful of how it got there. Spices truly are incredible, and I hope that while we are doing our best to eat local, we can be conscious of the magic contained in the spice rack.

Achiote to be made into paste

Fresh turmeric harvest

Farm to table peppercorns
Want to learn more?
Stay tuned for my next Life of Spice blog! And if you didn’t read my last blog about farm to table black pepper, read it here!
Want to learn more about growing your own foods and spices? Join us for our annual Permaculture Design Course or Agroforestry Skills Workshop, you can find more info on both these workshops here.
Check out these past articles about farm to table foods we are planting and processing here:
Sources and Further Reading
Heinerman’s Encyclopedia of Healing Herbs and Spices by John Heinerman
Spices – A Global History by Fred Czarra
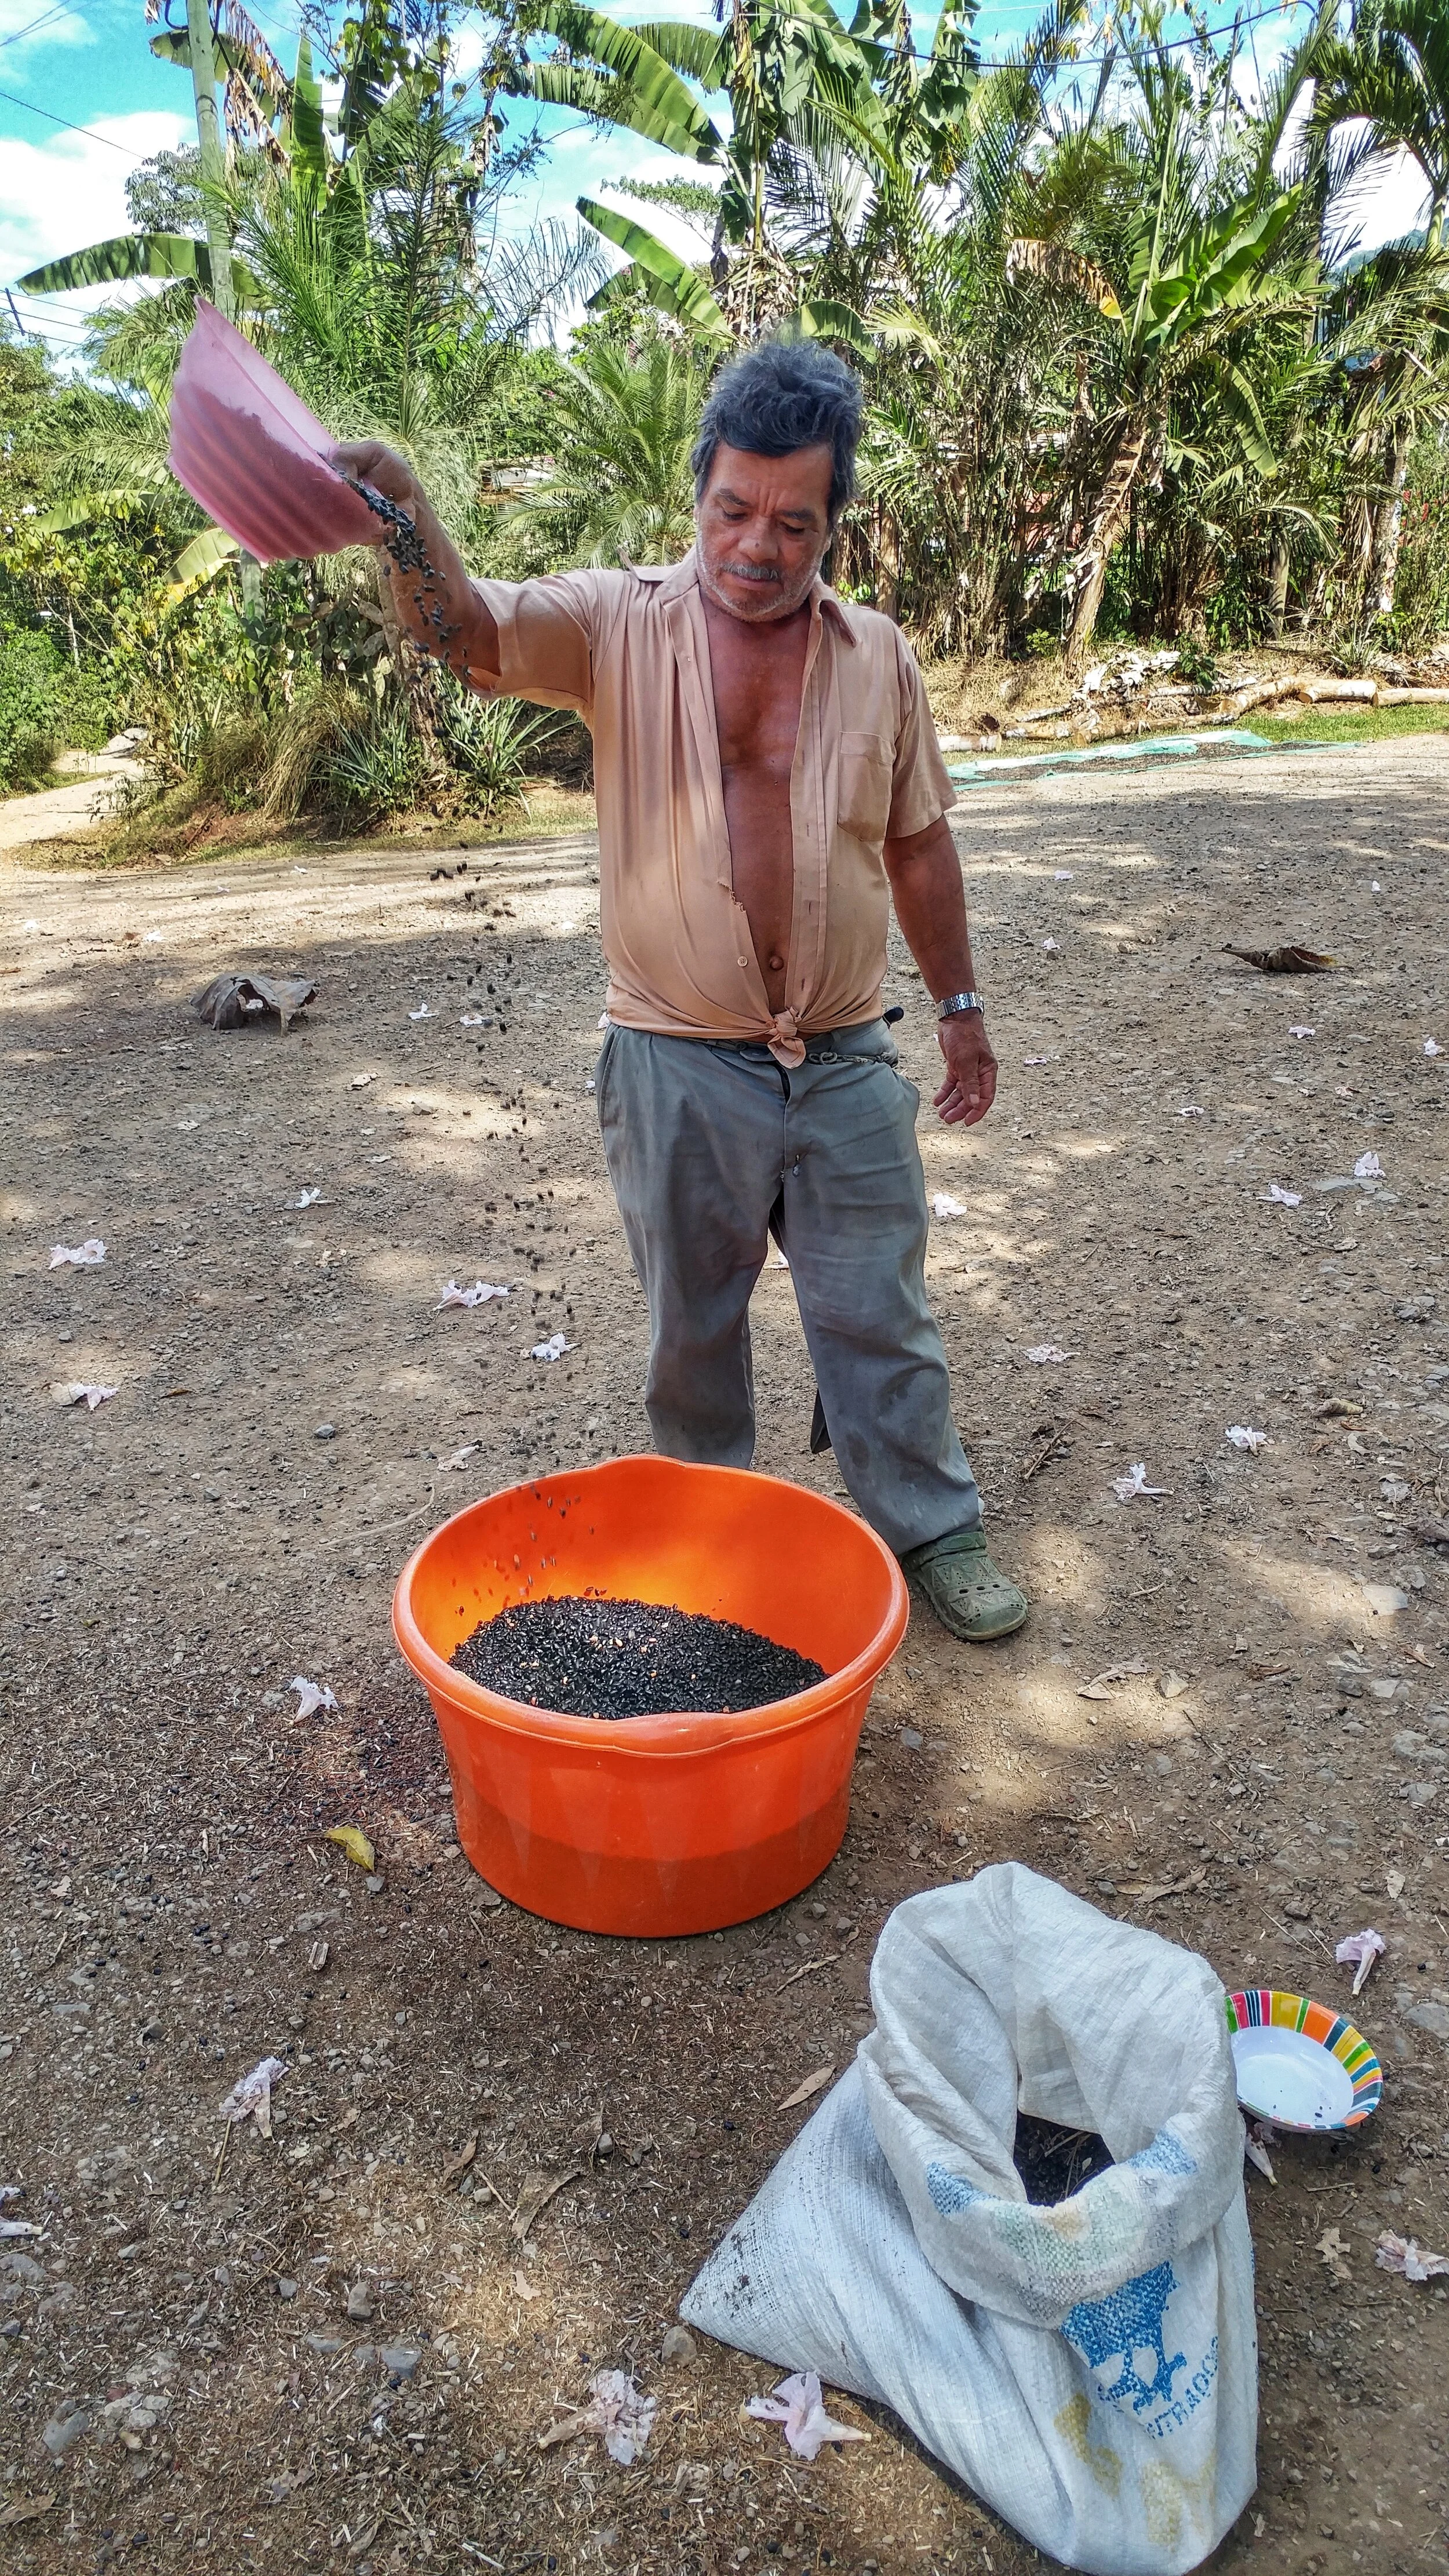
Eating Local: Reconnecting to Food
Food nourishes us and forms the heart of our community. Understanding where it comes from, how it is grown, and who has grown it helps us value our food in a way that we have lost in the modern era. We can get overwhelmed by the challenges of the modern world and food can provide us with some of the easiest and most accessible ways that we can begin to regenerate our planet.
By Nic, core team member
Food nourishes us and forms the heart of our community. Understanding where it comes from, how it is grown, and who has grown it helps us value our food in a way that we have lost in the modern era. We can get overwhelmed by the challenges of the modern world and food can provide us with some of the easiest and most accessible ways that we can begin to regenerate our planet.

Pejibaye: One of the delicious, nutritious and locally available staple tree crops
Since the agricultural revolution, our communities have been molded by the food we produce. Thriving when abundant and starving when scarce. The quest to guarantee our food security has led to mass population movements, wars, terrible famines and giant metropolises. But as we stand on the edge of environmental catastrophe, does it also hold the key to our own redemption? Does revisiting and re-valuing what has become just another commodity on the store shelf give us the opportunity to take back the power that we have given up with our disassociation from our food production and provide real tangible solutions to the current climate crisis? In Paul Hawken’s excellent book Drawdown: The Most Comprehensive Plan Ever Proposed to Reverse Global Warming, 2 of the top 3 solutions are food based (reducing food waste and eating a plant based diet). Each one is totally achievable on an individual level and something that we must demand on a wider commercial and political level.
Working at the Ranch people often ask me what they can do to be more sustainable or environmentally friendly when they return home. This is a question that I could answer in any number of ways. The answer that is the easiest and most accessible is to simply “eat local”. This is by no means the only answer, but today I am going to discuss just this one, simple act. that could help us move to larger changes for our climate and population.
Eat Local
Nelson holding a giant squash he grew for us.
Since the early days of the Ranch, local foods have been a cornerstone of our cuisine. One of our goals is to create an easy market where local producers can sell their products. Not only does this reduce the carbon footprint of our meals, it helps to ensure that this region’s farmers continue to grow food. Unfortunately, people worldwide are moving to urban areas and abandoning the farming practices of their parents. Essentially, by buying whatever is brought to our door, we are saying to the local community; “if you produce it, we will buy it.” We want to let them know that we value their products and are committed to work with them to maintain the food security of our region. After 20 years we continue to buy from many of same producers. This results in delicious, locally grown food for our table, while providing an essential income to numerous households in our community.
Over the years the Ranch has produced increasing amounts of its own food as our agroforestry systems have matured and our understanding of tropical agriculture has evolved. We serve over 20,000 meals yearly with about 90% of our calories coming directly from the Ranch, the community of Mastatal, or the local area (within a 20 km radius from the Ranch). We are fortunate to still enjoy food security regionally. We purchase the following directly from the producers themselves: milk, eggs, cheese, sour cream, tapa dulce (unrefined sugar cane), coffee, corn, beans, rice, squash, yucca, plantains, avocados, chicken, pork, lard, peach palm, citrus, papaya, pineapple, citrus, mango, palm heart, lettuce and chocolate. We have created a diverse and delicious menu based on what we can either grow or buy from our friends and neighbors. We have taken the cuisine of the “ticas” and tweaked it a bit while adding an international flare.

One of our indulgences: wheat based pizza party!
This transition to eating a local based diet has taken some adjustments. As Westerners, our diet is heavily dominated by wheat products. Wheat comes in the form of cereal for breakfast, bread in a sandwich for lunch and pasta for dinner. Wheat is by far the most heavily consumed grain in the western world. After moving to Central America we needed to adapt to a new food culture full of new ingredients and tropical comestibles. We look to the wonderful traditions of our region and Asia to inspire our new diet and to create new and wonderful food that is based on locally available ingredients. We are not purists however, and of course we love to have a pizza party every now and again, but we have spent much time experimenting with wheat free, local doughs (read about our Permaculture pizza quest).
Why is eating local so important?
There are many pieces that make eating local such powerful change. I think one of the most appealing is that it is relatively easy to do, it is not really much of an inconvenience and does not require huge changes to your lifestyle. What follows are some of the reasons I believe eating local to be important.
Local Economy
By creating a market for local producers to sell their agricultural products we are supporting the local economy. This happens on many levels that are all intertwined. Firstly, you are valuing agricultural products that people know how to grow successfully. This means that farmers in our region can continue to do what they know how to do and are not forced from their land to cities to find other work. Secondly, they can get a much better price selling their products direct to the consumer as this removes the middle man (the supermarket) from the equation. When you buy a $3 head of lettuce, how much of that do you think goes to the farmer and how much goes to the supermarket? Thirdly, it keeps the money in town. By keeping transactions local the money tends to stay in our community, creating a circular economy that can support more than just the farmer. In this scenario the farmer can now buy products from other local people who can develop businesses that further support the community that in turns creates more economy!

We have been purchasing local eggs for Doña Flor for as long as I can remember.
Transportation and Carbon Footprint
This may seem obvious, but by buying local food you are reducing the carbon footprint and the transportation inputs that are associated with that food product. Unfortunately, in our globalized world, many of our products are shipped all over the world before making it to the final consumer. This is not just true of food, but also of many consumer goods. Cotton is often grown in the US and then exported to a country with a cheap labor force and poor working conditions so that it can be fabricated into a t-shirt, only to be shipped back to the US to be sold in the US market! Isn’t that crazy? If we buy our food from a local farmer then we know where it has come from and we know that the transportation of that food is minimized.
Fresh Food

Farm fresh: these bananas are simply delicious, ripening naturally.
By reducing transportation, you also increase freshness! Did you know that the majority of fruits are shipped when they are still unripe in order to reduce damage during shipping? The banana is a classic example. When the banana arrives to its destination it is gassed with a chemical that induces the fruit to turn ripe so that it can be sold at the market. This effects freshness and flavor massively, not only because these commercial fruit varieties have been selected for good shipping quality rather than taste, but also because when the banana ripens like this it tastes totally different. I have eaten many supermarket bananas and after now living in the tropics can confidently say that they’re weird. They never hover in the perfect ripe zone like a farm fresh banana does, and it goes straight from green to brown and bad tasting. A banana that is harvested freshly and allowed to ripen naturally has a far superior flavor and hovers in that perfect zone of ripeness for many days.
Developing Relationships
By interacting directly with your farmer you can have your say about what is grown and how it’s grown,. You can visit their farm and see for yourself the practices that they use. This is a powerful tool as there are many misunderstandings as to how food is grown and where it comes from. This can only be reconciled through personal experience and empathy. Maybe you really love blueberries, but the organic type only come from far away, whereas all the local blueberries are not organic. Why might that be? Maybe this is worth further investigation that developing a relationship with some local berry farmers might shed some light on. Maybe this will lead you to understanding something that you didn’t know about berry farming in your area, or maybe it won’t, but you won’t know until you investigate!
Creating Community
Our globalized world has broken up small communities where everyone traditionally knew one another. It is not uncommon now to not know your neighbors or the people who live on the same street as you. This has broken down the fabric of our communities and our relationships with one another. It is up to us to rebuild those relationships and it is going to require time and effort. A great place to start is with your food choices. If you can buy food directly from farmers then you can begin to create that direct relationship with your food and the land that grows it. Maybe it will be with a local butcher, or a local shop, where you get to know the person or people who are selling the food. Once you have formed this relationship you can cultivate a mutual understanding of what you are looking for in your food. You will begin to see the same people also shopping in these places and this is the way that we can begin to cultivate community for ourselves in urban and rural environments. Another fantastic place to develop community is at your community gardens, “pea patches” or allotments. Food is so fundamental to us as humans that communities based around food are incredibly powerful and resilient.
Connection to Place
The average American moves 12 times in their lifetime. This is a long way from our lives just 100 years ago when most people grew up and died in the same house or the same town. By moving so frequently we lose our connection to place. Our homes, our food, our street are just commodities to be bought and sold. This loss of connection to our local environment creates a disconnect between our realities of the world and the limitations of our land. Avocados, believe it or not, are not in season all year round. You wouldn’t know it by going to the store though, as they are pretty much available all year round. In fact most food products are available all year round and we don’t even think about it. By eating locally you are by default also eating seasonally and this will allow you to truly connect to your place and environment, deepening your connection to the land and local climate.

Lights on in the food smithy!
How Can I Eat Local?
What follows are some of the simplest and most accessible ways that we can begin the transition to eating local.
Farmer Markets
In most urban centers now there are farmers’ markets. Usually they take place just a day or two a week so you might need to schedule time to go to these markets when they are open. Here you should be able to find local, seasonal and fresh food.
Directly from Farmers
If you live in a rural area it is likely that you have farmers all around you. You can approach them directly, ask them what they are cultivating and see if they already have a farm stand or go to farmers’ market on certain days. This is an opportunity to get know your neighbors! If you live in an urban center, check out if there is some innovative commercial urban or city farm that is selling their produce.

Tapa Dulce: locally sourced sugar - purchased directly from the local farmers
Grow your Own
Depending where you are, this could be on your balcony, at a community garden or in your yard! The scale of your new garden will have to be proportional to your available space and your time. Growing herbs on your window sill is a great place to start!
Local Business
Try and buy as much as you can from local business rather than going to a supermarket. It is not always cheaper from the supermarket and the quality and freshness can vary massively.
CSA or Veggie Box
If you can’t find a farmers’ market you could look into a veggie box or CSA (community supported agriculture). These are great ways to directly support farmers and you can often get the food delivered or pick it up close to your house to make it more convenient.
Farm to Table
Lastly, where do you choose to eat out? It might be worth exploring a local farm-to-table restaurant and make that your special treat for birthdays or special occasions.

Farm to Table meal at the Ranch, green banana chips, pejibaye dip, starfruit pickles and jackfruit salsa….Yummy!
I hope this has inspired you to think about your food and where it comes from and how to incorporate more locally available foods into your diet. Next time you see a farm stand, stop, buy your weekly fruits and veggies from there, and skip the supermarket. It wasn’t long ago when we all had a hand in the food we ate. To think about the separation that the majority of the world has from food now is astounding. So, plant something whether it’s big or small, find out where the nearest farms are to you, and change your diet to eat locally available products. I bet you’ll enjoy fresher, more delicious food and make a few connections along the way.

Farm to Table Permaculture Pizza
Being a permaculture and sustainable education centre, we try to source as many of our ingredients either directly from the farm itself, or from the local community. Some parts of the pizza are easy to source locally, others not so much. This has come to pose a few challenges at times, and often we make some compromises for the sake of indulgence.
By Marco, Apprentice 2020
Why pizza?
Pizza. What a concept. Basically just some bread with tomato and cheese on top. But, we all know it’s so much more than that. I’d go as far as to say it’s probably one of the, if not the, most widely adored foods in the world. In fact, it sometimes feels like people answer “what’s your favorite food?” with something other than pizza just to not come across banal, even though deep down they know all they really want is a calorific disk of doughy deliciousness. At the Ranch we don’t kid ourselves. We know what we want and we satisfy that desire whenever we find a good enough excuse to fire up the cob oven – i.e. birthdays, leaving parties and periods of over a month without pizza.
Rancho Pizza Parties

Our new cob oven with just a few finishing details left
Our farm-to-table pizza parties are pretty epic, and not just because of the pizza (though, obviously, they’re awesome). No, a pizza party entails the whole community coming together and working towards a common goal. They take up most of the day and require a fair amount of coordination. We divide the labor up like so: 3 people on toppings, 3 people on dough, 1 person on tomato sauce, 1 person on fire building, and 1 person cooking. The fire alone takes 3-4 hours to get the cob oven up to the right temperature (800-900°F); the dough must be prepared 4-5 hours in advance to give the dough enough time to rest and the dough makers enough time to mix, knead and roll 40+ pizzas; sauce is usually made a day in advance to give it a chance to really cook down and yummify, and the toppings…well, you get the picture. All of this we try and do with permaculture principles in mind, which is what drives the evolution of our pizzas forward…
Farm to Table Pizza
Being a permaculture and sustainable education centre, we try to source as many of our ingredients either directly from the farm itself, or from the local community. Some parts of the pizza are easy to source locally, others not so much. This has come to pose a few challenges at times, and often we make some compromises for the sake of indulgence. However, it has encouraged us to become creative with our recipes; trying to find local, tropical alternatives to some of the classic Italian
ingredients. So, below is a break-down, top to bottom, of our permaculture pizzas…

Cheese
The cheese we use on our pizzas comes from our friends’ farm about 1/2km down the road. It’s the same place where we get our milk (learn to make dairy kefir here) and the cow manure for our biodigester. Needless to say, they make good sh*t.
Toppings
Easy. You can put anything you want on a pizza! Here are some examples of toppings we make on the Ranch:
Fried banana flower – tastes a bit like artichoke when it’s been lacto-fermented for a few days and then fried with a bit of garlic (and soy sauce, if we’re feeling naughty). Learn about how amazing bananas are here.
Katuk shoots – katuk is an edible green that grows abundantly on the Ranch. The new, young shoots from these are crunchy and slightly nutty, reminiscent of asparagus. Learn about greens that thrive in the tropics here.
Grilled pineapple – Classic. Suffice to say that I am 100% a fan of pineapple on pizza *Italian ancestors turn in their graves*. Sorry, not sorry. Sweet and salty combo. It’s delicious. Plus, we grow a lot of them so, perfect for farm to table.
Farm fresh papayas
Tomato Sauce
A tough one. Tomatoes don’t grow well in this area, so we have to buy our tomatoes from elsewhere, they are typically coming from the highlands of Cartago about 100km away. Can’t be having pizza without tomato sauce, it’s just not right. And hence, this was one of the areas where we compromised… was. Then, we discovered papaya sauce! I must admit, I was skeptical at first. Being half-Italian, I grew up with nonna’s and mamma’s sugo di pomodoro, and a good tomato sauce is a rite of passage in my family… but this papaya stuff is really good! In fact, when it’s on a pizza with the cheese and toppings, it’s quite difficult to tell the difference. It’s also way quicker to cook than a tomato sauce as there’s less moisture in papayas. The recipe is the same as it would be for a tomato sauce – oil, onions, garlic, oregano, basil, splash of vinegar (banana vinegar recipe)/lemon juice – just that you replace the tomatoes with papaya and add a little more vinegar and salt to compensate for the added sweetness of the papaya. We also tried a 50-50% mix of tomatoes and papaya, which actually was my favorite of the 3 sauces we trialed (tomato sauce, papaya sauce, tomatoes + papaya sauce) as it had a great balance of sweet and sour. Now, with every passing pizza party, we are reducing our dependence on regional tomatoes and turning towards our locally grown, tropical, farm to table variation, and that’s alright with me.

Rolling dough
Dough
This is the biggie. How to replace wheat flour, which has to be imported from the US or Canada, with something from the farm? A question that has no doubt tormented many apprentices before me, and one that will probably continue to torment those after me.
Wheat’s going on?
The thing about wheat is that it’s great. It’s just great at what it does. Or, more precisely, what
we’ve bred its seeds to be able to do for us over millennia. You see, plants want to provide their seeds with the best chance in life and so they store energy in them in the form proteins, which the seed can access, once germinating is triggered, to power its growth. It’s sort of like a tiny packed lunch that it can take with it into the wide world before foraging its own food from the ground with roots. Most grasses have a protein called globulin in their packed lunch, but in wheat’s packed lunch there are two different proteins - glutenin and gliadin. Yum. When wetted these two form an elastic mesh structure known as gluten. They work in unison in dough – one allows the dough to be stretched (gliadin), while the other helps the dough contract back in on itself (glutenin). When baked, this elastic mesh helps trap gases and aromas created by the yeast and bacteria present in the dough, which is why bread rises, or in the case of pizza, why you get those lovely little puffy bits in the base. The trouble is that gluten is difficult to replace and so replicating wheat-based pizza dough is tricky… did we let that deter us? Pff. As if.

Dough experiments
This past pizza party we experimented with a few different doughs. Keeping permaculture principles in mind, I wanted to make use of the resources we have readily available on the farm. In this case, I decided on cuadrado (type of Musa sp.) and yuca. First, we peeled, sliced and dehydrated the cuadrado and yuca. Next, we milled the dried slices in a corona mill to create the two flours (one of each). I then divided them into 6 bowls (3 for each) and mixed them with equal parts water. Each bowl was to be a different combination – solo flour, 50-50% with wheat, dried water kefir SCOBY. (Dried SCOBY is supposedly a sort of faux xantham gum, which we’ve read may provide some of the same characteristics as gluten… worth a shot!). Below is a summary of the various combinations we tried:
Cuadrado flour + water (5-day ferment)
Cuadrado flour + wheat flour + water (5-day ferment)
Cuadrado flour + water + dry SCOBY (5-day ferment)
Yuca flour + water (5-day ferment)
Yuca flour + wheat flour + water (5-day ferment)
Cuadrado flour + water + dry SCOBY (5-day ferment)
Cuadrado flour + water (no ferment)
Yuca flour + water (no ferment)
Cuadrado flour + water + baking powder (no ferment)
Yuca flour + water + baking powder (no ferment)
Cuadrado flour + yuca flour (no ferment)

Local pizza dough trials
There was enough dough to make one small pizza of each. The results? Quite varied, actually, and
surprisingly successful. I must say that I wasn’t particularly hopeful, but was very pleasantly surprised. They had a kind of store-bought frozen pizza vibe about them… not amazing, but also not awful. There didn’t seem to be any outstanding winners either, and people were choosing different ones as their favorites, implying that there is potential to please a variety of palettes. In my personal opinion, the Cuadrado sourdough was the best one as it had a beautiful dark, whole-grain look and a unique but not overpowering aroma and taste. The Cuadrado-yuca mix was also quite popular and seemed to have the closest resemblance to actual pizza dough.
So, in conclusion, I think there is definitely potential and progress has been made… but, that wheat
pizza is still on top. To be continued…
Conclusion
So, there you have it folks, farm to table permaculture pizza, Rancho style. Please comment if you’ve
had any experimental pizzas you’d like to share! Pura vida.

Robin cooking the dough in our cob oven
want to learn more?
Join us for one of our upcoming workshops to learn more about sustainable living and ideas.
Or come stay as a guest and maybe you’ll luck out being here when we have a pizza party! Either way you will enjoy farm fresh meals, access to our beautiful property and facilities including acres of wildlife refuge, and be welcomed into an alternative community living in the rural jungle of Costa Rica. Hope to see you here someday!
Stay tuned for more farm to table recipes and ideas!
Check out past blog articles on food, fermentation and more:

Bamboo Shoots
Bamboo is of huge economic value and is not only used in the building industry, but it can be used also for eating (more on this later!), as a cooking device, burnt for charcoal, woven into a fabric, made into paper, used as a musical instruments, and much more!!
By Nic, Core Team member
Bamboo
Bamboo is a wonderfully sustainable building material due to the speed in which it grows and its weight to strength ratio (stronger than steel for its weight!!). Bamboo is of huge economic value and is not only used in the building industry, but it can be used also for eating (more on this later!), as a cooking device, burnt for charcoal, woven into a fabric, made into paper, used as a musical instruments, and much more!! At the Ranch we use it for many of these things; the most noteworthy being our use of it in our natural buildings (read here about how to treat your bamboo). We have 6 structures that are built almost entirely from Bamboo including a nursery, a meeting room, our classroom and the popular guest structure the Hooch. We have also used it as firewood and to make biochar and we have several bamboo instruments. Today however we are going to talk about the latest way we have learnt to use bamboo and that is in our farm to table world!

A clump of bamboo on our farm
Bamboo as Food
Humans have a long history of eating bamboo, but we are not the only animals that love eating bamboo. The Giant Panda loves eating the young bamboo shoots as well as the leaves and stems, along with a number of other animals including the bamboo lemurs of Madagascar and mountain gorillas in central Africa. Chimpanzees have also been seen drinking fermented bamboo sap which has turned alcoholic. It will not be a surprise then to hear that Yes! we can eat bamboo too, in fact its delicious and during the beginning of the wet season it is an abundant source of food.
At Rancho Mastatal we have some of the most revered species of bamboo for eating and for building. The species that we have that are known for providing tasty bamboo shoots are Dendrocalymus asper, Gigantochloa sp. and Bitcheeyana sp.

These are just 2 week old bamboo shoots!
Farm to Table Bamboo Shoots
Bamboo shoots contain a cyanogenic glycoside that produces cyanide in the gut. This is not good for you as you might know, cyanide is very poisonous, so we have to be careful to process our bamboo shoots carefully in order to make them edible. As it turns out this is relatively simple! Just boiling the bamboo for around 10 minutes removes that compound and can also remove any bitterness that can be present in the shoot. We found that adding ample salt and some sugar to the water before boiling makes them instantly a delicious crunchy snack! We have also lacto-fermented them (make a very pungent ferment!), pickled them in vinegar, and just boiled them and added them to dishes. But before you get to eat the bamboo shoots you have to know when to harvest them and how to prepare them.
Harvesting bamboo shoots

Peeled bamboo shoot
Generally speaking you want to harvest them as young as possible as they can become bitter if they are too old. As you may know bamboo grows incredibly quickly, so you will need to keep an eye on your clumps as a daily practice. As the rains start here in Costa Rica around April/May (on the pacific side) we found that initiated the growth of the new shoots. There is a delay though between the start of the rains and the shooting of the bamboo and this will vary be species and by the year. So its safe to say that once it starts to rain you need to start checking your clumps regularly. We found that this year the Guadua started shooting first (not a good bamboo to eat) and Dendrocalymus was the last one to start shooting in late June/July. Ideally you will want to harvest the bamboo shoot when it is around ~10-15” (~25-35cm) tall. Cut it at an angle as low as you can. This will then shed water and is less likely to lead to disease entering the plant. Generally speaking from a well-managed clump you should be harvesting about 33% of the new shoots. Take them from the places where they are not as ideally situated ie. Close to another shoot, with a blocked path etc… To learn more about how to manage you bamboo, join us for our bamboo management workshop.
Processing Bamboo Shoots
Take the bamboo shoot back to the kitchen and cut it lengthwise in half. You should be able to get your thumb and then your hands between the outer layers and the inner solid part and pry off the sheathing. This will leave you with a rather alien looking shoot. At this point it’s a good idea to chop it into strips several inches wide and then slice across the strips into thin pieces. The thinner the pieces the more bitterness is removed by cooking. At this stage you have the option to lacto-ferment the bamboo in a 2-3% by weight salt brine. This produces a very pungent ferment that smells very reminiscent of canned bamboo shoots from the grocery store. By lacto fermenting the shoots you also remove the cyanogenic glycoside and you gain the nutritional value of a raw bamboo and the probiotic qualities of the ferment.
By cooking these thin pieces of bamboo in a salty and slightly sweet brine we were able to produce a delicious treat with a great crunch, the flavor is not too dissimilar to Heart of Palm, although there was a large spectrum of views on what it tasted like. Everyone agreed that it was a delicate flavor that had an excellent texture.

Cut lengthwise
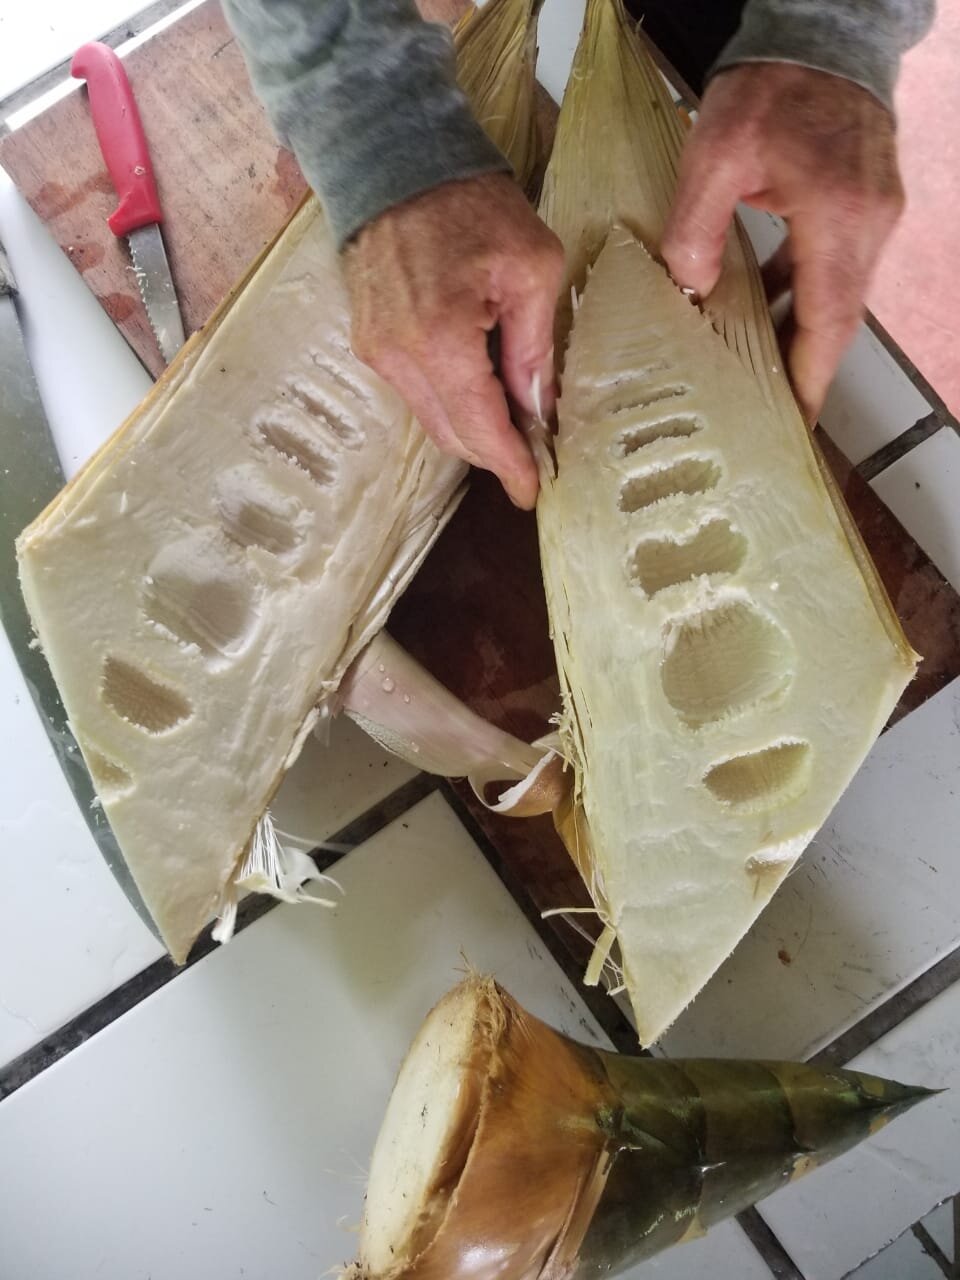
Then using your thumbs peel off outer layers
Bamboo Tea
The upper parts of the shoot that will have been left attached to the sheathing when you pried it out makes a very nice and refreshing tea. By taking a paring knife you can remove any of the soft parts still attached to the sheathing and dry them in the sun (or a dehydrator). This can then be added to hot water and left to steep.

Fresh bamboo shoot
Want to Learn More About Bamboo?
Join us for one or both of our upcoming bamboo related workshops!
Bamboo Management April 6 - 9, 2021
Bamboo Construction April 12 - 17, 2021
Stay tuned and up to date on what’s happening around here by subscribing to our monthly blog and visiting our website.
Check out our past blog article on Bamboo Treatment

Turn Local Rice & Beans into Fermented Bread
Being in Latin America, rice and beans are a part of almost every meal. They make up a huge portion of many people’s diets across the globe. While I love a good Gallo Pinto, I think flatbreads and breads are better vehicles for my condiment consumption!
By Dani, Apprentice 2020
Why is Food important?
We can’t stress enough how important food is, not just here at Rancho Mastatal but in the lives of every human being. Just in case it isn’t obvious food is a major part of our lives, we need it to survive, and the quality of our food directly impacts our health. We should think about what we put in our bodies, where it came from, how it was processed, and why we are consuming it. Being in Latin America, rice and beans are a part of almost every meal. They make up a huge portion of many people’s diets across the globe. While I love a good Gallo Pinto, I think flatbreads and breads are better vehicles for my condiment consumption! Wheat breads are not the best option here in Costa Rica as wheat is imported and therefore not local, but there is an abundance of rice and beans.

Fresh locally harvested beans
Eating Local Food
The forms rice and beans have taken throughout human history vary in incredible ways. Some amazing transformations of rice and beans into more breadlike things are dosas, dhoklas, and idlis, delicious bread alternatives we can make using local ingredients. Dosas are fried flatbreads that have been eaten for many centuries in southern India. Idlis come from the exact same batter, but they are steamed instead of fried. These are produced with a delightful combination of rice and black beans, while dhoklas are made with rice and chickpeas. But you can also create these dishes using any bean or legume! We have experimented with chickpeas, black beans, cowpeas, pinto beans, and peanuts. Yes, peanuts. Finding local alternatives is a sustainable way to eat the dishes you love wherever you are. Use your local beans and I’m sure they will be delicious!
Fermented Food is Better!
All these breads are fermented and therefore more digestible and higher in nutritional value than the raw grains. To say fermented foods are made by magic would be an insult to all the little microbes doing the work for our healthy guts, but they certainly are magical. Microbial cultures are necessary for our survival, playing key roles in our digestion and immunity. Reflecting on this relationship can bring us closer to our food and in turn our health. Dosas are traditionally a wild fermentation as microbes live everywhere! They live all over you, me, in the air, and on the rice and beans which we’ll use to make our dosas. Dosas are fantastic for eating curries, sauces, or whatever
condiments you like. They’re also great for stuffing with fillings and can be sweet or savory. After making the dosa base recipe, the possibilities are endless! If you enjoy them, thank the microbes.
Dosa Recipe
The following recipes all begin with the dosa base recipe and then are altered in some ways or cooked differently. There are so many things you can do. For example, you can make the dosa base recipe and then make one pan of bread and one pan of brownies. You can make the base recipe and have dosas one day and dosa bread the next. Keep in mind, here at Rancho Mastatal, the minimum number of people eating together is 12, so serving size is for 12 people. If you have a small group and are just making these for one meal, don’t forget to half the recipe. Buen Provecho!

Dosa Bread with a Garden Herb Paste
Step 1 - Dosa Base
Serves: 12 (24-36 dosas depending on size and thickness or 2 pans of dosa bread or brownies)
Ingredients:
3 cups rice
1 ½ cups of beans
1 ½ cups whey OR 2 cups dairy kefir
*You can also just use water here. The dosas will ferment with just the microflora present on them, but the kefir and whey will kick start the fermentation and add other flavors.
*We use leftover whey from our dairy kefir cream cheese recipe.
I have used many different types of beans to make this recipe. Dosas are usually made with black beans or lentils and dhokla with chick peas, but they work well with, cow peas, black beans, red beans, peanuts, and probably many other types. Experiment!
Fermentation times always vary based on climate. Here in the tropics, things ferment much quicker than in say a temperate climate.
Method:
Rinse rice thoroughly until water is clear.
Soak rice and beans for 12-24 hours making sure they are covered in at least a couple inches of water.
Drain off water, as much as you can, and grind in hand grinder, food processor, or blender. I have found the electric corona grinder we have here at the Ranch works best. It will be a kind of pasty consistency that sticks together when you pinch it. Some legumes or beans are bittier than others. Chickpeas and lentils will have a smoother consistency than say black beans, but small bits are fine. I recommend soaking them for longer for a smoother batter.
Add this to whey, dairy kefir, or simply water until the consistency is like a thick pancake batter. It is better not to make it too thin, as you can thin it out to your liking and for your purposes after the ferment.
Put batter in a bowl and cover with a cloth. Be sure to leave plenty of space for the dough to expand. Make sure the cloth is well secured so no bugs can get it. Those little guys love fermented stuff just as much as us.
Let sit out for 12-24 hours. This really depends on your climate and how fermented you want it to be.
When it is ready, you can do a number of things. Continue on this path to live our your dosa making dreams or go on to make dosa bread or brownies.
Dosas
Serves: 12 (24-36 dosas depending on size and thickness)
Note: This recipe stems from the dosa base recipe (above) so follow that recipe first.
Ingredients:
dosa base
water for consistency
spices of your choice
salt to taste
lard for cooking (or another fat source) *If you want to know why we use lard read this
Method:
For thin and crispy dosas, add water until it is a pourable batter. (You can also add more dairy kefir here if you prefer that flavor.)
Time to spice this mix up! Add whatever you fancy at this point.
I like to add a pinch of salt, fresh culantro, finely chopped, crushed garlic, and some cumin. Always toast your dry spices before adding them. Some other great options are parsley, ginger, cilantro and thyme.
Once your mix is ready, get a skillet hot with a bit of lard, butter, or cooking oil of your choice. Test one dosa to make sure it is the consistency you want. Cook until bubbles start to form and it browns a bit and flip. If it is too thick, you can add more water to the batter.
Variation, more ferments in the ferment:
We love fermented stuff, so why not add more of it! Add some super fermented cabbage kimichi. Also works well with shredded papaya kimichi. For this variation, it is best to have a slightly thicker batter so it holds together. You can mix the kimchi directly into the batter or put on top while frying.
Idlis
Serves: 12
Note: This recipe stems from the dosa base recipe (above) so follow that recipe first.
Ingredients:
dosa base
water for consistency
salt to taste
Method:
Add water until it’s a pourable batter, but it should not be too thin. Pourable, but not too easy to pour.
Add salt to taste.
Once your mix is ready, it’s time to steam your idlis. There are specific idlis steamers made for doing this, but there is no reason to go out and buy a one purpose item unless you fall in love and plan to make these cute little breads on the reg, and hey, I wouldn’t blame ya. You can also rig something up using pots on the stove. Or, take a cupcake pan, grease lightly, and pour idlis batter into each section. Be sure to leave room for dough to expand. Put some water in a hotel pan. Place the cupcake pan in the water, and steam in the oven for about 20 minutes.
Dosa Bread
Oh yes, bread.
Serves: 12 (2 loaves or about 24 pieces)
Notes: Using 9 inch round cake pans, this makes 2 loaves. Following the recipe for the dosa base, you should have exactly enough. If you only want one loaf, half the dosa recipe when making the batter. I usually divide the ingredients in half before starting and make 2 batches in separate bowls. Play with the spices. There are so many different things you can do with this bread!
Ingredients:
6 cups dosa base
2 eggs
2 teaspoons baking powder
2 teaspoons salt
½ cup tapa dulce syrup (or other sweetener) *If using another sweetener, like dry sugar, you may want to add more liquid to the mix.)
1 tablespoon coriander ground
1 tablespoon cumin ground
1 tablespoon turmeric ground
4 tablespoon lard (or other fat source)
Method:
Toast coriander, cumin, and turmeric in about 4 T of hot oil until it’s fragrant.
Combine with other ingredients in a bowl or split between two bowls. At this point, you may want to add some water to the batter. It should be the consistency of a thick pancake batter.
Pour into greased bread pans or round cake pans.
Steam until set, about 15-20 minutes.
Cool.
*One way to steam this is using a round cake pan in a pot on the stove. Another way, if you are using a bread pan is to heat a deep hotel pan with ½” of water in the oven, put the bread inside the pan and bake.
Dosa Brownies
Yes, you can turn these into an epic fermented dessert.
***For this recipe, I love to use peanuts as my legume in the base. It makes for some incredibly tasty peanut brownies.
Serves: 12 (2 loaves or about 24 pieces)
Notes: Using 9 inch round cake pans, this makes 2 loaves. Following the recipe for the dosa base, you should have exactly enough. If you only want one loaf, half the dosa recipe when making the batter. I usually divide the ingredients in half before starting and make 2 batches in separate bowls. Play with the spices. There are so many different things you can do with this bread!
Ingredients:
6 cups dosa base
2 eggs
2 teaspoons baking powder
2 teaspoons salt
1 cup tapa dulce syrup (or other sweetener) *If using another sweetener, like dry sugar, you may want to add more liquid to the mix.
4 tablespoons lard (or other fat source)
Method:
Combine ingredients in a bowl or split between two bowls. At this point, you may want to add some water to the batter. It should be the consistency of a thick pancake batter.
Pour into greased bread pans or round cake pans.
Steam until set, about 15-20 minutes.
Cool.
*One way to steam this is using a round cake pan in a pot on the stove. Another way, if you are using a bread pan is to heat a deep hotel pan with ½” of water in the oven, put the bread inside the pan and bake.
There ya have it, 4 ways to turn rice and beans into a fermented bread! Enjoy!
Further Reading
Wild Fermentation by Sandor Katz
The Art of Fermentation by Sandor Katz
Miso, Tempeh, Natto, & Other Tasty Ferments – A Step by Step Guide to Fermenting Grains and Beans by Kirsten K. Shockey and Christopher Shockey
On Food and Cooking – The Science and Lore of the Kitchen by Harold McGee
Make sure to check out our other food related, farm to table blogs!
Buen Provecho!

Dosa corn bread
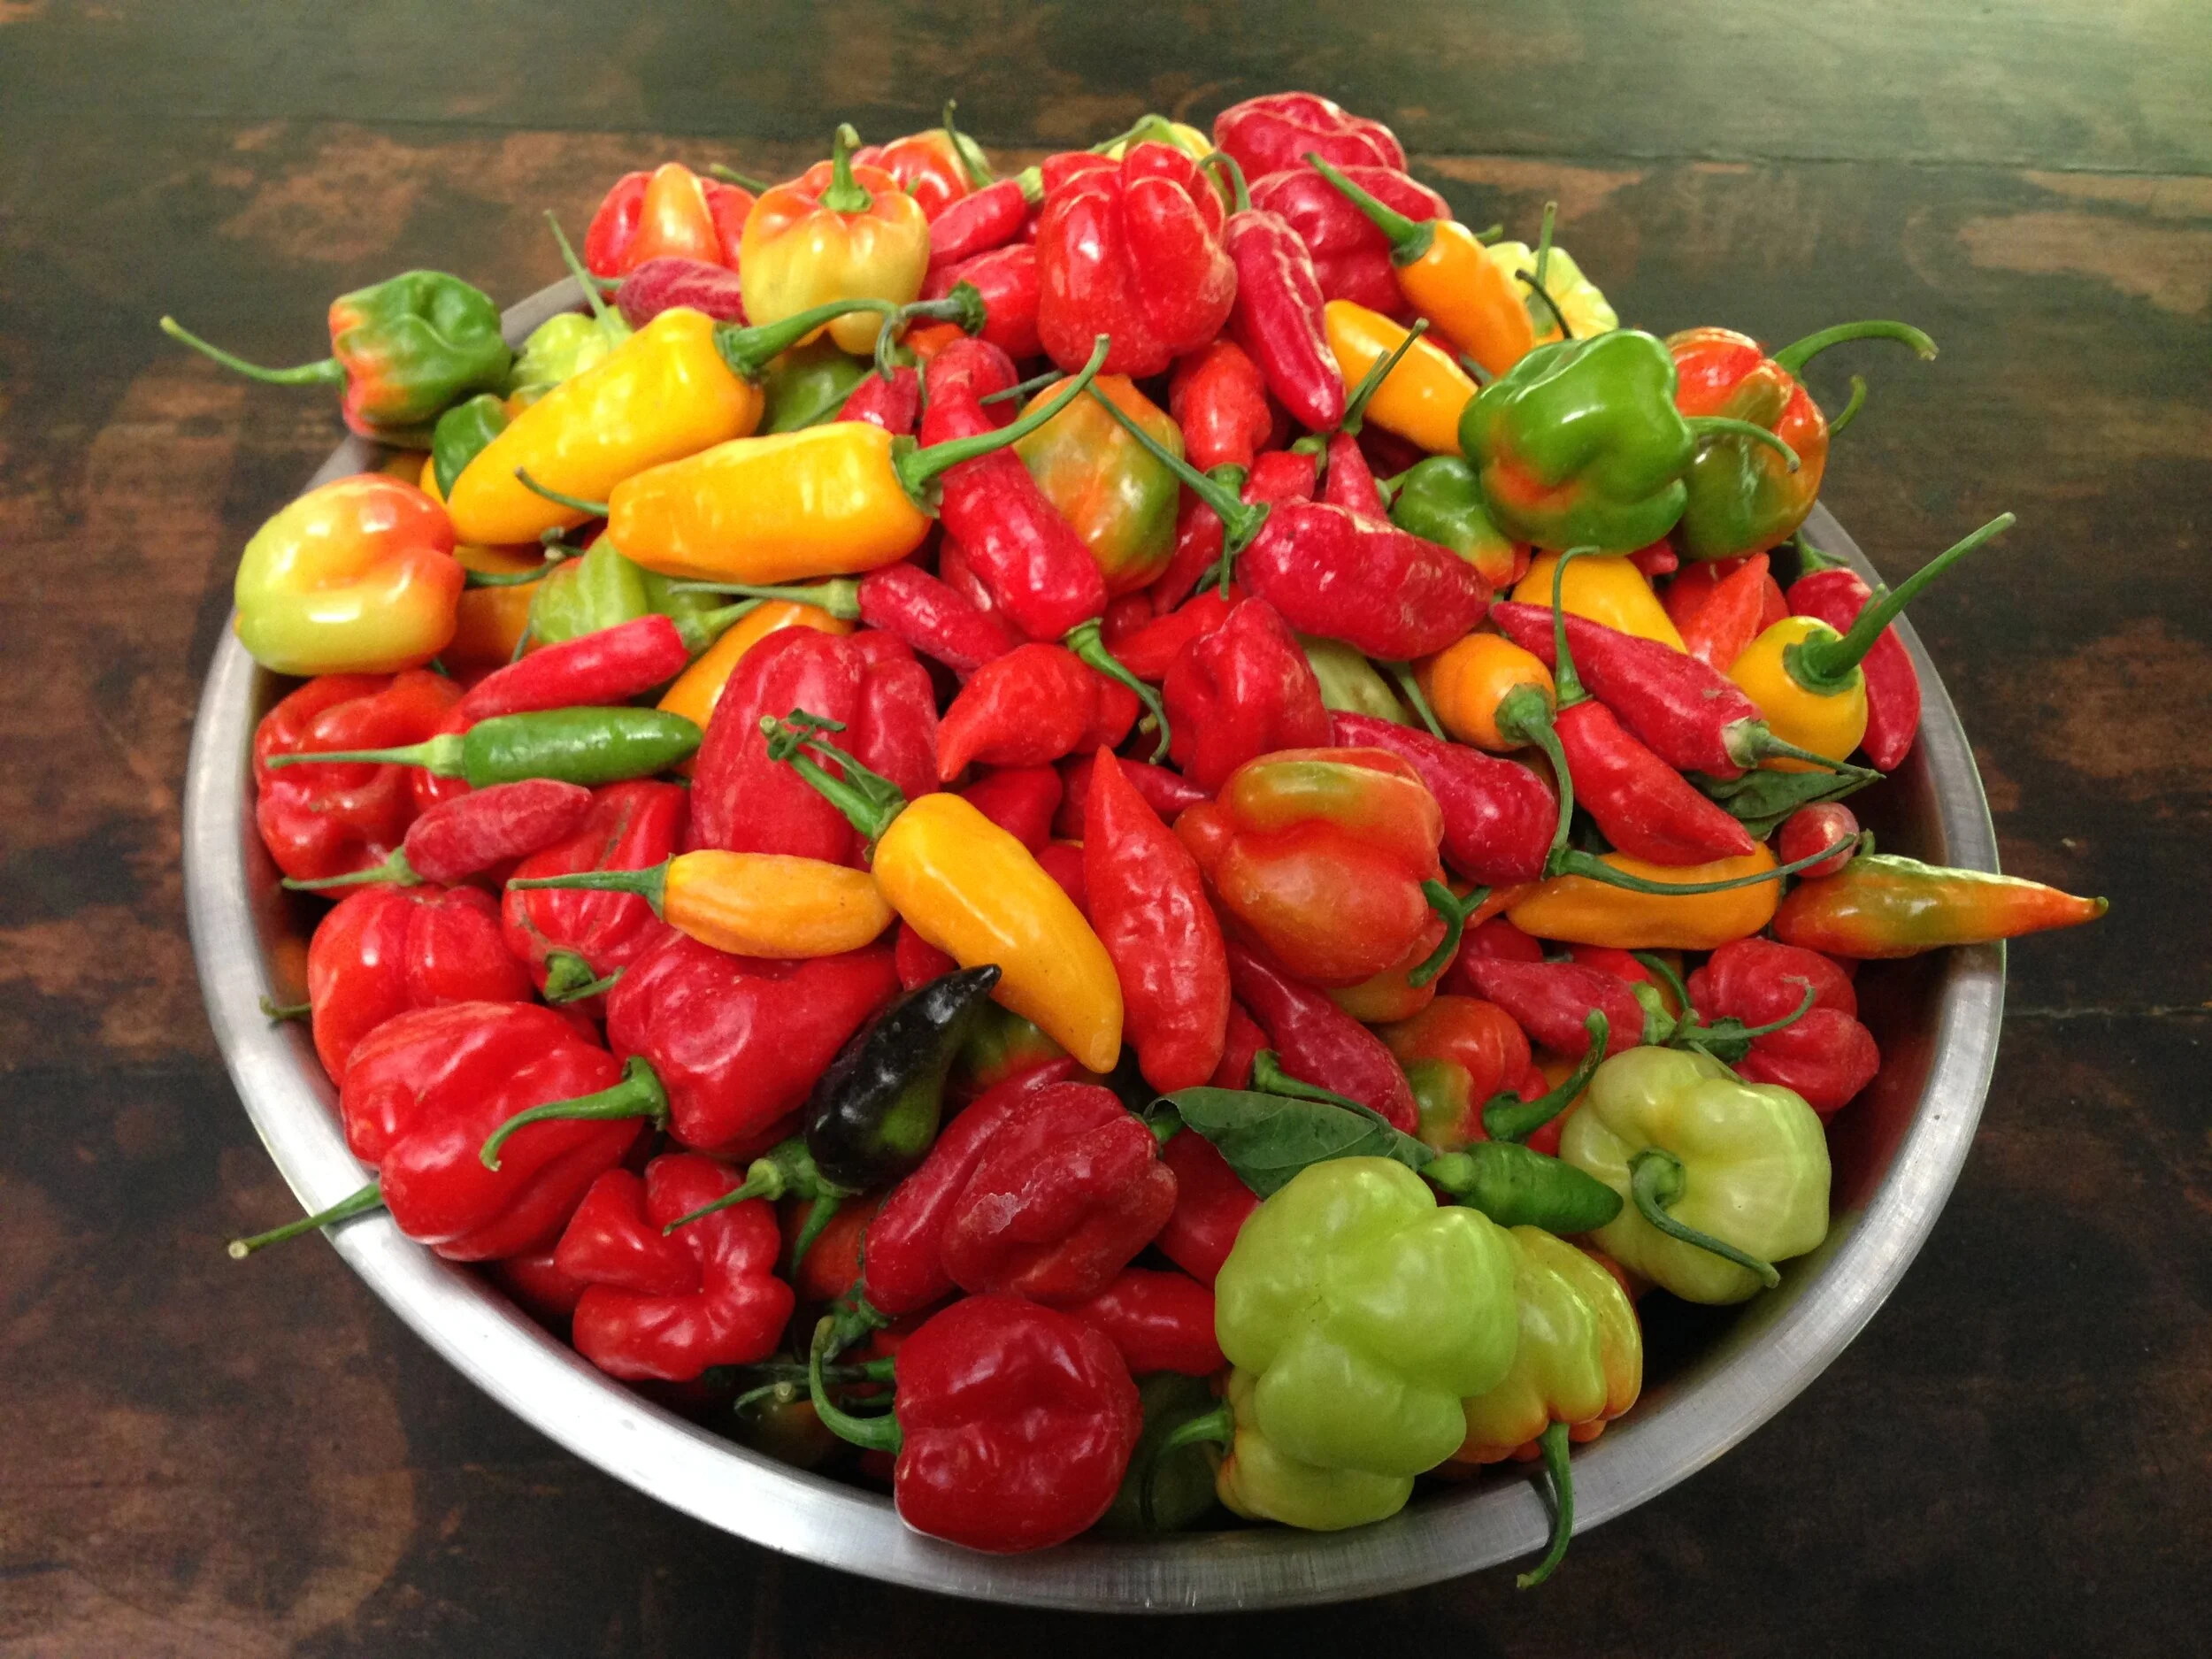
Farm to Table: Chilie Recipes
What do you do with all those chiles?!
Farm to Table: Chile Recipes
By Marco, Apprentice 2020
Before we get hot and saucy…
…is it chile, chilli, or chili? Good question. I usually hedge my bets and switch between the three spellings. Actually, all of them are correct. They all come from the Aztec Nahuatl word “chilli”, which became chile in Spanish and eventually the anglicised chilli. Chili, with one l, is the American spelling and is the reason my spell check is red-lining me right now. Anyway, glad we got that out the way. Moving on…
A Brief History of Chiles
When Columbus first landed in the West Indies (in modern-day Dominican Republic and Haiti) in 1492, he noted that the locals (Arawak) were preserving meat using pepper juices, specifically one type called “axi”. This is where the Spanish word aji was derived. (It was around this time that they noticed the Nahuatl word “chilli” being used as well). These plants were very valuable to the natives and were used extensively in most of their cuisine. The Spanish discovered that the peppers were easily preserved when dried and that the seeds kept well, leading to their far, wide and rapid dissemination throughout the world. (Thanks also, in no small part, to birds, of course. Cheers guys.)
Peppers vs. Chiles
One last bit of nomenclature clarification is the common confusion between the various peppers – bell peppers, black/white pepper (peppercorn) and chilli peppers. This goes back again to Columbus and his crew. Back in the day, peppercorn was as valuable as silver to Europeans. Thus, when they arrived in what they thought was India, they also expected to find peppercorn. Instead they found chillies. Nobody’s sure whether they dubbed them “pimiento” (pepper in Spanish) because they mistook them for peppercorn, or if they were trying to pull a fast one…my money’s on the latter. Learn more about black pepper from Dani’s last article “Life of Spice.”
Farm to Table Chile Recipes at the Ranch
At the Ranch, we try our best to follow permaculture principles. A couple of big ones are obtaining a yield and transforming/repurposing waste. Hence farm to table recipes abound and we are consistently trying to find novel ways of using our yields and decreasing our reliance on outside produce. This dry season has been particularly productive for our chillies and has hence inspired some spicy condiment creations. Below are a few spicy specials you can try at home:

Different types of chiles drying
Tabasco Sauce
Tabasco is perhaps the most famous hot sauce ever made. First synthesized in 1850, when Maunsel White decided to boil and mash up some chiles he’d brought back from Tabasco, Mexico and add vinegar and salt. The peppers found their way into middle-aged banker Ed McIlhenny’s hands whence they were blended, lacto-fermented for 30 days (nowadays they are fermented for 3 years in oak barrels) and then put into wine vinegar, creating the hot sauce we all know and love today. It’s a simple and delicious way to preserve chiles and comes in two varieties: quick and slow.
Ingredients:
· Chiles
· Vinegar
· Salt
Method 1 (quick version)
Step 1:
Chop up the chiles and weigh. Add 2% salt by weight (e.g. 100g chiles = 2g salt) and mix. Put them into a large container and make sure they are completely submerged in brine – you might have to add brine to achieve this. [Brine = water + 2% salt]. Leave the chilies to ferment for 1-2 weeks.
Step 2:
Remove chiles from brine (keep the brine!) and blend them into a chunky paste. Put the chiles back in their brine and add vinegar. Leave to ferment another week.
Step 3:
Strain off the liquid – this can be bottled and used as (quick) Tabasco.
[Pro-tip: The chilli solids can be dehydrated (in the sun or in an electric dehydrator) and used as chili flakes!]
Method 2 (slow/proper Tabasco version)
Step 1:
Same as quick version
Step 2:
Same as before - strain, blend and put into a jar but don’t add vinegar or brine this time. Place a muslin cloth (we just use a repurposed pillowcase) over the top of the jar and press down.
Step 3:
Add a thick layer of salt on top of the cloth – this will help seal the sauce whilst absorbing much of the moisture. This salt can then be dried and used as chile salt, once the sauce is ready.

Place cloth on top of jar and press down

Add thick layer of salt

Fold edges into the jar and cap
Step 4:
Leave to ferment for 6 – 36 months.

Chiles fermenting away

Finished Tabasco Sauce!
Chilli Jam (approx. 800ml)
This is one of my favorite condiments. It goes great with anything fried, meaty, cheesy and/or salty. Yum. The ingredients are few and the method easy. You can play around with this one as much as you like, substituting, adding and subtracting ingredients to your heart’s (and tongue’s) desire…
Ingredients
- 4 tomatoes
- 4 bell peppers
- 20 chiles
- 2 onions
- 2 heads of garlic
- 5-10grams of ginger
- 700grams sugar
- 300ml malt/balsamic vinegar
- [fruit of your choice]

You can smoke your chiles to give it a smoky taste!
Method
- Start by blending everything (except the tomatoes, sugar and vinegar) to a chunky consistency.
- Roughly chop the tomatoes and chuck them into a pot over medium heat. Cook them until they are softened up and the skins are starting to come off (5mins).
- Throw in the rest of the blended ingredients. Stir and cook (2mins).
- [You can throw in any fruit of your choosing here to give a unique flavour to the jam. We've had success with: pineapple, passion fruit, pickled limes, papaya and roasted zucchini.]
- Add sugar. Stir until dissolved (2mins).
- Add vinegar. Stir.
- Cook on a low-medium heat stirring occasionally until the jam has cooked down to a jammy consistency (30-45mins).
- Leave to cool - flavours will combine and take on new dimensions once the jam has cooled!
- Put in a glass jar and store in the fridge. Should keep for at least 3 months.
Jalapeno & Lime Pickle Hot Sauce
This is a two-step recipe that involves an initial lacto-ferment. Like the chilli jam, you can get creative and substitute the lime pickle for other fruits.
Ingredients
- 20+ Jalapeno peppers (or another chile of your choosing)
- 2 onions
- 2 heads of garlic
- 5-10grams ginger
- 2 carrots
- 250ml orange juice syrup*
- 2 lime pickles / juice of 2 limes

Lime Pickle
Method
Step 1 - Lacto-ferment:
- Roughly chop the: 20+ Jalapeno peppers, 2 onions, 2 heads of garlic, 5-10cm ginger, 2 carrots
- Weigh the total and add 2% salt. Mix.
- Put into a jar and submerge in brine (salt water).
- Leave to ferment for 1-3 weeks.
Step 2:
- Take your lacto-fermented ingredients and blend them (brine 'n all) to a paste.
- Mix in orange juice syrup.*
- Finely chop lime pickles / squeeze the juice of 2 limes and mix into sauce.
- Bottle it up and enjoy!
*Make the syrup by mixing 1 part orange juice to 1 part sugar. Cook over a low heat until the liquid reduces down to a syrupy texture.
So, there you go. Three simple chili sauce recipes to spice up your meals and make your grandmother proud. Hope you enjoy them as much as we do! Stay tuned for more farm to table tips, tricks, and recipes!

Categories
Topics
- Agriculture 6
- Agroforestry 21
- Animals 2
- Apprenticeship 19
- Appropriate Technology 6
- Backpacking 1
- Bananas 1
- Basic Pantry 4
- Biochar 1
- Books 3
- Build Your Own Home 1
- Central America 5
- Chiles 1
- Cinnamon 1
- Clay Carving 1
- Climate 2
- Climate Change 1
- Cob oven 1
- Communication 5
- Community 24
- Compost 2
- Composting Toilets 2
- Condiments 1
- Conservation 2
- Cooking 4
- Costa Rica 18
- Design 10
- Earthen Construction 10
- Eat Local 2
- Ecohome 1
- Education 9
- Environment 3
- Ethics 4
- Farm to Table 12
- Fasting 1
- Fermentation 14
- Food 22
- Food Choices 8
- Food Forest 8
- Food Processing 15
- Food Systems 12
- Gap Year 1
- Gardening 5
- Ginger Beer 1
- Harvest 2
- Health 12
- Healthy living 5
- Homemade 2
- Homestead 8
- Internet 2
The Ranch’s new cookbook is here!
This cookbook might not be quite like the others you have sitting on your shelf. We’ve made it look like a cookbook— and it might smell like a cookbook if it’s spent enough time in your kitchen— but it’s also a memoir, a history of a place, of 20 years of experimentation and learning and growing on the piece of paradise known as Rancho Mastatal.