
The First Rammed Earth Wall At Rancho Mastatal
By Thea, Apprentice 2025
During the recent natural building workshop, Rancho Mastatal saw the beginnings of the first rammed earth wall on the property. Together with Benito, Nic and Ali, the apprentice team had the satisfying job of completing the wall. It is situated in the new Pilón construction and stands as another example of natural building and more specifically, the uniqueness of rammed earth.
So what exactly is Rammed Earth Construction?
Good question. Rammed earth is an ancient method of construction used by civilizations such as the Assyrians, Babylonians and Persians over 10,000 years ago. Essentially, rammed earth is a mix of soil, sand and water mechanically compacted into a high density framework, which is then stripped and allowed to cure. Simple right?
Rammed earth is a simple yet highly effective building method known for its affordability, durability, and efficiency. This technique mimics the natural formation of sedimentary rock—over time, as the structure settles under its own weight, it becomes increasingly compressed and therefore stronger. This would explain why structures such as The Great Wall of China and Berber Tribesmen settlements in the Atlas Mountains are still standing today.
Traditionally, this method uses sandy soils in arid or moderate climates such as Morocco and Australia because it has great natural thermal regulating properties, offers termite-free lodging, can be quick and sustainable; providing materials are taken from nearby land, or the site itself. However this wall does tend to erode and deteriorate when faced with wetter climates and seismic regions; and does require extra insulation in temperate regions. To increase durability, stabilizers such as Portland cement or lime are commonly added, as well as rebar to increase stability in earth-quake prone areas; but this does come with the cost of higher processing and more embodied energy.
Recipe for our Rammed Earth Wall
When testing mixes for the Ranch’s earthen wall, the team experimented with ramming raw earth (soil, sand and water) as well as stabilized earth (with added lime) to test durability and sturdiness. The raw earth mixture didn’t pass the test due to the clayey composition of the soil here at the ranch- soil with a high volume of clay is highly absorbent, which causes shrinkage and cracking in your walls. The lime provides structure and stability when added into the mix and after successful testing of the stabilised earth; the final mix was devised as a 2:4 ratio of sand to soil, hydrated with 20% lime. This worked well for the ranch, but it is always crucial to do your own tests due to different soil types, choice of aggregate, and what your are asking of your wall.
how to make the wall
framework and tools
Decide where you want to situate your wall. As previously mentioned, rammed earth does not fair too well with consistent water; so using it for a shower wall probably isn’t a good idea. In our case, the wall was to act as a sturdy and aesthetic privacy barrier for the compost toilets. What will your wall be sitting on? In this case, the earthen wall was to sit on a foundation of concrete blocks which also determined the width and length go the wall.
The first step is to gather or make the tamper (tool for compression) ensuring it is not too large for your framework but heavy enough to tamp down the earth. It is also crucial to build the framework itself which will determine the width and length of the wall. The framework must also be easy to dismantle to allow for removal and re-construction. Having several identical frameworks could be a nice alternative to this process, however, since this was a small-scale wall, we worked with two forms which could be removed and leapfrogged up the wall. It is important to consider how to make the frame as sturdy as possible. It has to withstand the force and vibrations from the tamping as well as the compression of the earth. For instance, the framework we used had two large screw attachments in the end quarters (covered by thin PVC pipe to ensure for easy removal) that could be tightened from both sides. Furthermore, foreseeing that the corners of the wall are the most likely places for erosion and damage to occur (ie, getting knocked and touched), they have been flattened off to create an elongated octagonal shape.

Making the Mix
So, now we have the framework and tools ready, we need to make our mix. For this, we followed our ratios and mixed with a drill in large barrels; gradually adding water until the mixture would hold together when compressed, but not too sticky that it would be pulled off the wall with the framework. We colored half of our mix in order to create a multi-toned, wave-like effect, and left the rest as a ‘base’ coat to layer in-between as well as in the middle of the wall (where the colour won’t be visible). This is the creative part of the process, and we repeated this step with various colors and tones depending on what section of the wall we were working on.


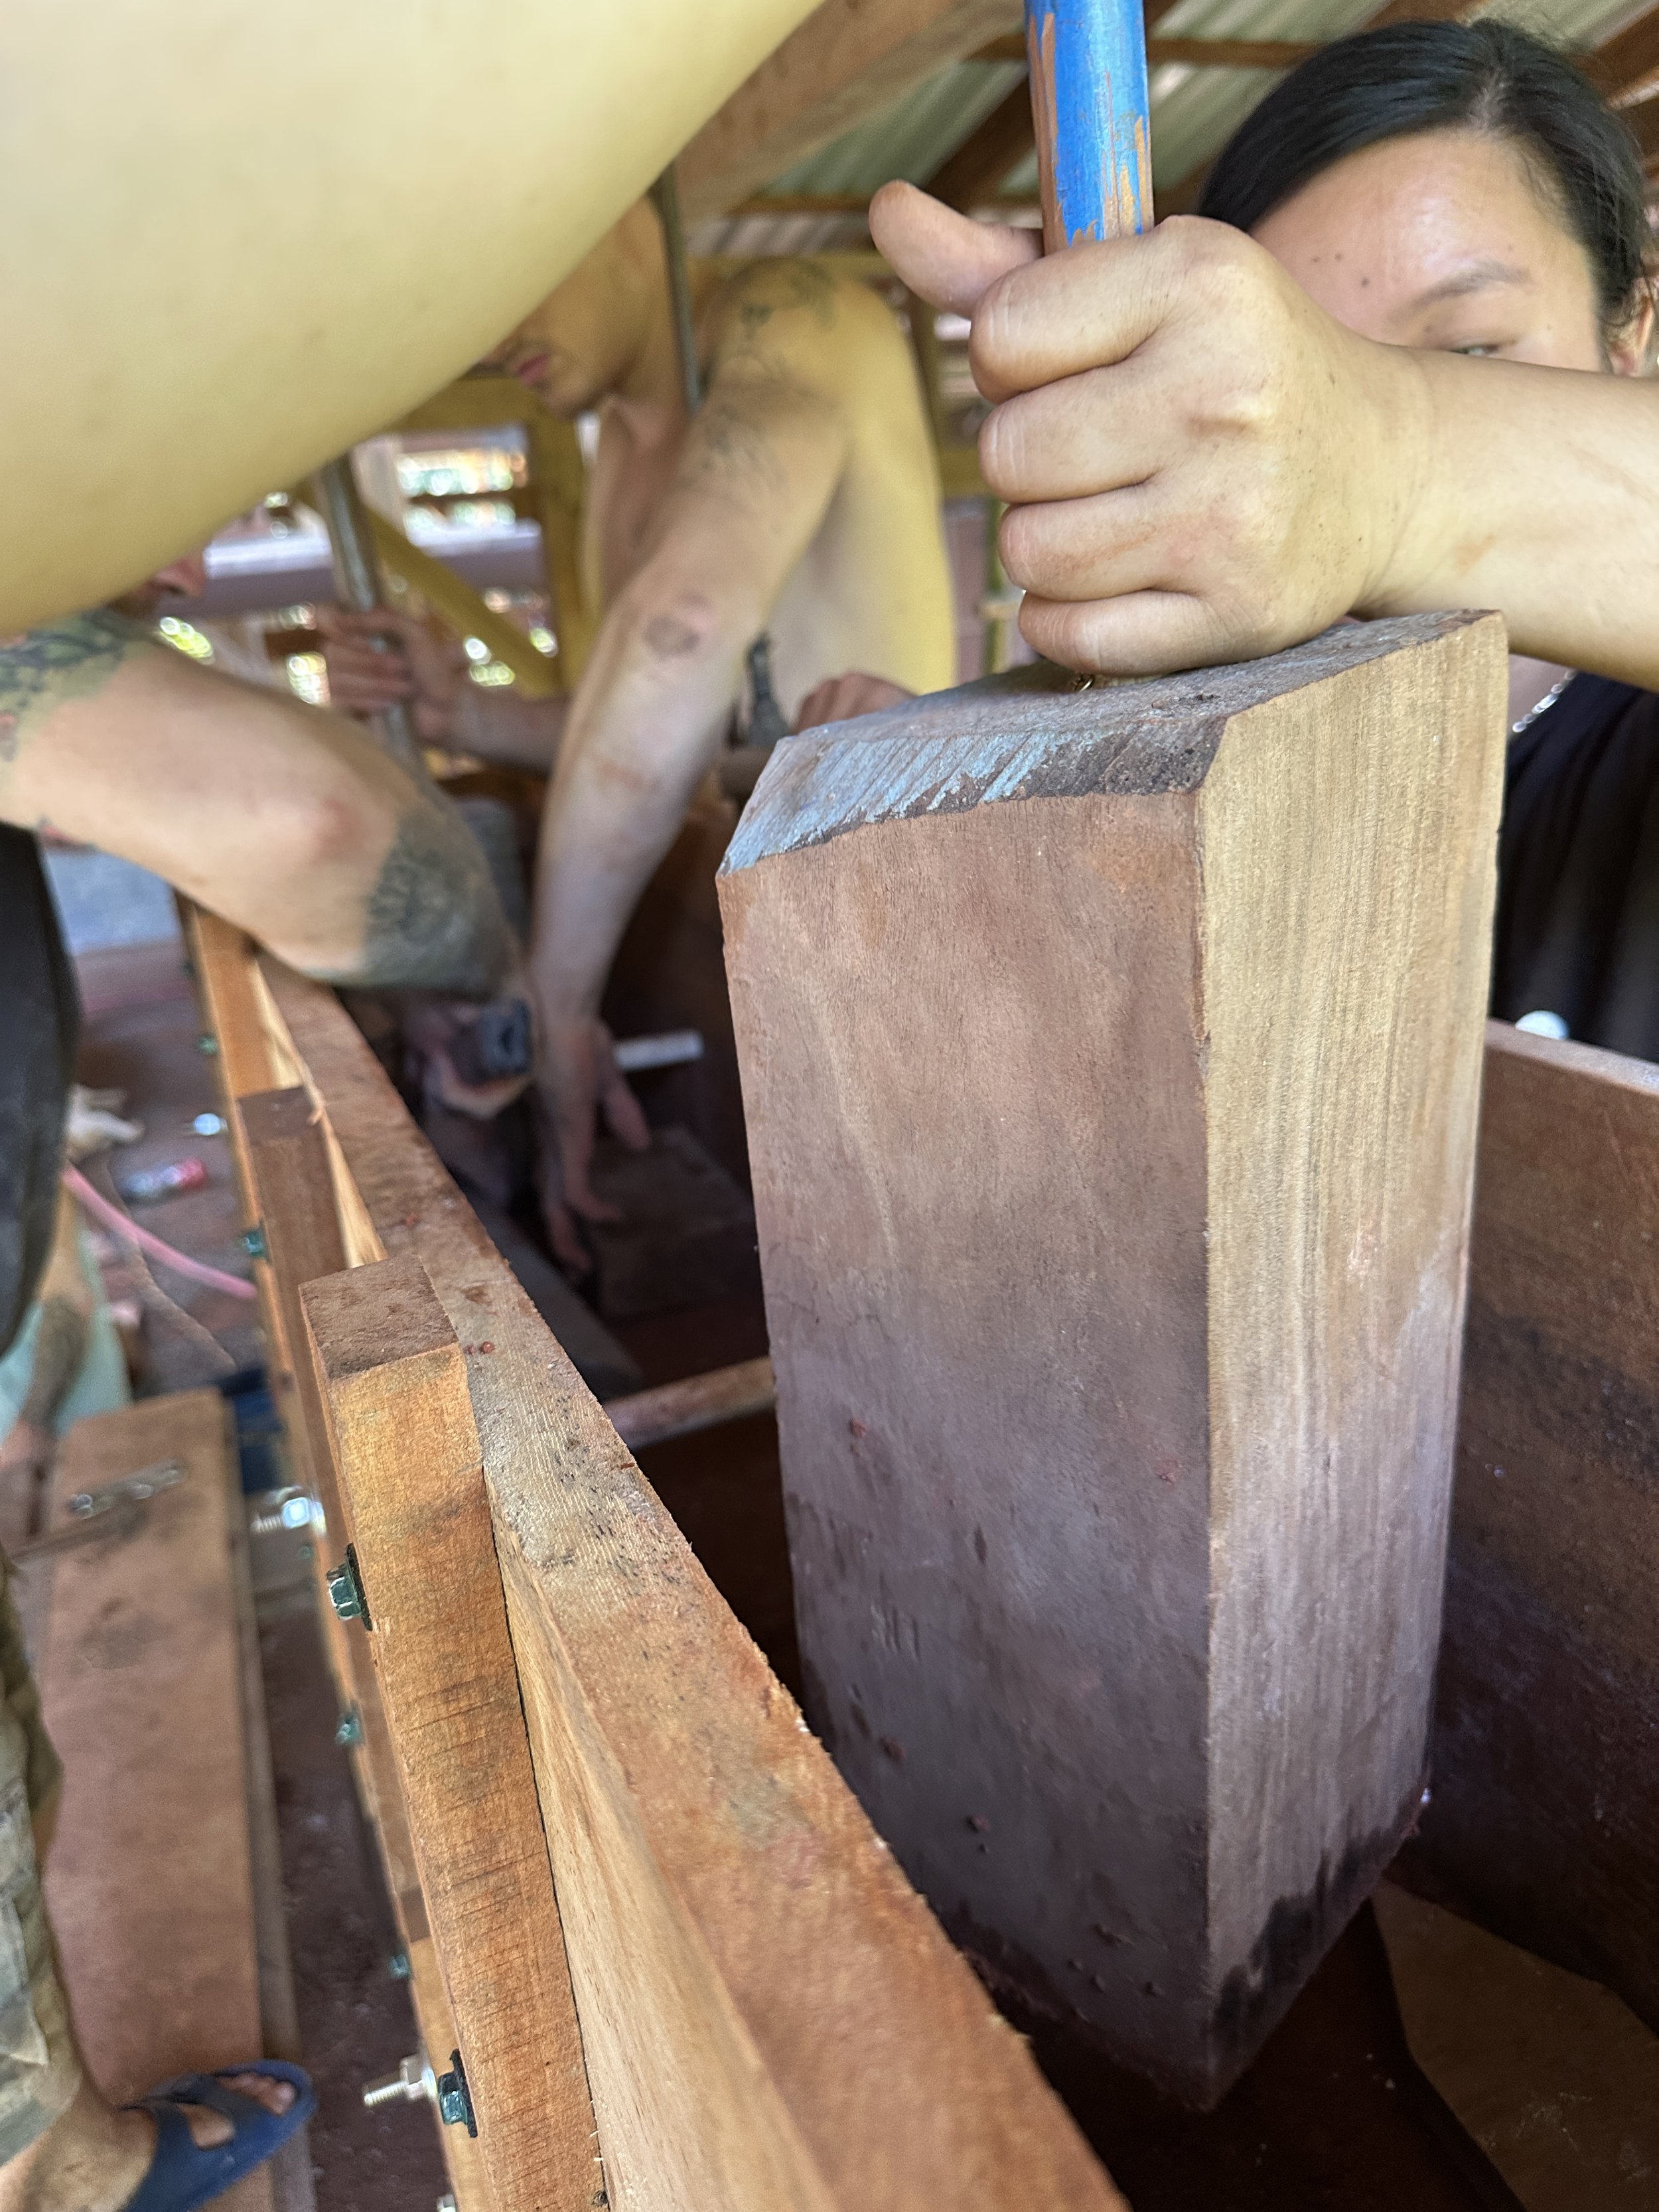
The Human Powered tamping Method

Being diligent to tamp everything well, including the edges and corners
Gather a driver, rubber mallet, several clamps, some thin pieces of wood, some creativity and some patience and hey presto you are ready to build.
Once the first framework has been set in the correct place and secured or held firmly down, it can be filled. The first section of wall will determine the trajectory of the rest of the wall, so placement is crucial. The next step is to layer the earth mixture and firmly but carefully tamp down; paying special attention to the edges. If you would like to add color, it is a good idea to cover the sides only, and fill in the middle with base mix in order to save on pigment. If you have access to different colored soils, you can just use the tone of the soil to create these color striations. When tamping near the long cross-sectional screws, we would take thin pieces of wood and a rubber mallet to compress areas that would be missed by the larger tamp.

Sealing the top of the wall
When the layers are nearing the top of the framework, the next nerve-wracking step is to carefully unscrew the lower framework and leapfrog it on top of the next. Clamp down, reset the screws and continue to layer and tamp. If the frames are not clamped together, you may find some mixture makes it into the gaps in-between; creating a fine line. Not a necessarily a problem- it can add to the aesthetic of the wall. Furthermore, the type of framework used will leave holes in the cross section of the wall. Again, these can add to the look, or be filled in afterwards with some mix. As the wall grows, so must the builders. We created a platform to stand on in order to tamp the upper layers with ease.
To seal and waterproof the top of the wall, we poured a colored concrete mix as the final layer before removing the last framework.
Now it is crucial to stand back and admire your wall, paying special attention to its unique pattern and beauty.


How sustainable is this rammed earth wall?
It is too soon to say what the longevity of this new construction will be. It has not yet ensured the hundreds of visitors it will see over the coming years. Will it withstand minor tremors? Will the decision to add lime and seal with concrete help it to fair in the humid jungle climate? Will it withstand the many hands that will touch with admiration? Only time will tell.
Because this was such a small wall in the overall building, and in an area with little consequences, we had the luxury of experimenting with this technique to see how well it holds up, for our knowledge and others that want to learn about natural building.
In the mean time, I hope you find some inspiration from this post and happy building!
Want to Learn More?
Check out one of our annual natural building classes to get theory and practice in earthen construction and plasters.