

How to Build with Wattle and Daub in Timber Frame Construction: A Natural Building Method for the Tropics
By 2025 apprentice Aaron Wilson
If you’re building in the tropics, it’s essential to choose methods and materials that can stand up to humidity, heat, heavy rain, and pests—without sacrificing sustainability or beauty. That’s why here at Rancho Mastatal, we rely on natural building techniques like wattle and daub combined with timber frame construction to create structures that are both resilient and aesthetic.
This traditional method, used for centuries by many different cultures throughout the world and in tropical and subtropical regions, is incredibly well-suited to the environment. The timber frame provides a strong, long-lasting skeleton made from locally sourced lumber, while wattle and daub infill offer not only privacy and protection but also cheap, efficient, breathable earth-based walls that help regulate temperature and moisture inside the building that modern conventional building methods fall short on.
This article will walk you through how to build with wattle and daub in a timber frame structure, step by step—from frame design and wall weaving to daub mixing and natural finishes. Whether you're planning a homestead, an eco-retreat, or just want to explore hands-on natural building methods, this guide will give you the practical foundation you need to get started.
Now, let’s get building.

Designing the Timber Frame Structure
Designing a resilient timber frame structure is the foundation of a successful natural building project. In the tropics, durability and ventilation are key. At Rancho Mastatal, we typically use dense, rot-resistant hardwoods sourced locally, such as Pilon, for their natural resilience to moisture, termites, and fungal decay. A post-and-beam layout works especially well, offering open spans and flexibility for interior walls made with wattle and daub. We elevate the structure using reinforced concrete stem wall for its resistance to earthquakes and provides good access around the entire house to spot termite activity before it becomes a structural problem. When sketching out your frame, be sure to plan for large roof overhangs (Dutch gable roof) to protect earthen walls from driving rain and include ample openings for cross-ventilation to support passive cooling. A well-thought-out timber frame doesn’t just support your building—it sets the tone for how the entire structure will perform in the tropical environment.
Preparing The Wattle Framework
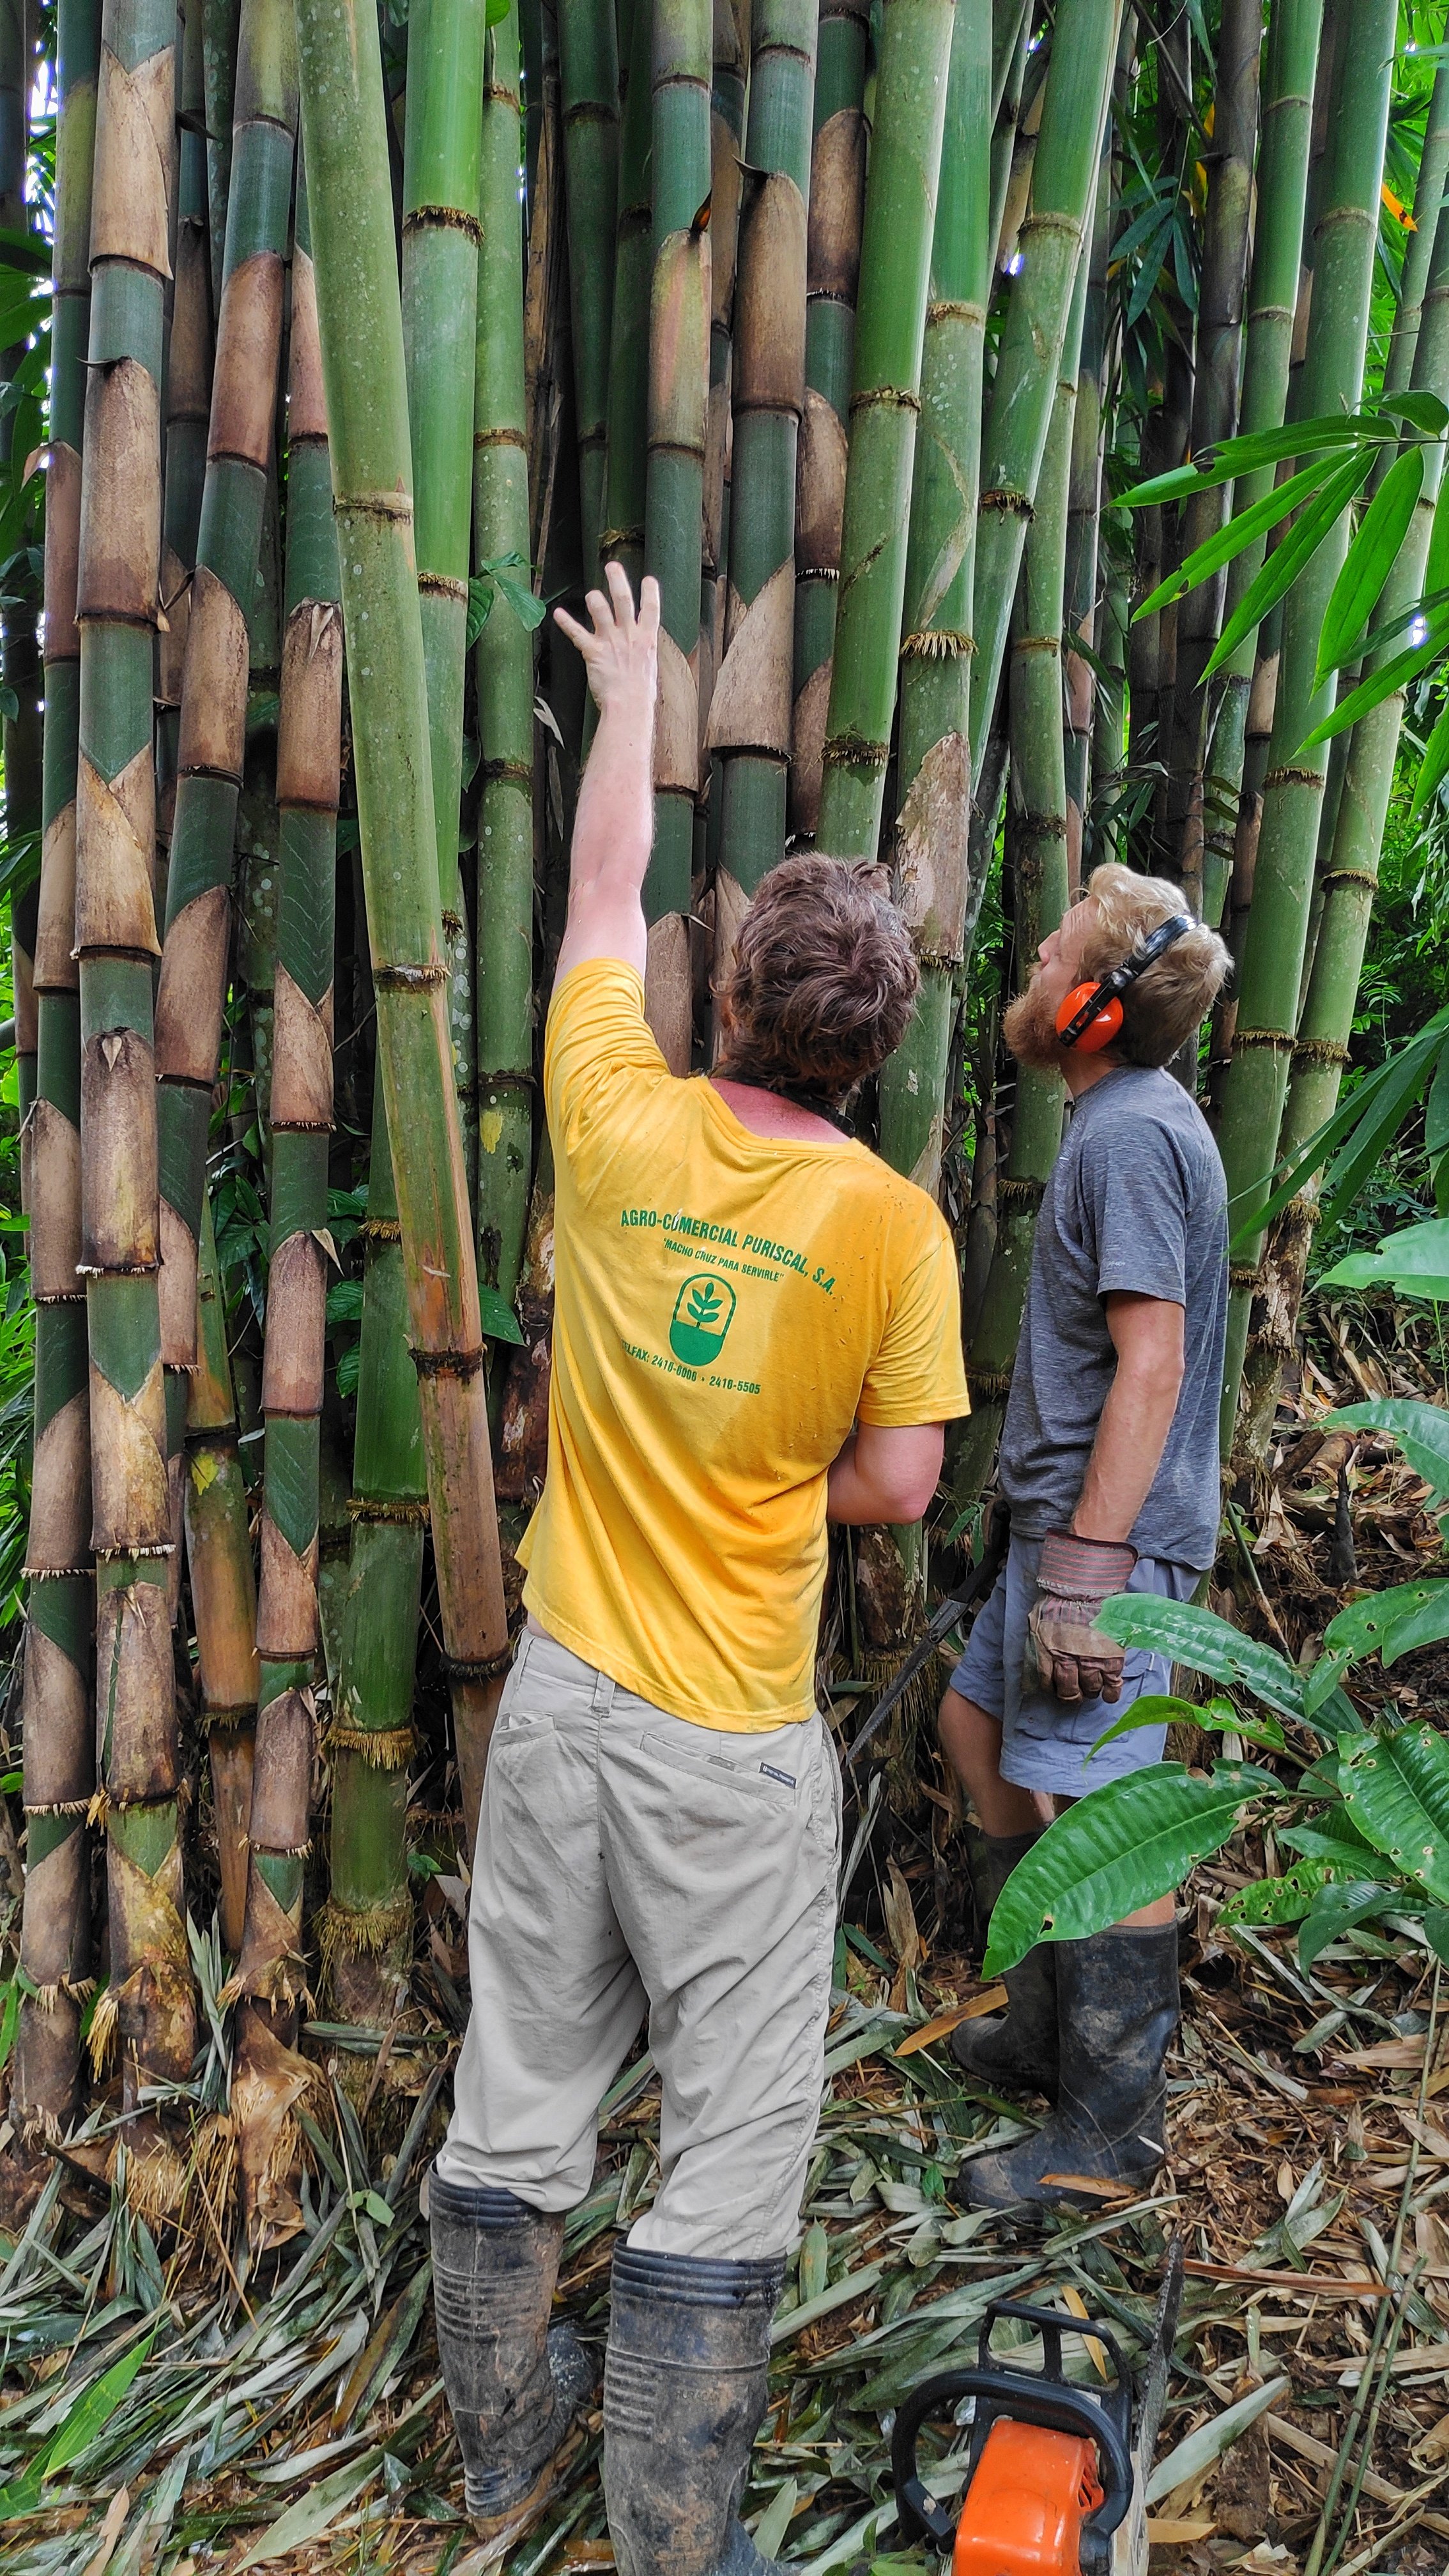
Wattle refers to the lattice work that creates the rigidity and structure for our daub (earth mix). We use bamboo as this lattice, because we grow it, but wattle can be made from any natural local material (wood, reeds, branches, etc.)
If you are using bamboo, your next step is to prepare the bamboo lattice (wattle). We harvest our bamboo from clumps growing on and around the Ranch. This typically takes a group of people in one of our all-hands-on deck work parties to process a bunch of bamboo at once and get it treated before installing it into the walls. The process involves a group cutting down bamboo branches and cutting them to a predetermined length. Then another group will take some machetes and wooden mallets to split the bamboo pieces into smaller strips, about 1 inch wide or so, not too wide and not too narrow so that they can be attached to the timber framing.


The bamboo strips will then be soaked in a solution of borax and boric acid to treat it for protection from insects and fungal decay, especially in environments like the tropics. After soaking the bamboo needs to be left out to dry for some time, 1 to 2 weeks or so. This method is great because it is non-toxic to humans and animals and doesn’t alter the color of the surface significantly. Once the bamboo is ready it can either be stapled to the timber framing or woven together to form a lattice, we opt for the staple method for the sake of time and ease.

Mixing the Daub
Daub refers to our earthen mix, which contains various ratios of clay, sand, and fiber. If you haven’t done any soil and mix tests yet, now is a perfect time to do so, now that your wattle is ready. During our training we made several different examples of mixes with different ratios of clay, sand, and straw to see how each one performed once it had dried, even though our instructors Ali and Nic already know the optimal mix, this an essential exercise to do on your project to get the right mix for your specific site. At Rancho Mastatal we are using a 1-part soil (ours is clay rich), 1-part sand, and 1- part straw for the daub mix, or simply 1:1:1. This gives a good balance of glue from the clay, compressive strength and cracking reduction from the use of sand, and tensile strength from the fiber, which is straw.
We start by laying out a tarp as close to the area we are going to daub as we can to minimize carrying buckets of mix around. We then pour the sand on the tarp first creating a crater in the middle to put the wet clay in to avoid it from just spreading out all over the place. This is where the fun begins as you need to be ready to get a bit muddy! Stomp, stomp, stomp then burrito is the strategy. The burrito part is probably the most import step in ensuring the materials get incorporated evenly and are not just sticking to the tarp. This simply involves flipping the mix over by pulling one end of the tarp over to the other in the rolling fashion, then stomping on the rolled material again and beginning to add in the straw each time as well as spraying the mix with water as needed to help get the right consistency, not dry but not too soupy. When it looks well mixed you can grab some and feel how it interacts in your hand, checking for stickiness and firmness. When this is done go ahead and put the mix into buckets and bring them to your wall for daubing.


Applying the Daub to the Wattle
Here at the Ranch, we like to get our hands dirty so we will partner up and each person will scoop up a handful of daub and begin weaving it into the lattice. It’s important to make sure that each side gets their mix in-between and through the horizontal strips rather than just laying it on flat, otherwise your mix may fall off the wall. As you start to fill up the wall with earth mix you can check the thickness with a screed which is set to the desired depth of your wall from the face of the timber. We opt for slightly thinner walls (3-4”), this thickness allows us to cover our electrics and plumbing, uses the minimal amount of mix, and accentuates the timber frame nicely. If you put on too much mix you simply use the screed to scrape off the extra and mix it in elsewhere, if your mix is too thin you will notice a gap between the wall and the screed. The goal here is an evenly flat wall at the right depth. You do want to leave your wall with some key on it, this key will ensure your next plaster adheres better.


That pretty much wraps it up for this article. The next step will be applying a level coat clay or lime-based plaster before the final finish coat. We will not cover this in this article but there are other’s that cover this here. Also consider joining the Ranch for one of their yearly natural building workshops, to get practice in all these techniques.
Final Thoughts and Learn More
By combining wattle and daub with timber frame construction, you can create a durable, sustainable, and climate-appropriate structure that blends seamlessly with the environment. For a deeper dive into Natural Building at Rancho Mastatal, check out our full blog page.
Interested in learning more? Join a natural building workshop at Rancho Mastatal to experience this technique firsthand!
