
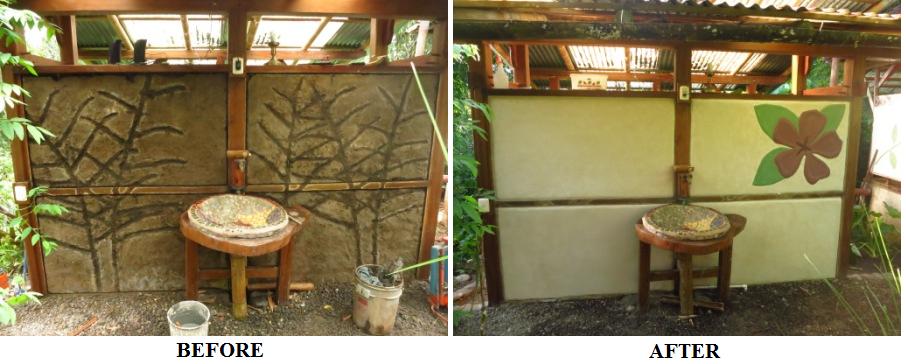
Re-plastering: What will be unveiled?

On the building list, one of our goals is to correctly re-plaster old structures to enhance their look and highlight our unique architecture. Over the last couple years we have slowly been giving our old structures new face lifts. Using lime plaster techniques that we have been learning, practicing and perfecting, we have transformed various run down plasters into beautiful canvases of art.
This process of remodeling never fails to reveal a variety of problems and headaches. We have learned that you never know what will be exposed once you start to take apart a wall for re-plastering and patching. So, as we have been going back to old structures to prepare for a face-lift we have encountered many different troubles due to past techniques.
In order to apply a new lime plaster you must remove all material from the wall that seems loose or may not allow the lime to adhere well. This is done by chiseling off old plaster materials, which can lead to more of the wall falling apart than planned. Once you’ve taken off the old materials you must go back and fill in the gaps created in this process; which can be a lot of gaps! The quality of the original wall is a big determining factor in how quickly (or not so quickly) this whole process will take. Therefore determining the amount of time a project will take is extremely difficult; you can make an estimated guess, but depending on what you uncover the estimate can change drastically. As in any remodeling job you just never know.
You can tell the difference between the walls that were built patiently with skill to those hurried by the physical amount of material falling off. There are a variety of reasons why there is so much variation in the quality of our walls, but we believe it is mostly due to the transient workforce that was utilised to build many of these structures. High school groups, short term volunteers, and so forth have built much of our campus. Lessons learned during one construction project were not always carried over to the next due to this lack of consistency. It resulted in a huge variety of quality and decisions were made that in reflection were not the best.

During our long evolution we have tried many different earth building methods, mixtures, materials, and tricks with varied success. For example, our previous wattle and daub methods used little bamboo wattle support meaning that the earth mixture didn’t have enough support and the walls ended up being a little wobbly. Now we have moved to weaving many bamboo strips between the uprights, spacing them about one half inch apart rather than a few inches. Our earth mixture has changed through the years as well, experimenting with the ratios of clay to sand, the additions of manure, different straws, and other materials that we were told would make the mix better. We went through a phase of adding manure to our earth mixes and applying a “poo schmer” as a plaster. Looking back the additions of manure possibly led to a weaker final mix and the schmer although an effective plaster was not ultimately what we wanted aesthetically. It has since proven difficult to remove in order to apply a finish that we actually want. We didn’t realize the importance of compressing the edges of your walls, which have resulted in cracks around the edges of our wattle and daub panels; or the importance of bridging between two different materials (eg. wood to be covered by earth).
Over the years there have been many different techniques used and we believe for the moment that we have developed the mixes, techniques, and materials that get the job done efficiently and create great looking walls and structures. Among other plastering projects the main one for this year is to re-plaster the Casucha inside and out, using a method called “poor man's” tadelakt on the inside and a sponge floated exterior. Stay tuned for pictures of the finish!