

Timber Framing: 10 Things You Didn't Know You Needed to Know (Part 2)
By Kara, Apprentice 2020
(This article continues from Part 1, read that one first to learn some basic tips for Timber Framing!)
Timber framing is an important natural building technique here at Rancho Mastatal, and much of it is done by workshop participants and apprentices-- not people with years of experience! With proper instruction, patience, and focus, it is entirely possible for a beginner to accomplish amazing things with this building technique. If you’ve taken a timber framing workshop with us here at the Ranch, you may find these tips a helpful reminder of the little techniques that often escape our memory. And if you’re planning on building your own sustainable home, these small things might be the difference between a day of frustration and a successful frame-raising.


If you’re interested in building your own home and timber framing check out our latest workshop offerings.

It takes a team to raise a frame
Doing your Lay-up
5. Pulling Horizontal Lines
After you’ve laid your tape and marked your measurements with a crow’s foot mark (remembering to subtract the 10” you’ve burned! See Part 1 of Timber Framing Tips to learn more), you’re ready to pull your horizontal lines around your timber. This means drawing straight, accurate lines around your timber at a right angle to the edge of your reference face, to indicate the cuts needed for each joint. With the crow’s foot ‘V’, pointing towards one long edge of the timber, it’s easy to see where on your mark your line needs to cross, but you still need to make sure that you’re drawing it perpendicular to the edge between the two reference faces. Both a framing square and a combination square can help you do this.
To use the framing square, orient your timber so that one reference face is up, and the other is on the side closest to your body. Hold the framing square with the ‘L’ parallel to the ground, one side resting flat across your timber where it intersects the measurement mark, and hold the edge of the other side flush against the close face of the timber. You’ll have to hold the square at a slight downward angle, but keep it as shallow as you can. Hold the framing square tight to the timber with your hip, and draw your line with a sharp pencil when you have it positioned accurately.
You can do the same thing with your combination square, and it’s not as important to be standing with a reference face facing you, as long as you’re aware each time you’re drawing a line to hold the flat edge of the square against a reference face. Never draw a line while the edge of the square is
resting against a non-reference face, it’s an easy mistake to make, but it can skew your lines and eventually cause misalignment in your joints if you don’t catch the mistake.
To pull a horizontal line around to a non-reference face, where you don’t have the crow’s foot mark, keep your square against a reference face, and draw the line around the timber, being careful to align your pencil lines at the corners. You’ll end up flipping your timber around as you work, so it’s important to mark your reference faces clearly. A thick chalk mark is ideal, so that you can see quickly if you’re using the right face to draw your lines from.
6. Drawing Vertical Lines
To draw the vertical lines for your layup, the ones parallel to the long edge of the timber, using a combination square is quick and accurate. Set the known distance between the edge of the reference face and your cut line, and place the flat edge of the square against the reference face, holding it parallel to the ground to that the ruler is resting fully on the timber. Using square rule, you only actually know the distance between the line and the edge of the reference face, since the corner
between reference faces is where your ‘perfect’ timber within the timber lives, and there could be extra wood on the other sides.
When setting the distance on your combination square, reveal the needed amount beyond the handle, leaving the tick mark on the ruler just slightly covered by the handle. Draw the line by holding your pencil against the end of the ruler, and drag both square and pencil along the length of the line, moving in tandem to draw a smooth line.
By almost covering the tick mark that you’re measuring to on the ruler, you account for the small
distance between the pencil line and the end of the ruler-- a sharp pencil helps, too!

Using the combination square to make your lines, making sure to set it just under the measurement you want, to account for the width of the pencil line
Cutting Joints
7. Don’t Remove Your Line!
Whenever you are cutting any joint remember to not cut away your line! The perfect cut would be cutting your line in half, but this isn’t always easy to achieve, especially for beginners. So instead cut just to the waste side of your line. This is important because as you’re cutting the rest of the joint you need reference of where to cut to! Seems obvious, but many people’s lines seem to disappear.
8. Practice Your Square Cuts
Seriously, you may think using a hand saw to make a square cut is easy… Well it’s not if you’ve never done it! Especially on large timbers. Usually you have a bit of extra timber to spare on either end, do as many practice cuts as you need to get a square cut.
To make a square cut, remember to cut on the waste side of the line. Align your saw blade at the far side of the line, you will move the blade down the line slowly, creating a small cut along the line (a kerf cut). Once you have your kerf cut you will begin moving the saw blade diagonally down the side line that is facing you, keeping the blade in the original kerf cut, and trying to not drop the blade down the other side that you can’t see. Stop cutting once you’ve reached the bottom. Now repeat on the other side of the timber, keeping your blade in the original kerf and moving the blade down the line. If at any point your blade begins to move off the line, stop and correct it immediately. The farther you move from the line the harder it will be to correct it.
The diagonal cuts should line up and create a square cut. You can check it with a framing square to see how far off or on you are.
9. Bevel up or bevel down
First, always make sure you have a sharp chisel! A dull chisel will make everything slower and probably not give you as clean of a cut.
There are two sides to the chisel. The bevel refers to the angled slant at the end of the chisel.
When you are cutting your joints it’s important to orientate the bevel the right way for which way the wood grain is going. When you are going with the grain of the wood, the bevel should be faced down. This will help insure that you don’t dive into the wood. Then when you are going against the grain, the bevel should be up.
10. Get a Team
Yep, timber framing kind of requires at least a few people. You always want someone to check your layouts before you cut anything. It is very helpful to have a partner to help spot you when you’re drilling the holes for mortises. And then when it comes to raising the frame, the extra hands will definitely be helpful and appreciated.

A student cutting this long tenon
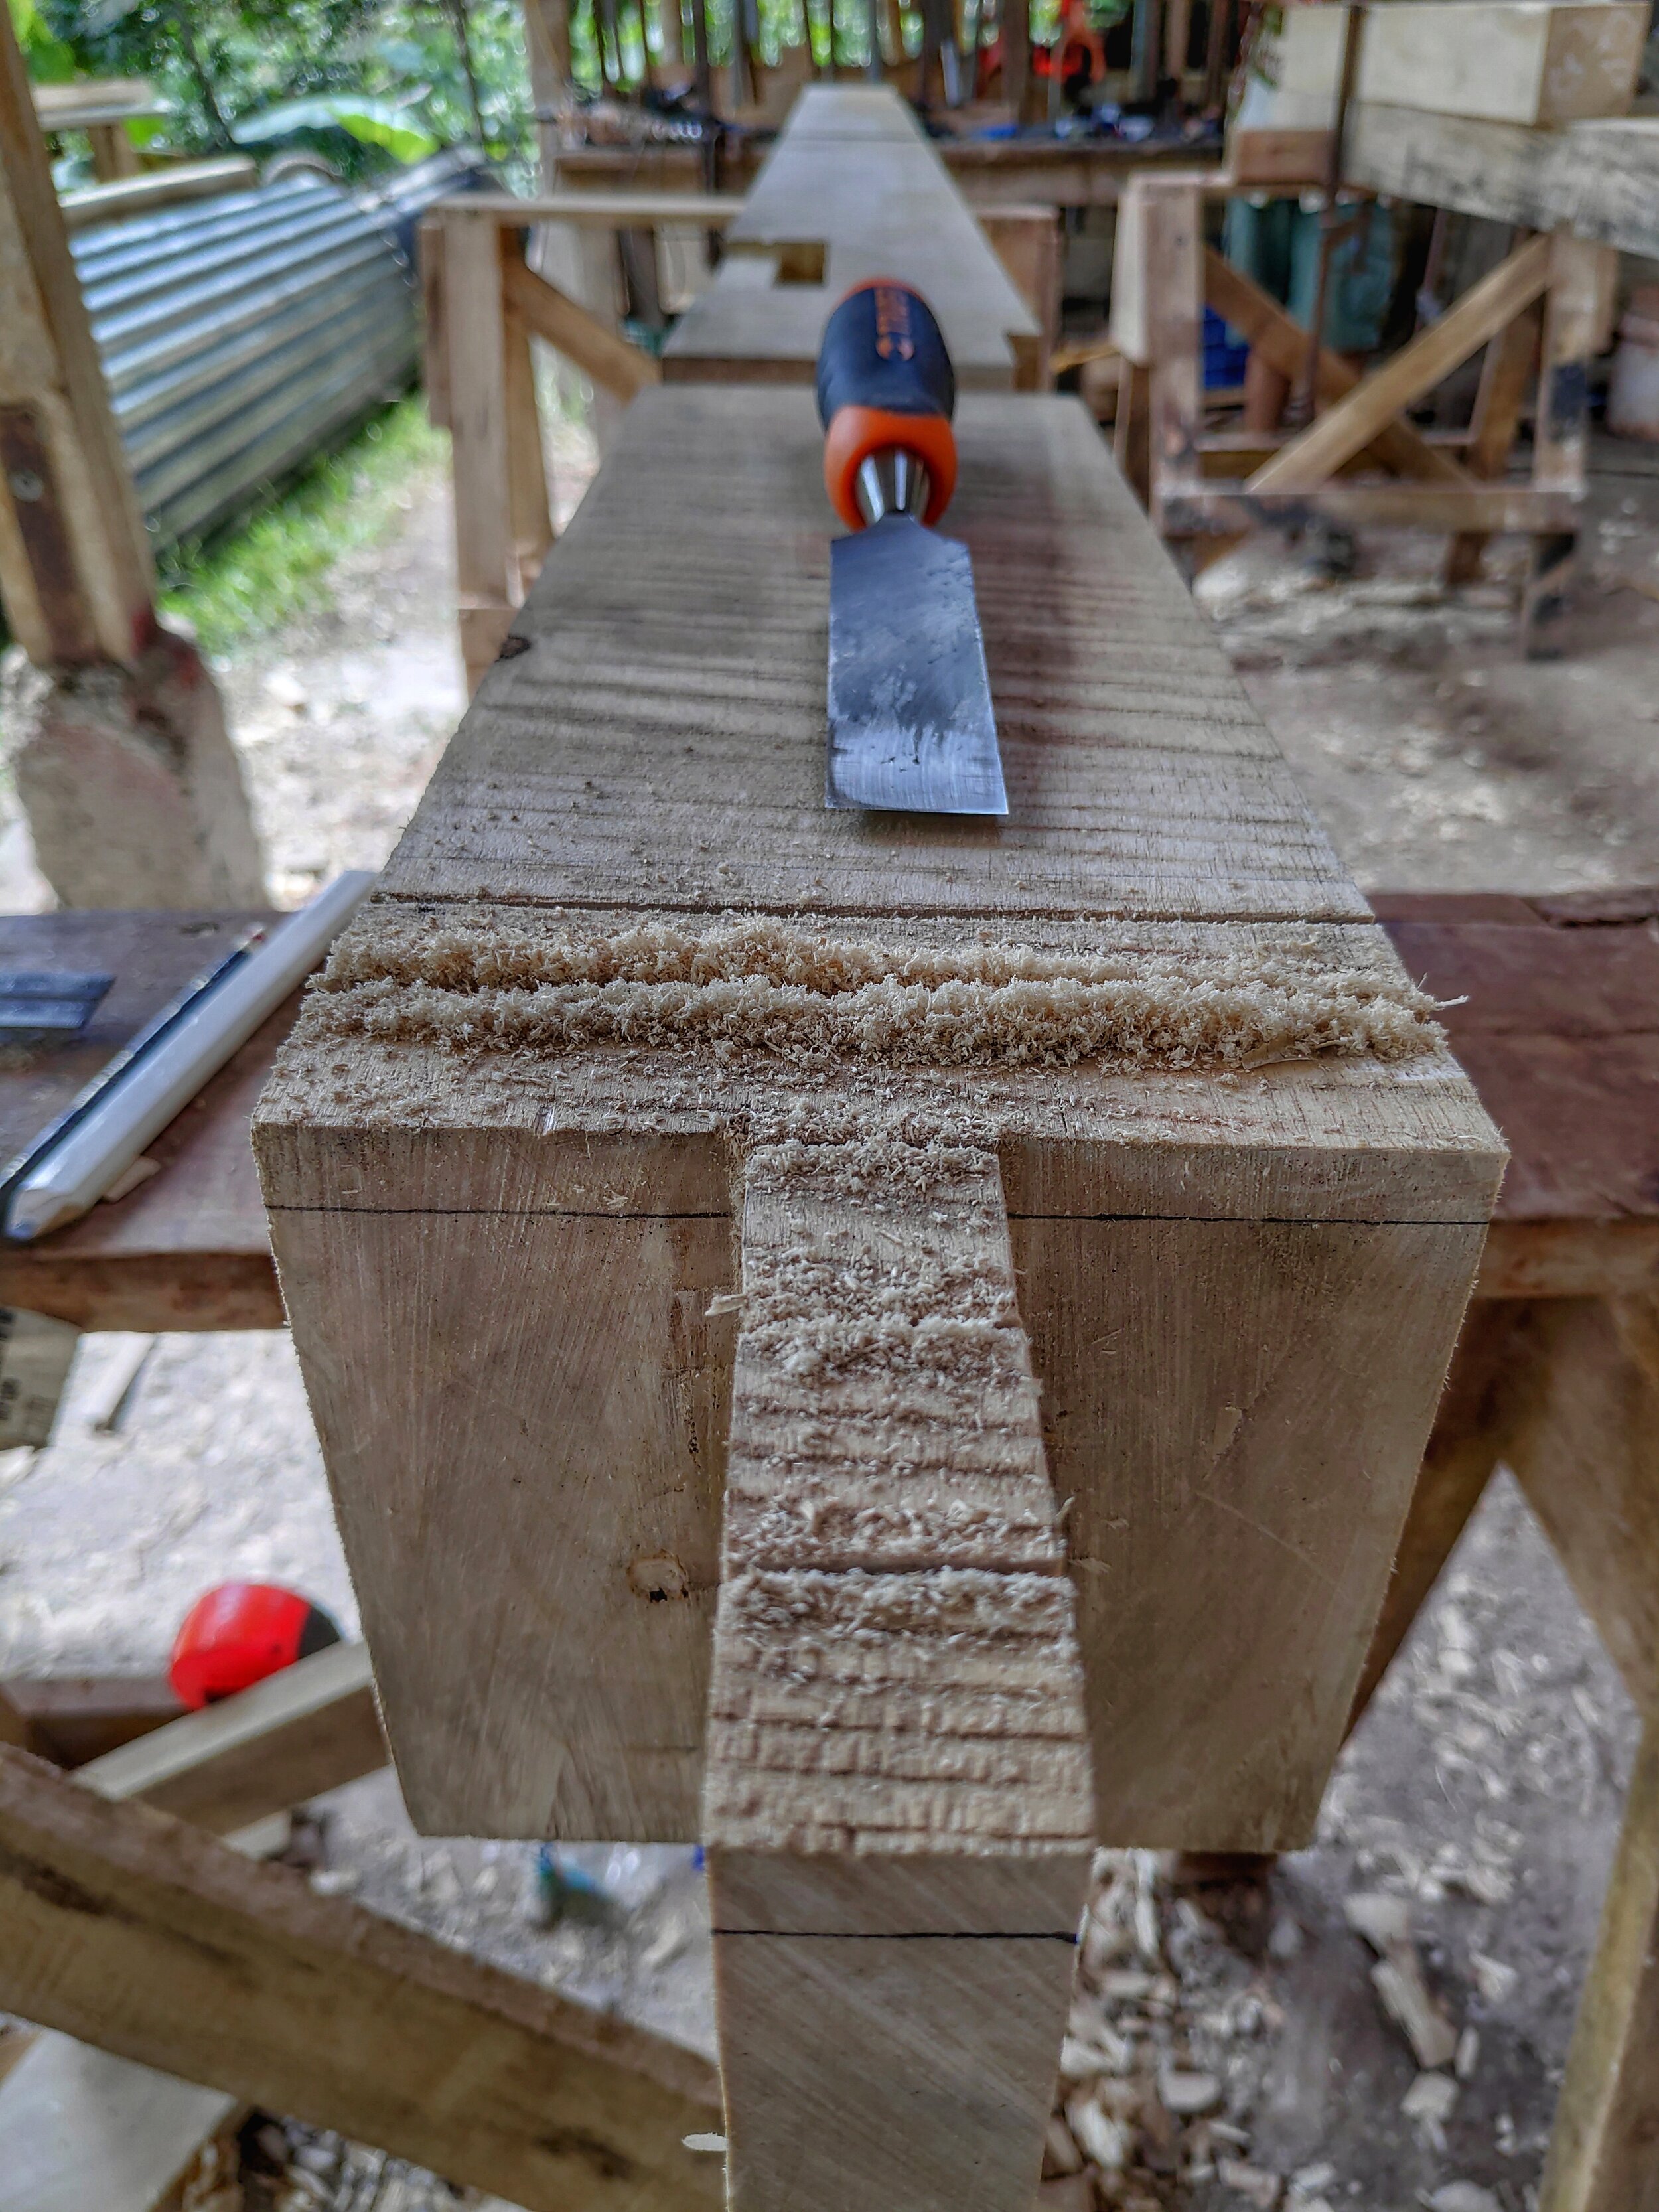
The kerf cuts to remove the housing on this joint
Want to Build Your Own Home?

Timber frame joinery
With over 15 years of experience in natural building including earth building, bamboo construction, and timber framing, Rancho Mastatal is a great learning environment to get inspired and hands on experience in these fields.
Make sure to check out our natural building courses:
Natural Building and Plasters Intensive
We host most of these courses annually, so make sure to stay tuned by visiting our workshop page here.
Past articles on timber framing and natural building at the Ranch:
Timber Framing: A Real Application of Sustainable Forestry Management