
Timber Framing: 10 Things You Didn't Know You Needed to Know
By Kara, Apprentice 2020
Timber framing is an integral part of the natural building techniques we use at Rancho Mastatal. The building style provides a strong framework to combine with other techniques. Adobe, cob, wattle and daub-- can all be used in conjunction with a timber frame. Maybe you’re already planning on building a timber frame house, or weighing options of building types. Either way it’s important to know that timber framing takes patience and practice if you’re a beginner. The tips in this article are intended to introduce some important concepts in timber framing and to solve some common problems before they even arise, in order to set you up for success in your sustainable home build.
If you’re interested in learning the basics of timber framing you can check out our upcoming workshop.


A happy crew after finishing the raising of this timber frame
1. Square Rule
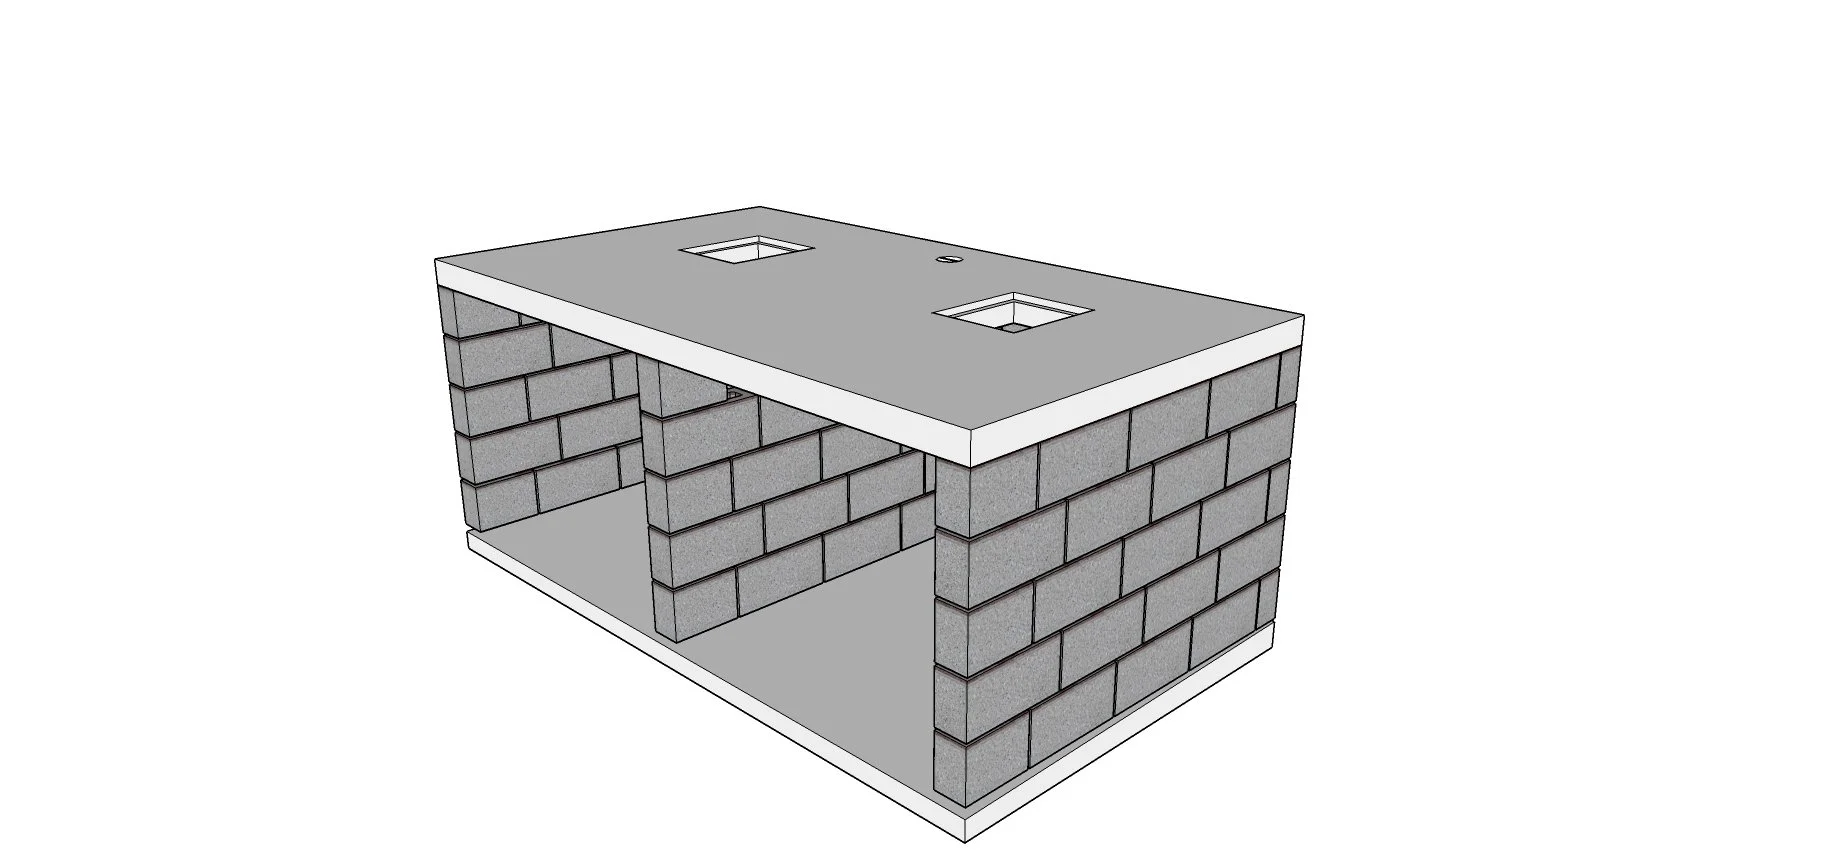
When building your sustainable home it may be possible to work with locally sourced, large-dimension timber, but the pieces provided by your local sawyer may vary in size and squareness. For timber framing, a construction style that relies on accurate measurements, this reality presents an interesting problem. A common solution, and one we use for our natural buildings at Rancho
Mastatal, is called square rule. The basis of square rule is the assumption that a perfect, slightly smaller, timber exists within your uneven timber. By making measurements and joints align to this
imagined perfect timber, the inconsistencies between the actual timber sizes won't affect the integrity of your joinery.
In practice, there are likely to be two adjacent faces on your timber that are at 90 degrees (or close enough to plane one side until they are). These two sides become your reference faces, and thinking in terms of your ‘perfect’ timber, it’s nestled into that 90 degree corner. You’ll measure everything from these two sides, marking them distinctly in pencil or chalk so that you can quickly see where they are.
In planning where your joinery is going to be laid out, you have to keep in mind that the exterior faces must be flush to allow the cladding to be attached as well. This means that one of your reference faces will always be on the exterior facing side of your timber. Along with this consideration, you’ll want most cuts to be on a reference face. Even if they aren’t, joints will be measured to the inner surfaces of the reference faces, so that the inconsistencies in the timber won’t affect their placement.
When cutting, this may mean that you have to cut out ‘housing’ for the joints on non-reference faces. This is a reduction that exposes the ‘perfect’ smaller timber, and allows mated pairs of joints to sit flush against each other. By exposing the ‘perfect’ timber, identical pieces like knee braces
become interchangeable throughout the building-- so you don’t have to plan for the inconsistencies and variations in each piece.
Square rule is a concept that may seem daunting at first, but it can becoming intuitive with practice. By measuring to the ‘perfect’ timber, and cutting housing to expose it, means that each piece can be cut without knowing the unique shape of the corresponding timbers it will fit into. I recommend doing more research into the topic. The book “Learn to Timber Frame” by Will Beemer is a good resource.

Using a framing square to find your best 90 degree sides

And a hand planer to make those sides perfectly 90

A perfectly sharp pencil
2. Sharpening your Pencil
To mark measurements on a rough piece of timber, it’s best to use a carpenter’s pencil. It should be sharpened to a wedge (you can use a chisel or a knife), so that you can make a thin line or a thick one. You can even shave down one wide side flat to the lead, so that it sits flush with your ruler as you draw a line. It’s important to consider the sharpness and the angle you’re holding your pencil as you draw, since it’s easy to skew a line as you draw it along your timber if you’re not paying attention.

Exact measurements are key to your frame fitting together
3. Burning 10”
When running a tape measure over your timber, don’t start measuring right from zero. Sometimes the metal edge is loose, and it is hard to get an accurate read on where 0” actually is. Instead, place your tape measure so that 10” is on your beginning mark. Measure from there, adding the 10” to your measurement. It’s better to use 10” than 1”, because it’s easier to see if you’ve forgotten to account for the burn when you’re checking your layout. Don’t get burned by the burn!
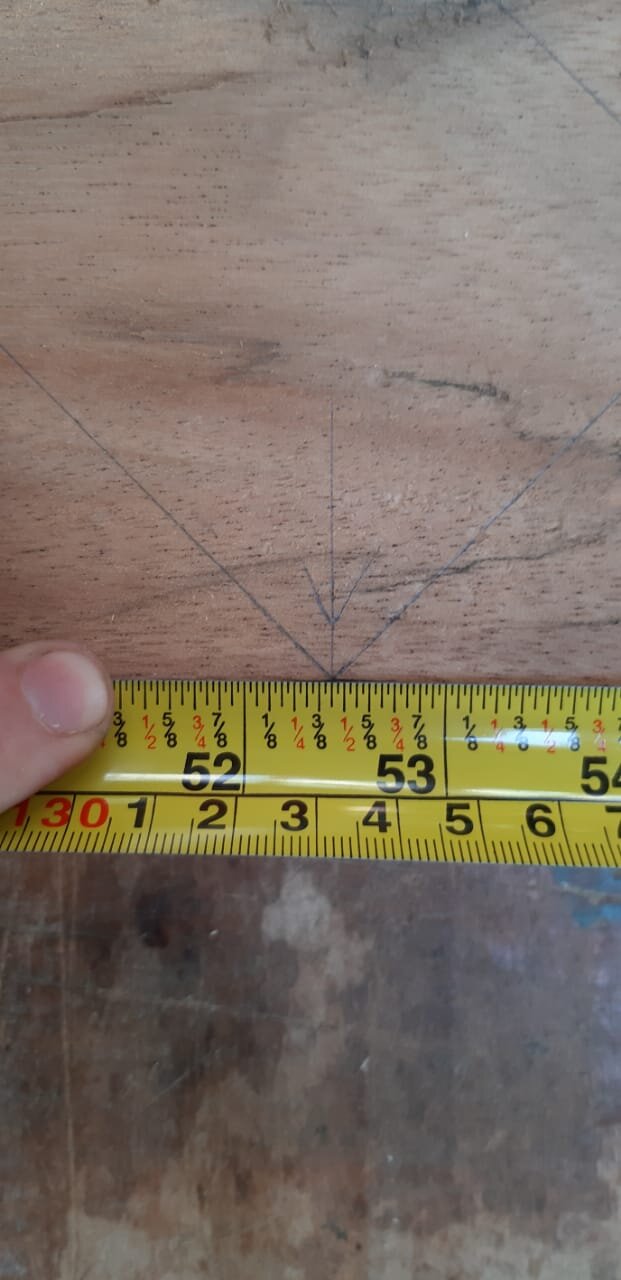
A crow’s foot helps you identify the right measurement
4. Crow’s Foot Marking
When marking measurements taken from your tape measure, use a ‘V’ shape ‘crow’s foot’ mark on
your timber instead of a single line. While carefully holding your tape flat against the timber (being sure not to move it!), draw the crux of the ‘V’ at the mark you’re measuring to, drawing both lines from the point out. A sharp pencil lead is crucial here for accuracy. A single, quickly drawn line can curve, and later it can be hard to tell exactly where on that line the accurate measurement is.

A timber frame joint called a “scarf joint” that allows you to join two long timbers together
Part 2 to Come!
Building your sustainable home using timber framing techniques is an exacting, but rewarding pursuit. Part 2 will continue with more tips to help you measure, layout, cut, and assemble your building.
Want to Build Your Own Home?
With over 15 years of experience in natural building including earth building, bamboo construction, and timber framing, Rancho Mastatal is a great learning environment to get inspired and hands on experience in these fields.
Make sure to check out our 2021 natural building courses:
Natural Building and Plasters Intensive: February 2021
Bamboo Construction: April 2021
Timber Frame Construction: June 2021
We host most of these courses annually, so stay tuned yearly by visiting our workshop page here.
Check out these past articles about natural building and timber framing here at the Ranch:
Design Ideas for a Sustainable Home in the Tropics
Timber Framing: A Real Application of Sustainable Forestry Management

Students in the Timber Frame course raising the frame they cut in class